
How to Draw a Detailed City-Scapes: A Step-By-Step Guide
Creating stunning city-scape drawings is not just about being able to replicate what you see; it’s about capturing the **essence** of urban landscapes. Whether you're an aspiring artist or a seasoned pro, this guide will provide you with essential techniques and tips for transforming your initial sketches into intricate masterpieces. Imagine strolling through the bustling streets, feeling the pulse of the city, and then translating that energy onto your canvas. Sounds exciting, right? Let’s embark on this artistic journey together!
Grasping perspective is crucial for creating realistic city-scapes. Think of perspective as the **framework** that holds your drawing together. It’s like the secret ingredient in a recipe that makes everything taste better. In this section, we’ll explore one-point, two-point, and three-point perspectives, helping you understand how to position buildings and streets effectively in your drawings. One-point perspective is perfect for scenes where you’re looking straight down a street, while two-point perspective adds depth when you’re viewing a corner. Three-point perspective? That’s for those dramatic views where you’re looking up at towering skyscrapers. Mastering these techniques will elevate your art and make it pop with realism!
Collecting reference images is vital for accuracy and inspiration. Imagine trying to build a house without a blueprint; it would be chaotic! Similarly, reference materials serve as your blueprint in the world of art. Learn how to find and utilize photographs and other resources to inform your city-scape drawings and enhance your artistic vision. The right reference can spark creativity and guide your hand as you sketch. So, where do you find these treasures?
Different types of references can serve unique purposes. Here are a few to consider:
- Architectural Photos: These provide precise details about structures.
- Urban Sketches: Perfect for capturing the vibe and energy of a city.
- Online Resources: Websites, forums, and social media can be gold mines for inspiration.
By building a comprehensive reference library for your artwork, you ensure that you have a wealth of information at your fingertips, ready to guide your creative process.
The internet offers a wealth of images and tutorials. Think of it as your personal art museum, accessible 24/7! Discover how to effectively search and select online resources that can aid in your city-scape drawing process. Use keywords like "urban photography" or "city sketches" to find the right images. Websites like Pinterest and Instagram are fantastic for visual inspiration, while platforms like YouTube can provide step-by-step tutorials to hone your skills.
Experiencing the city firsthand can provide invaluable insights. There’s nothing quite like standing in the middle of a bustling street, feeling the energy around you. This section will discuss the benefits of visiting urban locations to observe details and gather inspiration for your artwork. Take a sketchbook with you! Jot down quick sketches or notes about what catches your eye—the unique architecture, the interplay of light and shadow, or the vibrant colors of the cityscape. These observations will enrich your drawings and make them come alive!
A rough sketch is the foundation of your city-scape. Think of it as the skeleton of your artwork. This section will guide you through the process of laying out your composition and establishing the basic shapes and proportions of buildings. Start with simple shapes—rectangles for buildings, lines for roads. Don’t worry about details just yet; focus on getting the layout right. Once you have your rough sketch, you can begin to refine and add complexity, turning those basic shapes into stunning structures!
Details and textures bring your city-scape to life. Just like a good meal needs seasoning, your artwork requires intricate features such as windows, doors, and surface textures to enhance realism. This part will focus on techniques for adding those essential details. Use varying line weights to create depth—thicker lines for foreground elements and thinner lines for background details. Experiment with different shading techniques to give your buildings character and dimension. Remember, it’s the little things that can make a big difference!
The tools you use can significantly impact your artwork. Just like a chef needs the right knives, an artist needs quality materials. Learn about various drawing materials, from pencils to inks, and how they can help you achieve the desired effects in your city-scape. For instance, graphite pencils are great for detailed work, while ink pens can add sharpness and contrast. Don’t be afraid to experiment with different tools to find what feels right for you!
Layering is essential for depth and dimension. Think of it like building a sandwich; each layer adds flavor and texture. This section will discuss how to effectively layer different elements in your drawing to create a more dynamic and engaging city-scape. Start with your base layer and gradually add more details, adjusting the opacity and blending as needed. This technique will help your drawing feel more cohesive and alive!
The finishing touches can elevate your drawing from good to **extraordinary**. Here, you’ll learn about techniques for refining your artwork, including shading, highlights, and presentation options to showcase your finished city-scape. Don’t underestimate the power of highlights! A little bit of white gel pen or a touch of colored pencil can make windows sparkle and surfaces glow. Once you’re satisfied, consider framing your artwork or sharing it online to inspire others!
Q: What is the best medium for drawing city-scapes?
A: It really depends on your style! Graphite and ink are popular for detailed work, while watercolors can add a lovely wash of color.
Q: How can I improve my perspective skills?
A: Practice is key! Use reference images and try drawing from different angles to enhance your understanding of perspective.
Q: Should I always use references?
A: While references are incredibly helpful, don’t feel constrained by them. Use them as a guide, but let your creativity flow!

Understanding Perspective
Grasping perspective is crucial for creating realistic city-scapes. Imagine walking through a bustling city, where the towering buildings seem to stretch towards the sky, and the streets converge into a vanishing point. This visual phenomenon is what we refer to as perspective, and understanding its principles can transform your drawings from flat representations into dynamic, three-dimensional experiences. In this section, we will explore the fundamentals of one-point, two-point, and three-point perspectives, helping you to position buildings and streets effectively in your drawings.
At its core, perspective is all about how we perceive depth and space. Let's break down the three primary types:
- One-Point Perspective: This is the simplest form of perspective, where all lines converge at a single point on the horizon. It's perfect for scenes where you’re looking straight down a street or hallway. Imagine standing at the end of a straight road; everything you see ahead leads to that one point in the distance.
- Two-Point Perspective: Here, you have two vanishing points on the horizon line. This technique is commonly used for drawing objects at an angle, such as the corner of a building. Picture yourself standing at the corner of two streets; the buildings on either side will recede towards their respective vanishing points.
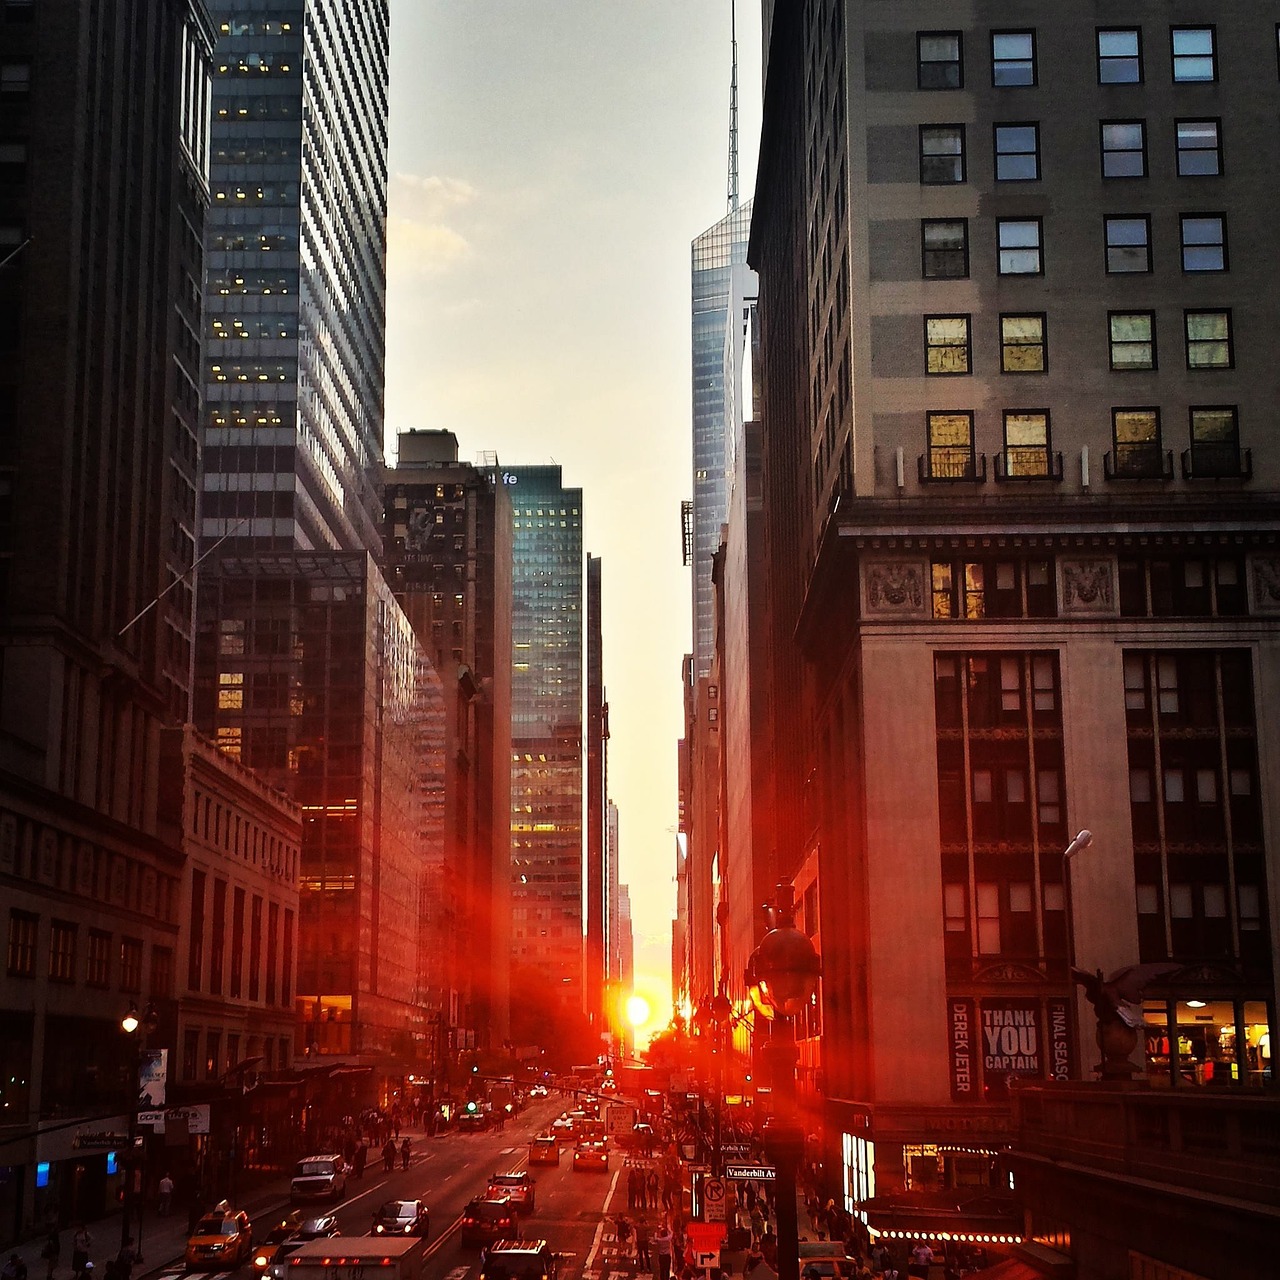
- Three-Point Perspective: This method adds a third vanishing point, typically above or below the horizon line, which is particularly useful for depicting tall structures or looking down from a height. Think of standing on a rooftop, looking down at the streets below; the buildings will appear to shrink as they recede towards that third point.
To master these perspectives, practice is key. Start with simple shapes and gradually incorporate more complex structures. Use a ruler to ensure your lines are straight and precise. As you sketch, constantly check your angles and proportions against your understanding of perspective. The more you practice, the more natural it will become.
Incorporating perspective into your city-scape drawings isn't just about making them look realistic; it's about creating a sense of depth and dimension. When you successfully apply these principles, your artwork will not only depict buildings and streets but will also evoke the feeling of actually being in that urban environment. So grab your sketchbook, and let’s dive into the world of perspectives!

Gathering Reference Materials
When it comes to creating stunning city-scape drawings, gathering reference materials is an essential step that can’t be overlooked. Think of your references as the roadmap guiding you through the intricate maze of urban landscapes. Just as an architect wouldn’t build a skyscraper without blueprints, you shouldn’t embark on your artistic journey without a solid collection of visual aids. But where do you start? The answer lies in a blend of photographs, sketches, and even personal observations that can enrich your work and provide a deeper understanding of the cityscape you wish to create.
To effectively gather reference materials, consider the following strategies:
- Photography: Take your own photos of urban landscapes or search for high-quality images online. Websites like Unsplash or Pexels offer a treasure trove of free images that can inspire and inform your artwork.
- Urban Sketching: Engage in sketching sessions in your local area. Observing and drawing real-life scenes helps you grasp the essence of the architecture and the vibe of the environment.
- Online Resources: Utilize platforms such as Pinterest or Instagram to discover artists who specialize in city-scapes. Their work can serve as both inspiration and a learning tool.
Each of these resources has its own unique benefits. For instance, photographs provide precise details and colors, while sketches can capture the atmosphere and energy of a place. By combining these resources, you can build a comprehensive visual library that will serve as a solid foundation for your drawings.
Understanding the different types of references can help you select the right materials for your specific needs. Here are a few categories to consider:
| Type of Reference | Purpose |
|---|---|
| Architectural Photos | Provides accurate details and proportions of buildings. |
| Urban Sketches | Captures the mood and character of the city. |
| Online Resources | Offers a wide variety of styles and techniques from different artists. |
By categorizing your references, you can better understand how each type can enhance your artwork. For example, architectural photos are invaluable for capturing the precise details of a building, while urban sketches can inspire a sense of movement and life in your drawing.
The internet is a goldmine for artists looking for reference materials. With just a few clicks, you can access countless images and tutorials that cater to your artistic needs. When searching online, use specific keywords related to your desired city-scape elements, such as "modern architecture," "historic buildings," or "urban parks." This targeted approach will yield more relevant results, allowing you to find exactly what you need to inform your drawing.
Nothing beats the experience of visiting urban locations in person. Walking through the streets, observing the play of light and shadow on buildings, and soaking in the sounds and smells of the city can provide invaluable insights that photos alone cannot capture. Consider taking a sketchbook with you when you explore; this way, you can quickly jot down impressions or sketches that can later inform your larger works.
In conclusion, gathering reference materials is a vital step in the city-scape drawing process. By utilizing a mix of photographs, sketches, and personal observations, you can create a rich tapestry of inspiration that will elevate your artwork to new heights. So, grab your camera, your sketchbook, and get ready to dive into the vibrant world of urban landscapes!
Q1: How do I choose the best reference materials for my drawing?
A: Focus on materials that resonate with your artistic style and the specific elements you want to capture. A mix of photographs and sketches often works best.
Q2: Can I use other artists' work as reference?
A: Yes, but make sure to use them for inspiration rather than copying. Always credit the original artist if you share your work.
Q3: How important is it to visit locations in person?
A: Very important! Experiencing the environment firsthand can give you insights that photos cannot provide, enhancing the authenticity of your artwork.
Types of References
When it comes to drawing captivating city-scapes, having a solid reference library is essential. References serve as your artistic compass, guiding you through the complexities of urban landscapes. There are several types of references you can utilize, each offering unique insights and inspiration. Let's dive into the most common types:
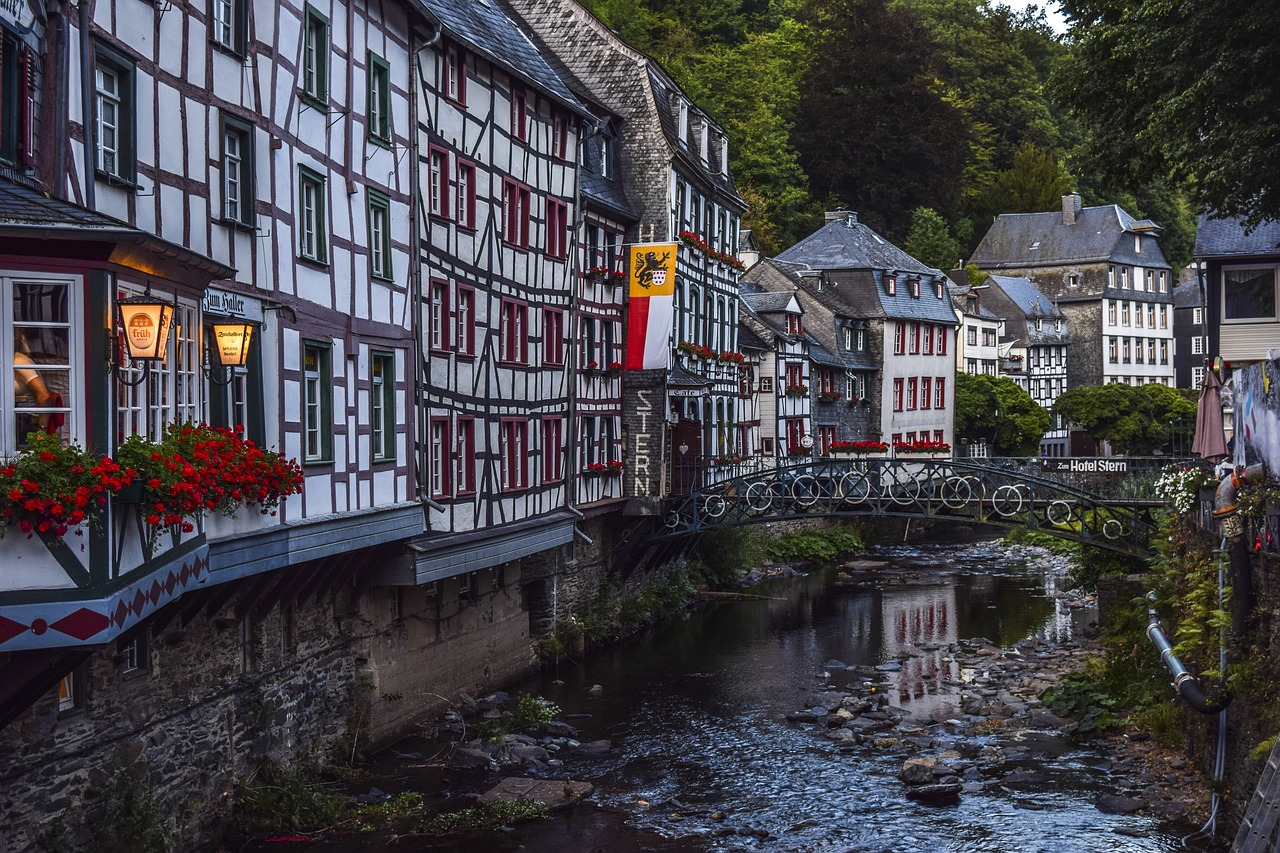
First up, we have architectural photos. These images capture the intricate details of buildings and structures, showcasing everything from the grandeur of skyscrapers to the quaint charm of historical homes. Architectural photos are particularly useful for understanding proportions, styles, and materials used in urban design. They can also help you grasp the relationship between various elements in a city, such as how buildings interact with natural light throughout the day.
Next, urban sketches can be a fantastic resource. These sketches often provide a more spontaneous and expressive interpretation of city life. Artists capture the essence of a scene quickly, highlighting movement and atmosphere. By studying urban sketches, you can learn how to incorporate dynamic elements into your own work, making your city-scapes feel alive. They can inspire you to experiment with different styles, techniques, and compositions.
Additionally, the internet is a treasure trove of resources. Websites like Pinterest and Unsplash offer vast collections of images that can fuel your creativity. You can find everything from high-resolution photographs to illustrations that depict urban scenes in various artistic styles. However, it's important to ensure that you are using these resources ethically and respecting copyright laws.
To help you organize your references, consider creating a simple reference table that categorizes your resources. Here’s a quick example:
| Type of Reference | Source | Usage |
|---|---|---|
| Architectural Photos | Photography websites, books | Understanding building details and proportions |
| Urban Sketches | Art blogs, sketchbooks | Inspiration for dynamic compositions |
| Online Resources | Social media, online galleries | Variety of styles and techniques |
Lastly, don’t underestimate the power of visiting urban locations. Experiencing a city firsthand can provide invaluable insights that photos and sketches may not convey. Take a stroll through your favorite urban areas, and observe the intricate details that make each location unique. Pay attention to how light interacts with buildings, the textures of different surfaces, and the bustling life around you. Jot down notes or take quick sketches to capture your impressions. This real-world experience will enrich your understanding and inform your artistic choices.
In summary, utilizing a variety of references—be it architectural photos, urban sketches, online resources, or firsthand observations—will significantly enhance your city-scape drawings. Each type of reference offers distinct advantages, and by combining them, you’ll develop a well-rounded perspective that will elevate your artwork to new heights.
Q: What is the best way to organize my reference materials?
A: Creating a digital folder or a physical binder categorized by type (photos, sketches, etc.) can help you easily access your references when needed.
Q: How can I ensure that I’m using online resources ethically?
A: Always check the copyright information associated with images. Use resources that are labeled for reuse or seek permission from the original creator when necessary.
Q: Is it necessary to visit urban locations for references?
A: While it’s not mandatory, visiting urban areas can provide a depth of understanding and inspiration that photos alone may not capture. It allows you to experience the atmosphere and nuances of the city.
Using Online Resources
In today's digital age, the internet is a treasure trove for artists seeking inspiration and reference materials for their city-scape drawings. It’s like having a vast library at your fingertips, filled with images, tutorials, and forums where you can connect with fellow artists. But how do you sift through this ocean of information to find exactly what you need? Well, the key is knowing where to look and how to utilize these resources effectively.
First off, search engines are your best friends. When you type in keywords like "urban photography," "city architecture," or "cityscape drawing references," you'll be amazed at the variety of resources that pop up. Websites such as Unsplash, Pexels, and Pixabay offer high-quality, royalty-free images that you can use as references. These platforms are particularly useful for finding stunning photographs of different urban landscapes from around the world.
Moreover, social media platforms like Instagram and Pinterest are gold mines for visual inspiration. You can follow artists who specialize in city-scapes or search for hashtags like #CityscapeArt or #UrbanSketching. This not only helps you find reference images but also allows you to see how other artists interpret urban environments, which can spark your creativity.
Don’t overlook the power of art forums and communities, such as DeviantArt or ArtStation. These platforms allow you to share your work, receive feedback, and discover tutorials that can enhance your skills. You might even stumble upon artists who share their own reference photos, which can be incredibly helpful. The interaction within these communities can provide you with insights that you might not find elsewhere.
When you’re searching for online resources, it’s also essential to keep your goals in mind. Are you looking for specific architectural styles? Or perhaps you want to capture the hustle and bustle of city life? Tailoring your searches to these specific needs will save you time and help you gather more relevant references. Here’s a quick table to summarize some useful online resources:
| Resource Type | Examples | Best For |
|---|---|---|
| Stock Photo Websites | Unsplash, Pexels, Pixabay | High-quality images of urban landscapes |
| Social Media | Instagram, Pinterest | Visual inspiration and artist connections |
| Art Communities | DeviantArt, ArtStation | Feedback, tutorials, and shared references |
Lastly, remember to bookmark your favorite resources and create a digital folder for your reference images. This way, you can easily access them when you're ready to start drawing. The more organized you are, the smoother your creative process will be. So, dive into the digital world, explore, and let the online resources fuel your artistic journey!
Q1: Where can I find high-quality images for my city-scape drawings?
A1: Websites like Unsplash, Pexels, and Pixabay offer a plethora of high-quality, royalty-free images that can serve as excellent references for your artwork.
Q2: How can social media help me with my city-scape drawings?
A2: Social media platforms like Instagram and Pinterest allow you to discover artists and their work, which can inspire your own creations. Following relevant hashtags can also lead you to a wealth of visual references.
Q3: Are there online communities for artists?
A3: Yes! Platforms like DeviantArt and ArtStation provide spaces for artists to share their work, receive feedback, and find tutorials. These communities can be incredibly supportive and resourceful.
Visiting Urban Locations
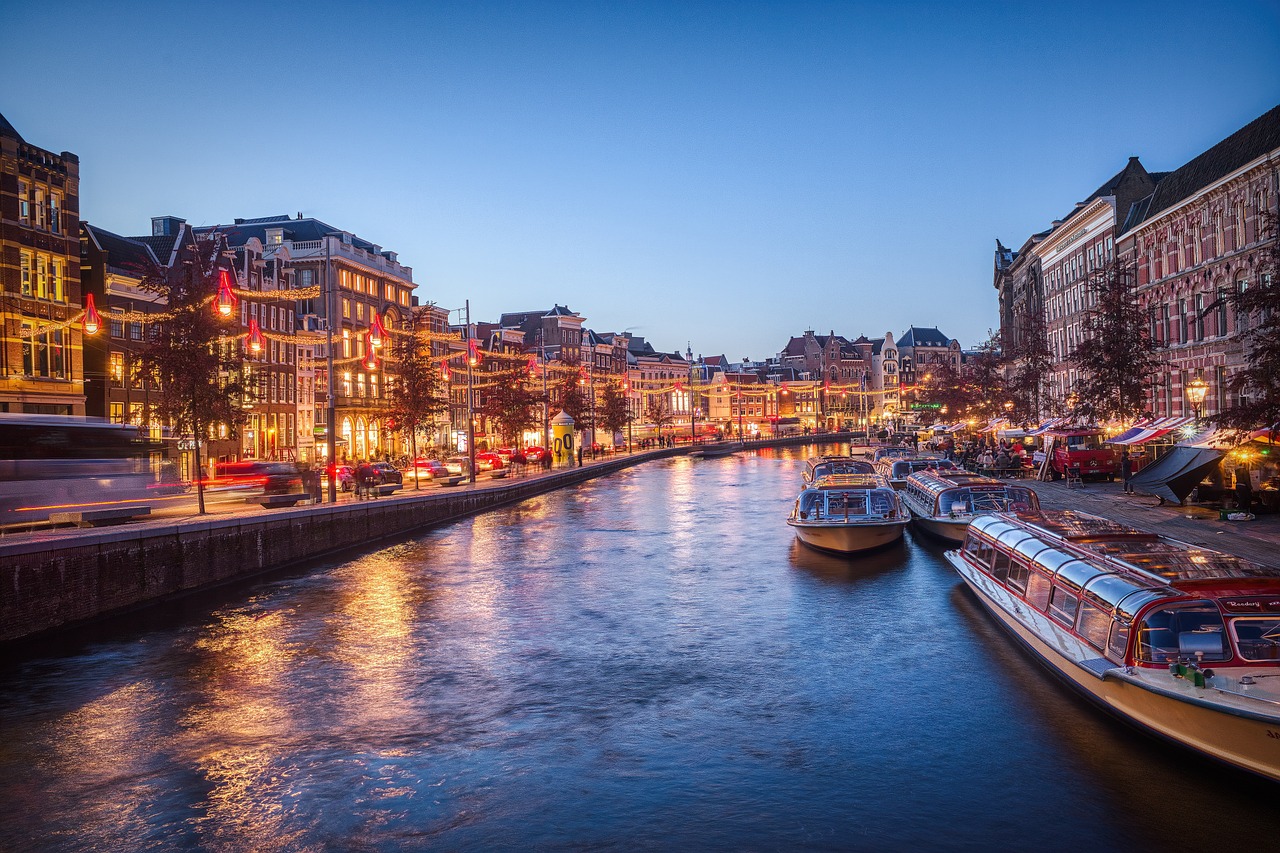
When it comes to drawing city-scapes, nothing beats the experience of being in the heart of an urban environment. Visiting urban locations allows you to absorb the atmosphere, the hustle and bustle, and the intricate details that photographs simply can't capture. Imagine standing on a busy street corner, the sounds of the city swirling around you, and the vibrant colors of the buildings reflecting the sunlight. This immersive experience fuels your creativity and sharpens your observational skills, making your drawings much more authentic.
While you might think that taking a few snapshots is enough, there’s an undeniable magic in being present in the moment. You can observe how light plays on different surfaces, how shadows stretch and shrink throughout the day, and how the architecture varies from one block to the next. Each street has its own personality, and by visiting these locations, you can gather a wealth of information that will inform your artwork.
Here are some key benefits of visiting urban locations for your city-scape drawings:
- Enhanced Observation Skills: Being there allows you to notice the small details that you might overlook in a photograph.
- Understanding Scale: You can better grasp the scale of buildings and streets, which is crucial for accurate perspective.
- Inspiration from Surroundings: The atmosphere and energy of a city can spark new ideas and concepts for your artwork.
Furthermore, consider bringing along a sketchbook during your visits. This way, you can quickly jot down ideas, create quick sketches, or even practice drawing on-site. It’s a fantastic way to capture the essence of a location in real-time. You might find that the act of sketching helps you connect with the environment on a deeper level, allowing you to translate those feelings into your detailed city-scape drawings.
In addition to sketching, try to engage with the urban environment. Talk to locals, visit unique shops, or enjoy a coffee at a corner café while sketching the view. Each interaction can provide you with new insights and ideas that will enrich your artistic vision. The city is a living canvas, and every corner holds a story waiting to be told through your art.
So, next time you're planning a drawing session, consider stepping outside your comfort zone and immersing yourself in an urban landscape. You'll be amazed at how much it can enhance your skills and inspire your creativity!

Creating a Rough Sketch
Creating a rough sketch is like laying the foundation of a house; it’s essential for ensuring that everything else will stand strong and look good. This initial stage allows you to establish the basic shapes and proportions of your city-scape, setting the groundwork for the intricate details that will follow. Start by grabbing your favorite sketching materials—whether it’s a pencil, charcoal, or even a digital tool. The important thing is to feel comfortable and ready to let your creativity flow.
Begin by lightly drawing the horizon line, which will serve as your guide for where the sky meets the land. This line is crucial because it dictates the perspective of your drawing. Next, sketch the main shapes of the buildings. Don’t worry about making them perfect; think of them as geometric forms—rectangles, squares, and triangles. This is the time to experiment with different heights and widths to create a dynamic skyline. Remember, a city is rarely uniform, so embrace the chaos!
As you work on your rough sketch, consider the following key points:
- Proportions: Ensure that the buildings are proportionate to one another. A towering skyscraper next to a quaint café can create a striking contrast.
- Lines of Action: Use light, sweeping lines to indicate movement and flow. This can help guide the viewer’s eye across the drawing.
- Foreground and Background: Establish depth by distinguishing between what’s in the foreground and what’s in the background. Larger shapes should be in the foreground, while smaller shapes fade into the distance.
Once you’ve sketched the basic layout, take a step back and evaluate your composition. Are the buildings balanced? Does the perspective feel right? This is your chance to make adjustments before diving into the details. If something feels off, don’t hesitate to erase and redraw. It’s all part of the creative process. You might even want to use a grid method to assist with proportions and alignment, especially if you’re aiming for precision.
After you’re satisfied with your rough sketch, it’s time to think about the elements that will bring your city-scape to life. Consider adding elements such as streets, trees, and even people. These features can add context and make your drawing feel more lively and relatable. Don’t forget to incorporate unique architectural features that reflect the character of the city you are drawing. Remember, every city has its own personality, and your sketch should express that!
In summary, creating a rough sketch is a vital step in your city-scape drawing journey. It’s where you set the stage for all the details that will follow. So grab your pencil, let your imagination run wild, and enjoy the process of bringing your urban vision to life!
Q: How detailed should my rough sketch be?
A: Your rough sketch should focus on the overall composition and basic shapes rather than intricate details. It’s meant to be a guide for your final drawing.
Q: Can I use digital tools for my rough sketch?
A: Absolutely! Digital tools can offer flexibility and ease of editing, making them a great option for creating rough sketches.
Q: What if I make a mistake in my rough sketch?
A: Don’t worry! Mistakes are part of the process. Use an eraser or adjust your lines as needed. The key is to keep moving forward.

Adding Details and Textures
When it comes to drawing city-scapes, details and textures are what truly breathe life into your artwork. Think of your drawing as a stage where every building, street, and shadow plays a role in the overall performance. Without these nuances, your city-scape might feel flat and lifeless. So, how do you transform a simple outline into a bustling urban landscape?
To begin with, focus on the intricacies of each building. Start by examining the architecture around you. Notice the unique features that make each structure stand out. For instance, the ornate window frames, the varying heights of rooftops, or the different materials used in construction. These elements can be the difference between a good drawing and a great one. Try to incorporate these details into your sketches, as they will add depth and character.
Textures are equally important. They provide a tactile quality that can make your drawing more engaging. Here are a few techniques to consider:
- Cross-Hatching: This technique involves drawing closely spaced parallel lines to create shadows and depth. The closer the lines, the darker the area will appear.
- Stippling: Using dots to create texture can give a soft, subtle effect. This method is particularly effective for rendering materials like brick or stone.
- Blending: Use a blending tool or your finger to smooth out pencil strokes, creating softer transitions between light and shadow.
As you add these textures, think about the lighting in your scene. Is it a sunny day or a gloomy evening? The light source will affect how shadows fall and how textures appear. For instance, a bright light will cast sharp, dark shadows, while diffused light might create softer, more blended shadows. Pay attention to these details, as they can dramatically alter the mood of your drawing.
Another essential aspect is the foreground, midground, and background layers. When adding details, remember that objects closer to the viewer should appear more defined, while those further away can be less detailed and more muted. This layering technique not only adds realism but also creates a sense of depth in your city-scape.
Finally, don’t forget to step back and evaluate your work. Sometimes, after getting lost in the minutiae, it’s easy to overlook how the overall composition looks. Take a moment to view your drawing from a distance to see if the details and textures harmonize with the larger scene.
By focusing on these techniques, you’ll find that your city-scape drawings will not only become more realistic but also tell a story. Each line and texture will contribute to the narrative of the urban environment you’re depicting, inviting viewers to explore and engage with your artwork on a deeper level.
Q: What tools are best for adding details and textures?
A: Pencils, fine liners, and blending stumps are excellent for adding details. Experiment with different grades of pencils for varying textures.
Q: How can I practice adding textures effectively?
A: Try sketching different materials like wood, metal, and stone separately. Focus on how light interacts with each surface to refine your technique.
Q: Is it necessary to use color when adding details?
A: While color can enhance textures, it’s not always necessary. Black and white sketches can also convey depth and detail effectively through shading and line work.

Choosing the Right Tools
When it comes to drawing stunning city-scapes, the tools you choose can make a world of difference. Think of your drawing tools like a chef's knives; the right ones can elevate your dish from ordinary to extraordinary. Whether you're a seasoned artist or just starting out, it’s essential to understand the various materials at your disposal and how they can enhance your creative process.
First and foremost, let’s talk about pencils. They are the backbone of any drawing. A good set of pencils can range from hard (H) to soft (B). Hard pencils are perfect for fine lines and detailed work, while soft pencils are great for shading and creating depth. It’s advisable to have a range of pencils handy, so you can switch between them depending on the effect you want to achieve. Some artists even like to use a mechanical pencil for precision, especially in the initial sketching phase.
Next up, we have inks and markers. Using ink can add a dramatic flair to your city-scape, allowing you to create bold outlines and intricate details. Fine liners come in various tip sizes, enabling you to play with line weight and texture. For a more vibrant look, consider using colored markers; they can bring life to your drawing and highlight specific areas, making them pop off the page. Just remember to use archival quality ink to ensure your artwork stands the test of time!
Now, let’s discuss paper. The type of paper you choose can significantly affect the outcome of your drawing. For pencil work, a smooth, heavyweight paper is ideal, while ink and marker drawings often benefit from a slightly textured surface. You might want to experiment with different types of paper to see what works best for your style. A quick tip: always do a small test before committing to a large piece, as this can save you from potential mishaps!
Moreover, don't overlook the importance of erasers. A good eraser can help you refine your lines and correct any mistakes without damaging the paper. Consider investing in both a kneaded eraser for subtle corrections and a vinyl eraser for more robust erasing. These tools can help you maintain a clean and polished look in your final piece.
Finally, let’s not forget about optional tools like blending stumps and tortillons. These handy tools can help you create smooth transitions and gradients in your shading, adding a level of realism that can make your city-scape truly stand out. They are especially useful when working with graphite or charcoal, allowing you to blend and soften lines seamlessly.
In summary, choosing the right tools is not just about having the most expensive or trendy materials; it’s about finding what works best for you and your artistic vision. Experiment with different combinations, and don’t be afraid to step outside your comfort zone. After all, every artist has their unique style, and the right tools are merely the means to express that individuality.
- What type of pencil should I use for city-scape drawings?
It’s best to use a range of pencils from H to B to achieve both fine lines and shading. - Can I use regular paper for my city-scape sketches?
While you can, using heavier, smoother paper is recommended for better results, especially with ink. - Are blending tools necessary for city-scape drawings?
While not necessary, blending tools can enhance the quality of shading and create a more polished look.
Layering Techniques
When it comes to creating captivating city-scapes, layering techniques are your secret weapon. Think of layering as building a cake; each layer adds depth and flavor, transforming a simple idea into a rich experience. In art, these layers can create a sense of dimension, making your city-scape feel alive and inviting. The key is to understand how to effectively layer different elements to achieve a harmonious and engaging composition.
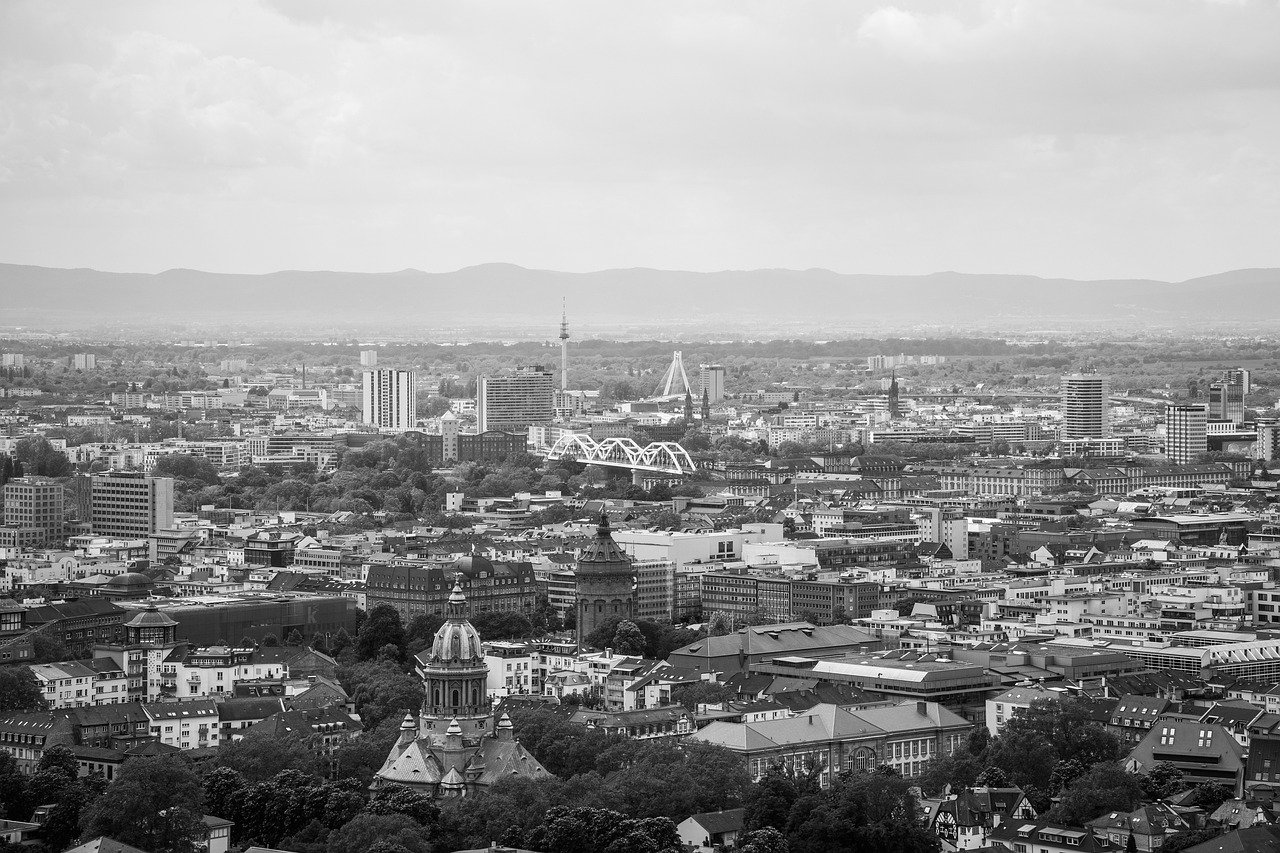
To start, you’ll want to establish a solid base. This typically involves sketching the major elements of your city-scape, such as buildings, streets, and any significant landmarks. Once you have your rough sketch in place, it's time to think about how you can build upon this foundation. The first layer should focus on the background elements. Use lighter shades for distant buildings and objects, as they will appear less defined and more muted due to atmospheric perspective. This technique can create an illusion of depth, drawing the viewer’s eye into the scene.
Next, as you move forward in your composition, gradually increase the intensity of your colors and the level of detail. For instance, the mid-ground elements—like trees, streetlights, and vehicles—should be more pronounced than the background but still not as sharp as the foreground elements. Here, you can experiment with different textures and shading techniques to add interest. Consider using cross-hatching or stippling for texture, as these methods can add a tactile quality to your work.
Finally, the foreground is where you can really let your creativity shine. This area should be the most detailed and vibrant part of your drawing, as it captures the viewer’s attention. You might want to add intricate details like people walking, shop signs, or even street art. These elements not only enhance the realism of your city-scape but also create a narrative that invites viewers to explore your artwork further.
When layering, it's essential to keep in mind the concept of transparency. Utilizing transparent layers can help you blend colors and textures seamlessly. For instance, if you're working with watercolors or digital media, you can apply a wash over your sketch to soften harsh lines and create a cohesive look. Remember, the beauty of layering lies in the ability to build complexity without overwhelming your viewer. Each layer should complement the others, creating a unified piece that tells a story.
To summarize, here are some essential tips for effective layering in your city-scape drawings:
- Start with a solid base: Establish your major elements first.
- Utilize atmospheric perspective: Use lighter shades for background elements.
- Gradually increase detail: Move from background to foreground, increasing intensity and detail.
- Experiment with textures: Use various techniques to add interest.
- Maintain transparency: Blend layers to create a cohesive look.
Incorporating these layering techniques into your city-scape drawings will not only enhance the depth and realism of your artwork but also elevate your overall artistic skills. Remember, art is a journey, and each layer brings you one step closer to creating a masterpiece that resonates with your audience.
Q1: What materials are best for layering in city-scape drawings?
A1: The best materials for layering depend on your preferred medium. For pencil drawings, use varying grades of pencils for depth. If you're using watercolors, opt for transparent washes, and for digital art, utilize layers in your software for flexibility.
Q2: How do I know when to stop adding layers?
A2: It’s essential to step back and assess your work periodically. If adding more layers starts to clutter your composition or detracts from the main focus, it’s time to stop. Trust your instincts, and remember that less can sometimes be more.
Q3: Can layering techniques be used in other types of artwork?
A3: Absolutely! Layering techniques are versatile and can be applied to various forms of art, including portraits, landscapes, and abstract pieces. The principles of depth and texture are universally applicable.

Final Touches and Presentation
When it comes to completing your city-scape drawing, the final touches can make all the difference. Think of these finishing details as the icing on the cake; they not only enhance the visual appeal but also add depth and character to your artwork. One of the first things to consider is shading. Proper shading can bring your buildings to life, creating the illusion of light and shadow that makes your drawing feel three-dimensional. Use a range of pencils, from hard to soft, to achieve varying levels of darkness. Remember, the contrast between light and shadow is essential for realism.
Next, consider adding highlights to areas where the light would naturally hit. This could be the tops of buildings or reflective surfaces like windows. A simple white gel pen or a white colored pencil can work wonders here, making those spots pop and giving your drawing a polished look. Additionally, don’t underestimate the power of textures. Take the time to add details like brick patterns, window frames, and even the texture of the pavement. These elements will draw the viewer’s eye and make your city-scape feel lived-in and authentic.
Once you’ve completed your drawing, think about how you want to present it. A well-chosen frame can elevate your artwork from a simple drawing to a stunning piece ready for display. Consider using a frame that complements the theme of your city-scape. For example, a sleek modern frame might work well for a contemporary skyline, while a vintage frame could enhance a more historical scene. Additionally, you might want to include a mat board to give your artwork some breathing room within the frame.
Lastly, don’t forget to sign your masterpiece! It’s a small but important step that marks your ownership of the artwork. Place your signature in a discreet corner, ensuring it doesn’t detract from the overall composition. After all, this is your creation, and it deserves to be recognized.
- What materials are best for adding final touches?
Pencils, gel pens, and colored pencils are excellent choices for adding shading, highlights, and textures.
- How can I improve my shading techniques?
Practice with different pencil grades and experiment with blending techniques to achieve smoother transitions.
- Should I frame my drawing?
Yes! Framing not only protects your artwork but also enhances its presentation.
- Where should I sign my artwork?
Sign in a small, discreet area of your drawing, ensuring it doesn’t distract from the main elements.
Frequently Asked Questions
- What is the importance of perspective in city-scape drawings?
Understanding perspective is crucial because it helps create a sense of depth and realism in your artwork. By mastering one-point, two-point, and three-point perspectives, you can accurately position buildings and streets, making your city-scape feel more dynamic and true to life.
- How can I gather effective reference materials for my drawings?
Collecting reference materials is essential for accuracy and inspiration. You can find architectural photos, urban sketches, and online resources that can help inform your city-scape drawings. Additionally, visiting urban locations can provide firsthand insights and details that enhance your artistic vision.
- What should I include in my rough sketch?
Your rough sketch should serve as the foundation of your city-scape. Start by laying out the overall composition and establishing the basic shapes and proportions of buildings. This initial step is crucial for planning the layout and ensuring that all elements fit harmoniously within the scene.
- What techniques can I use to add details and textures?
Adding details and textures is what brings your city-scape to life! Focus on techniques like cross-hatching for shadows, stippling for texture, and varying line thickness to depict different materials. Pay attention to elements like windows, doors, and surface textures to enhance the realism of your drawing.
- Which tools are best for drawing city-scapes?
The tools you choose can significantly impact your artwork. Consider using a range of pencils for different line weights, fine liners for details, and even inks for bold contrasts. Experimenting with various materials can help you achieve the desired effects and elevate the quality of your city-scape.
- How do I effectively layer elements in my drawing?
Layering is essential for creating depth and dimension in your city-scape. Start with the background and progressively add elements in the foreground. Use lighter tones for distant objects and darker shades for those closer to the viewer. This technique will help create a more dynamic and engaging composition.
- What are some final touches I can add to enhance my artwork?
The final touches can truly elevate your drawing! Consider refining your artwork with shading and highlights to add depth. You can also explore different presentation options, such as framing or mounting your piece, to showcase your finished city-scape beautifully.


