
How to Use a Palette Knife: Techniques and Tips
This article explores various techniques and tips for effectively using a palette knife in art. Whether you're a beginner or an experienced artist, these insights will enhance your skills and creativity.
Palette knives are fascinating tools in the artist's arsenal, coming in a variety of shapes and sizes, each designed for specific tasks. Understanding the different types will help you choose the right tool for your artistic needs. For instance, there are flat knives perfect for spreading paint, pointed knives ideal for fine details, and flexible knives that bend to create unique textures. Knowing the purpose of each type can significantly elevate your painting game.
Starting with the fundamentals is essential for any artist. When using a palette knife, the first thing to master is the grip. Hold the knife like a pencil, with a firm but relaxed grip to allow for fluid movements. This section covers basic techniques that will help beginners gain confidence and develop their skills using a palette knife.
One of the primary uses of a palette knife is mixing colors. Imagine blending paints like a chef mixing ingredients for a gourmet dish; the right combination can create a masterpiece. To effectively blend paints, start by placing a small amount of each color on your palette. Use the edge of the palette knife to scoop and mix the colors together, dragging them in a circular motion. This technique allows you to achieve the desired shades for your artwork, and the more you practice, the better your color mixing skills will become.
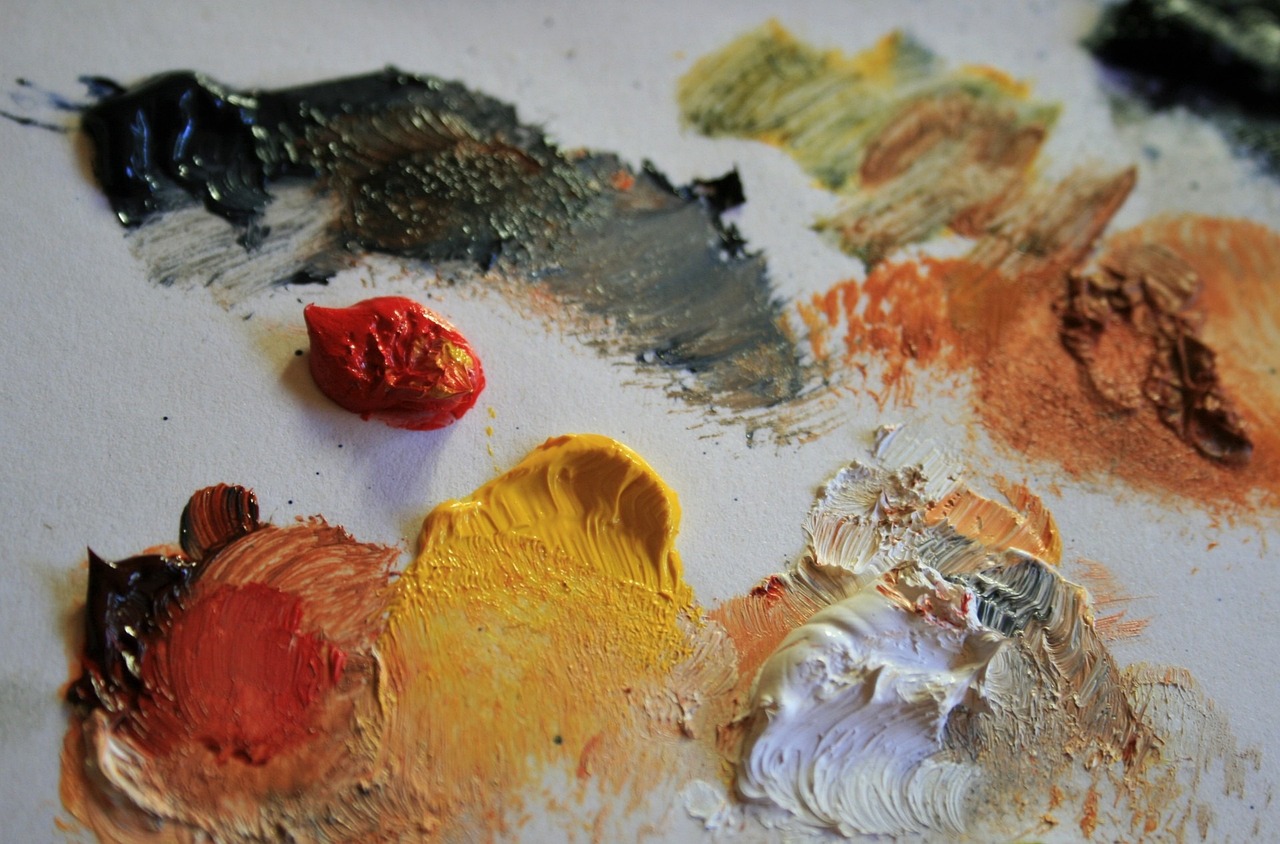
Texture adds depth to your paintings, making them more engaging and visually appealing. Discover techniques for using a palette knife to create various textures. For instance, you can create a rough texture by applying thick layers of paint and then scraping some off with the knife. Alternatively, a smooth texture can be achieved by spreading paint evenly across the canvas. Experimenting with different pressures and angles will yield a plethora of textures, each adding a unique flair to your work.
Layering is crucial in painting, much like building a house; each layer adds strength and character. This section explains how to use a palette knife to layer paint effectively. Start with a thin base layer and allow it to dry before adding more layers. Use the knife to apply subsequent layers, ensuring that each one interacts with the previous layer. This technique allows for more dynamic and interesting compositions, creating a sense of depth that captivates viewers.
For those looking to elevate their palette knife skills, advanced techniques can add complexity and richness to your artwork. Techniques such as impasto, where paint is laid on the canvas very thickly, can create stunning three-dimensional effects. Another advanced technique is scraping back, where you remove layers of paint to reveal the colors beneath, adding intrigue and surprise to your piece.
The type of paint you use can significantly impact your results. It's essential to explore the best paint options for palette knife techniques to achieve stunning effects. Acrylics are quick-drying and versatile, making them a popular choice for palette knife work. On the other hand, oil paints offer a rich texture and longer drying time, allowing for more blending and manipulation.
Both acrylic and oil paints offer unique properties. Here's a quick comparison:
| Feature | Acrylic Paint | Oil Paint |
|---|---|---|
| Drying Time | Fast | Slow |
| Texture | Flexible | Rich and buttery |
| Cleanup | Soap and water | Solvents required |
This comparison can help you decide which paint is best suited for your palette knife projects.
Proper maintenance of your palette knife is essential for longevity and performance. After each use, make sure to clean your knife thoroughly. Use a cloth or paper towel to wipe off excess paint, and then wash it with warm soapy water. Avoid leaving paint on the knife for extended periods, as it can harden and damage the blade. Learning the best practices for cleaning and caring for your tools will ensure they last for years to come.
- Can I use a palette knife with watercolor? While palette knives are primarily used with thicker paints, you can experiment with them on watercolor paper for unique effects.
- What's the best way to store my palette knives? Store them flat in a drawer or container to prevent bending and damage.
- How do I know which palette knife to choose? Consider the technique you want to use. For mixing, a larger flat knife is ideal, while finer details may require a smaller, pointed knife.
Understanding Palette Knives
Palette knives are not just tools; they are extensions of your creativity. These versatile instruments come in a variety of shapes and sizes, each designed to serve a specific purpose in the world of art. Whether you're mixing colors, applying paint, or creating textures, knowing your palette knife can make a world of difference. Imagine walking into an artist's studio and seeing a collection of these knives—each one a different shape, like a musician with various instruments ready to play a symphony of colors.
Typically, palette knives are made of flexible metal with a handle that allows for a comfortable grip. The blade can be flat, pointed, or even rounded, depending on the technique you wish to employ. Here’s a quick breakdown of some common types:
| Type | Description | Best Used For |
|---|---|---|
| Flat Blade | A straight, flat edge for spreading paint. | Mixing and applying paint. |
| Pointed Blade | A sharp tip for detailed work. | Creating fine lines and intricate details. |
| Round Blade | A curved edge for softening edges. | Blending and creating softer textures. |
Choosing the right palette knife can feel overwhelming at first, especially with so many options available. But think of it like picking the right brush for a specific stroke; each knife has its own personality and can evoke different emotions in your artwork. As you explore various techniques, you'll find that certain knives resonate more with your style and help you achieve your artistic vision.
In addition to their shapes, palette knives also vary in size. Smaller knives are perfect for detailed work, while larger ones can cover more area and create bold strokes. As you experiment with these tools, you'll discover how the size and shape of your palette knife can influence your technique and the overall feel of your painting.
Understanding palette knives is the first step toward mastering them. So, whether you're a beginner just starting out or an experienced artist looking to refine your skills, take the time to explore the different types of palette knives available. They’re not just tools; they’re your partners in creativity, helping you express your ideas and emotions on canvas.
Basic Techniques for Beginners
Starting your journey with a palette knife can be both exciting and a bit intimidating. But fear not! With a few basic techniques under your belt, you'll be able to wield this versatile tool like a pro in no time. One of the best aspects of using a palette knife is that it allows for a more spontaneous and expressive approach to painting. So, let's dive into some essential techniques that will help you gain confidence and develop your skills.
First things first, let's talk about holding the palette knife. Unlike a traditional paintbrush, a palette knife is held differently. You want to grip it firmly but not too tightly, allowing for fluid movement. Imagine you're holding a pen; this grip will give you better control over your strokes. When you’re mixing colors or applying paint, keep your wrist relaxed to create a natural flow, which is key to achieving those beautiful, organic shapes.
One of the most fundamental techniques is mixing colors. The palette knife excels in blending paints to create a range of shades. To do this, simply scoop a small amount of each color you want to mix onto your palette. Use the edge of the knife to cut through the colors, blending them together until you achieve the desired hue. The beauty of using a palette knife is that you can create unique textures in your mixtures, which isn’t as easily achieved with a brush. It’s almost like cooking—experimenting with different ingredients to find the perfect flavor!
Another essential technique is creating texture. Texture can dramatically change the feel of your artwork, adding depth and interest. To create texture with a palette knife, try applying thick layers of paint directly onto your canvas. You can use the flat side of the knife to spread the paint, or the edge to create lines and patterns. For instance, if you want to mimic the look of tree bark, use the edge of the knife to scrape and drag the paint in different directions. This technique can transform a flat painting into a vibrant, tactile experience.
Next up is layering paint. Layering is crucial in painting as it adds dimension and complexity to your work. With a palette knife, you can apply a base layer of color and then build on it with additional layers. It’s important to let each layer dry before applying the next to avoid muddling your colors. Start with a background color, and then use your knife to add new colors on top, allowing some of the previous layers to peek through. This technique can create a beautiful, multi-dimensional effect that draws the viewer in.
Lastly, don't forget about the importance of practice. The more you experiment with your palette knife, the more natural it will feel in your hands. Try different techniques, mix various colors, and create textures until you find your unique style. Remember, art is about exploration and self-expression, so don’t be afraid to make mistakes. Each stroke is a step towards mastering this incredible tool!
In summary, mastering the basic techniques of using a palette knife can significantly enhance your artistic journey. From mixing colors to creating textures and layering paint, each skill you develop will contribute to your growth as an artist. So grab your palette knife, unleash your creativity, and enjoy the process!
Q: Can I use a palette knife with any type of paint?
A: Yes, palette knives can be used with various types of paint, including acrylics and oils. However, each paint type may require different techniques for optimal results.
Q: How do I clean my palette knife?
A: Cleaning your palette knife is simple! Use a cloth or paper towel to wipe off excess paint, and then wash it with soap and water. Make sure to dry it thoroughly to prevent rusting.
Q: Is it necessary to use a palette knife for painting?
A: While it’s not necessary, using a palette knife can add unique textures and effects that brushes may not achieve. It’s a great tool to have in your artistic arsenal!
Mixing Colors
Mixing colors is one of the most exciting and essential aspects of using a palette knife. It’s like being a chef in a kitchen, where the paints are your ingredients, and the palette knife is your trusty spatula. The magic happens when you blend these colors together to create stunning hues that can elevate your artwork to the next level. But how do you achieve that perfect mix? Let’s dive into some techniques that will help you master the art of color mixing!
First off, it’s vital to understand the color wheel. This tool is your best friend when it comes to mixing colors. It showcases primary colors (red, blue, yellow), secondary colors (green, orange, purple), and tertiary colors. By knowing how these colors interact, you can create a vast array of shades. For instance, mixing red and yellow gives you orange, but did you know that adding a touch of blue to your orange can create a more muted, earthy tone? The possibilities are endless!
When using a palette knife to mix colors, the technique you employ can greatly affect the outcome. Here’s a simple yet effective method: Start with a small amount of each color on your palette. Use the edge of your palette knife to scoop up a bit of each color and then scrape them together on your palette. This action not only blends the colors but also introduces an element of texture, which can be quite appealing in your final piece. Don’t be afraid to experiment with different proportions; sometimes, a little more of one color can lead to unexpected and beautiful results!
Another technique to consider is the ‘twisting’ method. This involves twisting your palette knife as you mix, which can create a marbled effect. It’s a fantastic way to add depth to your colors, especially if you’re working on a background that needs some visual interest. Imagine swirling a spoon in a bowl of cake batter; the more you twist, the more dynamic the mixture becomes!
To illustrate the mixing process, here’s a simple table that shows how different color combinations can lead to new shades:
| Color 1 | Color 2 | Resulting Color |
|---|---|---|
| Red | Yellow | Orange |
| Blue | Yellow | Green |
| Red | Blue | Purple |
| White | Any Color | Pastel Shade |
Lastly, don’t forget to clean your palette knife between mixing different colors! This ensures that you don’t inadvertently muddy your beautiful blends. A quick wipe with a cloth or a rinse in water will keep your knife ready for the next color adventure.
In conclusion, mixing colors with a palette knife is not just a technique; it's an art form in itself. By understanding the color wheel, experimenting with different mixing methods, and maintaining your tools, you can unlock a world of creativity. So grab your palette knife, and let the color mixing begin!

Creating Texture
Creating texture in your artwork is like adding a secret ingredient to your favorite recipe; it elevates the entire dish! When using a palette knife, the possibilities are endless. The unique shape and flexibility of the knife allow you to manipulate paint in ways that brushes simply can't. Imagine transforming a flat canvas into a vibrant landscape or a dramatic abstract piece with just a few strokes. But how do you achieve that captivating texture that draws the viewer in?
One effective technique is to use the edge of the palette knife to scrape and lift paint. This method not only creates a rough texture but also reveals underlying layers of color, adding depth to your artwork. For instance, if you're painting a rocky surface, use the knife to scrape back some of the top layer, exposing darker shades beneath. This technique mimics the natural wear and tear found in nature, making your painting feel more organic and alive.
Another approach is to apply thick layers of paint directly onto the canvas and then use the palette knife to spread and manipulate it. Think of it as frosting a cake; the thicker the layer, the more texture you can create. Use the knife to create peaks and valleys in the paint, which will catch the light differently and create visually stunning effects. This method is especially effective with acrylic paints, which dry quickly, allowing you to build up layers without waiting too long.
Don’t forget about the power of color mixing when creating texture! By blending different colors on your palette knife before applying them to the canvas, you can achieve a marbled effect that adds richness to your work. For example, mixing a vibrant red with a touch of orange can create a warm, glowing texture that simulates the beauty of a sunset. The key is to experiment and find combinations that resonate with your artistic vision.
To help you visualize these techniques, here’s a simple table summarizing some popular texture techniques using a palette knife:
| Technique | Description | Best Used For |
|---|---|---|
| Scraping | Using the edge to remove layers of paint. | Creating depth and revealing underlayers. |
| Thick Application | Applying paint in thick layers for a raised effect. | Landscapes, abstracts, or any textured surfaces. |
| Color Mixing | Blending colors on the knife before applying. | Creating unique, rich textures and effects. |
In conclusion, the palette knife is an incredible tool for creating texture in your artwork. By experimenting with different techniques, you can unlock new dimensions in your paintings. Remember, art is all about exploration and expression, so don't hesitate to play around with your palette knife and discover what textures resonate with you. Happy painting!
Q: Can I use a palette knife with any type of paint?
A: Yes! Palette knives work well with acrylics, oils, and even some watercolors. However, the techniques may vary based on the paint's consistency.
Q: How do I clean my palette knife after use?
A: It's best to clean your palette knife immediately after use. For acrylics, rinse it under warm water; for oils, use a solvent like turpentine or mineral spirits.
Q: Can I create fine details with a palette knife?
A: While palette knives are generally used for broader strokes and textures, you can use the tip for finer details. However, for intricate work, a brush may be more suitable.
Layering Paint
Layering paint is an essential technique that can transform your artwork from flat to fabulous. Imagine building a cake, each layer adding flavor and depth to the final product. Similarly, when you layer paint with a palette knife, you're not just adding color; you're creating a rich tapestry of textures and hues that invite the viewer to explore your work more closely.
To start layering effectively, it's crucial to understand the drying times of your chosen paint. For instance, if you're using acrylics, they dry quickly, allowing you to build layers in a shorter amount of time. On the other hand, oil paints take significantly longer to dry, which can be advantageous for blending but requires more patience when layering. Here’s a quick comparison:
| Type of Paint | Drying Time | Best for Layering |
|---|---|---|
| Acrylic | Fast (minutes to hours) | Quick layering, vibrant colors |
| Oil | Slow (days to weeks) | Rich textures, blending |
When you begin layering, consider starting with a base layer that sets the foundation for your piece. This could be a simple wash of color that establishes the overall mood or theme of your artwork. Once that layer is dry, you can begin to add additional layers, each with its own unique application technique. For instance, try scraping some paint off with the edge of your palette knife to reveal the base layer underneath, creating an intriguing contrast. This technique can add a sense of movement and energy to your piece.
Another exciting aspect of layering is the ability to play with transparency. By mixing your paint with a medium, you can create semi-transparent layers that allow the colors beneath to shine through. This can create incredible depth and complexity in your work. Imagine the way sunlight filters through leaves; that’s the kind of effect you can achieve with careful layering.
Lastly, don’t forget about color harmony when layering. Using a limited color palette can help maintain coherence throughout your artwork. You can also experiment with complementary colors to create striking contrasts that draw the eye. The key is to have fun and let your creativity flow; after all, art is about expression!
In conclusion, layering paint with a palette knife opens up a world of possibilities for artists. Whether you’re aiming for a subtle gradation of colors or bold, textural contrasts, mastering this technique will undoubtedly enhance your artistic repertoire. So grab your palette knife, experiment with different layers, and watch your paintings come to life!
- What type of paint is best for layering? Acrylics are great for quick layering, while oils allow for more blending.
- How do I know when a layer is dry? Touch the surface lightly; if it feels tacky, give it more time.
- Can I layer different types of paint? It’s best to stick to one type for consistency, but some artists mix them for unique effects.

Advanced Techniques
Once you've mastered the basics of using a palette knife, it's time to dive into some that can truly elevate your artwork. These methods not only enhance your skills but also ignite your creativity, allowing you to create stunning pieces that captivate viewers. One of the most exciting aspects of using a palette knife is the ability to experiment with different styles and approaches. So, let's explore some of these advanced techniques that can transform your art!
First up is the technique of impasto, a method where paint is laid on the canvas very thickly, creating a three-dimensional effect. This technique is perfect for adding depth and drama to your paintings. To achieve impasto with a palette knife, load your knife with a generous amount of paint and apply it directly onto the canvas. Don't be afraid to use bold strokes and create peaks and valleys in the paint. The result will be a tactile surface that invites viewers to touch and explore your work.
Another advanced technique is scraping. This involves using the edge of your palette knife to remove paint from the canvas, revealing layers underneath. It’s a fantastic way to create interesting contrasts and textures. To scrape effectively, wait until the paint has dried slightly but is still tacky. Then, use the knife to gently pull away the top layer. This technique can add a sense of history to your work, as it reveals the journey of the painting beneath the surface.
For those looking to add a splash of spontaneity, consider the stabbing technique. This involves stabbing the paint with the knife to create random, energetic strokes. It’s a bit like playing an instrument—each stab can produce a different sound, or in this case, a different texture. This technique is particularly effective in abstract works, where the energy and movement can evoke emotion and intrigue.
Additionally, you can incorporate blending techniques into your advanced repertoire. While blending is often associated with brushes, you can achieve stunning results with a palette knife as well. Use the flat side of the knife to gently mix colors on the canvas, creating smooth transitions or soft gradients. This can be particularly effective in landscapes or portraits, where subtle color shifts can bring your subject to life.
Lastly, don’t forget about the power of layering. Advanced artists often build their paintings in layers, allowing each layer to dry before adding the next. This technique can create a sense of depth and complexity in your work. When using a palette knife, experiment with different colors and textures in each layer. You might find that the interplay of colors creates unexpected and beautiful results.
To summarize, here are some key advanced techniques to consider:
- Impasto for depth and dimension
- Scraping to reveal layers and create contrast
- Stabbing for energetic and spontaneous strokes
- Blending for smooth transitions
- Layering to build complexity
These techniques can be combined and adapted to suit your personal style, so don’t hesitate to experiment! Remember, the beauty of art lies in its ability to evolve and surprise both the artist and the viewer. So grab your palette knife, unleash your creativity, and see where these advanced techniques take you!
Q: Can I use a palette knife with any type of paint?
A: Yes! Palette knives can be used with various types of paint, including acrylics and oils. However, the techniques may vary slightly depending on the paint's consistency.
Q: What should I look for when choosing a palette knife?
A: Look for a palette knife that feels comfortable in your hand. The size and shape can vary, so choose one that suits your style and the techniques you plan to use.
Q: How do I clean my palette knife?
A: Cleaning your palette knife is simple. Use a cloth or paper towel to wipe off excess paint, and then wash it with warm, soapy water. Make sure to dry it thoroughly to prevent rust.
Q: Can I use a palette knife for detail work?
A: While palette knives are typically used for broader strokes and textures, you can use smaller knives for detail work. It may take some practice to master this technique!
Choosing the Right Paint
When it comes to using a palette knife, one of the most crucial decisions you'll make is . The type of paint you select can dramatically influence your technique, texture, and overall finish. Whether you're aiming for a vibrant, bold masterpiece or a subtle, soft landscape, the paint you use will play a pivotal role in achieving your desired outcome.
There are two primary types of paint that artists commonly use with palette knives: acrylics and oils. Each of these has unique properties that cater to different artistic styles and preferences. Understanding these differences can help you make an informed choice that aligns with your artistic vision.
Acrylic paint is water-based, which means it dries quickly and is easy to clean up. This can be a huge advantage for artists who like to work swiftly or need to make adjustments on the fly. Additionally, acrylics can be easily mixed with a variety of mediums, allowing for a range of textures and finishes. However, the fast drying time can also be a double-edged sword; it requires you to work efficiently, as you might lose the opportunity to blend colors on the canvas.
On the other hand, oil paint offers a richer, more vibrant color palette and a longer drying time, which allows for more extensive blending and layering techniques. This can be particularly beneficial when using a palette knife, as the slower drying time gives you the flexibility to manipulate the paint and create complex textures. However, oil paints require solvents for cleaning and can take a long time to dry completely, which might not suit everyone's workflow.
To help you visualize the differences between these two types of paint, here’s a simple comparison table:
| Feature | Acrylic Paint | Oil Paint |
|---|---|---|
| Drying Time | Fast | Slow |
| Cleanup | Water-based | Requires solvents |
| Color Vibrancy | Bright and bold | Rich and deep |
| Texture Options | Versatile with mediums | Excellent for blending |
Ultimately, the choice between acrylic and oil paint depends on your personal preferences and the effects you wish to achieve. If you enjoy quick, spontaneous painting, acrylics might be your best bet. However, if you prefer to take your time and explore intricate details, oil paints could be the way to go.
In conclusion, choosing the right paint is not just about the medium itself, but how it complements your palette knife techniques. Experimenting with both types can lead to exciting discoveries and unique styles. So, grab your palette knife, select your paint, and let your creativity flow!
- Can I use palette knives with watercolor paints? - While palette knives are typically used with thicker paints like acrylics and oils, you can experiment with them on watercolor paper for unique effects.
- How do I know which paint is best for my project? - Consider the style you want to achieve, your working speed, and your cleanup preferences when choosing your paint.
- Is it necessary to use a specific brand of paint? - Not at all! While some brands may offer better quality, the most important factor is how the paint feels to you and how it works with your palette knife.
Acrylic vs. Oil Paint
When it comes to choosing between acrylic and oil paint, the decision can feel overwhelming, especially for artists eager to explore the vibrant world of palette knife techniques. Both mediums have their unique characteristics, advantages, and challenges, which can greatly influence your creative process and the final outcome of your artwork. So, let's break it down!
Acrylic paint is known for its quick drying time, which can be both a blessing and a curse. Imagine working on a beautiful sunset and, just as you’re getting into the groove, your paint starts to dry before you can blend those gorgeous hues. However, this fast drying time allows for layering and quick adjustments, making it an excellent choice for artists who like to work in a spontaneous and dynamic way. Additionally, acrylics are water-soluble, meaning they can be easily cleaned up with just soap and water, making them user-friendly, especially for beginners.
On the flip side, oil paint offers a rich, buttery texture that many artists adore. It dries slowly, allowing you ample time to work and rework your paint, which is perfect for blending and creating depth. Think of oil paint as that cozy blanket you want to wrap yourself in – it just feels luxurious! However, the slow drying time can be a double-edged sword, as it requires patience and can lead to longer project timelines. Plus, cleaning up oil paint is a bit more complex since it requires solvents like turpentine or mineral spirits.
| Feature | Acrylic Paint | Oil Paint |
|---|---|---|
| Drying Time | Fast | Slow |
| Texture | Flexible, smooth | Rich, buttery |
| Cleanup | Water-soluble | Requires solvents |
| Color Shift | Minimal | Can darken as it dries |
Ultimately, the choice between acrylic and oil paint comes down to your personal preference and the specific effects you want to achieve with your palette knife. If you enjoy quick, vibrant strokes and the flexibility to layer without waiting too long, acrylics may be your best bet. However, if you’re looking to create rich textures and depth with the luxury of time, oil paints might be the way to go. Why not experiment with both? You might discover a new favorite technique that enhances your artistic journey!
- Can I use acrylic paint with a palette knife? Absolutely! Acrylic paint works wonderfully with palette knives and allows for vibrant textures and quick layering.
- How do I clean my palette knife after using oil paint? Use a solvent like turpentine or mineral spirits to clean your palette knife thoroughly after using oil paint.
- Which paint dries faster, acrylic or oil? Acrylic paint dries significantly faster than oil paint, making it ideal for artists who prefer a quicker working pace.
- Can I mix acrylic and oil paints? It's generally not recommended to mix the two directly, as they have different properties and drying times. However, you can layer them as long as the acrylic is dry before applying oil paint on top.

Maintaining Your Palette Knife
Just like any artist's tool, your palette knife requires proper care and maintenance to ensure it remains in top-notch condition. After all, a well-maintained knife can make all the difference in your artwork, allowing you to express your creativity without hindrance. So, how do you keep your palette knife in the best shape possible? Let’s dive into some essential tips!
First and foremost, the most critical step in maintaining your palette knife is to clean it immediately after use. Paint can dry quickly, and once it does, it becomes a real challenge to remove. Use a soft cloth or paper towel to wipe off excess paint while it's still wet. For more stubborn residues, a gentle scrub with warm, soapy water can work wonders. Just be sure to avoid abrasive materials that could scratch the blade.
Next, consider the type of paint you’re using. If you frequently work with acrylics, it's essential to clean your palette knife promptly, as acrylic paint dries faster than oil paint. On the other hand, if you're using oil paints, you might find that you can leave the paint on a bit longer, but it's still best practice to clean your knife after each session. This not only keeps your knife in great shape but also prevents unwanted color mixing in your future projects.
Another vital aspect of maintenance is storing your palette knife properly. Keep it in a designated space where it won’t get bent or damaged. A simple solution could be a small drawer or a dedicated tool holder. If you have multiple knives, consider organizing them by size and shape, which can save you time when you’re ready to create. Remember, a well-organized workspace can inspire creativity!
Lastly, if you notice any signs of rust or corrosion on your palette knife, it’s time to take action. A mixture of baking soda and water can be an effective rust remover. Apply the paste to the affected area, let it sit for a few minutes, and then gently scrub it off with a cloth. This simple step can extend the life of your tool significantly.
In summary, maintaining your palette knife is a straightforward yet crucial part of your artistic journey. By cleaning it regularly, storing it properly, and addressing any issues like rust, you can ensure that your palette knife remains a reliable companion in your creative endeavors. Remember, a well-cared-for tool not only performs better but also enhances your overall painting experience!
- How often should I clean my palette knife? It's best to clean your palette knife immediately after each use to prevent paint from drying on it.
- Can I use any type of soap to clean my palette knife? Yes, a mild dish soap is ideal for cleaning your palette knife. Just avoid harsh chemicals that could damage the blade.
- What should I do if my palette knife gets rusty? You can use a paste of baking soda and water to remove rust. Apply it to the affected area, let it sit, and then scrub gently.
- Is it necessary to store my palette knife in a specific way? Yes, storing it in a designated space where it won't get damaged is essential for its longevity.
Frequently Asked Questions
- What is a palette knife used for in art?
A palette knife is a versatile tool used primarily for mixing paints, applying paint to a canvas, and creating textures. Its unique shape allows artists to achieve effects that brushes can't, making it an essential tool for both beginners and experienced artists.
- How do I choose the right palette knife?
Choosing the right palette knife depends on your intended technique. There are various shapes and sizes, each serving different purposes. For example, a straight knife is great for mixing, while a pointed knife is ideal for fine details. Experimenting with different types can help you find the one that feels right for your style.
- Can I use a palette knife with any type of paint?
Yes, you can use a palette knife with various types of paint, including acrylics and oils. However, the texture and consistency of the paint can affect your results. Acrylics tend to dry faster, while oils allow for more blending time, so consider these factors when choosing your paint.
- What are some basic techniques for beginners?
For beginners, starting with mixing colors and applying paint in broad strokes can build confidence. Learning to create textures and layering paint are also fundamental techniques that can greatly enhance your art. Don't hesitate to practice and explore different methods!
- How can I create texture with a palette knife?
Creating texture with a palette knife involves using various techniques such as dabbing, scraping, and layering. By applying paint in thick layers or mixing different colors directly on the canvas, you can achieve a rich, textured effect that adds depth to your artwork.
- How do I maintain my palette knife?
Proper maintenance is key to ensuring the longevity of your palette knife. Always clean it immediately after use with warm soapy water to prevent paint from drying on the blade. For stubborn paint, a gentle scrub with a brush can help. Store your knives in a safe place to avoid damage.
- What are the advantages of acrylic paint over oil paint for palette knife techniques?
Acrylic paint dries quickly, allowing for faster layering and adjustments. It also cleans up easily with water and is less toxic than oil paint. However, if you prefer longer blending times and richer colors, oil paint might be the better choice for your palette knife projects.


