How to Draw a Realistic Nose for Beginners
Welcome to the fascinating world of drawing! If you've ever gazed at a portrait and marveled at the intricacy of the human nose, you’re not alone. Drawing a nose may seem daunting, but with the right techniques and a bit of practice, you can master this essential feature of the face. In this article, we’ll take you through a step-by-step guide that will not only help you draw a realistic nose but also boost your overall drawing skills. So, grab your pencils and let’s dive in!
Before you put pencil to paper, it's crucial to understand the basic anatomy of the nose. The nose isn't just a simple shape; it's a complex structure that includes various parts, each with its own characteristics. The main components to focus on are:
- The Bridge: The upper part of the nose that connects to the forehead.
- Nostrils: The openings at the base of the nose that can vary greatly in shape and size.
- The Tip: The rounded end of the nose that can be more pointed or flat depending on the individual.
By understanding these elements, you’ll be better equipped to depict the nose accurately in your drawings. Remember, every nose is unique, so take time to observe different noses to see how these parts vary.
Choosing the right tools can significantly impact your drawing quality. For drawing a realistic nose, consider investing in:
| Tool | Purpose |
|---|---|
| Pencils | Use a range of pencils, from H for light lines to B for darker shading. |
| Erasers | A kneaded eraser is great for lifting graphite without damaging the paper. |
| Paper | Smoother paper allows for finer details, while textured paper can add depth. |
Having the right tools will make your drawing experience smoother and more enjoyable. It’s like cooking; having quality ingredients makes all the difference!
Starting with basic shapes simplifies the drawing process. Begin by sketching light outlines of the nose using simple geometric shapes. Think of the nose as a combination of shapes:
- A triangle for the tip
- A rectangle for the bridge
- Two ovals for the nostrils
These shapes will serve as guidelines, ensuring correct proportions and placement on the face. As you refine your drawing, you can gradually add details and erase the guidelines. This approach is like building a house; you need a solid foundation before adding the roof!
Effective shading adds depth and realism to your drawing. To make your nose look three-dimensional, explore different shading techniques:
- Hatching: Drawing parallel lines to create shadows.
- Blending: Smudging pencil marks to create soft transitions between light and dark areas.
Experiment with these techniques to see which works best for you. Remember, shading is where the magic happens—it’s what brings your drawing to life!
Identifying and avoiding common pitfalls can significantly improve your drawing skills. Here are a few frequent mistakes beginners make:
- Overemphasizing the nostrils
- Ignoring the light source, which can lead to unrealistic shading
- Rushing through the initial sketch, which can result in poor proportions
By being aware of these mistakes, you can take steps to correct them and enhance your overall drawing technique.
Regular practice is key to improvement. Here are some exercises designed to help you refine your skills:
- Draw noses from different angles.
- Practice shading techniques using reference images.
- Sketch noses of various shapes and sizes to understand diversity.
These exercises will build your confidence and help you develop a unique style. Remember, practice makes perfect!
Reference images are invaluable for accuracy. When selecting reference photos, look for:
- Different angles of the nose
- Varied lighting conditions to see how shadows fall
- Noses of different shapes and ethnicities to broaden your understanding
Using these images effectively will help you capture the nuances of the nose's shape and shading, making your drawings more realistic.
Adding final touches can elevate your drawing. Once you’re satisfied with your initial sketch, take a step back and assess your work. Look for areas that may need more detail or shading. A few key techniques to consider include:
- Enhancing highlights to create contrast
- Refining edges for a cleaner look
- Adding texture to the skin for realism
These final adjustments can transform a good drawing into a great one, so don’t rush this part!
Once you've completed your drawing, sharing it can be a rewarding experience. Whether online or offline, presenting your artwork can help you connect with other artists and receive valuable feedback. Consider:
- Posting on social media platforms like Instagram or Pinterest.
- Joining local art groups or online forums to share your work.
- Creating a portfolio to showcase your progress over time.
Remember, every artist starts somewhere, and sharing your work can inspire others just as much as it inspires you!
Q: How long does it take to learn to draw a realistic nose?
A: The time it takes varies from person to person. With regular practice, you can see improvement in just a few weeks!
Q: Do I need expensive materials to draw well?
A: Not at all! While quality materials can help, you can create stunning art with basic supplies.
Q: Can I use digital tools to draw noses?
A: Absolutely! Digital tools can offer unique advantages, like the ability to easily erase mistakes and experiment with colors.
Understanding Nose Anatomy
Understanding the anatomy of the nose is essential for anyone looking to create a realistic drawing. The nose is a complex structure with various parts that work together to form its unique shape. By familiarizing yourself with these components, you can accurately depict the nose in your artwork, making it look more lifelike. Let's break down the key elements of the nose:
- Bridge: The bridge is the upper part of the nose, extending from the forehead to the tip. It plays a crucial role in defining the nose's overall shape.
- Nostrils: These are the openings at the base of the nose that allow air to flow in and out. The shape and size of the nostrils can vary greatly among individuals, adding to the uniqueness of each person's nose.
- Tip: The tip of the nose is often rounded and can vary in size. It's important to capture its curvature accurately to give your drawing depth.
Each of these parts contributes to the nose's overall appearance, and understanding their relationships is key. For instance, the bridge's height can affect how the nostrils and tip are perceived. If the bridge is too low, the nostrils may appear too wide; conversely, a high bridge can make the tip look more pronounced. To illustrate this concept, consider the following anatomical diagram:
| Part of the Nose | Description |
|---|---|
| Bridge | The upper structure that connects to the forehead. |
| Nostrils | The openings at the base that vary in shape and size. |
| Tip | The rounded end that can vary in size and shape. |
When drawing, it's helpful to visualize these parts in three dimensions. Imagine the nose as a sculpture made up of various planes and angles. This mental image will guide you in capturing the nose's form accurately. Pay attention to how light interacts with these surfaces, as it will help you create a more realistic representation.
In summary, understanding the basic anatomy of the nose is crucial for achieving realism in your drawings. By focusing on the bridge, nostrils, and tip, and considering how they relate to one another, you can create a nose that looks both natural and expressive. Remember, practice makes perfect, so don’t hesitate to sketch different noses from various angles to enhance your skills!
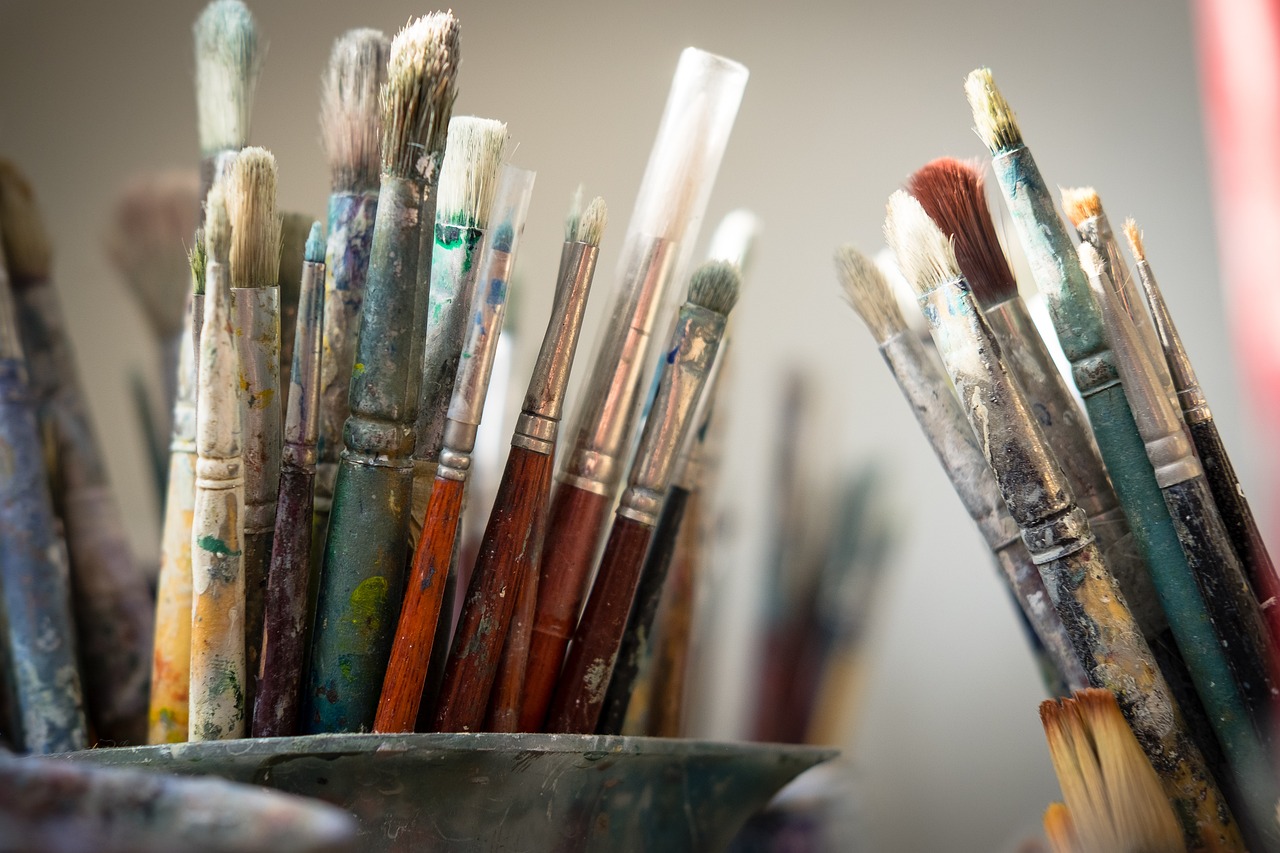
Essential Drawing Tools
When you're embarking on the artistic journey of drawing a realistic nose, having the right tools is like having a sturdy map before a big adventure. The tools you choose can significantly influence the quality of your artwork, so let's dive into what you'll need to set yourself up for success.
First and foremost, you'll want to consider your pencils. A good range of pencils is essential for achieving different shades and textures. Typically, you should have a selection from 2H (hard) to 6B (soft) to cover everything from light guidelines to deep shadows. The harder pencils are great for fine lines and initial sketches, while the softer ones allow you to add depth and richness to your shading. Here’s a quick breakdown:
| Pencil Grade | Use |
|---|---|
| 2H | Light lines and guidelines |
| HB | General sketches |
| 2B | Shading and detail work |
| 4B | Deep shadows |
| 6B | Rich, dark areas |
Next up, let’s talk about erasers. A good eraser is your best friend when it comes to refining your work. You might want to have both a kneaded eraser and a vinyl eraser on hand. The kneaded eraser is fantastic for lifting graphite without damaging the paper, while the vinyl eraser is perfect for making clean, sharp corrections. Trust me, having these two types will save you from a lot of frustration!
Now, let’s not forget about the paper. The type of paper you use can make a world of difference. For drawing realistic noses, a smooth, heavyweight drawing paper is ideal because it can handle multiple layers of shading without warping. Look for papers that are at least 200 gsm to give you that luxurious feel and durability. You might also want to experiment with textured papers, as they can add an interesting dimension to your work.
In addition to these essentials, consider investing in a blending stump or tortillon. These handy tools help you smooth out your shading and create a more polished look. They’re particularly useful when you’re trying to achieve the soft, realistic transitions found in the curves of a nose. And, of course, a good sharpener is crucial to keep your pencils in top condition.
Lastly, don’t underestimate the power of a good reference book or online resources. Having visual guides can be incredibly beneficial as you learn the intricacies of nose anatomy and shading techniques. Whether it's a tutorial video or a step-by-step guide, these resources can provide insights that enhance your skills.
In summary, the right tools can transform your drawing experience from frustrating to fulfilling. With a solid set of pencils, quality erasers, suitable paper, and additional accessories, you’ll be well-equipped to tackle the challenge of drawing a realistic nose. So, gather your supplies and get ready to unleash your creativity!
Basic Shapes and Guidelines
When it comes to drawing a realistic nose, starting with basic shapes is one of the most effective techniques you can employ. Think of it as laying a solid foundation for a house; without a good base, everything else can crumble. In this section, we'll break down the essential shapes that make up the nose and how to use guidelines to ensure accurate proportions and placement on the face.
First, let’s identify the primary shapes involved in drawing a nose. The nose can be simplified into three main forms: the triangle, the oval, and the rectangle. These shapes help you visualize the structure before diving into details. Here’s how they come into play:
- Triangle: This shape forms the bridge of the nose. It helps you outline the upper section where the nose meets the forehead.
- Oval: The nostrils can be represented as ovals. This shape is crucial for capturing the roundness and depth of the nostrils.
- Rectangle: The tip of the nose can be viewed as a rectangle, which gives you a clear idea of width and length.
Once you have these basic shapes sketched out, it’s time to refine them into a more realistic representation. Begin by lightly drawing these shapes with a pencil. Remember, the key here is to keep your lines light so you can easily erase and adjust as needed. Use your eraser liberally; it’s your best friend during this stage!
Next, you’ll want to establish some guidelines to ensure that your nose is proportionate to the rest of the face. A simple trick is to draw a vertical line down the center of your face sketch. This line will act as a reference point for aligning the nose with other facial features. From here, you can mark where the bridge of the nose starts and where the nostrils should be positioned. Here’s a quick breakdown of how to place your guidelines:
| Feature | Guideline Position |
|---|---|
| Bridge of the Nose | Start at the top of the triangle shape, centered along the vertical line. |
| Nostrils | Draw horizontal lines that extend from the base of the triangle to mark the width of the nostrils. |
| Tip of the Nose | Position at the end of the rectangle shape, ensuring it aligns with the vertical line. |
As you refine these shapes and guidelines, don’t hesitate to step back and assess your work. Are the proportions correct? Does the nose look natural? This is where you can adjust and tweak the shapes until you’re satisfied. Remember, the goal is to create a nose that looks like it belongs on the face you’re drawing. Think of this process as sculpting; you’re chiseling away the excess until you reveal the form beneath.
Finally, once you’re happy with your basic shapes and guidelines, you can start adding details. This is where the magic happens! But first, make sure you have a solid structure to build upon. With the foundation laid, you’re now ready to explore shading techniques that will bring your nose to life in the next section.

Shading Techniques
Shading is a crucial element in drawing, especially when it comes to creating a realistic nose. It adds depth and dimension, transforming a flat sketch into a lifelike representation. To master shading, you need to understand a few fundamental techniques that can elevate your artwork from basic to breathtaking. The key is to observe how light interacts with the nose and to replicate that in your drawing.
One of the most effective methods for shading is hatching, which involves drawing closely spaced parallel lines. This technique is excellent for creating texture and can be adjusted by varying the line density. For instance, areas that are darker can have more lines packed closely together, while lighter areas can have more space between the lines. When you practice hatching, consider the direction of the light source. This will guide you on where to place your shadows and highlights.
Another popular technique is blending. This method softens the harsh lines created by hatching, resulting in a smoother transition between light and shadow. You can achieve blending with tools such as blending stumps, your fingers, or even a soft cloth. To blend effectively, start by applying a base layer of graphite, then use your blending tool to gently smudge the graphite in the direction of the light source. This technique works wonders for the tip of the nose and the sides, where subtle gradations of tone are essential.
Here’s a quick overview of some shading techniques you might want to explore:
- Cross-hatching: This involves overlapping lines in different directions to create richer shadows.
- Stippling: Using tiny dots to create shading can give a unique texture to your drawing.
- Scumbling: A scribbled technique that can add a soft and organic feel to your shading.
As you experiment with these techniques, keep in mind that practice is essential. Try drawing different nose shapes and sizes to see how shading can alter their appearance. You might also want to consider the light source in your drawing. A consistent light direction will help you maintain realism. For example, if the light is coming from the left, the right side of the nose will typically be darker. This understanding will make your shading more believable.
Lastly, don’t forget to step back from your drawing periodically. This will help you see the overall effect of your shading and make adjustments as needed. Remember, shading is not just about making things darker; it’s about creating a sense of form and volume. With patience and practice, you’ll be able to create stunning, realistic noses that truly stand out in your artwork!
Q: What pencil grades are best for shading?
A: Generally, softer pencils (like 2B, 4B, or 6B) are great for shading as they produce darker marks. Harder pencils (like H or 2H) can be used for lighter shading and fine details.
Q: How do I know where to place shadows on the nose?
A: Observing reference images is key. Look for areas where the light does not hit directly, usually on the sides and under the tip of the nose.
Q: Can I use colored pencils for shading?
A: Absolutely! Colored pencils can add a unique touch to your drawings. Just make sure to blend well to achieve a smooth transition.
Common Mistakes to Avoid
When embarking on the journey of drawing a realistic nose, it's easy to fall into traps that can hinder your progress. One of the most common mistakes beginners make is neglecting the anatomy of the nose. Understanding the basic structure—like the bridge, nostrils, and tip—is essential. If you skip this step, you might end up with a nose that looks flat or oddly shaped. Think of it like building a house; without a solid foundation, everything else will crumble.
Another frequent error is over-reliance on outlines. While it’s tempting to create a heavy outline around the nose, this can lead to a cartoonish appearance. Instead, try to use softer lines and focus on the shading to define the shape. This technique allows the nose to appear more three-dimensional and lifelike. Remember, less is often more in the world of realistic drawing!
Shading is where many beginners stumble. A common pitfall is using a single shading technique throughout the drawing. Different areas of the nose require varying levels of shading and texture. For instance, the tip of the nose is often lighter than the sides. Experimenting with techniques like hatching, cross-hatching, and blending can make a significant difference in the realism of your work. Don't be afraid to practice these techniques separately before applying them to your drawing.
Another mistake that can undermine your efforts is failing to use reference images. Attempting to draw a nose from memory can lead to inaccuracies. Instead, look for high-quality reference photos that capture different angles and lighting conditions. This will not only improve your accuracy but also help you understand the subtleties of the shape and shading. Remember, even the best artists rely on references!
Lastly, it's crucial to avoid rushing through the process. Drawing is an art that requires patience. Take your time to observe, sketch, and refine your work. If you find yourself getting frustrated, step back and take a break. Sometimes, a fresh perspective can help you see mistakes that you might have overlooked.
In summary, here are some key mistakes to avoid:
- Neglecting the anatomy of the nose
- Over-reliance on heavy outlines
- Using a single shading technique
- Not using reference images
- Rushing through the drawing process
By being mindful of these common pitfalls, you'll be on your way to mastering the art of drawing a realistic nose. Remember, practice makes perfect, and every mistake is an opportunity to learn and grow as an artist!
Q: What is the best way to start drawing a nose?
A: Begin by studying the basic anatomy of the nose. Use light pencil strokes to outline the general shape before adding details.
Q: How can I improve my shading techniques?
A: Practice different shading methods such as hatching, cross-hatching, and blending. Experiment with various pencil pressures to see how they affect the shading.
Q: Should I always use reference images?
A: Yes! Reference images are invaluable for capturing the nuances of the nose's shape and shading. They help ensure accuracy in your drawings.
Q: How do I know if my drawing looks realistic?
A: Compare your drawing to reference images. Look for inconsistencies in shape, shading, and proportions. Getting feedback from others can also be helpful.

Practice Exercises
When it comes to mastering the art of drawing a realistic nose, practice is your best friend. Just like learning to ride a bike or play a musical instrument, the more you practice, the better you become. Here are some engaging exercises that will help you refine your skills and boost your confidence in drawing noses.
First, start with simple sketches. Grab a pencil and some paper, and begin by drawing a series of noses from different angles. Don’t worry about perfection; the goal here is to get comfortable with the shapes and proportions. You can use reference images to guide your sketches. Try to vary the styles and sizes of noses you draw. This will not only improve your observational skills but also help you understand the diversity in nose shapes.
Next, consider doing some quick gesture drawings. Set a timer for 30 seconds to 1 minute and draw as many noses as you can within that time frame. This exercise encourages you to focus on the overall form and flow of the nose rather than getting bogged down in details. You’ll be surprised at how this quick practice can enhance your ability to capture the essence of the nose.
Another effective exercise is to practice shading. Choose a few of your favorite sketches and add shading to them. Experiment with different techniques, such as hatching, cross-hatching, and blending. Notice how the light interacts with the nose and how shadows can create depth. This not only makes your drawings more realistic but also helps you understand the three-dimensionality of the nose.
Lastly, consider keeping a sketchbook dedicated solely to nose studies. This sketchbook can be a treasure trove of your progress. Over time, you’ll see how your understanding of the nose evolves, and it will serve as a motivational tool to keep pushing your boundaries. Remember, the journey of learning is just as important as the destination!
To further enhance your practice, here are a few additional exercises you can incorporate:
- Mirror Drawing: Use a mirror to observe your own nose from different angles and sketch what you see.
- Photo Studies: Choose high-quality photographs of noses and attempt to replicate them in your style.
- Collaborative Practice: Join art groups or online forums where you can share your sketches and receive constructive feedback.
By regularly engaging in these exercises, you'll not only develop your technical skills but also cultivate your unique style. Remember, the key to improvement lies in consistency and a willingness to learn from your mistakes. So grab your sketchbook, let your creativity flow, and enjoy the process of drawing!
Q: How often should I practice drawing noses?
A: Aim to practice drawing noses at least a few times a week. Consistency is crucial for improvement.
Q: What if I struggle to get the proportions right?
A: Don’t worry! Use guidelines and basic shapes to help you establish proportions. With time and practice, it will become easier.
Q: Can I use digital tools for practice?
A: Absolutely! Digital drawing tools can offer flexibility and ease of correction, making them a great option for practice.
Q: How do I know if I'm improving?
A: Keep a record of your drawings over time. Comparing your earlier work with your recent sketches can provide a clear indication of your progress.
Using Reference Images
When it comes to drawing a realistic nose, can be a game changer. Think of reference images as your personal guide, helping you navigate the complex landscape of nose anatomy. They provide a visual context that can make a world of difference in your drawing. But how do you choose the right reference images? First, consider the lighting and angle. A well-lit image can help you see the subtle shadows and highlights that give depth to your drawing. Remember, the nose isn’t just a flat surface; it has curves and contours that catch light in fascinating ways.
Next, ensure that the reference image is of high quality. A blurry or pixelated image can lead to inaccuracies in your drawing. Look for images that show the nose from different angles, as this will help you understand its three-dimensional form. You might find it helpful to create a collection of reference images that showcase various noses, from different ethnicities and ages, to broaden your understanding of the diversity in nose shapes.
When you're ready to start drawing, take a moment to study your reference image closely. Pay attention to the proportions and shapes of the nose. You might want to ask yourself questions like:
- What shape does the bridge of the nose take?
- How wide are the nostrils in relation to the overall nose?
- What direction does the tip of the nose point?
These questions can guide your observation and ensure you capture the essence of the nose accurately. As you draw, don’t hesitate to refer back to your images frequently. This will help you stay on track and make adjustments as needed.
Another tip is to use multiple reference images simultaneously. By comparing different noses side by side, you can gain insights into the variations and commonalities among them. This practice not only enhances your understanding but also enriches your drawing style, allowing you to incorporate elements from various references into a unique interpretation of the nose.
Finally, remember that reference images are not just for beginners. Even seasoned artists use them to refine their skills and explore new techniques. So, don’t shy away from using them as a tool for improvement. As you become more comfortable with drawing noses, you'll find that your reliance on reference images may decrease, but they will always serve as a valuable resource in your artistic journey.
Q: How do I find good reference images for nose drawing?
A: Look for high-resolution images on photography websites, art platforms, or even take your own photos. Ensure the images capture the nose from various angles and lighting conditions.
Q: Can I use images of noses from cartoons or stylized art?
A: While stylized images can be fun and useful for practice, they might not provide the anatomical accuracy you need for realistic drawing. Stick to realistic images for the best results.
Q: How many reference images should I use?
A: It depends on your comfort level. Beginners might benefit from 3-5 images showcasing different angles and features, while advanced artists may only need one or two for specific details.
Q: Is it okay to trace over reference images?
A: Tracing can be a helpful learning tool, especially for understanding proportions and shapes. However, rely on your own drawing skills for final pieces to develop your style.

Final Touches and Refinements
Once you've meticulously sketched the nose, the final touches can truly elevate your artwork from good to great. Think of this stage as the cherry on top of your drawing sundae! It's where you can add those little details that breathe life into your creation. You might be wondering, "What exactly should I focus on?" Well, let’s break it down.
First, consider the shading. Go over the shaded areas and assess whether they provide enough depth. Sometimes, a little more contrast can make a world of difference. Use a softer pencil, like a 4B or 6B, to deepen shadows and create a more three-dimensional effect. Remember, shading isn't just about darkening areas; it's about understanding light and how it interacts with the nose's curves.
Next, pay attention to the highlights. These are the spots where light hits the nose directly, usually on the tip and the bridge. You can use a kneaded eraser to gently lift some graphite and create those highlights. This technique adds a nice pop and makes your drawing appear more lifelike.
Another important aspect is the edges. Are they too harsh? Softening some edges with a blending stump can create a more realistic transition between light and shadow. Think of it like blending colors in a painting; smooth transitions can make all the difference.
Finally, step back and look at your drawing from a distance. Sometimes, being too close can make you miss the overall composition. Does the nose look balanced with the rest of the face? If not, you can make minor adjustments. A slight tweak can often lead to a significant improvement.
In summary, the final touches are all about refining details, enhancing depth, and ensuring that your nose drawing integrates well with the rest of the facial features. Don't rush this part; take your time to evaluate and adjust as necessary. Your patience will pay off!
- How do I know if my shading is good enough? Look for a smooth transition between light and dark areas. Practice will help you develop this skill.
- What if I make a mistake during the final touches? Don’t worry! You can always use an eraser or adjust with a blending tool to correct any errors.
- Can I use color in my nose drawing? Absolutely! Adding color can give your drawing an extra dimension, but make sure to keep the tones realistic.

Showcasing Your Work
Once you've put in the time and effort to create a stunning drawing of a realistic nose, it's time to share your masterpiece with the world! Showcasing your work not only allows you to receive feedback but also helps you connect with other artists and art enthusiasts. So, how do you go about this? First off, consider your audience. Are you sharing with friends and family, or are you aiming to reach a broader artistic community? Understanding your audience will guide your approach.
One of the most effective ways to showcase your artwork is through social media platforms. Websites like Instagram, Facebook, and Pinterest are fantastic for sharing visual content. Create a dedicated art account or use your personal profile to post high-quality images of your drawing. Make sure to use relevant hashtags, such as #ArtShowcase or #RealisticDrawing, to increase visibility. A catchy caption can also draw in viewers—think of it as your artwork's voice!
Another great option is to join online art communities or forums. Websites like DeviantArt or ArtStation allow you to upload your artwork, receive critiques, and engage with other artists. It's a supportive environment where you can learn from others while showcasing your skills. Don't forget to participate in discussions and provide feedback on others' work too; this fosters a sense of community and can lead to valuable connections.
If you're more into offline showcasing, consider participating in local art exhibitions or fairs. These events provide a platform to display your artwork in person, allowing you to interact with viewers directly. You can also look into local galleries that may be open to showcasing emerging artists. Networking at these events can open doors to future opportunities!
Lastly, think about creating a portfolio. Whether digital or physical, a portfolio is a curated collection of your best work. This can be a powerful tool when applying for art schools, exhibitions, or even freelance opportunities. Make sure to include a variety of pieces to showcase your versatility and skill. A well-organized portfolio not only highlights your talent but also demonstrates your commitment to your craft.
In conclusion, showcasing your work is an essential step in your artistic journey. Whether online or offline, sharing your creations allows you to connect with others, gain valuable feedback, and build your reputation as an artist. So, don’t be shy—put your art out there and watch your confidence grow!
- How do I choose the right platform to showcase my art?
Consider your target audience and the type of engagement you want. Social media is great for reaching a wide audience, while art communities offer more focused feedback. - What should I include in my portfolio?
Your portfolio should include a diverse range of your best work, showcasing different styles and techniques. Quality over quantity is key! - How can I get constructive feedback on my art?
Join art communities or forums where you can share your work and ask for critiques. Be open to feedback and use it to improve your skills. - Is it necessary to have a physical portfolio?
While a physical portfolio can be beneficial for in-person interviews or exhibitions, a digital portfolio is often more convenient and accessible.
Frequently Asked Questions
- What materials do I need to draw a realistic nose?
To get started, you'll want to have a good set of pencils, ranging from hard to soft (like 2H to 6B), a quality eraser, and smooth drawing paper. These materials will help you achieve the detail and shading needed for a realistic appearance.
- How can I understand the anatomy of the nose better?
Studying reference images and anatomy diagrams can greatly enhance your understanding. Pay attention to the bridge, nostrils, and tip of the nose. Observing real noses, whether on people or sculptures, can provide insight into their structure and how light interacts with them.
- What are some common mistakes beginners make when drawing noses?
Many beginners struggle with proportions and often make the mistake of drawing the nose too large or too small. Another common issue is neglecting the importance of shading, which can lead to a flat appearance. Remember, practice makes perfect!
- How do I effectively shade a nose?
Shading is crucial for creating depth. Techniques like hatching, cross-hatching, and blending can help. Start with light pressure and gradually build up darker areas to create shadows, especially around the nostrils and the tip of the nose.
- Can I use digital tools to draw a nose?
Absolutely! Digital drawing tools can be incredibly helpful. Programs like Adobe Photoshop or Procreate offer features like layers and undo options that can make the drawing process easier and more forgiving.
- How often should I practice drawing noses?
Consistency is key! Try to practice a little every day or a few times a week. Even short sessions can lead to significant improvements over time. The more you draw, the more comfortable you’ll become with the shapes and shading.
- What should I look for in reference images?
Choose images that showcase different angles and lighting conditions. This variety will help you understand how the nose appears in different contexts and how light affects its shape and shadows.
- How do I showcase my finished drawing?
Once you're happy with your drawing, consider taking high-quality photos or scans to share online. Platforms like Instagram, art forums, or even local art shows can be great for showcasing your work. Remember, feedback can help you grow!


