
Drawing Tips: How to Create Texture with Pencil
Have you ever stared at a drawing and felt the urge to reach out and touch it? That’s the magic of texture! In the world of pencil drawing, texture is more than just a visual element; it’s the heart and soul that breathes life into your artwork. Think of texture as the seasoning in your favorite dish; without it, everything can taste a bit bland. This article provides essential tips and techniques for enhancing your pencil drawings by effectively creating texture. Explore various methods to add depth and realism to your artwork, making your pieces not just seen but felt.
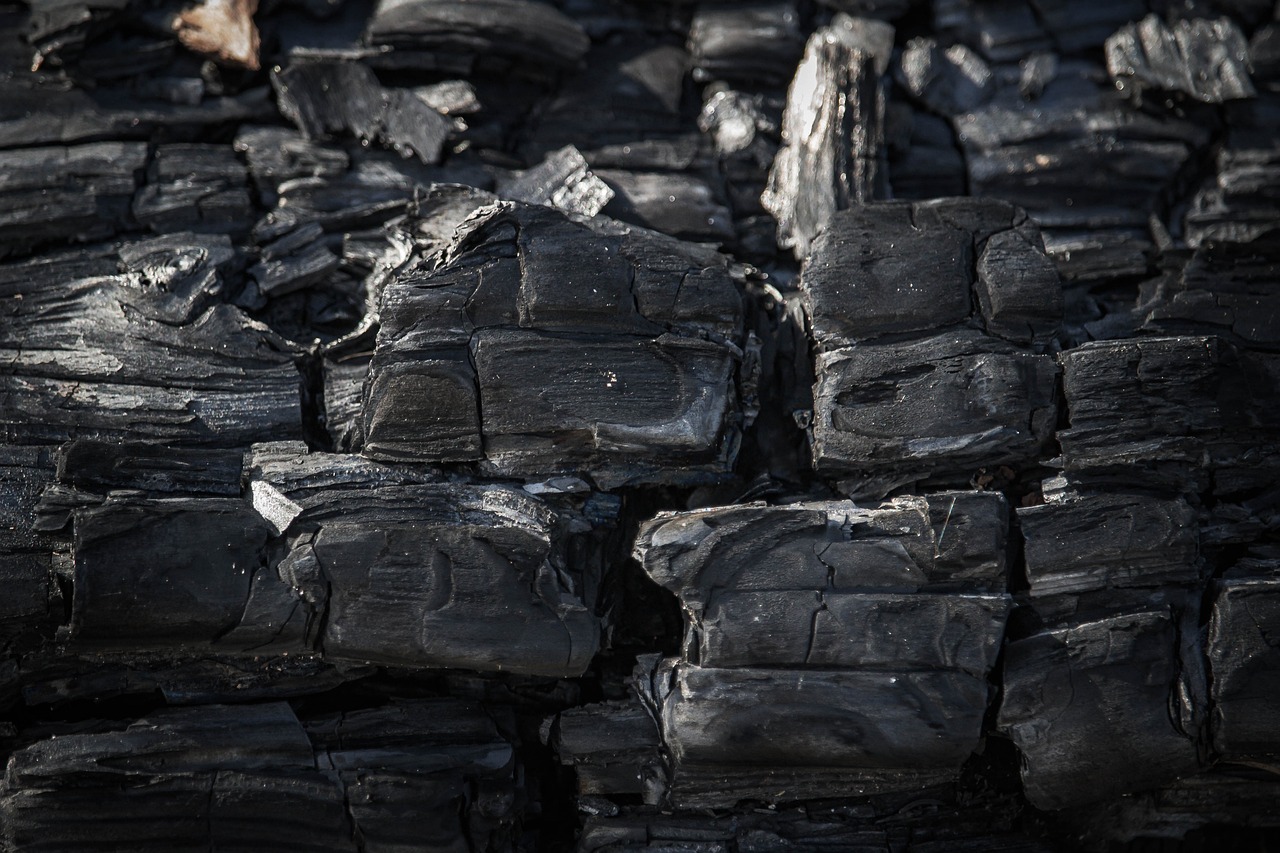
So, what exactly is texture in art? It’s the perceived surface quality of a work, and it can be categorized into two main types: actual texture and implied texture. Actual texture is the tactile quality you can feel, while implied texture is the illusion of texture created through artistic techniques. Understanding these two types is crucial for any artist. They add depth and interest, making your drawing more engaging. Imagine a fluffy cloud drawn with soft pencil strokes versus a rough rock depicted with sharp, jagged lines. Each conveys a different feeling and draws the viewer into the scene.
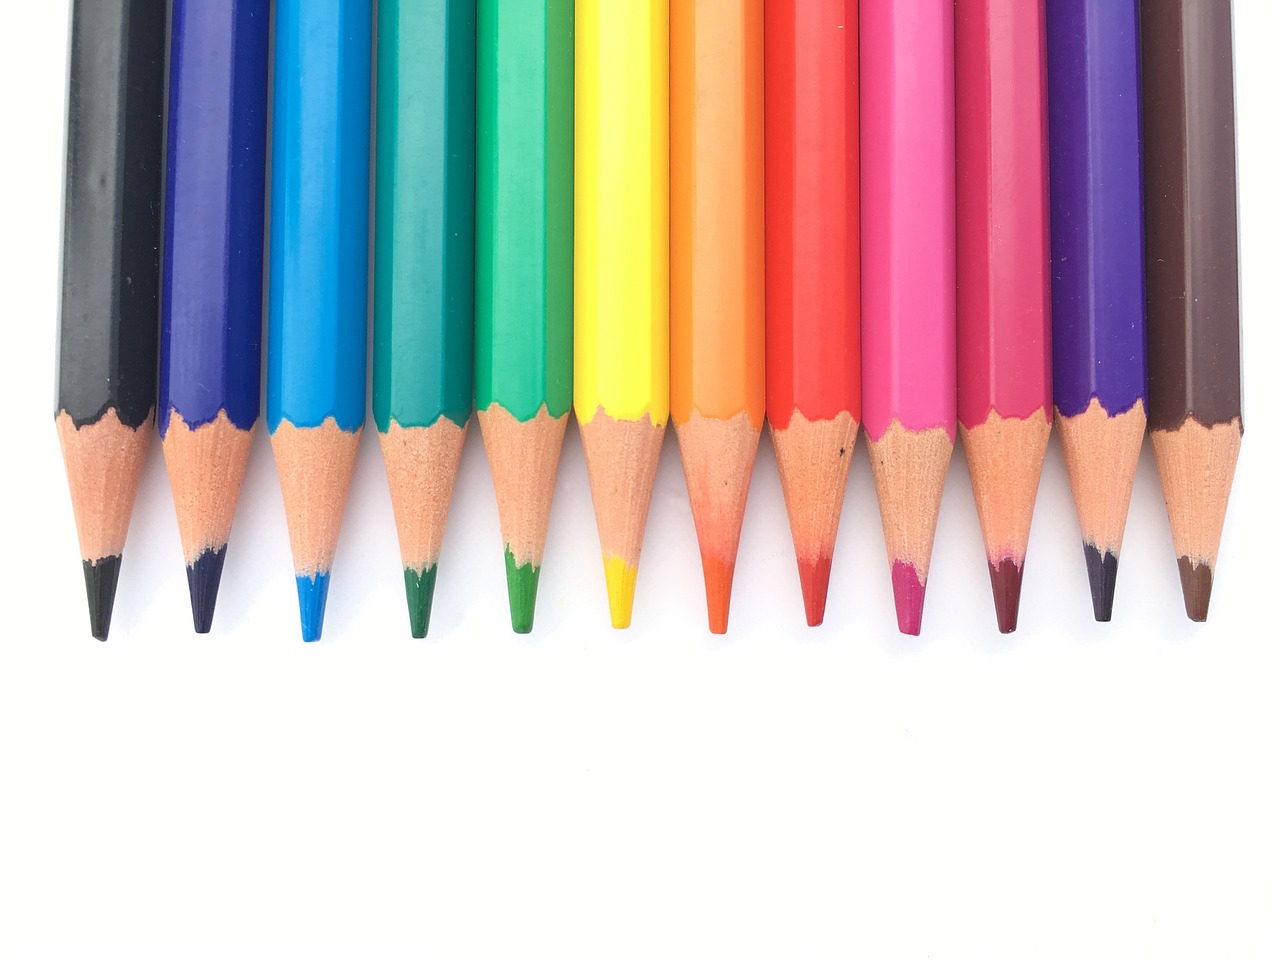
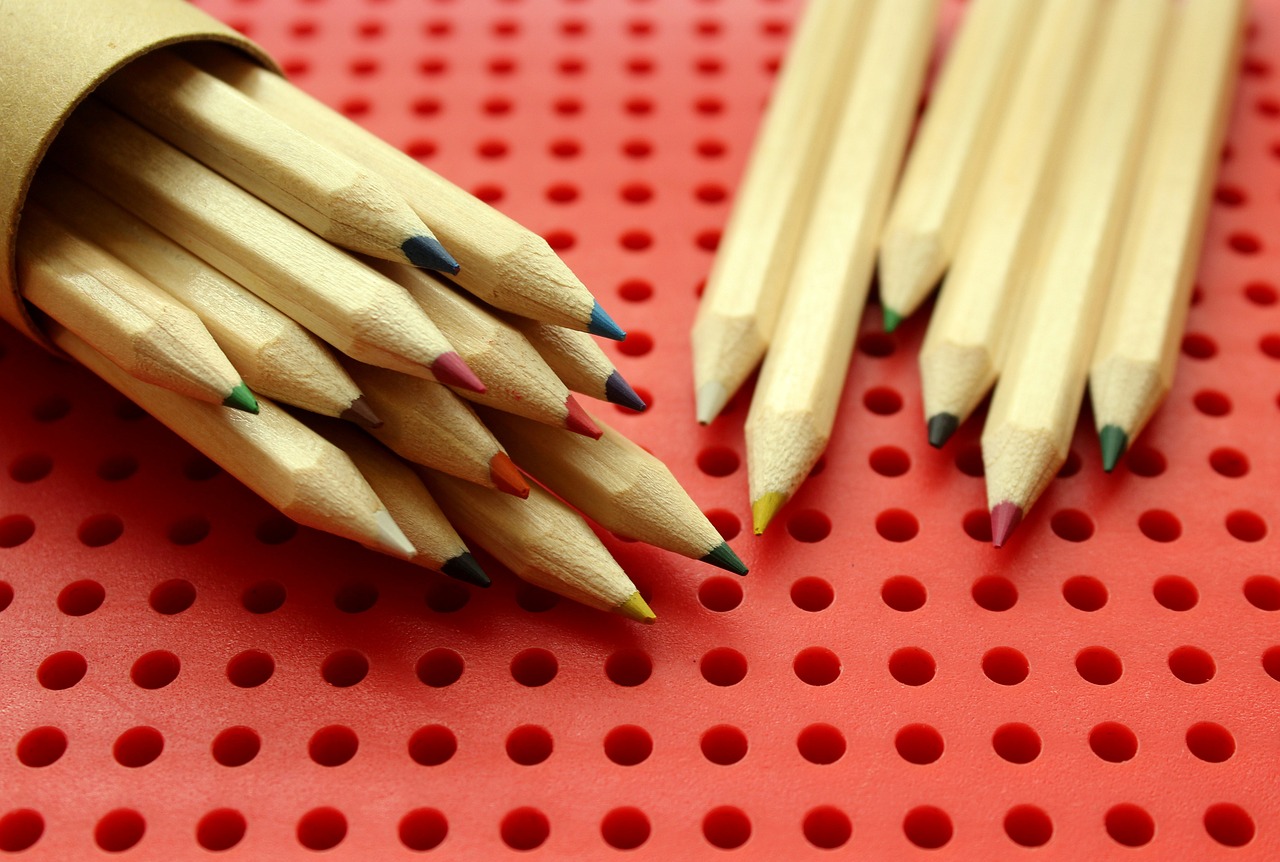
Selecting the appropriate pencils is crucial for achieving the textures you desire. Pencils come in various grades, ranging from hard (H) to soft (B), and each grade affects the texture differently. Hard pencils create fine lines and light shades, ideal for detailed work, while soft pencils produce rich, dark tones that can convey depth and drama. Here’s a quick breakdown:
| Pencil Grade | Characteristics | Best For |
|---|---|---|
| H (Hard) | Produces lighter marks; less smudging | Fine details, precise lines |
| B (Soft) | Creates darker marks; more smudging | Shading, bold textures |
Incorporating a mix of both H and B pencils can help you achieve a variety of textures, allowing your artwork to come alive with detail and nuance.
When it comes to creating texture, the choice between graphite and charcoal can make a huge difference. Graphite pencils are known for their smooth application and range of values, which makes them perfect for detailed textures. On the other hand, charcoal offers a richer, bolder texture that can create dramatic effects. Each medium has its own personality, and choosing the right one depends on the vibe you want to convey in your artwork.
Graphite pencils excel in providing a wide range of values, allowing artists to achieve subtle gradients and fine details. Their smooth application makes them ideal for creating textures that require precision, such as the delicate fur of an animal or the intricate patterns of fabric. Plus, they’re easy to blend, which can help in softening harsh lines and creating a more realistic appearance.
Charcoal, with its deep blacks and rich textures, is excellent for artists looking to make a bold statement. It can create expressive, dramatic textures that jump off the page. Think of it as the difference between a whisper and a shout in your artwork. Charcoal can be manipulated easily, allowing for a variety of effects, from soft shading to sharp contrasts, making it a versatile choice for creating texture.
Now that you’ve chosen your pencils, let’s dive into some techniques that can enhance texture in your drawings. Techniques like hatching, cross-hatching, and stippling can add dimension to your artwork. Hatching involves drawing parallel lines to create shading, while cross-hatching uses intersecting lines for a more complex texture. Stippling, on the other hand, relies on dots to build up texture and shading. Each technique can be used alone or in combination to achieve a variety of textures. Experimenting with these methods is key; the more you practice, the more intuitive they will become.
Layering is a powerful technique to build texture gradually. By layering different pencil strokes, you can create complex textures that add depth to your drawings. Start with light strokes and gradually build up darker values. This technique not only enhances texture but also gives your artwork a three-dimensional feel. Think of it like building a cake; you start with a solid base and add layers of frosting and decorations to make it visually appealing.
Gradually building up values is essential for achieving realistic textures. Start with a light touch and slowly increase the pressure as you layer your pencil strokes. This can create a smooth transition from light to dark, enhancing the texture and depth in your pencil artwork. It’s like sculpting with shadows; the more you layer, the more defined your shapes become.
Blending can either soften or enhance textures in your drawings. Using tools like blending stumps or even your fingers can help achieve smooth transitions between different values. Experiment with different blending techniques to find what works best for your style. Remember, blending is not just about softening; it can also be used to intensify textures, making them pop in your artwork.
- What pencil grade is best for beginners? Generally, a mix of H and B pencils is recommended for beginners to explore different textures.
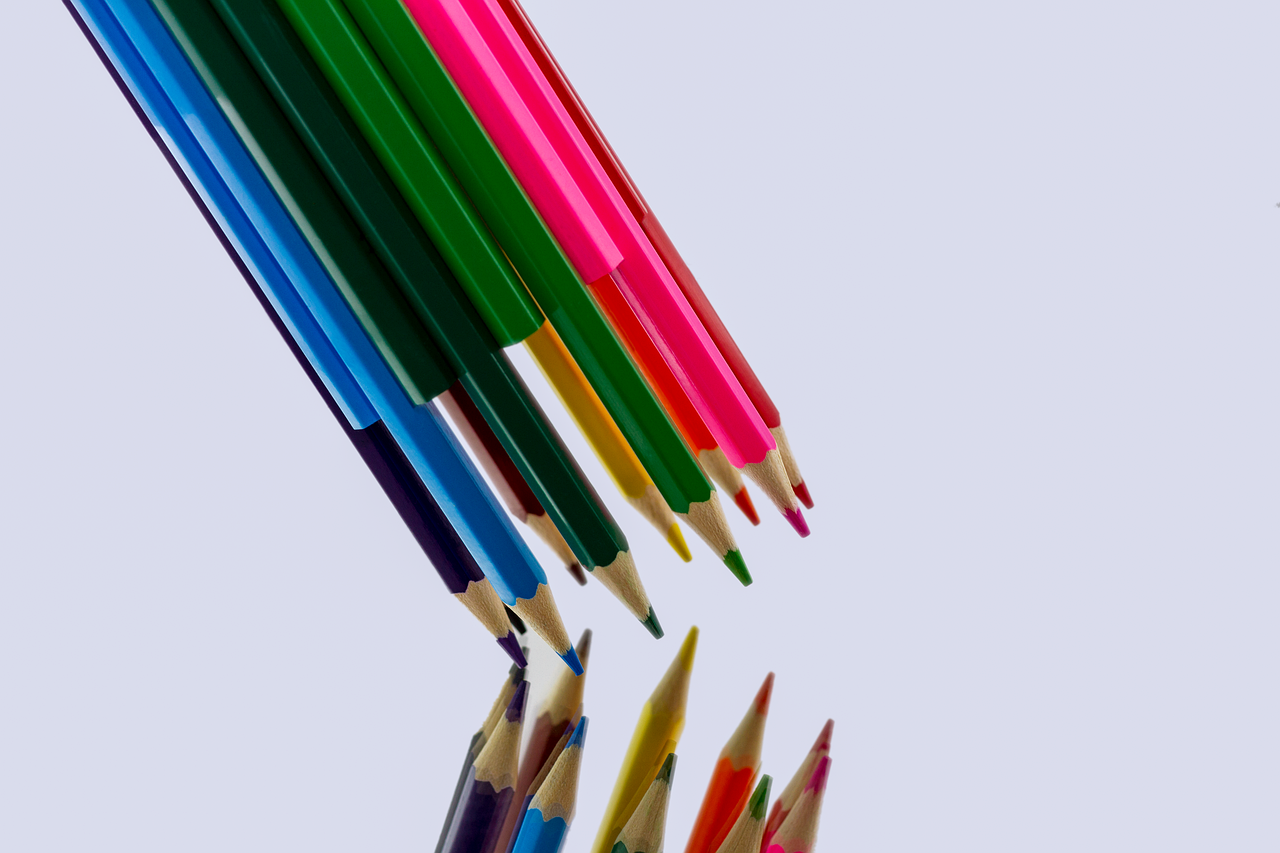
- Can I use colored pencils for texture? Absolutely! Colored pencils can also create beautiful textures when applied with the right techniques.
- How can I practice texture techniques? Start with simple objects like fruits or fabrics and focus on different techniques to enhance their textures.
Understanding Texture in Art
Texture is not just a visual element; it's the heartbeat of any artwork, breathing life into your drawings and inviting viewers to touch, feel, and connect with the piece. Imagine running your fingers over a canvas and feeling the roughness of tree bark or the softness of a cloud. This sensory experience is what texture brings to art, making it an essential component for artists to master. In essence, texture can be categorized into two main types: actual texture and implied texture.
Actual texture refers to the physical surface quality of an artwork. This is what you can feel when you touch the piece; think of a thick layer of paint that creates a three-dimensional effect or the roughness of a collage made from various materials. On the other hand, implied texture is a visual illusion created by the artist. It tricks the eye into perceiving depth and surface quality without any physical texture present. For instance, a well-drawn pencil sketch can suggest the texture of fur, wood, or fabric without any actual texture being applied to the paper.
Understanding these two types of texture is crucial for artists. They serve different purposes and evoke different emotional responses. Actual texture can provide a tactile experience that draws viewers in, while implied texture can create a sense of realism and detail that captivates the imagination. As you delve deeper into your artistic journey, consider how you can manipulate these textures to enhance your work.
Moreover, the significance of texture transcends mere aesthetics. It plays a vital role in conveying mood and emotion. For example, rough textures can evoke feelings of chaos or tension, while smooth textures often impart a sense of calm and tranquility. Think of a serene landscape drawn with soft, blended pencil strokes versus a gritty urban scene filled with sharp, jagged lines. Each choice you make regarding texture can alter the narrative of your artwork.
As you explore texture in your drawings, consider experimenting with different techniques and materials. The beauty of art lies in its endless possibilities, and texture is a powerful tool that can help you express your unique vision. Whether you’re aiming for realism or abstraction, understanding how to create and manipulate texture will elevate your artwork to new heights.
Choosing the Right Pencils
When it comes to pencil drawing, selecting the right pencils is like choosing the right tools for a craftsman. The type of pencil you use can significantly influence the texture and overall quality of your artwork. There are various pencil grades available, each offering unique characteristics that can help you achieve different textures. The grading scale typically ranges from H (hard) to B (black), with F (fine point) in between. Understanding these grades can make a world of difference in your drawing experience.
For instance, H pencils are great for creating fine lines and lighter textures, making them perfect for detailed work or when you want to achieve a delicate touch. On the other hand, B pencils are softer and allow for darker marks, ideal for creating bold, rich textures that can really make your artwork pop. The F pencil serves as a happy medium, providing a balance between hardness and softness, making it versatile for various techniques.
Here’s a quick overview of the pencil grades and their typical uses:
| Pencil Grade | Characteristics | Best For |
|---|---|---|
| H | Hard, light marks | Fine details, light textures |
| F | Fine point, moderate darkness | General use, versatile techniques |
| B | Soft, dark marks | Bold textures, shading |
Additionally, the choice between graphite and charcoal pencils can also affect the textures you can achieve. Graphite pencils are known for their smooth application and range of values, making them suitable for detailed textures. In contrast, charcoal pencils can provide dramatic, expressive textures that can add a unique flair to your artwork. Think of graphite as your fine paintbrush, while charcoal is more like a broad, expressive stroke; both have their place in the artist's toolkit.
So, how do you decide which pencil to use? It often comes down to personal preference and the specific effect you want to achieve. Experimenting with different grades and types can help you discover which ones resonate with your style. Remember, the right pencil can make all the difference in bringing your artistic vision to life!
Graphite vs. Charcoal
When it comes to choosing between graphite and charcoal, artists often find themselves at a crossroads, each medium offering its own unique set of characteristics and textures. Understanding the differences can significantly impact the outcome of your artwork. Graphite is known for its smooth application and fine details, making it a favorite for those who love to create intricate and realistic textures. It glides effortlessly across the paper, allowing for a range of values from light to dark, which is essential when you want to depict subtle textures like skin or soft fabric.
On the other hand, charcoal is a powerhouse of boldness. It produces rich, deep blacks that can create dramatic contrasts and striking textures that grab attention. The beauty of charcoal lies in its versatility; it can be smudged to create soft, blurred edges or applied with pressure to create sharp lines. This makes it ideal for expressive works where texture plays a crucial role in conveying emotion. For instance, if you're drawing a stormy sky, charcoal can capture the chaos and movement in a way that graphite simply can't.
To help you visualize the differences, consider the following table:
| Feature | Graphite | Charcoal |
|---|---|---|
| Application | Smooth and controlled | Bold and expressive |
| Texture | Fine details, subtle gradients | Rich, deep textures, dramatic contrasts |
| Ease of Blending | Easy with blending tools | Can be smudged for soft effects |
| Best For | Realistic drawings, detailed textures | Expressive and dramatic artworks |
Ultimately, the choice between graphite and charcoal boils down to the kind of texture you want to achieve in your artwork. If you’re aiming for precision and detail, graphite is your best friend. However, if you want to evoke strong emotions and create striking visuals, then charcoal might just be the medium you need. Why not experiment with both? You might find that combining the two can lead to some truly stunning results!
- Can I use both graphite and charcoal in the same drawing?
Absolutely! Many artists combine both mediums to take advantage of their unique properties, creating depth and interest in their works. - How do I fix charcoal drawings?
Using a fixative spray can help preserve your charcoal artwork and prevent smudging. Just be sure to apply it in a well-ventilated area. - Which is better for beginners?
Graphite is often recommended for beginners due to its ease of use and control. However, charcoal can be a fun medium to explore once you’re comfortable with basic techniques.
Benefits of Graphite
When it comes to pencil drawing, graphite pencils are a favorite among artists for a variety of compelling reasons. One of the primary benefits is their ability to produce a wide range of values, from the softest grays to the deepest blacks. This versatility allows artists to create stunning contrasts and intricate details that can bring a drawing to life. Imagine the way light dances across a surface; graphite enables you to mimic that effect beautifully.
Another significant advantage of using graphite is its smoother application. Unlike some other mediums, graphite glides effortlessly across the paper, making it easier to achieve fine details and delicate textures. This quality is particularly beneficial when you're working on intricate pieces where precision is key. The tactile experience of drawing with graphite can be likened to a dancer gliding across a stage—each stroke feels fluid and controlled.
Graphite also allows for layering techniques that can enhance the depth of your artwork. By gradually building up layers of graphite, you can create rich, complex textures that add realism to your drawings. This is especially useful for depicting surfaces like skin, fabric, or natural elements such as wood and stone. The layering process can be compared to adding ingredients to a recipe: each layer contributes to a more flavorful and satisfying final product.
Moreover, graphite is relatively easy to erase, which is another reason artists often prefer it. Mistakes can be corrected without leaving behind a messy residue, allowing for a more forgiving drawing experience. This feature encourages experimentation, as you can try different techniques without the fear of permanently ruining your work. It's like having a safety net that gives you the freedom to explore your creativity without hesitation.
Lastly, the affordability and availability of graphite pencils make them accessible to artists of all levels. Whether you're a beginner just starting your artistic journey or a seasoned professional, you can easily find a variety of graphite pencils in art supply stores or online. This accessibility ensures that everyone can experience the joy of drawing with graphite, making it a staple in the art community.
In summary, the benefits of graphite pencils are numerous and significant. Their ability to produce a wide range of values, smooth application, layering potential, easy erasure, and affordability make them an indispensable tool for artists. So, the next time you pick up a graphite pencil, remember all the incredible possibilities it holds!
- What grades of graphite pencils should I use for texture? It's best to experiment with a range of grades, from H (hard) to B (soft), to see which works best for your desired texture.
- Can I mix graphite with other mediums? Absolutely! Graphite can be combined with charcoal, ink, or colored pencils to create unique textures and effects.
- Are there specific papers that work best with graphite? Yes, textured papers can enhance the grip of the graphite, while smoother papers allow for finer details.
Benefits of Charcoal
Charcoal is a remarkable medium that offers a plethora of benefits for artists looking to create stunning textures in their drawings. One of the most significant advantages of using charcoal is its ability to produce rich and bold textures. Unlike graphite, which tends to be more subdued, charcoal can deliver deep blacks and a wide range of values, allowing for dramatic contrasts that can make your artwork truly pop. This characteristic makes charcoal an excellent choice for artists who want to convey strong emotions or create striking compositions.
Another benefit of charcoal is its versatility. Charcoal can be used in various forms, including compressed, vine, and willow charcoal, each providing different textural qualities. For instance, compressed charcoal is great for achieving darker, more intense lines, while vine charcoal is softer and perfect for lighter, more delicate strokes. This versatility allows artists to experiment and find the perfect texture for their specific needs. Moreover, charcoal can be easily manipulated with various tools, such as blending stumps or even your fingers, enabling you to create smooth transitions and intricate details.
Additionally, charcoal is known for its expressive nature. The way charcoal glides across the paper can evoke a sense of movement and fluidity, making it an ideal medium for capturing dynamic textures. Whether you’re drawing the rough bark of a tree or the soft fur of an animal, charcoal allows for a level of expression that can bring your artwork to life. Plus, the tactile experience of working with charcoal can be incredibly satisfying, as it gives artists a direct connection to their work.
To sum it up, here are some key benefits of using charcoal in your drawings:
- Rich and bold textures that create dramatic contrasts.
- Versatility with different forms for various textural qualities.
- Expressive nature that captures movement and fluidity.
In conclusion, charcoal is a powerful tool for artists seeking to enhance the texture in their drawings. Its unique properties not only allow for a wide range of artistic expression but also enable the creation of visually striking pieces that draw the viewer's eye. So, if you haven't yet explored the potential of charcoal, now is the perfect time to dive in and see how it can transform your artwork!
Q: What is the difference between charcoal and graphite?
A: Charcoal is generally darker and offers a wider range of textures, while graphite provides smoother lines and a more subtle range of values.
Q: Can I use charcoal on any type of paper?
A: While charcoal can be used on various papers, it works best on textured or heavier papers that can handle the medium's richness.
Q: How do I fix charcoal drawings?
A: To fix charcoal drawings, you can use a fixative spray, which helps to prevent smudging and preserves the artwork.
Techniques for Creating Texture
Creating texture in pencil drawings is akin to adding layers to a cake; each layer contributes to the overall flavor and appeal. There are several techniques that artists can employ to bring their drawings to life, making them feel more dynamic and engaging. One of the most popular methods is hatching, which involves drawing closely spaced parallel lines. This technique is particularly effective for creating shadows and subtle gradations in your artwork. The closer the lines are to each other, the darker the area will appear, allowing you to manipulate light and shadow with precision.
Another technique that can elevate your texture game is cross-hatching. This involves layering lines in different directions to build up darker areas. Imagine weaving a basket; the interlacing of lines creates a complex texture that adds depth to your drawing. Cross-hatching can be used to create intricate details and is especially useful in areas where you want to convey a sense of volume or mass.
Then there's stippling, a method that involves using small dots to create texture. This technique can be incredibly effective for adding fine details and soft transitions. Think of it as creating a pointillist painting, where the density of the dots determines the darkness of the area. Stippling requires patience and a steady hand, but the results can be stunning, providing a unique texture that is both subtle and eye-catching.
Incorporating these techniques can dramatically change the feel of your artwork. For instance, using hatching for a soft shadow can evoke a sense of calm, while stippling can create a lively texture that draws the viewer's eye. It's all about experimenting and finding what resonates with your style. Remember, the beauty of drawing lies in its versatility; don’t hesitate to mix and match these techniques to discover new textures that can make your artwork pop.
In addition to these methods, consider the pressure you apply to your pencil. Varying your pressure can create a wide range of textures, from soft and delicate to bold and striking. Try using a lighter touch for highlights and a firmer grip for shadows. The interplay of pressure and technique can lead to breathtaking results.
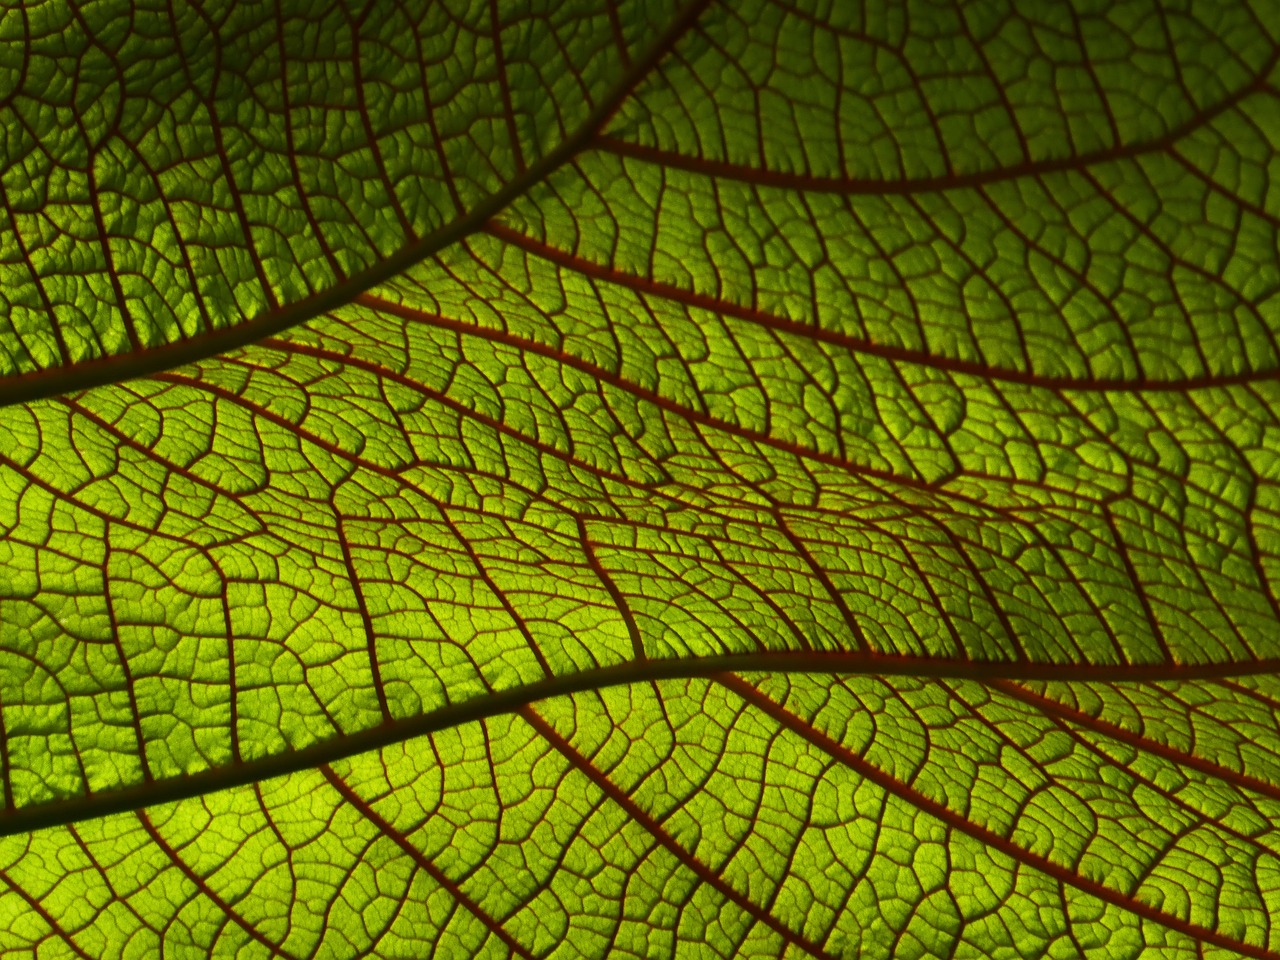
Ultimately, mastering these techniques is about practice and observation. Spend time studying textures in the world around you—whether it’s the rough bark of a tree, the smooth surface of a pebble, or the intricate patterns on a leaf. As you draw, ask yourself how you can replicate those textures using the techniques you've learned. The more you practice, the more confident you will become in your ability to create stunning textures that enhance your pencil drawings.
- What is the best technique for beginners to start with? Hatching is often recommended for beginners, as it is simple and allows for quick practice in controlling pencil strokes.
- Can I combine different techniques in one drawing? Absolutely! Combining techniques like hatching and stippling can create unique textures and add depth to your artwork.
- How do I know which technique to use for a specific texture? Observe the texture you want to replicate in real life and consider how light interacts with it. Experiment with different techniques to see which best captures the essence of that texture.
Layering for Depth
Layering is an essential technique in pencil drawing that allows artists to build texture and depth gradually, much like the way a sculptor chisels away at stone to reveal a masterpiece. This process involves applying multiple layers of pencil strokes, which can create a rich, complex surface that draws the viewer's eye. Imagine painting a landscape: the more layers you add, the more vibrant and lifelike the scene becomes. In drawing, layering serves a similar purpose, providing a sense of realism and dimension that flat, single-layer drawings often lack.
To effectively layer your pencil strokes, start with light pressure on your pencil. This initial layer should be subtle, almost like a whisper on the page. As you progress, gradually increase the pressure and add more layers. This technique not only helps in achieving a smoother transition between tones but also allows for the creation of intricate textures. Think of it as building a sandwich; each layer adds flavor and complexity to the final bite. The key is to be patient and allow each layer to dry (or settle) before applying the next, ensuring that your drawing maintains clarity and precision.
When layering, consider the following techniques to enhance your texture:
- Varying Pencil Pressure: By adjusting how hard or soft you press the pencil against the paper, you can create a range of textures. Light strokes create soft, delicate textures, while heavier strokes can produce bold, striking effects.
- Mixing Pencil Grades: Using different grades of pencils (from H to B) can add depth to your work. Harder pencils (H) create lighter, finer lines, while softer pencils (B) yield darker, bolder marks. Combining these can enhance the overall texture.
- Utilizing Different Techniques: Techniques such as hatching and cross-hatching can be layered to create more intricate textures. For instance, start with hatching for the base layer and follow up with cross-hatching to add depth and complexity.
As you layer, it's also important to be aware of how light interacts with your drawing. Shadows and highlights play a crucial role in creating depth. By layering darker shades in areas that would naturally be shadowed and leaving highlights untouched or lightly shaded, you can create a three-dimensional effect that makes your drawing pop off the page. It's like the difference between a flat pancake and a fluffy soufflé; the latter has layers that create a delightful texture and appearance.
In conclusion, layering is a powerful tool in your artistic arsenal. It allows for the creation of depth and richness in your drawings, transforming a simple sketch into a captivating piece of art. Remember to be patient, practice regularly, and experiment with different techniques and materials. With time, you'll find your unique style and approach to layering that will set your work apart.
Q: How many layers should I apply to achieve depth?
A: There’s no set number of layers; it depends on the effect you want to achieve. Start with a few light layers and gradually add more until you reach your desired depth.
Q: Can I use colored pencils for layering?
A: Absolutely! Colored pencils can also benefit from layering techniques, allowing you to create rich textures and depth in color.
Q: What paper is best for layering techniques?
A: A heavier, textured paper is often ideal for layering, as it can handle multiple layers without tearing or smudging.
Building Up Values
When it comes to creating stunning textures in your pencil drawings, is an essential technique that every artist should master. Think of it as layering a cake; each layer adds depth and richness to the final product. In the context of drawing, building values involves gradually applying different shades to create a sense of realism and dimension. This technique not only enhances the overall appearance of your artwork but also allows you to convey emotions and atmosphere effectively.
To begin, you’ll want to start with a light touch using a harder pencil, like a 2H or H. This initial layer serves as a foundation for your values, providing a subtle base that will enable you to build upon. As you progress, you can switch to softer pencils (like 2B or 4B) to gradually darken specific areas. This gradual transition is crucial; it’s all about patience and control. Rushing through this process can lead to harsh lines and an unnatural look.
Here’s a simple step-by-step approach to help you effectively build up values:
- Start Light: Use a hard pencil to create a light base layer.
- Identify Dark Areas: Look for the areas in your reference that need more depth and begin to darken them gradually.
- Layering: Continue to build up layers, switching between hard and soft pencils as necessary to achieve the desired darkness.
- Blend: Use blending tools or even your fingers to smooth transitions between different values.
One of the most effective ways to see how building values works is to practice with different objects and surfaces. For instance, try drawing a simple sphere. Start with a light layer and gradually add darker tones to simulate shadows. Pay attention to how the light interacts with the surface. Notice how the transitions between light and dark create the illusion of roundness. This exercise can be incredibly revealing and will help you understand how to manipulate values to your advantage.
Moreover, using a
| Pencil Grade | Darkness Level | Best Use |
|---|---|---|
| 2H | Light | Initial layers, fine details |
| HB | Medium | General drawing |
| 2B | Dark | Shadows, mid-tones |
| 4B | Very Dark | Deep shadows, bold textures |
Remember, the key to mastering this technique is to be observant. Look at how light interacts with different textures in real life. Whether it’s a shiny apple or a rough piece of bark, each surface has its unique way of reflecting light and shadow. By practicing how to build up values, you’ll be able to replicate these effects in your drawings, making them more lifelike and engaging.
In conclusion, building up values is not just a technique; it’s an art form in itself. It requires practice, patience, and a keen eye for detail. As you continue to explore this method, you’ll find that your pencil drawings will not only improve but will also convey a sense of depth that captivates your audience. So grab your pencils, and let’s get layering!
- What is the best pencil for building up values?
The best pencil can vary based on personal preference, but generally, a combination of hard and soft pencils works best for building up values. - How do I know when to switch pencils?
Switch to a softer pencil when you feel that you need to darken an area or when you want to create smoother transitions. - Can I use colored pencils for building up values?
Absolutely! Colored pencils can be layered in the same way as graphite to create rich textures and values.
Blending Techniques
When it comes to pencil drawing, are your secret weapon for creating smooth transitions and realistic textures. Imagine you're painting a beautiful sunset; the colors need to flow seamlessly into one another to capture that breathtaking moment. The same principle applies to pencil drawings. Blending can transform your artwork from a simple sketch into a stunning piece that draws viewers in.
One of the most popular methods for blending is using a blending stump. This tool, made from tightly rolled paper, allows you to smudge and soften pencil strokes with precision. Think of it as a magic wand that helps you achieve that ethereal quality in your drawings. To use a blending stump, simply rub it gently over the area you wish to blend. The key is to apply light pressure and work in small circular motions to avoid over-smoothing your texture.
Another effective method is using your fingers. Yes, your own fingers can be a fantastic tool for blending! They allow for a more personal touch and can create a soft, organic feel to your artwork. However, it's essential to keep your fingers clean to avoid unwanted smudges. A quick tip: consider using a tissue or paper towel to shield your fingers from the graphite while still allowing for blending. This way, you can maintain control over the texture without compromising the cleanliness of your work.
For those looking to add even more depth, you might want to experiment with different blending techniques. Here are a few to consider:
- Cross-blending: This technique involves layering different pencil grades and then blending them together. It creates a rich texture and depth that can be particularly effective in portraits and landscapes.
- Wet blending: Although less common, some artists use a small amount of water on their pencils to create a watercolor-like effect. This can be particularly useful for achieving smooth gradients.
- Using a brush: A clean, dry brush can also help in blending, especially for larger areas. Just make sure to use a soft brush to avoid harsh lines.
Don't forget to practice these techniques on scrap paper before applying them to your main artwork. Just like any skill, blending takes time to master. Experiment with different pressures and angles to see how they affect your textures. The more you practice, the more intuitive these techniques will become.
In summary, blending techniques are an essential part of pencil drawing that can significantly enhance your artwork. Whether you choose to use blending stumps, your fingers, or even brushes, the goal is to create a seamless texture that captivates and engages your audience. So, grab your pencils and start blending your way to stunning textures!
Q: What is the best tool for blending pencil drawings?
A: The best tool can vary depending on personal preference, but blending stumps and your fingers are two of the most popular choices. Each offers unique benefits for achieving different textures.
Q: Can I blend with colored pencils?
A: Absolutely! Many of the same techniques used for graphite can be applied to colored pencils. Just be aware that colored pencil may require a slightly different approach due to its waxy texture.
Q: How do I prevent smudging when blending?
A: To minimize smudging, consider using a clean sheet of paper under your hand while you draw. Additionally, using a fixative spray after completing your drawing can help preserve your work.
Frequently Asked Questions
-
What is texture in drawing?
Texture in drawing refers to the surface quality or feel of an object, which can be perceived visually or through touch. It adds depth and interest to your artwork, making it more engaging and realistic. Think of it as the difference between a smooth glass surface and a rough tree bark; each has its own unique feel that can be conveyed through your drawings.
-
How do I choose the right pencils for creating texture?
Choosing the right pencils is essential for achieving the desired texture in your drawings. Graphite pencils, for instance, come in various grades (from H to B), allowing you to create everything from fine lines to deep shadows. On the other hand, charcoal pencils offer a richer, bolder texture, perfect for dramatic effects. Experimenting with different types can help you find the best fit for your artistic style.
-
What are some effective techniques for creating texture?
There are several techniques you can use to create texture in your pencil drawings. Hatching involves drawing parallel lines, while cross-hatching uses intersecting lines to build depth. Stippling, which consists of tiny dots, can also add a unique texture. Each method has its own charm, and combining them can lead to stunning results!
-
How can layering enhance the texture in my drawings?
Layering is a fantastic technique to gradually build texture and depth. By applying multiple layers of pencil strokes, you can create complex textures that mimic real-life surfaces. Start with lighter shades and gradually add darker ones to achieve a more realistic effect. This method allows you to control the intensity and richness of the texture in your artwork.
-
What blending techniques can I use to improve texture?
Blending techniques can either soften or enhance the textures in your drawings. You can use blending stumps, tortillons, or even your fingers to smooth out transitions between different shades. This creates a more cohesive look and can help achieve realistic textural effects. Just remember to keep your tools clean to avoid muddying your artwork!


