How to Improve Figure Drawing Skills
Are you ready to take your figure drawing skills to the next level? Whether you're a beginner just dipping your toes into the world of art or an advanced artist looking to refine your craft, improving your figure drawing can be both exciting and rewarding. It’s like unlocking a new level in a video game; once you grasp the fundamentals, you can create stunning and lifelike representations of the human form. In this article, we will explore various techniques, exercises, and resources that will help you enhance your abilities, making your journey into figure drawing not just educational but also enjoyable.
First things first, let’s talk about the importance of understanding human anatomy. Think of anatomy as the foundation of a house; without a solid base, everything else can crumble. A thorough grasp of human anatomy allows you to depict figures accurately, capturing the nuances of muscles, bones, and proportions. The more you know about how the body moves and functions, the better your drawings will become. You don't need to be a medical expert; just familiarize yourself with the major muscle groups and skeletal structure. This knowledge will inform your artistic decisions and help you create more realistic figures.
Next, we dive into the exhilarating world of gesture drawing techniques. Gesture drawing is all about capturing the essence and movement of a figure in a short amount of time. It’s like trying to catch a fleeting moment in a photograph, where you want to convey emotion and dynamism in your artwork. To practice gesture drawing effectively, try setting a timer for one to five minutes and sketching the figure in that timeframe. This exercise will not only improve your spontaneity but also enhance your ability to see the flow and rhythm of the human form.
One effective way to incorporate quick sketching exercises into your routine is by participating in figure drawing sessions. These sessions often feature live models and can be a fantastic way to hone your skills. You might be surprised at how much you learn in just an hour of focused drawing. You can even set up your own mini sessions at home using reference images or videos. The key is consistency; make quick sketching a part of your daily practice, and you'll see improvement in no time.
Now, let’s talk about the importance of proportions in figure drawing. Understanding proportions is vital for creating realistic figures. Think of proportions as the blueprint of your artwork; if they’re off, the whole piece can feel unbalanced. To maintain correct proportions, you can use techniques like measuring with your pencil or employing the grid method. These methods allow you to compare the sizes of different body parts relative to one another. For example, did you know that the average adult human figure is about 7.5 heads tall? Keeping such guidelines in mind can help you create more harmonious and realistic figures.
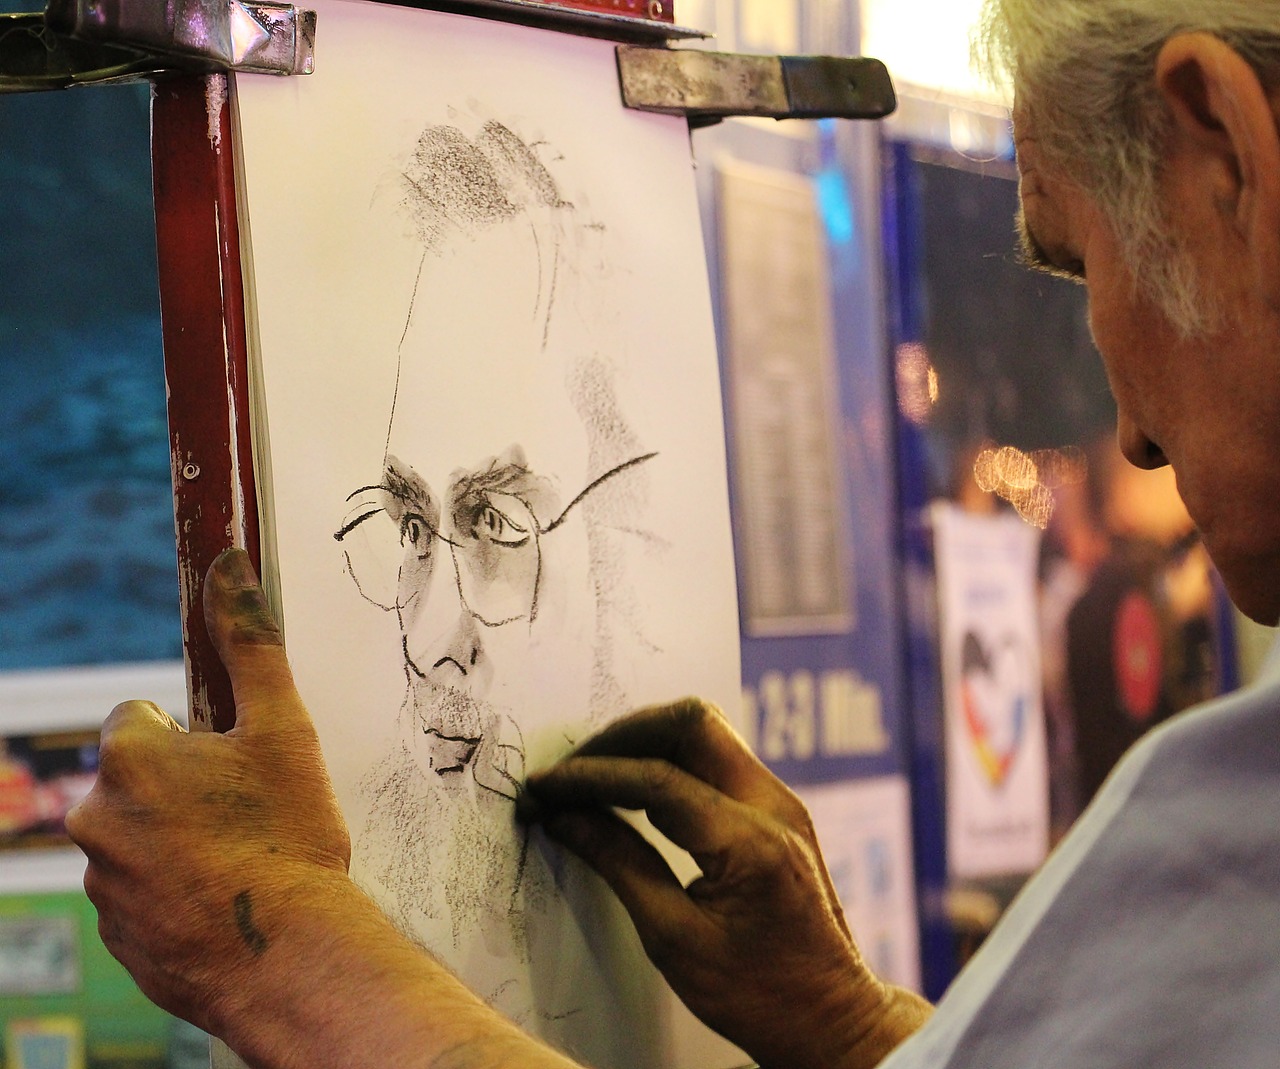
Drawing from live models offers invaluable experience. Life drawing sessions provide a unique opportunity to observe and capture the human form in real-time. The benefits of these sessions are immense; not only do they enhance your observational skills, but they also allow you to experience the subtleties of light, shadow, and movement. When you have the chance to draw from a live model, take it! You'll find that the energy and dynamism of a live session can inspire your creativity in ways that photographs simply cannot.
Finding life drawing classes can be a game-changer for your artistic journey. These classes often provide structured environments where you can practice and receive feedback from instructors and peers. When searching for classes, consider factors like location, skill level, and the type of models used. Many art schools and community centers offer life drawing sessions, so don’t hesitate to explore your options.
Finally, let’s discuss how digital tools and techniques have transformed figure drawing. In today’s digital age, artists have access to a plethora of software and applications that can aid in developing their figure drawing skills. Popular drawing software such as Adobe Photoshop, Procreate, and Corel Painter offer features that make it easier to experiment with styles and techniques. If you’re new to digital art, investing in a tablet and stylus can open up a whole new world of possibilities. These tools provide a versatile medium for figure drawing, allowing for quick adjustments and endless experimentation.
In conclusion, improving your figure drawing skills is a journey filled with exploration and discovery. By understanding human anatomy, practicing gesture drawing, focusing on proportions, drawing from life, and utilizing digital tools, you can elevate your artistic abilities to new heights. So grab your sketchbook, set aside some time each day, and embark on this exciting adventure!
- What materials do I need to start figure drawing? All you need is a sketchbook and some pencils! As you progress, you can explore different mediums like charcoal or digital tools.
- How often should I practice figure drawing? Consistency is key! Aim for at least a few sessions each week to see significant improvement.
- Can I improve my figure drawing skills without attending classes? Absolutely! There are plenty of online resources, tutorials, and books available that can help you learn at your own pace.
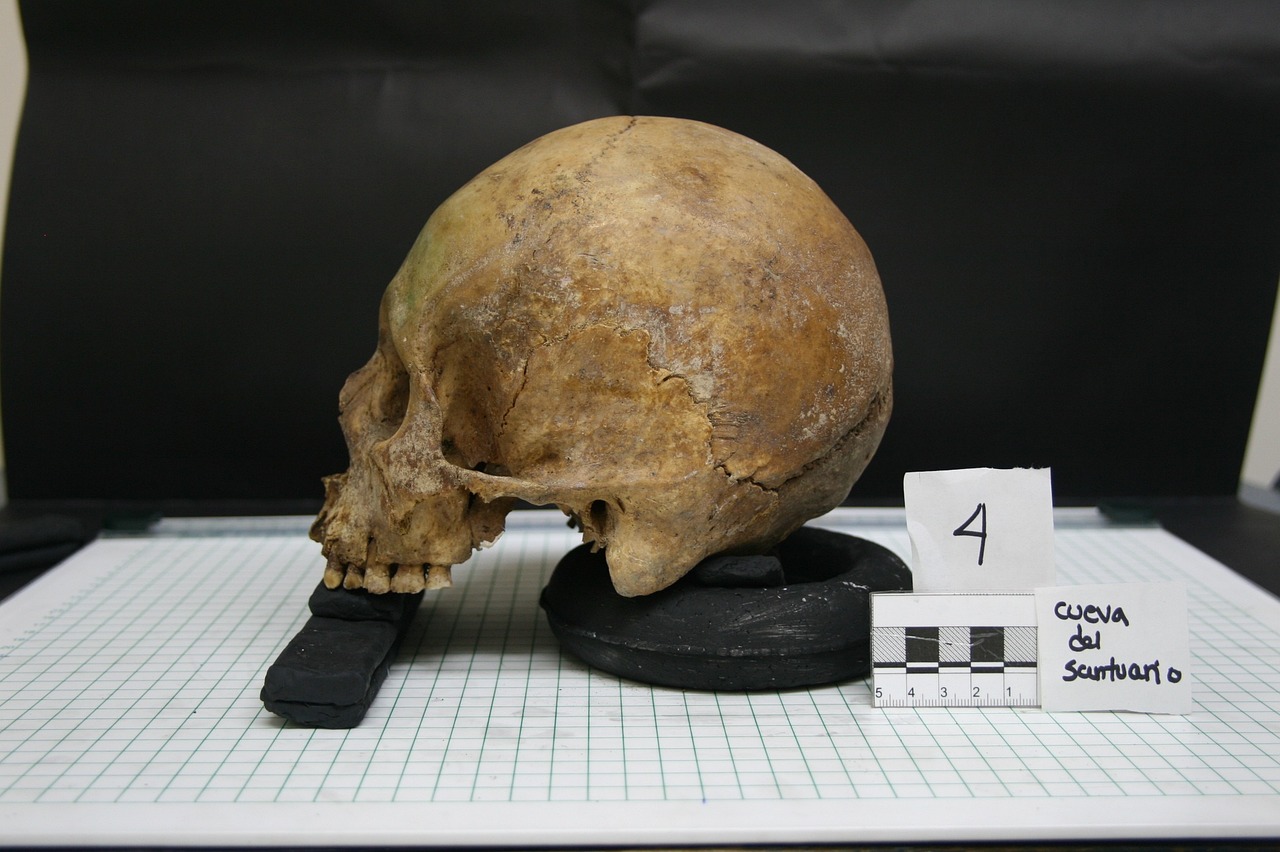
Understanding Human Anatomy
When it comes to figure drawing, having a solid grasp of human anatomy is not just beneficial; it's essential. Imagine trying to build a house without understanding the blueprint; it would likely collapse! Similarly, without a deep understanding of how the human body is structured, your drawings may lack realism and accuracy. Anatomy knowledge informs your artistic decisions, allowing you to depict the human form in a way that resonates with viewers.
Understanding anatomy involves more than memorizing the names of bones and muscles. It’s about recognizing how these elements interact to create movement, posture, and expression. When you understand how muscles contract and bones move, you can create figures that are not only visually appealing but also lifelike. Think of anatomy as the foundation of your artistic skills—the stronger your foundation, the more impressive your creations will be.
To get started, consider breaking down the human body into manageable parts. Here are some key areas to focus on:
- Skeleton Structure: Familiarize yourself with the major bones, as they form the framework of your figure.
- Muscle Groups: Understanding how muscles work can help you depict movement and tension accurately.
- Proportions: Learn the general proportions of the human body, which can vary between individuals but have standard guidelines.
Incorporating life drawing into your practice can also significantly enhance your understanding of anatomy. Drawing from real models gives you the opportunity to see how muscles and bones interact in real time. This experience is invaluable, as it allows you to observe the subtleties of human movement and form that are often missed in photographs or illustrations.
Moreover, utilizing anatomical reference materials, such as books or online resources, can provide you with a wealth of knowledge. Consider investing in anatomy books specifically designed for artists. These resources often include detailed illustrations and explanations that can bridge the gap between theoretical knowledge and practical application.
In conclusion, mastering human anatomy is a journey that will greatly enhance your figure drawing skills. By understanding the underlying structures of the body, you’ll be able to create more dynamic and realistic figures that truly capture the essence of human movement. So, roll up your sleeves, dive into some anatomy studies, and watch your drawings transform!

Gesture Drawing Techniques
Gesture drawing is one of the most dynamic and exciting aspects of figure drawing. It’s like capturing a fleeting moment—a dancer mid-leap or a runner in full stride. These quick sketches are not just about the final product; they’re about understanding movement and the flow of the human body. By focusing on the essence of the pose rather than the details, you can create drawings that feel alive and spontaneous. So, how can you incorporate effective gesture drawing techniques into your practice? Let’s dive in!
One effective method for improving your gesture drawing skills is to set aside dedicated time for practice. Start with short sessions, perhaps just 30 seconds to 2 minutes per pose. This will force you to focus on the overall shape and movement without getting bogged down by details. The goal here is to capture the energy and flow of the figure. You might find it helpful to use a timer—this adds a sense of urgency and encourages you to work quickly.
When practicing gesture drawing, consider using a variety of poses. This can include standing, sitting, or dynamic action poses. The more diverse your reference material, the better you’ll understand how different positions affect the body’s lines and shapes. You can find references from online resources, figure drawing books, or even by attending life drawing sessions. It’s all about immersing yourself in different forms and movements.
Another technique worth exploring is the concept of line of action. This is an imaginary line that runs through the figure, capturing the primary movement and energy. By establishing this line early in your drawing, you can create a more dynamic and cohesive representation. Think of it as the backbone of your figure—it guides you in placing limbs and features in relation to one another. To practice, try sketching the line of action first, and then build your figure around it.
In addition to these techniques, consider incorporating quick sketching exercises into your routine. These exercises are designed to enhance your observation skills and improve your ability to translate what you see onto paper. For instance, you might choose to do a series of 1-minute sketches, focusing solely on capturing the figure's silhouette. This can help you develop a keen eye for proportion and movement.
Lastly, don’t forget the importance of feedback and iteration. After completing a session, take a moment to review your sketches. Identify areas where you excelled and aspects that could use improvement. This reflective practice is crucial for growth. You might even consider sharing your work with fellow artists or joining an online community where you can receive constructive criticism.
In summary, gesture drawing is an invaluable skill that can significantly enhance your figure drawing abilities. By practicing regularly, utilizing the line of action, and engaging in quick sketching exercises, you’ll be on your way to creating more dynamic and expressive figures. Remember, the key is to keep it fun and fluid—after all, art is about exploration and self-expression!
- What is the best way to start gesture drawing? Begin with short time limits for each pose, focusing on capturing movement rather than details.
- How long should I practice gesture drawing each day? Even 15-30 minutes a day can make a significant difference over time.
- Where can I find good reference images for gesture drawing? Websites like Line of Action, or local life drawing classes are excellent resources.

Quick Sketching Exercises
When it comes to honing your figure drawing skills, are your secret weapon. These exercises are not just about speed; they're about capturing the essence of the human form in a matter of minutes. Think of them as a workout for your artistic muscles, helping you build the strength and agility needed to create more detailed and refined drawings later on. So, how do you incorporate these exercises into your routine?
First, consider setting aside a specific time each day dedicated to quick sketches. You don’t need a fancy studio or expensive materials; all you need is a sketchbook and a pencil. Start with a goal of sketching for just 10 to 15 minutes each day. This time frame is manageable and allows you to focus on the essence of the figure without getting bogged down in details. You’ll be amazed at how quickly your skills will improve!
One effective method is to use a timer. Set it for 30 seconds, and during that time, try to capture the figure's overall shape and movement. You might be surprised at how liberating it feels to draw without the pressure of perfection. As you become more comfortable, you can gradually increase the time to 1 or 2 minutes, allowing for slightly more detail without losing the spontaneity that quick sketches offer.
Another fantastic way to practice is by using online resources or apps that provide random poses. Websites like Line of Action and Quickposes offer a variety of poses that change every few seconds, perfect for getting your creative juices flowing. You can also create your own reference library by taking photos of friends or family in various poses. This personal touch can add a level of familiarity that makes your sketches feel more authentic.
Additionally, consider incorporating gesture drawing into your quick sketching routine. Gesture drawing focuses on capturing the movement and flow of the figure rather than its details. This technique is invaluable for artists because it trains your eye to see the underlying structure of the body. You might find that after a few sessions, your ability to depict dynamic poses improves dramatically.
To help you get started, here’s a simple quick sketching exercise you can try:
| Exercise | Duration | Focus |
|---|---|---|
| Timed Gesture Drawing | 30 seconds | Overall shape and flow |
| Quick Pose Sketch | 1 minute | Basic proportions |
| Detail Sketch | 2 minutes | Adding some details |
By integrating these quick sketching exercises into your daily routine, you’ll not only improve your speed and accuracy but also gain a deeper understanding of human anatomy and movement. Remember, the goal isn’t to create a masterpiece every time; it’s about building confidence and developing your unique style. So grab your sketchbook, set your timer, and let your creativity flow!
Timed Sessions
Setting a timer for your sketches might sound like a simple trick, but it can be a game-changer in your figure drawing practice. Just imagine you’re in a race against time, where every tick of the clock pushes you to be more decisive and focused. This method not only enhances your efficiency but also encourages you to trust your instincts. When you know you have only a limited time to capture the essence of a pose, you start to prioritize the most important elements of the figure. It’s like having a personal coach urging you to push your limits!
To implement timed sessions effectively, consider the following steps:
- Choose Your Time Frame: Depending on your skill level, you might start with shorter sessions of 1-5 minutes. As you become more comfortable, gradually increase this time to 10 or even 20 minutes.
- Focus on Specific Goals: Each timed session can have a focus, such as capturing the overall pose, emphasizing proportions, or working on details. This targeted approach helps you track your progress over time.
- Review and Reflect: After each session, take a moment to assess your work. What did you do well? Where can you improve? This reflection is crucial for growth.
One effective way to structure your timed sessions is to use a simple table to track your progress. Here’s an example of how you might set it up:
| Session Date | Time (minutes) | Focus Area | Self-Assessment |
|---|---|---|---|
| 2023-10-01 | 5 | Overall Pose | Good fluidity, need to work on proportions. |
| 2023-10-02 | 10 | Details | Improved detail work, but lost some spontaneity. |
As you practice, remember that the goal is not perfection but progress. Each timed session is a stepping stone towards honing your skills. You might find that the pressure of the ticking clock brings out a side of your creativity that you didn’t know existed. So, don’t shy away from the challenge! Embrace the chaos, and let your pencil dance across the page as you capture the fleeting moments of the human form.
In conclusion, timed sessions are not just about racing against the clock; they are about fostering a sense of urgency that can lead to remarkable growth in your figure drawing abilities. So grab your sketchbook, set that timer, and let the magic happen!
- How long should my timed sessions be? Start with shorter sessions of 1-5 minutes and gradually increase the time as you become more comfortable.
- What should I focus on during these sessions? Each session can focus on different aspects such as overall pose, proportions, or details to help you improve in specific areas.
- How can I track my progress? Use a simple table to log your session dates, time spent, focus areas, and self-assessments to see how you improve over time.

Using Reference Images
When it comes to figure drawing, using reference images can be a game changer. Imagine trying to build a house without a blueprint—it's daunting, right? Similarly, reference images serve as your blueprint, guiding you through the complexities of human anatomy and movement. They provide a visual anchor that helps you understand how different body parts interact, their proportions, and the subtleties of posture. But how do you effectively choose and utilize these images in your practice?
First off, it's essential to select high-quality images that showcase a variety of poses and angles. Look for images that highlight the anatomical structure of the body clearly. Websites like Pinterest or dedicated art reference sites can be treasure troves of inspiration. You can find everything from dynamic action shots to serene, relaxed poses. The key is diversity; the more varied your references, the better you'll understand the intricacies of human form.
Once you've gathered your reference images, the next step is to analyze them. This is where the real magic happens. Take a moment to study the proportions and angles in the images. Ask yourself questions like: What is the relationship between the head and the torso? How do the limbs connect to the body? By breaking down the image into manageable parts, you can create a mental map that will enhance your drawing accuracy. It’s akin to dissecting a puzzle—once you understand how the pieces fit together, you can recreate the whole picture.
Additionally, consider using a technique called overlaying. This involves placing a transparent layer over your reference image to sketch out basic shapes and outlines. This can help you grasp the overall composition before diving into the details. Many digital art programs offer this feature, making it easier than ever to manipulate and analyze your references.
Finally, don't forget to practice regularly with your reference images. Set aside time each week to draw from your collection. This repeated exposure will not only enhance your skills but also help internalize the knowledge you've gained. Over time, you'll find that you rely less on references and draw from memory with greater confidence. Remember, the goal is not just to copy the images but to understand the underlying principles of figure drawing.
- How do I find good reference images? Look for high-quality, diverse images on platforms like Pinterest, Unsplash, or dedicated art reference websites.
- Can I use photos of people I know? Absolutely! Personal photos can provide a unique perspective and add a personal touch to your work.
- How often should I practice with reference images? Aim for at least a few sessions each week to build your skills and confidence over time.
- Is it okay to trace over reference images? Tracing can be a useful learning tool, but it's essential to understand the anatomy and proportions rather than just copying.

Building Proportions
Understanding proportions is vital for creating realistic figures in your artwork. Think of proportions as the skeleton that supports the flesh of your drawing; without a solid understanding of this framework, your figures can easily become distorted or unrecognizable. To get started, it’s essential to familiarize yourself with the basic measurements of the human body. For instance, did you know that the average adult human figure is about 7.5 heads tall? This gives you a basic guideline for maintaining correct proportions.
One effective way to build your understanding of proportions is through the use of the “head measurement” technique. This method involves using the size of the head as a unit of measurement to gauge the rest of the body. Here’s a quick breakdown of how this works:
| Body Part | Proportion (in heads) |
|---|---|
| Height of the Figure | 7.5 heads |
| Shoulder Width | 2-3 heads |
| Torso Length | 3 heads |
| Leg Length | 4 heads |
As you can see, using the head as a reference point allows you to maintain consistency across different figures. However, proportions can vary significantly based on age, gender, and ethnicity, so it’s crucial to adapt these guidelines to the specific figure you are drawing. For instance, a child's proportions differ from those of an adult, with their heads being relatively larger in comparison to their bodies.
Another essential aspect of building proportions is measuring relationships between body parts. For example, the width of the shoulders should generally be about 1.5 times the width of the head. By keeping these relationships in mind, you can create more balanced and lifelike figures. A simple exercise is to draw a grid over your reference images. This will help you see the proportional relationships more clearly and allow you to replicate them in your drawings.
Practicing with different poses and perspectives is also crucial for mastering proportions. Experiment with drawing figures in dynamic poses, as this will challenge your understanding and force you to apply your knowledge of proportions in real-time. Remember, the more you practice, the more intuitive your understanding of proportions will become.
Lastly, don't forget the importance of feedback. Share your work with peers or mentors who can provide constructive criticism. They may spot proportional mistakes that you might have overlooked, helping you to refine your skills further. In the world of figure drawing, every mistake is an opportunity to learn and grow!
- What is the best way to practice proportions? The best way to practice proportions is through consistent drawing from life or reference images while using measurement techniques like the head measurement method.
- How do I know if my proportions are correct? You can check your proportions by comparing them to established guidelines, using a grid system, or measuring against reference images.
- Can I use digital tools to help with proportions? Absolutely! Many digital drawing programs offer tools that can assist in maintaining proportions, such as grids and measurement overlays.
Practicing with Live Models
When it comes to honing your figure drawing skills, is like hitting the jackpot! There's something incredibly enriching about capturing the human form in real time. Unlike photos, live sessions allow you to observe subtle movements, shifts in weight, and the unique nuances of each pose. It’s an experience that breathes life into your drawings, making them more dynamic and realistic. But how do you make the most of these opportunities? Let’s dive into some tips and insights!
First and foremost, the benefits of drawing from live models are immense. Not only do you get to improve your observational skills, but you also learn to understand anatomy in a way that photos can't replicate. You can see how muscles contract and relax, how skin folds, and how light interacts with the body. This direct interaction with a model helps you build a more intuitive understanding of proportions and movement.
To get started, it’s essential to find life drawing classes in your area. Many art schools, community centers, and even local studios offer sessions where you can draw from live models. If you’re unsure where to look, consider searching online platforms that connect artists with local events. Websites like Meetup or social media groups dedicated to artists can be fantastic resources. When selecting a class, keep in mind the following factors:
| Factor | Considerations |
|---|---|
| Skill Level | Choose classes that cater to your current abilities, whether you’re a beginner or more advanced. |
| Class Size | Smaller classes often allow for more personalized feedback from instructors. |
| Model Diversity | Look for classes that offer a variety of models to enhance your experience. |
Once you’ve found a class, it’s crucial to create a comfortable environment for yourself. This means not just the physical space you’re in, but also your mental state. Arrive early to set up your materials, and take a moment to breathe and focus. A calm mind will help you absorb the details of the model more effectively. Consider bringing the following items to enhance your experience:
- Sketchbook: A good-quality sketchbook is essential for capturing those fleeting moments.
- Pencils and Charcoal: Experiment with different tools to find what works best for you.
- Comfortable Seating: If the class doesn’t provide seating, a portable stool can make a big difference.
During the session, remember to keep your sketches loose and fluid, especially in the beginning. Don’t stress about perfection; instead, focus on capturing the essence of the pose. Use quick gestures to get the overall shape and movement before diving into details. This approach not only warms you up but also helps you develop your own style over time.
Finally, don’t forget to connect with your fellow artists! Sharing insights and experiences can be incredibly rewarding. You might find a mentor, make friends, or even discover new techniques that could elevate your work. In the world of art, collaboration and community can spark creativity in ways you never imagined.
Q: How often should I practice with live models?
A: Aim for at least once a week if possible. Regular practice helps solidify your skills and boosts your confidence.
Q: What should I do if I feel nervous about drawing from a live model?
A: It's completely normal to feel nervous! Take a few deep breaths, remind yourself that everyone is there to learn, and focus on enjoying the process rather than worrying about the outcome.
Q: Can I practice figure drawing without a live model?
A: Absolutely! While live models provide unique benefits, you can also use reference images, anatomical books, or digital resources to practice your skills.
Finding Life Drawing Classes
Finding the right life drawing class can be a game-changer for your artistic journey. It’s like searching for the perfect gym that not only fits your schedule but also motivates you to push your limits. The right environment can inspire creativity and provide the structure you need to improve your skills. So, how do you go about finding these classes? Let’s break it down!
First off, consider local art schools and community colleges. Many institutions offer life drawing sessions that cater to various skill levels, from absolute beginners to seasoned artists. These classes often provide a structured environment where you can learn anatomy, proportions, and various drawing techniques under the guidance of experienced instructors. Plus, you’ll have the opportunity to meet fellow artists and share ideas, which can be incredibly beneficial for your growth.
Another avenue to explore is art studios and community centers. Many cities have independent art studios that host life drawing sessions. These can be more casual than classes at art schools, often providing a relaxed atmosphere that encourages experimentation. You can typically find information about these sessions on social media platforms or local community boards. Don’t hesitate to reach out to studios directly to inquire about their offerings, schedules, and any specific requirements.
If you’re looking for something more flexible, consider online platforms. With the rise of digital learning, many websites now offer virtual life drawing classes. These classes can be a great way to practice from the comfort of your home while still getting valuable feedback from instructors. Some popular platforms include:
- Skillshare - Offers various courses on figure drawing, including live sessions.
- Domestika - Features courses from professional artists, often with a focus on specific techniques.
- Zoom Drawing Sessions - Many artists host live sessions on Zoom where you can draw alongside them and receive real-time feedback.
Additionally, don't forget to leverage social media! Platforms like Instagram and Facebook can be gold mines for finding local artists who offer life drawing sessions or workshops. Search for hashtags like #LifeDrawing or #FigureDrawingClasses to discover new opportunities. You might even find groups dedicated to life drawing in your area, where you can connect with other artists and share experiences.
Finally, consider university bulletin boards or local art fairs. Often, these places will have postings for upcoming classes or workshops. If you’re in a university town, there’s a good chance that art students or professors are hosting drawing sessions that are open to the public. Keep your eyes peeled for flyers or announcements!
In summary, finding the right life drawing class involves a mix of exploration and community engagement. Whether you choose to go the traditional route with local schools and studios or opt for the convenience of online classes, the key is to find a setting that inspires you. Remember, the goal is to immerse yourself in an environment that fosters growth, creativity, and, most importantly, fun!
Q: What should I bring to a life drawing class?
A: Typically, you’ll want to bring your drawing materials (pencils, charcoal, sketchbook), an eraser, and any other tools you prefer. Some classes may provide materials, so it’s always good to check in advance.
Q: Do I need to have prior experience to join a life drawing class?
A: Not at all! Life drawing classes are often designed to accommodate all skill levels, so whether you’re a complete beginner or have some experience, you’ll find a class that suits your needs.
Q: How often should I attend life drawing classes?
A: Consistency is key in developing your skills. Try to attend classes regularly, whether that’s weekly, bi-weekly, or even monthly. The more you practice, the more you’ll improve!

Creating a Comfortable Environment
When it comes to figure drawing, one of the most important yet often overlooked aspects is the environment in which you create. Think of your workspace as your artistic sanctuary; it should inspire creativity and allow you to focus without distractions. Imagine trying to draw a beautiful figure while sitting on a hard chair in a cluttered room—your mind would be racing, and your creativity would be stifled. So, how can you create a comfortable and inviting environment that enhances your figure drawing experience? Let’s dive into some essential elements!
First, consider the lighting. Natural light is often the best option, as it provides a soft, even illumination that can bring out the details in your drawings. If you're drawing indoors, position your workspace near a window, but avoid direct sunlight that can create harsh shadows. If natural light isn't an option, invest in some good quality lamps that mimic daylight. This not only helps you see your subject better but also reduces eye strain during long drawing sessions.
Next, think about your seating and workspace. A comfortable chair is crucial; after all, you could be sitting for hours at a time. Opt for an ergonomic chair that supports your back and encourages good posture. Pair it with a desk or table that’s at the right height for you. Your drawing surface should be stable and at a comfortable angle to minimize strain on your wrists and shoulders. If you find yourself hunching over or straining to see your work, it’s time to reevaluate your setup!
Another key aspect is organization. A tidy workspace can do wonders for your focus and productivity. Keep your drawing materials—pencils, charcoals, erasers, and sketchpads—within easy reach. Consider using containers or drawers to keep everything organized. This not only saves time but also reduces the frustration of searching for materials when inspiration strikes. You might even want to create a mood board or a small area dedicated to your inspirations to keep your creative juices flowing.
Finally, don't underestimate the power of ambiance. Surround yourself with things that inspire you—be it art prints, plants, or even your favorite music. A few plants can bring life to your space and improve air quality, making it a more pleasant environment to work in. If music helps you concentrate, curate a playlist that gets your creative juices flowing. The right ambiance can turn a mundane drawing session into a delightful experience.
In summary, creating a comfortable environment for figure drawing involves a mix of good lighting, ergonomic furniture, organized materials, and inspiring ambiance. By paying attention to these elements, you’ll find that your drawing sessions become more enjoyable and productive. So, take a moment to assess your current workspace—what changes can you make to transform it into your personal artistic haven?
- What type of lighting is best for figure drawing? Natural light is ideal, but if that's not available, opt for lamps that mimic daylight.
- How can I improve my posture while drawing? Use an ergonomic chair and ensure your drawing surface is at the right height to maintain good posture.
- What should I keep in my drawing space? Keep essential materials like pencils, erasers, and sketchpads organized and within reach to enhance your workflow.
- How can I make my workspace more inspiring? Surround yourself with art, plants, and music that motivate you and create a positive atmosphere.
Digital Tools and Techniques
In today's digital age, tools and techniques for figure drawing have evolved dramatically, opening up a whole new world of possibilities for artists. Whether you're a seasoned professional or just starting out, embracing digital tools can significantly enhance your artistic journey. Imagine being able to sketch anywhere, anytime, with just a tablet and stylus—it's like having a portable studio right in your backpack! With the right software and equipment, you can not only create stunning artwork but also streamline your workflow, making the process more enjoyable and efficient.
One of the first steps in diving into digital figure drawing is selecting the right drawing software. There are numerous options available, catering to various styles and preferences. Some popular choices include:
- Adobe Photoshop: A classic in the digital art world, Photoshop offers a vast array of tools and features for artists to explore.
- Corel Painter: Known for its natural brush simulation, Corel Painter is perfect for artists looking to replicate traditional media.
- Procreate: This app has gained immense popularity among digital artists, especially on the iPad, thanks to its user-friendly interface and powerful features.
- Clip Studio Paint: Ideal for comic artists and illustrators, this software excels in line art and has robust coloring tools.
Each of these programs has its strengths, so it's worth experimenting with a few to see which one resonates with your artistic style. Additionally, many of these platforms offer tutorials and community support, making it easier to learn and grow your skills.
Next, let’s talk about the tools that can elevate your figure drawing experience: tablets and styluses. Using a tablet allows for a more natural drawing experience, mimicking the feel of traditional mediums. Here are some benefits of using these tools:
| Tool | Benefits |
|---|---|
| Graphics Tablet | Offers pressure sensitivity, allowing for varied line thickness and opacity. |
| Stylus | Provides precision and control, making it easier to create intricate details. |
| Screen Tablet | Allows you to draw directly on the screen, enhancing the connection between hand and eye. |
When it comes to getting started with digital art, the initial investment in a good tablet and stylus can be daunting. However, think of it as an investment in your creative future. Just like a painter needs quality brushes and canvas, a digital artist needs the right tools to express their vision. Once you have your equipment set up, take the time to familiarize yourself with the software. Don’t hesitate to explore tutorials, both video and written, to get the most out of your tools. The more comfortable you become, the more your creativity can flow.
Moreover, digital tools allow for a level of experimentation that traditional media often doesn't. You can easily undo mistakes, try out different color palettes, and even create multiple layers to refine your work without the fear of ruining your piece. This flexibility can lead to a more playful and innovative approach to figure drawing.
In summary, embracing digital tools and techniques can significantly enhance your figure drawing skills. With the right software and hardware, you can create beautiful, precise artwork while enjoying the process. So, why not take the plunge into the digital realm? Your artistic journey awaits!
Q: Do I need to be tech-savvy to start digital drawing?
A: Not at all! Most drawing software is designed to be user-friendly, and there are plenty of tutorials available to help you get started.
Q: Can I use a regular tablet for drawing?
A: While you can use a regular tablet, a graphics tablet or a screen tablet specifically designed for drawing will provide a better experience.
Q: Is digital drawing as good as traditional drawing?
A: Both methods have their unique qualities. Digital drawing offers flexibility and ease of editing, while traditional drawing has a tactile quality that many artists love. It ultimately depends on your personal preference.
Q: What is the best software for beginners?
A: Programs like Procreate and Krita are often recommended for beginners due to their intuitive interfaces and extensive resources for learning.

Popular Drawing Software
In today's digital age, artists have a plethora of tools at their disposal to enhance their figure drawing skills. The right software can make a significant difference in your workflow, allowing you to experiment, create, and refine your art with ease. Whether you're a beginner or an advanced artist, understanding the various options available can help you choose the best tools for your needs.
Some of the most popular drawing software includes:
- Adobe Photoshop: A staple in the art community, Photoshop offers an extensive range of brushes and tools that mimic traditional drawing. Its versatility makes it suitable for everything from sketching to detailed illustrations.
- Corel Painter: Known for its realistic brush simulations, Corel Painter is perfect for artists looking to replicate traditional painting techniques digitally. It provides a vast library of textures and effects.
- Procreate: Exclusively available for iPad, Procreate has gained immense popularity due to its user-friendly interface and powerful features. It's ideal for artists who prefer drawing on the go and offers a wide variety of brushes and tools.
- Krita: This open-source software is a fantastic option for artists on a budget. Krita is tailored specifically for digital painting and offers a robust set of features, including animation capabilities.
Each of these software options has unique features that cater to different artistic styles and preferences. For instance, if you’re someone who enjoys a more hands-on approach, using a tablet with software like Procreate can provide a tactile experience similar to traditional drawing. On the other hand, if you’re focused on detailed illustrations and photo manipulation, Adobe Photoshop may be your go-to choice.
When choosing the right software, consider factors such as:
- Your artistic style and preferences
- The type of projects you plan to work on
- Your budget
- The learning curve associated with the software
Additionally, many of these programs offer trial versions, allowing you to test them out before making a commitment. This can be incredibly beneficial as it gives you a chance to explore the features and see which software aligns best with your workflow.
As you delve into digital figure drawing, don't forget to leverage online tutorials and communities associated with these software programs. They can be invaluable resources for learning new techniques and troubleshooting any challenges you may encounter.
1. What is the best software for beginners?
For beginners, Procreate is often recommended due to its intuitive interface and ease of use. Krita is also a great choice as it is free and provides a comprehensive set of tools.
2. Can I use a regular tablet for digital drawing?
While you can use a regular tablet, a drawing tablet with a stylus is highly recommended. It offers better precision and a more natural drawing experience.
3. Is it necessary to invest in expensive software?
Not at all! There are many free or affordable options available that provide excellent features. It's essential to choose software that fits your needs rather than focusing solely on price.
4. Are there tutorials available for these software programs?
Yes, most popular drawing software has extensive online tutorials available, both free and paid. Websites like YouTube, Skillshare, and the software's official site are great places to start.
Utilizing Tablets and Styluses
In today's digital age, tablets and styluses have become indispensable tools for artists, especially those looking to improve their figure drawing skills. Imagine having a portable canvas at your fingertips, allowing you to sketch anywhere, anytime! This flexibility not only enhances your creativity but also provides a unique way to experiment with different styles and techniques without the constraints of traditional media.
One of the most significant advantages of using a tablet is the immediate feedback it offers. With various drawing applications, you can undo mistakes with a simple tap, adjust layers, and play with colors effortlessly. This capability encourages you to take risks in your artwork, leading to a more enjoyable and liberating drawing experience. The ability to zoom in and out allows you to focus on minute details or see the overall composition, making it easier to maintain proportions and fluidity in your figure drawings.
When selecting a tablet, consider factors such as size, pressure sensitivity, and compatibility with your preferred drawing software. Here’s a quick comparison table of popular tablets that cater to different needs:
| Tablet Model | Screen Size | Pressure Sensitivity | Operating System |
|---|---|---|---|
| Wacom Cintiq | 13" - 32" | 8192 levels | Windows, macOS |
| iPad Pro | 11" - 12.9" | 4096 levels | iOS |
| Huion Kamvas | 13" - 22" | 8192 levels | Windows, macOS |
| XP-Pen Artist | 11.6" - 24" | 8192 levels | Windows, macOS |
Once you have your tablet, pairing it with a quality stylus is crucial. A stylus mimics the feel of a traditional pencil or brush, providing a more natural drawing experience. Look for styluses that offer pressure sensitivity and tilt recognition, as these features allow for more dynamic line work and shading techniques. For example, the Apple Pencil and Wacom Pro Pen are popular choices among digital artists because they provide excellent responsiveness and precision.
To get started with figure drawing on a tablet, begin by downloading drawing applications like Procreate, Adobe Fresco, or Clip Studio Paint. These programs offer a variety of brushes and tools that can mimic traditional drawing methods while providing the flexibility of digital art. Experiment with different brushes to find what suits your style best. You might find that a soft brush works well for shading, while a hard brush is perfect for outlines.
Incorporating digital tools into your figure drawing practice can significantly enhance your skills. Not only does it allow for easy corrections and experimentation, but it also opens up a world of possibilities in terms of coloring and layering. So, don’t hesitate to dive into the digital realm! It’s all about finding what works for you and unleashing your creativity.
- What tablet is best for beginners? If you're just starting out, the iPad with Apple Pencil or the Huion Kamvas are excellent choices due to their user-friendly interfaces and affordability.
- Can I use a regular stylus for drawing? While you can use a regular stylus, a pressure-sensitive stylus will provide a much better drawing experience, allowing for varied line thickness and shading.
- Do I need a specific software for drawing? No, but using dedicated drawing software like Procreate or Adobe Fresco will significantly improve your workflow and provide more tools tailored for artists.
Frequently Asked Questions
- What is the best way to start improving my figure drawing skills?
To kickstart your figure drawing journey, begin by familiarizing yourself with the basics of human anatomy. Understanding the structure of the body will help you create more accurate representations. Additionally, practice gesture drawing to capture movement and form, and incorporate quick sketching exercises to enhance your observation skills.
- How important is anatomy knowledge for figure drawing?
Anatomy knowledge is crucial for creating realistic figures. It informs your artistic decisions, helping you understand how muscles and bones interact. This understanding allows you to depict the human form more accurately and expressively, making your drawings more lifelike.
- What are gesture drawing techniques?
Gesture drawing techniques focus on capturing the essence and movement of a figure quickly. This involves making rapid sketches that emphasize the overall form and action rather than fine details. Practicing gesture drawing can enhance your spontaneity and fluidity, making your artwork more dynamic.
- How can I improve my proportions in figure drawing?
Improving proportions requires practice and a good understanding of measurement techniques. Try using a reference grid or measuring with your pencil to maintain correct proportions. Regularly practicing with live models can also help you develop a better eye for proportion in your drawings.
- What are the benefits of drawing from live models?
Drawing from live models provides invaluable experience as it allows you to observe real human forms in different poses and lighting. This practice enhances your ability to capture movement, proportions, and details, ultimately leading to more refined and realistic artwork.
- How do I find life drawing classes?
To find life drawing classes, check local art schools, community centers, or online platforms that offer art courses. Look for classes that match your skill level and artistic goals, and don’t hesitate to ask about the instructor’s experience and the class structure.
- What digital tools can help improve my figure drawing skills?
There are numerous digital tools available that can enhance your figure drawing skills. Popular drawing software like Adobe Photoshop, Corel Painter, and Procreate offer a variety of features for artists. Utilizing tablets and styluses can also provide a versatile medium for practicing digital figure drawing.
- Do I need special equipment to start digital figure drawing?
While you can start digital figure drawing with just a computer and drawing software, using a tablet and stylus can significantly enhance your experience. These tools allow for greater precision and control, making it easier to replicate the feel of traditional drawing.


