
How to Create Realistic Light in Your Paintings
Creating realistic light in your paintings is akin to unlocking a treasure chest of visual possibilities. Imagine stepping into a world where your artwork doesn’t just sit on a canvas but rather *breathes* and *lives*. Light is the magic wand that can transform a flat surface into a dynamic scene, drawing viewers into your artistic universe. Mastering the art of light is essential for any painter looking to add depth and dimension to their work. In this article, we will explore various techniques and tips that will help you manipulate light effectively, bringing your paintings to life in ways you never thought possible.
At the heart of every captivating painting lies the relationship between light and shadow. Think of light as the artist's brush that shapes colors and forms, creating a dance of illumination across your canvas. When you understand how different light sources affect colors and shapes, you lay the groundwork for a realistic representation. Shadows are not just dark patches; they are the *silent partners* of light, enhancing the three-dimensionality of your artwork. The interplay between these two elements can evoke emotions, set a mood, and guide the viewer’s eye through your composition.
Different light sources bring unique characteristics and effects to your paintings. Understanding these can be the difference between a flat image and a stunning visual experience. Let's break down the key types of light sources: natural and artificial.
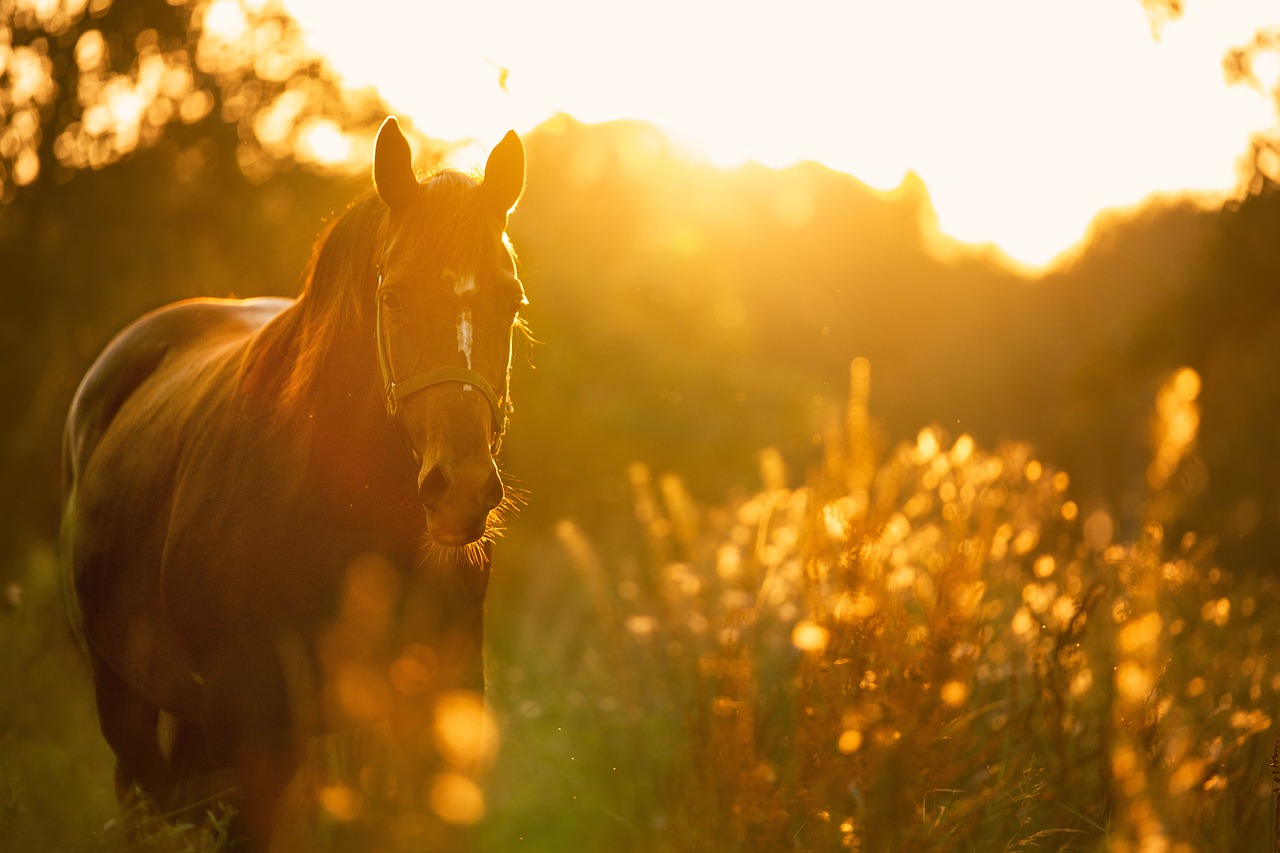
Natural light is a constantly changing phenomenon, influenced by time of day and weather conditions. It can infuse your paintings with a sense of realism and emotional resonance. Capturing these variations can lead to more dynamic compositions. Have you ever noticed how the light shifts from morning to evening? Each moment offers a different palette. For instance, the soft, golden hues of the early morning can create a sense of calm, while the vibrant, harsh light of noon can evoke energy and activity.
The golden hour, that magical time just after sunrise or before sunset, provides a soft, warm light that can enhance your paintings dramatically. This is when shadows become elongated and colors appear richer. To utilize this time effectively, consider planning your painting sessions around these hours. The warm light can add a *dreamy quality* to your work, making it feel almost ethereal.
On the flip side, overcast days offer diffused light that softens shadows and creates a serene atmosphere. This type of lighting is perfect for capturing subtle details and delicate colors. When painting under overcast conditions, focus on the gentle transitions between light and shadow, allowing your colors to blend seamlessly and creating a tranquil mood.
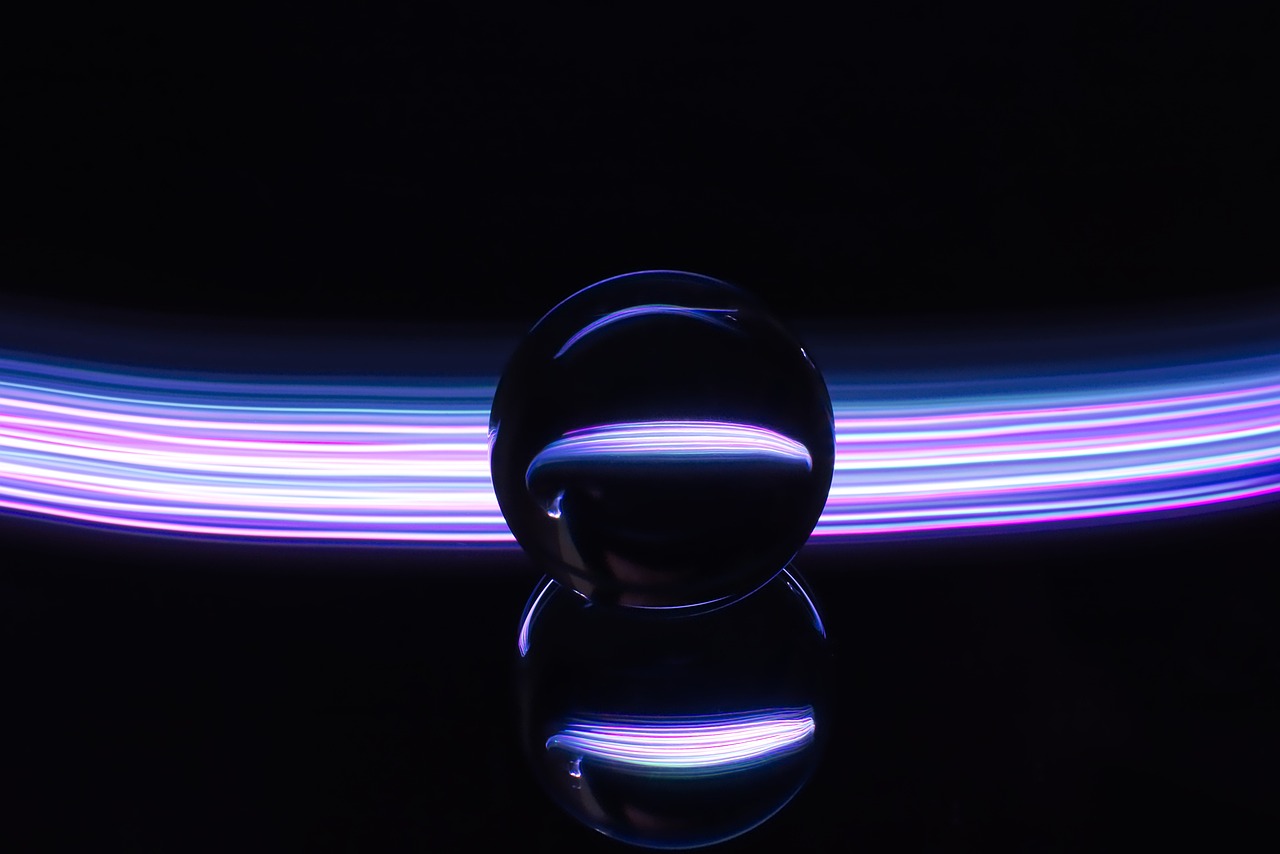
Artificial lighting introduces a different set of challenges and opportunities. It can create dramatic contrasts that highlight specific areas of your painting, drawing attention to focal points. Think about how a spotlight can illuminate a performer on stage, creating a sense of drama and importance. When using artificial light, experiment with different intensities and angles to see how they affect your colors and shadows. This exploration can lead to striking and memorable artworks.
Understanding color temperature is crucial for achieving realistic lighting in your paintings. Light can emit warm or cool tones, each affecting the mood and feel of your artwork. Warm light, like that of a sunset, evokes feelings of warmth and comfort, while cool light, reminiscent of moonlight, can create a sense of calm or mystery.
When choosing the right temperature for your painting’s theme, consider the emotional response you want to evoke. For instance, if you’re painting a lively scene, warm tones can enhance the vibrancy and energy. Conversely, cool tones can add a layer of introspection and tranquility. By skillfully balancing these tones, you can guide your audience’s emotional journey through your work.
Light is a powerful tool for creating depth in paintings. By strategically placing light and shadow, you can enhance the three-dimensionality of your subjects. Think of it as sculpting with light; you’re carving out forms and spaces that invite the viewer to explore your work more deeply.
One effective method for achieving depth is through layering different shades and tones. Start with your base colors and gradually build up layers of lighter and darker tones. This technique not only adds richness but also allows you to play with the effects of light and shadow. Imagine building a cake, where each layer adds to the overall flavor and texture. The same principle applies to your paintings.
Like any skill, mastering realistic lighting takes practice. It’s essential to continually refine your techniques. One great way to do this is by setting up exercises that challenge your understanding of light. For example, try painting the same scene at different times of day to see how the light transforms your subject.
Observing real-life lighting scenarios can significantly enhance your understanding of how light behaves. Whether it’s the soft glow of a lamp in a dim room or the bright sunlight filtering through trees, studying these conditions will give you invaluable insights. So grab your brushes and head outside or set up a still life in your studio. The more you practice, the more confident you’ll become in depicting light.
As you embark on your journey to master realistic lighting, keep these practical tips in mind:
- Observe: Spend time observing how light interacts with different surfaces and colors.
- Experiment: Don’t be afraid to try new techniques and approaches to light.
- Practice: Regular practice is key to improving your skills.
- Reflect: After each painting, take time to reflect on what worked and what didn’t.
By embracing these strategies, you’ll not only improve your technical skills but also develop a deeper appreciation for the role of light in your artistic expression.
Q: What is the best time of day to paint outdoors?
A: The golden hour, just after sunrise or before sunset, is ideal due to the soft, warm light it provides.
Q: How can I practice my lighting techniques?
A: Set up still life arrangements with different light sources or paint from life in varying lighting conditions.
Q: What tools can help me understand light better?
A: A sketchbook for quick studies, a camera to capture lighting conditions, and color wheels can be beneficial.
Q: Should I always use realistic lighting in my paintings?
A: Not necessarily! While realistic lighting can enhance depth, feel free to experiment with stylized lighting for creative expression.

Understanding Light and Shadow
This article explores techniques and tips for achieving realistic lighting effects in your artwork, enhancing depth and dimension. Learn how to manipulate light to bring your paintings to life.
Light and shadow are the unsung heroes of painting. They work together in a beautiful dance, creating the illusion of depth and form on a flat canvas. Imagine walking into a room filled with sunlight; the way light spills across surfaces, casting shadows, is a crucial aspect of how we perceive the world. To achieve realism in your artwork, it's essential to understand how these elements interact.
When we talk about light sources, we’re referring to anything that emits light, whether it be the sun, a lamp, or even a candle. Each source has unique qualities that influence how colors appear and how shapes are defined. For instance, direct sunlight can create harsh shadows, while a soft lamp might cast gentle, diffused light. Understanding these differences can elevate your painting technique significantly.
Consider the following effects of light on your artwork:
- Color Variations: Light can change the hue of colors. A bright, warm light can make reds and yellows pop, while cooler light may mute them.
- Shape Definition: Shadows can create the illusion of three-dimensionality, helping shapes stand out or recede into the background.
- Texture Highlighting: Light can emphasize textures, making surfaces feel more dynamic and tactile.
To master the interplay of light and shadow, consider practicing with various lighting conditions. Set up still-life arrangements under different lights, and observe how the shadows shift and change. Take notes on how the colors look under different conditions—this will enhance your ability to replicate those effects in your paintings.
Moreover, understanding the concept of chiaroscuro, which is the dramatic effect of contrasting light and shadow, can add a theatrical quality to your work. This technique has been used by masters like Caravaggio to evoke emotion and draw the viewer's eye to focal points. By skillfully manipulating light and shadow, you can guide your audience’s gaze and create a narrative within your painting.
In conclusion, mastering light and shadow is not just about technical skill; it’s about observation and emotional expression. As you practice, you'll find that these elements can transform your paintings from mere representations into captivating stories. So grab your brushes and start experimenting—your canvas is waiting to come alive!
Q: Why is understanding light important in painting?
A: Understanding light is crucial because it helps create depth, dimension, and realism in your artwork. It affects how colors are perceived and how shapes are defined.
Q: What are some common light sources I can use in my paintings?
A: Common light sources include natural light from the sun, artificial lights like lamps, and even candlelight. Each source creates different effects and moods.
Q: How can I practice painting light and shadow?
A: You can practice by setting up still-life arrangements under various lighting conditions, observing how shadows and colors change. Painting from life is also a great way to enhance your skills.
Q: What is chiaroscuro, and how can I use it?
A: Chiaroscuro is the use of strong contrasts between light and dark to create a sense of volume and depth. You can use it to draw attention to specific areas of your painting and evoke emotion.
Types of Light Sources
When it comes to creating stunning paintings, understanding the is essential. Each source of light brings its own unique characteristics, which can dramatically affect the mood, color, and overall impact of your artwork. In this section, we will explore the two primary categories of light sources: natural light and artificial light. By recognizing their differences and learning how to incorporate them effectively into your paintings, you can elevate your work to new heights.
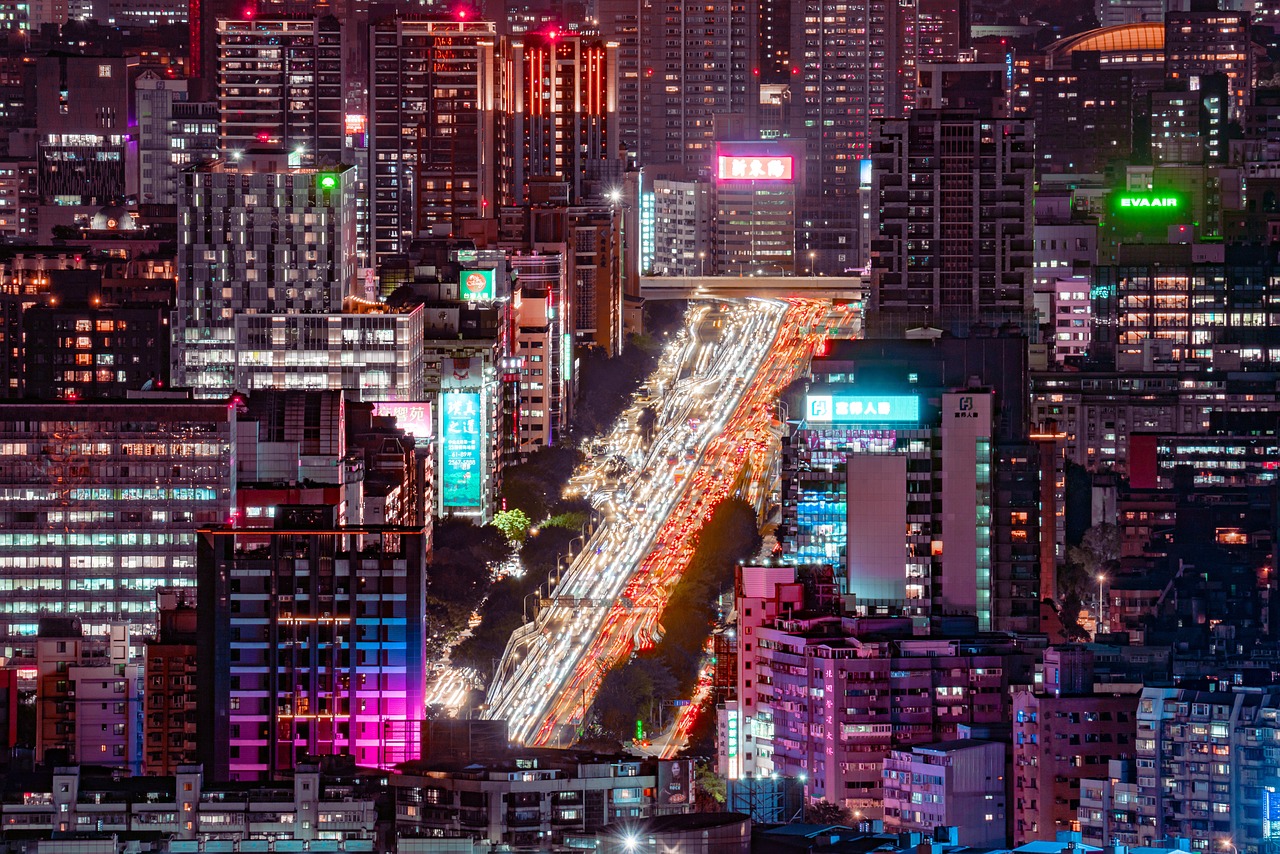
Natural light is the light that comes from the sun and is influenced by atmospheric conditions. It shifts throughout the day, creating different lighting scenarios that can evoke various emotions. For example, the warmth of the morning sun can create a sense of freshness and optimism, while the harsh midday sun can cast deep shadows, adding drama to your scene. On the other hand, artificial light comes from man-made sources such as lamps, bulbs, and neon signs. This type of light can produce stark contrasts and highlight specific areas in your painting, making it a powerful tool for creating focal points.
To help illustrate the differences between these two light sources, consider the following table:
| Type of Light | Characteristics | Effects on Painting |
|---|---|---|
| Natural Light | Varies throughout the day; influenced by weather and time | Creates soft transitions; evokes emotions; enhances realism |
| Artificial Light | Consistent; can be controlled; often harsh | Creates dramatic contrasts; highlights specific areas; adds intensity |
Understanding how to manipulate these light sources can significantly enhance the depth and dimension of your paintings. For instance, when using natural light, consider the time of day and the weather conditions. A sunny day will provide bright, direct light, while an overcast day will produce softer, diffused light that can create a more serene atmosphere. Conversely, artificial light can be used to create specific moods—think about how a warm lamp can make a scene feel cozy, while a harsh fluorescent light might evoke a more clinical or stark feeling.
Incorporating both types of light sources into your artwork can add a layer of complexity and intrigue. You might choose to paint a scene illuminated by the golden glow of a sunset, juxtaposed with the cool shadows cast by nearby buildings. This interplay can lead to dynamic compositions that draw the viewer in, making them feel as though they are part of the scene.
Ultimately, the choice of light source will depend on the story you want to tell through your painting. As you experiment with different light conditions, you'll discover how they can transform your artwork, enhancing its emotional impact and visual appeal. So, grab your brushes and start exploring the captivating world of light!
- What is the best time to paint with natural light?
The best time to paint with natural light is during the golden hour, which occurs shortly after sunrise and before sunset. The soft, warm light during this time can create stunning effects in your artwork. - How can I simulate natural light indoors?
You can simulate natural light indoors by using soft, diffused lighting such as lamps with warm bulbs. Position them near your painting area to mimic the effects of sunlight. - What are some tips for working with artificial light?
When working with artificial light, consider the color temperature of the bulbs you are using. Warmer bulbs can create a cozy atmosphere, while cooler bulbs can produce a more clinical effect. Experiment with different angles and distances to see how they affect your painting.

Natural Light
When it comes to painting, is like the artist's best friend. It shifts and dances throughout the day, casting different moods and colors that can transform a simple scene into a breathtaking masterpiece. Imagine standing outside during the early morning; the world is bathed in a soft, golden hue, and every color seems to sing. This is the magic of natural light, and capturing its essence can elevate your artwork to new heights.
One of the key aspects of painting with natural light is understanding how it changes throughout the day. The quality of light can vary dramatically, which affects the colors and shadows in your painting. For instance, during the golden hour—the hour after sunrise or before sunset—the light is warm and diffused, creating long shadows and a soft glow that can enhance textures and details. On the other hand, midday light is harsher, producing stark contrasts and vibrant colors that can make details pop.
To effectively capture natural light, consider the following tips:
- Observe the Environment: Spend time studying how light interacts with objects in your surroundings. Notice how colors shift and shadows change.
- Choose Your Time Wisely: Plan your painting sessions around specific times of the day to take advantage of the most flattering light conditions.
- Use a Limited Palette: This can help you focus on the light and shadow dynamics without getting overwhelmed by too many colors.
Another fascinating aspect of natural light is its ability to evoke emotions. For example, a scene illuminated by soft, warm light can create feelings of comfort and nostalgia, while a scene drenched in cool, blue light might evoke tranquility or melancholy. As an artist, you have the power to manipulate these emotional cues through your choice of lighting, guiding your viewers’ feelings and reactions to your work.
To truly master the art of painting with natural light, practice is essential. Set up your easel outside, and paint directly from life. This will not only improve your observation skills but also help you understand how to mix colors to replicate the light you see. Experiment with different times of day and weather conditions, as each brings its own unique challenges and rewards.
In summary, embracing natural light in your paintings can lead to stunning results. By understanding its characteristics and practicing diligently, you can create artworks that resonate with depth and emotion. So grab your brushes, head outside, and let the beauty of the natural world inspire your next masterpiece!

Golden Hour Effects
The golden hour—that magical time shortly after sunrise or before sunset—offers artists a unique opportunity to capture the world in its most enchanting light. During this period, the sun casts a warm, soft glow that transforms ordinary scenes into breathtaking vistas. If you’ve ever marveled at how everything seems to glow with a golden hue just before nightfall, you know exactly what I mean! This phenomenon occurs because the sun is lower in the sky, allowing its rays to travel through more atmosphere, which filters out harsh blue light and enhances reds and yellows.
To make the most of the golden hour in your paintings, consider the following techniques:
- Warm Color Palette: Embrace the warm tones of the golden hour by incorporating rich yellows, oranges, and soft reds into your palette. These colors can evoke feelings of warmth and nostalgia, inviting the viewer into your artwork.
- Soft Shadows: The light during this time is less intense, which means shadows are softer and less defined. Use this to your advantage by blending edges and creating a more ethereal quality in your work.
- Highlighting Textures: The angled sunlight can reveal textures that might go unnoticed in flat lighting. Pay attention to how light interacts with surfaces, and use it to create depth and interest in your paintings.
When painting during the golden hour, it’s also essential to be mindful of the changing light conditions. The colors will shift rapidly, so it’s a good idea to have a clear vision of what you want to achieve before you start. Consider setting up your canvas and materials beforehand to maximize your painting time. This way, you can capture those fleeting moments of beauty without feeling rushed.
Lastly, don’t forget to experiment! Each golden hour presents a unique opportunity, and your approach can vary depending on the scene and your artistic intent. Whether you’re painting landscapes, portraits, or still life, the golden hour can infuse your work with a sense of warmth and life that’s hard to replicate at any other time of day.
- What is the best time to paint during the golden hour? The golden hour occurs roughly an hour after sunrise and an hour before sunset, but the exact timing can vary based on your location and the time of year.
- How can I prepare for painting during the golden hour? Set up your materials in advance, choose your color palette, and have a clear vision of your composition to make the most of the fleeting light.
- Can I use photographs taken during the golden hour as references? Absolutely! Photographs can help you capture the colors and light dynamics, but try to paint from life when possible for the best experience.
Overcast Conditions
Painting under can be a truly rewarding experience, offering a unique opportunity to explore the subtleties of light and shadow. When the sun is hidden behind clouds, the light becomes diffused, resulting in a soft and gentle illumination that can transform the atmosphere of your artwork. This kind of lighting is particularly beneficial for artists seeking to convey a sense of calmness and serenity in their pieces.
One of the key characteristics of overcast light is its ability to minimize harsh shadows. Instead of stark contrasts, you will find a more uniform light distribution across your subject, which can enhance the overall mood of your painting. This can be especially useful in landscapes where you want to depict a tranquil scene, or in portraits where you aim to capture the subtle nuances of your subject's features without the distraction of strong shadows.
To effectively capture the essence of overcast conditions, consider the following techniques:
- Color Palette: Use a palette that leans towards cooler tones, as overcast light tends to bring out blues and greens. This can help you achieve a more realistic representation of the scene.
- Soft Edges: When painting shadows, opt for softer edges rather than sharp lines. This mimics the natural blending of light that occurs on cloudy days.
- Layering: Build up your colors in layers to create depth. Start with a base layer of muted tones and gradually add highlights to suggest the subtle variations in light.
Moreover, don't forget to pay attention to the reflections and textures in your subject matter. Overcast conditions can enhance the visibility of textures, making them more pronounced and interesting. For instance, the surface of water may appear smoother, while the details of foliage can become more vivid. By incorporating these elements into your painting, you can create a more engaging and immersive experience for the viewer.
In conclusion, embracing overcast conditions in your paintings allows you to explore a different facet of light. With the right approach, you can create stunning works that capture the beauty of these subtle lighting scenarios. So next time you find yourself in a cloudy setting, grab your brushes and let the soft light inspire your creativity!
Q1: How do I know if I'm capturing overcast light correctly?
A: Look for the absence of harsh shadows and the presence of a more even light across your subject. If your colors appear muted and soft, you’re likely on the right track.
Q2: Can I use bright colors in an overcast painting?
A: Yes, but be mindful of how you balance them with cooler tones. Bright colors can still work well, especially if they are used sparingly to create focal points.
Q3: What should I focus on when painting landscapes under overcast skies?
A: Pay attention to the overall mood and atmosphere. Use softer edges and a cooler color palette to convey the tranquility of the scene.
Artificial Light
When it comes to painting, can be a game-changer. It’s like the spotlight in a theater, directing attention and creating drama. Unlike natural light, which has its own rhythm and flow, artificial light can be manipulated to achieve striking contrasts and highlight specific elements in your artwork. Think about it: how many times have you seen a painting that just pops because of the way light is used? That’s the magic of artificial lighting!
Artificial light sources, such as lamps, neon signs, and even candles, produce distinct effects that can dramatically alter the mood of your painting. For instance, a warm lamp can create a cozy atmosphere, while a harsh fluorescent light can give a more clinical feel. Understanding these nuances is crucial for any artist looking to enhance their work. Here are some key aspects to consider:
- Direction: The angle at which light hits your subject can create different shadows and highlights. Side lighting can add depth, while overhead lighting can flatten the image.
- Intensity: The brightness of the light affects how colors appear. Bright lights can wash out colors, while dim lights can enrich them, adding a sense of mystery.
- Color Temperature: Artificial lights come in various color temperatures, from warm yellows to cool blues. Choosing the right temperature can evoke specific emotions and set the mood of your painting.
To effectively incorporate artificial light into your paintings, start by experimenting with different light sources in your studio. Observe how the light interacts with various materials and colors. For example, place a colored object under a warm light and notice how it transforms. This experimentation will give you a better understanding of how to replicate these effects on canvas.
Additionally, consider using highlights and shadows to your advantage. Highlights can draw the viewer's eye to focal points, while shadows can create a sense of depth and dimension. By layering these elements, you can create a vibrant and dynamic composition that feels alive. Remember, the goal is to mimic the way light behaves in real life, so don’t be afraid to play around and make adjustments as needed.
Incorporating artificial light into your painting practice not only enhances your technical skills but also expands your creative possibilities. So grab that lamp, turn it on, and let the magic of artificial light inspire your next masterpiece!
Q: How can I effectively use artificial light in my paintings?
A: Start by experimenting with different light sources and observe how they affect colors and shadows. Use highlights to draw attention and shadows to create depth.
Q: What are the best types of artificial light for painting?
A: Soft white bulbs are great for creating a warm atmosphere, while daylight bulbs can help you see true colors. Experiment with different types to see what works best for your style.
Q: How does the color temperature of artificial light affect my artwork?
A: Color temperature can influence the mood of your painting. Warm lights can evoke feelings of comfort, while cool lights can create a more clinical or serene atmosphere.
Q: Is it necessary to use artificial light in all my paintings?
A: Not at all! It depends on the effect you want to achieve. Sometimes natural light is perfect, but artificial light can add a unique twist to your work.
Color Temperature and Light
Understanding color temperature is crucial for achieving realistic lighting in your paintings. It refers to the warmth or coolness of light, which can dramatically influence the mood and atmosphere of your artwork. Imagine stepping into a room lit by a cozy fireplace; the warm glow envelops you, creating a sense of comfort. Now, picture a stark, fluorescent-lit office. The cool, harsh light can feel sterile and uninviting. This is the power of color temperature at play!
In art, color temperature can be broken down into two primary categories: warm tones and cool tones. Warm tones are typically associated with sunlight, fire, and other sources of light that create a sense of energy and vibrancy. These colors—like reds, oranges, and yellows—can evoke feelings of happiness and excitement. On the other hand, cool tones—such as blues, greens, and purples—are reminiscent of moonlight or shadowy areas, imparting a sense of calm or melancholy.
When painting, it’s important to consider the emotional impact of the light you are depicting. For instance, if you're painting a sunset, utilizing warm tones can enhance the feeling of warmth and nostalgia. Conversely, if you’re capturing a moonlit night, cool tones can help convey a sense of tranquility and mystery. To effectively manipulate color temperature in your artwork, you might want to experiment with the following techniques:
- Mixing Colors: When mixing your paints, consider adding a touch of complementary colors to adjust the temperature. For example, mixing a little blue into your yellow can create a more muted, cooler hue.
- Layering Techniques: Apply warm and cool colors in layers to create depth and interest. This can help simulate the way light interacts with different surfaces.
- Contextual Lighting: Always think about the context of your light source. Is it a warm candlelight or a cool, harsh overhead light? This will guide your color choices.
Additionally, color temperature can also affect how we perceive the colors in our paintings. For instance, a warm light can make colors appear more vibrant, while a cool light can desaturate them. This phenomenon is particularly important when painting shadows, as they often take on a cooler temperature compared to the lighted areas. Understanding this relationship allows you to create more realistic and compelling compositions.
To illustrate the differences in color temperature, consider the following table:
| Color Temperature | Typical Colors | Emotional Impact |
|---|---|---|
| Warm | Reds, Oranges, Yellows | Excitement, Energy, Warmth |
| Cool | Blues, Greens, Purples | Calm, Serenity, Distance |
In conclusion, mastering color temperature is a powerful tool for any artist looking to enhance the realism and emotional depth of their work. By understanding how warm and cool tones interact and influence perception, you can create paintings that resonate with viewers on a deeper level. So, the next time you pick up your brushes, think about the light in your scene and how you can use color temperature to bring it to life!
- What is color temperature in art? Color temperature refers to the warmth or coolness of light, which affects the colors in your artwork and the emotions they evoke.
- How can I effectively use warm and cool colors in my paintings? Experiment with mixing and layering colors, and consider the context of your light source to guide your choices.
- Can color temperature change the perception of depth in a painting? Yes! Using warm tones in the foreground and cool tones in the background can help create a sense of depth and perspective.
Warm vs. Cool Light
When it comes to painting, the temperature of light can dramatically alter the mood and perception of your artwork. Think of warm light as a cozy blanket, wrapping your scene in a golden embrace, while cool light acts like a refreshing breeze, bringing clarity and a sense of calm. Understanding how to manipulate these two types of light is essential for any artist aiming to create depth and emotion in their work.
Warm light, typically associated with sunlight during the morning and evening, can evoke feelings of happiness, nostalgia, and warmth. This type of light tends to enhance reds, oranges, and yellows in your palette, making them pop with vibrancy. For instance, imagine a sunset over a tranquil lake—the oranges and pinks reflecting off the water create a dreamlike quality that draws the viewer in. When you use warm light in your paintings, you can create a sense of intimacy and comfort, inviting the audience to connect with the scene on a personal level.
On the other hand, cool light, often found in the midday sun or under overcast skies, brings a different emotional palette to your work. It emphasizes blues, greens, and purples, giving your painting a more serene and contemplative feel. Picture a misty morning where the cool light softens the landscape, creating ethereal shapes and shadows that seem to whisper secrets. Cool light can add a layer of mystery and depth, making your artwork feel expansive and open.
When deciding between warm and cool light in your paintings, consider the following factors:
- Subject Matter: What story are you trying to tell? Warm light might be perfect for a lively market scene, while cool light could enhance a quiet forest landscape.
- Emotional Tone: Do you want to convey joy and energy or calm and reflection? Your choice of light temperature can significantly impact the emotional response of your audience.
- Time of Day: Remember that the position of the sun changes the quality of light throughout the day. Morning and evening light is typically warmer, while midday light is cooler.
Incorporating both warm and cool light into your artwork can also create a dynamic contrast that draws the viewer’s eye. For example, you might use warm light to illuminate a subject in the foreground while allowing cooler tones to dominate the background. This technique not only enhances the three-dimensionality of your work but also guides the viewer’s focus to where you want it most.
Ultimately, mastering the balance between warm and cool light is about experimentation. Don't be afraid to play with different light temperatures in your sketches and studies. With practice, you'll develop a keen eye for how light influences color and mood, allowing you to create paintings that resonate deeply with your audience.
Q: How can I determine whether to use warm or cool light in my painting?
A: Consider the emotion you want to convey and the time of day depicted in your artwork. Warm light works well for lively scenes, while cool light is ideal for serene or contemplative settings.
Q: Can I mix warm and cool light in the same painting?
A: Absolutely! Mixing both can create stunning contrasts and depth. Just be mindful of how you balance them to maintain harmony in your composition.
Q: What are some techniques for painting warm and cool light effectively?
A: Experiment with color mixing, layering, and glazing techniques. Observing real-life scenarios will also help you understand how light behaves in different conditions.
Creating Depth with Light
When it comes to painting, depth is one of those magical elements that can transform a flat canvas into a vibrant, three-dimensional experience. But how do you achieve this illusion? The answer lies in the way you manipulate light and shadow. By understanding how light interacts with objects, you can create a sense of volume and space that draws viewers in and makes them feel as though they could step right into your artwork.
One effective technique for creating depth is to use contrasting light and shadow. Think about how the sun casts shadows on a sunny day. The areas in direct light are bright and vibrant, while the shadows are darker and cooler in tone. By layering these contrasts, you can guide the viewer's eye through your painting, leading them from one focal point to another. For example, consider a landscape painting where the foreground is bathed in sunlight, while the background fades into shadow. This not only creates depth but also adds a sense of mystery to the composition.
Another approach to consider is the use of layering techniques. Layering different shades and tones can significantly enhance the depth of your painting. Start with a base layer of color and gradually build up lighter and darker shades. This method is particularly effective in creating realistic textures, such as the roughness of tree bark or the softness of a cloud. As you layer, be mindful of how light interacts with each surface. Does the light hit the object directly, casting a sharp shadow, or does it diffuse softly, creating a gentle gradient? Understanding these nuances will help you create a more compelling sense of depth.
To illustrate this concept, consider the following table that outlines the effects of different light sources on depth perception:
| Light Source | Effect on Depth |
|---|---|
| Natural Light | Creates soft shadows, enhancing the natural look of objects. |
| Artificial Light | Can create harsh contrasts, emphasizing certain areas while deepening shadows. |
| Overcast Light | Produces even lighting, reducing harsh shadows and creating a serene atmosphere. |
In addition to these techniques, consider the placement of light sources within your composition. The positioning of light can dramatically alter the perception of depth. For instance, a low light source will cast long shadows, which can create a sense of drama and tension. Conversely, a high light source may flatten the image, making it appear more two-dimensional. Experimenting with the angle and intensity of your light sources can yield surprising results that enhance the overall depth of your painting.
Lastly, don't forget to practice! Like any skill, mastering depth through light requires time and experimentation. Set aside some time to work on exercises that focus solely on light and shadow. Try painting simple shapes, like spheres or cubes, under different lighting conditions. Observe how the light affects their form and practice replicating that effect on your canvas. Over time, you'll find that your ability to create depth with light will improve, making your paintings not only more realistic but also more engaging for your audience.
- What is the best way to practice creating depth with light?
Focus on simple shapes and experiment with different light sources. Observe how they interact with the shapes and try to replicate that in your paintings. - How can I tell if my painting has enough depth?
Step back and look at your painting from a distance. If it appears flat or lacks dimension, consider adjusting the light and shadow contrasts. - Are there specific colors that work better for creating depth?
Yes! Warmer colors tend to advance, while cooler colors recede. Using this principle can help enhance the perception of depth in your artwork.
Layering Techniques
When it comes to achieving a realistic representation of light in your paintings, are absolutely essential. Imagine creating a beautiful sunset; you wouldn't just slap on one color and call it a day, right? Instead, you'd build up layers of color, gradually adding depth and richness. This technique not only enhances the visual appeal but also mimics the way light interacts with objects in the real world.
One effective approach is to start with a base layer. This layer sets the foundation for your painting, establishing the overall tone and mood. Choose a color that reflects the primary light source in your scene. For instance, if you're painting a warm sunset, a soft yellow or orange might be your best bet. Once your base layer is dry, you can begin to add additional layers of color.
Next, think about transparency. Using transparent paints or glazing techniques allows the underlying layers to shine through, creating a sense of luminosity. When you apply a transparent layer over a dry base, it can change the color and mood dramatically. For example, a layer of transparent blue over a warm base can evoke the feeling of twilight, adding an ethereal quality to your work.
Another vital aspect of layering is the application of light and shadow. As you build up your layers, consider how light falls on the objects in your painting. Use lighter shades to highlight areas where light hits directly, and darker shades for the shadows. This contrast is what gives your painting that three-dimensional feel. A simple way to think about it is: light brings things forward, while shadow pushes them back.
To further enhance your layering technique, consider the following tips:
- Experiment with brush strokes: Different brushes can create varied textures. Try using a flat brush for broad strokes and a round brush for details.
- Utilize color mixing: Mix colors on your palette before applying them to the canvas. This can create more realistic hues that mimic natural light.
- Practice patience: Allow each layer to dry completely before adding the next. This prevents muddy colors and helps maintain the integrity of each layer.
Moreover, don't hesitate to step back and assess your work from a distance. Sometimes, what looks good up close may not translate well from afar. This perspective can help you identify areas where the light and shadow balance may need adjustment. Remember, layering is about building a narrative with your colors and tones, and each layer tells a part of that story.
In conclusion, mastering layering techniques is a journey that requires practice and experimentation. The more you play with different colors and layering methods, the more you'll understand how light interacts with your subjects. So grab your brushes, unleash your creativity, and let the magic of layering transform your paintings into stunning visual experiences!
1. What is the best way to start layering in a painting?
Begin with a solid base layer that reflects the primary light source. Gradually build up layers, allowing each to dry before applying the next.
2. How do I know when to stop layering?
A good rule of thumb is to step back and assess your painting from a distance. If it feels balanced and the light and shadow are working harmoniously, you may be ready to stop.
3. Can I use any type of paint for layering techniques?
Yes, but transparent paints or glazing mediums are particularly effective for creating depth and luminosity in your layers.
Practicing Realistic Lighting
When it comes to mastering realistic lighting in your paintings, practice is not just important; it's essential. Think of it like learning to ride a bike; the more you practice, the more confident you become. But how do you practice effectively? One of the best ways is to immerse yourself in real-life scenarios. Observing how light interacts with different surfaces and colors can significantly enhance your understanding of light and shadow. This means stepping outside, taking a walk, and really paying attention to how light behaves at different times of the day.
Consider setting up a dedicated space in your studio where you can experiment with various lighting conditions. You might use a single lamp to mimic a warm light source or position multiple lamps to create dramatic shadows. Experimentation is key here; don’t be afraid to try different angles and distances to see how they affect your work. Remember, it’s not just about replicating what you see but also about understanding the underlying principles of light.
One effective exercise is to create a series of small studies focusing on different lighting conditions. For example, you could paint the same still life under:
- Bright sunlight
- Soft, diffused light from an overcast sky
- Warm indoor lighting
This will help you recognize the subtle differences in color temperature and shadow depth. Additionally, keep a sketchbook handy to jot down notes about your observations. You might find it helpful to include color swatches that represent the light you’re seeing. This practice not only enhances your observational skills but also builds a valuable reference library for future works.
Another tip is to study from life. This means painting real objects in real light rather than relying solely on photographs. While photos can capture details, they often fail to convey the true essence of light. By painting from life, you’ll learn to see the nuances of color and shadow that photographs can’t capture. Consider joining a local painting group or attending workshops that focus on painting outdoors, often referred to as plein air painting. This approach not only improves your skills but also allows you to connect with other artists.
As you practice, don’t forget to challenge yourself. Try to incorporate different elements into your work, such as:
- Reflective surfaces like glass or water
- Translucent materials like fabric or leaves
- Complex shadows cast by multiple light sources
These elements can add layers of complexity to your paintings and push your understanding of light even further. Remember, the goal is to capture not just the image but the mood and atmosphere created by light.
Finally, keep a positive mindset. Progress may feel slow at times, but every painting you create is a step forward. Celebrate your successes, no matter how small, and learn from your mistakes. Art is a journey, and with every brushstroke, you're getting closer to mastering the art of realistic lighting.
Q: How can I improve my understanding of light quickly?
A: Practice regularly by painting from life and experimenting with different light sources. Keep a sketchbook for notes and color swatches to track your progress.
Q: Is it better to use natural light or artificial light for practice?
A: Both have their advantages. Natural light offers dynamic changes throughout the day, while artificial light can create dramatic contrasts. Try using both to see how they affect your artwork.
Q: What should I focus on when practicing realistic lighting?
A: Pay attention to color temperature, shadow depth, and the way light interacts with different materials. Challenge yourself with various lighting scenarios for a well-rounded understanding.
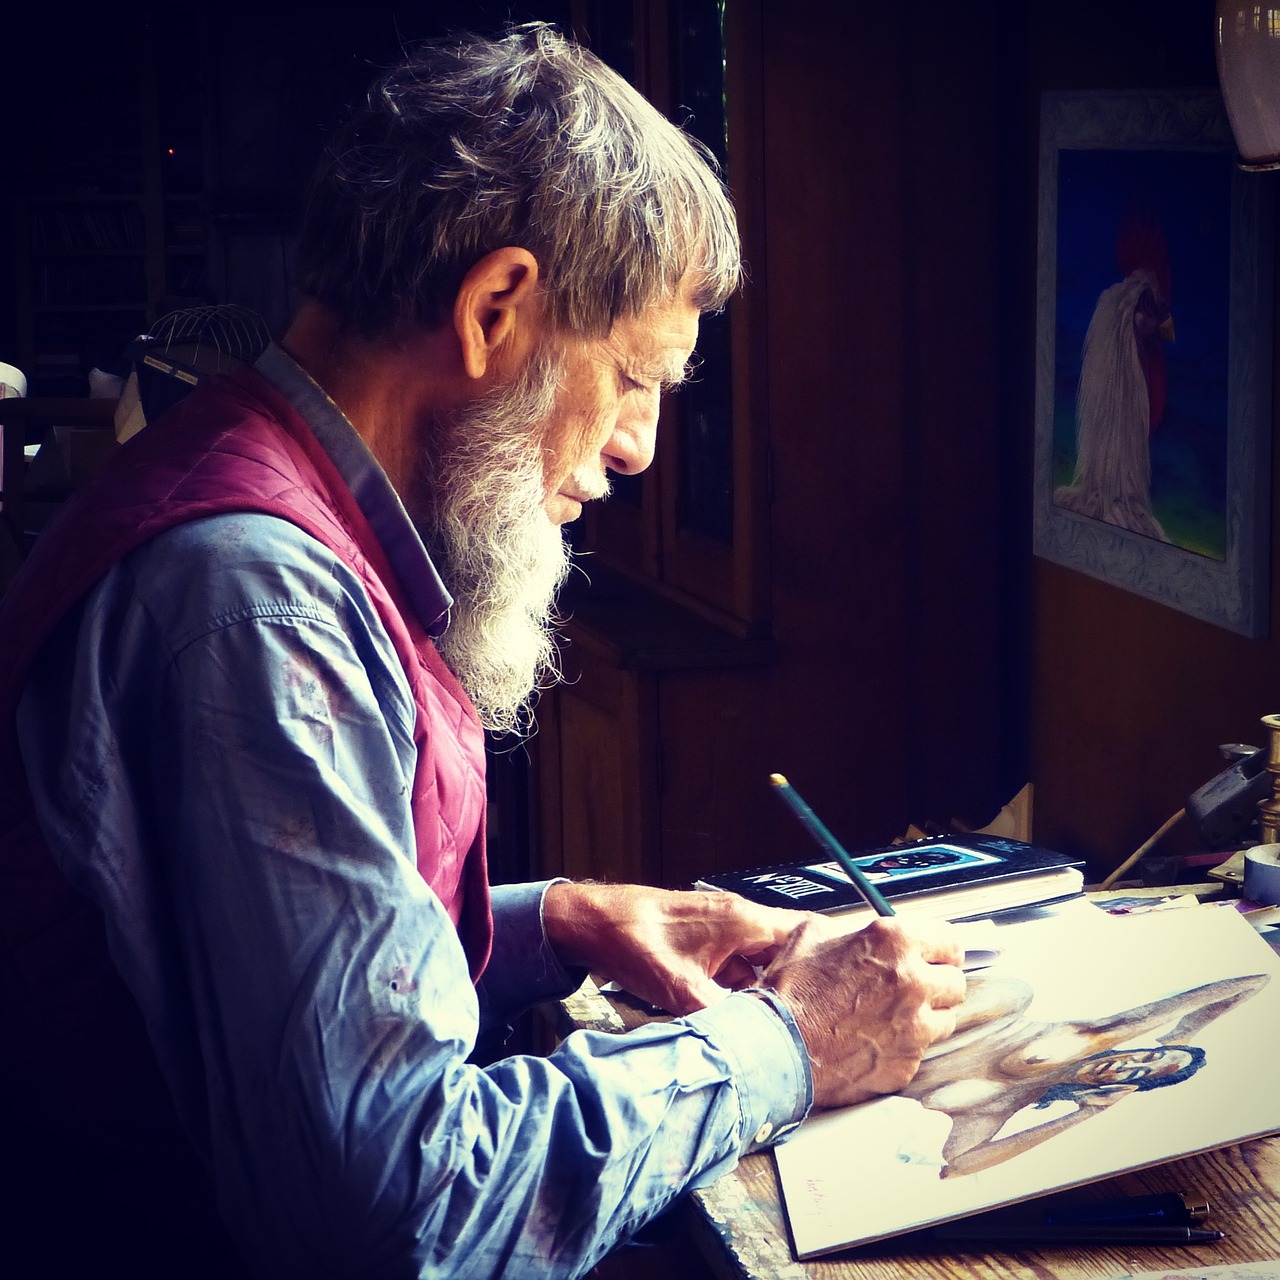
Study from Life
One of the most effective ways to master realistic lighting in your paintings is to . This practice involves observing real-life scenarios, allowing you to see how light interacts with objects, colors, and shadows in a way that photographs simply cannot capture. Think of it as a personal workshop where nature is your teacher, and every moment presents a new opportunity to learn. The nuances of light can change dramatically with the time of day, weather conditions, and even the environment's colors, making it essential to immerse yourself in these experiences.
When you set up your easel outdoors or in a well-lit room, you allow yourself to be part of the scene. This practice not only enhances your understanding of light but also improves your ability to translate that understanding onto canvas. Remember, the goal is to observe how light behaves in different settings. For instance, consider the following aspects while painting:
- Direction of Light: Observe where the light is coming from and how it casts shadows.
- Quality of Light: Notice whether the light is harsh or soft, and how this affects the colors you see.
- Color of Light: Pay attention to the temperature of the light—does it appear warm like a sunset or cool like a cloudy day?
To truly enhance your skills, try to set aside time each week for this practice. You can start with simple objects in your home, like a fruit bowl or a vase of flowers, and gradually move on to more complex scenes. This approach will help you develop a keen eye for detail and an understanding of how to manipulate light in your artwork. Remember, the more you observe, the better you'll become at capturing the essence of light and shadow in your paintings.
Q: Why is studying from life important for artists?
A: Studying from life helps artists understand the complexities of light and shadow, which can be difficult to capture from photographs. It allows for a more nuanced interpretation of color and form.
Q: What should I focus on when painting from life?
A: Focus on the direction, quality, and color of the light. Observe how these elements interact with your subject to create depth and dimension.
Q: How often should I practice painting from life?
A: Aim to practice at least once a week. Regular observation and painting will significantly enhance your skills over time.
Q: Can I use photographs as a reference instead?
A: While photographs can be useful, they often lack the dynamic qualities of real-life lighting. Use them as a supplement but try to prioritize studying from life whenever possible.
Final Tips for Light in Painting
As you embark on your artistic journey, mastering the interplay of light and shadow can truly elevate your work. Here are some final tips to keep in mind as you paint, ensuring that your depictions of light are both realistic and captivating:
First and foremost, always remember that practice makes perfect. The more you paint, the more intuitive your understanding of light will become. Try to set aside regular time for painting, focusing specifically on how light interacts with different surfaces and materials. Consider keeping a sketchbook dedicated to light studies, where you can experiment with various lighting scenarios without the pressure of creating a finished piece.
Next, it’s crucial to observe the world around you. Take the time to notice how light behaves in different environments and at various times of the day. For instance, when you step outside during the golden hour, take a moment to appreciate how the warm tones transform your surroundings. This observational practice can be an invaluable asset when it comes time to apply those insights to your canvas.
Additionally, don’t shy away from using color temperature to your advantage. Understanding the emotional impact of warm and cool tones can help you convey the mood you want in your painting. For example, if you’re aiming for a cozy, inviting atmosphere, lean into warmer colors. Conversely, if you want to evoke a sense of calm or distance, cooler tones can be your best friend. Mixing these tones effectively can create a dynamic contrast that draws the viewer's eye.
Another tip is to experiment with layering techniques. Layering different shades of light and shadow can add depth and dimension to your work. Start with a base layer of light and gradually build up darker tones, allowing for a more three-dimensional effect. This technique not only enhances realism but also gives your paintings a sense of movement and life.
Lastly, don’t forget to trust your instincts. Art is subjective, and what might seem like a mistake at first could lead to a unique and beautiful outcome. Allow yourself the freedom to explore and make bold choices. Sometimes, the most surprising results can come from stepping outside your comfort zone.
In summary, mastering light in painting is a multifaceted journey that requires observation, practice, and a willingness to experiment. Keep these tips in mind as you continue to hone your skills, and don’t forget to enjoy the process!
Here are some common questions artists have about working with light in their paintings:
- What is the best time of day to paint outdoors? - The golden hour, shortly after sunrise or before sunset, provides beautiful, warm light perfect for capturing stunning effects.
- How can I practice painting light effectively? - Set up still life arrangements with a single light source and observe how it casts shadows and highlights on different objects.
- What tools can help me understand color temperature? - A color wheel can be a great tool to help you visualize warm and cool tones and how they interact with one another.
Frequently Asked Questions
- What are the key elements to consider when painting light?
When painting light, it's essential to understand the interplay between light and shadow. Consider the light source, its intensity, and the direction it comes from. This will affect how colors appear and how shapes are defined. Additionally, think about the color temperature of the light, as it can significantly influence the mood of your painting.
- How does natural light differ from artificial light in painting?
Natural light varies throughout the day and can create soft, dynamic effects, especially during the golden hour. In contrast, artificial light tends to produce sharper contrasts and highlights, allowing for dramatic effects. Understanding these differences helps artists choose the right lighting for their compositions.
- What techniques can I use to create depth in my paintings?
To create depth, utilize layering techniques with different shades and tones. Employing a mix of light and shadow can enhance the three-dimensionality of your work. Additionally, consider the placement of light sources to direct the viewer's eye and add perspective to your painting.
- How can I practice realistic lighting in my artwork?
One of the best ways to practice is to study from life. Observe how light interacts with objects in various conditions. Set up still life scenes or paint en plein air to capture real-time lighting changes. Regular practice will help you refine your skills and boost your confidence in depicting light.
- What are some final tips for working with light in painting?
Always remember to keep experimenting with different light sources and conditions. Don’t shy away from making mistakes, as they can lead to valuable learning experiences. Additionally, continually observe the world around you and take notes on how light affects your environment; this will enhance your understanding and application of light in your artwork.


