Brush Up Your Calligraphy Skills with Brush Pen Drawing
Are you ready to transform your handwriting into a stunning work of art? Brush pen calligraphy is not just a hobby; it's a fantastic way to express your creativity and add a personal touch to everything from greeting cards to home decor. Whether you're a complete beginner or someone looking to refine your skills, this article will guide you through the essential techniques, tools, and tips to elevate your brush pen calligraphy game.
Imagine the thrill of seeing your letters flow effortlessly across the page, each stroke bursting with personality and flair. With the right techniques and a bit of practice, you can achieve that and more. Brush pens are versatile tools that allow you to create beautiful, expressive lettering with ease. They combine the fluidity of a paintbrush with the convenience of a pen, making them ideal for various styles of calligraphy.
Now, you might be wondering, "What exactly do I need to get started?" Well, fear not! This article will cover everything from understanding different types of brush pens to choosing the right paper, and even exploring advanced calligraphy styles. By the end, you'll be equipped with the knowledge you need to start your calligraphy journey with confidence.
So, grab your brush pens, some paper, and let's dive into the world of brush pen calligraphy! You'll discover how to master the basics, explore advanced techniques, and develop your unique style that reflects your personality. Whether you want to impress friends with beautifully written invitations or simply enjoy the meditative process of writing, brush pen calligraphy is a rewarding endeavor. Let’s get started!
Brush pens come in a variety of types and sizes, each offering unique features that can significantly influence your calligraphy style. Some pens have flexible tips that allow for dramatic thick and thin strokes, while others have firmer tips that are better suited for precise lettering. Understanding these differences is crucial for selecting the right pen for your specific needs.
The choice of paper can dramatically impact your brush pen calligraphy. The right paper will not only enhance the appearance of your letters but also improve the overall experience of writing. You want a surface that allows for smooth ink flow without bleeding or feathering. Let's explore the characteristics that make paper suitable for brush pen calligraphy.
The texture and weight of the paper can greatly affect ink flow and the final appearance of your work. A smooth surface often allows for cleaner lines and less resistance when writing, while a textured paper can add a unique touch to your lettering style. When selecting paper, consider the following:
- Smooth Paper: Ideal for clean, crisp lines.
- Textured Paper: Adds depth and character to your letters.
- Weight: Heavier paper (around 200gsm) is often better for preventing bleed-through.
There are several brands that offer specialized papers for brush pen calligraphy. Here are some popular options:
| Brand | Type | Features |
|---|---|---|
| Strathmore | Mixed Media Paper | Heavyweight, smooth surface, great for ink. |
| Canson | Marker Paper | Bleed-proof, smooth texture, ideal for brush pens. |
| Rhodia | Dot Grid Paper | High-quality, smooth finish, perfect for practice. |
If you're on a budget, don't worry! You can create your own calligraphy-friendly paper. Here are a few tips:
- Use regular printer paper and apply a light coat of clear acrylic spray to reduce bleed-through.
- Try using watercolor paper for a textured effect.
- Experiment with different types of paper scraps you may already have at home.
Mastering basic strokes is essential for developing your calligraphy skills. Start by practicing simple shapes and lines to get a feel for the brush pen's movement. As you gain confidence, you can begin to form letters and words. Remember, practice makes perfect!
Once you've grasped the basics, it's time to explore advanced styles that can elevate your work. From modern calligraphy to intricate flourishing techniques, there's a whole world of creativity waiting for you.
Modern calligraphy blends traditional techniques with contemporary flair. This style allows for a more relaxed approach, encouraging you to develop your unique voice. Think of it as a conversation between you and the paper, where each stroke tells a story.
Flourishing adds elegance to your calligraphy. Incorporating swirls and loops can enhance your lettering skills, making your work truly stand out. Think of flourishing as the icing on the cake—it adds that special touch that makes everything sweeter!
Consistent practice is key to improving your calligraphy skills. To help you refine your technique and build confidence, consider the following strategies:
Creating a structured practice schedule can help you stay committed to improving your skills. Aim to set aside a specific time each day or week dedicated to practice. This will not only help you track your progress but also make it a habit.
The internet is filled with valuable resources for calligraphy enthusiasts. Websites, tutorials, and communities can provide support and inspiration on your learning journey. Don't hesitate to explore and connect with others who share your passion!
1. Do I need special ink for brush pens?
Most brush pens come pre-filled with ink, but if you're using refillable ones, make sure to choose the right ink type designed for brush pens to achieve the best results.
2. How long does it take to learn brush pen calligraphy?
The time varies from person to person. With consistent practice, you can start seeing improvement within a few weeks!
3. Can I use brush pens on any type of paper?
While you can experiment, it's best to use paper specifically designed for brush pens to avoid issues like bleed-through or feathering.
4. Are there online courses available for brush pen calligraphy?
Absolutely! There are numerous online platforms offering courses that cater to all skill levels, allowing you to learn at your own pace.
Understanding Brush Pens
Brush pens are not just your average writing tools; they are the magic wands of the calligraphy world! These pens come in a variety of types and sizes, each with its own unique characteristics that can dramatically influence your calligraphy style. Whether you're a beginner just dipping your toes into the art of brush pen calligraphy or an advanced artist looking to refine your skills, understanding the nuances of brush pens is crucial.
At their core, brush pens feature a flexible tip that allows for a range of stroke thicknesses, which is essential for creating the beautiful contrasts in your lettering. The ink flow can vary widely between different brands and types, affecting how the pen behaves on paper. For instance, some brush pens are filled with water-based inks that offer a softer touch, while others use pigment-based inks that provide a bold, vibrant finish.
When choosing a brush pen, consider the following types:
- Felt-tip Brush Pens: These pens have a soft, flexible tip and are great for beginners due to their ease of use.
- Watercolor Brush Pens: Perfect for those who want to combine calligraphy with watercolor effects, these pens allow you to create stunning gradients.
- Dual-tip Brush Pens: Offering both a brush tip and a fine tip, these pens are versatile and great for adding details to your work.
Moreover, the size of the brush pen plays a significant role in your calligraphy. Larger brush pens are excellent for bold, sweeping strokes, while smaller ones are ideal for intricate details and fine lettering. It's like choosing the right paintbrush for a canvas; the right size can make all the difference in the final outcome.
In addition to the type and size, the ink quality is another vital factor. High-quality inks will flow smoothly and dry quickly, preventing smudging and ensuring that your work looks polished. When selecting your brush pens, look for those that are labeled as 'non-toxic' and 'lightfast' to ensure your creations will last over time.
To help you navigate the world of brush pens, here’s a quick comparison table of some popular options:
| Type of Brush Pen | Features | Best For |
|---|---|---|
| Felt-tip Brush Pens | Soft, flexible tip; easy ink flow | Beginners and general use |
| Watercolor Brush Pens | Blendable ink; great for gradients | Mixed media projects |
| Dual-tip Brush Pens | Two tips for versatility; fine and brush | Detailed calligraphy and illustrations |
Understanding brush pens is not just about knowing their types; it’s also about experimenting with them. Each pen has its own personality, and the more you play with them, the better you'll understand how they can enhance your calligraphy. So grab a few different types, and let your creativity flow!
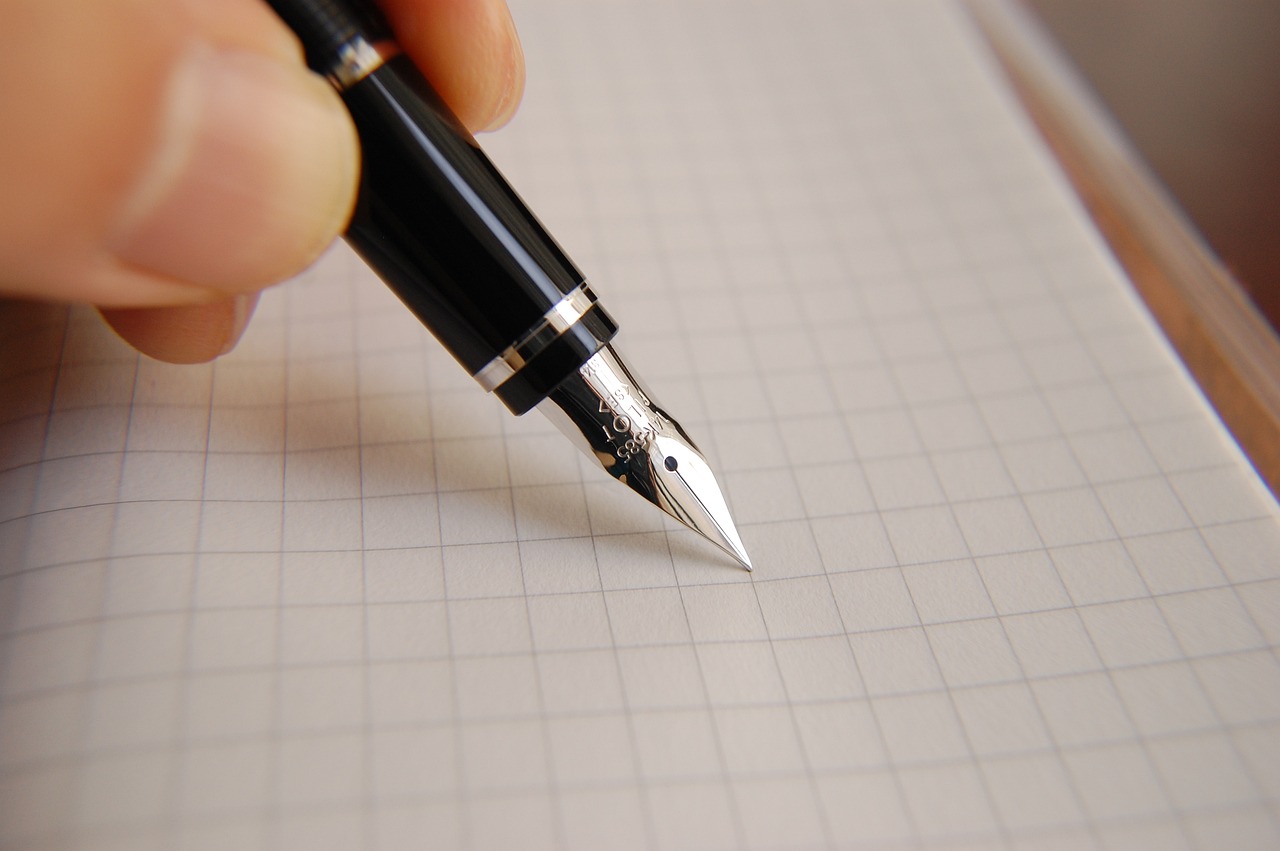
Choosing the Right Paper
When it comes to brush pen calligraphy, the choice of paper is crucial for achieving stunning results. The right paper can make a world of difference in how your brush strokes appear, impacting everything from ink flow to the final aesthetic of your lettering. If you've ever tried to write on the wrong type of paper, you know how frustrating it can be when the ink bleeds or the strokes don’t glide smoothly. So, let’s dive into what makes paper suitable for brush pen calligraphy.
First and foremost, you want to consider the texture of the paper. A smooth surface allows your brush pen to glide effortlessly, while a textured surface can create a more organic feel. However, too much texture can hinder your control over the pen, leading to uneven lines. It's all about finding that sweet spot that complements your style. For instance, if you're aiming for clean, crisp lettering, opt for a smooth paper like Bristol or marker paper, which provides a beautiful canvas for your artistry.
The weight of the paper is another important factor. Heavier paper (measured in GSM - grams per square meter) can handle the moisture from the ink better, reducing the risk of bleed-through. Generally, papers with a weight of 200 GSM or more are ideal for brush pen work. If you're unsure, you might want to experiment with different weights to see what feels best in your hand and looks good on the page.
Now, let’s talk about some recommended paper brands that are favorites among calligraphy enthusiasts:
| Brand | Type | Best For |
|---|---|---|
| Strathmore | Bristol Smooth | Clean lines and detailed work |
| HP Premium Presentation | Matte Paper | Vibrant colors and minimal bleed |
| Canson | Marker Paper | Versatile for various styles |
If you're on a budget, don't fret! There are DIY paper options that can work just as well. You can use high-quality printer paper or even watercolor paper if you’re looking for something a bit thicker. Just make sure to test it out first. A simple trick is to hold the paper up to the light; if you can see through it, it may not be suitable for your brush pen work.
In conclusion, the paper you choose can either make or break your brush pen calligraphy experience. By selecting the right texture and weight, and experimenting with different brands, you can elevate your skills and create beautiful pieces of art. So, grab that brush pen and start exploring the wonderful world of calligraphy paper!
- What type of paper is best for beginners? A smooth, heavier paper like Bristol is often recommended for beginners as it provides a forgiving surface for practice.
- Can I use regular printer paper for brush pen calligraphy? While you can use regular printer paper, it may not hold up well to the moisture of the ink, leading to bleed-through.
- Is watercolor paper suitable for brush pen calligraphy? Yes, watercolor paper can be used, especially if you prefer a thicker texture, but be mindful of the texture as it can affect the flow of the ink.
Texture and Weight
When it comes to brush pen calligraphy, the texture and weight of the paper you choose can make a world of difference. Imagine trying to paint a masterpiece on a rough canvas versus a smooth one; the results would be drastically different, right? Similarly, the right paper can enhance your calligraphy experience, making each stroke feel effortless and fluid.
First, let’s talk about texture. The texture of the paper affects how the brush pen glides across its surface. Smooth papers allow for clean, uninterrupted strokes, making them ideal for beginners who are still mastering control. Conversely, textured papers can add character and depth to your work, but they may require more skill to navigate. If you’re looking to experiment, consider trying different textures to see how they influence your style.
Next up is weight. The weight of the paper is crucial as it determines how well it can handle ink without bleeding or feathering. Heavier papers (typically 200gsm and above) are excellent for brush pen techniques because they absorb ink well and resist warping. On the other hand, lighter papers can be more affordable but may not yield the same quality results. To help you make an informed choice, here’s a quick overview:
| Paper Weight | Recommended Use |
|---|---|
| 90-120 gsm | Note-taking, sketching |
| 150-200 gsm | Basic calligraphy practice |
| 200 gsm and above | Advanced calligraphy, final pieces |
Choosing the right combination of texture and weight can elevate your brush pen calligraphy. For instance, if you aim for a more dramatic effect, a textured, heavyweight paper can provide stunning results that make your lettering pop. However, if you prefer a more delicate and refined look, a smooth, lighter paper might be more suitable.
Ultimately, the best way to find your ideal paper is through experimentation. Don’t hesitate to try various types and see how they work with your brush pens. Remember, every artist has their preferences, and what works for one may not work for another. So, grab a few different papers and start creating—your perfect canvas is waiting!
- What is the best paper for beginners? Smooth, lightweight paper is often recommended for beginners as it allows for easier control.
- Can I use regular printer paper for brush pen calligraphy? While you can, it may not yield the best results due to bleeding and feathering.
- How do I know if a paper is suitable for brush pens? Look for papers specifically labeled for calligraphy or art use, and check the weight and texture.
Recommended Paper Brands
When it comes to brush pen calligraphy, the right paper can make all the difference in your work. Choosing high-quality paper not only enhances the appearance of your lettering but also affects how the ink flows and dries. Here are some that have gained popularity among calligraphy enthusiasts:
| Brand | Type | Features |
|---|---|---|
| Strathmore | Mixed Media Paper | Heavyweight, smooth surface, ideal for various media. |
| Canson | Marker Paper | Bleed-proof, smooth finish, great for vibrant colors. |
| Tomoe River | Fountain Pen Paper | Ultra-smooth, lightweight, excellent ink absorption. |
| Rhodia | Dot Grid Notebooks | High-quality paper, perfect for precision and control. |
Each of these brands offers unique characteristics that cater to different styles and preferences. For instance, Strathmore is well-known for its heavyweight paper, making it perfect for artists who enjoy layering colors or using multiple mediums. On the other hand, Tomoe River is a favorite among those who appreciate a smooth texture that allows for effortless strokes and minimal bleed-through.
In addition to these popular options, you might also want to explore Rhodia notebooks, which are fantastic for practicing your lettering skills. The dot grid helps maintain alignment, ensuring your letters remain consistent. It's like having a built-in guide that keeps your creativity flowing without sacrificing precision!
But wait, what if you're on a budget? No worries! Many calligraphers swear by Canson marker paper, which is both affordable and effective. It offers a smooth finish and is bleed-proof, making it a reliable choice for beginners who are just starting to experiment with brush pens.
Ultimately, the best paper for you will depend on your personal style and the effects you want to achieve. Don't hesitate to try out a few different brands to see which one resonates with your creative process. Remember, the journey to mastering brush pen calligraphy is all about exploration and finding what works best for you!
Here are some common questions that aspiring calligraphers often have:
- What type of paper is best for beginners?
For beginners, a smooth, bleed-proof paper like Canson marker paper is highly recommended. It allows for easy practice without worrying about ink bleeding through.
- Can I use regular printer paper for brush pen calligraphy?
While you can use regular printer paper, it may not provide the best results. The ink might bleed or feather, which can affect the overall appearance of your work.
- How do I know if the paper is suitable for brush pens?
Look for papers that are labeled as "marker" or "mixed media." These types usually have a smooth surface and are designed to handle various inks without bleeding.
DIY Paper Options
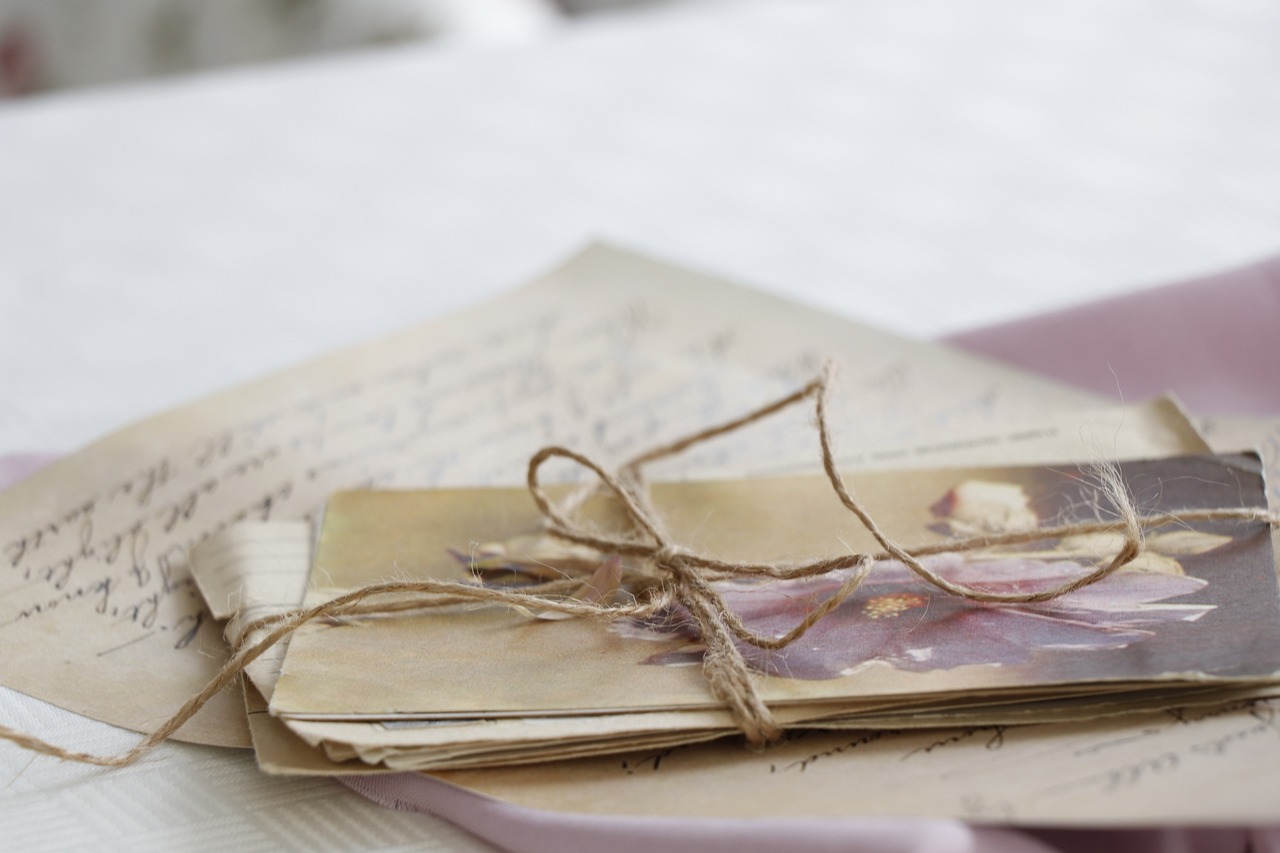
Creating your own paper for brush pen calligraphy can be a fun and budget-friendly approach to enhancing your artistic journey. Whether you're looking to experiment with different textures or simply want to save some cash, DIY paper options can be surprisingly effective. The key is to understand the characteristics of the paper that work best with brush pens, such as smoothness and weight.
One popular method for making DIY calligraphy paper is to use standard printer paper, which is widely available. However, to give it a more calligraphy-friendly finish, you can use a few techniques to modify its surface. For instance, lightly sanding the paper with fine-grit sandpaper can create a smoother surface that allows the ink to glide effortlessly. Just be careful not to over-sand, as you want to maintain some thickness to prevent bleeding.
Another option is to create paper from recycled materials. For example, you can repurpose old magazines or newspapers. Simply tear them into smaller pieces and mix them with water to create a pulp. Once you've blended it to your desired consistency, pour the pulp onto a flat surface, spread it out evenly, and let it dry. This method not only gives you unique textures and colors but also contributes to an eco-friendly crafting practice.
If you're feeling adventurous, you can also experiment with different additives to your DIY paper. Consider incorporating:
- Food Coloring: Add vibrant colors to your paper pulp for a personalized touch.
- Glitter: For a bit of sparkle, mix in some glitter before it dries.
- Herbs or Flowers: Adding dried herbs or flower petals can create a beautiful, textured effect.
When it comes to achieving the right weight for your DIY paper, aim for something that feels substantial yet is still flexible. A good rule of thumb is to make your paper around 80-120 gsm (grams per square meter). This weight will provide a sturdy base for your brush pen calligraphy while preventing ink bleed-through.
Lastly, don't be afraid to experiment with different finishes. After creating your paper, consider applying a light coat of clear acrylic spray to seal it. This will not only protect your artwork but also give it a polished look. Overall, DIY paper options can open up a world of creativity and customization for your brush pen calligraphy projects!
Q: Can I use any type of paper for brush pen calligraphy?
A: While you can technically use any paper, smoother surfaces work best to achieve clean lines and prevent ink bleeding. Experimenting with different types can yield interesting results!
Q: How do I prevent my brush pen from bleeding through the paper?
A: Choosing paper with a higher weight and a smooth finish will help minimize bleed-through. Also, let the ink dry completely before handling the paper.
Q: Is it worth making my own paper for calligraphy?
A: Absolutely! DIY paper can be a fun and creative process, allowing you to customize textures and colors to suit your style while saving money.

Basic Calligraphy Techniques
When it comes to calligraphy, mastering the basic strokes is akin to learning the ABCs of writing. Think of these strokes as the foundation of a house; without a solid base, everything built on top is at risk of collapsing. The beauty of calligraphy lies in its fluidity and grace, and understanding these fundamental techniques will set you on a path to creating stunning letterforms.
Start with the upstroke, which is light and delicate, almost like a whisper on the page. This stroke is crucial because it teaches you control and precision. Next, practice the downstroke, which is heavier and more pronounced. The contrast between these two strokes is what gives calligraphy its characteristic flair. You can visualize this contrast as the difference between a gentle breeze and a strong gust of wind.
In addition to these strokes, there are several key techniques that every budding calligrapher should familiarize themselves with:
- Pressure Control: Learning to apply varying pressure on your brush pen will help you achieve those beautiful thick and thin lines that are so iconic in calligraphy.
- Angle and Posture: The angle at which you hold your brush pen can drastically change the look of your letters. Experiment with different angles to find what feels comfortable for you.
- Consistency: Strive for consistency in your strokes. This doesn’t mean every letter has to look identical, but they should share a similar style and flow.
Another essential technique is letter spacing. Just like a well-composed piece of music, the spacing between each letter can affect the overall harmony of your work. Too close, and it feels cramped; too far apart, and it loses its connection. Practicing with guidelines can help you maintain even spacing as you develop your style.
Lastly, don’t underestimate the power of practice sheets. These can be your best friends as you work on refining your skills. You can create your own or find numerous templates online tailored for brush pen calligraphy. Use them to practice your strokes, letters, and even entire words until you feel confident enough to venture into freehand writing.
In conclusion, mastering these basic calligraphy techniques will not only improve your skills but also boost your confidence as an artist. Remember, every expert was once a beginner, and the journey is just as important as the destination. So grab your brush pen, find a comfy spot, and let your creativity flow!
Q: How long does it take to learn basic calligraphy techniques?
A: The time it takes varies for everyone. Some may pick it up in a few weeks, while others may take months. Consistent practice is key!
Q: What type of brush pen is best for beginners?
A: A medium-sized brush pen with a flexible tip is often recommended for beginners. It allows for a good range of strokes without being too difficult to control.
Q: Can I use regular paper for practicing calligraphy?
A: While you can use regular paper, it’s best to use paper designed for brush pens to prevent ink bleed and ensure smooth strokes.
Advanced Calligraphy Styles
Once you've got the basics down, it's time to unleash your creativity and dive into the world of . Imagine transforming simple letters into stunning works of art that capture the eye and evoke emotion. With brush pens, the possibilities are endless! You can create everything from elegant scripts to bold, modern designs that reflect your unique personality.
One of the most popular styles in this realm is modern calligraphy. This style breaks away from traditional rules, allowing artists to express themselves freely. Think of it as the rebellious teenager of the calligraphy world—it's all about personal expression and flair! To develop your own modern calligraphy style, start by practicing the basic strokes and then experiment with variations in size, slant, and embellishments. Don't be afraid to mix and match different letterforms or add your personal touch with flourishes and swirls.
Speaking of flourishes, they are like the cherry on top of your calligraphy sundae! Flourishing techniques add a level of sophistication and elegance to your work. These decorative elements can range from simple loops to intricate designs that frame your lettering. To master flourishing, practice drawing them separately before integrating them into your lettering. You can think of flourishes as the jewelry of calligraphy—just the right amount can enhance your overall piece, but too much can overshadow your main message.
As you delve deeper into advanced styles, you might want to explore brush lettering techniques. This style emphasizes the natural strokes of the brush pen, allowing for beautiful transitions between thick and thin lines. The key here is to maintain a consistent pressure while writing, which can be challenging but rewarding. Remember, the beauty of brush lettering lies in its fluidity and organic feel, so embrace the imperfections that come with it.
To help you visualize these advanced styles, consider the following table that outlines some popular techniques and their characteristics:
| Technique | Description |
|---|---|
| Modern Calligraphy | Free-form style that allows for personal expression and creativity. |
| Flourishing | Decorative elements that enhance letters, adding elegance and style. |
| Brush Lettering | Focuses on thick and thin strokes created by varying pressure on the brush pen. |
Ultimately, the journey into advanced calligraphy styles is about experimentation and finding what resonates with you. Don’t hesitate to try out different techniques, combine styles, and even incorporate other artistic elements like watercolor or ink splashes. The more you practice, the more your unique style will emerge. So grab your brush pens, let your creativity flow, and watch as your calligraphy transforms into a captivating art form!
- What is the best way to practice advanced calligraphy styles? The best way is to set aside dedicated time for practice, use reference materials, and focus on one technique at a time.
- Can I use any brush pen for advanced calligraphy styles? While many brush pens can work, it's best to choose one that suits your style and offers the flexibility you need.
- How do I develop my own unique calligraphy style? Experiment with different techniques, combine elements from various styles, and don’t be afraid to make mistakes along the way.

Modern Calligraphy
Modern calligraphy is like a breath of fresh air in the world of lettering. Imagine taking the elegant strokes of traditional calligraphy and infusing them with a contemporary twist. It’s not just about following strict rules; it’s about expressing your personality and creativity through every curve and line. In modern calligraphy, the possibilities are endless, and that’s what makes it so exciting!
One of the key aspects of modern calligraphy is its freedom of style. Unlike traditional calligraphy, which often adheres to specific scripts and formats, modern calligraphy invites artists to play with various techniques and styles. You might find yourself blending different scripts, experimenting with thickness and thinness in your strokes, or even incorporating elements like watercolor and florals into your designs. This is where your imagination can truly run wild!
To get started with modern calligraphy, you’ll want to focus on a few essential techniques. First, consider your brush pen. The flexibility of the brush tip allows for dynamic strokes, which are crucial in achieving that beautiful contrast between thick downstrokes and thin upstrokes. Practice is vital here; start with basic strokes to get comfortable with the pen's movement. Once you have the hang of it, try writing out the alphabet, paying attention to how each letter connects and flows into the next.
Another important element is spacing. Modern calligraphy often embraces a more casual and organic feel, allowing for varying distances between letters and words. This can create a more relaxed and artistic appearance, which is perfect for invitations, greeting cards, or even wall art. Don’t be afraid to let your letters breathe! Play around with the spacing until it feels just right.
Incorporating flourishes is another fantastic way to add personality to your modern calligraphy. Flourishes can be simple swirls or elaborate designs that enhance the overall look of your lettering. They can be added to the beginning or end of letters, or even as decorative elements around your text. Remember, the key is to keep it balanced—too many flourishes can overwhelm your design, so choose them wisely!
Lastly, let’s talk about color. Modern calligraphy opens the door to using vibrant hues and even metallics. Instead of sticking to traditional black ink, why not experiment with pastels, bold colors, or even gold and silver? The right color palette can elevate your work from ordinary to extraordinary. Just be sure to choose colors that complement each other and fit the theme of your project.
In summary, modern calligraphy is all about self-expression and creativity. It encourages you to break free from convention and explore your unique style. So grab your brush pen, some paper, and let your imagination take flight! Whether you’re creating personalized gifts, stunning invitations, or simply practicing for fun, modern calligraphy is a rewarding and enjoyable art form that anyone can master with a little patience and practice.
Q: Do I need special tools to start modern calligraphy?
A: While you can use any brush pen, it's best to choose one with a flexible tip. Additionally, good quality paper will help prevent bleeding and make your strokes smoother.
Q: How long does it take to learn modern calligraphy?
A: The time it takes varies from person to person. With consistent practice, you can see improvements in just a few weeks, but mastering the art can take months or even years!
Q: Can I use modern calligraphy for digital designs?
A: Absolutely! Many artists create digital calligraphy using tablets and design software. You can also scan your hand-lettered pieces and edit them digitally.
Flourishing Techniques
Flourishing techniques in calligraphy can transform your lettering from simple to stunning! Think of flourishing as the cherry on top of your calligraphy sundae; it adds that extra flair that captivates the viewer's eye. Flourishing involves adding decorative strokes and embellishments to your letters, which can elevate your overall design and make your work truly unique. The beauty of flourishing lies in its ability to convey emotion and artistry, enhancing the message behind your words.
To start with flourishing, it’s essential to have a solid grasp of basic strokes. Once you feel comfortable with your brush pen, you can begin to incorporate flourishes into your letters. The key is to practice these techniques regularly until they become second nature. You might want to focus on specific letters first, such as 'f', 'h', or 'g', which lend themselves well to embellishments. As you practice, try to visualize the flow of your pen and how each stroke interacts with the others.
Here are some common flourishing techniques you can explore:
- Swirls: These are simple curves that can be added to the ends of letters, creating a sense of movement.
- Loops: Incorporating loops can add a playful touch to your lettering, especially in cursive styles.
- Lines and Dots: Adding small lines or dots can create a delicate, intricate look that enhances your design.
When practicing your flourishes, it’s helpful to keep a few tips in mind:
- Start Slow: Don’t rush your strokes. Take your time to ensure each flourish is deliberate and precise.
- Use Light Pressure: Varying pressure can create beautiful contrasts in thickness, adding depth to your flourishes.
- Experiment: Don’t be afraid to try different styles of flourishes. Find what feels right for you and your artistic voice.
As you grow more comfortable with these techniques, consider how they can be integrated into your projects. Whether you’re addressing envelopes, creating invitations, or designing personalized gifts, flourishing can add a touch of elegance that makes your work stand out. Remember, the goal is to enhance your lettering without overwhelming it. Balance is key!
To inspire your flourishing journey, take a look at some examples:
| Flourishing Technique | Description | Best Used With |
|---|---|---|
| Swirls | Curved lines that add movement. | Elegant scripts |
| Loops | Playful curves that enhance letters. | Cursive styles |
| Lines and Dots | Small embellishments for detail. | Any style |
In conclusion, mastering flourishing techniques can significantly enhance your brush pen calligraphy. With practice and creativity, you can develop your own unique style that reflects your personality and artistic vision. So grab your brush pen, let your imagination run wild, and start adding those beautiful flourishes to your work!
Q: What is flourishing in calligraphy?
A: Flourishing refers to the decorative strokes and embellishments added to letters in calligraphy, enhancing their visual appeal.
Q: How can I improve my flourishing techniques?
A: Regular practice, starting slow, and experimenting with different styles can help you improve your flourishing skills.
Q: Are there specific letters that are better for flourishing?
A: Yes, letters like 'f', 'h', and 'g' are great starting points for incorporating flourishes.
Q: Can I use flourishing in digital calligraphy?
A: Absolutely! Flourishing can be adapted for digital calligraphy using graphic design software.
Practice Strategies
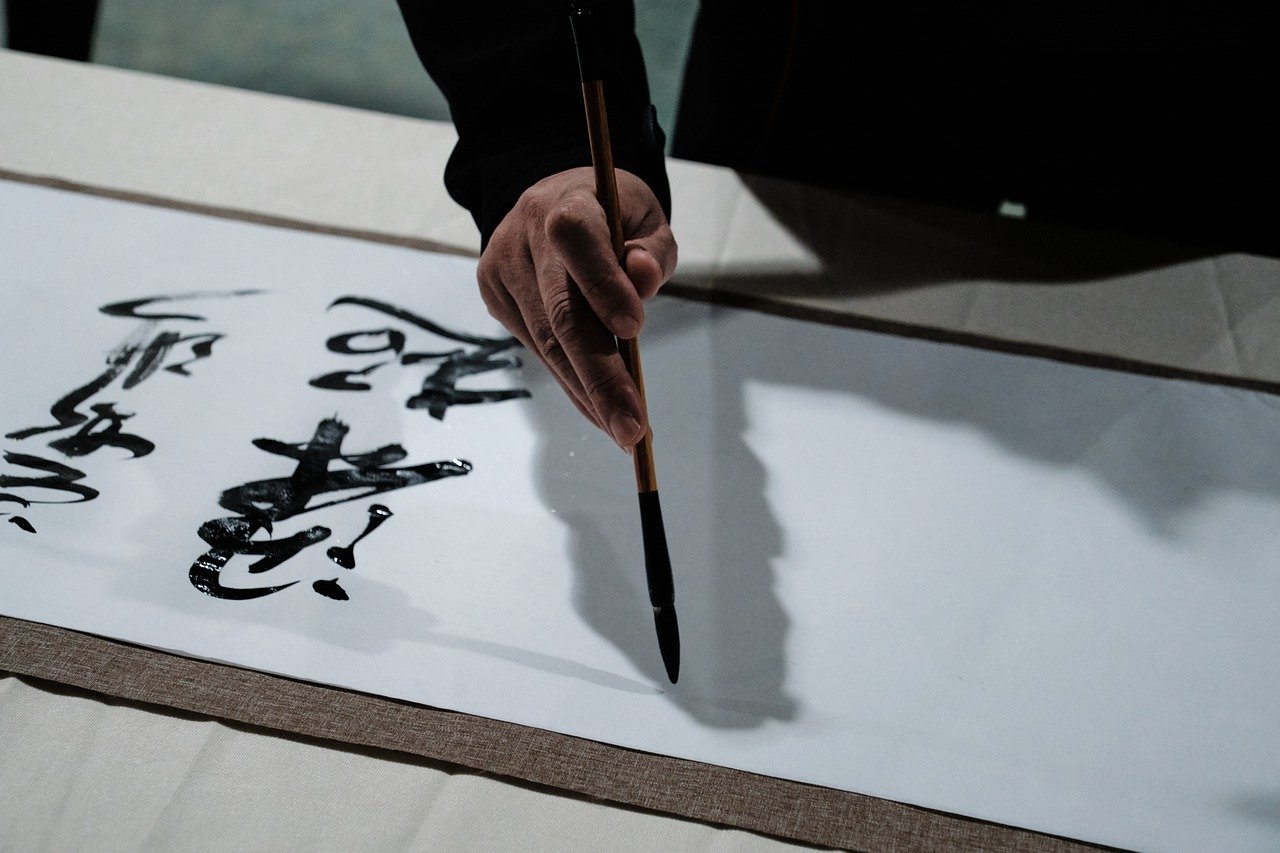
When it comes to mastering calligraphy with brush pens, the key ingredient is consistent practice. Just like learning to ride a bike or play a musical instrument, the more you practice, the better you become. But how do you turn practice into progress? It starts with a well-structured approach that not only keeps you motivated but also helps you track your improvements. Think of your practice sessions as mini-workouts for your artistic muscles!
First and foremost, setting a practice schedule is crucial. This doesn’t have to be a rigid timetable; rather, it should be a flexible plan that fits into your daily routine. For instance, you might decide to practice for 30 minutes every morning before work or dedicate a couple of hours on weekends. The goal is to create a habit. You could even create a simple calendar to mark your practice days, which can serve as a visual reminder of your commitment.
Next, consider utilizing online resources. The internet is a treasure trove of information, offering countless tutorials, videos, and communities that cater to calligraphy enthusiasts. Websites like YouTube have numerous channels dedicated to brush pen techniques, while social media platforms like Instagram and Pinterest are filled with inspiring artworks and tips from fellow calligraphers. Joining online forums or groups can also provide you with valuable feedback and encouragement, making your practice sessions more enjoyable.
Another effective strategy is to incorporate a variety of practice exercises into your routine. Instead of just writing the same letter repeatedly, try mixing it up! You could practice:
- Basic strokes: These are the building blocks of calligraphy. Spend time mastering different strokes before moving on to full letters.
- Letterforms: Focus on individual letters, ensuring each one is consistent in size and style.
- Words and phrases: Once you feel confident with letters, start connecting them to form words.
- Quotes and sayings: Choose your favorite quotes to practice longer phrases, which can also serve as beautiful decor for your home.
Finally, don’t forget to keep a progress journal. Documenting your journey can be incredibly motivating. Take photos of your work, note down what techniques you've practiced, and reflect on what you’ve learned. This not only helps you see how far you’ve come but also allows you to identify areas that need improvement. After all, every artist started somewhere, and tracking your growth can be a source of inspiration.
Q: How often should I practice calligraphy with brush pens?
A: Ideally, aim for at least 20-30 minutes a day. Consistency is key, so find a schedule that works for you!
Q: What if I don’t see improvement?
A: Improvement takes time! Focus on specific techniques and be patient with yourself. Consider seeking feedback from online communities.
Q: Can I use any type of paper for practice?
A: While you can practice on any paper, using smooth, bleed-proof paper will yield the best results and help you develop your technique.
Q: Are there any online resources for beginners?
A: Absolutely! Websites like Skillshare, YouTube, and various calligraphy blogs offer fantastic tutorials tailored for beginners.

Setting a Practice Schedule
Creating a structured practice schedule is crucial for anyone looking to enhance their calligraphy skills. Think of it as setting a date with your creativity. Just like you wouldn’t skip a meeting with a friend, you shouldn’t skip your calligraphy sessions! By dedicating specific times to practice, you not only make progress but also develop a habit that will lead to mastery over time.
Start by assessing how much time you can realistically dedicate to your calligraphy practice each week. Even if it’s just 15-30 minutes a day, consistency is key. You might want to block out time during your morning coffee or right before bed. The important thing is to find a time that works best for you and stick to it. Consider creating a simple table to track your practice sessions:
| Date | Duration | Focus Area |
|---|---|---|
| Monday | 30 mins | Basic Strokes |
| Wednesday | 45 mins | Modern Calligraphy |
| Friday | 30 mins | Flourishing Techniques |
As you create your schedule, it’s beneficial to set specific goals for each session. For example, one day you might focus on mastering the upstrokes and downstrokes, while another day could be dedicated to experimenting with new styles. This approach not only keeps your practice fresh and exciting but also ensures that you’re continually challenging yourself.
Moreover, don’t forget to incorporate breaks into your schedule. Just like any other skill, your hand and mind need time to rest and rejuvenate. A good rule of thumb is to practice for 25 minutes and then take a 5-minute break. During this time, stretch your hands, relax your eyes, and let your mind wander. You’d be surprised how much a little break can enhance your creativity!
Lastly, consider joining a calligraphy community or finding a practice buddy. Sharing your experiences and progress with others can be incredibly motivating. Plus, you can exchange tips, tricks, and feedback that can help you grow. Remember, the journey of mastering calligraphy is as beautiful as the art itself, so enjoy every moment of your practice!
- How often should I practice calligraphy? Aim for at least 15-30 minutes a day, but consistency is more important than duration.
- What if I miss a practice session? Don't stress! Just pick up where you left off and continue with your schedule.
- Can I practice without a specific goal? While it’s okay to have free practice days, setting goals can help you track progress and stay motivated.
- What resources can I use to improve my skills? There are plenty of online tutorials, videos, and community forums dedicated to calligraphy that can be incredibly helpful.
Utilizing Online Resources
In today's digital age, the internet is a treasure trove of resources for anyone looking to enhance their calligraphy skills using brush pens. Whether you are a beginner just dipping your toes into the world of calligraphy or an advanced artist seeking to refine your techniques, online resources can provide invaluable support. From instructional videos to interactive forums, the possibilities are endless. Have you ever wondered how you can leverage these resources effectively? Let’s dive into some of the best ways to utilize online tools to boost your calligraphy journey!
First, consider exploring video tutorials. Platforms like YouTube host countless channels dedicated to calligraphy. These videos often break down techniques step-by-step, making it easier to follow along. You can pause, rewind, and practice at your own pace—an advantage that traditional classes can’t always offer. Look for channels that resonate with your style; some focus on modern calligraphy, while others may dive into more traditional techniques. Here’s a quick list of popular YouTube channels to check out:
- Calligraphy Masters - A hub for various styles and techniques.
- The Postman’s Knock - Perfect for modern calligraphy enthusiasts.
- Kristin’s Calligraphy - Offers a mix of tutorials and tips for all skill levels.
Next up, don't underestimate the power of online communities. Websites like Reddit and Facebook host groups where calligraphy lovers gather to share their work, ask for feedback, and exchange tips. Engaging with these communities can provide motivation and inspiration. You might find a fellow artist who shares your passion and can offer personalized advice based on their experiences. Remember, collaboration can often lead to breakthroughs in your own artistic journey!
For those who prefer structured learning, consider enrolling in online courses. Websites like Skillshare and Udemy offer comprehensive courses that cover everything from the basics of brush pen handling to advanced flourishing techniques. These courses often come with downloadable resources, allowing you to practice alongside the lessons. Investing in a course could be the catalyst you need to take your skills to the next level. Here’s a quick comparison of some popular platforms:
| Platform | Course Variety | Price Range | Skill Level |
|---|---|---|---|
| Skillshare | Beginner to Advanced | Subscription-based | All Levels |
| Udemy | Wide Range | Per Course | All Levels |
| CreativeLive | Focused on Arts | Per Course | All Levels |
Lastly, take advantage of social media platforms like Instagram and Pinterest. These platforms are not only great for inspiration but also for connecting with other calligraphers. You can follow hashtags such as #brushpen or #moderncalligraphy to discover a wealth of creative ideas and techniques. Engaging with artists through comments or direct messages can lead to valuable insights and even friendships!
In conclusion, the internet is a powerful ally in your calligraphy journey. By utilizing video tutorials, participating in online communities, enrolling in courses, and exploring social media, you can significantly enhance your skills. Remember, every artist was once a beginner, and the key to improvement lies in your willingness to learn and practice. So, what are you waiting for? Dive into the vast ocean of online resources and watch your calligraphy skills flourish!
Q: What are the best online resources for beginners?
A: Beginners can start with YouTube tutorials, online forums, and beginner courses on platforms like Skillshare or Udemy.
Q: How can I find a community of calligraphy enthusiasts?
A: Look for groups on social media platforms like Facebook or Reddit. Engaging in these communities can provide support and inspiration.
Q: Are online courses worth the investment?
A: Yes! Online courses often provide structured learning and valuable resources that can help you improve your skills significantly.
Frequently Asked Questions
- What are brush pens, and how do they differ from regular pens?
Brush pens are unique writing tools that feature a flexible brush tip, allowing for varying line thickness based on pressure. Unlike regular pens, which have a fixed nib, brush pens give you the ability to create both fine and bold strokes, making them perfect for calligraphy.
- What type of paper should I use for brush pen calligraphy?
The best paper for brush pen calligraphy is smooth and has a weight of at least 90 gsm. This helps to ensure that the ink flows well and doesn’t bleed through. Look for papers specifically designed for calligraphy or watercolor, as they typically have the right texture.
- Can I use any brush pen for calligraphy?
While you can use various brush pens for calligraphy, it's best to choose one that has a flexible tip and is designed for lettering. Some popular options include water-based and alcohol-based brush pens, as they offer different effects and ink qualities.
- How can I improve my calligraphy skills quickly?
Improvement comes with consistent practice. Try setting a dedicated practice schedule, focusing on basic strokes, and gradually introducing advanced techniques. Utilizing online resources, such as tutorials and communities, can also provide valuable tips and motivation.
- What are some common mistakes beginners make in calligraphy?
Beginners often rush through their practice, neglecting the fundamentals. Common mistakes include inconsistent pressure, improper grip, and not paying attention to spacing. Taking your time to master each stroke will lead to better results.
- Is it necessary to invest in expensive brush pens?
Not necessarily! While high-quality brush pens can enhance your experience, there are many affordable options that work well for beginners. Start with a few budget-friendly pens to see what you enjoy before making a larger investment.
- How can I create my own calligraphy-friendly paper?
You can make DIY calligraphy paper by using smooth cardstock or printer paper and applying a light coating of clear gesso. This creates a smoother surface that allows the ink to glide easily without bleeding.
- What is modern calligraphy, and how is it different from traditional calligraphy?
Modern calligraphy blends traditional techniques with a contemporary twist, allowing for more freedom in style and expression. Unlike traditional calligraphy, which often follows strict rules, modern calligraphy encourages creativity and personal flair.
- Are there specific flourishing techniques I should learn?
Yes! Some popular flourishing techniques include loops, swirls, and embellishments that enhance your lettering. Start with basic flourishes and gradually incorporate more complex designs as you gain confidence in your skills.


