Guide to Different Drawing Tools and Their Uses
Welcome to the fascinating world of drawing tools! Whether you're an aspiring artist or a seasoned designer, understanding the various tools at your disposal can significantly enhance your creativity and precision. Drawing is not just about putting pencil to paper; it's about expressing ideas, emotions, and stories in a visual format. Each tool has its own unique characteristics, and knowing how to use them effectively can lead to stunning works of art. In this guide, we will explore the essential drawing tools, their features, applications, and benefits, ensuring that you have the knowledge to elevate your artistic journey.
Pencils are the backbone of any artist's toolkit. These versatile instruments come in a range of hardness levels, from soft to hard, allowing for a variety of techniques. Soft pencils (like 2B and 4B) are perfect for shading and creating rich, dark lines, while harder pencils (like H and 2H) are excellent for fine details and lighter strokes. The beauty of pencils lies in their ability to create everything from delicate sketches to bold, expressive lines. Artists can easily erase and modify their work, making pencils ideal for both beginners and professionals. The tactile experience of drawing with a pencil can be incredibly satisfying, almost like dancing on the page!
When it comes to dramatic effects, charcoal takes the cake! This medium is known for its rich, deep blacks and unique texture, allowing artists to create striking contrasts and expressive strokes. Charcoal comes in various forms, including compressed, vine, and pencil. Each type offers different textures and applications. For instance, compressed charcoal is great for bold lines, while vine charcoal is softer and perfect for subtle shading. Techniques like smudging and blending can yield breathtaking results, giving your artwork a sense of depth and movement. Imagine creating a moody landscape or a dynamic portrait with the fluidity that only charcoal can provide!
Precision and control are the hallmarks of ink pens. These tools are essential for artists who crave detail in their work. Ink pens come in various types, including fine liners, brush pens, and fountain pens, each offering distinct styles and effects. Fine liners are fantastic for intricate line work, while brush pens allow for expressive strokes and varying line widths. The beauty of ink is that it dries quickly, which means you can layer and build up textures without worrying about smudging. Whether you're illustrating a comic book or crafting a detailed botanical drawing, ink pens can help you achieve stunning results with clarity and finesse.
For those who love vibrant colors, markers are the ultimate choice! These tools are perfect for creating bold illustrations that pop off the page. Markers come in various types, such as alcohol-based, water-based, and permanent, each with its unique properties. Alcohol-based markers are known for their smooth application and blending capabilities, while water-based markers are easier to clean and work well for layering. One of the best things about markers is their versatility; you can use them for everything from graphic design to fashion illustrations. With a little practice, you can master techniques like blending and layering to create stunning visual effects.
Pastels are a delightful medium known for their rich colors and soft texture. They come in various types, including oil pastels and soft pastels, each offering unique blending capabilities. Soft pastels are perfect for creating soft, dreamy effects, while oil pastels provide a more vibrant and glossy finish. The joy of working with pastels lies in their ability to layer and blend colors seamlessly, allowing artists to create depth and dimension in their artwork. Imagine painting a sunset where the colors melt into each other, creating a breathtaking visual experience!
In today's digital age, drawing tablets have revolutionized the way artists create. These devices offer precision and flexibility that traditional tools can't match. With features like pressure sensitivity and customizable brushes, digital drawing tablets allow artists to replicate the feeling of traditional media while enjoying the benefits of digital technology. They are compatible with various software programs, making them an essential tool for modern artists and designers. Whether you're sketching, painting, or creating intricate illustrations, a digital drawing tablet can enhance your workflow and unleash your creativity.
Brushes are not just for painting; they can also be used in drawing to create stunning effects. There are various types of brushes, including flat, round, and filbert, each serving different purposes. The material of the brush—whether synthetic or natural—also impacts the texture and finish of your work. Brushes can be used to create everything from fine lines to broad strokes, allowing for a range of artistic expression. Imagine using a soft brush to create delicate clouds in a landscape or a stiff brush to add texture to a bold abstract piece!
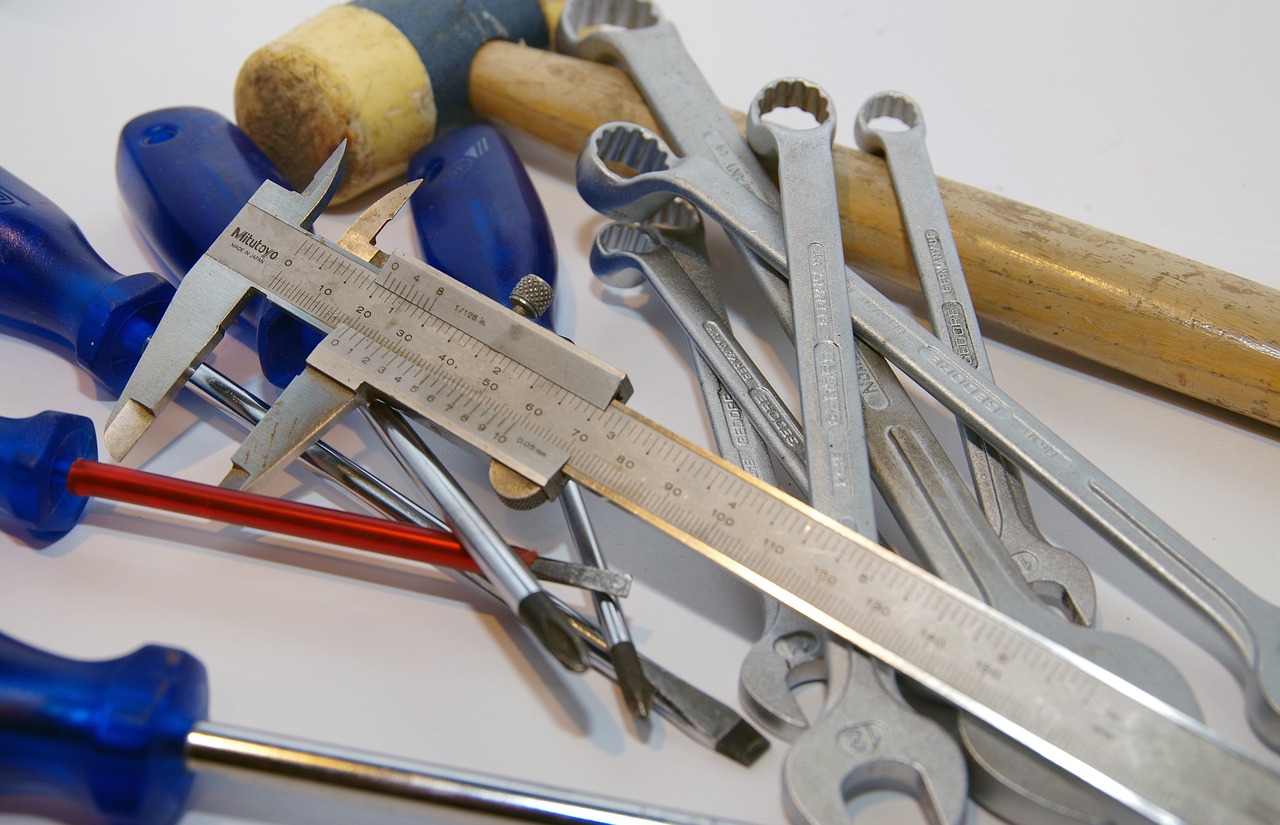
For those who appreciate precision, rulers and compasses are indispensable tools in technical drawing. They help artists create accurate shapes and lines, especially in fields like architecture and engineering. Rulers can be used for straight lines, while compasses are perfect for drawing circles and arcs. These tools ensure that your artwork maintains a level of accuracy and professionalism that is crucial in technical illustrations. Think of them as the backbone of precision in your artistic toolkit!
No drawing toolset is complete without erasers! These handy tools play a vital role in the drawing process, allowing artists to correct mistakes or create highlights. There are various types of erasers, including kneaded, vinyl, and gum erasers, each with specific uses. Kneaded erasers are great for lifting graphite without damaging the paper, while vinyl erasers are perfect for clean, sharp corrections. Understanding how to use erasers effectively can elevate your artwork, giving you the freedom to experiment and refine your creations.
Q: What is the best drawing tool for beginners?
A: Pencils are often recommended for beginners due to their versatility and ease of use. They allow for experimentation without the commitment of permanent mediums.
Q: Can I use digital drawing tablets for traditional art techniques?
A: Absolutely! Many digital drawing tablets come with features that replicate traditional techniques, allowing you to blend and layer colors just like you would with physical mediums.
Q: How do I choose the right type of charcoal for my artwork?
A: It depends on the effect you want to achieve. If you’re looking for bold lines, compressed charcoal is ideal, while vine charcoal offers softer, more subtle strokes.
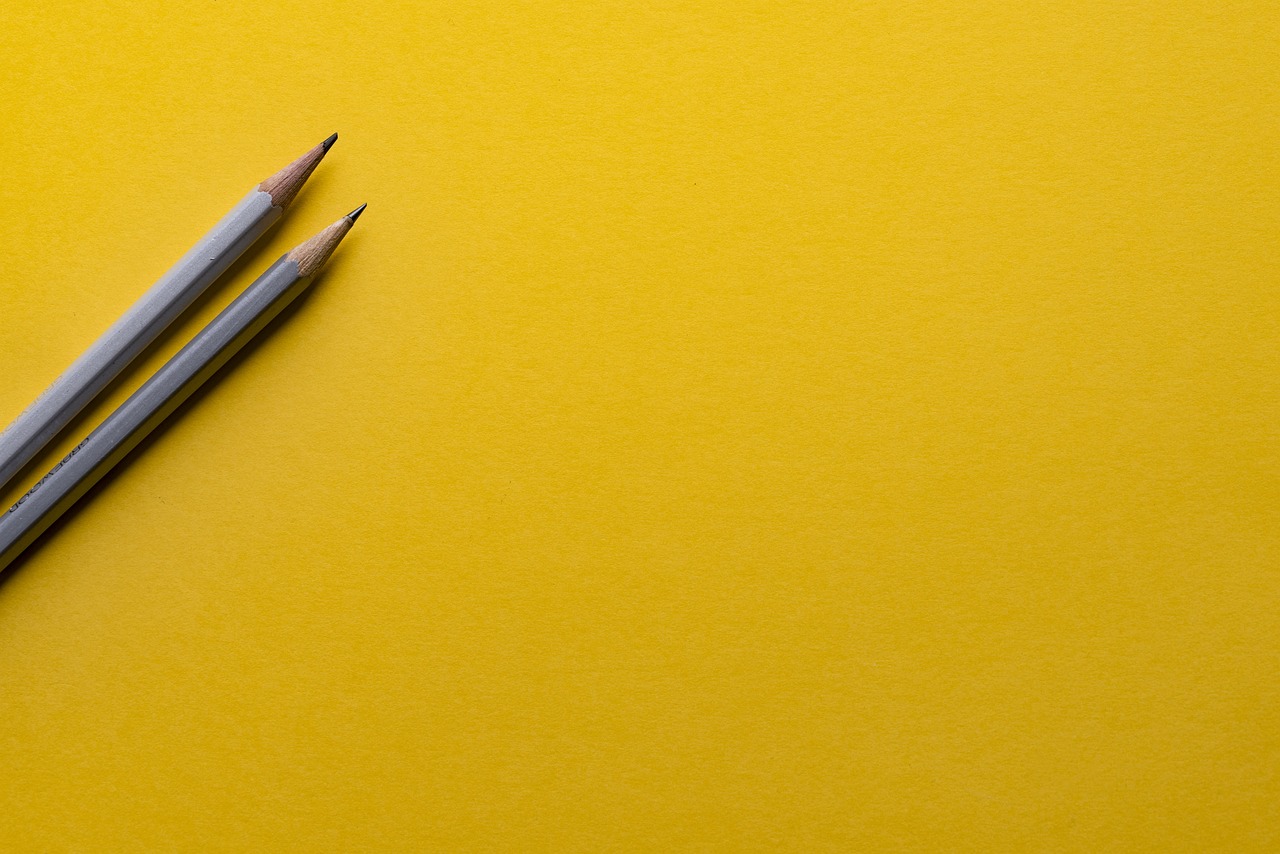
Pencils
Pencils are the foundation of drawing tools, and their significance in the art world cannot be overstated. Whether you're a seasoned artist or just starting out, the humble pencil is likely your first companion in the journey of creativity. The beauty of pencils lies in their versatility and the range of hardness available, which allows artists to achieve a multitude of effects. From delicate sketches to bold, expressive lines, pencils can cater to various styles and techniques.
One of the key aspects that make pencils so appealing is their portability. You can easily carry a sketchbook and a few pencils wherever you go, making it convenient to capture inspiration on the fly. Imagine sitting in a park, surrounded by nature, and having the ability to sketch the scene in front of you with just a pencil and paper. This accessibility is what draws many artists to pencils as their primary drawing tool.
When it comes to choosing a pencil, understanding the grading system is essential. Pencils are categorized based on their hardness and darkness, ranging from H (hard) to B (black). Here’s a quick breakdown:
| Grade | Characteristics |
|---|---|
| H | Harder lead, produces lighter marks, ideal for fine details. |
| B | Softer lead, produces darker marks, great for shading and expressive lines. |
| HB | Balanced hardness and darkness, perfect for general use. |
Choosing the right pencil can significantly impact your drawing experience. For instance, H pencils are excellent for detailed work and precise lines, while B pencils are perfect for shading and creating depth. Many artists often keep a range of pencils at their disposal to switch between different techniques effortlessly. The tactile feel of the pencil against the paper can also influence creativity, as it allows for a personal connection to the artwork.
Moreover, the techniques you employ with pencils can vary widely. Sketching is often the first step in the drawing process, where artists lay down the basic shapes and forms. As you progress, you can refine your work by adding details and shading. Techniques like hatching and cross-hatching allow artists to create texture and depth, transforming a simple sketch into a dynamic piece of art.
For those who enjoy experimenting, colored pencils offer an exciting twist. They combine the precision of traditional pencils with a splash of color, opening up new avenues for creativity. Whether you prefer the vibrant hues of wax-based colored pencils or the more subdued tones of oil-based ones, they can be blended and layered to produce stunning effects.
In conclusion, pencils are not just tools; they are a gateway to creativity. Their ability to adapt to various styles and techniques makes them indispensable for artists of all levels. So, the next time you pick up a pencil, remember that you hold a powerful instrument that can bring your imagination to life.
- What is the difference between H and B pencils?
H pencils are harder and create lighter lines, while B pencils are softer and produce darker lines. - Can I use colored pencils for detailed work?
Absolutely! Colored pencils can be used for both detailed and expressive artwork. - How do I choose the right pencil for my drawing?
Consider the style of your artwork; for detailed work, use H pencils, and for shading, opt for B pencils.
Charcoal
Charcoal is one of the most expressive and versatile drawing mediums available to artists. Its ability to produce rich, deep blacks and a wide range of tonal values makes it a favorite among those who seek to create dramatic effects in their artwork. When you hold a piece of charcoal in your hand, it feels like you have the power to bring your imagination to life with every stroke. But what exactly makes charcoal such a unique tool in the artist's arsenal?
Firstly, let's talk about the different types of charcoal. There are primarily two types: vine charcoal and compressed charcoal. Vine charcoal is made from charred twigs and is known for its soft texture and easy blendability. It’s perfect for sketching and creating light, delicate lines. On the other hand, compressed charcoal is denser and produces darker lines, making it ideal for more defined and bold work. Each type has its own unique characteristics and can be used in various ways to achieve different effects.
| Type of Charcoal | Characteristics | Best Used For |
|---|---|---|
| Vine Charcoal | Soft, easy to blend, light marks | Sketching, preliminary drawings |
| Compressed Charcoal | Dense, dark marks, less blendable | Final drawings, bold contrasts |
| Charcoal Pencils | Controlled, precise lines | Detail work, fine lines |
Now, let’s dive into some techniques that can elevate your charcoal drawing skills. One popular method is the layering technique, where you build up layers of charcoal to create depth and texture. Start with a light application of vine charcoal for your initial sketch, and then gradually add compressed charcoal for darker areas. This creates a beautiful contrast that can really make your artwork pop!
Another technique to consider is the smudging technique. Using your fingers, a blending stump, or even a piece of cloth, you can smudge the charcoal to create soft transitions between light and dark areas. This is especially effective for creating realistic skin tones or atmospheric backgrounds. Just remember, with great power comes great responsibility—too much smudging can lead to a muddy look, so practice moderation!
Charcoal also allows for creative expression in ways that other mediums may not. The spontaneity of charcoal can lead to unexpected results, which can be both thrilling and inspiring. You might find yourself in a flow state, where your hand moves almost independently, guided by your intuition rather than conscious thought. This can result in artwork that feels alive and dynamic, capturing the essence of your subject in a way that feels authentic.
However, working with charcoal does come with its challenges. It can be quite messy, leaving behind dust and smudges that can ruin your work if you’re not careful. To mitigate this, consider using a fixative spray once you’ve completed your drawing. This will help set the charcoal and prevent it from smudging or fading over time. Additionally, keep a damp cloth handy to clean up any accidental marks on your drawing surface.
In conclusion, charcoal is a powerful and expressive medium that can enhance your artistic journey. Whether you are a seasoned artist or just starting out, experimenting with charcoal can open up new avenues for creativity. So grab some charcoal, unleash your imagination, and see where it takes you!
- What is the best paper to use with charcoal? Charcoal works best on textured paper that can hold the medium, such as charcoal paper or bristol board.
- Can I use charcoal for detailed work? Yes! Charcoal pencils are specifically designed for detailed work and can produce fine lines.
- How do I preserve my charcoal drawings? Use a fixative spray to protect your artwork from smudging and fading.
Ink Pens
When it comes to drawing, are like the trusty sidekick every artist wishes they had. Offering a level of precision and control that other tools can only dream of, these pens are indispensable for creating detailed illustrations and intricate designs. Whether you’re sketching the delicate petals of a flower or drafting a complex architectural blueprint, the right ink pen can make all the difference. But what exactly makes these pens so special?
Ink pens come in various types, each designed to cater to different artistic styles and techniques. For instance, fine liners are perfect for those who love crisp, clean lines. They are often used in comic book art and detailed illustrations, where every stroke counts. On the other hand, brush pens offer the flexibility of a brush with the convenience of a pen, allowing artists to create both thick and thin lines with a single stroke. This versatility is what makes them a favorite among calligraphers and those who enjoy hand lettering.
Let’s break down some popular types of ink pens and their uses:
| Type of Ink Pen | Features | Best For |
|---|---|---|
| Fine Liners | Thin, precise tips; available in various colors | Detailed illustrations, technical drawings |
| Brush Pens | Flexible brush-like tips; varying line thickness | Calligraphy, expressive artwork |
| Gel Pens | Smooth ink flow; vibrant colors | Creative doodles, journaling |
| Fountain Pens | Refillable; offers a classic writing experience | Sketching, writing, and journaling |
Using ink pens effectively requires a bit of practice, but once you get the hang of it, the results can be stunning. One popular technique is cross-hatching, where you layer lines in different directions to create depth and texture. This method can transform a simple drawing into a rich, dynamic piece of art. Additionally, blending different ink pen types can yield unique effects; for example, combining a fine liner for details with a brush pen for shading can create a visually striking contrast.
Another exciting aspect of ink pens is their compatibility with various surfaces. While traditional sketchbooks are a go-to, you can also experiment with watercolor paper, canvas, and even wood! Just remember that the type of ink used can affect the outcome, especially when combined with other mediums like watercolors. It’s like a dance between the ink and the surface – each step influences the final performance.
So, why should you choose ink pens over other drawing tools? Here are a few compelling reasons:
- Precision: Ink pens allow for incredibly detailed work.
- Variety: With so many types available, there’s an ink pen for every style.
- Accessibility: They’re widely available and relatively inexpensive.
- Portability: Easy to carry around, making them great for on-the-go artists.
In conclusion, ink pens are not just tools; they are extensions of your creativity. They empower you to express your ideas with clarity and precision, making them a must-have in any artist's toolkit. Whether you're a seasoned professional or just starting your artistic journey, investing in a quality set of ink pens can elevate your work to new heights. So grab your pens, unleash your imagination, and let the ink flow!
Q: What type of ink pen is best for beginners?
A: Fine liners are often recommended for beginners due to their ease of use and versatility. They allow for precise lines and are great for practicing basic techniques.
Q: Can I use ink pens on watercolor paper?
A: Yes, but be cautious! Make sure the ink is waterproof if you plan to add watercolors on top. Otherwise, the ink may bleed.
Q: How do I clean my ink pens?
A: Depending on the type, some ink pens can be cleaned with water, while others may require specific cleaning solutions. Always check the manufacturer's instructions.

Markers
Markers are not just simple coloring tools; they are vibrant, versatile instruments that can transform a blank canvas into a masterpiece. Whether you're a seasoned artist or just dabbling in creativity, markers offer an explosion of colors that can breathe life into your illustrations. Imagine wielding a tool that can produce everything from fine, intricate details to bold, sweeping strokes—this is the magic of markers!
There are various types of markers available, each designed for specific styles and techniques. For instance, permanent markers are perfect for bold outlines and vibrant colors that stand the test of time, while water-based markers allow for blending and layering, giving your artwork a softer touch. It's like having a whole toolbox at your fingertips! Here’s a quick rundown of some popular types:
| Type of Marker | Best For | Features |
|---|---|---|
| Permanent Markers | Bold outlines, permanent artwork | Water-resistant, quick-drying |
| Water-Based Markers | Blending, layering | Easily washable, vibrant colors |
| Alcohol-Based Markers | Professional illustrations, graphic design | Blendable, quick-drying, translucent |
| Brush Markers | Calligraphy, artistic strokes | Flexible brush tip, versatile techniques |
Using markers effectively involves understanding their unique properties. For example, the blending technique is essential for achieving smooth transitions between colors. You can create gradients by layering colors or using a colorless blender to soften the edges. It's almost like magic—watching colors meld together to create depth and dimension!
Additionally, layering is a powerful technique that can add richness to your artwork. Start with lighter colors and gradually build up to darker shades. This method not only enhances the vibrancy of your piece but also allows for corrections along the way. Remember, art is about exploration and experimentation—don't be afraid to try out new techniques!
Markers can also be used in various applications beyond traditional drawing. They are fantastic for graphic design, illustration, and even hand lettering. The versatility of markers means that you can use them in your sketchbook, on canvas, or even in mixed media projects. Think of them as your creative sidekick, always ready to help you express your ideas!
So, whether you're doodling in a notebook or working on a detailed illustration, markers can elevate your artwork to new heights. Embrace the vibrant world of markers and let your creativity flow! And remember, the only limit is your imagination.
- What type of markers are best for beginners?
Water-based markers are a great choice for beginners due to their ease of use and ability to blend. - Can I use markers on different surfaces?
Yes! Markers can be used on paper, canvas, and even some plastics, but always check the marker type for compatibility. - How do I prevent my markers from drying out?
Store markers horizontally and ensure the caps are tightly sealed after use to maintain their longevity.

Pastels
When it comes to creating artwork that bursts with color and texture, are truly a game changer. These wonderful tools, known for their vibrant hues and soft, blendable texture, allow artists to achieve stunning effects that are hard to replicate with other mediums. Whether you’re a seasoned professional or just starting out, pastels offer a unique way to express your creativity. They come in various forms, including soft pastels, hard pastels, and oil pastels, each with its own characteristics and applications.
Soft pastels are the most popular choice among artists due to their rich pigmentation and ease of blending. They glide smoothly across the paper, allowing for a soft, painterly effect that can transform a simple sketch into a vibrant masterpiece. On the other hand, hard pastels are firmer and offer more control, making them ideal for detailed work. They are perfect for creating fine lines and intricate details, which can be quite challenging with soft pastels. Then we have oil pastels, which are unique in their creamy texture and ability to create bold, vibrant colors that can be layered and blended.
The beauty of pastels lies in their versatility. They can be used on various surfaces, including textured paper, canvas, and even wood. The choice of surface can dramatically affect the outcome of your artwork. For instance, using a textured paper can enhance the blending capabilities of soft pastels, while a smoother surface might be better suited for hard pastels or oil pastels. Experimenting with different surfaces is key to discovering the full potential of pastels.
To get started with pastels, it's essential to understand a few techniques that can elevate your artwork:
- Blending: Use your fingers, blending stumps, or even a soft cloth to blend colors seamlessly.
- Layering: Build up layers of color to create depth and richness in your artwork.
- Scraping: For a unique texture, try scraping away some pastel to reveal the surface underneath.
As you dive into the world of pastels, don't forget about the importance of fixatives. These sprays can help set your work and prevent smudging, allowing you to preserve your masterpiece for years to come. However, be cautious with the amount you apply, as too much can dull the vibrant colors you worked hard to achieve.
In conclusion, pastels are more than just a drawing tool; they are a gateway to a world of creativity. Their ability to blend, layer, and produce stunning colors makes them a favorite among artists of all levels. So, grab your pastels, choose your surface, and let your imagination run wild!
- What are the different types of pastels? Soft pastels, hard pastels, and oil pastels are the main types, each with unique properties.
- Can I use pastels on any paper? While you can use pastels on various surfaces, textured paper often yields the best results.
- How do I preserve my pastel artwork? Using a fixative spray can help set your work and protect it from smudging.
- Are pastels suitable for beginners? Absolutely! Pastels are user-friendly and allow for easy blending, making them perfect for artists just starting out.
Digital Drawing Tablets
In the ever-evolving world of art, have emerged as game-changers, offering artists a blend of traditional techniques and modern technology. Imagine having a canvas that can instantly adapt to your creative whims—this is exactly what digital tablets provide! They come equipped with pressure-sensitive surfaces that mimic the feel of paper, allowing for a seamless transition from pencil to pixel.
One of the most exciting features of digital drawing tablets is their precision. With the ability to adjust brush sizes, opacity, and textures, artists can create intricate details that are often challenging to achieve with traditional media. Furthermore, the flexibility of these devices means you can easily undo mistakes, experiment with colors, and layer elements without the fear of ruining your work. It’s like having an endless supply of erasers and paint!
When choosing a digital drawing tablet, it's essential to consider your specific needs and preferences. Here’s a quick overview of the key features to look for:
| Feature | Description |
|---|---|
| Pressure Sensitivity | Allows for variations in line thickness based on how hard you press. |
| Screen Size | Affects your workspace; larger screens provide more room for detailed work. |
| Resolution | Higher resolution means better detail and clarity in your artwork. |
| Software Compatibility | Ensure the tablet works with your preferred art software. |
Additionally, many tablets come with their own software, which can be a fantastic way to get started. Programs like Adobe Photoshop, Corel Painter, and Procreate have become staples in the digital artist's toolkit, each offering unique features tailored to different styles of work. Whether you’re into illustration, graphic design, or even 3D modeling, there’s a digital drawing tablet that fits your artistic vision.
However, it's not just about the tools; it's about how you use them. Digital tablets encourage a different approach to creativity. For instance, the ability to zoom in and out allows artists to work on fine details and overall composition simultaneously, an advantage that traditional media simply can’t match. Plus, many tablets support customizable shortcuts, enabling you to streamline your workflow and focus more on creating rather than navigating menus.
In conclusion, digital drawing tablets have opened up a world of possibilities for artists and designers alike. They combine the tactile experience of drawing with the limitless potential of digital art, making them an essential tool in the modern artist’s arsenal. So, if you haven’t yet explored the realm of digital drawing, now is the time to dive in and unleash your creativity!
- What is the best digital drawing tablet for beginners?
For newcomers, tablets like the Wacom Intuos or Huion Inspiroy are often recommended due to their user-friendly interfaces and affordability.
- Do I need a special software to use a digital drawing tablet?
While many tablets come with their own software, popular programs like Adobe Photoshop and Clip Studio Paint are widely used and compatible with most tablets.
- Can I use a digital drawing tablet for purposes other than drawing?
Absolutely! Digital drawing tablets can be used for photo editing, graphic design, and even as a regular computer input device.
Brushes
When it comes to creating stunning artwork, are the unsung heroes of the painting world. They come in various shapes, sizes, and materials, each designed to produce different effects on your canvas. Think of brushes as the magic wands of artists; with the right flick of the wrist, they can transform a blank canvas into a vibrant masterpiece. Whether you're painting a delicate landscape or bold abstract art, the right brush can make all the difference.
Brushes are typically categorized based on their shape and bristle type. Here are some common types:
- Flat Brushes: Perfect for bold strokes and filling in large areas, these brushes have a rectangular shape that allows for even application of paint.
- Round Brushes: With a pointed tip, round brushes are great for detailed work and can be used for both fine lines and broader strokes.
- Filbert Brushes: These brushes have an oval shape and combine the qualities of flat and round brushes, making them versatile for blending and softening edges.
- Fan Brushes: Ideal for creating texture, fan brushes can mimic natural elements like grass or fur, adding a unique flair to your artwork.
Each type of brush serves a specific purpose, but the magic really happens when you learn how to use them effectively. For instance, a flat brush can create sharp, clean lines, while a round brush can add intricate details to your work. Experimentation is key! Don’t be afraid to try different techniques, such as dry brushing for a textured look or washing for a softer effect.
Moreover, the materials used in brushes can significantly impact your painting experience. Natural bristles, often made from animal hair, tend to hold more paint and provide a smoother application. On the other hand, synthetic brushes are durable, easy to clean, and often more affordable. Here’s a quick comparison:
| Brush Material | Advantages | Disadvantages |
|---|---|---|
| Natural Bristles | Excellent paint retention, smooth application | More expensive, may require special care |
| Synthetic Bristles | Durable, easy to clean, cost-effective | May not hold paint as well, can feel stiffer |
As you dive deeper into your artistic journey, remember that maintaining your brushes is just as important as choosing the right ones. Regular cleaning and proper storage will extend their lifespan and ensure that you get the best results from your tools. A simple wash with soap and water after each use can prevent paint buildup, keeping your brushes in top condition for your next creative endeavor.
In conclusion, brushes are more than just tools; they are extensions of your artistic vision. By understanding their features and experimenting with different techniques, you can unlock new levels of creativity in your artwork. So, grab your brushes and let your imagination run wild!
Q: What type of brush is best for beginners?
A: Round brushes are often recommended for beginners as they are versatile and can be used for various techniques.
Q: How often should I clean my brushes?
A: It’s best to clean your brushes after each use to prevent paint from drying and damaging the bristles.
Q: Can I use acrylic brushes for oil painting?
A: While you can use acrylic brushes for oil painting, it’s advisable to use brushes specifically designed for oil to achieve the best results.
Rulers and Compasses
When it comes to precision in drawing, rulers and compasses are the unsung heroes of the art world. These tools might not have the flair of vibrant markers or the elegance of charcoal, but their importance cannot be overstated. Imagine trying to create a perfectly straight line or a flawless circle without them—it's like trying to bake a cake without measuring cups! Rulers and compasses provide the foundation for accurate shapes and lines, essential in both artistic and technical drawings.
Rulers come in various forms, from the classic wooden ruler to flexible plastic ones that can bend and twist to fit your needs. They are not just for measuring; they serve as a guide for drawing straight lines, creating grids, and even as a makeshift straightedge for cutting. The versatility of a ruler allows artists to explore different styles, whether it’s designing intricate patterns or laying down the groundwork for a larger piece.
On the other hand, compasses are the go-to tool for creating circles and arcs. With a simple pivot and a sharp point, they allow you to draw perfect circles of any size. This tool is especially useful in architectural drawings or when designing logos, where precision is key. The ability to adjust the radius of the circle gives artists the freedom to play with proportions, making it easier to experiment with different designs.
Combining both rulers and compasses can elevate your artwork to a new level. For instance, when sketching a geometric pattern, using a ruler to create the initial lines and then a compass to add circles can result in a stunning composition. This technique not only enhances the aesthetic appeal but also adds a layer of complexity that can captivate viewers. It’s all about finding the right balance between freehand creativity and structured precision.
Here’s a quick comparison table to highlight the key features of rulers and compasses:
| Tool | Primary Use | Key Features |
|---|---|---|
| Ruler | Drawing straight lines | Flexible, various lengths, marked with measurements |
| Compass | Drawing circles and arcs | Adjustable radius, sharp point for precision |
In conclusion, while rulers and compasses may seem basic, they are essential tools that every artist and designer should have in their toolkit. They provide the accuracy and control needed for professional-quality work, ensuring that your artistic visions can be realized with precision. So, next time you sit down to create, don’t overlook these humble tools—they might just be the key to unlocking your next masterpiece!
- What type of ruler is best for drawing? A clear plastic ruler is often preferred for drawing, as it allows you to see your work underneath while providing a straight edge.
- Can I use a compass for different sizes of circles? Yes! Most compasses are adjustable, enabling you to set the radius to create circles of various sizes.
- Are there special rulers for technical drawing? Absolutely! Technical drawing often requires specific rulers like T-squares and scale rulers for greater accuracy.
Erasers
Erasers are often the unsung heroes of the drawing world. While they might seem like simple tools, they play a crucial role in the creative process. Whether you're sketching a masterpiece or just doodling for fun, having the right eraser can make all the difference. Imagine working on a beautiful drawing only to realize you've made a mistake; that's where these little gadgets come into play, allowing you to correct errors and refine your work.
There are several types of erasers, each designed for specific tasks. The most common types include:
- Rubber Erasers: These are the classic erasers found in most pencil cases. They are effective for graphite and can be used for both light and heavy erasing.
- Kneaded Erasers: These are soft and pliable, perfect for lifting graphite without damaging the paper. They can be shaped to a point for precision work, making them ideal for artists who want to create highlights or soft edges.
- Vinyl Erasers: Known for their durability, vinyl erasers are excellent for erasing ink and are often used in technical drawings. They can remove marks cleanly without tearing the paper.
- Electric Erasers: For those who prefer a high-tech approach, electric erasers can make quick work of erasing, especially on larger surfaces or for detailed work.
When choosing an eraser, consider the medium you'll be working with. For instance, if you're sketching with graphite, a rubber or kneaded eraser will serve you well. On the other hand, if you're using ink or colored pencils, a vinyl eraser might be the better choice. The right eraser can help you achieve that clean finish you're aiming for, enhancing the overall quality of your artwork.
In addition to correcting mistakes, erasers can also be used creatively. Artists often use kneaded erasers to create highlights by gently lifting graphite from the paper. This technique can add depth and dimension to your drawings, transforming simple sketches into stunning pieces of art. Think of your eraser as a sculptor's tool, carving out the light in your work.
To help you navigate the world of erasers, here's a quick comparison table of the different types:
| Type | Best For | Pros | Cons |
|---|---|---|---|
| Rubber Eraser | Graphite | Effective, affordable | Can tear paper if used aggressively |
| Kneaded Eraser | Graphite, highlights | Soft, versatile | Can get dirty quickly |
| Vinyl Eraser | Ink, technical drawings | Durable, clean erasing | Can be too harsh on delicate paper |
| Electric Eraser | Large surfaces, detailed work | Fast, efficient | Requires batteries, can be noisy |
In conclusion, erasers are not just tools for fixing mistakes; they are essential instruments that can enhance your artistic process. By understanding the different types of erasers and their specific uses, you can elevate your artwork and enjoy a smoother creative experience. So, the next time you pick up your pencil, don’t forget about your trusty eraser—it's there to help you every step of the way!
- What type of eraser should I use for colored pencils? A vinyl eraser is typically best for colored pencils, as it can effectively remove marks without damaging the paper.
- Can I use a rubber eraser on watercolor paper? It's best to avoid rubber erasers on watercolor paper, as they can tear the delicate fibers. Instead, opt for a kneaded eraser.
- How do I clean a kneaded eraser? Simply knead it until it becomes clean and free of graphite. If it gets too dirty, you may need to replace it.
Frequently Asked Questions
-
What types of pencils are best for drawing?
When it comes to drawing, the best pencils are often a mix of graphite and colored pencils. Graphite pencils come in different hardness levels, ranging from H (hard) to B (black), allowing artists to create various shades and textures. For vibrant colors, colored pencils are fantastic for layering and blending.
-
How do I use charcoal effectively in my artwork?
Using charcoal can be a game changer! Start with vine charcoal for light sketches, then move to compressed charcoal for deeper tones. Don't forget to experiment with blending stumps or your fingers to create smooth transitions. Remember, less is more; build up layers gradually for the best effects!
-
What are the differences between ink pens and markers?
Ink pens are typically used for detailed work and offer precision, while markers provide vibrant colors and are great for bold illustrations. Ink pens come in various types, like fine liners and brush pens, each serving different artistic styles. Markers, on the other hand, can be used for blending and layering colors, making them versatile for all kinds of artwork.
-
Can pastels be used for detailed work?
Absolutely! While pastels are known for their soft texture and rich colors, they can also be used for detailed work. Use hard pastels for finer lines and soft pastels for broader strokes. Layering and blending techniques can help you achieve stunning results, making pastels a favorite among many artists.
-
What should I look for in a digital drawing tablet?
When choosing a digital drawing tablet, consider factors like pressure sensitivity, size, and software compatibility. A tablet with higher pressure sensitivity allows for more nuanced strokes, while a comfortable size can enhance your drawing experience. Make sure it's compatible with your favorite art software to unleash your creativity!
-
Are there specific brushes for different painting techniques?
Yes! Different brushes serve different purposes. For example, round brushes are great for detail work, while flat brushes are perfect for bold strokes and washes. Filbert brushes combine the benefits of both, making them versatile for various techniques. Choosing the right brush can significantly impact your artwork!
-
How important are rulers and compasses in drawing?
Rulers and compasses are crucial for technical drawing and precision work. They help achieve accurate shapes and lines, which is especially important in architectural and engineering drawings. Even in creative drawing, they can help maintain proportions and symmetry, making your work look more polished and professional.
-
What types of erasers are best for artists?
Artists have a variety of erasers to choose from! Kneaded erasers are great for lifting graphite without damaging the paper, while vinyl erasers can erase cleanly and thoroughly. Pink pearl erasers are also popular for general use. Each type has its strengths, so it's worth experimenting to find what works best for your style.


