
The Basic Guide to Acrylic Painting
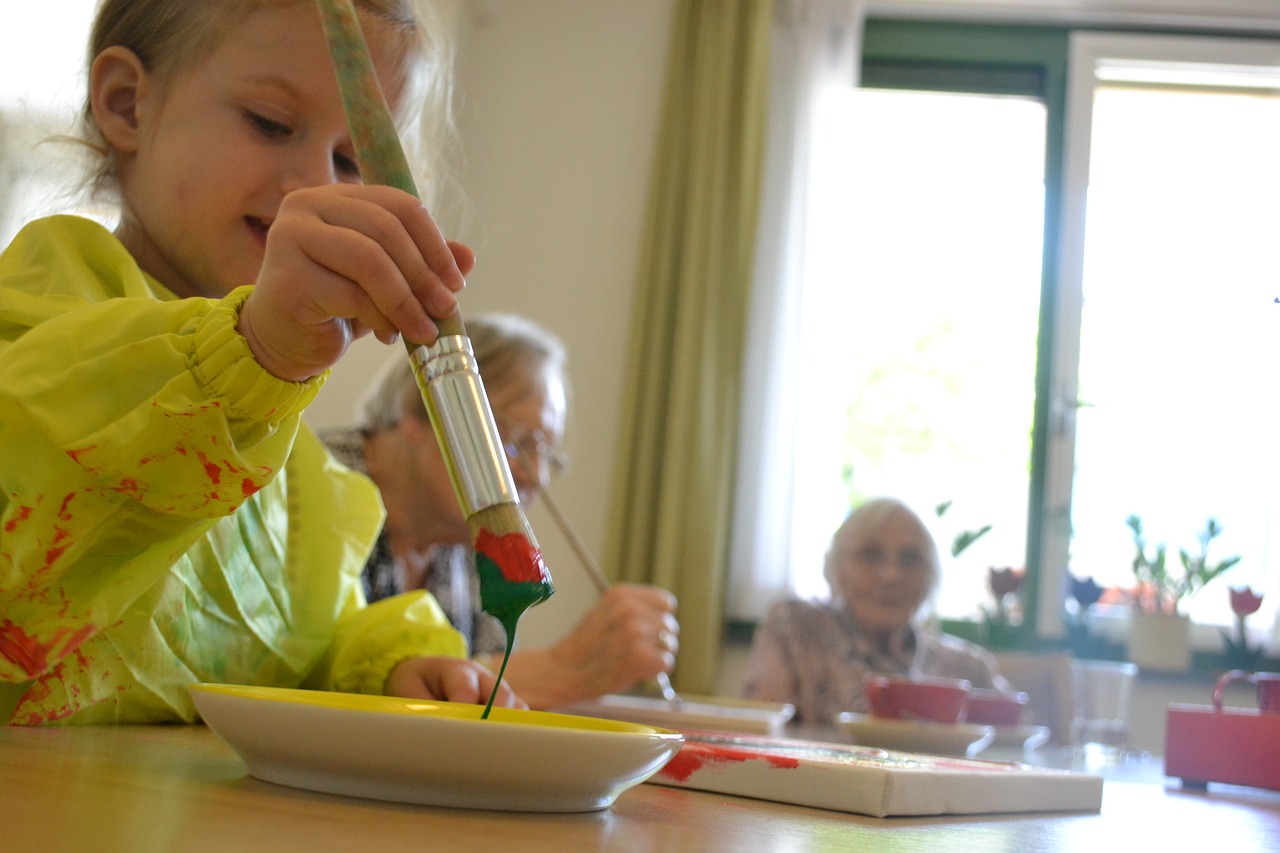
Welcome to the vibrant world of acrylic painting! If you’re a beginner looking to dive into this exciting medium, you’re in the right place. Acrylics are not just any paint; they are a fantastic fusion of versatility and vibrancy, allowing artists to express their creativity in countless ways. Imagine being able to create a masterpiece that bursts with color and life, all while enjoying the process! This guide will explore essential techniques, materials, and tips that will help you embark on your acrylic painting journey.
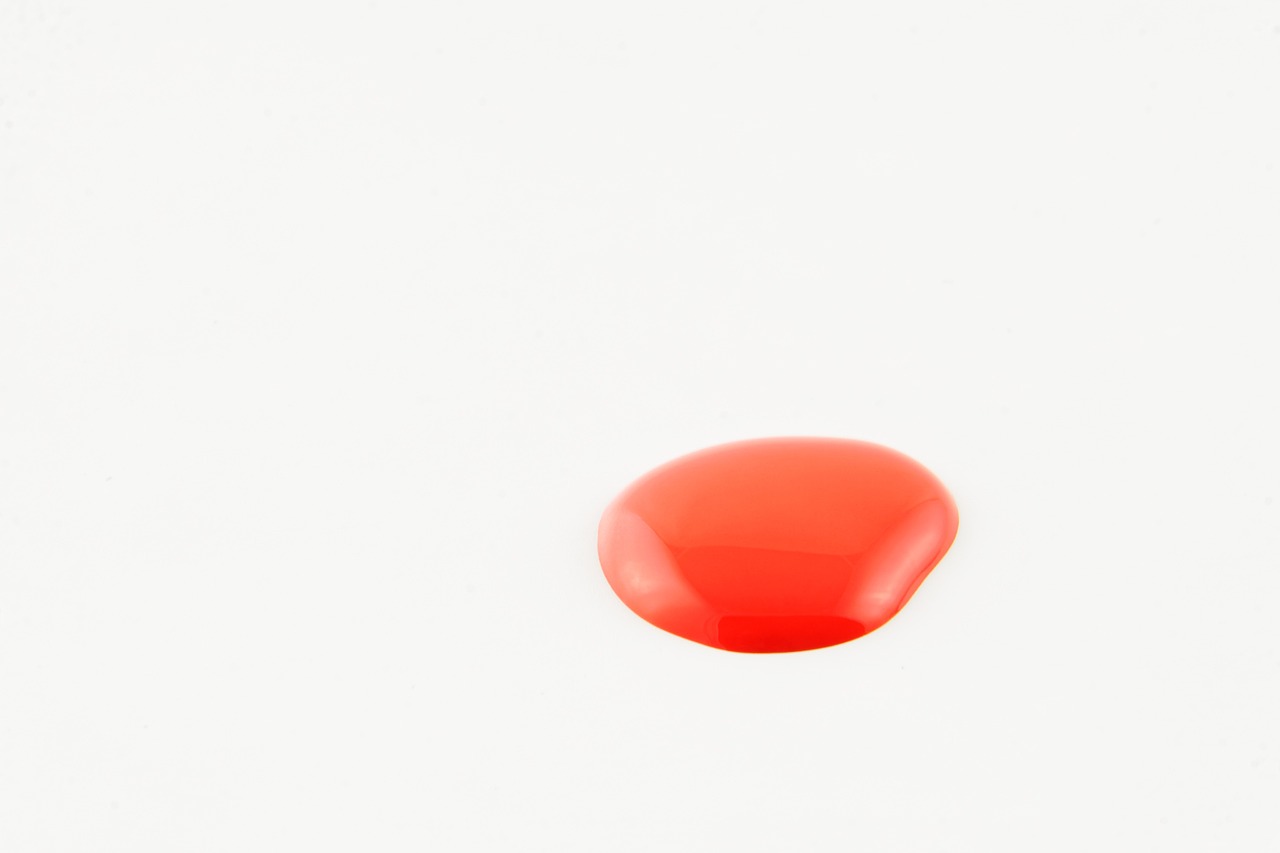
Acrylic paint is a unique medium that has gained popularity among artists for its quick drying time and adaptability. Unlike oils, which can take days to dry, acrylics allow you to work swiftly, making it easier to layer and build your artwork. But what exactly is acrylic paint made of? At its core, acrylic paint consists of pigment suspended in an acrylic polymer emulsion. This means it can be diluted with water, yet once dry, it becomes water-resistant, allowing for a variety of techniques and styles. One of the biggest advantages of acrylics is their ability to mimic other mediums. Want the transparency of watercolors? Just add more water! Prefer the boldness of oils? Use the paint straight from the tube! The possibilities are endless.
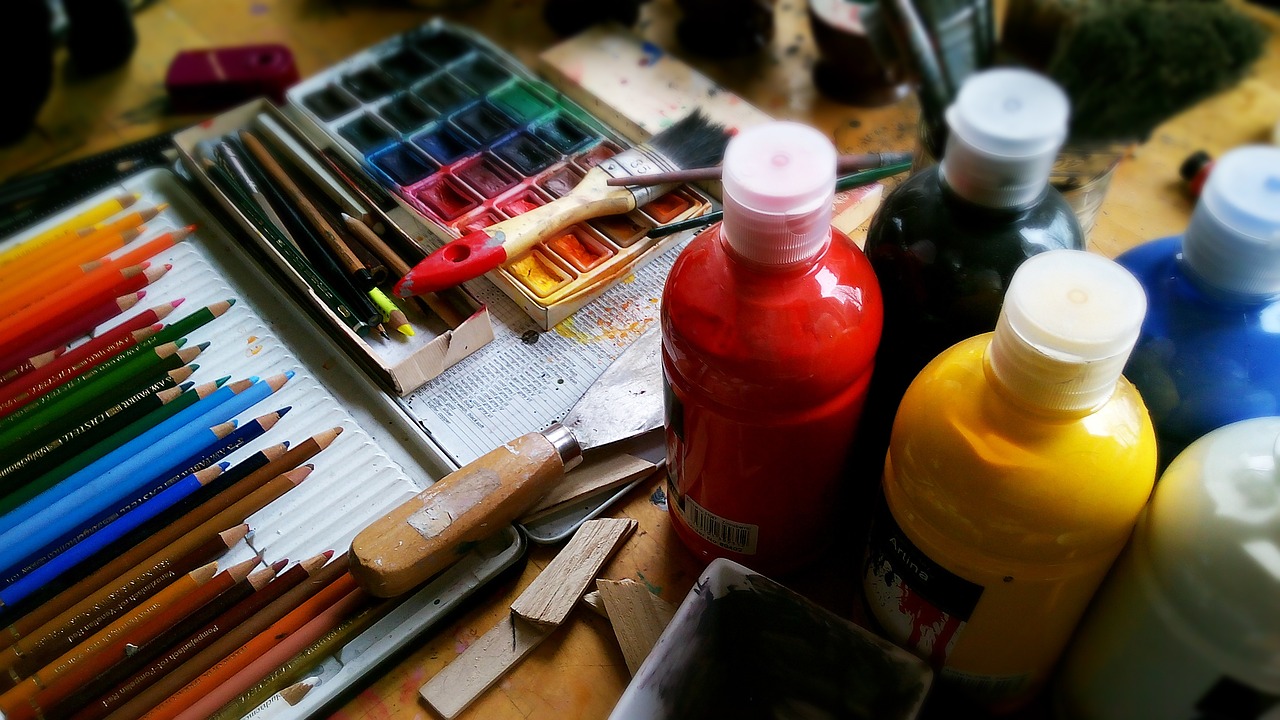
To kickstart your acrylic painting adventure, you’ll need some essential tools and materials. Think of these as your artistic arsenal, equipping you to create stunning artworks. Here’s what you’ll need:
- Brushes: A variety of brushes in different shapes and sizes will give you the flexibility to achieve various effects.
- Canvas: Choose between stretched canvases, canvas boards, or even paper designed for acrylics.
- Palette: A mixing surface is crucial for blending colors and creating your palette.
- Water container: Keep your brushes clean and your colors vibrant by rinsing them regularly.
- Paper towels or rags: Handy for quick clean-ups and drying brushes.
Brush selection is one of the most important decisions you'll make as an acrylic painter. The right brush can make a world of difference in the outcome of your work. You’ll find a range of brush types, each designed for specific techniques:
- Flat Brushes: Perfect for bold strokes and filling in large areas.
- Round Brushes: Great for detail work and creating fine lines.
- Filbert Brushes: A hybrid that combines the best of flat and round for versatility.
When it comes to brush bristles, you have two main options: synthetic and natural. Synthetic brushes are made from man-made fibers and are often more durable and easier to clean. They work well with acrylics and come in various shapes and sizes. On the other hand, natural bristles are made from animal hair and can hold more paint, giving you a different texture and finish. Understanding these characteristics will help you choose the right brushes for your artistic style.
Taking care of your brushes is essential for maintaining their performance and longevity. After each painting session, rinse your brushes thoroughly in water to remove any paint residue. For stubborn paint, a gentle soap can do wonders. Always reshape the bristles after cleaning and store them upright or flat to prevent damage. A well-cared-for brush can last for years, making it a worthwhile investment in your artistic journey.
The surface you choose to paint on can significantly impact your artwork. Acrylics can be applied to a variety of surfaces, including:
- Stretched Canvas: The most popular choice, offering a ready-to-paint surface.
- Canvas Boards: Lightweight and portable, perfect for practice.
- Acrylic Paper: Specifically designed for acrylics, providing a unique texture.
Choosing the right canvas can enhance your painting experience and the final outcome of your artwork.
Mastering fundamental techniques is key to successful acrylic painting. Let’s explore some essential methods that will serve as the foundation for your artistic journey.
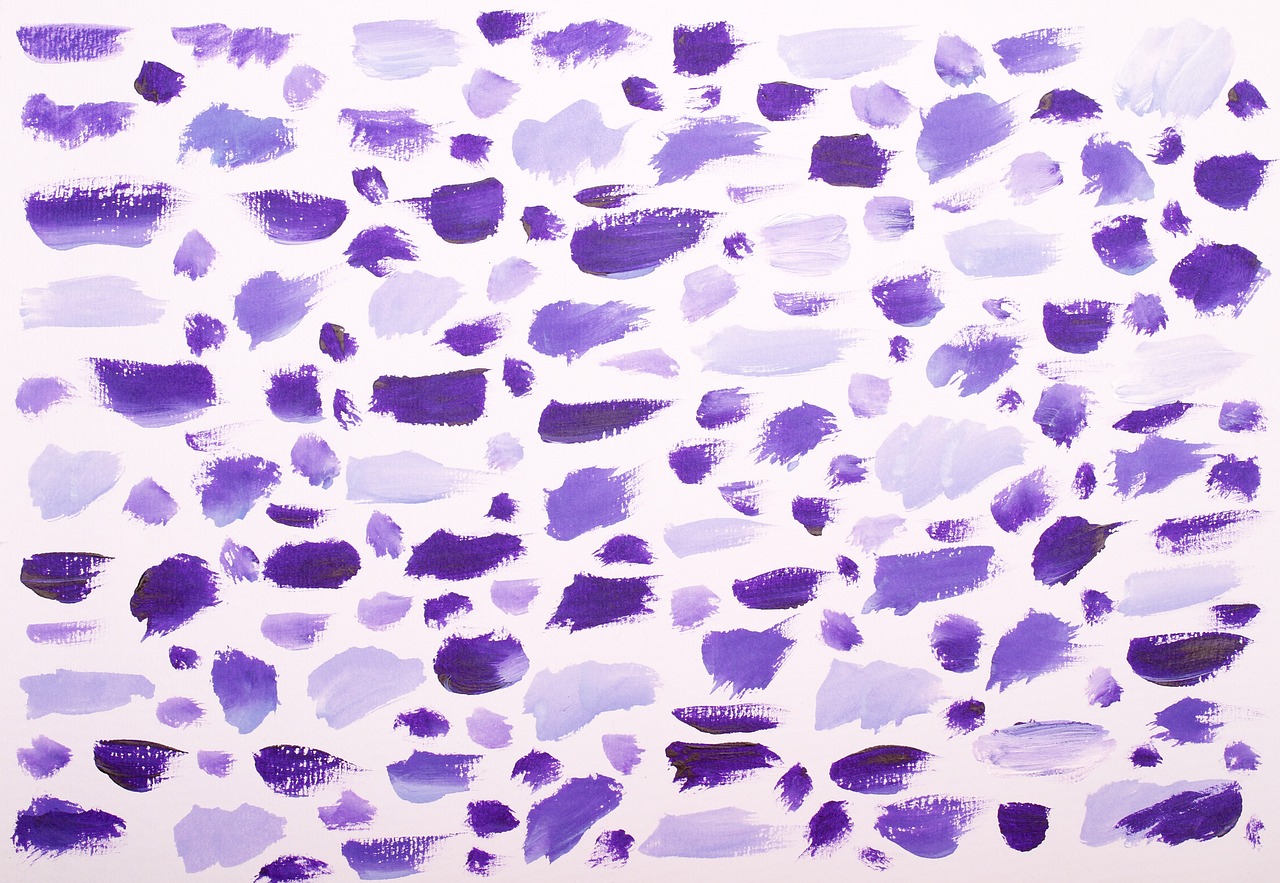
Layering is vital for adding depth and dimension to your acrylic paintings. By applying multiple layers of paint, you can create a rich and dynamic visual experience. Start with a base layer and gradually build up additional layers, allowing each to dry before adding the next. This technique not only enhances the complexity of your artwork but also allows for corrections and adjustments along the way.
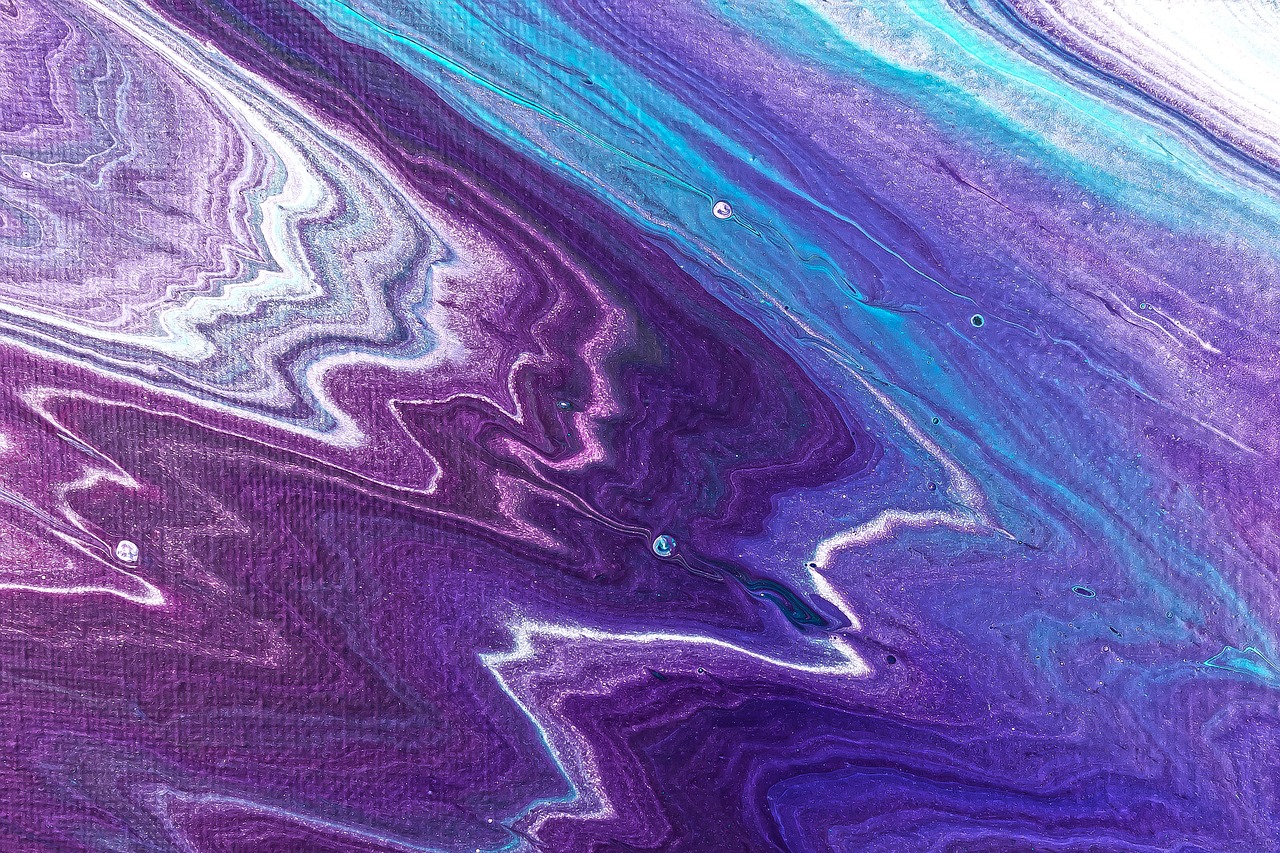
Blending and glazing techniques are essential for achieving smooth transitions and luminosity in your paintings. Blending involves mixing colors directly on your canvas to create gradients, while glazing is about applying a thin, transparent layer of paint over a dried layer to modify its appearance. Mastering these techniques can elevate your work, giving it a professional finish that captures the eye.
1. Can I use acrylic paint on any surface?
Yes, acrylics can be applied to a wide variety of surfaces, including canvas, wood, paper, and even fabric. Just make sure the surface is prepared appropriately.
2. How do I clean my acrylic brushes?
Rinse your brushes in water immediately after use. For stubborn paint, use mild soap and reshape the bristles before storing.
3. What is the best way to store my acrylic paints?
Keep your acrylic paints in a cool, dry place and ensure the lids are tightly closed to prevent them from drying out.
Understanding Acrylic Paint
Acrylic paint is a versatile and exciting medium that has taken the art world by storm. Its quick-drying properties and adaptability make it a favorite among both beginners and seasoned artists. Unlike oil paints, which can take days or even weeks to dry, acrylics allow you to work quickly, making them perfect for those who love to experiment and create without waiting around. Imagine being able to layer colors and add details in a matter of minutes! This rapid drying time means you can build up your artwork with ease and spontaneity.
But what exactly is acrylic paint? At its core, acrylic paint consists of pigment suspended in an acrylic polymer emulsion. This composition gives it a unique set of properties that artists adore. For instance, acrylics can mimic the appearance of both watercolor and oil paints, depending on how you use them. When diluted with water, they can create translucent washes, while using them straight from the tube results in vibrant, opaque colors. This flexibility allows for a wide range of techniques and styles, making acrylics suitable for everything from detailed portraits to bold abstract pieces.
One of the major advantages of acrylic paint is its fast drying time. While this can be a double-edged sword—since it means you have to work quickly to blend colors—it also allows for layering. Artists can apply multiple layers in a single session, creating depth and complexity in their work. Additionally, acrylics are water-resistant when dry, which means your finished pieces will stand the test of time without fading or deteriorating.
Another appealing aspect of acrylic paint is its ease of use. It can be applied to a variety of surfaces, including canvas, wood, paper, and even fabric. This versatility opens up a world of creative possibilities. Whether you prefer traditional canvas painting or want to explore mixed media, acrylics can adapt to your artistic vision. Plus, clean-up is a breeze—simply use soap and water while the paint is still wet!
To sum it up, acrylic paint is a fantastic choice for artists looking to explore their creativity. Its quick-drying nature, versatility, and ease of use make it an ideal medium for both beginners and experienced painters alike. So, grab your brushes, and let your imagination run wild with the vibrant world of acrylics!
Essential Tools and Materials
When diving into the world of acrylic painting, having the right tools and materials can make all the difference between a frustrating experience and a delightful one. Imagine trying to cook a gourmet meal without the necessary utensils; it just wouldn’t work, right? Similarly, your painting journey requires specific items to help you express your creativity fully. First and foremost, you’ll need acrylic paints. These vibrant colors are available in various formulations, including heavy body, fluid, and acrylic gouache, each offering unique textures and finishes. Investing in a good quality set of paints can elevate your artwork significantly.
Next up, let’s talk about brushes. The right brushes can transform your painting style and technique. You’ll find a variety of shapes and sizes, each designed for specific applications. For example, flat brushes are ideal for broad strokes and filling in large areas, while round brushes are perfect for detail work. Don't forget to consider the material of the brush bristles, as this can affect how the paint is applied and the final look of your piece.
Now, onto the canvas. The surface you choose to paint on can greatly influence your final artwork. While traditional canvas is a popular choice, you can also explore other surfaces like wood panels, paper, or even fabric. Each material offers its own unique texture and absorption qualities, which can add depth and character to your work. If you’re just starting out, pre-stretched canvases are a convenient option that saves you time and effort.
For mixing colors, a palette is essential. You can use a traditional wooden palette, a disposable paper palette, or even a glass one. Each type has its pros and cons, but the goal is to find a surface that allows you to mix your colors seamlessly. Additionally, don’t overlook the importance of a palette knife. This handy tool is perfect for mixing paints and can also be used to create interesting textures on your canvas.
Lastly, let’s not forget about water containers and rags or paper towels. Keeping your brushes clean and your workspace tidy is crucial for maintaining your workflow and ensuring that your colors remain true. A simple jar of water can help you rinse your brushes between colors, while rags or paper towels can assist in wiping off excess paint and keeping your hands clean.
In summary, the essential tools and materials for acrylic painting include:
- Acrylic paints (various types)
- Brushes (various shapes and sizes)
- Canvas or alternative surfaces
- Palette (for mixing colors)
- Palette knife (for mixing and texturing)
- Water container (for cleaning brushes)
- Rags or paper towels (for cleanup)
By gathering these essential tools and materials, you’ll be well on your way to creating stunning acrylic artworks that reflect your unique style and vision. Remember, the right supplies not only enhance your artistic experience but also allow you to explore and experiment freely!
Q: What type of acrylic paint is best for beginners?
A: For beginners, a set of student-grade acrylic paints is often recommended. They are more affordable and easier to work with while still providing vibrant colors.
Q: Can I use regular brushes for acrylic painting?
A: While you can use regular brushes, it’s best to use brushes specifically designed for acrylics. They are more durable and can handle the thicker consistency of the paint.
Q: Do I need to prime my canvas before painting?
A: If you’re using a pre-stretched canvas, it’s usually already primed. However, if you’re working on raw canvas or other surfaces, applying a coat of gesso can help the paint adhere better.
Q: How do I clean my brushes after painting?
A: Rinse your brushes in water immediately after use to remove excess paint. You can also use mild soap to clean them thoroughly, ensuring they maintain their shape and effectiveness.
Choosing the Right Brushes
When it comes to acrylic painting, selecting the right brushes can make a world of difference in your artistic journey. Just like a chef wouldn’t use a butter knife to chop vegetables, an artist should choose brushes that suit their specific needs and techniques. With so many options available, it can feel overwhelming at first, but understanding the different types of brushes and their uses will simplify the process significantly.
First off, let’s talk about the shapes of brushes. Each shape serves a unique purpose, allowing you to create various effects in your artwork:
- Flat Brushes: These are perfect for broad strokes, filling in larger areas, and creating sharp edges. They can be used for both painting and blending.
- Round Brushes: Ideal for detailed work, these brushes are excellent for making fine lines and intricate details. They are versatile and can also be used for washes.
- Filbert Brushes: With a unique oval shape, filbert brushes combine the qualities of flat and round brushes, making them great for blending and creating soft edges.
- Fan Brushes: These brushes are fantastic for creating texture, such as foliage or fur, thanks to their unique shape.
Next, let’s dive into brush sizes. The size of the brush you choose can have a significant impact on your painting style and the details you wish to achieve. Brushes are typically numbered, with smaller numbers indicating smaller brushes and larger numbers indicating larger brushes. For example, a size 0 brush is great for tiny details, while a size 12 brush is suited for larger areas. A good rule of thumb is to have a range of sizes in your toolkit, so you can switch between them depending on your needs.
Now, let’s not forget about the bristle types. Brushes come with either synthetic or natural bristles, and each type has its own set of advantages:
| Bristle Type | Characteristics | Best For |
|---|---|---|
| Synthetic | Durable, easy to clean, and maintain their shape | General use, especially for acrylics |
| Natural | Soft, absorbent, and ideal for blending | Watercolor and oil paints |
Choosing between synthetic and natural bristles often comes down to personal preference and the specific effects you want to achieve. For acrylic painting, many artists prefer synthetic brushes because they hold their shape well and are easier to clean. However, if you're looking for a soft finish or want to blend colors smoothly, natural bristles might be your go-to.
Lastly, proper brush care is essential for maintaining the quality of your brushes and ensuring they last for many painting sessions to come. Always rinse your brushes in water immediately after use and gently reshape the bristles. Avoid letting them sit in water for prolonged periods, as this can damage the bristles and the ferrule (the metal part that holds the bristles). A little care goes a long way in preserving your tools!
In conclusion, choosing the right brushes for acrylic painting is a blend of understanding shapes, sizes, bristle types, and proper maintenance. By investing time in selecting the right tools, you’ll set the stage for a successful and enjoyable painting experience. So, grab your brushes and let your creativity flow!
Q: How do I know which brush to use for my painting?
A: It depends on the effect you want to achieve! Flat brushes are great for broad strokes, while round brushes are perfect for details. Experiment with different shapes and sizes to find what works best for you.
Q: Can I use the same brush for different colors?
A: Yes, but it's best to clean your brush between colors to avoid muddying your paints. Rinse it well and reshape the bristles before switching colors.
Q: What are the best brands for acrylic brushes?
A: Some popular brands include Winsor & Newton, Da Vinci, and Princeton. Look for brushes that suit your budget and meet your specific needs.
Types of Brush Bristles
When it comes to acrylic painting, the type of brush bristles you choose can significantly affect your artwork's outcome. Understanding the differences between synthetic and natural bristles is crucial for achieving various effects and textures in your paintings. Synthetic brushes are made from man-made fibers, typically nylon or polyester. They are known for their durability and resilience, making them perfect for beginners who might not yet have mastered the delicate handling of paint. These brushes maintain their shape well, allowing for consistent strokes, and they are also easier to clean. On the other hand, natural bristle brushes, such as those made from hog hair or sable, offer a unique softness and flexibility. They can hold more paint and water, allowing for smooth application and blending, which is particularly beneficial for techniques that require a softer touch.
Choosing the right bristle type depends on your painting style and the effects you want to achieve. For instance, if you’re looking to create bold, textured strokes, a stiff natural bristle brush might be your best bet. In contrast, if you're after fine details or smooth washes, a soft synthetic brush could be more appropriate. Here’s a quick comparison:
| Bristle Type | Characteristics | Best For |
|---|---|---|
| Synthetic | Durable, easy to clean, holds shape well | Beginners, detailed work, washes |
| Natural | Soft, holds more paint, flexible | Blending, textured strokes, fine details |
It's also worth noting that within these two categories, there are various shapes and sizes of brushes, each serving a different purpose. For example, flat brushes are fantastic for bold strokes and filling in large areas, while round brushes are ideal for detailed work and fine lines. As you explore the world of acrylic painting, experimenting with different brush types will help you discover what works best for your personal style.
Ultimately, the choice between synthetic and natural bristles comes down to your individual preferences and the specific techniques you wish to employ. Don't hesitate to try out both types to see which one resonates with you. Remember, the right brush can make all the difference in bringing your artistic vision to life!
- What type of brush is best for beginners? Synthetic brushes are often recommended for beginners due to their durability and ease of use.
- Can I use natural brushes for acrylic painting? Yes, natural brushes can be used for acrylics, but they may require more care and maintenance.
- How do I clean my brushes after painting? Rinse brushes in water immediately after use, then wash with mild soap and reshape the bristles before drying.
Brush Care and Maintenance
Taking care of your brushes is not just a chore; it’s an essential part of being an acrylic painter. Imagine trying to create a masterpiece with a worn-out brush; it’s like trying to write a novel with a broken pen! Proper brush care ensures that your tools remain in top shape, allowing you to express your creativity without the frustration of subpar equipment. So, let’s dive into some simple yet effective tips that will help you maintain your brushes and keep them performing at their best.
First and foremost, always clean your brushes immediately after use. Acrylic paint dries quickly, and if you let it sit on the bristles, it can harden and ruin your brush. Rinse your brushes under lukewarm water, using your fingers to gently work out the paint. Avoid using hot water, as it can damage the bristles. For stubborn paint, a gentle soap, like dish soap or a specialized brush cleaner, can work wonders. Just remember: the sooner you clean your brushes, the easier it will be!
Once your brushes are clean, reshape the bristles while they are still wet. This is crucial because it helps maintain their original shape and ensures that they perform well the next time you use them. You can lay them flat on a clean towel or hang them upside down to dry. Avoid standing brushes in a jar while wet, as this can cause the bristles to bend and fray. Instead, think of your brushes as delicate flowers that need gentle care to bloom beautifully.
Storage is another vital aspect of brush maintenance. Keep your brushes in a cool, dry place, away from direct sunlight. A brush holder or a dedicated container can help keep them organized and prevent them from getting damaged. If you have a variety of brushes, consider organizing them by type or size, which makes it easier to find the right one when inspiration strikes. Remember, a well-organized workspace is a happy workspace!
Lastly, don’t forget to periodically check your brushes for wear and tear. If you notice any fraying bristles or a loss of shape, it might be time to retire that brush. Investing in quality brushes is essential, but maintaining them is equally important. A well-cared-for brush can last for years, providing you with countless opportunities to express your artistic vision.
In summary, brush care and maintenance are fundamental to the acrylic painting process. By cleaning your brushes immediately after use, reshaping them, storing them properly, and regularly checking their condition, you’ll ensure that your painting experience is both enjoyable and productive. Remember, your brushes are your partners in creativity, so treat them well!
- How often should I clean my brushes? It's best to clean your brushes immediately after each use to prevent paint from drying on the bristles.
- Can I use soap to clean my brushes? Yes, gentle dish soap or a specialized brush cleaner works well to remove paint.
- How should I store my brushes? Store them in a cool, dry place, preferably in a brush holder to keep them organized and protected.
- What should I do if my brush bristles are frayed? If you notice fraying, it may be time to replace the brush, as damaged bristles can affect your painting.
Canvas and Surface Options
When it comes to acrylic painting, the canvas or surface you choose can dramatically affect the outcome of your artwork. Imagine trying to paint a masterpiece on a surface that doesn't complement your style—it's like trying to run a race in flip-flops! Therefore, selecting the right canvas is crucial. Acrylics are incredibly versatile, and so are the surfaces you can use. From traditional canvases to innovative alternatives, let's dive into the world of options available to you.
First off, the most common choice for acrylic painting is the classic stretched canvas. This is typically made from cotton or linen and is pre-stretched over a wooden frame. The texture of the canvas can vary, with options ranging from rough to smooth. A rough texture can add an interesting dynamic to your painting, while a smooth canvas allows for finer detail work. If you're looking for something more affordable, canvas boards are a great alternative. They are essentially canvases glued to a stiff board, making them easy to transport and store.
Another option is canvas paper. This is a pad of paper that mimics the texture of canvas, allowing you to experiment without the commitment of a stretched canvas. It's perfect for practicing techniques or sketching out ideas. However, keep in mind that canvas paper may not hold up to heavy layering like traditional canvas does.
If you're feeling adventurous, consider using wood panels or acrylic paper. Wood panels provide a sturdy surface that can withstand heavy applications of paint, making them ideal for textured works. Acrylic paper, on the other hand, is specially designed to handle the unique properties of acrylic paint, preventing warping and buckling. This type of paper is perfect for artists who enjoy working with various wet techniques.
In addition to traditional surfaces, you can also explore alternatives such as glass or metal. These surfaces can produce stunning effects, particularly with glazing techniques, as the paint can appear luminous and vibrant. However, be prepared to adjust your approach, as these surfaces require different handling and preparation compared to standard canvases.
Ultimately, the choice of surface comes down to personal preference and the specific effects you want to achieve. Don't be afraid to experiment with different materials! Your artistic journey is all about exploration and finding what resonates with you. To help you visualize your options, here's a quick comparison:
| Surface Type | Advantages | Best For |
|---|---|---|
| Stretched Canvas | Traditional feel, texture variety | General use, detailed work |
| Canvas Boards | Portable, affordable | Practice, studies |
| Canvas Paper | Easy to use, great for sketching | Experimentation, quick studies |
| Wood Panels | Sturdy, excellent for textures | Heavy layering, mixed media |
| Acrylic Paper | Prevents warping, designed for acrylics | Wet techniques, detailed work |
| Glass/Metal | Unique effects, high gloss | Glazing techniques, experimental work |
In conclusion, the canvas or surface you choose for your acrylic painting can significantly influence your creative process and the final result. So, take your time exploring these options, and don't hesitate to try something new. After all, art is about pushing boundaries and expressing yourself!
- What is the best surface for beginners? Stretched canvas or canvas boards are great options as they are user-friendly and widely available.
- Can I use acrylic paint on wood? Absolutely! Wood panels can provide a unique texture and are excellent for heavy paint applications.
- Is canvas paper worth it? Yes, especially for practice and sketching. It’s a cost-effective way to try out new ideas.
- How do I prepare a wooden surface for acrylic painting? Make sure to sand it smooth and apply a primer to ensure the paint adheres well.
Basic Acrylic Painting Techniques
Acrylic painting is a thrilling adventure that opens the door to endless creativity. Whether you’re a complete novice or someone looking to refine your skills, mastering fundamental techniques is crucial for achieving stunning results. Let’s dive into some of the essential methods that can elevate your acrylic artwork from ordinary to extraordinary. Are you ready to unleash your inner artist?
One of the most vital techniques to grasp is layering. This method involves applying multiple coats of paint to create depth and dimension in your work. Think of it like building a sandwich; each layer adds flavor and texture to the final product. Start with a base layer and gradually add more colors, allowing each layer to dry before applying the next. This not only enhances the richness of your piece but also allows for corrections and adjustments along the way. The beauty of acrylics is their quick drying time, which lets you build layers without a long wait.
Another key technique is blending. Imagine mixing colors on a palette and then seamlessly transitioning them on your canvas. Blending allows you to create soft gradients and smooth transitions between colors, which can add a realistic touch to your artwork. To master blending, use a damp brush to gently mix colors together on the canvas while they are still wet. This technique can be particularly effective in landscapes or portraits, where you want to capture the subtleties of light and shadow.
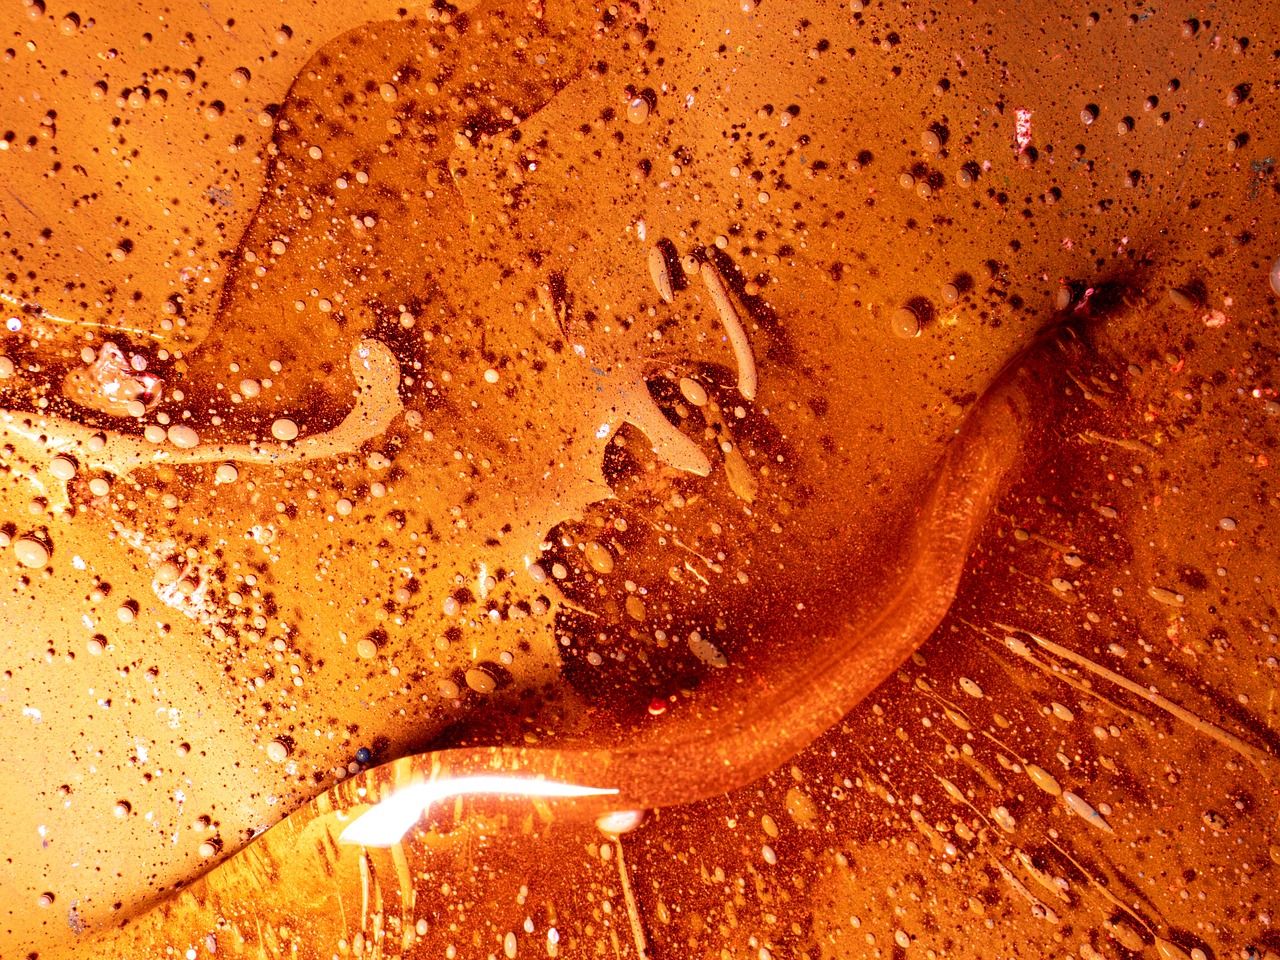
Then, we have glazing, a technique that can bring a sense of luminosity to your paintings. Glazing involves applying a thin, transparent layer of paint over a dry base layer. It’s like putting a filter over your artwork, enhancing the colors beneath without completely covering them. This technique is perfect for achieving vibrant highlights or deep shadows, giving your work a polished and professional look. To create a glaze, simply mix your acrylic paint with a glazing medium and apply it with a soft brush.
Here’s a quick comparison table of the three techniques for a clearer understanding:
| Technique | Description | Effect |
|---|---|---|
| Layering | Applying multiple coats of paint | Creates depth and dimension |
| Blending | Mixing colors on the canvas | Soft gradients and smooth transitions |
| Glazing | Applying a transparent layer over dry paint | Enhances luminosity and color depth |
Now, let’s not forget about the importance of practice. Just like learning to ride a bike, the more you paint, the better you’ll get. Don’t be afraid to experiment with these techniques. Try layering colors to see how they interact, blend different shades to create unique effects, and use glazing to add a magical touch to your pieces. Remember, every brush stroke is a step toward developing your unique style.
Lastly, here’s a quick checklist to keep in mind as you practice these techniques:
- Start with a clean canvas and prepare your workspace.
- Experiment with different brush sizes and shapes.
- Use a palette for mixing colors and testing techniques.
- Always allow layers to dry before adding more.
- Embrace mistakes; they can lead to unexpected creativity!
Q: What is the best way to clean acrylic brushes?
A: Rinse your brushes in warm water immediately after use. For stubborn paint, use a mild soap and reshape the bristles before storing them.
Q: Can I mix acrylic paint with water?
A: Yes! Water can be used to thin acrylic paint for a watercolor effect, but be cautious not to dilute it too much, or you may lose vibrancy.
Q: How can I prevent my acrylic paint from drying too quickly?
A: Use a palette with a lid or a stay-wet palette to keep your paint moist, or consider using a slow-drying medium mixed with your acrylics.
By mastering these basic acrylic painting techniques, you’ll be well on your way to creating vibrant and dynamic artworks that reflect your unique vision. So grab your brushes and let your creativity flow!
Layering Techniques
Layering is one of the most essential techniques in acrylic painting, allowing artists to create depth, dimension, and richness in their artwork. Think of it like building a sandwich: each layer adds flavor and texture, making the final product more satisfying and complex. When you layer acrylic paint, you’re essentially adding translucent or opaque layers on top of one another, which can dramatically change the appearance of your piece. This technique is not only about adding colors but also about playing with light and shadow, which can bring your artwork to life.
To get started with layering, it's important to understand the concept of drying times in acrylics. Acrylic paint dries quickly, which can be both an advantage and a challenge. The fast-drying nature allows you to build layers without waiting for long periods, but it also means you have to work efficiently. If you're looking to create a smooth transition between layers, consider using a retarder, a medium that slows down the drying time of acrylic paint. This gives you more time to manipulate the paint before it sets, allowing for seamless blending.
When layering, there are a few key techniques to keep in mind:
- Glazing: This involves applying a thin, transparent layer of paint over a dry layer. It’s like putting a tinted window over a clear one—suddenly, everything looks richer and more vibrant.
- Scumbling: This is a technique where you apply a dry brush with a small amount of paint over a dry base layer. The result is a textured effect that can add interest and depth.
- Wet-on-wet: By applying wet paint onto a wet surface, you can achieve beautiful blends and soft edges. This technique is perfect for creating skies or soft backgrounds.
As you experiment with layering, it’s crucial to remember that less is often more. Start with a light hand and gradually build up the intensity of your colors. You can always add more layers, but it’s challenging to take away once the paint is on the canvas. Additionally, consider the order of your layers; typically, darker colors go down first, followed by lighter colors on top. This approach helps maintain the vibrancy of your lighter hues.
Another important aspect of layering is the choice of colors. Complementary colors can create dynamic contrasts, while analogous colors can offer a more harmonious feel. It's often beneficial to create a color palette before you start painting, so you can visualize how your layers will interact. Don’t hesitate to test your colors on a separate piece of paper to see how they blend and layer before committing them to your canvas.
In conclusion, mastering layering techniques in acrylic painting can elevate your artwork to new heights. By understanding how to effectively build layers, you can create stunning pieces that captivate and engage viewers. Whether you're aiming for subtlety or bold contrasts, layering is your secret weapon in the world of acrylics.
Q: How long does it take for acrylic paint to dry between layers?
A: Acrylic paint typically dries within 15 to 30 minutes, but this can vary based on thickness and environmental conditions. Using a retarder can help extend drying time.
Q: Can I layer acrylic paint on top of oil paint?
A: No, it's not advisable to layer acrylic paint on top of oil paint. Acrylics and oils have different drying times and properties, which can lead to issues with adhesion and cracking.
Q: What should I do if my layers are becoming muddy?
A: If your colors are becoming muddy, try to limit the number of layers you apply or ensure that each layer is completely dry before adding the next. Also, using a clean brush for each color can help maintain clarity.
Blending and Glazing
When it comes to acrylic painting, blending and glazing are two techniques that can truly elevate your artwork from ordinary to extraordinary. Imagine the way a sunset transitions from vibrant oranges to deep purples, or how a soft shadow adds depth to a subject. These effects are achieved through the careful application of blending and glazing, allowing artists to create a sense of luminosity and richness in their paintings.
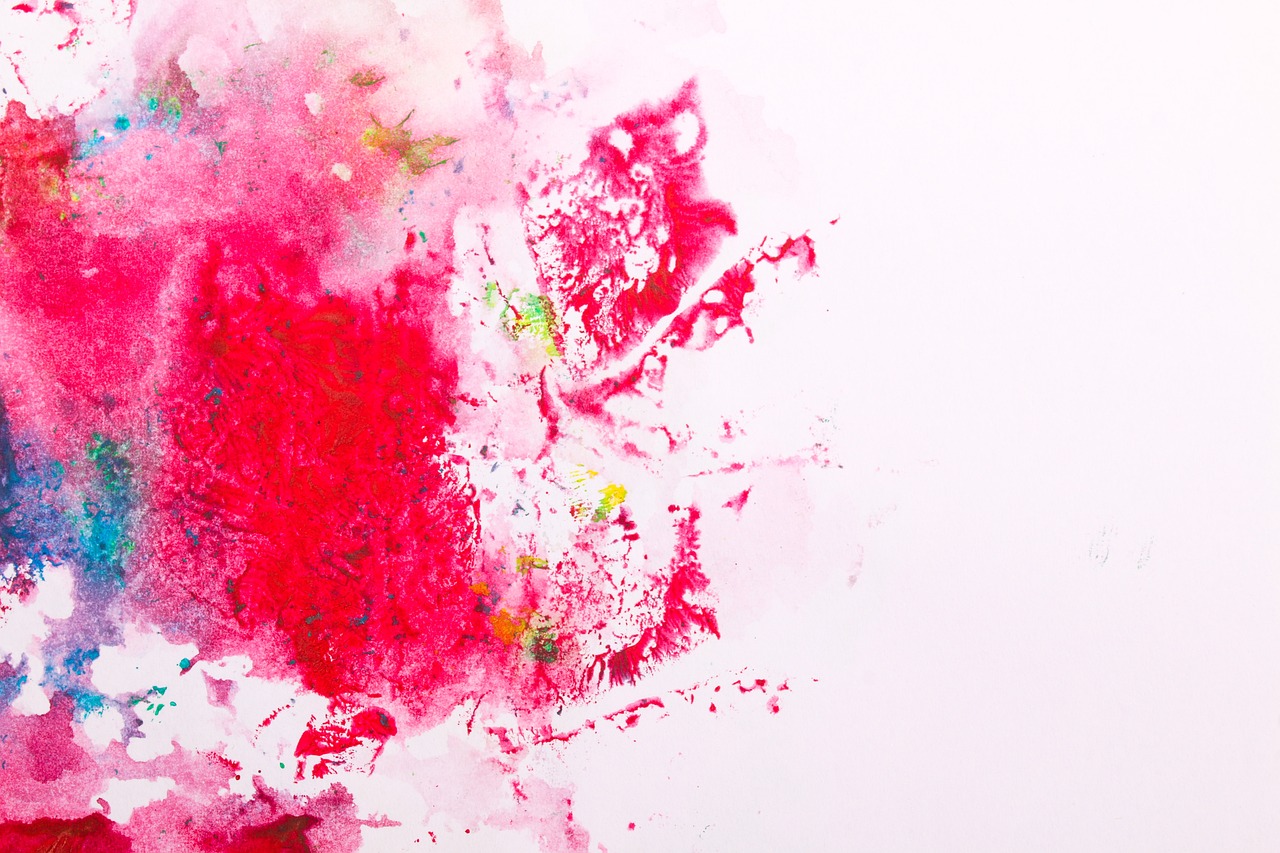
Blending involves the smooth transition between colors, creating a seamless effect that can mimic the softness of a watercolor or the boldness of an oil painting. To achieve a successful blend, you can use a variety of tools, including brushes, sponges, or even your fingers. The key is to work quickly, as acrylic paint dries rapidly. Start by applying your base color and then layer on a second color while the first is still wet. Use a clean brush to gently stroke the two colors together, allowing them to merge and create a gradient. This technique is especially effective for creating skies, skin tones, or any area that requires a soft transition.
On the other hand, glazing is all about transparency. By applying a thin, transparent layer of paint over a dried layer, you can modify the underlying color without completely obscuring it. This technique is fantastic for adding depth and complexity to your work. For instance, if you want to warm up a cool blue background, you can apply a glaze of transparent yellow or orange over it. The result is a vibrant, glowing effect that enhances the overall composition. To create a glaze, simply mix your acrylic paint with a glazing medium or water, ensuring it’s thin enough to allow the underlying colors to show through.
Here’s a quick comparison of blending and glazing:
| Technique | Description | Best Uses |
|---|---|---|
| Blending | Combining colors while wet for smooth transitions. | Skies, shadows, and soft textures. |
| Glazing | Applying transparent layers over dried paint. | Enhancing depth, color richness, and luminosity. |
To master these techniques, practice is essential. Set aside time to experiment with blending and glazing on scrap pieces of canvas. Don’t be afraid to make mistakes; every artist has been there! Over time, you will develop a feel for how different colors interact and how to manipulate them to achieve the desired effects. Remember, the beauty of acrylics lies in their versatility, so embrace the process and let your creativity flow!
- What is the difference between blending and glazing?
Blending involves mixing colors while they are still wet to create smooth transitions, while glazing involves applying a transparent layer of paint over dried paint to modify its appearance. - Can I use any medium for glazing?
It’s best to use a glazing medium specifically designed for acrylics, as it helps maintain the paint's adhesion and flow. - How do I clean my brushes after blending and glazing?
Always clean your brushes with soap and water immediately after use to prevent paint from drying in the bristles.
Frequently Asked Questions
-
What is acrylic paint made of?
Acrylic paint is a water-based medium made from pigment suspended in an acrylic polymer emulsion. This composition allows it to dry quickly and be easily manipulated with water, making it a favorite among both beginners and experienced artists.
-
What are the advantages of using acrylic paint?
Acrylic paint offers several advantages, including its fast drying time, versatility, and ease of use. Artists can layer colors quickly, create various textures, and even use it on different surfaces, such as canvas, wood, or paper. Plus, it’s non-toxic and can be cleaned up easily with water!
-
What tools do I need to start acrylic painting?
To start acrylic painting, you'll need some essential tools, including a variety of brushes (both synthetic and natural), a palette for mixing colors, canvases or other surfaces to paint on, and a container for water. Don't forget paper towels for quick clean-ups!
-
How do I choose the right brushes for acrylic painting?
Choosing the right brushes is crucial for achieving different effects. Look for brushes with stiff bristles for bold strokes and softer bristles for finer details. Sizes vary, so having a range from small detail brushes to larger flat brushes will give you more flexibility in your work.
-
What’s the difference between synthetic and natural brush bristles?
Synthetic bristles are typically more durable and easier to clean, while natural bristles (like those from sable or hog) can hold more paint and create softer strokes. Each type has its strengths, so it’s worth experimenting to see which you prefer!
-
How should I care for my acrylic brushes?
Proper care is key to keeping your brushes in great shape. Always rinse them in water immediately after use to remove paint. You can use mild soap for thorough cleaning. Store them upright or flat to maintain their shape, and avoid letting them sit in water for long periods!
-
What surfaces can I use for acrylic painting?
Acrylics can be painted on a variety of surfaces, including traditional canvases, wood panels, and even heavy paper. Each surface will give a different texture and finish, so feel free to experiment to find what works best for your artistic style!
-
What are some basic techniques I should learn for acrylic painting?
Start with fundamental techniques like layering, glazing, and blending. Layering adds depth, glazing creates luminosity, and blending allows for smooth transitions between colors. Mastering these will give you a solid foundation to create vibrant and dynamic artworks!
-
How can I achieve depth in my acrylic paintings?
To achieve depth, focus on layering your paint. Start with a base layer and gradually build up with additional layers, allowing each to dry before adding the next. This method creates a rich, multi-dimensional effect that can really make your artwork pop!
-
Can I mix acrylic paint with other mediums?
Absolutely! Acrylic paint is highly versatile and can be mixed with various mediums, such as gels and pastes, to create different textures and finishes. Just make sure to check compatibility to ensure the best results!


