
A Comprehensive Guide to Landscape Painting
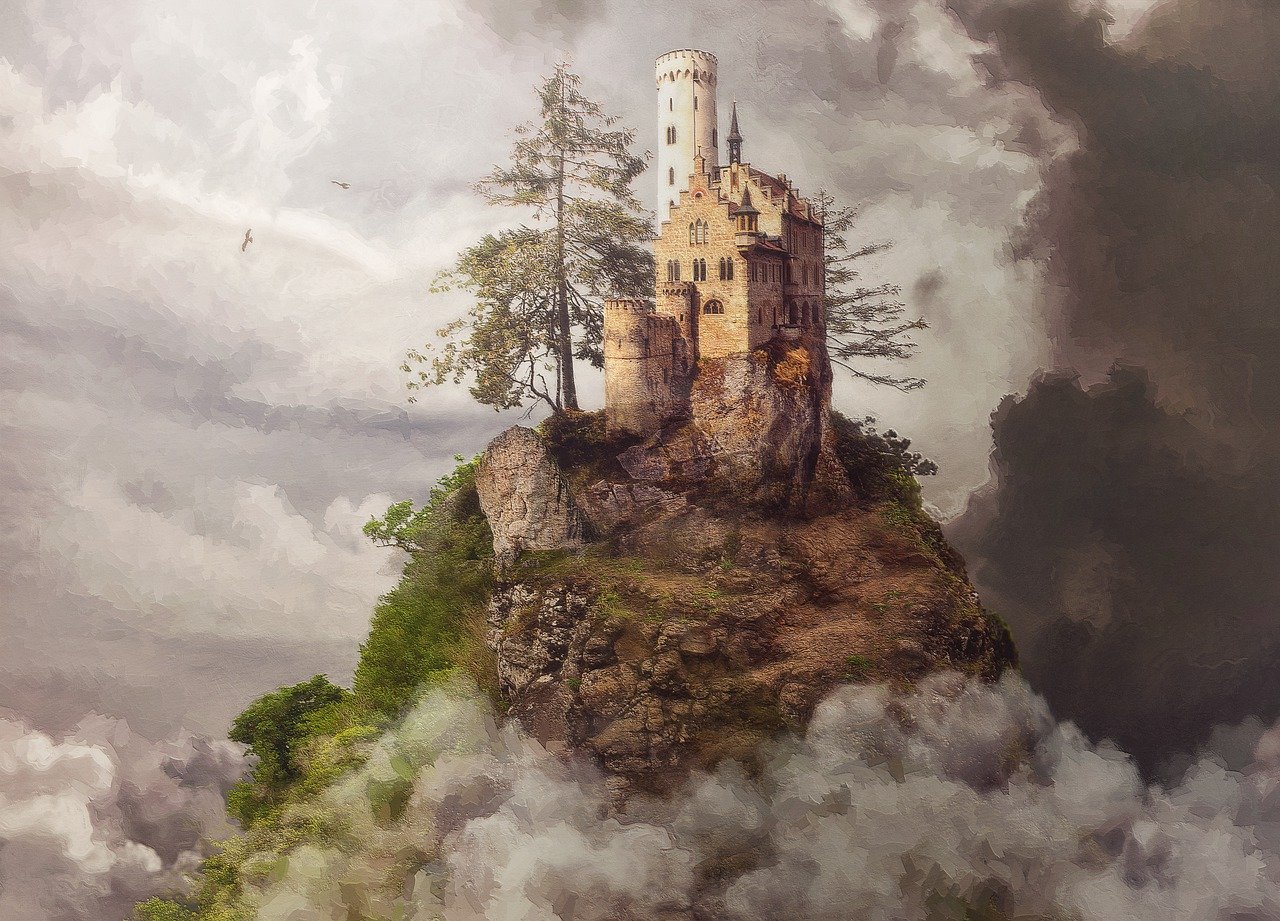
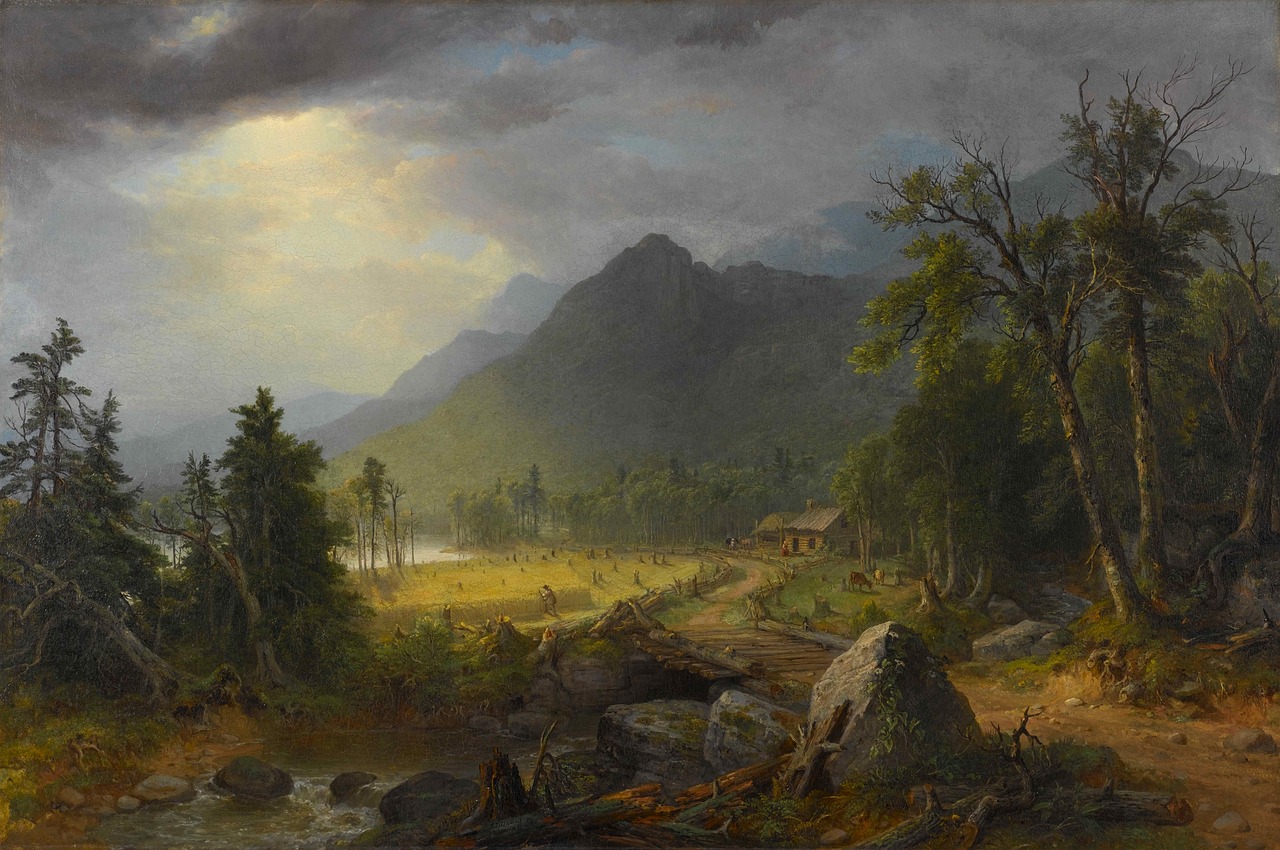
Landscape painting is not just about putting colors on a canvas; it's a journey into the heart of nature. Whether you're a beginner picking up a brush for the first time or an experienced artist looking to refine your skills, understanding the essential techniques, tools, and inspirations behind this captivating art form is crucial. Imagine standing before a breathtaking vista, feeling the gentle breeze, and hearing the rustle of leaves. Your goal is to capture that moment, to translate the beauty of the outdoors onto your canvas. This article will explore various aspects of landscape painting, from composition and materials to techniques for capturing light and depth, all while encouraging you to find your unique artistic voice.
Composition is the backbone of any successful landscape painting. It’s like the blueprint of a building; without a solid plan, the final product can feel disjointed. When arranging elements within your artwork, consider the following principles:
- Balance: Distributing visual weight evenly across the canvas creates harmony.
- Focal Point: Direct the viewer’s eye to a specific area, such as a mountain peak or a winding river.
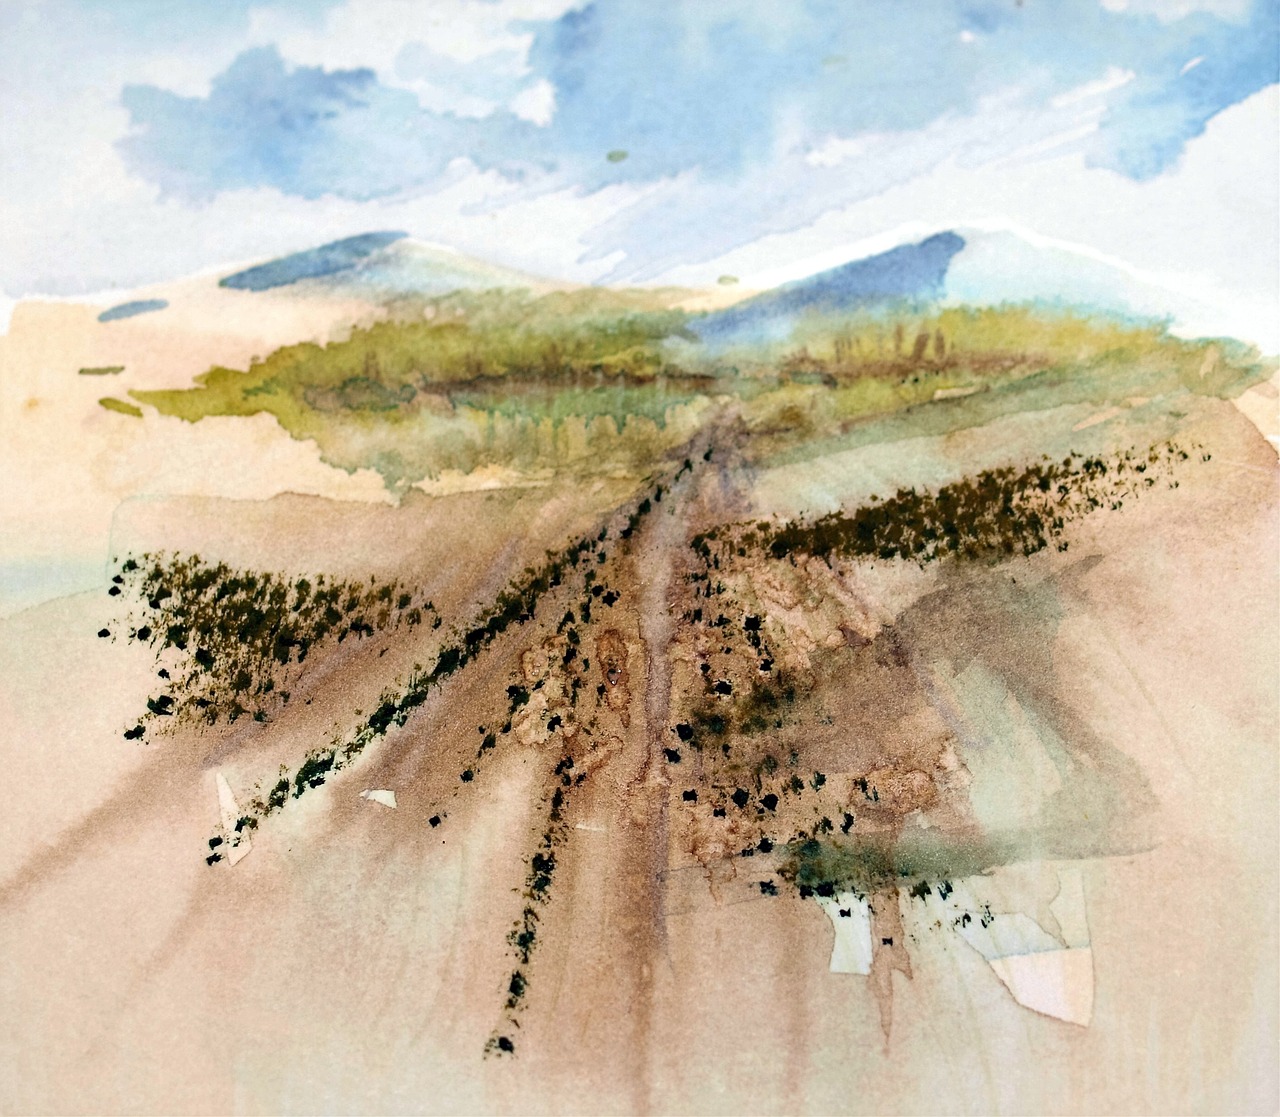
- Leading Lines: Use natural lines, like roads or rivers, to guide the viewer through the painting.
By mastering these principles, you can enhance your compositions and create paintings that draw the viewer in, making them feel as if they are stepping into the scene.
The materials you choose can significantly impact the outcome of your landscape painting. Think of it as selecting the right ingredients for a recipe; the better the ingredients, the tastier the dish! Here’s a look at some essential materials:
Different types of paints offer unique qualities that can affect your artwork. Understanding these can help you make the right choice:
Oil paints are renowned for their rich colors and blending capabilities. They allow for detailed work and can be manipulated over a longer period, giving you the chance to perfect your landscape. However, they do require a bit of patience as they take longer to dry.
Acrylics, on the other hand, dry quickly and are incredibly versatile. They can mimic the qualities of oil paints when mixed with mediums, or they can be used straight from the tube for a more vibrant, opaque finish. This makes them suitable for various styles and techniques.
The right brushes and tools can make or break your painting experience. Different brush types serve specific purposes, from broad strokes to fine details. For instance, flat brushes are perfect for covering large areas, while round brushes are ideal for intricate work. Additionally, tools like palette knives can help create texture, adding depth to your landscapes.
Light is a crucial element in landscape painting, influencing the mood and depth of your artwork. To effectively capture light and shadow, consider the time of day and weather conditions. Early mornings and late afternoons often provide the most dramatic lighting. Techniques such as glazing and layering can help you achieve a realistic portrayal of light.
Color theory is essential for creating harmonious landscapes. By using complementary colors, you can enhance the vibrancy of your painting. For example, pairing warm colors like oranges and yellows with cool colors like blues and greens can create a striking contrast that draws the viewer's eye.
To create a sense of distance and dimension in your landscape, you can employ techniques such as atmospheric perspective, where colors fade and soften as they recede into the background. This gives the illusion of depth, making your landscapes feel more realistic and immersive.
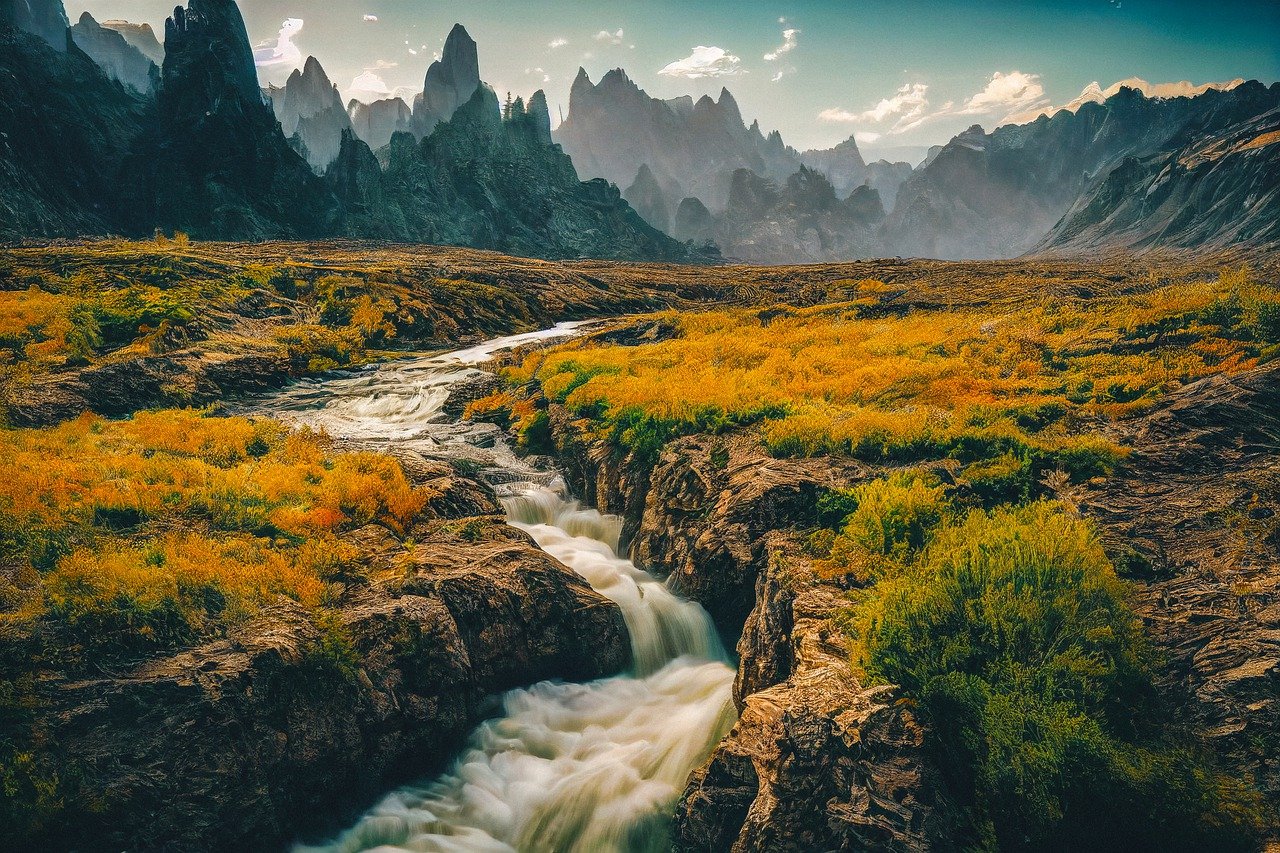
Nature is the ultimate muse for landscape painters. To find inspiration, look around you—everywhere you go, there are stunning scenes waiting to be captured. Whether it's a sprawling meadow, a dense forest, or a tranquil beach, nature provides endless opportunities for creativity.
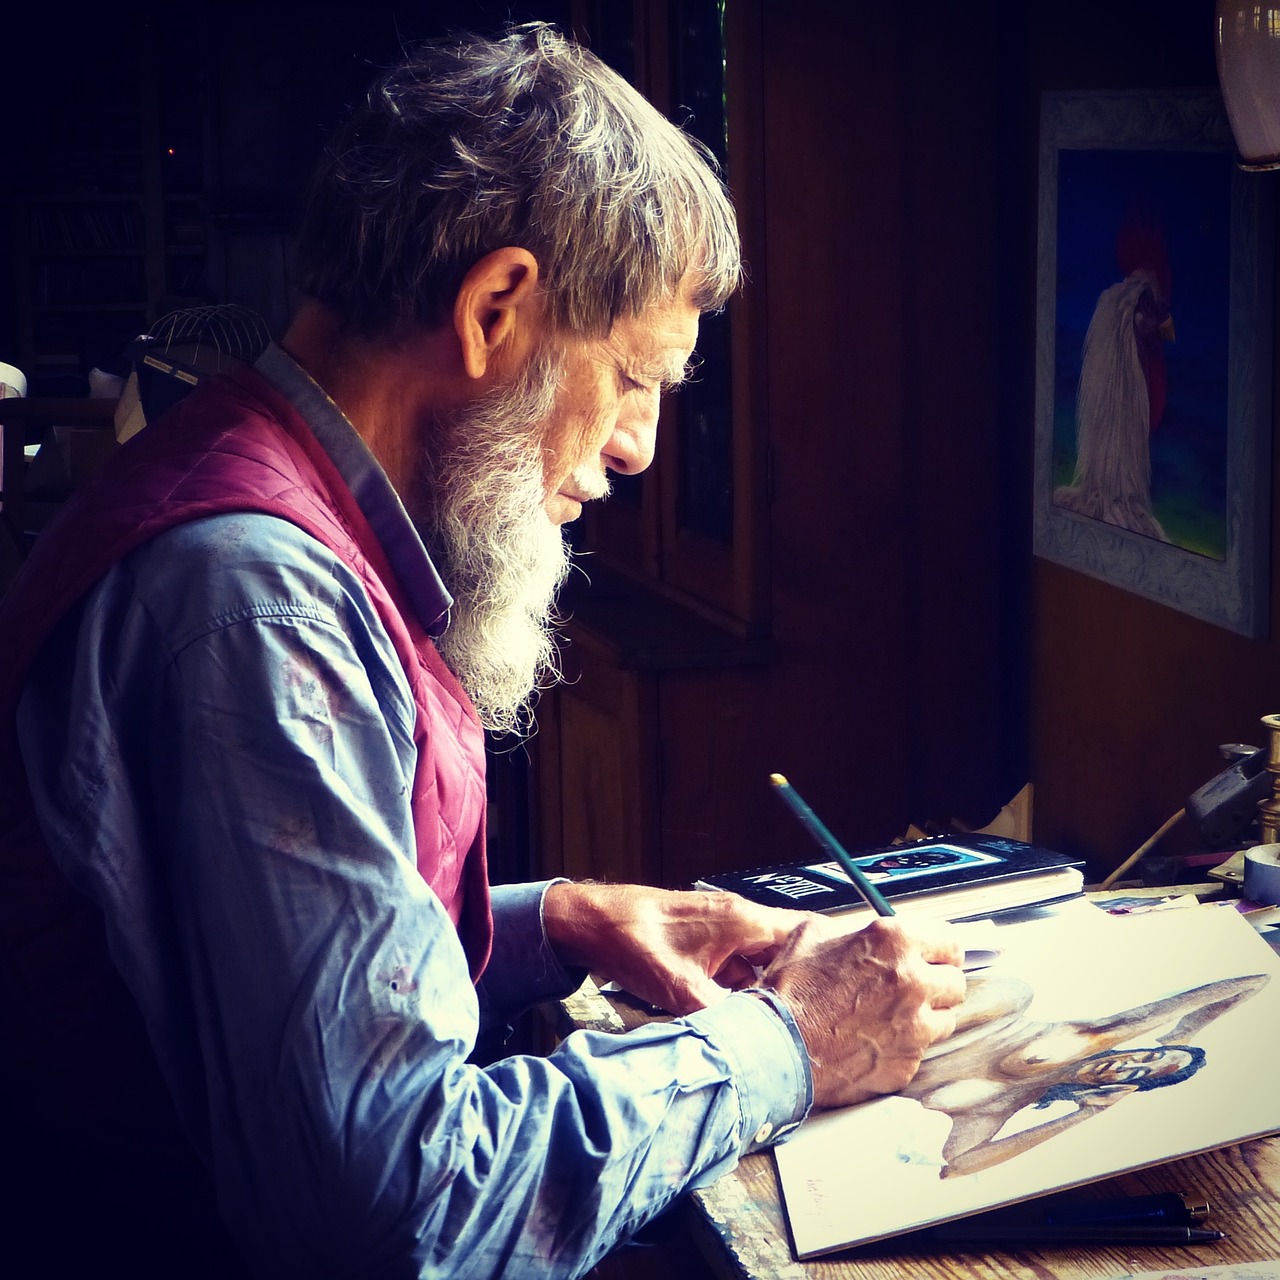
Plein air painting, or sketching outdoors, allows you to capture the essence of a landscape in real-time. It’s an exhilarating experience that connects you with your surroundings. Bring a sketchbook and some basic supplies, and don't be afraid to make quick notes of colors and shapes; these will serve as invaluable references when you return to your studio.
Using photographs as references can help you capture details that might be missed in real-time. When selecting photos, look for images with strong lighting and interesting compositions. These can guide your brushwork and help you recreate the scene on your canvas.
Every artist has a unique voice, and landscape painting is no exception. Developing your personal style is about exploring various techniques and finding what resonates with you. Don’t be afraid to experiment; sometimes the most beautiful works come from a place of spontaneity.
Trying different techniques can help you discover your style. Whether it’s layering colors, using unconventional tools, or incorporating mixed media, allow yourself the freedom to explore. Your unique perspective will shine through in your work.
A well-curated portfolio showcases your best work and reflects your artistic journey. When selecting pieces, consider diversity in your techniques and subjects. This not only highlights your skills but also tells a story about your growth as an artist.
In conclusion, landscape painting is a rewarding artistic endeavor that invites you to explore the beauty of nature. By understanding composition, choosing the right materials, mastering techniques for light and depth, and finding inspiration in your surroundings, you can create stunning artworks that resonate with viewers. Remember, the journey of an artist is ongoing—so keep experimenting, practicing, and most importantly, enjoying the process!
- What is the best type of paint for beginners? Acrylic paints are often recommended for beginners due to their versatility and quick drying time.
- How can I improve my landscape compositions? Study the principles of composition, practice sketching, and analyze the work of other artists to gain insights.
- Is it necessary to paint outdoors? While plein air painting is beneficial, you can also create beautiful landscapes from photographs or imagination.
Understanding Landscape Composition
Composition is the backbone of any painting, and when it comes to landscape art, it becomes even more crucial. Imagine you’re setting the stage for a beautiful story—the way you arrange elements within your artwork can either captivate your audience or leave them feeling lost. So, what exactly makes a composition effective in landscape painting? Let’s dive into the essential principles that can elevate your artwork to new heights.
First off, consider the concept of the rule of thirds. This classic guideline suggests that you divide your canvas into a grid of nine equal sections by two horizontal lines and two vertical lines. The idea is to place key elements of your landscape along these lines or at their intersections. This technique not only creates balance but also draws the viewer's eye naturally across the painting. Think of it as a roadmap guiding your audience through the scenic journey you’ve captured on canvas.
Another important principle is leading lines. These are lines within your composition that lead the viewer’s eye toward a focal point. They can be roads, rivers, or even rows of trees. By incorporating leading lines, you create a sense of depth and movement, making your landscape feel more dynamic. For instance, a winding river can guide the viewer's gaze from the foreground to the distant mountains, creating a visual path that invites exploration.
Additionally, consider the foreground, middle ground, and background in your landscape. This layering adds depth and perspective to your painting. The foreground often contains the most detail and vibrant colors, drawing the viewer in, while the background can be softer and less defined, creating a sense of distance. Balancing these elements helps to create a more immersive experience. Here’s a quick breakdown:
| Layer | Description | Purpose |
|---|---|---|
| Foreground | Contains detailed elements, like flowers or rocks. | Draws the viewer's eye and creates intimacy. |
| Middle Ground | Features elements like trees or buildings. | Adds context and depth to the scene. |
| Background | Includes distant mountains or skies. | Provides a sense of scale and atmosphere. |
Finally, don’t underestimate the power of color and contrast. The colors you choose can evoke emotions and set the mood for your landscape. Warm colors like reds and yellows can create a feeling of warmth and happiness, while cooler colors like blues and greens can evoke calmness and serenity. Using contrasting colors can also help to emphasize certain areas of your painting, guiding the viewer’s focus where you want it most.
In conclusion, understanding landscape composition is about more than just arranging elements; it's about telling a story and evoking emotions. By mastering these principles, you’ll be well on your way to creating stunning landscapes that resonate with viewers. Remember, practice is key—experiment with different compositions, and don’t be afraid to break the rules to find your unique voice!

Choosing the Right Materials
When it comes to landscape painting, is crucial for achieving the desired results. Just like a chef needs quality ingredients to create a delicious dish, an artist requires the best tools and supplies to bring their vision to life. The materials you select can greatly influence the texture, depth, and overall impact of your artwork. So, what should you consider when gathering your painting arsenal?
First off, let's talk about paints. The type of paint you choose will affect your painting technique and the final outcome. There are three primary types of paints commonly used in landscape painting: oil, acrylic, and watercolor. Each has its own unique properties and benefits:
| Type of Paint | Characteristics | Best For |
|---|---|---|
| Oil Paints | Rich colors, slow drying, excellent blending | Detailed landscapes with depth |
| Acrylic Paints | Fast drying, versatile, water-soluble | Varied styles and techniques |
| Watercolor | Translucent, quick drying, requires special paper | Light and airy landscapes |
Next, we have brushes. The right brushes can make a world of difference in how you apply paint to your canvas. Different brush shapes and sizes can create various textures and effects. For instance, flat brushes are great for broad strokes and washes, while round brushes are excellent for detail work. It’s also wise to invest in a few specialty brushes, such as fan brushes for creating foliage and palette knives for texture.
Don’t forget about the canvas or paper you’ll be painting on. The surface you choose will affect how the paint adheres and the overall texture of your artwork. Canvases come in various forms, including stretched, canvas boards, and panels. If you're using watercolors, ensure you select high-quality watercolor paper, which can handle the moisture without warping.
In addition to these essentials, consider other tools that can enhance your landscape painting experience:
- Palette: A good palette is essential for mixing colors effectively.
- Palette Knife: Useful for mixing paints and applying thick layers.
- Rags or Paper Towels: Handy for cleaning brushes and wiping off excess paint.
- Varnish: Protects finished paintings and enhances colors.
Finally, it’s important to remember that while quality materials can elevate your artwork, creativity and practice are what truly make a painting shine. Don't be afraid to experiment with different materials to find what works best for you. The right combination of tools will not only boost your confidence but also help you express your artistic vision more effectively.
Q: Do I need to use expensive materials to create good landscape paintings?
A: While high-quality materials can enhance your work, it's not necessary to break the bank. Many artists create stunning pieces using affordable supplies. The key is to practice and develop your skills.
Q: Can I use any type of canvas for oil or acrylic paints?
A: It's best to use canvas specifically designed for oil or acrylic paints, as they are primed to handle the medium. Using the wrong type can lead to issues like paint peeling or fading.
Q: How do I know which brushes to buy?
A: Start with a basic set that includes different shapes and sizes. As you become more comfortable with your technique, you can invest in specialty brushes that suit your style.
Types of Paints
When it comes to landscape painting, the type of paint you choose can significantly influence the final outcome of your artwork. Each paint type has its unique characteristics, advantages, and challenges. Understanding these differences can help you make an informed decision that aligns with your artistic vision. Let's dive into the three most popular types of paints used in landscape painting: oil paints, acrylic paints, and watercolors.
Oil paints are a classic choice among landscape artists. They are known for their rich, vibrant colors and excellent blending capabilities, allowing artists to create smooth transitions between hues. One of the standout features of oil paints is their long drying time, which gives you the flexibility to work on details and make adjustments over several days. However, this can also be a drawback if you're eager to complete a piece quickly. Oil paints require specific mediums and solvents for thinning and cleaning, which can add complexity to your process. Here are some key benefits of using oil paints:
- Rich Color Depth: The pigments in oil paints create stunning depth and luminosity.
- Blendability: The slow drying time allows for seamless blending of colors.
- Layering Techniques: Artists can build up layers for texture and depth.
Next up, we have acrylic paints, which have gained immense popularity due to their versatility and quick drying time. Acrylics can mimic the appearance of oil paints when used with slow-drying mediums or can be thinned to resemble watercolors. This adaptability makes them suitable for various styles, from detailed realism to abstract expression. Acrylic paints are water-based, making them easy to clean up with soap and water. Here are some notable advantages:
- Fast Drying: Ideal for artists who prefer to complete their work in one session.
- Versatility: Can be used on a variety of surfaces, including canvas, wood, and paper.
- Non-Toxic: Generally safer to use compared to oil paints.
Lastly, we have watercolors, which offer a completely different approach to landscape painting. Watercolors are known for their transparency and ability to create soft, delicate washes of color. They require a different technique, as the paint is activated with water and applied to wet or dry paper. This medium is perfect for capturing the ethereal quality of light and atmosphere in landscapes. While they can be challenging for beginners, mastering watercolors can lead to breathtaking results. Here are some characteristics of watercolor paints:
- Transparency: Allows for layering and creating depth through washes.
- Portability: Easy to transport, making them ideal for outdoor painting.
- Quick Drying: Allows for rapid application and adjustments.
In summary, choosing the right type of paint is crucial for achieving the desired effect in your landscape paintings. Whether you opt for the rich vibrancy of oil, the versatility of acrylics, or the delicate washes of watercolor, each paint type offers unique opportunities for expression. As you experiment with these mediums, you'll discover which one resonates most with your artistic style and preferences.
Q: Which paint is best for beginners?
A: Acrylic paints are often recommended for beginners due to their ease of use, quick drying time, and versatility.
Q: Can I mix different types of paints?
A: It's generally not advisable to mix different types of paints (e.g., oil and acrylic) as they have different binding agents and drying times, which can lead to complications.
Q: How do I choose the right brushes for my paint type?
A: Each paint type works best with specific brushes. For oil paints, use stiff brushes for thicker applications, while softer brushes work well with acrylics. Watercolors typically require special watercolor brushes that hold water well.
Oil Paints
When it comes to landscape painting, are often the go-to choice for many artists, and for good reason! These paints are celebrated for their rich colors and incredible blending capabilities, allowing you to create stunning and detailed landscapes that can evoke emotion and transport viewers to another world. Imagine painting a sunset where the colors seamlessly merge into one another, creating a breathtaking gradient. That's the magic of oil paints!
One of the standout features of oil paints is their slow drying time. This characteristic can be a double-edged sword; on one hand, it provides artists with the luxury of time to blend colors and make adjustments, resulting in a more polished final piece. On the other hand, it requires patience and can be a challenge for those who prefer a quicker painting process. However, this extended working time is ideal for capturing the subtle nuances of light and shadow in landscapes.
To work effectively with oil paints, it's essential to understand some fundamental techniques. Here are a few tips to get you started:
- Layering: Start with an underpainting to establish your composition and values. Gradually build up layers, allowing each to dry slightly before applying the next.
- Glazing: This technique involves applying a thin, transparent layer of paint over a dried layer, enhancing depth and luminosity.
- Impasto: For a more textured look, apply paint thickly to create dimension and interest in your landscapes.
Additionally, it's crucial to invest in high-quality oil paints and mediums. The quality of your materials can significantly influence the final outcome of your artwork. When selecting your colors, consider the color wheel and how different hues interact with each other. A well-chosen palette can elevate your landscape painting from ordinary to extraordinary!
In conclusion, oil paints are a fantastic medium for landscape artists looking to explore depth, texture, and vibrant color. With practice and experimentation, you can master the techniques that will allow you to create breathtaking landscapes that truly capture the beauty of the world around you.
- What are the best oil paints for beginners? Look for student-grade oil paints from reputable brands. They offer good quality at a more affordable price.
- How do I clean my brushes after using oil paints? Use a solvent like turpentine or mineral spirits to clean your brushes, followed by soap and water to remove any residue.
- Can I mix oil paints with other mediums? Yes, but be cautious! Always mix compatible mediums to avoid compromising the integrity of your paint.
Acrylic Paints
Acrylic paints have revolutionized the world of art, offering a versatile medium that caters to both beginners and seasoned artists alike. One of the most appealing aspects of acrylics is their quick drying time. Unlike oil paints, which can take days to dry, acrylics allow you to layer and work on your painting without the long wait. This quality makes them perfect for artists who thrive on spontaneity and experimentation.
Another significant advantage of acrylic paints is their flexibility. You can use them straight from the tube for vibrant, opaque colors, or dilute them with water to achieve a watercolor-like effect. This adaptability means that you can create a wide range of textures and finishes, making acrylics suitable for various styles, from traditional landscapes to modern abstracts. The ability to mix acrylics with different mediums, such as gels and pastes, further expands your creative possibilities.
When working with acrylics, it’s essential to consider your painting surface. Acrylics adhere well to a variety of materials, including canvas, paper, wood, and even fabric. However, the choice of surface can significantly influence the final outcome of your artwork. For instance, a textured canvas can add depth to your landscape painting, while a smooth panel may yield a more refined finish. Experimenting with different surfaces can lead to exciting discoveries in your artistic journey.
One of the most common challenges artists face when using acrylics is the potential for color shift. Acrylics tend to dry darker than they appear when wet, which can lead to unexpected results. To combat this, it’s helpful to keep a color chart or swatches of your mixed colors handy, allowing you to gauge how they will look once dried. Additionally, using a palette with a white or light background can help you see the true colors as you mix.
For those looking to enhance their landscape paintings, acrylics offer incredible opacity and brightness, which can help bring your scenes to life. The vibrant colors can mimic the stunning hues found in nature, from the deep blues of a serene lake to the fiery oranges and reds of a sunset. Plus, acrylics are water-resistant once dry, making them a durable choice for artworks that may be displayed in various environments.
In conclusion, acrylic paints are a fantastic option for landscape artists seeking a medium that is both dynamic and accessible. With their quick drying time, versatility, and vibrant colors, acrylics can help you capture the beauty of nature in your unique style. So grab your brushes, choose your canvas, and let your creativity flow with acrylics!
- What are the best surfaces for acrylic painting? Acrylics can be used on canvas, paper, wood, and fabric. The choice of surface can affect the texture and finish of your artwork.
- How can I prevent acrylic paints from drying too quickly? Use a slow-drying medium or mist your palette with water to keep the paints workable for a longer period.
- Can I mix acrylics with other mediums? Yes, acrylics can be mixed with gels, pastes, and other mediums to create different textures and effects.
- Are acrylic paints safe for children? Most acrylic paints are non-toxic, but it's always best to check the label and supervise young children while they paint.

Brushes and Tools
When it comes to landscape painting, the right brushes and tools can make all the difference in your artwork. Just like a chef needs the right knives to create a culinary masterpiece, an artist requires the proper tools to bring their vision to life. The selection of brushes can significantly influence the texture, detail, and overall feel of your landscape paintings. So, what should you consider when choosing your brushes and tools?
First and foremost, it's essential to understand the different types of brushes available and their specific uses. For instance, flat brushes are perfect for creating broad strokes and filling in large areas of color, while round brushes are ideal for detailing and fine lines. Additionally, fan brushes can be used to create texture, resembling the look of grass or foliage, which is crucial in landscape painting. It's like having a toolbox where each tool serves a unique purpose, allowing you to tackle various aspects of your painting.
Moreover, the material of the brush bristles plays a vital role in how paint is applied. Synthetic brushes are durable and versatile, making them great for both acrylic and oil paints. On the other hand, natural hair brushes, such as those made from sable or hog bristle, offer superior paint-holding capacity and smooth application, particularly beneficial for oil painting. Ultimately, the choice between synthetic and natural brushes depends on your painting style and personal preference.
In addition to brushes, there are other tools that can enhance your landscape painting experience. A palette knife, for example, is not just for mixing colors; it can create stunning textures and effects on the canvas, adding depth to your landscape. Similarly, using a rigger brush can help you achieve fine lines for details like tree branches or delicate grasses, elevating your artwork to a new level.
Don't forget about the importance of a good easel and a comfortable workspace. An easel allows you to work at the right angle and height, reducing strain on your back and neck while painting. A well-organized workspace with all your tools within reach can also enhance your creative flow, making the painting process more enjoyable and productive.
In summary, investing in quality brushes and tools tailored to your landscape painting needs is crucial. By understanding the various types of brushes and their uses, along with incorporating helpful tools like palette knives and riggers, you can significantly improve your painting technique and the overall quality of your artwork. Remember, the right tools not only help you execute your vision but also inspire creativity and innovation in your landscape paintings.
- What types of brushes are best for landscape painting? Flat, round, and fan brushes are commonly used for various techniques in landscape painting.
- Should I use synthetic or natural hair brushes? It depends on your preference; synthetic brushes are versatile, while natural hair brushes provide better paint application.
- What other tools should I consider for landscape painting? Palette knives, easels, and rigger brushes can enhance your painting experience and improve your artwork.
Techniques for Capturing Light
Capturing light in landscape painting is akin to catching fireflies on a warm summer night; it requires patience, practice, and a keen eye. Light is not just a physical phenomenon; it influences the mood, depth, and overall atmosphere of your artwork. Understanding how to manipulate light can transform a simple landscape into a breathtaking masterpiece. So, how do you go about this? Let’s dive into some essential techniques that will help you portray light and shadow effectively in your paintings.
One of the most fundamental aspects of capturing light is understanding its direction and intensity. The position of the sun or any light source can dramatically change the appearance of the landscape. For instance, early morning light is soft and warm, while the midday sun is harsh and creates strong shadows. As an artist, you need to observe how light interacts with various elements in your scene. This can be done by creating a simple sketch or taking a moment to study the way light reflects off surfaces. A useful technique is to create a light and shadow map—a quick outline of where the light hits and where shadows fall, helping you visualize the scene more effectively.
Another powerful technique is the use of glazing. This involves applying thin layers of transparent paint over dried layers to create luminosity and depth. By glazing, you can simulate the way light filters through leaves or the soft glow of a sunset. For example, if you are painting a sunset, you might start with a base layer of warm yellow and then glaze over it with a thin layer of red or orange. This technique not only enhances the vibrancy of your colors but also adds an ethereal quality to your landscape.
Additionally, understanding color temperature is crucial in portraying light. Warm colors (reds, oranges, yellows) tend to advance, while cool colors (blues, greens, purples) recede. By skillfully balancing these colors, you can create a sense of depth and dimension in your painting. For instance, placing warm colors in the foreground can draw the viewer's eye, while cooler tones in the background can create a feeling of distance.
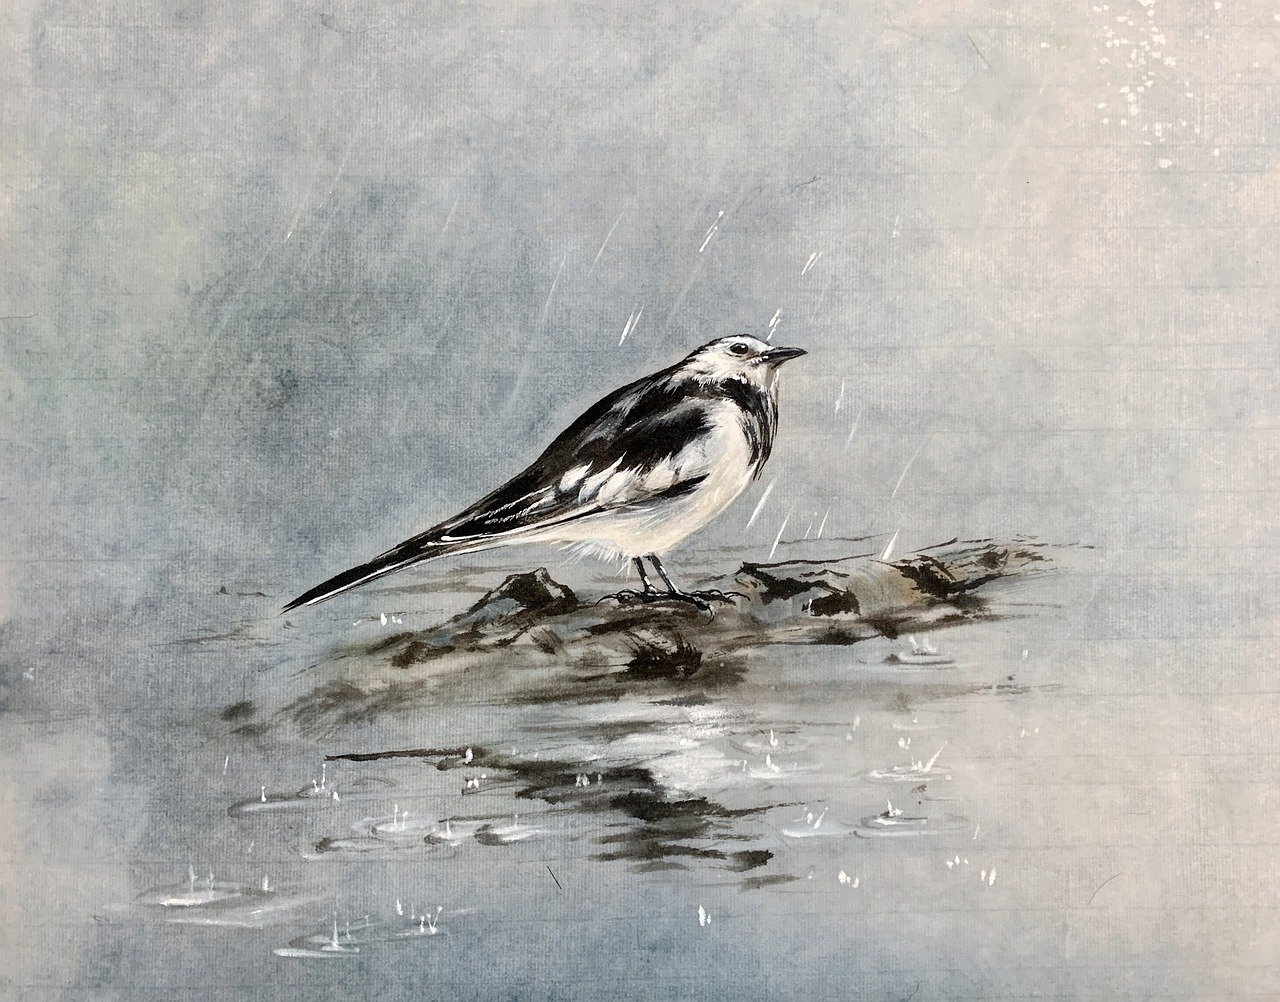
Another technique worth mentioning is the use of highlights and reflections. These elements can add a dynamic quality to your landscape. For instance, if you’re painting a lake, consider how the water reflects the sky and surrounding trees. Using a lighter shade of the colors in your scene can effectively mimic the way light interacts with surfaces. A small amount of white or a lighter hue can be added to the areas where light hits directly, creating a striking contrast that draws attention.
| Technique | Description |
|---|---|
| Light and Shadow Mapping | Sketching out where light hits and where shadows fall to visualize the scene. |
| Glazing | Applying thin layers of transparent paint to enhance luminosity. |
| Color Temperature | Utilizing warm and cool colors to create depth and dimension. |
| Highlights and Reflections | Adding lighter shades to simulate light interaction with surfaces. |
Finally, don’t forget the importance of practice and observation. Spend time outdoors, observing how light changes throughout the day. Take photographs, make quick sketches, or simply take a moment to sit and absorb the beauty around you. The more you practice, the more intuitive your understanding of light will become, allowing you to capture its essence in your landscape paintings.
- What is the best time of day to paint landscapes? Early morning and late afternoon are often considered the best times due to the soft, warm light.
- How can I improve my understanding of light in painting? Regularly observe natural light in different conditions and practice sketching or painting under varying light sources.
- Is glazing suitable for beginners? Yes, glazing can be a great technique for beginners to learn how to build depth and luminosity in their paintings.
- What colors should I use for shadows? Shadows are often represented with cooler colors, but they can also include complementary colors to add interest.
Understanding Color Theory
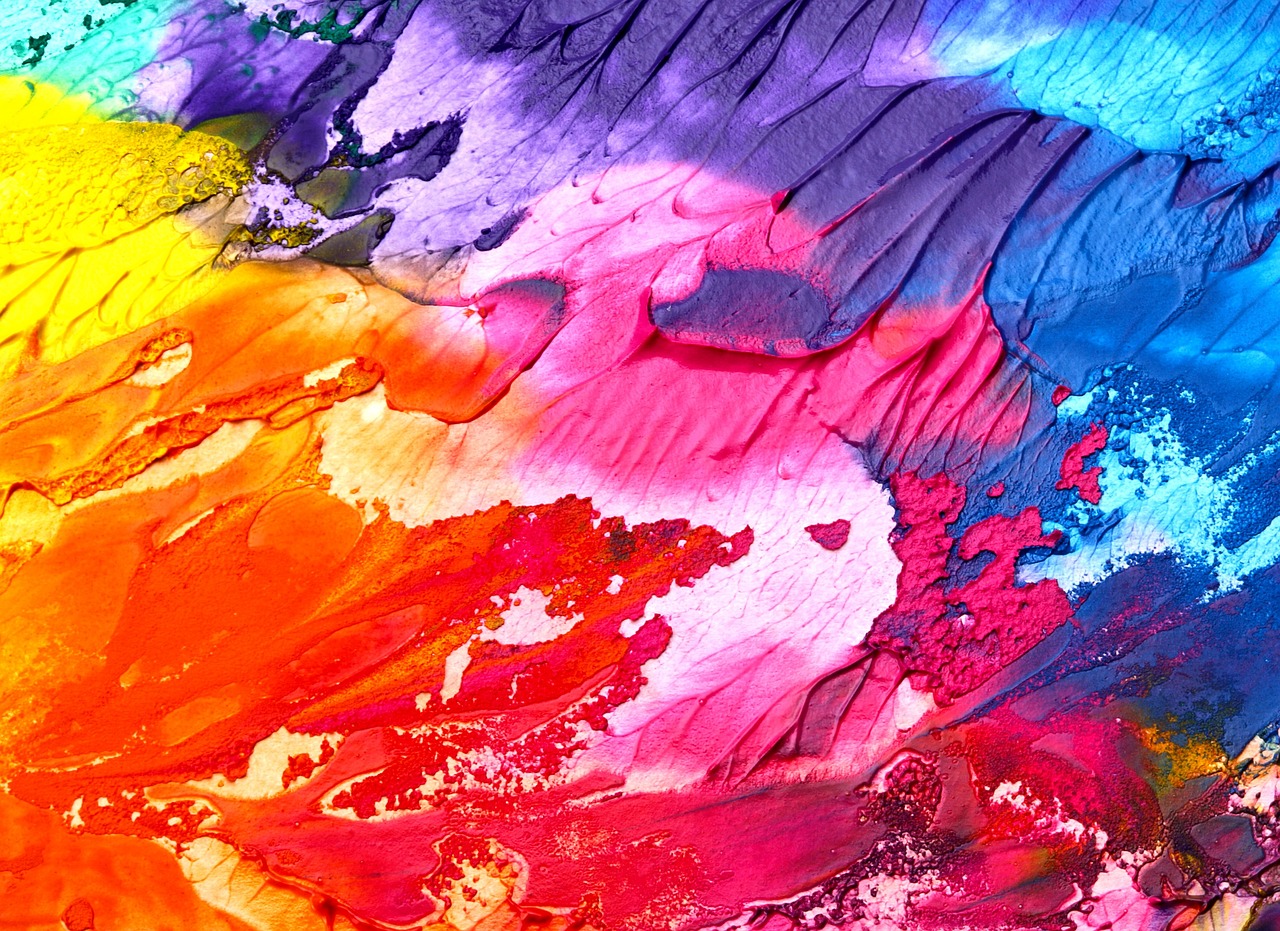
When it comes to landscape painting, understanding color theory is like having a secret map that guides you through the vibrant world of hues and tones. Color theory helps artists create visually appealing compositions by understanding how colors interact with one another. It’s not just about slapping paint onto a canvas; it’s about creating a harmonious balance that evokes emotion and captures the essence of the landscape.
At its core, color theory revolves around the color wheel, which is divided into primary, secondary, and tertiary colors. The primary colors—red, blue, and yellow—cannot be created by mixing other colors. Secondary colors, such as green, orange, and purple, are formed by mixing primary colors. Tertiary colors are created by mixing a primary color with a secondary color, giving you a broader palette to work with. Understanding this wheel is crucial for selecting colors that complement each other.
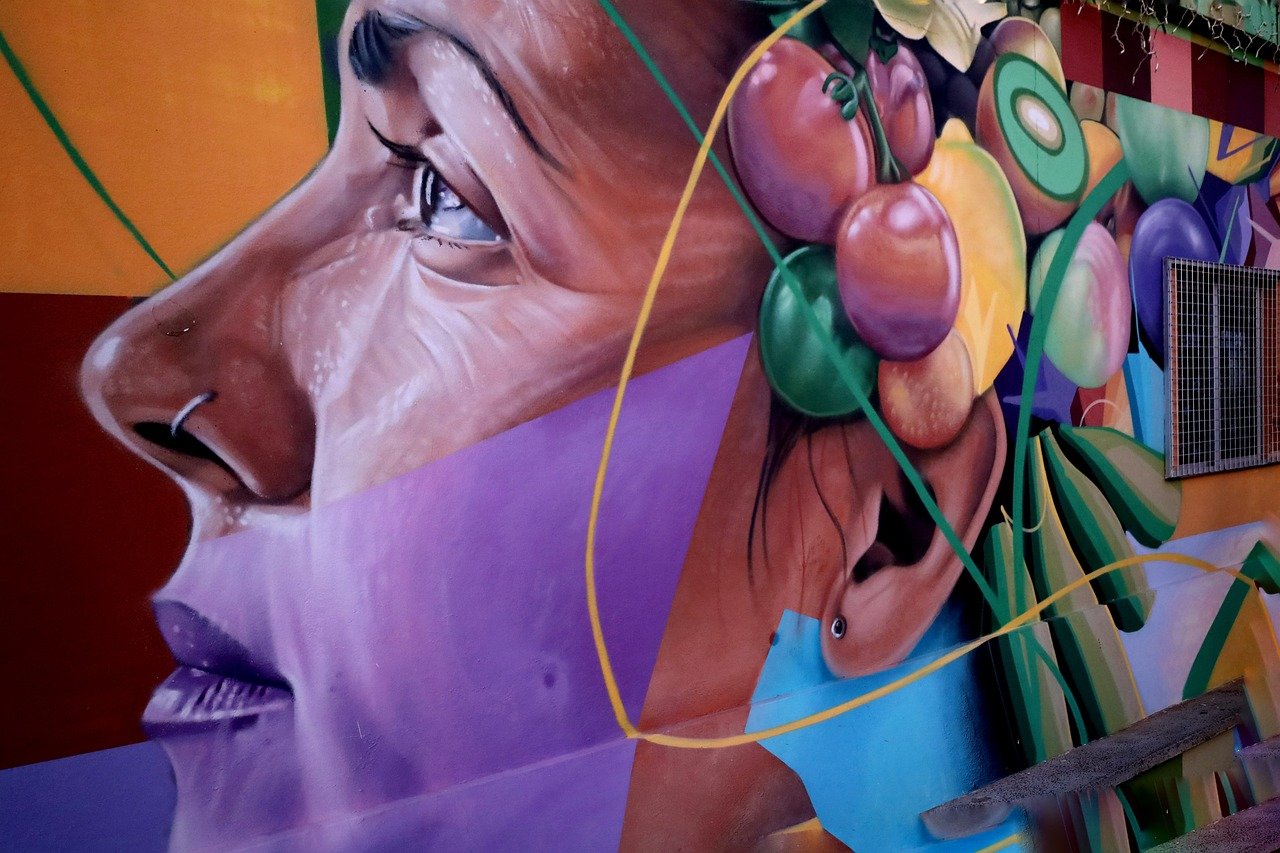
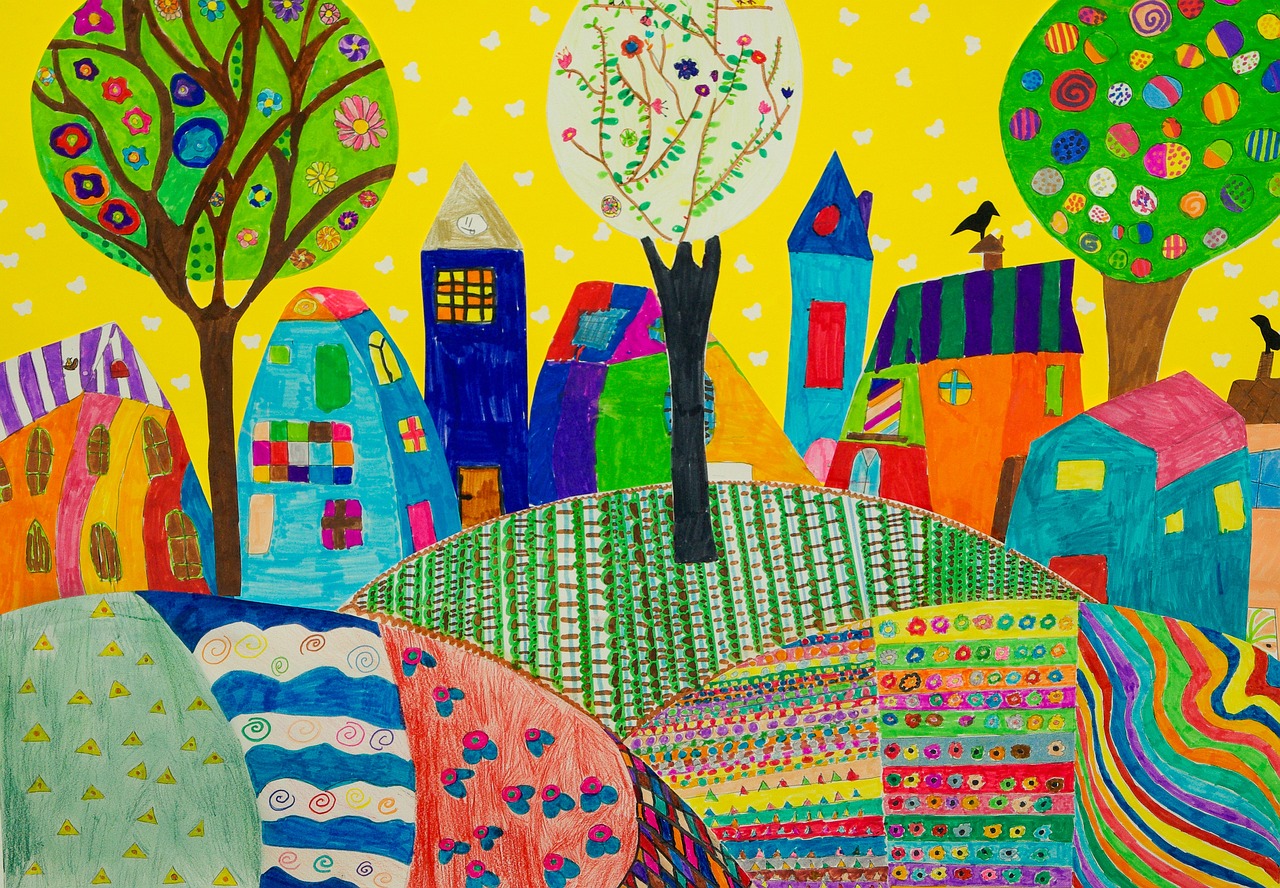
One of the fundamental principles in color theory is the use of complementary colors. These are colors that are opposite each other on the color wheel. For example, blue and orange are complementary. When used together in a landscape painting, they create a striking contrast that draws the viewer's eye. This technique can add depth and vibrancy to your work, making elements pop off the canvas.
Another essential concept is the idea of analogous colors, which are colors that sit next to each other on the color wheel. For instance, if you choose green, yellow-green, and yellow for your landscape, you create a soothing and cohesive look. This approach is particularly effective in landscapes where you want to convey a sense of tranquility or harmony with nature.
To further enhance your understanding of color theory, consider the following key aspects:
- Warm and Cool Colors: Warm colors (reds, oranges, yellows) tend to evoke feelings of warmth and energy, while cool colors (blues, greens, purples) can create a sense of calm and serenity. Using a mix of both can help you convey the right mood in your landscape.
- Value and Saturation: Value refers to how light or dark a color is, while saturation indicates its intensity. By manipulating these aspects, you can create depth and focus within your painting. For instance, using lighter, less saturated colors in the background can give the illusion of distance.
- Color Harmony: Achieving harmony in your painting involves balancing various colors to create a unified look. This can be done through techniques such as limiting your palette or using a dominant color to tie the piece together.
In summary, mastering color theory is essential for any landscape painter looking to elevate their work. It allows you to create compositions that are not only visually stunning but also emotionally resonant. So, the next time you step in front of your canvas, remember that the colors you choose can tell a story, evoke feelings, and transport viewers to the landscapes you love.
- What are the primary colors? The primary colors are red, blue, and yellow. These colors cannot be created by mixing other colors.
- How do complementary colors work? Complementary colors are opposite each other on the color wheel and, when used together, create a striking contrast that can enhance your artwork.
- What is the difference between warm and cool colors? Warm colors (reds, oranges, yellows) evoke energy and warmth, while cool colors (blues, greens, purples) create a sense of calm and tranquility.
- Why is color harmony important? Color harmony helps create a unified look in your painting, making it more visually appealing and enhancing the overall composition.
Creating Depth and Perspective
Creating depth and perspective in landscape painting is like crafting a three-dimensional world on a flat canvas. It’s all about tricking the eye into perceiving distance and dimension, which can transform a simple scene into a breathtaking vista. Imagine standing on a hilltop, looking down at a valley filled with trees, rivers, and mountains in the background. How do you convey that feeling of space and depth? Let’s dive into some techniques that can help you achieve this effect in your artwork.
One of the most effective methods to create depth is through the use of overlapping elements. When objects overlap, it gives the viewer a sense of which elements are closer and which are further away. For example, if you paint a foreground tree that partially obscures a distant mountain, the viewer can intuitively understand that the tree is closer. This simple technique can add a significant layer of realism to your landscape.
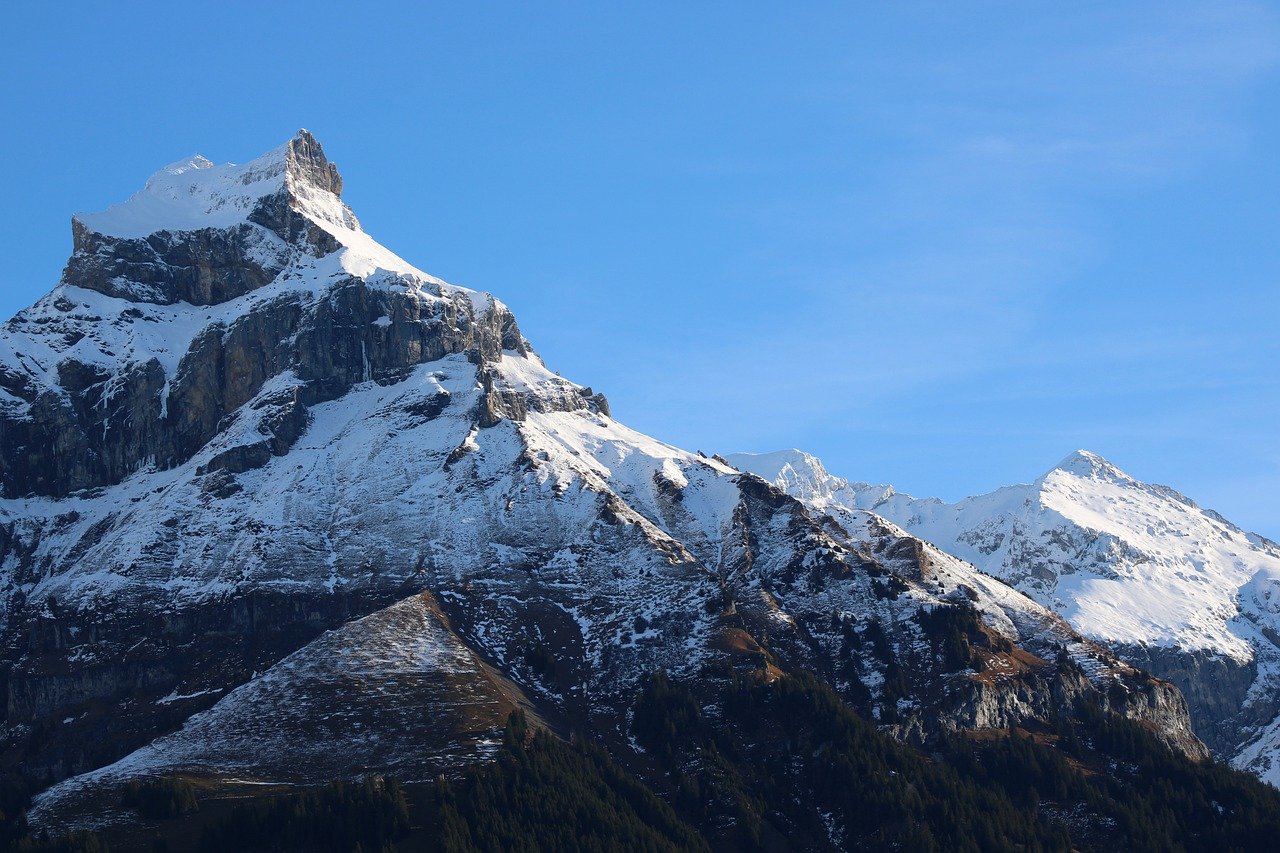
Another crucial aspect is atmospheric perspective. This technique involves altering the color and clarity of objects as they recede into the distance. Distant mountains often appear lighter and bluer than those in the foreground due to the atmosphere's effect on light. By using softer edges and muted colors for background elements, you can create a sense of depth that pulls the viewer into the scene. It’s like looking through a foggy window; the further away something is, the less detail you see.
Additionally, consider the size and scale of objects in your painting. Larger objects appear closer, while smaller ones seem further away. This principle can be effectively applied when painting landscapes. For instance, if you’re depicting a river, you might paint it wider and more detailed in the foreground, gradually narrowing it and simplifying the details as it recedes into the background. This not only adds depth but also guides the viewer’s eye through the painting.
Here’s a quick summary of techniques to create depth and perspective:
- Use overlapping elements to indicate proximity.
- Apply atmospheric perspective by softening colors and edges in the background.
- Manipulate size and scale to enhance the sense of distance.
Moreover, linear perspective can also play a significant role in your landscapes. This technique involves using a vanishing point where parallel lines converge, creating the illusion of depth. For example, if you’re painting a road or a river, you can draw lines that lead towards a point on the horizon. This not only adds depth but also creates a dynamic flow that can draw viewers into the scene.
Remember, practice is key. Try sketching different landscapes, experimenting with these techniques to see how they affect your composition. You might find that a combination of these methods works best for you. In the end, creating depth and perspective is about capturing the essence of the scene and inviting the viewer to step into your painted world.
- What is atmospheric perspective?
Atmospheric perspective is a technique used to create the illusion of depth by altering color and clarity of objects as they recede into the distance. - How can I practice creating depth in my paintings?
Experiment with overlapping elements, atmospheric perspective, and linear perspective in your sketches and paintings. - Why is depth important in landscape painting?
Depth adds realism and interest to your artwork, making it more engaging for viewers.
Finding Inspiration in Nature
When it comes to landscape painting, nature is the ultimate muse. There’s something incredibly magical about stepping outside and immersing yourself in the vibrant colors, textures, and forms that the world around us offers. Whether it’s the gentle sway of the trees, the shimmering surface of a lake, or the dramatic play of light during sunset, nature provides endless inspiration. But how do you translate that inspiration into your artwork? Let’s dive into some effective ways to harness the beauty of the outdoors and transform it into captivating landscape paintings.
One of the best ways to capture the essence of a landscape is through outdoor sketching. This practice, often referred to as plein air painting, allows you to connect with your surroundings on a deeper level. Imagine sitting on a hillside, the breeze gently rustling the leaves, as you sketch the scene before you. This not only helps you understand the composition and colors but also allows you to feel the atmosphere of the place. Here are a few tips to make the most of your outdoor sketching experience:
- Choose the Right Time: Early mornings or late afternoons often provide the best lighting conditions.
- Bring the Essentials: A portable easel, sketchbook, and a few basic supplies are all you need to get started.
- Focus on the Details: Pay attention to the subtle changes in color and light as they shift throughout the day.
In addition to outdoor sketching, using photographic references can significantly aid in your landscape painting journey. Photographs can capture intricate details that might be missed in a fleeting moment. However, it’s essential to choose your references wisely. Look for images that resonate with you emotionally and reflect the mood you wish to convey in your painting. Here are some tips for selecting and using photographs:
- Quality Matters: Choose high-resolution images to ensure clarity in details.
- Lighting and Composition: Look for photos with interesting lighting and strong compositional elements.
- Personal Connection: Select images that evoke a personal response or memory, as this will enhance your creativity.
Lastly, don't forget that inspiration can be found in the most unexpected places. Sometimes, a simple walk in your neighborhood or a visit to a local park can spark ideas for your next masterpiece. Allow your surroundings to speak to you—notice the colors, the shapes, and the feelings they evoke. Keep a sketchbook handy to jot down ideas or make quick sketches when inspiration strikes. Remember, the more you engage with nature, the more you’ll find yourself inspired to paint.
Q: How can I improve my outdoor sketching skills?
A: Practice regularly, focus on quick sketches to capture the essence of a scene, and don’t be afraid to experiment with different styles.
Q: What should I look for in a photographic reference?
A: Aim for high-quality images with good lighting and composition that evoke a personal connection or emotion.
Q: Can I mix different mediums in my landscape painting?
A: Absolutely! Mixing mediums like watercolor and acrylic can create unique textures and effects in your artwork.
Outdoor Sketching
Outdoor sketching is an exhilarating way to immerse yourself in the beauty of nature while honing your artistic skills. Imagine standing in a sunlit meadow, the gentle breeze rustling through the grass, and the vibrant colors of the landscape unfolding before your eyes. This experience not only allows you to capture the essence of a scene but also helps you connect with your surroundings on a deeper level. By sketching outdoors, you can develop a keen eye for detail and learn to translate the fleeting moments of natural beauty onto paper.
One of the greatest advantages of outdoor sketching is the opportunity to observe light and shadow in real-time. Unlike working from photographs, where lighting can be manipulated, being in the environment allows you to see how the sun interacts with the landscape, creating dynamic contrasts and varying hues. You can experiment with different times of the day to see how the changing light affects the colors and shapes in your sketches. For instance, early morning light casts a soft glow, while the harsh midday sun creates stark shadows.
To get started with outdoor sketching, you don’t need a lot of fancy materials. A simple sketchbook and a few pencils or pens can suffice. However, many artists find that using portable watercolor sets or colored pencils can enhance their outdoor sketches by adding a splash of color. Here’s a quick list of essentials to consider bringing along:
- Sketchbook or drawing pad
- Pencils or charcoal for sketching
- Watercolors or colored pencils for adding color
- Eraser and sharpener
- Portable chair or blanket for comfort
When you arrive at your chosen location, take a moment to soak in the scene. Look for focal points that draw your eye—perhaps a winding river, a majestic tree, or a distant mountain range. Start by lightly sketching the basic shapes and outlines, gradually adding details as you go along. Remember, the goal isn’t to create a perfect masterpiece but to capture the essence of the moment. Allow yourself to be spontaneous; embrace the imperfections that come with working outdoors.
In addition to improving your observation skills, outdoor sketching can also serve as a fantastic way to break through creative blocks. If you’re feeling uninspired in your studio, stepping outside and engaging with nature can reignite your passion for painting. The sights, sounds, and smells of the outdoors can stimulate your senses and inspire new ideas. So, grab your materials and head out—who knows what stunning landscapes await you?
Q: What is the best time of day for outdoor sketching?
A: Early morning and late afternoon are often considered the best times for outdoor sketching due to the softer light and longer shadows, which can enhance the depth and richness of your sketches.
Q: Do I need to be an experienced artist to sketch outdoors?
A: Absolutely not! Outdoor sketching is for everyone, regardless of skill level. The key is to enjoy the process and learn from your experiences.
Q: How can I improve my outdoor sketching skills?
A: Practice is essential. Try to sketch regularly, experiment with different techniques, and don’t be afraid to make mistakes. Observing other artists and studying their work can also provide valuable insights.
Photographic References
Using photographic references in landscape painting can be a game changer for artists at any skill level. Imagine standing in front of a breathtaking view, but you can’t quite capture the essence of that moment on canvas. This is where photographs come in handy! They serve as a bridge between the real world and your artistic expression, allowing you to freeze a moment in time and translate it into your artwork.
When selecting photographs for reference, consider the following aspects to ensure you capture the beauty and intricacies of the landscape:
- Lighting: Look for images taken during the golden hour—just after sunrise or before sunset—when the light casts a warm, soft glow. This lighting can add depth and drama to your painting.
- Composition: Choose photographs with strong compositions. Pay attention to the rule of thirds, leading lines, and focal points that draw the viewer's eye. A well-composed photograph can serve as a fantastic blueprint for your painting.
- Details: Select images that showcase interesting details, such as textures in the foreground or vibrant colors in the sky. These elements can enhance the richness of your landscape.
One effective way to use photographic references is to create a mood board. Gather a collection of images that resonate with you and represent the style, colors, and emotions you want to convey in your painting. This can help you visualize your artwork better and inspire your creative process.
Additionally, be mindful of the limitations of photographs. While they are incredibly useful, they can sometimes distort colors or flatten perspectives. Use them as a guide, but don’t feel bound to replicate every detail. Allow your artistic intuition to take over and interpret the scene in your unique way. Remember, the goal is to capture the spirit of the landscape, not just a photographic replica.
Lastly, consider combining multiple photographs to create a composite reference. This technique allows you to blend the best elements from various images, crafting a unique scene that reflects your vision. For instance, you might take the sky from one photo, the foreground from another, and the colors from a third. This method can lead to stunning, imaginative landscapes that are entirely your own.
Q1: Can I use any photograph as a reference for my paintings?
A1: While you can use any photograph, it’s best to choose images that are taken by you or are royalty-free to avoid copyright issues. Additionally, select images that inspire you and reflect the style you wish to achieve.
Q2: How do I avoid making my painting look like a photograph?
A2: Focus on your interpretation of the scene rather than an exact replica. Use your creativity to alter colors, add elements, or change the composition to create a more personal and artistic representation.
Q3: Should I only use photographs for reference?
A3: No, photographs are just one tool in your artistic arsenal. You should also consider outdoor sketching and painting from life to develop your skills and understanding of landscapes.
Q4: How can I improve my skills in using photographic references?
A4: Practice regularly by painting from various photographs. Experiment with different styles and techniques, and don’t hesitate to challenge yourself by altering elements in the images you choose.
Developing Your Unique Style
Every artist possesses a unique voice, a personal signature that distinguishes their work from others. This individuality is crucial in landscape painting, where the beauty of nature can be interpreted in countless ways. As you embark on your journey to develop your unique style, it’s essential to embrace experimentation and self-expression. Think of your artistic style as a fingerprint—no two are alike, and it’s shaped by your experiences, preferences, and influences.
One of the best ways to discover your style is by experimenting with various techniques. Try different brushes, color palettes, and compositions. For instance, if you usually work with oil paints, why not give acrylics a shot? Each medium has its own characteristics that can lead you to unexpected results. You might find that you enjoy the quick drying time of acrylics, or perhaps the rich textures achievable with oils. Don’t shy away from making mistakes; they often lead to the most profound discoveries. Remember, every brush stroke is a step toward finding what resonates with you.
Moreover, don't hesitate to explore different subject matters. While landscapes may be your primary focus, dabbling in still life or abstract art can provide fresh perspectives that enrich your landscape work. This cross-pollination of ideas can help you develop a more rounded style that reflects your personality. Think of it as adding spices to a dish; each ingredient enhances the overall flavor, creating something uniquely yours.
Another important aspect is to build a portfolio that showcases your best work. This isn’t just about displaying finished pieces; it’s also a reflection of your artistic journey. Include a variety of works that highlight your growth and evolution as an artist. When curating your portfolio, consider these factors:
| Criteria | Description |
|---|---|
| Quality | Choose pieces that demonstrate your skills and creativity. |
| Variety | Include different styles, techniques, and subjects to show versatility. |
| Personal Connection | Select works that resonate with you on a personal level. |
As you develop your style, remember to seek feedback from fellow artists and mentors. Constructive criticism can provide valuable insights and help you refine your techniques. Engaging with a community of artists can also inspire you to push your boundaries and explore new ideas.
Lastly, don't forget to enjoy the process! Your unique style will naturally evolve as you continue to paint and express yourself. Think of it as a journey rather than a destination. Allow yourself the freedom to grow, change, and discover new aspects of your artistic identity. Just like nature itself, your artistic voice is ever-changing and full of surprises.
- How long does it take to develop a unique style? - Developing a unique style can take time; it varies for each artist. The key is to keep experimenting and painting regularly.
- Can I change my style over time? - Absolutely! Many artists evolve their style as they gain new experiences and insights. Embrace the change!
- What if I feel stuck in my artistic journey? - It’s normal to feel stuck at times. Try exploring new techniques, taking breaks, or seeking inspiration from other artists to reignite your creativity.
Experimenting with Techniques
When it comes to landscape painting, can be one of the most thrilling parts of your artistic journey. Just like a chef tries out new ingredients to create a unique dish, artists should feel free to mix and match various painting methods to discover what resonates with them. This exploration not only enhances your skill set but also helps you develop a personal style that is distinctly yours.
One of the best ways to begin experimenting is by diving into different mediums. For instance, if you usually work with oils, why not give acrylics or watercolors a shot? Each medium has its own characteristics and challenges, which can lead to unexpected outcomes. This unpredictability can be a source of inspiration, pushing you to think outside the box and approach your landscapes from a fresh perspective.
Another exciting avenue to explore is the use of various brush techniques. From dry brushing to stippling, each method can create different textures and effects in your paintings. For example, using a fan brush can help you achieve a soft, grassy texture, while a palette knife can create bold, dramatic strokes that add depth and interest. Don’t be afraid to experiment with unconventional tools, such as sponges or even your fingers, to create unique textures that mimic the natural world.
Moreover, consider playing with color applications. Instead of sticking to traditional color palettes, try using unexpected colors to evoke emotions or set a mood. For instance, using vibrant purples and blues in a sunset scene can create a dreamy atmosphere that draws viewers in. Mixing colors directly on the canvas rather than on your palette can also yield beautiful, spontaneous results, allowing for a more organic feel in your landscapes.
It’s also beneficial to embrace the concept of layering. Start with a base layer of broad strokes, then gradually build up details and textures. This technique not only adds depth but also allows for a more dynamic interplay of light and shadow, which is crucial in landscape painting. As you layer your paint, step back frequently to assess your work from a distance. This practice can help you identify areas that need more contrast or detail.
Lastly, don't forget the power of collaboration. Engaging with fellow artists can open up new perspectives and techniques you may not have considered. Join a local art group or participate in workshops where you can share ideas and learn from one another. Sometimes, a simple conversation about your techniques can spark a new idea that transforms your approach to landscape painting.
In summary, experimenting with techniques in landscape painting is not just about trying something new; it's about embracing the journey of discovery. Each brushstroke, each color choice, and each technique you explore shapes your artistic voice. So, grab your brushes, take a deep breath, and let your creativity flow!
- What is the best medium for beginners in landscape painting?
Acrylics are often recommended for beginners due to their quick drying time and versatility. - How can I improve my landscape compositions?
Study the principles of composition, such as the rule of thirds, and practice sketching different arrangements. - Is it necessary to paint outdoors for landscape painting?
While outdoor painting (plein air) is beneficial, you can also work from photographs or your imagination. - How do I find my unique style in landscape painting?
Experiment with different techniques and mediums, and reflect on what elements you enjoy the most in your work.
Building a Portfolio
Creating a stunning portfolio is like crafting your own personal gallery; it showcases your journey as an artist and highlights your best work. But how do you go about building one that truly reflects your unique style and abilities? First and foremost, it’s essential to select pieces that not only demonstrate your technical skills but also convey your artistic voice. Think of your portfolio as a storybook, where each painting is a chapter that reveals something about you and your creative evolution.
When curating your portfolio, aim for diversity. Include various landscape paintings that showcase different techniques, color palettes, and moods. This variety not only keeps the viewer engaged but also illustrates your versatility as an artist. You might want to consider the following factors when selecting your pieces:
- Technical Skill: Choose works that highlight your mastery of techniques, whether it's capturing light, creating depth, or using color effectively.
- Personal Style: Include pieces that resonate with your artistic identity. This helps potential clients or galleries understand who you are as an artist.
- Emotional Impact: Select paintings that evoke emotion. Art is not just about technique; it’s about connection.
Once you have selected your works, pay attention to presentation. The way you display your paintings can significantly impact how they are perceived. Consider the following tips:
| Presentation Tips | Description |
|---|---|
| Consistent Framing | Use similar frames or matting styles to create a cohesive look across your portfolio. |
| High-Quality Images | Ensure that all photographs of your artwork are high-resolution and well-lit, showcasing the details. |
| Clear Organization | Arrange your pieces logically, perhaps chronologically or thematically, to guide the viewer through your artistic journey. |
In addition to physical portfolios, consider creating an online presence. A website or social media page dedicated to your art can reach a wider audience and attract potential buyers or galleries. Make sure to include an 'About Me' section where you share your story, inspirations, and artistic philosophy. This personal touch can make a significant difference in how your work is perceived.
Lastly, don’t forget to update your portfolio regularly. As you grow and evolve as an artist, your portfolio should reflect those changes. Remove older works that no longer represent your current style and replace them with your latest creations. This not only keeps your portfolio fresh but also shows your commitment to growth and improvement.
Building a portfolio is more than just a collection of paintings; it’s a reflection of who you are as an artist. Take the time to curate it thoughtfully, and it will serve as a powerful tool in your artistic career.
Q: How many pieces should I include in my portfolio?
A: Generally, a portfolio should contain between 10 to 20 pieces. This allows you to showcase a variety of works without overwhelming the viewer.
Q: Should I include only finished works?
A: While finished pieces are essential, including a few sketches or studies can provide insight into your creative process and development.
Q: How often should I update my portfolio?
A: Aim to update your portfolio at least once a year or whenever you create new work that you feel represents your current style and skill level.
Q: Is it necessary to have an online portfolio?
A: In today’s digital age, having an online portfolio is highly beneficial. It increases your visibility and allows potential clients to view your work easily.
Final Thoughts on Landscape Painting
In conclusion, landscape painting is not just a form of artistic expression; it's a journey that invites you to explore the beauty of the natural world. Whether you are a beginner dipping your toes into the vibrant waters of creativity or an experienced artist refining your skills, the key is to embrace the process. Remember, every brushstroke you make is a step toward discovering your unique voice and style.
As you reflect on your landscape painting experiences, consider the following aspects that can enhance your artistic journey:
- Practice Consistently: Just like any skill, the more you paint, the better you become. Set aside time each week to create.
- Stay Curious: Always seek inspiration in your surroundings. Nature is full of surprises waiting to be captured on canvas.
- Connect with Other Artists: Join local art groups or online communities. Sharing experiences and techniques can be incredibly enriching.
Moreover, don't shy away from experimenting with different techniques and materials. Each artist has a distinct approach, and what works for one may not work for another. Allow yourself the freedom to explore and make mistakes; they are often the best teachers. As you paint, consider how the light changes throughout the day, how the seasons transform landscapes, and how your emotions influence your work. These elements can add depth and meaning to your art.
Lastly, remember that your landscape paintings are a reflection of your perception of the world. They tell a story, convey emotions, and invite viewers to see the beauty you see. So, let your creativity flow, and don't hesitate to showcase your work. Your art has the power to inspire others and create connections.
To further assist you on your landscape painting journey, here are some frequently asked questions:
| Question | Answer |
|---|---|
| What is the best time of day to paint landscapes? | The golden hour, shortly after sunrise or before sunset, provides beautiful light and shadows, enhancing the colors in your painting. |
| How do I improve my painting skills? | Practice regularly, study the works of other artists, and don’t hesitate to take workshops or classes to learn new techniques. |
| Can I use photographs as references? | Absolutely! Photographs can help you capture details and lighting, but try to add your personal touch to make the painting your own. |
| What should I include in my portfolio? | Your portfolio should showcase your best work, focusing on pieces that highlight your range of skills and unique style. |
Frequently Asked Questions
- What is the best type of paint for landscape painting?
Choosing the right paint depends on your style and preference. Oil paints are great for rich colors and blending, while acrylics are versatile and dry quickly. If you prefer a more fluid approach, watercolors can offer stunning effects. Experimenting with different types can help you find what works best for you!
- How can I improve my landscape composition?
Improving composition involves understanding principles like balance, focal points, and the rule of thirds. Try sketching your layout before painting to visualize how elements interact. Remember, less is often more—don’t overcrowd your canvas!
- What tools do I need for landscape painting?
Essential tools include a variety of brushes, a palette for mixing colors, and a suitable canvas. You might also consider using a palette knife for texture and a good set of pencils for sketching your initial layout. The right tools can make a big difference!
- How do I capture light and shadow in my paintings?
Capturing light and shadow involves observing how light interacts with the landscape. Use techniques like chiaroscuro to create contrast and depth. Remember to consider the time of day; the angle of light can dramatically change the mood of your painting!
- Where can I find inspiration for my landscape paintings?
Nature is the best source of inspiration! Take walks in parks, visit scenic locations, or even look at photographs. Plein air painting—painting outdoors—can also help you capture the essence of a scene directly from life!
- How can I develop my unique style in landscape painting?
Developing your style takes time and experimentation. Try different techniques and subjects until you find what resonates with you. Keep a sketchbook to jot down ideas and practice regularly; your style will naturally evolve!
- What are some tips for building a portfolio?
A strong portfolio showcases your best work. Select pieces that represent your style and growth as an artist. Include a variety of landscapes and consider organizing them by theme or technique to highlight your versatility!
- Is outdoor sketching necessary for landscape painting?
While not strictly necessary, outdoor sketching can be incredibly beneficial. It allows you to capture the atmosphere and details of a scene that photos might miss. Plus, it’s a great way to hone your observational skills!


