
Intricate Drawing Techniques for Detailed Artworks
This article explores various drawing techniques that enhance detail and precision in artworks, providing artists with tips and methods to elevate their craft to a new level of intricacy and beauty. Drawing is not just about putting pencil to paper; it's about expressing emotions, capturing moments, and creating visual stories that resonate with viewers. Whether you're a seasoned artist or just starting out, mastering intricate drawing techniques can significantly impact the quality of your work and how it is perceived.
Line quality is crucial in creating depth and texture in drawings. The way you use lines can completely transform an artwork. Think of lines as the backbone of your drawing; they can define shapes, suggest movement, and evoke emotions. By varying the thickness and style of your lines, you can create a sense of weight and dimension. For instance, thick lines might convey strength, while thin, delicate lines can suggest fragility. Experimenting with different line qualities can add a unique flair to your pieces and make them stand out.
Effective shading adds dimension and realism to drawings. Imagine a world where your drawings leap off the page; that's the power of shading! Here, we explore different shading methods, including hatching, cross-hatching, and stippling, to create lifelike effects. Each technique has its own charm and can be used to achieve various textures and depths in your artwork.
Hatching involves drawing parallel lines to create shadow, while cross-hatching uses intersecting lines for deeper tones. This technique is essential for achieving nuanced shading in intricate works. Imagine drawing a sphere—using hatching can help you illustrate the light hitting its surface, while cross-hatching can deepen the shadow on the opposite side. This interplay of light and dark not only adds realism but also engages the viewer's eye.
Learn how to use hatching techniques to depict various textures, such as fur or fabric, enhancing the realism of your subjects. For example, when drawing fur, you can use short, quick strokes to mimic the softness and flow of the hair. This method not only captures the essence of the material but also invites the viewer to feel the texture through the visual representation.
Explore how cross-hatching can add layers and depth to your drawings, allowing for complex light and shadow interplay. The beauty of cross-hatching lies in its versatility; with practice, you can create a range of tones from light to dark, giving your artwork a three-dimensional feel. It’s like building a house—each layer adds stability and character, making the final structure more impressive.
Stippling is a technique that uses dots to create shading and texture. This section covers how to effectively use stippling to achieve detailed artwork. Imagine creating a starry night sky; with stippling, you can place tiny dots to represent stars, varying their density to suggest depth and distance. This method requires patience but rewards you with stunning results that can captivate any audience.
Understanding composition and perspective is vital for creating balanced and engaging drawings. Think of composition as the stage where your story unfolds; it dictates how elements interact and how the viewer's eye travels across the artwork. Techniques for arranging elements and creating depth in your artwork can make the difference between a flat image and a captivating scene.
The rule of thirds helps artists create dynamic compositions by dividing the canvas into sections. This method guides the placement of focal points for visual interest. Imagine a tic-tac-toe grid overlaying your canvas; placing key elements at the intersections can create a more balanced and engaging composition that draws the viewer in.
Overlapping elements in a drawing enhances the perception of depth. This section explains how to effectively use overlap to create a three-dimensional feel in your artwork. Think of a crowded street scene; the way people and objects overlap creates a sense of space and distance, making the viewer feel as if they could step right into the scene.
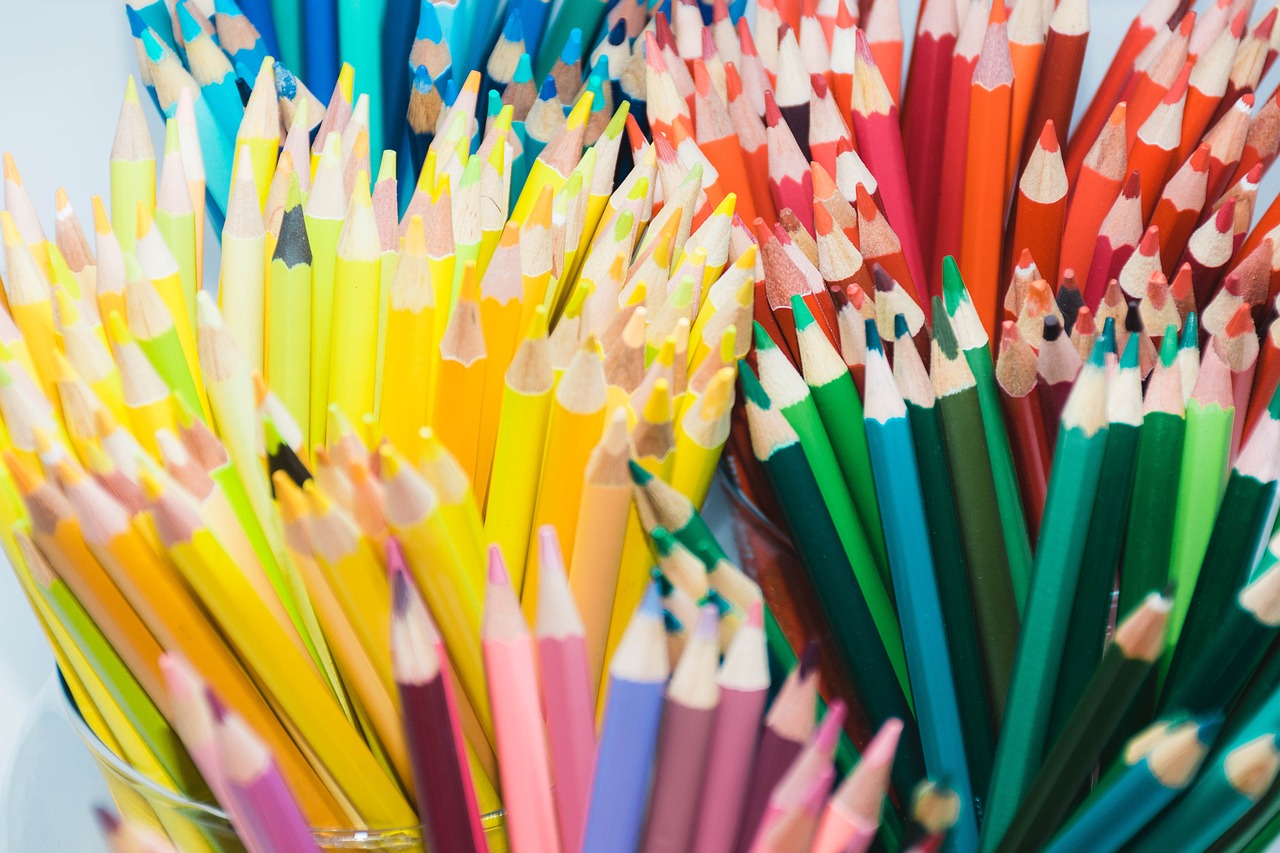
The choice of materials significantly affects the outcome of intricate drawings. Just like a chef needs quality ingredients for a great dish, artists require the right tools to produce stunning artworks. This section discusses various pencils, papers, and tools that can enhance detail and precision, ensuring your artistic vision comes to life.
Different pencil grades offer varying levels of hardness and darkness, impacting the detail achievable in drawings. Learn how to select the right pencil for your needs, whether you're aiming for fine lines or bold strokes. A softer pencil (like a 2B) is perfect for rich, dark lines, while a harder pencil (like an H) is great for fine details.
The texture and weight of paper can influence the final look of your artwork. Explore different paper types suitable for intricate drawing techniques. For instance, smooth papers are excellent for detailed work, while textured papers can add an interesting element to your drawings. Choosing the right paper is like selecting the perfect canvas for a painting; it sets the stage for your creativity.
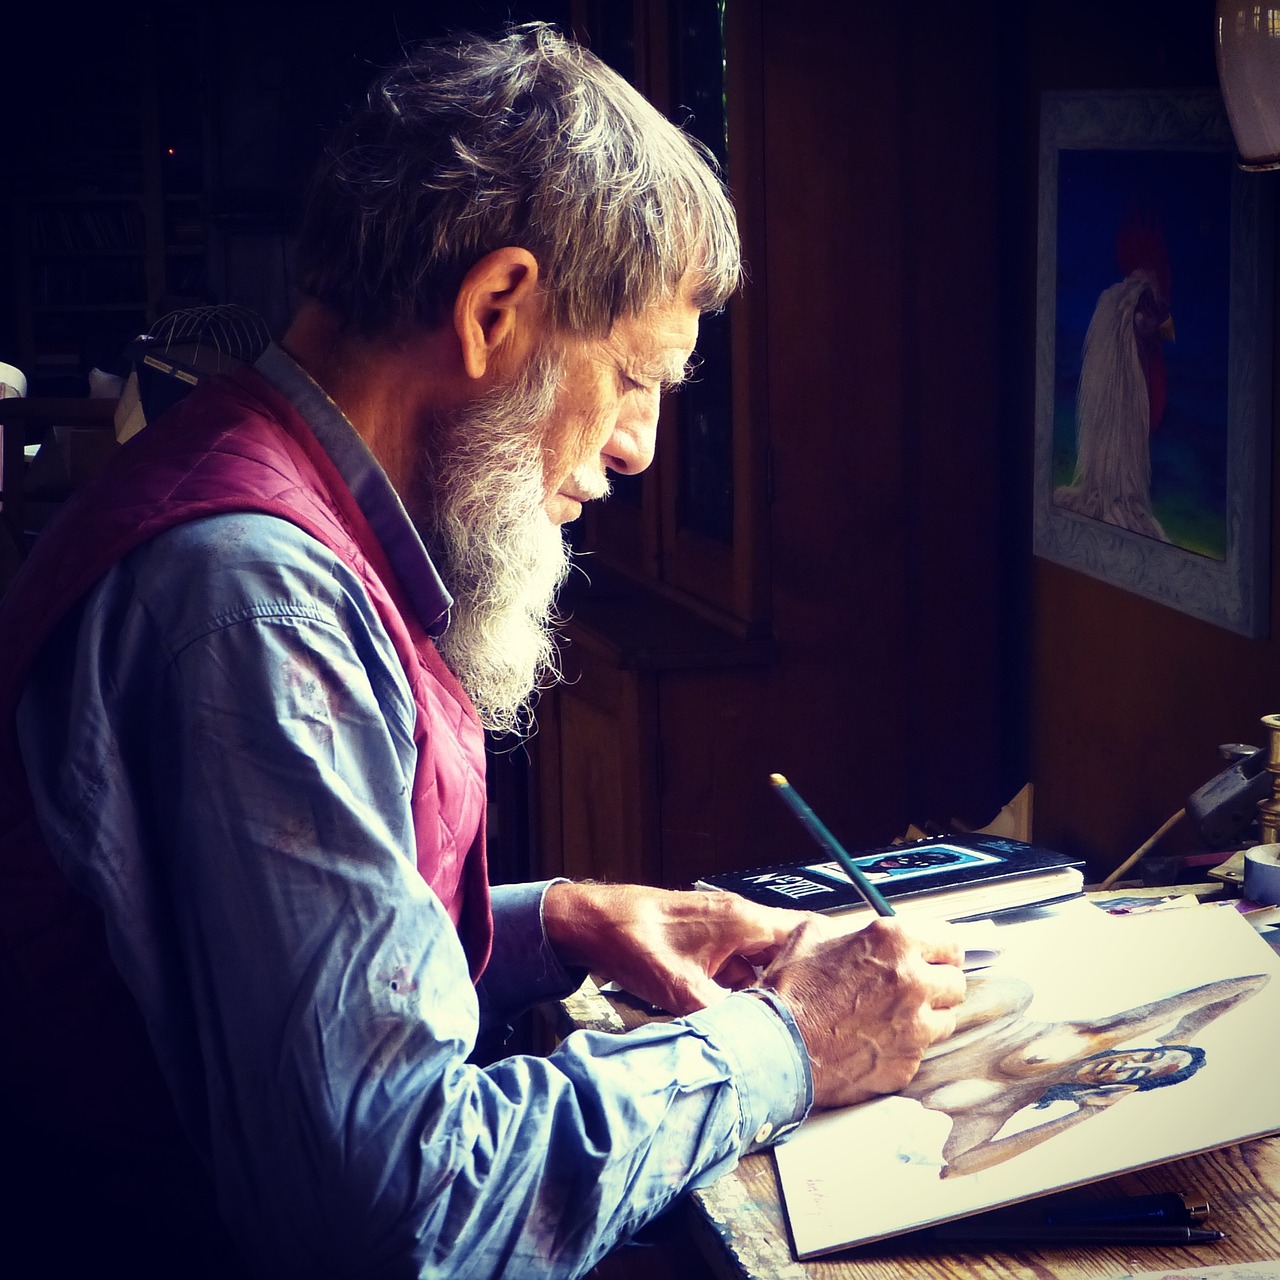
Intricate drawing requires time and attention to detail. This section emphasizes the importance of patience and practice in mastering complex techniques for detailed artworks. Remember, Rome wasn't built in a day, and neither will your drawing skills be. Taking the time to hone your techniques will pay off in the long run.
Setting achievable goals for each drawing session can help artists focus on improving their skills without feeling overwhelmed by complexity. Start small, and as you gain confidence, gradually tackle more challenging projects. This approach turns the daunting task of intricate drawing into a series of manageable steps.
Incorporating mindfulness into your drawing practice can enhance focus and precision, allowing for a more enjoyable and productive creative process. Embrace the moment; let your pencil glide across the paper, and enjoy the journey of creation. Mindfulness can transform drawing from a task into a meditative experience, enriching both your art and your mind.
- What is the best pencil for detailed drawings? A softer pencil like 2B or 4B is ideal for creating rich dark lines, while harder pencils like H are great for fine details.
- How can I improve my shading techniques? Practice hatching, cross-hatching, and stippling regularly, and experiment with different pressures and angles.
- What type of paper should I use for intricate drawings? Smooth, heavyweight paper is recommended for detailed work, as it allows for clean lines and precise shading.
Understanding Line Quality
Line quality is a fundamental aspect of drawing that can dramatically influence the overall feel and impact of your artwork. It refers to the characteristics of the lines you use, including their thickness, texture, and style. Just like a musician uses different notes to create a melody, an artist uses varying line qualities to evoke emotions and convey depth. Imagine a simple sketch of a tree: the delicate, thin lines of the leaves can express gentleness, while bold, heavy lines of the trunk can suggest strength and stability.
When you vary line thickness, you introduce a sense of dimension to your work. Thicker lines can outline shapes and create a sense of weight, while thinner lines can add detail and intricacy. For example, an illustration of a bustling cityscape can benefit from a mix of bold outlines for buildings and fine lines for the intricate details of windows and rooftops. This contrast not only enhances visual interest but also guides the viewer's eye through the composition.
Furthermore, the style of your lines—whether they are smooth, jagged, or textured—can convey different emotions or themes. A series of jagged lines might evoke chaos or tension, while smooth, flowing lines can suggest calmness and serenity. Understanding how to manipulate line quality allows you to express a range of feelings and narratives through your art.
To master line quality, consider the following techniques:
- Pressure Control: Varying the pressure applied to your drawing tool can change the line's thickness instantly. Practice applying different pressures to create a range of line qualities within a single stroke.
- Line Weight Variation: Use different tools (like pens, pencils, or brushes) to achieve various line weights. For example, a brush might give you a softer line, while a fine-tip pen can create sharp, precise edges.
- Continuous Lines: Experiment with creating continuous lines without lifting your pencil. This technique can help you develop a more fluid and dynamic quality in your drawings.
Incorporating these techniques into your practice can elevate your artwork, allowing you to create pieces that not only capture the eye but also tell a story. Remember, the beauty of line quality lies in its ability to transform a simple drawing into a captivating narrative. So grab your tools, experiment, and let your lines speak volumes!
Shading Techniques
When it comes to creating art that truly captivates the viewer, effective shading is your best friend. It’s like the secret sauce that adds depth and realism to your drawings, transforming a flat image into a lifelike representation. But what exactly are the different shading techniques you can use? Let's dive into some of the most popular methods, including hatching, cross-hatching, and stippling. Each of these techniques offers unique ways to bring your artwork to life, allowing you to play with light and shadow in fascinating ways.
First up, we have hatching. This technique involves drawing a series of parallel lines that vary in spacing and thickness to create shadows. The closer the lines are together, the darker the area appears. It’s like building a wall with bricks; the more bricks you stack, the stronger the wall becomes. Hatching is particularly effective for creating soft shadows and can be used to depict smooth surfaces. But don’t just stop there! You can also combine hatching with other techniques to add even more depth and detail to your work.
Now, let’s talk about cross-hatching. This technique takes hatching to the next level by introducing intersecting lines. Imagine laying a crisscross pattern over a surface; the result is deeper tones and more complex shading. Cross-hatching is essential for adding nuanced shadows in intricate works, allowing you to create a rich tapestry of light and dark. You can use varying line weights and directions to further enhance the dimensionality of your artwork.
Have you ever tried to depict the texture of fur or fabric? Hatching can be a game-changer here. By manipulating the direction and density of your lines, you can mimic the appearance of different materials. For instance, for fur, you might use short, quick strokes that follow the natural flow of the hair, while for fabric, longer, smoother lines might do the trick. This technique not only adds realism but also invites the viewer to feel the texture with their eyes.
Cross-hatching is particularly useful when you want to create a sense of depth in your drawings. By layering lines in different directions, you can simulate complex light and shadow interplay. Think of it as building a multi-layered cake; each layer adds richness and flavor. The more layers of cross-hatching you apply, the more depth and interest your artwork will have. It's a technique that encourages experimentation, so don’t hesitate to play around with it!
Another fantastic technique to master is stippling. This method involves creating images using tiny dots, and it can produce stunning shading and texture effects. Think of stippling as a pointillist painting, where each dot contributes to the overall image. The density and arrangement of the dots determine the darkness or lightness of the area. This technique is particularly useful for achieving fine details in your work. It requires a steady hand and a lot of patience, but the results can be breathtaking!
In conclusion, mastering these shading techniques can elevate your drawing skills to new heights. Whether you choose to explore hatching, cross-hatching, or stippling, each method offers unique advantages that can enhance the detail and realism of your artwork. So grab your pencils and start experimenting! The world of shading is vast and full of possibilities, waiting for you to discover.
- What is the best shading technique for beginners? Hatching is often recommended for beginners because it’s simple to master and can produce effective results.
- How can I improve my shading skills? Practice regularly and experiment with different techniques. Try drawing the same object using various shading methods to see what works best for you.
- Can I combine shading techniques? Absolutely! Many artists combine hatching, cross-hatching, and stippling to create unique effects and add depth to their artwork.

Hatching and Cross-Hatching
When it comes to intricate drawing techniques, hatching and cross-hatching stand out as essential methods for adding depth and dimension to your artwork. Hatching involves creating a series of parallel lines that can vary in thickness and spacing, allowing you to simulate shadows and form. The beauty of this technique lies in its simplicity; with just a few strokes, you can create a sense of volume and light. For instance, consider how a simple curved line can transform into a rounded object when layered with hatching. It's like giving life to a flat surface!
On the other hand, cross-hatching takes this concept a step further. By intersecting lines at various angles, you can achieve richer tones and more complex shadows. This technique is particularly useful for creating nuanced effects, where the interplay of light and dark can evoke a sense of realism. Imagine drawing a sphere; using hatching alone might give it a basic shadow, but by applying cross-hatching, you can convey the curvature and texture of the surface, making it pop off the page.
To illustrate the differences between these two techniques, consider the following table:
| Technique | Description | Use Cases |
|---|---|---|
| Hatching | Parallel lines used to create shadows and texture. | Basic shading, simple textures. |
| Cross-Hatching | Intersecting lines for deeper tones and complex shadows. | Detailed shading, realistic textures. |
Both techniques are not only effective but also versatile. As you practice, you’ll discover that hatching can be used to depict various textures, from the soft fur of an animal to the rugged surface of a tree bark. Cross-hatching, meanwhile, can create dramatic contrasts that draw the viewer's eye, enhancing the focal points in your artwork. The key is to experiment with different line weights and spacing, allowing your unique style to emerge.
Incorporating these techniques into your drawing practice can be likened to a musician mastering scales; the more you practice hatching and cross-hatching, the more fluid and natural your lines will become. So grab your pencil, and let your creativity flow as you explore the endless possibilities of hatching and cross-hatching!
- What materials do I need to start hatching and cross-hatching?
All you need is a good set of pencils, some quality paper, and your creativity! - Can I use hatching and cross-hatching with colored pencils?
Absolutely! These techniques work wonderfully with colored pencils, adding depth to your colors. - How can I improve my hatching and cross-hatching skills?
Practice regularly and try to replicate different textures and shapes. Don’t be afraid to experiment!

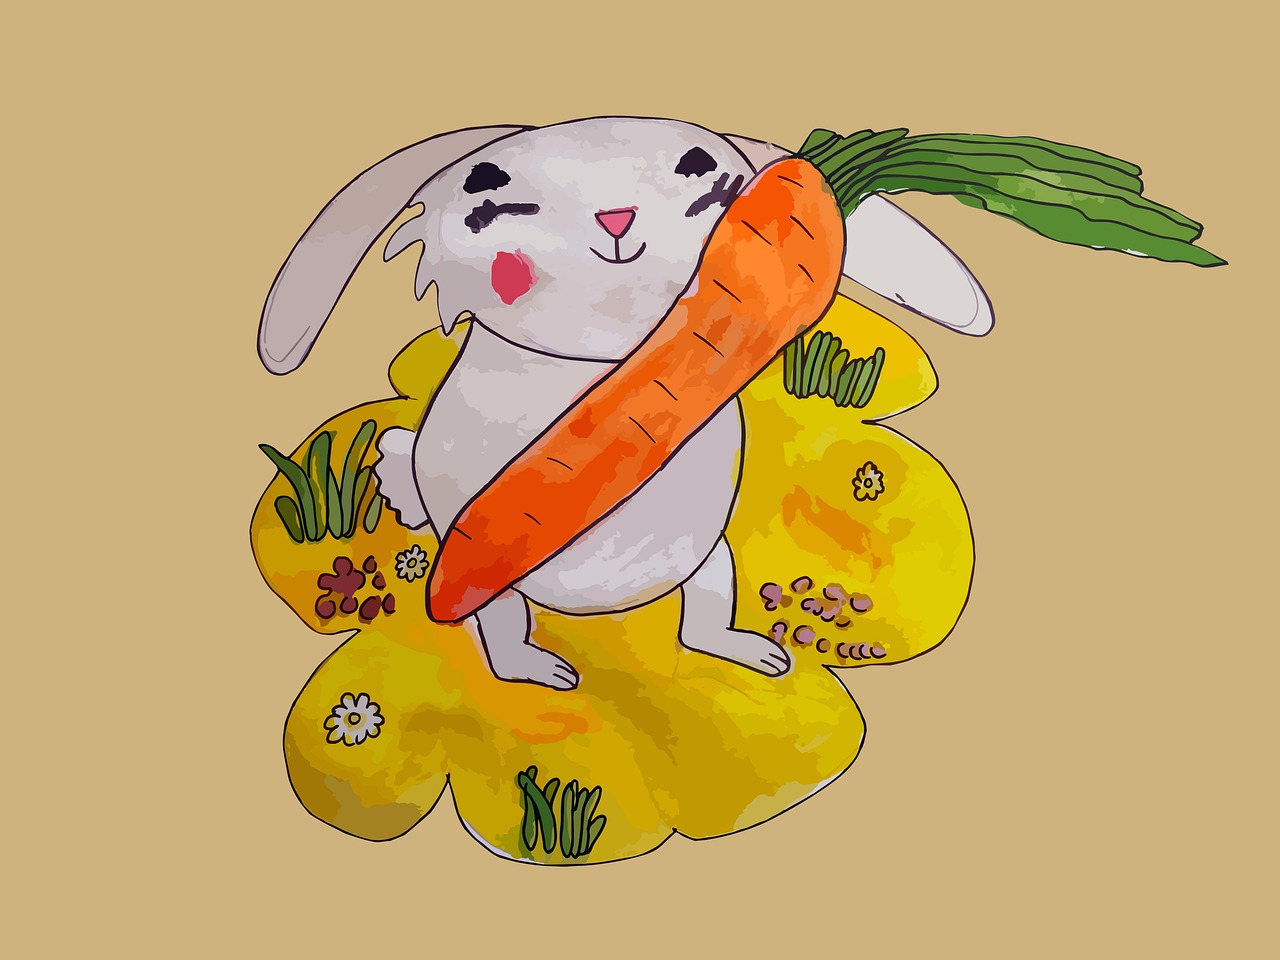
Creating Texture with Hatching
When it comes to creating texture in your drawings, hatching is a powerful technique that can transform a flat image into something with incredible depth and realism. By using a series of parallel lines, you can suggest the surface quality of various materials, from the soft fluffiness of a bunny's fur to the coarse grain of tree bark. The key to mastering hatching lies in the direction, spacing, and thickness of the lines you use.
For instance, to depict soft textures, like skin or fabric, you might opt for light, closely spaced lines. This technique creates a subtle shading effect that feels gentle and smooth. On the other hand, if you're aiming to represent something with a rougher texture, like stone or metal, you might choose thicker lines spaced further apart, giving your artwork a more rugged appearance.
Moreover, the angle at which you draw your hatching lines can also influence the texture's perceived directionality. For example, drawing lines diagonally can suggest movement or flow, while horizontal lines can create a sense of stability. Experimenting with these variations allows you to develop a unique style that enhances the overall feel of your artwork.
To illustrate the effectiveness of hatching in creating texture, consider the following examples:
| Texture Type | Hatching Technique | Example Description |
|---|---|---|
| Fur | Short, curved lines | Use curved lines to mimic the soft, fluffy appearance of animal fur. |
| Fabric | Light, parallel lines | Employ closely spaced lines to suggest the smoothness of silk or cotton. |
| Wood | Thick, varied lines | Utilize thicker lines with varying spacing to convey the grain of wood. |
| Stone | Rough, jagged lines | Incorporate uneven lines to depict the rugged texture of stone. |
In summary, hatching is not just about shading; it's about storytelling through texture. By paying attention to the nuances of your lines, you can evoke emotions and create a more immersive experience for your viewers. So grab your pencil, and start experimenting with hatching techniques to bring your drawings to life!
- What is hatching? Hatching is a drawing technique that involves creating parallel lines to build up shading and texture in an artwork.
- How can I improve my hatching technique? Practice drawing lines at different angles, thicknesses, and spacings to see how they affect the texture and shading of your work.
- Can hatching be used with other techniques? Absolutely! Hatching can be combined with techniques like cross-hatching and stippling to achieve even more intricate effects.

Cross-Hatching for Depth
Cross-hatching is not just a technique; it's a magical process that transforms a flat surface into a world of depth and dimension. Imagine standing in a sunlit forest where the light dances through the leaves, creating shadows that ripple across the ground. That’s the kind of effect cross-hatching can achieve in your artwork. By using intersecting lines, artists can create a rich tapestry of tones that adds a three-dimensional quality to even the simplest of subjects.
To master cross-hatching, it's essential to understand how to manipulate the density and direction of your lines. Think of it like laying down a foundation for a house; the more layers you add, the sturdier the structure becomes. Start with light, sparse lines to establish the basic form, and gradually build up darker and denser lines in areas where shadows naturally fall. This technique allows for a gradual transition from light to dark, creating a smooth gradient that mimics real-life lighting conditions.
One of the most exciting aspects of cross-hatching is its versatility. You can use it to depict a variety of textures and materials. For instance, if you’re drawing a shiny object, you might use closely spaced lines to create the illusion of gloss. Conversely, when representing rough surfaces, wider gaps between lines can suggest a more rugged texture. The key is to observe the world around you and replicate those observations on paper.
Here’s a quick guide to enhance your cross-hatching skills:
- Start Light: Begin with light strokes to map out your subject.
- Layering: Gradually add more lines, varying the angle and density to create depth.
- Practice Different Textures: Experiment with cross-hatching on various surfaces like skin, fabric, and metal.
- Use a Reference: Study photographs or real-life objects to understand how light interacts with them.
Remember, the beauty of cross-hatching lies in its ability to convey emotion and atmosphere. By manipulating the direction and spacing of your lines, you can evoke feelings of calmness, tension, or even drama in your artwork. So, next time you pick up your pencil, think of cross-hatching as your secret weapon for depth. It’s not just about making your drawings look realistic; it’s about breathing life into them.
Q: What materials do I need for cross-hatching?
A: All you need is a good set of pencils (preferably varying grades), quality drawing paper, and perhaps a fine pen for added detail.
Q: Can I use cross-hatching with color?
A: Absolutely! Cross-hatching can be effectively used with colored pencils or inks to create vibrant, textured artworks.
Q: How do I know when to stop cross-hatching?
A: It's often a matter of personal preference. Step back from your work periodically to assess if the depth and texture meet your artistic vision.
Stippling for Detail
Stippling is a fascinating drawing technique that employs a multitude of tiny dots to create shading and texture in artwork. This method may seem simple at first glance, but it holds the potential to produce incredibly detailed and realistic images. Imagine creating a portrait where the subtle play of light and shadow is conveyed through an intricate dance of dots. The beauty of stippling lies in its ability to transform a blank canvas into a vibrant piece of art, one dot at a time.
One of the most significant advantages of stippling is the level of control it offers the artist. By varying the density and placement of the dots, you can manipulate how light interacts with the surface of your drawing. For instance, closely packed dots can create darker areas, while more spaced-out dots can suggest lighter tones. This technique is particularly effective in rendering complex textures, such as the delicate feathers of a bird or the rough bark of a tree. The patience required for stippling can be likened to the meticulous work of a sculptor chipping away at a block of marble; each dot contributes to the final masterpiece.
To effectively use stippling, consider the following tips:
- Start Light: Begin with a light touch to outline your subject. This initial phase allows you to map out where you want your darker tones to be.
- Build Gradually: Layer your dots slowly. This gradual buildup helps in achieving the depth and richness of tones that stippling is known for.
- Experiment with Tools: Different tools, such as fine-tipped pens or pencils, can yield varying results. Experiment to find what works best for you.
In addition to shading, stippling can also be used to create intricate patterns and designs. Artists often incorporate stippling into their works not just for realism, but also for stylistic flair. For example, stippling can be used to create backgrounds that enhance the main subject of a drawing, adding an extra layer of interest without overwhelming the viewer. This technique can be particularly striking in black-and-white illustrations, where the contrast between the dense dots and the white paper creates a stunning visual effect.
As you delve into stippling, it’s essential to practice regularly. Start with simple shapes and gradually progress to more complex subjects. Over time, you’ll develop a sense of how to place your dots effectively to achieve the desired effect. Remember, the key to mastering stippling is patience; it’s not just about the end result, but also about enjoying the process of creating.
In summary, stippling is a versatile technique that can add incredible detail and depth to your drawings. By understanding how to manipulate dot density and placement, you can create stunning artworks that captivate the viewer. So grab your tools, and let your creativity flow, one dot at a time!
Q: What materials do I need for stippling?
A: You can use fine-tipped pens, pencils, or even brushes with ink. The choice of materials depends on the effect you wish to achieve.
Q: How long does it take to master stippling?
A: Mastery of stippling varies from person to person. Regular practice and patience are essential, and you may see significant improvement over a few weeks.
Q: Can stippling be combined with other techniques?
A: Absolutely! Many artists combine stippling with hatching or cross-hatching to create more dynamic and detailed artworks.

Composition and Perspective
When it comes to creating stunning artworks, composition and perspective are the unsung heroes that can elevate your drawings from ordinary to extraordinary. Imagine a beautifully arranged bouquet of flowers; each bloom is strategically placed to draw the eye and create a harmonious balance. Similarly, in art, the way you arrange your elements can make all the difference in capturing the viewer's attention and conveying your intended message.
Understanding composition is like learning the rules of a game. It allows you to play creatively within those boundaries. One popular method is the Rule of Thirds, which suggests dividing your canvas into a grid of nine equal parts. By placing key elements along these lines or at their intersections, you can create a more dynamic and engaging composition. Think of it as setting up a stage for a performance; where you place your actors (or in this case, your subjects) can significantly influence the story being told.
But what about perspective? This is where the magic of depth comes into play. By manipulating perspective, you can create a sense of three-dimensionality that pulls the viewer into your artwork. For instance, when you draw a road that narrows into the distance, you’re not just creating a path; you’re inviting the viewer to journey along with it. Techniques like linear perspective and atmospheric perspective can help achieve this effect. In linear perspective, parallel lines converge at a vanishing point, while atmospheric perspective uses color and clarity to suggest depth. It's like how distant mountains appear lighter and blurrier than those up close.
Now, let’s talk about overlapping elements. This technique is a simple yet effective way to enhance depth in your drawings. By placing one object in front of another, you create a visual hierarchy that guides the viewer’s eye through the piece. Think of it as stacking blocks; the block on top is more prominent, while the ones below support it. This layering effect can transform a flat drawing into a vibrant scene full of life and dimension.
To summarize, mastering composition and perspective is essential for creating visually appealing artworks. It’s not just about throwing elements onto the page; it’s about thoughtfully arranging them to create balance and depth. Whether you’re using the Rule of Thirds, experimenting with perspective techniques, or overlapping elements, remember that each choice you make contributes to the overall impact of your artwork. So grab your pencils and start experimenting—your next masterpiece awaits!
- What is the Rule of Thirds? The Rule of Thirds is a compositional guideline that suggests dividing your canvas into nine equal parts and placing key elements along these lines or at their intersections for a balanced look.
- How can I create depth in my drawings? You can create depth by using techniques such as overlapping elements, applying linear and atmospheric perspective, and varying the size and detail of objects based on their distance from the viewer.
- What materials can help improve my composition? High-quality sketchbooks, rulers for straight lines, and reference images can help you practice and refine your compositional skills.

Using the Rule of Thirds
The Rule of Thirds is a powerful guideline that can dramatically enhance the composition of your artwork. Imagine slicing your canvas into a grid of nine equal parts, like a tic-tac-toe board. This technique helps you identify key focal points that can draw the viewer's eye, making your drawings not just visually appealing but also engaging. By aligning your subject along these lines or at their intersections, you create a sense of balance and harmony that attracts attention.
Think of it this way: when you place your main subject off-center, it often feels more dynamic and interesting. For instance, if you’re drawing a landscape, rather than placing the horizon line directly in the middle, try positioning it along the top or bottom third of your canvas. This simple adjustment can transform a flat image into a more compelling scene that invites the viewer to explore every corner of your artwork.
But how do you effectively implement the Rule of Thirds? Here are some tips to consider:
- Identify your focal point: Before you start drawing, decide what the main element of your artwork will be. This could be a person, an object, or a specific area of interest.
- Sketch the grid: Lightly sketch the grid on your canvas or paper to guide your placement. You can easily erase it later, but it will serve as a helpful reference.
- Experiment with placement: Don’t be afraid to move elements around. Sometimes, the best composition comes from trial and error.
- Consider negative space: The areas around your focal point matter too. Using negative space effectively can enhance your composition and draw attention to the subject.
Moreover, the Rule of Thirds can be applied to various subjects, from portraits to still lifes. For portraits, placing the subject’s eyes along the upper third line creates a more engaging image, while in still lifes, arranging objects along these lines can create a sense of flow and balance. Remember, the rule is a guideline, not a strict rule. Feel free to break it when your creative instincts tell you to!
In summary, mastering the Rule of Thirds can elevate your artwork significantly. It encourages you to think critically about composition and helps you create pieces that resonate with viewers on a deeper level. So next time you sit down to draw, take a moment to visualize that grid, and watch how your art transforms!
Q: What is the Rule of Thirds?
A: The Rule of Thirds is a composition guideline that divides an image into nine equal parts using two horizontal and two vertical lines. Placing important elements along these lines or at their intersections can create a more balanced and engaging composition.
Q: Can I break the Rule of Thirds?
A: Absolutely! The Rule of Thirds is a guideline, not a hard and fast rule. While it can help improve your compositions, feel free to experiment and trust your instincts.
Q: Is the Rule of Thirds applicable only to drawing?
A: No, the Rule of Thirds is widely used in photography, painting, and other visual arts. It’s a versatile tool that can enhance any visual composition.

Creating Depth with Overlapping
When it comes to drawing, one of the most effective techniques for creating a sense of depth is through overlapping elements. Imagine standing in a dense forest; the trees in the foreground block your view of those behind them, creating layers that draw your eye deeper into the scene. This principle can be applied to your artwork to enhance its three-dimensional quality. By strategically placing objects so that they overlap, you can guide the viewer’s gaze and create a more immersive experience.
Overlapping not only adds depth but also helps in establishing a hierarchy among the elements in your composition. For instance, if you're drawing a still life arrangement, position the larger objects in the foreground, while smaller items recede into the background. This technique allows the viewer to understand which elements are closest and which are further away. To illustrate this concept, consider the following:
| Foreground Objects | Background Objects |
|---|---|
| Large fruit, like a melon | Smaller fruits, like berries |
| A vase | Plants or flowers behind the vase |
In your drawings, overlapping can also create interesting shapes and negative spaces. These areas can add to the overall composition, making it more dynamic. Think of overlapping as a way to break up the monotony of flat surfaces. When elements overlap, they create new shapes and forms that can intrigue the viewer. This can be particularly effective in landscape drawings, where hills and trees can overlap to form a more complex visual narrative.
Another important aspect of overlapping is the use of transparency. When drawing transparent objects, such as glass or water, overlapping can help convey the illusion of transparency by showing how one object interacts with another. For example, if you draw a glass in front of a colorful background, the colors behind will subtly show through the glass, creating a captivating effect.
To master the art of overlapping, practice is key. Start with simple shapes and gradually move to more complex compositions. Here are a few tips to keep in mind:
- Plan your composition: Before you start, sketch out your elements lightly to see how they interact.
- Use varying levels of detail: Keep the details sharper in the foreground and softer in the background to emphasize depth.
- Experiment with shadows: Shadows can enhance the overlapping effect, making objects appear grounded and adding to the realism.
In conclusion, overlapping is a fundamental technique that can significantly enhance the depth and complexity of your drawings. By carefully considering how elements interact and using transparency to your advantage, you can create artworks that not only captivate but also invite viewers to explore every layer of detail. So grab your pencils and start experimenting with overlapping in your next masterpiece!
Q1: What is the best way to practice overlapping in drawing?
A1: Start with simple shapes and gradually incorporate more complex objects. Use reference images to understand how objects overlap in real life.
Q2: Can overlapping be used in digital art as well?
A2: Absolutely! The principles of overlapping apply to both traditional and digital art. Use layers in digital software to experiment with this technique.
Q3: How do I know if I have overlapped elements correctly?
A3: Step back and view your drawing from a distance. If the depth feels natural and the viewer's eye moves through the composition, you've likely achieved effective overlapping.
Choosing the Right Materials
When it comes to creating intricate drawings, the choice of materials is not just a minor detail; it can be the foundation of your artistic expression. Selecting the right tools can significantly enhance the quality and precision of your work. For instance, different types of pencils can yield different results, and understanding these differences is crucial for any artist aiming to elevate their craft. You might be wondering, "What makes one pencil better than another for detailed work?" Well, let’s dive into the nitty-gritty of pencil grades, paper types, and other essential tools.
First off, let’s talk about pencil grades. Pencils are graded based on their hardness and darkness, typically ranging from H (hard) to B (black) with F (fine point) in between. Here’s a quick breakdown:
| Pencil Grade | Characteristics | Best For |
|---|---|---|
| H | Hard, light marks | Fine lines and detailed work |
| HB | Medium hardness | General drawing and sketching |
| B | Soft, dark marks | Shading and bold lines |
Choosing the right pencil can make a world of difference in your drawings. For intricate details, you might prefer a harder pencil like 2H or H, which will allow you to create fine lines without smudging. On the other hand, for shading and darker areas, B pencils are your best friends, offering rich tones and depth.
Next up is the paper you use. The texture and weight of the paper can dramatically impact the final look of your artwork. For detailed work, consider using smooth, heavyweight papers that can hold fine lines without bleeding. Here are a few types of paper to consider:
- Bristol Board: Ideal for detailed illustrations and ink work.
- Watercolor Paper: Great for mixed media, offering texture that can enhance shading.
- Sketch Paper: Good for practice, but may not hold fine details as well as other types.
In addition to pencils and paper, don’t overlook the importance of other drawing tools. Erasers, blending stumps, and even rulers can play a significant role in achieving the precision you desire. A good quality eraser can help you correct mistakes without damaging the paper, while blending stumps allow for smooth transitions between shades. Think of these tools as your trusty sidekicks in your artistic journey!
Finally, remember that the right materials can inspire creativity. When you sit down to draw with tools that feel good in your hands and papers that invite your pencil to glide across their surface, you’re more likely to lose yourself in the process. So, take the time to experiment with different materials until you find the perfect combination that resonates with your artistic style.
- What pencil grade is best for detailed work? Generally, harder pencils (H grades) are better for fine lines, while softer pencils (B grades) are ideal for shading.
- Can I use any paper for drawing? While you can use any paper, smoother, heavier papers are recommended for intricate details.
- What tools should I have for detailed drawing? Essential tools include a range of pencils, quality erasers, blending stumps, and good paper.
Pencil Grades and Their Uses
When it comes to creating intricate drawings, understanding pencil grades is essential for achieving the desired level of detail and shading. Pencils are graded based on their hardness and darkness, which directly influences the marks they leave on paper. The grading scale typically ranges from H (hard) to B (black), with F (fine point) sitting in the middle. Artists often find themselves navigating this scale to find the perfect pencil for their specific needs.
Hard pencils, such as H grades, produce lighter marks and are ideal for fine lines and detailed work. These pencils are perfect for initial sketches or when you want to create subtle textures without overwhelming the composition. On the other hand, B pencils, which are softer and darker, are excellent for shading and creating rich, dark areas in a drawing. They allow for a more expressive and bold application, making them suitable for adding depth and dimension to your artwork.
Here's a quick breakdown of common pencil grades and their typical uses:
| Pencil Grade | Characteristics | Best Uses |
|---|---|---|
| 4H | Very hard, light marks | Fine details, technical drawings |
| 2H | Hard, light to medium marks | Sketching, light shading |
| HB | Medium hardness, versatile | General-purpose drawing |
| 2B | Soft, darker marks | Shading, bold lines |
| 4B | Very soft, very dark marks | Deep shading, expressive lines |
Additionally, the choice of pencil can also be influenced by the technique you are using. For instance, if you are employing stippling or hatching, a softer pencil like 2B or 4B can help you achieve the necessary depth and texture. Conversely, for precise line work, a harder pencil like H or 2H would be more appropriate. It’s all about finding the right balance and experimenting with different grades to see what works best for your unique style.
In conclusion, understanding pencil grades is a fundamental aspect of mastering intricate drawing techniques. By selecting the right pencil for your artwork, you can enhance your ability to create stunning details and textures that bring your drawings to life.
- What is the difference between H and B pencils? H pencils are harder and produce lighter marks, while B pencils are softer and create darker, bolder lines.
- Which pencil grade is best for beginners? An HB pencil is often recommended for beginners as it offers a good balance of hardness and darkness for various drawing techniques.
- Can I use colored pencils for detailed work? Yes, colored pencils can also be used for intricate drawings, especially when layered correctly to achieve depth and richness in color.
Paper Types for Detailed Work
When it comes to intricate drawing, the type of paper you choose can significantly influence the outcome of your artwork. Different papers offer unique textures and weights that can either enhance or hinder the detail you aim to achieve. For artists focused on precision and intricacy, selecting the appropriate paper is as crucial as choosing the right pencil.
One popular choice among artists is cold-pressed watercolor paper. This type of paper has a textured surface that allows for excellent ink absorption, making it ideal for techniques like hatching and stippling. The texture provides a natural grip for pencils, resulting in more control over line quality and shading. On the other hand, hot-pressed watercolor paper is smooth and offers a different tactile experience, perfect for detailed work that requires clean lines and minimal texture interference.
Another excellent option is bristol board, which is known for its smooth surface and durability. This paper comes in different weights, with heavier options providing a sturdy base for intricate drawings. Artists often prefer bristol board for its ability to handle various mediums, from graphite to ink, without warping. Additionally, drawing paper that is specifically designed for pencil work can also be an excellent choice. These papers are typically slightly textured, allowing for good shading while still providing a smooth finish for fine details.
Here’s a quick comparison of some popular paper types for detailed work:
| Paper Type | Texture | Best For |
|---|---|---|
| Cold-Pressed Watercolor Paper | Textured | Hatching, Stippling |
| Hot-Pressed Watercolor Paper | Smooth | Clean Lines, Detail Work |
| Bristol Board | Smooth | Graphite, Ink Drawings |
| Drawing Paper | Lightly Textured | Pencil Work, Shading |
Ultimately, the choice of paper can make a world of difference in your drawing experience. It’s essential to experiment with various types to find what works best for your style and the techniques you prefer. Remember, the right paper not only enhances the quality of your artwork but also makes the drawing process more enjoyable. So, don’t hesitate to explore and invest in high-quality papers that will elevate your intricate drawings to new heights!
- What is the best paper for pencil drawing? Bristol board and smooth drawing paper are excellent choices for pencil work.
- Can I use watercolor paper for pencil drawings? Yes, both cold-pressed and hot-pressed watercolor papers can be used for pencil drawings, depending on the texture you prefer.
- How does paper weight affect drawing? Heavier paper can handle more layers of graphite or ink without warping, making it ideal for intricate details.
- Should I use textured or smooth paper? It depends on your technique; textured paper is great for hatching, while smooth paper is better for clean lines.
Practicing Patience and Precision
Intricate drawing is not just about talent; it's also about patience and precision. As artists, we often find ourselves in a rush to complete our masterpieces, but this can lead to mistakes and a lack of detail. Imagine sculpting a delicate piece of glass; one wrong move can shatter it. Similarly, in drawing, a hasty hand can ruin the fine lines and textures you've worked so hard to create. Therefore, taking your time is crucial.
To cultivate patience, start by setting aside dedicated time for your drawing sessions. This allows you to immerse yourself in the process without the pressure of a ticking clock. Consider breaking your work into smaller sections. For example, if you're drawing a complex scene, focus on one element at a time, such as a character or an intricate background. This approach not only reduces overwhelm but also enhances your attention to detail.
Moreover, practicing mindfulness while drawing can significantly improve your focus. Mindfulness encourages you to be present in the moment, allowing you to appreciate each stroke of your pencil. Try to clear your mind of distractions and fully engage with your artwork. You might even find it helpful to incorporate breathing exercises before you start drawing. This can help center your thoughts and prepare you for a productive session.
Setting realistic goals is another essential aspect of practicing patience. Instead of aiming to finish an entire piece in one sitting, set smaller, achievable objectives for each session. For instance, you might decide to focus solely on the shading of a character's face or the texture of a fabric. By accomplishing these smaller tasks, you’ll feel a sense of achievement that motivates you to continue.
In addition to patience, precision is key in creating intricate artworks. This means paying close attention to the details, such as the line quality and shading techniques you use. When practicing, try using a grid method to help you maintain proportions and accuracy in your drawings. This technique involves drawing a grid over your reference image and then replicating that grid on your drawing paper. It’s like building a framework that keeps everything in check.
Lastly, keep in mind that mastering intricate drawing techniques is a journey, not a race. Embrace the process, and don’t be too hard on yourself if things don’t turn out perfectly the first time. Every stroke is a step toward improvement, and with each drawing, you will find yourself growing more skilled and confident in your abilities. Remember, the beauty of art lies not only in the final product but also in the journey of creating it.
- How can I improve my patience while drawing?
Start by setting aside specific times for drawing, breaking your work into smaller tasks, and practicing mindfulness techniques. - What are some effective ways to enhance precision in my drawings?
Consider using a grid method, focusing on line quality, and practicing different shading techniques to improve your accuracy. - Is it normal to feel frustrated when trying to create intricate art?
Absolutely! Frustration is a natural part of the creative process. Embrace it, and use it as motivation to keep improving. - How can I incorporate mindfulness into my drawing practice?
Clear your mind of distractions, take deep breaths, and fully engage with your artwork to enhance your focus and enjoyment.
Setting Realistic Goals
When it comes to honing your intricate drawing skills, is essential. Think of it as charting a course on a map; without a clear destination, you might find yourself wandering aimlessly. Instead of diving headfirst into complex projects that could lead to frustration, start with manageable objectives that build your confidence and skills over time.
For instance, if you're aiming to master shading techniques, consider breaking this down into smaller, achievable tasks. You might set a goal to practice hatching for 15 minutes each day for a week, then move on to cross-hatching the following week. This approach not only makes the learning process less overwhelming but also allows you to see tangible progress, which can be incredibly motivating.
Moreover, it’s crucial to reflect on your progress regularly. After a few weeks of practice, take some time to review your sketches. Ask yourself questions like, “What techniques have I improved in?” or “Where do I still struggle?” This self-assessment will help you adjust your goals as needed, ensuring that you’re always challenged but never overwhelmed.
Another effective strategy is to incorporate a goal-setting framework like SMART goals, which stands for Specific, Measurable, Achievable, Relevant, and Time-bound. Here’s a quick breakdown:
| Criteria | Description |
|---|---|
| Specific | Define exactly what you want to achieve. |
| Measurable | Determine how you will measure your progress. |
| Achievable | Ensure your goal is realistic and attainable. |
| Relevant | Make sure it aligns with your overall artistic aspirations. |
| Time-bound | Set a deadline to create a sense of urgency. |
By applying this framework, you can create clear and structured goals that are tailored to your artistic journey. For example, instead of saying, “I want to get better at drawing,” you could say, “I will practice hatching techniques for 30 minutes every day for the next two weeks.” This specificity not only makes your goal clearer but also more attainable.
Lastly, remember that patience is key. Artistic growth doesn’t happen overnight; it’s a gradual process that requires dedication and time. Celebrate small victories along the way, whether it’s completing a challenging piece or mastering a new technique. These moments of success will fuel your passion and keep you moving forward on your artistic path.
- How do I stay motivated while practicing drawing? Setting small, achievable goals can help maintain motivation. Celebrate your progress regularly!
- What should I do if I feel overwhelmed by my goals? Reassess your goals and break them down into smaller, more manageable tasks.
- Is it normal to struggle with certain techniques? Absolutely! Every artist faces challenges; it’s part of the learning process.
- How often should I practice to improve my skills? Consistent practice is key. Aim for at least a few times a week, even if it’s just for a short period.

Mindfulness in Drawing
In the fast-paced world we live in, taking a moment to breathe and focus can be a game changer, especially in the realm of art. isn’t just about being present; it's about immersing yourself in the moment and allowing your creativity to flow without distractions. When you engage in this practice, you not only enhance your artistic skills but also foster a deeper connection with your artwork.
Imagine sitting down with your sketchbook, the world around you fading away as you concentrate solely on the strokes of your pencil. This state of flow can lead to remarkable improvements in your work. Mindfulness encourages you to observe the little details: the way light interacts with surfaces, the subtle variations in color, and the intricate patterns that often go unnoticed. By being fully present, you can capture the essence of your subject matter more accurately.
To incorporate mindfulness into your drawing practice, consider these techniques:
- Breathing Exercises: Before you start drawing, take a few deep breaths. This helps calm your mind and prepares you for focused creativity.
- Set an Intention: Decide what you want to achieve during your drawing session. Whether it’s mastering a technique or simply enjoying the process, having a clear intention can guide your focus.
- Eliminate Distractions: Create a space that is free from interruptions. Turn off your phone, close unnecessary tabs on your computer, and let others know you need some quiet time.
As you draw, pay attention to your hand movements and the texture of the paper. Feel the weight of the pencil and the resistance it encounters. This tactile awareness not only enhances your connection to the drawing but also helps you notice the nuances of your technique. The more you practice mindfulness, the more intuitive your drawing will become, allowing you to express your thoughts and feelings through your art.
Additionally, consider keeping a mindfulness journal alongside your sketchbook. Document your thoughts and feelings before and after each drawing session. Reflecting on your experiences can provide insights into your creative process and help you identify areas for growth. You might find that certain techniques resonate more with you when you approach them mindfully.
In essence, integrating mindfulness into your drawing practice can transform your artistic journey. It shifts the focus from merely creating a finished product to enjoying the process itself. So, the next time you pick up your pencil, remember to breathe, be present, and let your creativity flourish!
Q1: How does mindfulness improve my drawing skills?
A1: Mindfulness helps you focus on the present moment, allowing you to observe details and techniques more closely, which can lead to improved skills and creativity.
Q2: Can I practice mindfulness while drawing from a reference?
A2: Absolutely! Mindfulness can enhance your ability to observe and replicate the details in your reference, making your artwork more accurate and expressive.
Q3: What if I struggle to stay focused while drawing?
A3: It’s normal to have distractions. Start with short drawing sessions and gradually increase the time as you become more comfortable with the mindfulness practice.
Q4: Is mindfulness in drawing suitable for beginners?
A4: Yes! Mindfulness is beneficial for artists at all levels. It encourages a relaxed approach to creativity, making it easier for beginners to express themselves without the pressure of perfection.
Frequently Asked Questions
- What is line quality and why is it important in drawing?
Line quality refers to the thickness, darkness, and style of the lines used in a drawing. It's crucial because varying line quality can create depth and texture, making your artwork feel more dynamic and engaging. Think of it like the difference between a whisper and a shout; each has its own impact on how the message is received!
- Can you explain the different shading techniques?
Absolutely! There are several shading techniques, but the most common ones include hatching, cross-hatching, and stippling. Hatching involves drawing parallel lines to suggest shadow, while cross-hatching uses intersecting lines for deeper tones. Stippling, on the other hand, uses dots to create texture and shading. Each technique allows for unique effects and can be used to enhance the realism of your drawings.
- What is the rule of thirds in composition?
The rule of thirds is a guideline that helps artists create balanced and visually appealing compositions. By dividing your canvas into a 3x3 grid, you can strategically place focal points along the lines or at their intersections. This method leads to more dynamic and interesting artwork, rather than just centering everything, which can sometimes feel a bit stale.
- How do I choose the right materials for detailed drawing?
Choosing the right materials is essential for achieving intricate details. Start with different pencil grades; softer pencils (like 2B or 4B) create darker lines, while harder pencils (like H or 2H) produce lighter, finer lines. As for paper, look for textured options that can hold pencil well, allowing for smoother shading and detail. It's like picking the right tools for a job; the right materials make all the difference!
- Why is patience important in intricate drawing?
Patience is key in intricate drawing because these techniques require time and attention to detail. Rushing through can lead to mistakes or a lack of precision. Setting realistic goals for each drawing session can help you focus on mastering each technique without feeling overwhelmed. Just like a fine wine, some things take time to develop their full flavor!
- What are some ways to practice mindfulness while drawing?
Incorporating mindfulness into your drawing practice can greatly enhance your focus and precision. Try to eliminate distractions and immerse yourself in the process. You could also take deep breaths or perform light stretches before starting. This way, you create a calm environment that allows for a more enjoyable and productive creative experience, making each stroke feel intentional and meaningful.


