
Understanding Perspective in Drawing: A Beginner’s Guide
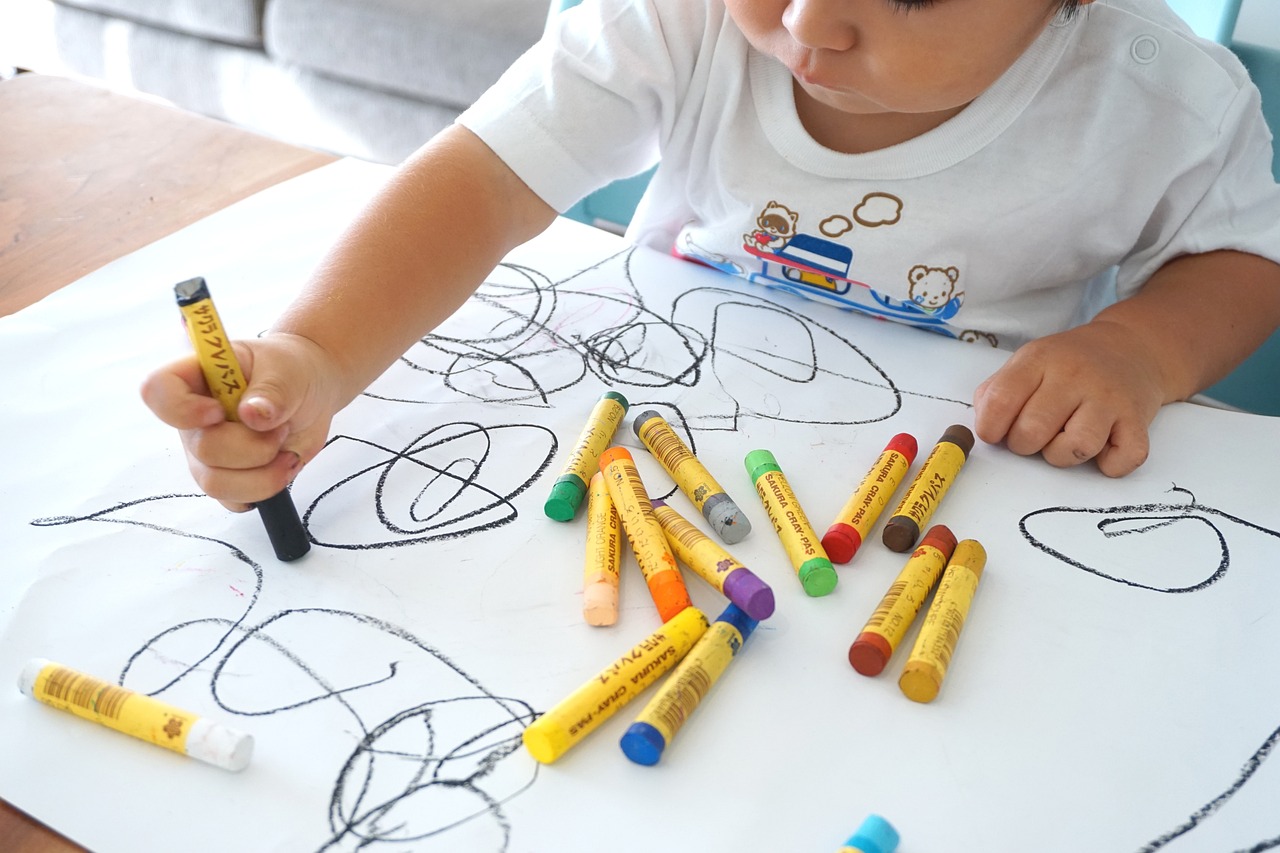
Welcome to the fascinating world of drawing! If you've ever gazed at a beautiful landscape or an intricate architectural piece and wondered how artists manage to capture such depth and realism, you're in the right place. Perspective is the secret sauce that transforms flat images into captivating three-dimensional illusions. In this guide, we'll unravel the mysteries of perspective, making it accessible for beginners eager to enhance their artistic skills.
So, what exactly is perspective in drawing? At its core, it's all about how we perceive the world around us. Imagine standing on a long road that stretches out before you. As you look down the road, you'll notice that it appears to narrow and eventually disappear into the horizon. This is the essence of perspective—it's how we interpret distance and depth visually. By mastering perspective, you can create artworks that draw viewers in, making them feel as if they could step right into your scene.
Let’s dive deeper into the foundational principles of perspective. The two most important concepts you'll encounter are the horizon line and vanishing points. The horizon line represents the viewer's eye level, while vanishing points are the spots on the horizon where parallel lines seem to converge. Understanding these elements is crucial for constructing realistic drawings. For beginners, it might feel a bit overwhelming at first, but fear not! With practice and patience, you'll soon be able to incorporate these techniques into your artwork seamlessly.
Now that you have a grasp on the basics, you might be wondering how to apply these principles. That's where the different types of perspective come into play. You'll encounter one-point, two-point, and three-point perspectives, each serving unique purposes in your drawings. One-point perspective is perfect for scenes viewed head-on, while two-point perspective allows for more dynamic angles. Three-point perspective, on the other hand, adds a vertical element, making it ideal for depicting tall structures like skyscrapers. The beauty of these techniques lies in their versatility, enabling you to bring a variety of scenes to life.
As we journey through this guide, we'll provide practical exercises and resources to help you hone your skills. Drawing is a muscle that needs to be exercised, and the more you practice, the more confident you'll become. Whether you're sketching a cozy room, a bustling street, or a towering mountain, understanding perspective will elevate your art to new heights.
- What is the best way to practice perspective drawing? Start with simple shapes and gradually work your way up to complex scenes. Use reference images to guide your understanding of how perspective works in real life.
- Do I need special tools to draw in perspective? While you can use basic pencils and paper, tools like rulers and perspective grids can greatly assist in achieving accurate lines and angles.
- Can I use perspective in digital art? Absolutely! Digital platforms often have tools that help you create perspective grids, making it easier to apply these techniques in your digital drawings.
The Basics of Perspective
Understanding the foundational principles of perspective is crucial for any artist looking to enhance their drawing skills. Perspective is the art of representing three-dimensional objects on a two-dimensional surface, and it plays a vital role in creating the illusion of depth and space in your artwork. At its core, perspective involves two main elements: the horizon line and vanishing points. The horizon line represents the viewer's eye level in the artwork, while vanishing points are the spots on the horizon line where parallel lines appear to converge.
To visualize this, think of standing on a straight road that stretches out to the horizon. The edges of the road seem to come together at a point in the distance—that's your vanishing point. By understanding how to manipulate these elements, you can create stunning drawings that feel alive with depth. When you draw, placing your horizon line at different heights can dramatically change the viewer's perspective. For instance, a low horizon line can make objects seem towering and grand, while a high line can give a bird's-eye view.
Another key concept is the depth cue. This refers to techniques that suggest depth, such as overlapping objects, size variation, and atmospheric perspective. Overlapping is straightforward: if one object covers part of another, it suggests that the covered object is further away. Size variation plays a significant role too; objects that are closer appear larger, while those further away seem smaller. Atmospheric perspective involves using color and clarity to indicate distance—objects in the background often appear lighter and less detailed than those in the foreground.
To further grasp these concepts, let's look at a simple table that summarizes the key elements of perspective:
| Element | Description |
|---|---|
| Horizon Line | The line that represents the viewer's eye level. |
| Vanishing Point | The point on the horizon where parallel lines appear to converge. |
| Depth Cue | Techniques used to create an illusion of depth, such as overlapping, size variation, and atmospheric perspective. |
By mastering these basics, you’ll be well on your way to creating artwork that not only captures attention but also tells a story through its depth. Remember, practice is key! Try sketching simple shapes using these principles. As you gain confidence, you can experiment with more complex scenes that incorporate various perspectives.
As you embark on this artistic journey, keep in mind that perspective is not just a technical skill; it’s a way to express your unique view of the world. So grab your pencil, find your horizon line, and let your imagination soar!

Types of Perspective
When diving into the world of drawing, grasping the different is like unlocking a treasure chest of artistic possibilities. Each type serves as a unique lens through which you can view and create your artwork, allowing you to manipulate space and depth in ways that can astonish your audience. Let's explore the three primary forms of perspective: one-point, two-point, and three-point perspective.
Each type has its own set of rules and applications, making them essential tools in your artistic toolkit. Understanding these differences not only enhances your ability to draw realistic scenes but also empowers you to express your creativity in a more profound way.
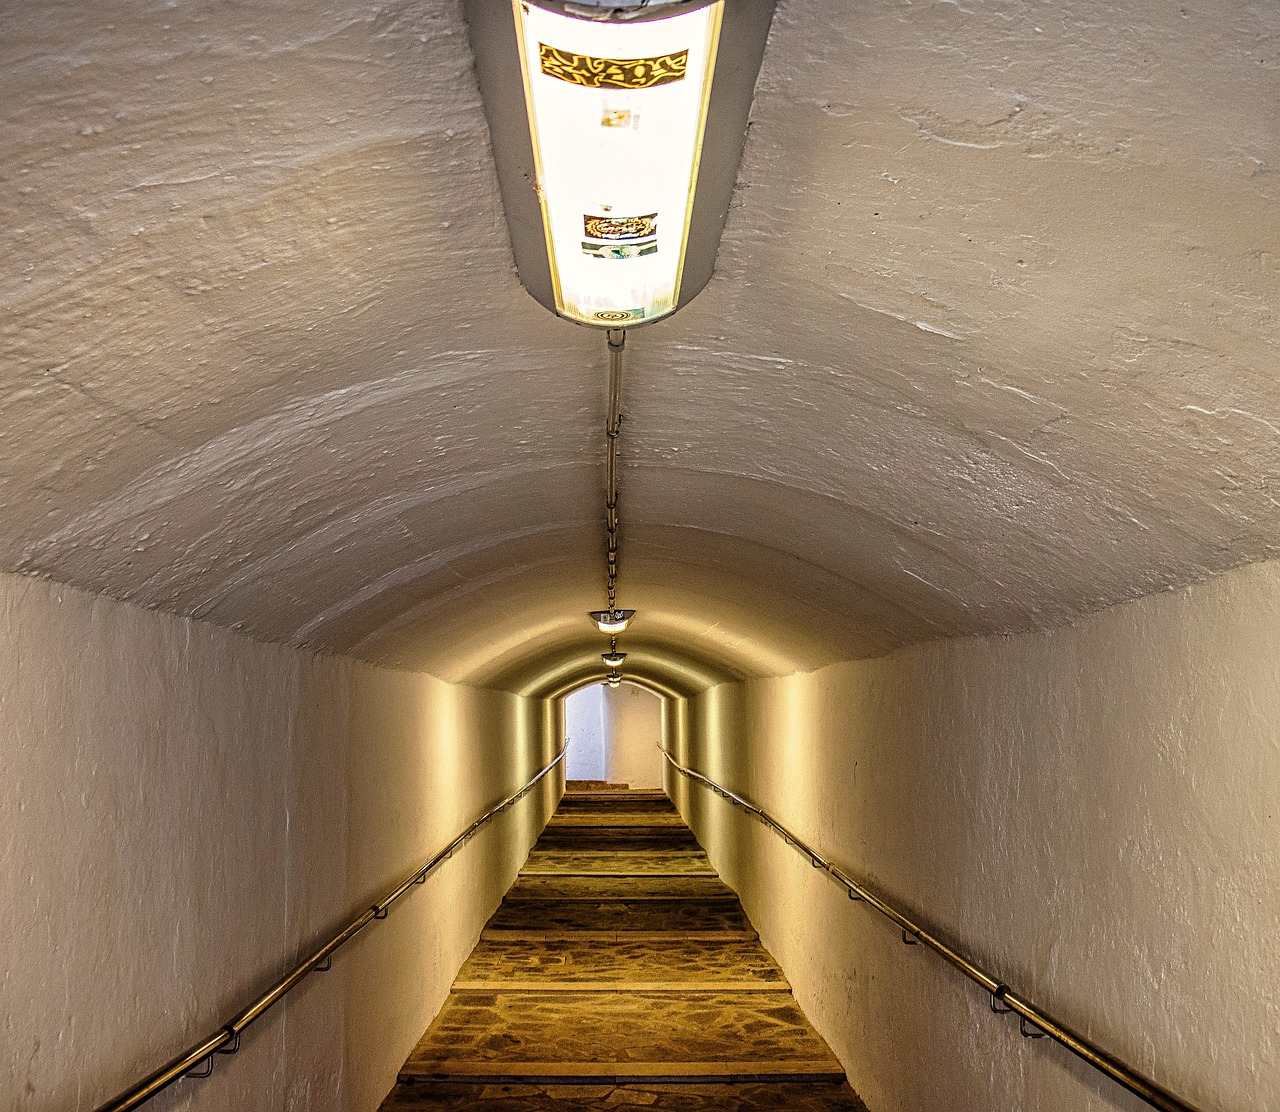
One-point perspective is the simplest of the three. It involves a single vanishing point on the horizon line, which is where all parallel lines converge. Imagine standing in the middle of a long, straight road; the lines of the road seem to meet at a point in the distance. This perspective is often used in scenes where you are looking straight down a path, such as a railway or a hallway. It creates a sense of depth and draws the viewer's eye into the scene.
On the other hand, two-point perspective introduces a bit more complexity. Instead of one vanishing point, there are two, typically located on the horizon line. This perspective is perfect for depicting objects at an angle, like a building viewed from a corner. Here, the lines of the object recede toward both vanishing points, creating a more dynamic and realistic representation. However, it can be tricky for beginners, as the placement of these points is crucial for achieving accuracy.
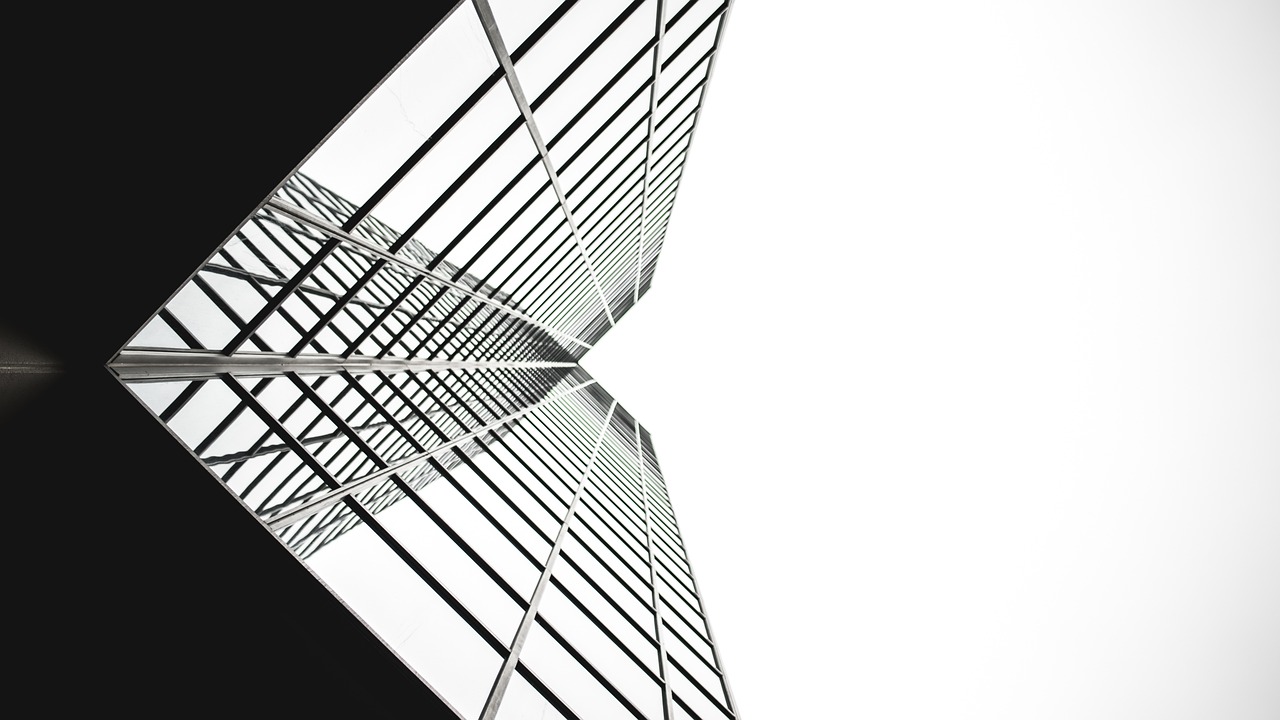
Finally, we have three-point perspective, which adds a vertical dimension to the mix. This type involves three vanishing points: two on the horizon line and one either above or below it, depending on whether you're looking up at a tall structure or down from a high vantage point. This perspective can create dramatic effects, making your artwork feel more immersive and engaging. Think of towering skyscrapers or deep chasms—three-point perspective allows you to capture these extremes beautifully.
To help illustrate these concepts, here's a simple table summarizing the key differences:
| Type of Perspective | Vanishing Points | Best Used For |
|---|---|---|
| One-Point Perspective | 1 | Direct views, roads, hallways |
| Two-Point Perspective | 2 | Objects at an angle, buildings |
| Three-Point Perspective | 3 | Tall structures, dramatic views |
Understanding these types of perspective is essential for any aspiring artist. They provide the framework for creating depth and realism in your drawings. As you practice these techniques, you'll find that your ability to convey space and dimension will improve dramatically, making your artwork not only more realistic but also more compelling. So grab your pencil and start experimenting with these perspectives—you'll be amazed at how they transform your drawings!

One-Point Perspective
One-point perspective is a fascinating technique that can transform a flat canvas into a vibrant, three-dimensional space. Imagine standing at the end of a long, straight road that seems to stretch endlessly into the horizon. This is the essence of one-point perspective! It utilizes a single vanishing point on the horizon line, which is where all parallel lines converge, creating an illusion of depth. When you grasp this concept, you can make your drawings pop with realism.
To create a compelling one-point perspective drawing, you'll want to start by establishing your horizon line. This line represents the viewer's eye level and is crucial for grounding your artwork. Once you have your horizon line, place your vanishing point somewhere along it. From this point, draw lines that extend outward to represent objects receding into space. For instance, if you're drawing a road, the edges of the road will angle towards the vanishing point, giving the viewer the sensation of distance.
One-point perspective is particularly effective for scenes that have a direct view, such as interiors or straight pathways. Here are a few practical applications:
- Roads and Railways: These elements naturally lead the eye towards the vanishing point, enhancing the sense of depth.
- Interior Spaces: When drawing rooms or hallways, one-point perspective helps to create a believable environment where walls and furniture seem to recede into the distance.
- Architectural Elements: Buildings can be depicted with accurate proportions by aligning their edges with the vanishing point.
As you practice, remember that the placement of your vanishing point can drastically change the composition. For example, if you position it high on the horizon, you’ll create a sense of looking up, as if you’re standing at the base of a tall structure. Conversely, placing it lower can give the impression of looking down a long corridor or street. Experimenting with these placements will enhance your creative expression and allow for more dynamic artwork.
In summary, mastering one-point perspective is like learning to see the world through a new lens. It opens up a realm of possibilities for artists, enabling them to convey depth and realism in their drawings. So grab your pencil, find your vanishing point, and start exploring the exciting world of one-point perspective!

Practical Applications
When it comes to one-point perspective, the possibilities are nearly endless, and understanding its practical applications can truly elevate your artistic skills. Imagine standing on a long, straight road that seems to stretch infinitely into the horizon. This is the essence of one-point perspective, where all lines converge at a single vanishing point on the horizon. By mastering this technique, you can create stunning visuals that draw your viewers in, making them feel as if they are stepping right into your artwork.
One of the most common applications of one-point perspective is in drawing interior spaces. Picture a room where the walls, floor, and ceiling all lead the eye to a focal point, like a cozy armchair or a window. By positioning your vanishing point at the center of the room, you can effectively illustrate depth, making the viewer feel as though they are part of the scene. This technique is not just limited to interiors; it is also fantastic for creating realistic representations of roads and railways. When you draw a straight road that disappears into the distance, the vanishing point serves as a guide for the parallel lines of the road, enhancing the sense of depth.
Additionally, one-point perspective can be applied to architectural drawings. Whether you’re sketching a building or a bridge, this technique allows you to convey the structure's dimensions accurately. For instance, when drawing a building, you can position the vanishing point at the center of your page, ensuring that the edges of the building recede toward it. This not only adds realism but also creates a sense of grandeur, making your structures appear more imposing.
To further illustrate the effectiveness of one-point perspective, consider the following examples:
| Application | Description |
|---|---|
| Interior Spaces | Creating depth in rooms, emphasizing furniture and decor. |
| Roads | Drawing long, straight roads that lead the eye to the horizon. |
| Architectural Drawings | Accurate representation of buildings and structures. |
Understanding these practical applications not only helps in creating more realistic drawings but also enhances your overall artistic expression. Remember, practice is key! Try sketching various scenes using one-point perspective, and soon you'll find that your ability to depict depth and dimension improves dramatically.
Q: What is one-point perspective?
A: One-point perspective is a drawing method where all parallel lines converge at a single vanishing point on the horizon, creating a sense of depth.
Q: How can I practice one-point perspective?
A: Start by drawing simple shapes like boxes or rooms and gradually move to more complex scenes like streets or interiors. Use a ruler to help maintain straight lines toward the vanishing point.
Q: Are there any common mistakes to avoid?
A: Yes! One common mistake is misplacing the vanishing point. Ensure it is on the horizon line and central to your composition for the best results.

Two-Point Perspective
Two-point perspective is a fascinating technique that opens up a whole new world of possibilities for artists. Unlike one-point perspective, which simplifies depth with a single vanishing point, two-point perspective introduces complexity and realism by using two distinct vanishing points. These points are typically placed on the horizon line, allowing artists to create the illusion of depth when drawing objects at an angle. Imagine standing on a street corner and looking at a building; you can see two sides of it, and that’s precisely what two-point perspective captures!
To create a convincing two-point perspective drawing, follow these essential steps:
- Establish the Horizon Line: This line represents the viewer's eye level. It’s crucial to position it correctly as it dictates the overall perspective of your drawing.
- Identify the Vanishing Points: Place two vanishing points on the horizon line, spaced apart. These will guide the angles of your drawing and help achieve that realistic look.
- Draw the Edges: Start by sketching the edges of the object you want to depict. Connect these edges to the vanishing points, allowing the lines to converge towards them.
- Add Details: Once the basic structure is in place, you can begin adding details, texture, and shading to enhance the three-dimensional effect.
One of the most exciting aspects of two-point perspective is its versatility. It can be applied to various subjects, from buildings and streets to furniture and landscapes. For example, if you’re drawing a cityscape, you can use two-point perspective to depict towering skyscrapers, giving them a sense of height and depth that captivates the viewer. This technique is particularly effective in architectural drawings, where accuracy and realism are paramount.
However, beginners often encounter some common mistakes when attempting two-point perspective. For instance, failing to keep the vanishing points aligned can result in distorted images that lack realism. Additionally, neglecting the horizon line or drawing lines that are not directed towards the vanishing points can lead to confusion in the viewer’s eye. To avoid these pitfalls, consider practicing with simple shapes, like boxes or cubes, before moving on to more complex subjects.
In summary, mastering two-point perspective is a rewarding journey that can significantly enhance your drawing skills. With practice, you’ll find that it not only improves your ability to depict objects accurately but also adds a dynamic quality to your artwork that draws the viewer in. So grab your pencil and start exploring the exciting world of two-point perspective!
Q: What is the main difference between one-point and two-point perspective?
A: The primary difference lies in the number of vanishing points used. One-point perspective employs a single vanishing point, ideal for straight-on views, while two-point perspective uses two vanishing points to create depth in angled views.
Q: Can I use two-point perspective for drawing landscapes?
A: Absolutely! Two-point perspective is fantastic for landscapes, especially when depicting structures like bridges or buildings that are viewed from an angle.
Q: What are some common mistakes to avoid in two-point perspective?
A: Common mistakes include misplacing the vanishing points, not aligning lines correctly towards the points, and neglecting the horizon line, which can distort the final drawing.

Common Mistakes
When diving into the world of two-point perspective, beginners often find themselves grappling with a few common pitfalls that can hinder their artistic growth. One of the most frequent mistakes is misplacing the vanishing points. Imagine trying to navigate a maze without a map; that’s how it feels when your vanishing points are incorrectly positioned. If they are too close together or too far apart, your entire drawing can appear skewed and unrealistic.
Another common error involves the alignment of vertical lines. Many artists instinctively draw vertical elements at an angle, which can create a confusing effect. Remember, in a two-point perspective, vertical lines should remain vertical, even if the horizontal lines lead to the vanishing points. This is crucial for maintaining the integrity of the scene you're creating.
Additionally, many beginners underestimate the importance of the horizon line. This line isn’t just an arbitrary marker; it represents the viewer's eye level. Placing it too high or too low can distort the entire perspective of your drawing. Think of it as the stage upon which your scene unfolds—if it’s off-kilter, the whole performance falls flat.
To help you avoid these common mistakes, here are a few tips:
- Check your vanishing points: Ensure they are placed far enough apart to create a realistic depth.
- Keep vertical lines straight: No matter how the perspective shifts, vertical lines should always remain vertical.
- Establish your horizon line: Make sure it accurately reflects the viewer's eye level to create a believable scene.
By being mindful of these common mistakes, you can enhance your two-point perspective drawings significantly. Remember, practice makes perfect, and every error is just another stepping stone toward mastering your artistic skills. So grab your pencil, keep these tips in mind, and let your creativity flow!
Q1: What is the difference between one-point and two-point perspective?
A1: One-point perspective uses a single vanishing point, ideal for scenes viewed head-on, while two-point perspective employs two vanishing points, allowing for more complex angles and depth.
Q2: How can I practice perspective drawing effectively?
A2: Start by sketching simple shapes in one-point perspective, then gradually move to more complex structures using two-point and three-point perspectives. Consistent practice is key!
Q3: Are there any specific tools I should use for drawing perspectives?
A3: A ruler is essential for drawing straight lines, while a compass can help in creating curves. Additionally, perspective guides and drawing apps can also be beneficial.
Q4: Can I use perspective in abstract art?
A4: Absolutely! Perspective can add depth and intrigue to abstract compositions, guiding the viewer's eye through your artwork.

Three-Point Perspective
Three-point perspective is a fascinating technique that brings a whole new dimension to your drawings. Unlike one-point and two-point perspectives, which primarily focus on horizontal and angled views, three-point perspective adds a vertical element, allowing artists to depict tall structures such as skyscrapers or deep chasms. Imagine standing at the base of a towering building and looking up; the lines converge not just toward the horizon but also toward the sky. This creates a sense of awe and drama that can be incredibly powerful in visual storytelling.
To grasp three-point perspective, it's essential to understand its three vanishing points: two are located on the horizon line (just like in two-point perspective), while the third is positioned either above or below this line. The placement of this third point is what gives your drawing that exhilarating vertical depth. For example, if you're drawing a tall building, the two vanishing points on the horizon will guide the horizontal lines of the structure, while the third point will dictate how the vertical lines recede into space. This technique can make your artwork feel more dynamic and immersive.
Many artists, especially beginners, can feel intimidated by the complexity of three-point perspective. However, with practice and a few simple steps, you can master it. Here’s a quick overview of how to implement three-point perspective:
- Identify Your Horizon Line: This is the eye level of your viewer. It’s where the sky meets the ground.
- Place the Vanishing Points: Set two points on the horizon line for the horizontal lines and place the third point either above or below it, depending on your viewpoint.
- Draw the Vertical Lines: These will extend toward the third vanishing point, creating the illusion of height.
- Connect the Points: Draw lines from the vanishing points to create the structure, ensuring that all lines converge correctly.
Here's a simple diagram to illustrate these points:
| Vanishing Point | Position |
|---|---|
| VP1 | Left side of the horizon |
| VP2 | Right side of the horizon |
| VP3 | Above or below the horizon |
As you become more comfortable with three-point perspective, you’ll notice how it can enhance your ability to create dramatic scenes. Think of it as the difference between a flat landscape and a breathtaking view from a mountaintop. The depth and dimension you can achieve will not only capture attention but also evoke emotion in your audience. So, grab your sketchbook, and start experimenting with this exciting technique!
Q: What is the main purpose of using three-point perspective?
A: The main purpose is to create a sense of depth and realism in drawings, especially for tall structures or scenes viewed from an extreme angle.
Q: Can I use three-point perspective for objects other than buildings?
A: Absolutely! While it's often used for architecture, you can apply it to any tall object, such as trees, towers, or even characters in dynamic poses.
Q: Is three-point perspective difficult to master?
A: It can be challenging at first, but with practice and understanding of the basic principles, you can become proficient over time.
Practical Exercises
To truly grasp the concept of perspective in drawing, are an absolute must. These activities not only reinforce the theoretical knowledge you've gained but also provide a hands-on approach to applying those principles in your artwork. Think of it like training for a sport; the more you practice, the better you become! Here are some engaging exercises designed to help you master different types of perspective.
First, start with a simple exercise focusing on one-point perspective. Find a room in your house and draw it from a corner where you can see two walls meeting. Establish your horizon line at eye level and create a vanishing point where the lines of the walls converge. This exercise allows you to visualize depth, making your drawing feel more realistic. Remember, the key is to observe how the lines of the room lead to that single point.
Next, challenge yourself with two-point perspective. Grab a piece of paper and draw a simple box, but this time, tilt it so that it’s at an angle. Place two vanishing points on your horizon line, one on the left and one on the right. As you draw the edges of your box, make sure they lead back to these vanishing points. This exercise will help you understand how objects appear when viewed from different angles, enhancing the depth and realism in your drawings.
For those ready to take it up a notch, try your hand at three-point perspective. This technique can be particularly exhilarating! To practice, sketch a tall building from a low angle, like you’re looking up at it. Place one vanishing point on the horizon line for the horizontal edges, and two additional points—one above for the vertical lines and one below for the depth. This exercise will not only challenge your skills but also give your artwork a dramatic flair, making it stand out.
Additionally, incorporating still life drawing can be an excellent way to practice perspective. Set up a simple arrangement of objects, such as fruits or vases, and draw them from different angles. By changing your viewpoint, you’ll learn how perspective alters the appearance of objects, which is crucial for creating realistic scenes. Be sure to pay attention to how the objects overlap and how their sizes change based on their distance from your viewpoint.
Lastly, consider using online resources and tutorials that provide step-by-step guidance on perspective drawing. Many platforms offer interactive exercises that can make the learning process more engaging. A simple search can lead you to video tutorials or drawing challenges that focus specifically on perspective. Remember, the world of art is vast, and the more you explore, the more you’ll discover!
In conclusion, practicing these exercises will not only enhance your understanding of perspective but also build your confidence as an artist. Don’t be afraid to make mistakes; they are part of the learning process. With time and dedication, you’ll find that your drawings will come alive with depth and dimension, captivating anyone who lays eyes on them!
Q: How long should I practice perspective drawing?
A: It's recommended to dedicate at least 30 minutes a day to practice. Consistency is key!
Q: Are there any specific tools I need for perspective drawing?
A: A ruler, pencil, and eraser are essential. You might also find a sketchbook helpful for practicing.
Q: Can I use digital tools for practicing perspective?
A: Absolutely! Many artists use software like Adobe Illustrator or Procreate, which have tools specifically designed for perspective drawing.
Q: How do I know if I'm improving?
A: Keep a portfolio of your work. Over time, you’ll notice improvements in your understanding and application of perspective.

Tools and Resources
Having the right tools can make a world of difference in your drawing journey. Whether you’re a beginner or looking to refine your skills, investing in quality materials is essential. First and foremost, you'll want to gather basic drawing supplies that will serve as your foundation. This includes items like pencils, erasers, and paper. But don't just grab any pencil off the shelf; consider different grades of pencils, as they can drastically affect the shading and detail in your work. For instance, a 2B pencil is great for darker lines, while an H pencil is perfect for lighter, finer details.
Next, let’s talk about paper. Not all paper is created equal! You'll want to choose a paper that suits your style. For instance, if you're working with pencils, a smooth bristol board can be ideal, while textured paper is better for charcoal or pastels. And remember, quality paper can elevate your art from good to stunning.
In addition to traditional tools, exploring digital drawing can open up a new world of possibilities. Programs like Adobe Photoshop or Procreate provide a plethora of tools that can help you experiment with perspective in an innovative way. These platforms often come with built-in grids and guides, making it easier to practice one-point, two-point, and three-point perspectives without the hassle of manual setup.
Now, let’s not forget about resources. There’s a treasure trove of books and online courses that can guide you through the learning process. Some highly recommended books include:
- “Drawing on the Right Side of the Brain” by Betty Edwards - This classic book helps you see the world as an artist does.
- “Perspective Made Easy” by Ernest R. Norling - A straightforward guide that breaks down complex concepts into digestible parts.
- “The Complete Guide to Perspective” by David Chelsea - This book offers in-depth insights into various perspective techniques.
Online platforms like Skillshare, Udemy, and even YouTube are fantastic for visual learners. You can find tutorials that cover everything from basic perspective to advanced techniques. Remember, learning through videos can provide you with instant feedback and visual examples, which can be incredibly beneficial.
To help you keep track of your progress, consider maintaining a sketchbook. This will not only allow you to practice regularly but also serve as a visual diary of your artistic journey. You can jot down notes, ideas, and even inspiration that you encounter along the way. Don’t underestimate the power of a good sketchbook; it can become your best friend in the world of art!
Lastly, joining art communities, whether online or in-person, can provide you with support and feedback. Platforms like DeviantArt or Instagram allow you to share your work and connect with other artists. You can gain insights, tips, and even constructive criticism that can help you grow. Remember, every artist was once a beginner, and learning from each other is part of the journey!
Q1: What are the best pencils for beginners?
A1: Generally, a set of pencils that includes HB, 2B, and 4B is great for beginners. This range allows you to experiment with different shading techniques.
Q2: Do I need expensive materials to start drawing?
A2: Not at all! While quality materials can enhance your work, many affordable options can still yield fantastic results. Focus on practicing and developing your skills first.
Q3: How often should I practice drawing?
A3: Consistency is key! Try to practice daily, even if it's just for 15-30 minutes. Regular practice will help you improve faster.
Applying Perspective in Various Art Styles
When it comes to the world of art, perspective is not just a technical skill; it’s a powerful tool that can transform how we perceive a piece. Different art styles utilize perspective in unique ways, allowing artists to convey emotions, depth, and realism. By understanding how perspective works within various styles, you can enhance your creativity and bring your artistic visions to life.
For instance, in realism, perspective is crucial for creating lifelike representations. Artists often use accurate measurements and vanishing points to ensure that their subjects appear as they do in the real world. This attention to detail can make a simple still life or a landscape feel incredibly immersive. On the other hand, in abstract art, perspective might be manipulated or entirely disregarded. Artists like Piet Mondrian played with geometric shapes and lines, creating a sense of depth without adhering to traditional rules. This approach invites viewers to engage with the artwork on a different level, challenging their perceptions.
In cartooning, perspective takes on a more exaggerated form. Artists often use one-point or two-point perspective to create dynamic scenes that draw the viewer’s eye. Think about your favorite animated shows—how the characters and backgrounds often seem to pop out at you. This is achieved by playing with scale and perspective, making the scenes feel more lively and engaging. For example, in a comic strip, a character might be drawn larger in the foreground to emphasize their importance, while the background recedes into a simplified perspective, creating a sense of action.
One of the fascinating aspects of perspective is how it can evoke different emotions depending on the art style. In surrealism, artists often distort perspective to create dreamlike scenes that challenge reality. Salvador Dalí, for instance, used unusual vanishing points and warped dimensions to create a sense of disorientation. This manipulation of perspective can evoke feelings of unease or wonder, inviting viewers to explore the subconscious.
To illustrate how perspective varies across styles, let’s take a look at the following table:
| Art Style | Perspective Application | Emotional Impact |
|---|---|---|
| Realism | Accurate vanishing points and measurements | Immersion and familiarity |
| Abstract | Manipulated shapes and lines | Challenge perceptions and provoke thought |
| Cartooning | Exaggerated forms and dynamic angles | Engagement and fun |
| Surrealism | Distorted perspectives | Unease and wonder |
As you explore these various styles, consider how you can experiment with perspective in your own work. Whether you’re drawing a still life, crafting a comic, or diving into an abstract piece, think about how perspective can enhance your storytelling. Remember, the beauty of art lies in its ability to express your unique vision, so don’t be afraid to bend the rules and create your own perspective!
Q: How can I practice perspective drawing?
A: Start by sketching simple shapes using one-point perspective. Gradually incorporate two-point and three-point perspectives as you become more comfortable.
Q: Are there specific tools I should use for perspective drawing?
A: A ruler is essential for drawing straight lines, while a compass can help with curves. Additionally, digital tools like drawing software can offer perspective grids.
Q: Can I use perspective in abstract art?
A: Absolutely! Abstract artists often play with perspective to create unique visual experiences, so feel free to experiment!
Frequently Asked Questions
- What is perspective in drawing?
Perspective in drawing refers to the technique used to represent three-dimensional objects on a two-dimensional surface. It helps create the illusion of depth and space, making your artwork more realistic and engaging.
- Why is understanding perspective important for beginners?
Understanding perspective is crucial for beginners because it lays the foundation for creating realistic drawings. Without grasping the basic principles, your artwork may appear flat and unconvincing. Mastering perspective can significantly enhance your artistic skills!
- What are the different types of perspective?
There are three main types of perspective: one-point, two-point, and three-point perspective. Each type serves different purposes and can be used in various drawing scenarios to create depth and dimension in your work.
- How do I create a one-point perspective drawing?
To create a one-point perspective drawing, start by establishing a horizon line and a single vanishing point. From there, draw lines that converge at the vanishing point to create depth. This technique is great for scenes viewed directly from the front.
- What common mistakes should I avoid in two-point perspective?
Common mistakes in two-point perspective include misplacing the vanishing points, drawing lines that don't converge correctly, and neglecting the horizon line. To avoid these pitfalls, practice regularly and refer to examples to guide your work.
- What is three-point perspective used for?
Three-point perspective is used for drawing tall structures or scenes viewed from above or below. This technique introduces a vertical dimension, adding drama and realism to your artwork, making it pop off the page!
- Can you recommend some practical exercises for practicing perspective?
Absolutely! Try drawing simple shapes like cubes and pyramids using different perspectives. You can also sketch real-life scenes, focusing on how objects relate to the horizon line and vanishing points. Regular practice will sharpen your skills!
- What tools do I need to start drawing with perspective?
To get started, all you really need are some basic drawing tools like pencils, erasers, and paper. However, rulers can be extremely helpful for creating straight lines and ensuring accurate vanishing points. Don't forget to explore online resources and books for additional guidance!
- How does perspective differ across various art styles?
Different art styles utilize perspective in unique ways. For example, realism relies heavily on accurate perspective to create lifelike images, while abstract art may play with perspective to evoke emotions rather than depict reality. Understanding these differences can inspire your creativity!


