
How to Layer in Acrylic Paint: A Complete Tutorial
Welcome to the vibrant world of acrylic painting! If you've ever marveled at a stunning piece of art and wondered how the artist achieved such depth and texture, you're in the right place. This tutorial is designed to unravel the mystery of layering in acrylic paint, providing you with all the tips and tricks you need to create your own masterpieces. Whether you're a novice or a seasoned artist looking to refine your skills, understanding layering techniques is essential for bringing your artistic vision to life.
Acrylic paint is known for its versatility and quick-drying properties, making it a favorite among artists. However, the key to mastering acrylics lies in how you layer them. Imagine building a house; you need a solid foundation before you can add the beautiful details. Similarly, in acrylic painting, layering allows you to create a rich tapestry of colors and textures that can transform a simple canvas into a breathtaking work of art.
Throughout this tutorial, we will explore various aspects of layering in acrylic painting, including essential tools, preparation techniques, basic methods, and common mistakes to avoid. By the end, you'll be equipped with the knowledge to experiment and develop your unique style while creating depth and dimension in your artwork.
So, grab your brushes, and let's dive into the colorful world of acrylic layering!
Acrylic paint is a water-based medium that dries rapidly, allowing artists to work quickly and efficiently. Its flexibility enables it to mimic the appearance of oil paints or watercolors, depending on how it’s used. This adaptability is one of the reasons why acrylics are so popular among artists of all levels. However, to layer effectively, it’s crucial to understand the properties of acrylic paint, such as its opacity and transparency.
When layering, you can use transparent colors to create a sense of depth. Think of it like glazing a window; the more layers you add, the richer the view becomes. Conversely, opaque colors can be used to cover areas or create bold highlights. Understanding how these characteristics interact will help you make informed choices as you build your artwork.
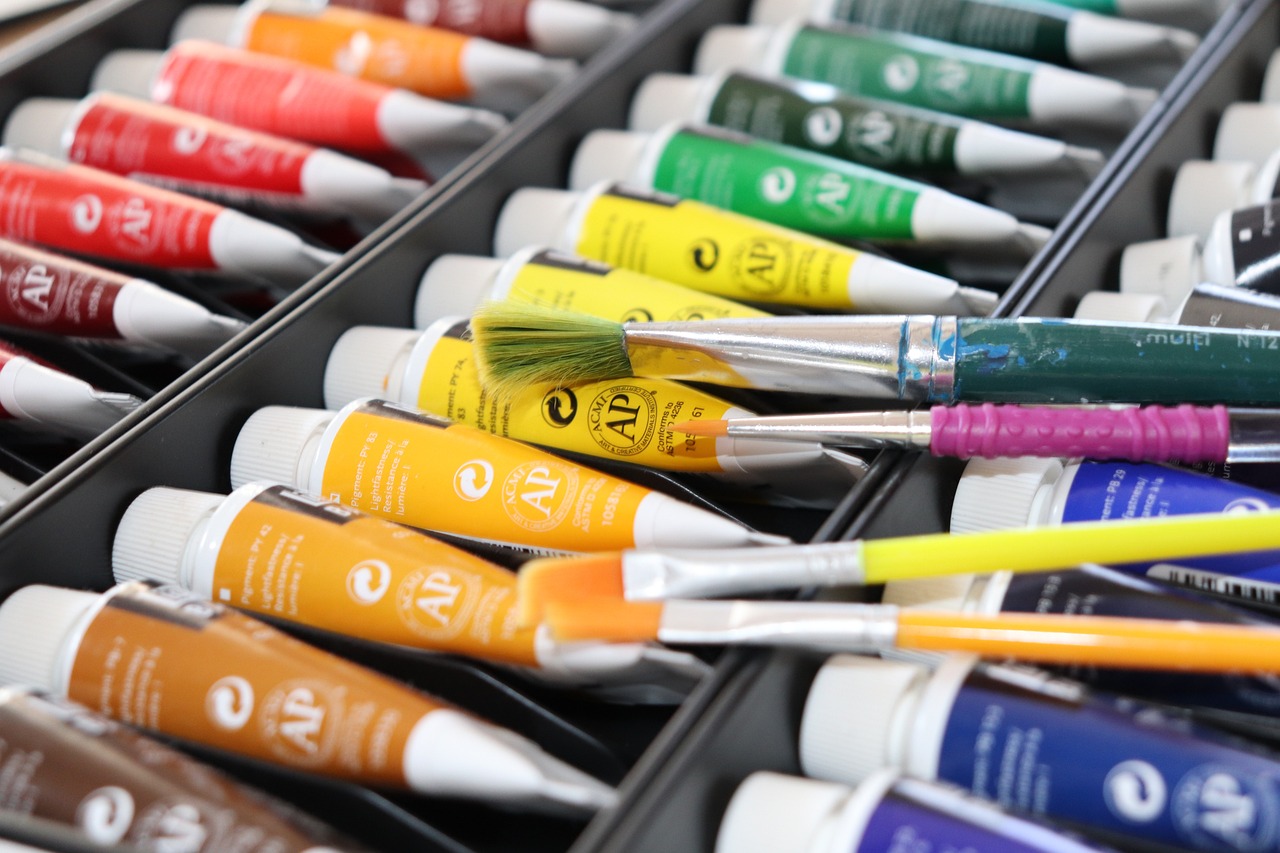
Having the right tools is paramount when it comes to layering in acrylic painting. Here’s a quick rundown of the essential items you’ll need:
- Brushes: A variety of brushes, including flat, round, and filbert shapes, will allow you to create different textures and effects.
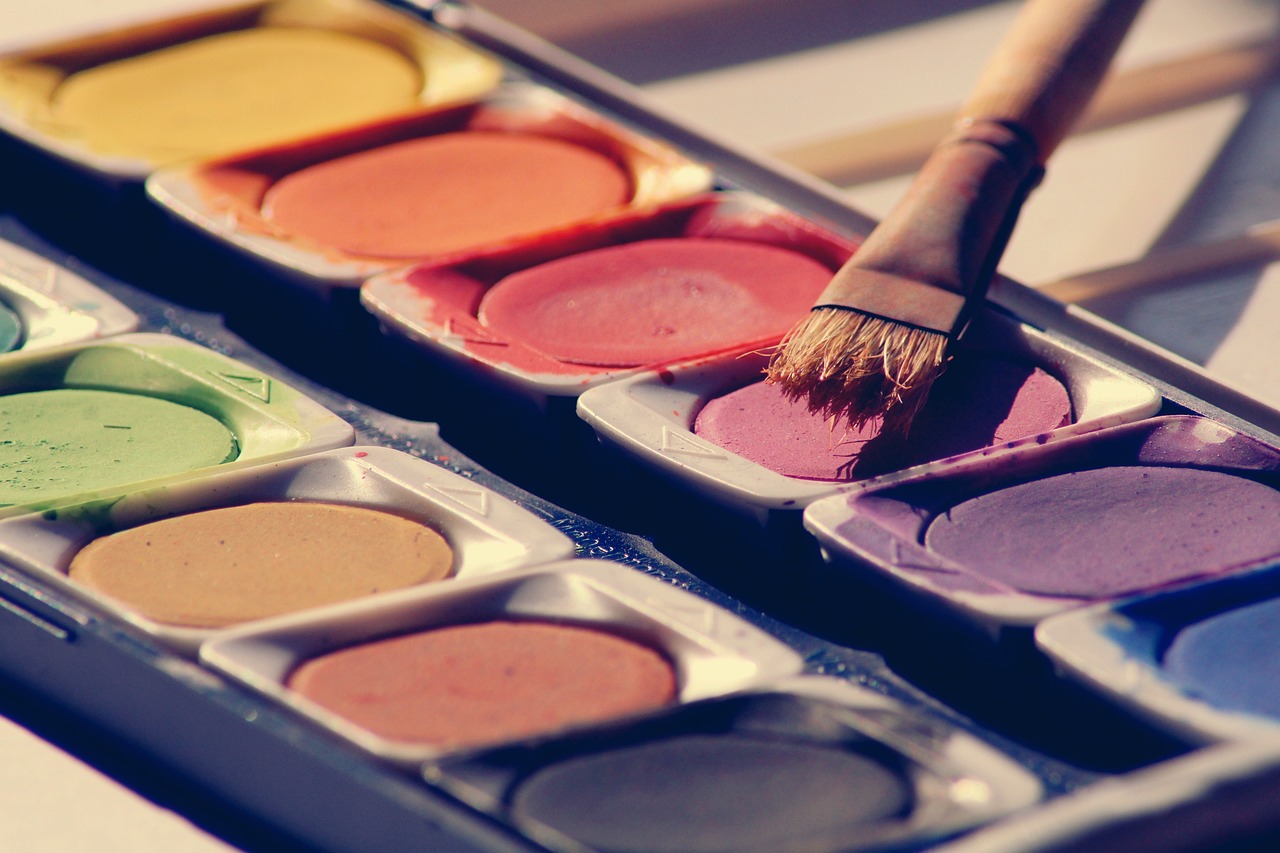
- Palettes: A palette for mixing colors is essential. Consider using a disposable palette for easy cleanup.
- Mediums: Acrylic mediums can alter the texture and finish of your paint, giving you more control over the layering process.
Investing in quality tools can significantly enhance your painting experience, allowing for smoother application and better blending of colors.
Before you start layering, it’s crucial to prepare your canvas properly. This step is akin to setting the stage for a performance; a well-prepared canvas ensures your artwork shines. Start by priming your surface with gesso, which creates a smooth, even base for your paint. You can choose between stretched canvas, canvas boards, or even heavyweight paper, depending on your preference.
Once primed, allow your canvas to dry completely before adding your first layer of paint. This preparation not only improves adhesion but also enhances the vibrancy of your colors.
Now that your canvas is ready, let’s dive into some fundamental layering techniques:
- Glazing: This involves applying a thin, transparent layer of paint over a dry base layer to create depth.
- Scumbling: A technique that uses a dry brush to apply a thin layer of paint, allowing the underlying color to show through.
- Impasto: This technique involves applying thick layers of paint, creating a three-dimensional effect on the canvas.
Each of these techniques offers unique possibilities for your artwork, allowing you to experiment and discover what works best for you.
Color mixing is an art in itself, especially when it comes to layering. Understanding how to create harmonious color palettes can elevate your artwork to new heights. Consider the following tips:
- Use a color wheel to find complementary colors that can enhance each other when layered.
- Experiment with mixing transparent and opaque colors to achieve the desired effect.
- Keep a record of your color mixtures for future reference.
By mastering color mixing, you’ll be able to create stunning layers that captivate the viewer's eye.
Creating depth and texture is crucial in layered painting. Utilize different brush strokes and techniques to add dimension to your artwork. For instance, using a palette knife can introduce exciting textures, while varying your brush pressure can create interesting patterns. Additionally, consider incorporating mixed media elements like collage or pastels to enhance the tactile quality of your piece.
Even seasoned artists can fall into common pitfalls when layering. Here are a few mistakes to watch out for:
- Applying too many layers too quickly can lead to muddy colors.
- Neglecting to let layers dry completely before adding new ones can result in unintended mixing.
- Not using enough medium can make your paint difficult to work with.
By being aware of these mistakes, you can navigate your layering process with confidence and ease.
The final touches can make or break your layered painting. Take a moment to step back and assess your work. Are there areas that need more contrast? Do some colors need to be intensified? Once you’re satisfied with your piece, consider varnishing it to protect your artwork and enhance its vibrancy. Varnishing adds a beautiful finish that can make your colors pop and give your painting a professional look.
Q: How long does it take for acrylic paint to dry between layers?
A: Acrylic paint typically dries within 15-30 minutes, but drying times can vary based on thickness and environmental conditions.
Q: Can I use acrylic paint on any surface?
A: Yes! Acrylic paint can be used on various surfaces, including canvas, wood, paper, and even fabric.
Q: What should I do if my layers are becoming muddy?
A: If your layers are muddy, try using more transparent colors and allow each layer to dry completely before adding new ones.
With these insights and techniques, you're now ready to explore the world of acrylic layering. Remember, the journey of painting is as important as the final piece, so enjoy every brushstroke!
Understanding Acrylic Paint
Acrylic paint is a versatile medium that has captured the hearts of many artists, both beginners and professionals alike. One of its most appealing characteristics is its quick drying time, which allows for rapid layering and experimentation. Unlike oil paints, which can take days or even weeks to dry, acrylics can be manipulated and layered within minutes. This quality opens up a world of possibilities for artists who crave spontaneity and creativity in their work.
But what exactly makes acrylic paint so special? For starters, it is made from pigment suspended in an acrylic polymer emulsion, which means it can be diluted with water for a variety of effects. When dry, acrylic paint becomes water-resistant and flexible, which is ideal for layering techniques. The ability to create both opaque and transparent layers is crucial for achieving depth in your artwork.
In terms of texture, acrylics can mimic the qualities of oil paints, watercolors, and even gouache, depending on how they are applied. For instance, you can use a thicker application for an impasto effect, where the paint stands out from the canvas, or you can water it down for a more fluid, watercolor-like finish. This adaptability is one of the reasons why acrylic painting has become so popular.
Moreover, understanding the properties of acrylic paint is essential for effective layering. Here are some key points to consider:
- Transparency vs. Opacity: Knowing how to manipulate transparency and opacity can drastically change the outcome of your layers. Transparent layers can create a beautiful glow, while opaque layers can add boldness and coverage.
- Color Shift: Acrylics may appear darker when wet and lighten as they dry. This is crucial to keep in mind when planning your layers.
- Mixing: Acrylics can be mixed with various mediums to alter their consistency, drying time, and finish. Experimenting with these can yield exciting results.
In summary, understanding the properties of acrylic paint is your first step towards mastering the art of layering. As you dive deeper into this medium, you'll discover that the possibilities are endless. Whether you're aiming for a smooth gradient or a textured masterpiece, acrylic paint has the tools you need to bring your vision to life. So grab your brushes and start experimenting!

Essential Tools for Layering
When it comes to layering in acrylic painting, having the right tools can make all the difference between a mediocre piece and a stunning masterpiece. Think of your tools as the instruments in a symphony; each one plays a crucial role in creating a harmonious final product. So, what exactly do you need to set the stage for your creative journey? Let's dive into the essentials!
First and foremost, you'll need a selection of brushes. The type of brush you use can significantly affect the texture and depth of your layers. For instance, flat brushes are fantastic for broad strokes and washes, while round brushes are perfect for detailed work and fine lines. Additionally, consider having some fan brushes on hand; they can create interesting textures that add dimension to your artwork.
Next up is your palette. A good palette allows you to mix colors effectively and keep your workspace organized. You can choose between traditional wooden palettes, disposable paper palettes, or even a glass palette for easy cleanup. Each has its benefits, so pick one that suits your style. Remember, a clutter-free palette can lead to a clutter-free mind, which is essential for creativity!
Another essential tool is mediums. Mediums can alter the consistency and drying time of your acrylic paint, allowing for various techniques. For layering, a glazing medium is particularly useful, as it increases transparency and allows you to build depth gradually. If you’re looking to create textured layers, consider using a heavy gel medium. It can give your paint a thicker consistency, adding that extra oomph to your artwork.
Lastly, don’t forget about your canvas or painting surface. The choice of canvas can dramatically influence your layering techniques. Whether you opt for stretched canvas, canvas boards, or even wood panels, make sure they are prepped properly. A well-primed surface allows for smoother application and better adhesion of the paint, which is crucial for successful layering.
To sum it up, here’s a quick overview of the essential tools:
| Tool | Purpose |
|---|---|
| Brushes | For applying paint in various strokes and textures |
| Palette | For mixing colors and keeping your workspace organized |
| Mediums | To alter paint consistency and drying time |
| Canvas | For providing a suitable surface for painting |
Having these tools at your disposal will set you up for success as you embark on your acrylic painting adventure. Remember, the right tools not only enhance your layering techniques but also inspire your creativity. So gather your supplies, and let’s get layering!
1. What types of brushes are best for layering in acrylic painting?
A variety of brushes can be used, but flat, round, and fan brushes are particularly effective for creating different textures and effects.
2. Can I use regular paint palettes for acrylics?
Yes, you can use traditional wooden palettes, disposable paper palettes, or glass palettes. Choose one that you find easy to work with and clean.
3. What is the purpose of using mediums in acrylic painting?
Mediums modify the properties of acrylic paint, such as consistency and drying time, which is essential for achieving various layering techniques.
4. Do I need to prime my canvas before painting?
Yes, priming your canvas is crucial as it prepares the surface for better paint adhesion and smoother application.
Preparing Your Canvas
When it comes to acrylic painting, the canvas you choose can significantly impact the final result of your artwork. Think of your canvas as the stage for a grand performance; if the stage isn’t set properly, the show might not go on as planned. So, how do you prepare your canvas for the best possible outcome? Let’s dive into the steps you need to take to create a solid foundation for your masterpiece.
First and foremost, it’s essential to select the right type of canvas. There are various options available, including cotton, linen, and synthetic blends. Each type has its own unique texture and absorbency, which can affect how the paint adheres and how colors appear. For example, a cotton canvas is typically more affordable and versatile, making it a popular choice for beginners. On the other hand, linen canvases are more durable and can hold more paint, which is ideal for more experienced artists looking to achieve intricate details.
Once you've chosen your canvas, the next step is priming it. This is a crucial process that prepares the surface for painting. Most canvases come pre-stretched and pre-primed, but if you’re using raw canvas or a non-primed surface, you’ll need to apply a layer of gesso. Gesso acts as a barrier between the canvas and the paint, preventing the paint from soaking into the fibers and ensuring vibrant colors. To apply gesso, simply use a wide brush or a palette knife and spread an even layer across the surface. Allow it to dry completely before you begin painting.
Here’s a quick overview of the priming process:
- Select your canvas: Choose between cotton, linen, or synthetic.
- Apply gesso: Use a brush or palette knife to spread an even layer.
- Let it dry: Ensure the gesso is completely dry before painting.
Another important aspect of preparing your canvas is to consider the size and orientation. A larger canvas offers more space for creativity, while a smaller canvas can be less intimidating for beginners. Additionally, think about whether you want to work in landscape or portrait orientation. This decision can influence your composition and the overall feel of your artwork.
Finally, make sure your workspace is set up for success. A well-lit area will help you see the true colors of your paint and make it easier to apply layers effectively. Consider using an easel to hold your canvas at the right angle, which can help you maintain a comfortable posture while you paint. Remember, a comfortable artist is a happy artist!
By paying attention to these details when preparing your canvas, you’re setting yourself up for a successful painting experience. It’s like building a house; you wouldn’t start without a solid foundation, right? So take the time to prepare your canvas properly, and you’ll find that layering your acrylic paints becomes a much more enjoyable and rewarding process.
Q: Do I need to prime a pre-stretched canvas?
A: If the canvas is already pre-primed, you can start painting right away. However, applying an additional layer of gesso can enhance the surface further.
Q: Can I use acrylic paint on any type of canvas?
A: While acrylic paint can adhere to various surfaces, it's best to use canvas specifically designed for acrylics for optimal results.
Q: How long does gesso take to dry?
A: Gesso typically dries within 30 minutes to an hour, but it's best to wait until it's completely dry before painting over it.
Basic Layering Techniques
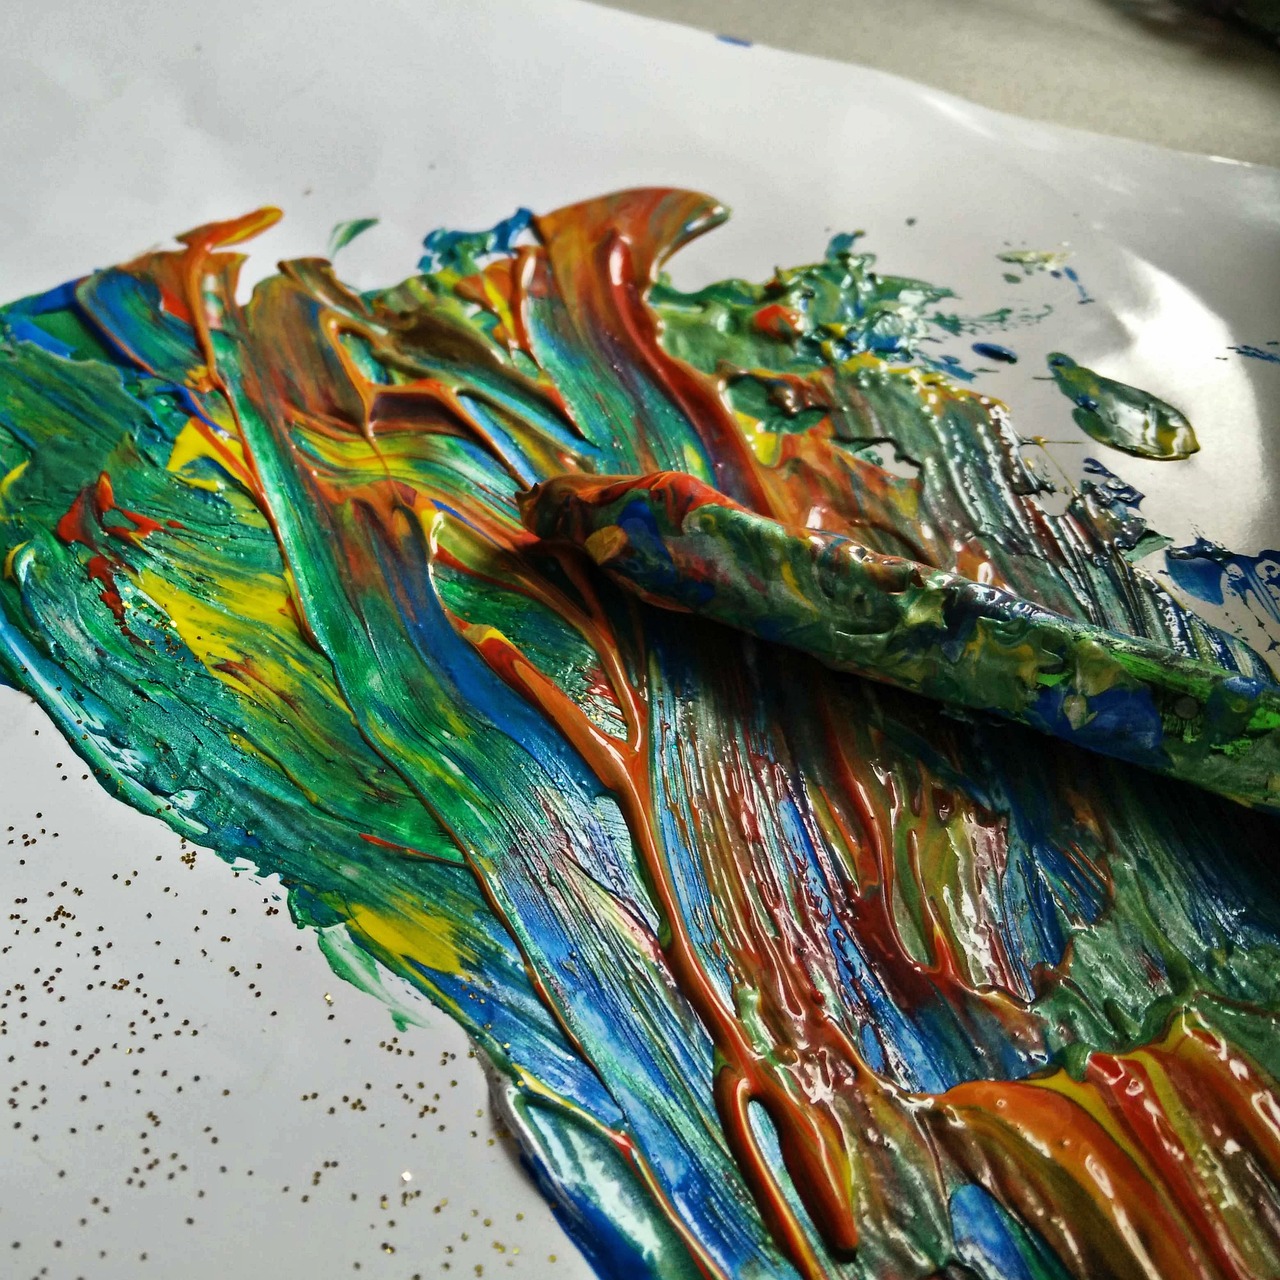
When it comes to acrylic painting, mastering basic layering techniques can truly transform your artwork. Think of layering as building a house; each layer adds strength and character to the final structure. In this section, we’ll explore some essential techniques that will help you create stunning depth and dimension in your paintings.
The first technique to consider is glazing. This method involves applying a thin, transparent layer of paint over a dry base layer. The beauty of glazing lies in its ability to create luminous effects and rich colors without overwhelming the underlying layers. To achieve a successful glaze, mix your acrylic paint with a glazing medium, which increases transparency and flow. Remember, a little goes a long way! Start with a small amount and gradually build up as needed.
Next up is scumbling. This technique is all about creating texture and visual interest. Scumbling involves using a dry brush to apply a thin layer of opaque or semi-opaque paint over a dry base layer. The key here is to use a light touch, allowing the underlying colors to peek through. Imagine it as gently dusting powdered sugar over a cake; you want just enough to enhance the flavor without covering it completely. This technique is particularly effective for landscapes or abstract works where you want to suggest texture, such as clouds or foliage.
Another exciting technique is impasto, which is all about using thick paint to create a three-dimensional effect. With impasto, you apply the paint directly from the tube or with a palette knife, allowing it to stand out from the canvas. This method is fantastic for adding drama and emphasis to specific areas of your painting. Think of it like sculpting with paint, where the texture becomes an integral part of the artwork. Just be mindful of drying times; thicker layers can take longer to dry, which might affect subsequent layers.
To further enhance your understanding of these techniques, let’s break down each one in a simple table:
| Technique | Description | Best Used For |
|---|---|---|
| Glazing | Applying a thin, transparent layer over a dry base. | Luminous effects, rich colors. |
| Scumbling | Using a dry brush to create a textured layer. | Landscapes, abstract works. |
| Impasto | Applying thick paint for a three-dimensional effect. | Adding drama, emphasis on specific areas. |
As you practice these techniques, don’t hesitate to experiment! Mixing and matching can lead to unique results that reflect your personal style. For instance, you might start with a base layer of glazing, followed by scumbling to add texture, and finish with impasto to highlight focal points. The possibilities are endless, and each layer adds a new dimension to your artwork.
In conclusion, mastering these basic layering techniques will significantly enhance your acrylic painting skills. Remember, the journey of painting is about exploration and self-expression. So grab your brushes, let your creativity flow, and watch your artwork come to life through the magic of layering!
Q: How long do I need to wait between layers?
A: Generally, you should wait until the previous layer is completely dry before applying the next one. This can take anywhere from 10 minutes to a few hours, depending on the thickness of the paint and the humidity of your environment.
Q: Can I use other mediums with acrylics for layering?
A: Absolutely! You can experiment with various mediums like gels and pastes to create different textures and effects. Just ensure they are compatible with acrylic paint.
Q: What if I make a mistake while layering?
A: Mistakes are part of the artistic process! You can often paint over errors once the layer is dry. Alternatively, you can use techniques like scumbling to cover up mistakes creatively.
Color Mixing for Layers
When it comes to acrylic painting, color mixing is more than just a technique; it’s an art form in itself! The way colors interact with one another can dramatically alter the depth and vibrancy of your layered artwork. Understanding how to mix colors effectively is crucial for creating harmonious compositions that resonate with viewers. Think of color mixing as a dance: each color partner must know their steps to create a beautiful performance on your canvas.
To start, it’s essential to grasp the difference between transparency and opacity in acrylic paint. While transparent colors allow the layers beneath to show through, opaque colors sit on top, creating a more solid appearance. This interplay can be used to your advantage when layering. For instance, you might choose a transparent wash of blue over a vibrant yellow to create a stunning green hue, while also allowing hints of the yellow to shine through. Isn’t that fascinating? It’s like revealing secrets hidden beneath the surface!
One effective way to mix colors is to use a color wheel. This simple tool helps you understand the relationships between colors, such as complementary and analogous colors. By using complementary colors, you can create vibrancy and contrast in your paintings, while analogous colors will provide a more harmonious and soothing effect. Here’s a quick breakdown of how to use the color wheel:
| Color Type | Description | Example Colors |
|---|---|---|
| Complementary | Colors opposite each other on the color wheel, creating contrast. | Red & Green, Blue & Orange |
| Analogous | Colors next to each other on the wheel, providing harmony. | Red, Red-Orange, Orange |
| Triadic | Three colors evenly spaced on the color wheel, offering balance. | Red, Yellow, Blue |
As you mix your colors, remember to keep a color journal. This can be a simple sketchbook where you document your color combinations, noting which ones worked well and which didn’t. Over time, this will become an invaluable resource, guiding you in future projects and helping you to develop your unique palette. It’s like having a personal recipe book for your artistic creations!
Lastly, don’t shy away from experimenting with various mediums that can alter the characteristics of your paint. For example, adding a glazing medium can increase transparency, allowing you to layer colors without losing the vibrancy of those underneath. Similarly, a matte medium can give a softer finish, perfect for achieving that dreamy effect in your landscapes. The key here is to play and explore—after all, art is about discovery!
As you dive into the world of color mixing for layers, remember that the journey is just as important as the destination. Allow yourself the freedom to make mistakes, learn, and grow as an artist. Each layer you add brings you closer to a masterpiece that is uniquely yours. So grab your brushes, mix those colors, and let your creativity flow!
- What is the best way to create a harmonious color palette?
Start by choosing a base color, then use the color wheel to find complementary or analogous colors that work well together. - How do I know if my mixed colors will look good on the canvas?
Test your mixed colors on a scrap piece of paper or canvas before applying them to your artwork. - Can I layer transparent and opaque colors?
Absolutely! Mixing both can create stunning effects, with transparent layers allowing for depth and opaque layers providing boldness.

Building Depth and Texture
When it comes to acrylic painting, is like adding a third dimension to your artwork. Think of it as creating a landscape where every hill and valley tells a story. The beauty of acrylics lies in their versatility, allowing you to explore various techniques that can elevate your work from flat to fabulous. So, how do you achieve this mesmerizing effect? Let’s dive into some techniques that can help you create stunning layers.
One of the most effective methods for adding depth is through the use of different brush strokes. Each stroke can convey a distinct feeling and texture. For instance, using a flat brush can produce bold, sweeping strokes, while a round brush can create intricate details. Experimenting with these brushes can lead to surprising results. Don’t be afraid to mix and match! Consider using:
- Flat Brushes: Great for bold strokes and filling large areas.
- Round Brushes: Perfect for detail work and softer edges.
- Fan Brushes: Ideal for creating textures like grass or fur.
Another exciting way to build texture is by incorporating mixed media elements. Think of adding sand, fabric, or even paper into your paint to create a tactile surface. This not only adds visual interest but also invites viewers to engage with your piece on a sensory level. It’s like inviting them to touch your painting and feel the story it tells. Just imagine how intriguing a canvas feels when it combines smooth paint with rough, textured materials!
Moreover, layering techniques such as glazing and scumbling can significantly enhance the depth of your artwork. Glazing involves applying a thin, transparent layer of paint over a dried layer, which allows the colors beneath to shine through. This technique can create a luminous effect, as if your painting is glowing from within. On the other hand, scumbling involves applying a dry, opaque layer of paint over a dried layer, allowing the underlying colors to peek through in a more muted way. Both methods can be used in tandem to achieve a rich, complex surface.
Let’s not forget about the importance of color choice in building depth. Darker colors tend to recede, while lighter colors advance, creating an illusion of space. By strategically placing your colors, you can guide the viewer’s eye throughout your painting, leading them on a journey through its depths. For example, using deep blues and purples in the background can make your foreground elements pop, creating a striking contrast that draws attention.
Finally, consider the overall composition of your piece. Think of it as sculpting with paint. Each layer adds another dimension, and the arrangement of colors and textures can lead to a harmonious balance. Don’t shy away from experimenting! Sometimes, the most unexpected combinations can yield the most captivating results. Remember, art is a journey, not a destination.
In conclusion, building depth and texture in your acrylic paintings is all about exploration and experimentation. With the right techniques and a bit of creativity, you can transform your artwork into a multi-dimensional experience that captivates and inspires. So grab those brushes and start layering – your canvas is waiting!
Q: What is the best way to create texture in acrylic painting?
A: The best way to create texture is by using various brush strokes and incorporating mixed media elements. Experimenting with techniques like glazing and scumbling also adds depth.
Q: Can I use other materials to enhance texture?
A: Absolutely! You can use materials like sand, fabric, or paper to add interesting textures to your acrylic paintings.
Q: How do I choose colors for depth?
A: Use darker colors for backgrounds and lighter colors for foreground elements to create an illusion of depth. The placement of colors can guide the viewer's eye through your painting.
Q: Is it important to let layers dry before adding more?
A: Yes, allowing layers to dry is crucial for achieving the desired effects, especially when using glazing or scumbling techniques.
Common Mistakes to Avoid
When diving into the vibrant world of acrylic painting, it’s easy to get swept away by the excitement of layering. However, there are some common mistakes that can hinder your progress and diminish the beauty of your artwork. Recognizing these pitfalls is the first step to becoming a more skilled artist. Let’s explore some of these blunders and how to avoid them.
One frequent mistake is overworking the paint. Acrylics dry quickly, which is a blessing and a curse. If you keep going back to a layer that’s already set, you might end up muddying your colors instead of enhancing them. It's like trying to fix a cake that’s already baked; sometimes, it’s better to let it be and move on to the next layer. Instead, focus on building your layers with intention and allow each one to dry completely before adding more.
Another common error is not using the right mediums to achieve the desired transparency or texture. Acrylic paint can be modified with various mediums to change its consistency and finish. For instance, if you want to create a glossier look, using a gloss medium can help. Skipping this step can lead to flat, lifeless layers. So, always keep your mediums handy and experiment with them to see how they can elevate your work.
Additionally, many artists neglect the importance of color mixing. It’s tempting to squeeze out colors straight from the tube, but this can result in a lack of harmony in your layers. Instead, take the time to mix your colors on a palette. This not only gives you a chance to create unique shades but also helps you understand how different colors interact. Think of it as cooking; the right ingredients can make a dish truly delicious!
Lastly, failing to assess your work as you go can lead to overwhelming frustration. It’s crucial to step back and look at your painting from a distance. This practice allows you to see how your layers are coming together and if adjustments are needed. Don’t be afraid to make changes; it’s all part of the creative process. Remember, art is not just about the final product, but also about the journey you take to create it.
To summarize, here are some key mistakes to avoid when layering acrylic paint:
- Overworking the paint
- Neglecting to use the right mediums
- Skipping color mixing
- Failing to assess your work
By being mindful of these common mistakes, you can enhance your acrylic painting skills and create stunning layered artworks that truly reflect your artistic vision. Remember, every artist makes mistakes; the important thing is to learn from them and keep pushing your creative boundaries!
Q1: What is the best way to layer acrylic paint?
A1: The best way to layer acrylic paint is to allow each layer to dry completely before adding the next one. Use glazing techniques for transparency or impasto for texture, depending on your desired effect.
Q2: How can I avoid muddy colors when layering?
A2: To avoid muddy colors, mix your paints on a palette and use complementary colors sparingly. Allow each layer to dry before applying additional colors to maintain vibrancy.
Q3: What mediums should I use for layering?
A3: Common mediums include gloss medium for shine, matte medium for a flat finish, and retarders to slow drying time. Experiment with different mediums to see which best suits your style.
Q4: How do I know when to stop layering?
A4: It’s often best to stop layering when you feel your painting has the depth and texture you desire. Step back frequently to assess your work and trust your instincts.
Final Touches and Varnishing
Once you've poured your heart and soul into your acrylic painting, the final touches can make all the difference. This is the moment where you step back, assess your work, and decide what it needs to truly shine. Think of it like the cherry on top of a delicious sundae; it’s that last little detail that elevates your creation from good to absolutely stunning. But how do you know when your painting is finished? It’s all about trusting your instincts and being open to making adjustments. Take a moment to look at your piece from different angles and distances. Sometimes, a small tweak—like adding a highlight or adjusting a color—can transform the entire composition.
After you’ve made your final adjustments, it’s time to protect your masterpiece. Varnishing is crucial in preserving the vibrancy of your colors and providing a protective layer against dust, UV light, and other environmental factors. There are various types of varnishes available, each offering different finishes and levels of protection. Here’s a quick breakdown:
| Varnish Type | Finish | Best For |
|---|---|---|
| Gloss Varnish | High Shine | Enhancing color vibrancy |
| Satin Varnish | Soft Glow | Balanced look |
| Matte Varnish | No Shine | Reducing glare |
When applying varnish, remember to choose a well-ventilated area and use a clean, soft brush. Apply the varnish evenly, working from one side to the other to avoid drips and streaks. It’s also essential to let each layer dry completely before adding another if you’re going for a thicker coat. Depending on the type of varnish, you may need to apply two or three layers. This not only enhances the durability of your painting but also gives it a professional finish.
Finally, don’t forget to sign your work! Just like an author signs their book, your signature adds a personal touch and marks your creation as yours. Whether you choose to place it in a corner or integrate it into the artwork itself, it’s an essential step in completing your masterpiece.
In conclusion, the final touches and varnishing process is not just about protection; it’s about celebrating your hard work and ensuring that your acrylic painting stands the test of time. With the right techniques and a little patience, your artwork will not only look fantastic but will also be preserved for years to come.
- What type of varnish should I use for my acrylic painting? It depends on the finish you desire. Gloss varnish enhances color vibrancy, while matte varnish reduces glare.
- How long should I wait before varnishing my painting? It’s best to wait at least 24 hours after your final layer of paint has dried, but longer is often better to ensure complete dryness.
- Can I use a spray varnish instead of a brush-on varnish? Yes, spray varnish can provide an even coat and is easier for larger pieces, but be sure to use it in a well-ventilated area.
- Is it necessary to varnish my painting? While it’s not mandatory, varnishing protects your artwork and enhances its appearance, making it a worthwhile step.
Frequently Asked Questions
- What is the best way to layer acrylic paint?
Layering acrylic paint effectively involves using techniques like glazing, scumbling, and impasto. Start with thin layers and gradually build up your colors. Remember, patience is key! Allow each layer to dry before adding the next to avoid muddying your colors.
- Do I need to prime my canvas before painting?
Yes, priming your canvas is essential for achieving the best results with acrylic paint. It helps the paint adhere better and prevents it from soaking into the canvas. Use a gesso primer for optimal results, and choose a canvas that suits your painting style.
- Can I mix different brands of acrylic paint?
Absolutely! Mixing different brands of acrylic paint is generally fine, but be aware that variations in texture and finish might occur. It's best to stick to similar paint types (like heavy body or fluid) to maintain consistency in your artwork.
- What tools do I need for layering?
Essential tools for layering include a variety of brushes (flat, round, and fan brushes), a palette for mixing colors, and mediums like glazing liquid or gel for enhancing transparency. Having the right tools can make a world of difference in your painting experience!
- How can I avoid common mistakes when layering?
To avoid common mistakes, always let each layer dry completely before adding the next. Also, be cautious with your color choices; too much opacity can lead to a flat appearance. Experimenting on scrap paper can help you find the right balance before applying it to your canvas!
- What is the importance of varnishing my finished painting?
Varnishing your finished painting protects it from dust, UV light, and yellowing over time. It can also enhance the colors and give your artwork a professional finish. Make sure to wait until your painting is fully dry, usually a few weeks after completion, before applying varnish.


