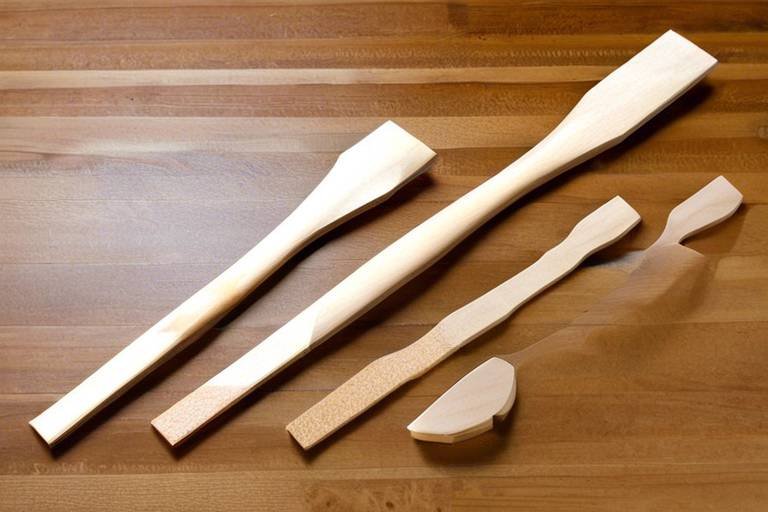
Woodworking: How to Make Wooden Spatulas
Welcome to the wonderful world of woodworking! If you’ve ever found yourself in the kitchen, flipping pancakes or stirring up a delicious sauce, you might have thought, "Wouldn't it be great to have a spatula that’s not just functional but also a piece of art?" Well, you’re in luck! This article will guide you through the essential steps and techniques for crafting wooden spatulas, including tools needed, wood selection, design considerations, and finishing touches for a functional kitchen tool. By the end of this journey, you’ll not only have a beautiful spatula but also the satisfaction of creating something with your own hands. So, grab your tools, and let’s get started!
Understanding the tools necessary for woodworking is crucial. You wouldn’t want to start your spatula-making project without the right gear, right? Here’s a rundown of the essential tools you’ll need:
- Saws: A bandsaw or a coping saw is ideal for cutting the wood into the desired shape.
- Chisels: These are great for carving out details and refining edges.
- Sanders: An electric sander can save you time, but hand sanding gives you more control over the finish.
- Measuring Tools: A tape measure and square are essential for accuracy.
When selecting your tools, always opt for quality over quantity. Investing in good tools not only makes the process easier but also ensures that your spatula will be crafted with precision.
Now that you have your tools ready, let’s talk about the heart of your spatula: the wood! Selecting the appropriate type of wood is vital for durability and aesthetics. You want something that can withstand the heat of the kitchen while also looking good on your countertop. Here are some popular wood species suitable for spatula making:
| Wood Type | Hardness | Grain | Food Safety |
|---|---|---|---|
| Maple | Hard | Fine | Safe |
| Cherry | Medium | Medium | Safe |
| Walnut | Medium | Bold | Safe |
| Bamboo | Hard | Striated | Safe |
When choosing wood, consider factors like hardness, grain, and food safety. Hardwoods like maple and cherry are excellent choices for spatulas because they don’t easily warp or absorb odors.
A well-thought-out design enhances functionality and appeal. Think about what you’ll primarily use your spatula for. Do you need a wide blade for flipping burgers or a thin edge for delicate crepes? The shape and size of your spatula can greatly affect its usability. Here are a few design tips:
- Consider a rounded edge for scraping bowls clean.
- Opt for a tapered edge to slide under delicate foods.
- Experiment with different handle shapes for comfort and grip.
Don’t be afraid to sketch out your ideas. A visual representation can help you refine your design before you start cutting the wood.
Accurate measurements are essential for a successful spatula. You wouldn’t want a spatula that’s too short or too wide, right? We’ll delve into effective measuring and marking techniques to ensure precision in your woodworking project. Use a tape measure to determine the length and width, and a square to ensure your angles are correct. Mark your measurements clearly with a pencil, so you can easily see where to cut.
The cutting and shaping process is where your spatula starts to take form. Here’s a step-by-step guide: First, secure your wood to prevent any movement while cutting. Using a bandsaw, carefully follow your marked lines. Once your spatula is cut out, use chisels to refine the edges and create any design features you want. Remember to take your time; rushing can lead to mistakes!
Sanding is crucial for achieving a smooth finish. After cutting and shaping, you’ll want to sand your spatula to eliminate any rough spots. Start with a coarser grit sandpaper and gradually move to finer grits. This process not only makes your spatula feel great in your hand but also enhances the overall appearance. Don’t forget to sand the edges and corners to avoid any sharp spots!
Finishing your spatula not only enhances its appearance but also protects the wood. You’ll want to use a food-safe finish to ensure that your spatula is safe for cooking. Options include mineral oil, beeswax, or specialized wood finishes. Apply the finish using a clean cloth, making sure to cover all surfaces evenly. Let it dry completely before using your spatula in the kitchen.
Proper care extends the life of your wooden spatula. Here are some tips on cleaning, storing, and maintaining your spatula to keep it in excellent condition for years to come:
- Hand wash with mild soap and water; avoid soaking.
- Dry immediately to prevent warping.
- Reapply oil every few months to maintain the finish.
By following these simple care instructions, your handmade spatula will remain a cherished tool in your kitchen for many meals to come!
Q: Can I use any type of wood for making spatulas?
A: While you can use various types of wood, it’s best to avoid softwoods like pine, as they can absorb odors and warp. Hardwoods like maple, cherry, and bamboo are ideal.
Q: How do I know if the finish is food-safe?
A: Look for finishes labeled as "food-safe" or "non-toxic." Mineral oil and beeswax are excellent choices for wooden kitchen utensils.
Q: How often should I oil my wooden spatula?
A: It’s a good idea to reapply oil every few months or whenever the wood looks dry.
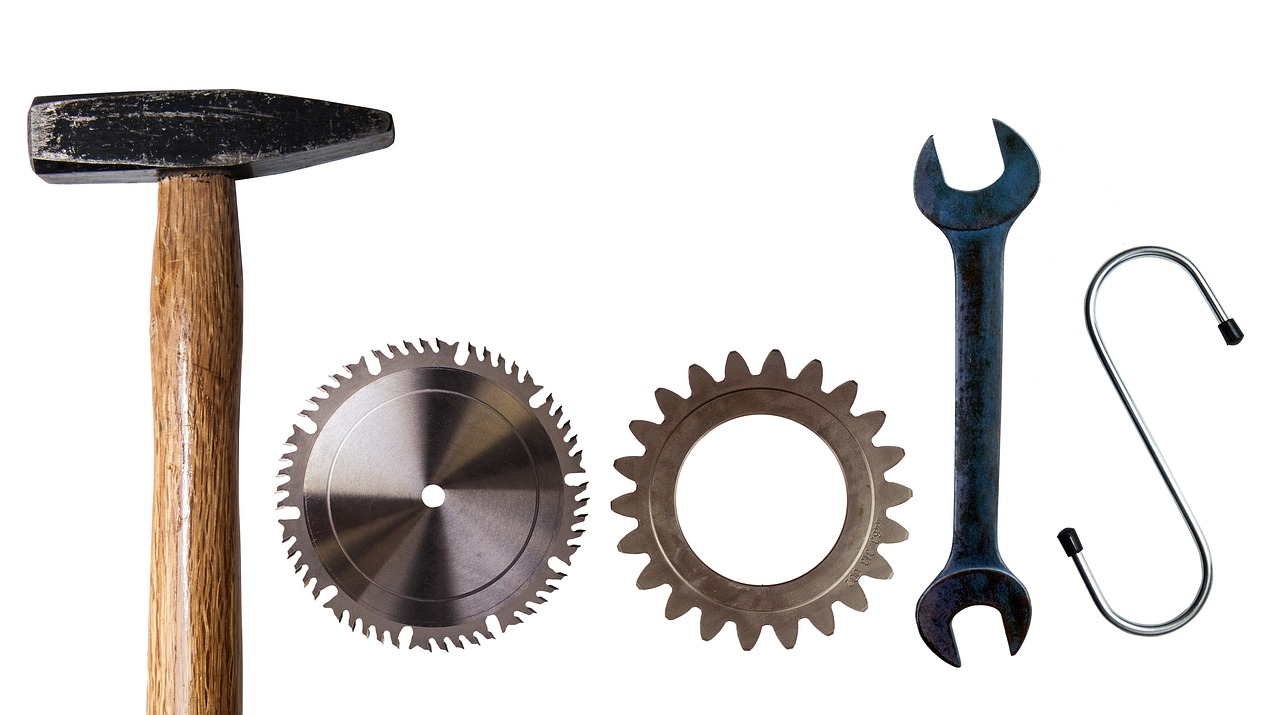
Tools Required for Woodworking
Understanding the tools necessary for woodworking is crucial, especially when embarking on a project as delightful as crafting your own wooden spatulas. The right tools can make the difference between a frustrating experience and a smooth, enjoyable one. So, what tools do you need to get started? Let’s dive into the essentials!
First and foremost, you'll need a good quality saw. A band saw or a jigsaw works wonders for cutting out the rough shape of your spatula. If you're looking for more precision, a scroll saw can also be a great choice. Remember, investing in a sharp blade is key; dull blades can lead to jagged edges and a lot of extra work.
Next up are chisels. These are invaluable for shaping the edges and creating the desired contours of your spatula. A set of chisels in various sizes will allow you to tackle different tasks with ease. Make sure to keep them sharp; a well-maintained chisel can glide through wood like a hot knife through butter!
Another essential tool is a sander. Sanding is where the magic happens, transforming a rough-cut piece of wood into a smooth, polished spatula. You can use a power sander for larger areas, but don’t underestimate the effectiveness of hand sanding for those intricate details. A combination of different grits will help you achieve a flawless finish.
In addition to these primary tools, having a few measuring tools at your disposal is essential. A tape measure and a square will ensure your spatula is symmetrical and accurately sized. After all, nobody wants a lopsided spatula that can't flip a pancake!
Here’s a quick overview of the essential tools you'll need:
| Tool | Purpose |
|---|---|
| Saw | Cutting the wood to shape |
| Chisels | Shaping and detailing |
| Sander | Smoothing the surface |
| Measuring Tools | Ensuring accuracy in dimensions |
Lastly, don’t forget about safety equipment. Safety glasses and ear protection should be worn whenever you're using power tools. It might seem like a hassle, but it’s a small price to pay for keeping your eyes and ears safe while you work on your culinary masterpiece.
So, whether you’re a seasoned woodworker or a curious beginner, having the right tools at your fingertips will set you up for success. With the right equipment, you’ll be well on your way to creating beautiful, functional wooden spatulas that not only serve a purpose but also add a personal touch to your kitchen!
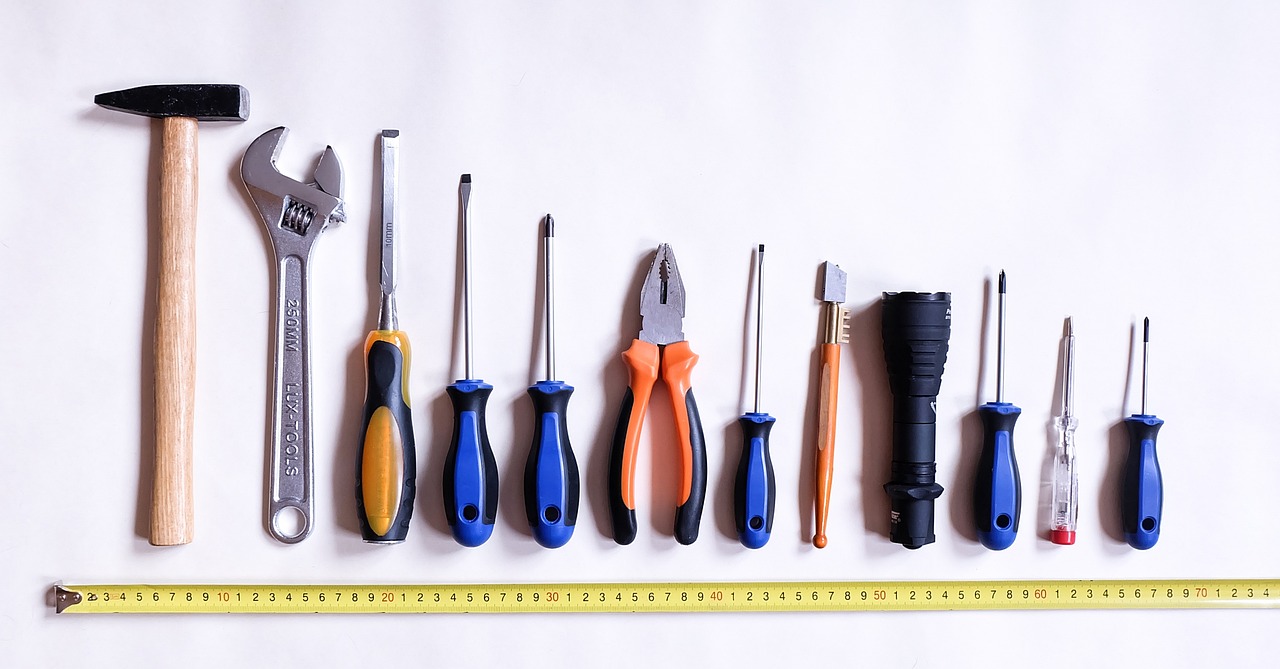
Choosing the Right Wood
When it comes to crafting your own wooden spatula, selecting the right type of wood is not just a matter of aesthetics; it's crucial for ensuring the durability and functionality of your kitchen tool. Imagine trying to flip a pancake with a spatula that splinters at the first touch! So, let’s dive into the world of wood selection, where each species brings its own unique characteristics to the table.
First off, you want to consider the hardness of the wood. Hardwoods, such as maple, cherry, and walnut, are often preferred for spatula making because they are durable and resistant to wear. They can withstand the rigors of daily cooking without easily showing signs of damage. On the other hand, softwoods like pine may be more affordable and easier to work with, but they can dent and wear out much faster, making them less ideal for kitchen utensils.
Next, think about the grain pattern. A beautiful grain not only adds visual appeal but can also impact the spatula's performance. For instance, woods with a tight, even grain, like maple, are less likely to harbor bacteria, making them a safer choice for food preparation. You might also want to consider the color of the wood, as it can affect the overall look of your spatula. A rich, dark walnut can add a touch of elegance, while lighter woods like birch might lend a more rustic charm.
Food safety is another critical factor. Ensure that the wood you choose is food-safe and has not been treated with harmful chemicals. Some woods, such as bamboo, are naturally antimicrobial and can be an excellent choice for kitchen utensils. Always check for certifications or guidelines that confirm the wood’s safety for food contact.
| Wood Type | Hardness | Grain Pattern | Food Safety |
|---|---|---|---|
| Maple | Hard | Fine, even | Yes |
| Cherry | Hard | Medium, straight | Yes |
| Walnut | Hard | Rich, swirling | Yes |
| Pine | Soft | Open, knotty | Depends on treatment |
| Bamboo | Medium | Striated | Yes |
In conclusion, the wood you choose for your spatula can significantly affect not only its durability but also its overall appearance and safety. Take your time to explore different wood options, consider their properties, and select one that aligns with your cooking needs and aesthetic preferences. After all, a well-crafted wooden spatula can be a functional piece of art in your kitchen!
- What is the best wood for a spatula? Hardwoods like maple, cherry, and walnut are often recommended due to their durability and food safety.
- Can I use softwood for making a spatula? While softwoods like pine are easier to work with, they may not be as durable and can wear out faster.
- Is bamboo a good choice for spatulas? Yes, bamboo is a great option as it is naturally antimicrobial and very sturdy.
- How do I ensure the wood is food-safe? Always check for certifications or guidelines that confirm the wood’s safety for food contact.
Designing Your Spatula
When it comes to , this is where the magic truly begins! Think of your spatula as not just a kitchen tool, but a reflection of your personal style and cooking preferences. The shape, size, and even the handle design can transform a simple wooden spatula into a functional work of art. So, let’s dive into the creative process!
First off, consider the functionality of your spatula. Are you flipping pancakes, sautéing vegetables, or perhaps serving up a delicious lasagna? Each of these tasks might require a different spatula design. For instance, a broader head is ideal for flipping delicate items like pancakes, while a narrower one might be better suited for scraping the sides of bowls or lifting cookies off a baking sheet. This is where the shape comes into play.
Now, let’s talk about the size. Generally, a spatula that is around 3 to 4 inches wide works well for most tasks, but if you have larger pots or pans, you might want to go bigger. The length of the handle is also crucial; a longer handle gives you more leverage, especially when you're working with hot surfaces. However, a shorter handle can provide better control for intricate tasks. Finding the perfect balance between size and functionality is key!
Next, think about the handle design. A comfortable grip can make a world of difference in your cooking experience. Consider adding a slight curve or contour to the handle to fit comfortably in your hand. You might also want to incorporate a thumb rest for added comfort during prolonged use. Remember, the goal is to create a spatula that feels like an extension of your hand.
Additionally, aesthetics play a vital role in your spatula's design. You can choose to leave the wood in its natural state to showcase its beautiful grain, or you can get creative with different finishes. Some woodworkers even opt for decorative carvings or inlays to personalize their spatulas. A well-designed spatula can be a conversation starter at any gathering!
To help you visualize your spatula design, consider creating a simple sketch. This doesn’t have to be a masterpiece; just a rough outline of your ideas can help you plan out your project. You can also use a template to ensure consistency if you decide to make multiple spatulas. If you’re feeling adventurous, why not experiment with different designs? You might stumble upon a unique shape that becomes your new favorite kitchen tool!
In summary, designing your spatula is an exciting process that allows you to combine functionality with personal expression. By considering the shape, size, and handle design, you can create a spatula that not only serves its purpose but also adds a touch of your personality to your kitchen. So grab your sketchpad and let your creativity flow!
- What type of wood is best for making spatulas? Hardwoods like maple, cherry, and walnut are excellent choices because they are durable and have a fine grain.
- Can I use my spatula for non-cooking tasks? While it’s designed for cooking, many people use wooden spatulas for mixing and serving non-food items, but avoid using them for heavy-duty tasks.
- How do I know if my spatula is food-safe? Always use food-safe finishes and sealants, and ensure your wood is untreated and free from harmful chemicals.
Measuring and Marking Techniques
When it comes to woodworking, especially when crafting something as precise as a wooden spatula, measuring and marking are the unsung heroes of the process. Imagine trying to bake a cake without measuring the ingredients—chaos, right? The same principle applies here. Getting your measurements right is crucial for ensuring that your spatula not only looks great but also functions well in the kitchen.
First off, you’ll want to gather some essential measuring tools. A good quality tape measure is a must-have, but don’t overlook the importance of a square for ensuring your edges are straight and your angles are true. A combination square is particularly handy as it can help you measure both lengths and angles with precision. Additionally, a marking gauge can be a game-changer, allowing you to score a line that is consistent and accurate across the grain of the wood.
Now, let’s talk about how to actually measure and mark your wood. Start by deciding on the dimensions of your spatula. Typically, a spatula is about 12 to 14 inches long with a blade width of around 3 to 4 inches. Once you have your dimensions, use your tape measure to mark the length on the wood. It’s always a good idea to measure twice and cut once—this old adage holds true in woodworking!
When marking your measurements, consider using a pencil or a fine-tip marker for visibility. You want lines that are easy to see but can be sanded away later. For more precise work, you might even want to use a scratch awl to create a small indentation in the wood, which can help guide your saw blade and prevent it from wandering off course.
Another technique worth mentioning is the use of a template. If you’re planning to make multiple spatulas, creating a template can save you a lot of time and ensure consistency. You can make a template out of cardboard or thin plywood. Simply trace your design, cut it out, and then use it to mark your wood. This way, you can ensure that every spatula you create has the same dimensions and shape!
One last tip: always mark on the side of the wood that will be cut away. This helps to keep your lines visible and ensures that you don’t accidentally cut into the part of the wood that you want to keep. Remember that precision in measuring and marking is what sets apart a handmade spatula from one that looks like it was made in a hurry.
In summary, taking the time to measure and mark accurately will set you up for success in your spatula-making journey. It’s like laying the foundation for a house; without a solid base, everything else will be off. So grab your tools, take your time, and let’s get those measurements right!
- What tools do I need for measuring and marking? A tape measure, square, marking gauge, pencil, and scratch awl are essential.
- How do I ensure my measurements are accurate? Measure twice and cut once! Always double-check your dimensions before making any cuts.
- Can I use a template for multiple spatulas? Absolutely! A template will help you maintain consistency across all your spatula designs.
- What should I do if I make a mistake in my measurements? Don’t panic! You can often adjust your design slightly or use wood filler for small errors.
Cutting and Shaping the Wood
Once you have selected your wood and finalized your design, it’s time to dive into the exciting phase of cutting and shaping your spatula. This is where your vision starts to transform into reality. But before you grab your saw, let’s talk about some essential safety measures. Always wear protective gear, including safety goggles and gloves, to shield yourself from any flying wood chips or accidental cuts. Remember, safety first!
Now, let’s get into the nitty-gritty of cutting. Start by measuring your wood according to your spatula design. Use a reliable measuring tape and a square to mark your cutting lines accurately. It’s crucial to be precise here; even a small mistake can lead to a spatula that doesn’t meet your expectations. Once marked, you can use a handsaw or a jigsaw, depending on the thickness of the wood and your comfort level with the tools. If you’re using a jigsaw, ensure that the blade is sharp and appropriate for wood cutting to achieve a clean cut.
After making the initial cuts, you’ll want to start shaping your spatula. This is where your creativity can shine! For the rounded edges and the unique shape of the spatula head, consider using a bandsaw for more intricate cuts. If you don’t have access to a bandsaw, a coping saw can also do the trick, although it may take a bit longer. As you cut, take your time and let the saw do the work; forcing it can lead to uneven edges.
Once you’ve cut the basic shape, it’s time to refine those edges. This is where a chisel comes in handy. Carefully use your chisel to carve out any curves or angles, paying close attention to the grain of the wood. It’s a bit like sculpting; you’ll want to visualize the final product as you work. Remember, patience is key! If you find the wood too tough to shape, consider switching to a softer wood for your next spatula.
To ensure that your spatula feels comfortable in your hand, focus on the handle. A good handle should be ergonomic; it should fit naturally in your grip. You might want to taper the handle slightly or round the edges for added comfort. This is also a good time to test the spatula’s balance. Hold it in your hand and see how it feels. If it feels off, don’t hesitate to make adjustments until it’s just right.
Lastly, once you’ve shaped your spatula to perfection, it’s time for the finishing touches. Use sandpaper to smooth out any rough edges and surfaces. Start with a coarse grit (around 80) to tackle the rough spots, and gradually move to finer grits (up to 220) for a silky-smooth finish. Sanding is crucial not just for aesthetics but also for functionality; you want to ensure that your spatula won’t snag on food or scratch your cookware.
In summary, cutting and shaping your wooden spatula is a rewarding process that combines safety, precision, and creativity. With the right tools and techniques, you can create a beautiful and functional kitchen tool that reflects your personal style. So, roll up your sleeves, grab that wood, and let your imagination guide you!
- What type of wood is best for making spatulas? Hardwoods like maple, cherry, and walnut are excellent choices due to their durability and resistance to moisture.
- Do I need special tools to cut the wood? While basic tools like a handsaw and chisel can suffice, a bandsaw or jigsaw will make the process easier and more precise.
- How do I ensure my spatula is food-safe? Always choose food-safe finishes and sealants, and make sure to clean and maintain your spatula properly.

Sanding and Smoothing the Surface
Sanding is a crucial step in the woodworking process, especially when it comes to crafting wooden spatulas. It’s not just about making your spatula look pretty; it’s about ensuring that it feels comfortable in your hand and performs well in the kitchen. Imagine reaching for a spatula that feels rough and splintery—yikes! You definitely want to avoid that. So, let’s dive into the world of sanding and smoothing your spatula’s surface.
First off, you’ll want to start with a coarser grit sandpaper, typically around 80 to 120 grit. This grit will help you remove any rough edges left from cutting and shaping your spatula. As you sand, make sure to move in the direction of the wood grain. Going against the grain can lead to scratches that will be hard to remove later. It’s a bit like brushing your hair; you wouldn’t want to go against the natural flow, right?
Once you’ve smoothed out the rough spots with the coarse grit, it’s time to switch to a finer grit sandpaper, around 220 to 320 grit. This finer grit will help you achieve that silky-smooth finish that you desire. When sanding with the finer grit, take your time. You want to ensure that every inch of your spatula is smooth to the touch. It’s like the final touch on a masterpiece; every detail counts!
For those hard-to-reach areas or intricate designs, consider using a sanding sponge or a small sanding block. These tools can help you maneuver around curves and corners without losing your grip. It’s a bit like using a paintbrush for detailed artwork; the right tool makes all the difference!
After sanding, it’s essential to clean off the dust. Use a damp cloth or a tack cloth to wipe down your spatula. This step is often overlooked, but it’s vital because any leftover dust can interfere with the finishing process. Think of it as cleaning your canvas before painting; a clean surface leads to a better result.
Finally, don’t rush through this process. Sanding and smoothing take patience and care. The time you invest in this step will pay off when you see your spatula shining and feeling great in your hands. Remember, a well-sanded spatula not only looks good but also enhances your cooking experience. Who wouldn’t want to cook with a beautiful, smooth tool that feels just right?
- How long should I sand my spatula? It depends on the wood type and your desired finish, but generally, spend at least 10-15 minutes on each grit.
- Can I use an electric sander? Yes, but be cautious! Start with a lower speed and always finish by hand to ensure a smooth finish.
- What if I accidentally sand too much? Don’t panic! You can always reshape your spatula or apply a food-safe finish to mask minor imperfections.
Applying Finishes and Sealants
Once you've shaped your wooden spatula to perfection, the next step is applying finishes and sealants. This is where the magic happens! Not only does a good finish enhance the visual appeal of your spatula, but it also serves as a protective barrier against moisture, stains, and food particles. Think of it as a superhero cape for your spatula, guarding it against the wear and tear of daily kitchen use.
When selecting a finish, it's crucial to choose a product that is food-safe. You wouldn't want any harmful chemicals leaching into your food, right? There are several options available, each with its unique benefits:
- Mineral Oil: This is a popular choice among woodworkers. It's easy to apply, inexpensive, and penetrates the wood fibers well, providing excellent moisture resistance.
- Beeswax: Often used in conjunction with mineral oil, beeswax adds a beautiful sheen and extra protection. It's natural and safe for food contact.
- Shellac: This natural resin is another great option. It dries quickly and provides a hard finish, but it’s not as water-resistant as oils.
- Polyurethane: While this offers a durable finish, it’s typically not recommended for kitchen utensils unless labeled as food-safe, due to potential toxicity.
To apply your chosen finish, start by ensuring your spatula is clean and dry. If you've just sanded it, wipe it down with a damp cloth to remove any dust. Then, pour a small amount of your finish onto a clean cloth or paper towel. Gently rub it onto the surface of the spatula, following the grain of the wood. It’s best to apply multiple thin coats rather than one thick coat, allowing each layer to dry completely before applying the next.
After you've achieved your desired finish, let the spatula cure for a few days. This waiting period allows the finish to harden properly, ensuring maximum durability. Remember, a well-finished spatula not only looks stunning but also lasts longer, making it a worthwhile investment of your time and effort.
Lastly, don’t forget about maintenance! Regularly reapplying your finish, especially if you notice the wood starting to look dry or dull, will keep your spatula in top shape. A little care goes a long way in preserving your handcrafted kitchen tool.
Q: How often should I reapply the finish on my wooden spatula?
A: It depends on usage, but generally, every few months is a good rule of thumb. If the wood looks dry or feels rough, it’s time for a touch-up!
Q: Can I put my wooden spatula in the dishwasher?
A: It's not recommended. The heat and moisture can damage the wood and the finish. Hand wash with mild soap and warm water instead.
Q: What should I do if my spatula starts to crack?
A: If you notice cracks, sand the area lightly and reapply your finish. If the cracks are deep, it may be time to consider a replacement.

Maintenance and Care for Wooden Spatulas
Taking care of your wooden spatulas is not just about keeping them looking good; it's about ensuring their longevity and functionality in your kitchen. Just like any cherished tool, a wooden spatula requires a little love and attention to stay in top shape. So, how do you go about maintaining these beautiful kitchen companions? Let’s dive into some essential tips and tricks that will keep your spatula serving you well for years to come!
First and foremost, cleaning is crucial. After each use, it's best to wash your spatula by hand with warm, soapy water. Avoid soaking it or putting it in the dishwasher, as excessive moisture and heat can warp or crack the wood. Instead, gently scrub it with a sponge, and rinse it thoroughly under running water. Once cleaned, make sure to dry it immediately with a soft cloth. Leaving it wet can lead to mold and unpleasant odors, which nobody wants in their kitchen!
Next, let’s talk about oiling. Just like your skin needs moisturizer, your wooden spatula benefits from a good oil treatment. Every few months, or whenever the wood starts to look dull, apply a food-safe mineral oil or beeswax to the surface. This not only nourishes the wood but also creates a protective barrier against moisture and food particles. Simply pour a small amount of oil onto a clean cloth, and rub it into the spatula in the direction of the grain. Let it sit for a few hours, or overnight, to absorb the oil, then wipe off any excess.
Storage is another vital aspect of maintaining your wooden spatula. Store it in a dry place away from direct sunlight, which can cause the wood to fade and crack. If possible, keep it in a drawer or a utensil holder that allows for air circulation. Avoid stacking heavy items on top of it, as this can lead to warping. Remember, a little bit of care goes a long way in preserving its beauty and functionality!
Lastly, if you notice any deep scratches or stains on your spatula, don’t despair! You can gently sand the surface with fine-grit sandpaper to smooth it out. Just be sure to reapply oil afterward to restore its finish. And if it ever starts to smell funky, a quick soak in a vinegar-water solution can work wonders to eliminate odors. Just be sure to rinse and dry it thoroughly afterward!
- Can I use my wooden spatula for cooking with high heat?
It's best to avoid using wooden spatulas on high heat settings, as this can cause the wood to scorch or warp. Stick to low to medium heat for best results! - How often should I oil my wooden spatula?
Oiling every 1-3 months is generally sufficient, but you can do it more often if the wood appears dry or dull. - What should I do if my spatula starts to crack?
If you notice small cracks, applying oil can help. However, if the cracks are significant, it might be time to retire the spatula to prevent any splinters in your food.
Frequently Asked Questions
- What type of wood is best for making spatulas?
When it comes to crafting spatulas, hardwoods like maple, cherry, and walnut are excellent choices. They offer durability and a beautiful grain. Avoid softwoods like pine, as they can wear down quickly and may not be food-safe.
- Do I need special tools to make wooden spatulas?
While you don't need an entire workshop, having a few essential tools is crucial. A handsaw, chisel, and sander will do the trick. Investing in quality tools can make your woodworking experience smoother and more enjoyable!
- How do I ensure my spatula is food-safe?
To make your spatula food-safe, use non-toxic finishes and sealants specifically designed for kitchenware. Always check the labels to ensure they meet food safety standards. Remember, a little care goes a long way!
- What are some design tips for my spatula?
When designing your spatula, think about its intended use. A wider head is great for flipping pancakes, while a thinner edge works well for delicate foods. Don't forget to consider the handle length and ergonomics for comfort!
- How should I care for my wooden spatula?
To keep your spatula in top shape, wash it by hand with mild soap and water. Avoid soaking it or putting it in the dishwasher. After cleaning, let it dry completely and apply food-safe mineral oil occasionally to maintain its finish.
- Can I customize my spatula with designs or carvings?
Absolutely! Personalizing your spatula with carvings or designs can add a unique touch. Just ensure that any modifications do not compromise the spatula's functionality or safety.
- What grit sandpaper should I use for sanding my spatula?
Start with a coarser grit, like 80 or 120, to shape the wood, then move to finer grits, such as 220 or higher, for a smooth finish. This progression helps achieve a professional look and feel!

