How to Create a Unique Wooden Birdcage
Creating a unique wooden birdcage is not just about providing a home for your feathered friends; it’s about crafting a piece of art that reflects your style and creativity. Imagine a cozy haven filled with vibrant colors, playful toys, and intricate designs that catch the eye of anyone who walks by. In this article, we will guide you through the entire process of designing and building your own wooden birdcage, covering everything from selecting the right materials to adding personal touches that make it truly one-of-a-kind.
When it comes to building a birdcage, the choice of wood is crucial. Not only does it affect the durability of the cage, but it also plays a significant role in the overall aesthetics. You want a wood that is not only strong but also visually appealing. Some popular choices include:
- Pine: Affordable and easy to work with, pine is a great option for beginners.
- Cedar: Naturally resistant to decay, cedar adds a lovely scent and rich color to your birdcage.
- Birch: Known for its smooth finish and light color, birch can give your birdcage a modern look.
When selecting your wood, consider factors such as the type of birds you are housing and the environment in which the cage will be placed. For instance, if your bird is a chewer, you might want to avoid softer woods that can be easily damaged.
Before you dive into building your birdcage, it’s essential to gather all the necessary tools and materials. This preparation will save you time and frustration later on. Here’s a quick rundown of what you’ll need:
- Wood: Choose your preferred type based on the previous section.
- Nails and Screws: Opt for rust-resistant options to ensure longevity.
- Wood Glue: For added strength in joints.
Additionally, having the right tools will make your project smoother. You’ll need a saw, drill, measuring tape, and a sander at the very least. It’s like assembling a toolbox for a grand adventure; each item plays its part in bringing your vision to life!
Now, let’s talk about tools. There’s a significant difference between hand tools and power tools, and understanding this can help you decide what’s best for your project. Hand tools provide precision and control, allowing you to work slowly and carefully. However, power tools can save you a lot of time and effort, especially for larger cuts and repetitive tasks. It’s like choosing between a fine paintbrush for detailing and a spray can for quick coverage.
Here’s a quick list of essential hand tools you might consider:
- Hand Saw: For precise cuts.
- Chisel: Great for shaping and detailing.
- Screwdriver: For assembling the cage.
Using hand tools can be a rewarding experience, giving you a sense of accomplishment as you shape your creation with your own hands.
If you’re looking to speed things up, power tools can be a game changer. A circular saw can make quick work of cutting boards to size, while a drill can help you assemble pieces with ease. Think of power tools as the trusty sidekick that helps you conquer the challenges of building your birdcage faster and more efficiently.
Design is where the magic happens. It’s your chance to let your creativity shine! Whether you prefer a rustic look or something more contemporary, the design of your birdcage will set the tone for your project. Start by sketching out your ideas—this is like mapping out a treasure hunt, guiding you toward your final masterpiece.
Grab a pencil and paper and start doodling! Don’t worry about making it perfect; just get your ideas down. Consider the dimensions of your cage, the placement of perches, and any unique features you want to include. This sketch will serve as your blueprint, ensuring that you have a clear vision as you move forward.
Want to take your birdcage to the next level? Think about adding unique features! Maybe a spiral staircase for your birds to explore or a hanging toy that swings gently with the breeze. These little touches can transform a simple cage into a vibrant playground. Remember, the more personalized your design, the more your birds will love it!
Once your design is ready, it’s time to bring it to life! Understanding basic construction techniques is essential for building a sturdy and visually appealing birdcage. Think of this step as the foundation of your dream home; without it, everything else could crumble.
Follow these basic assembly steps to ensure a successful build:
- Cut your wood to size based on your sketch.
- Assemble the frame, ensuring everything is square.
- Add perches and any additional features.
These steps will guide you through the process, ensuring that your birdcage is not only functional but also a work of art.
Finally, don’t forget about the finishing touches! Sanding down rough edges, applying a non-toxic paint, or sealing the wood can elevate the appearance of your birdcage. It’s like putting on the final coat of polish to make your creation shine!
Safety should always be your top priority when building a birdcage. This isn’t just for your safety; it’s also crucial for the well-being of your feathered friends. Take a moment to consider the following safety tips:
Wearing the right safety gear is essential. Make sure to use goggles to protect your eyes from dust and debris, and consider gloves to prevent splinters. It’s like gearing up for a big game; you want to be prepared for anything!
Lastly, don’t forget about your birds! Ensure that there are no sharp edges or toxic materials in the cage. Regularly check for wear and tear, and always prioritize their comfort and safety. After all, a happy bird makes for a happy home!
Here are some common questions people have about building a wooden birdcage:
- What type of wood is best for birdcages? Softwoods like pine and cedar are popular choices due to their availability and workability.
- How can I make my birdcage more visually appealing? Incorporate unique features like colorful toys, decorative elements, and varied perch heights.
- Is it safe to use paint on my birdcage? Always use non-toxic, bird-safe paints and finishes to ensure the safety of your pets.
By considering these questions, you can feel more confident in your birdcage building journey. Happy crafting!
Choosing the Right Wood
When it comes to crafting a unique wooden birdcage, choosing the right type of wood is not just about aesthetics; it's about ensuring the durability and safety of your feathered friends. You want a wood that not only looks great but can withstand the test of time, especially if your birdcage will be exposed to the elements. Let's dive into some popular wood options that are commonly used for birdcages and their unique properties.
One of the top contenders is pine, known for its lightweight and affordability. Pine is easy to work with, making it an excellent choice for beginners. However, it’s essential to note that pine can be prone to splintering, so proper sanding is crucial to keep your birds safe. On the other hand, cedar is a fantastic option due to its natural resistance to rot and insects, which means your birdcage can last longer without requiring extensive maintenance. The aromatic scent of cedar also adds a pleasant touch to your birdcage, creating a cozy environment for your pets.
Another popular choice is plywood, which is made from thin layers of wood glued together. This material is not only strong but also versatile, allowing you to create intricate designs without compromising stability. When selecting plywood, ensure that it is of high quality and free from harmful chemicals, as some plywood can contain adhesives that may be harmful to birds. If you’re looking for an exotic touch, consider bamboo. This sustainable material is lightweight, durable, and gives your birdcage a unique look that can be quite eye-catching.
To help you make an informed decision, here’s a quick comparison table of the wood options mentioned:
| Wood Type | Durability | Weight | Cost | Notes |
|---|---|---|---|---|
| Pine | Moderate | Light | Low | Easy to work with, prone to splintering |
| Cedar | High | Medium | Moderate | Natural rot resistance, aromatic |
| Plywood | High | Medium | Varies | Versatile, ensure quality |
| Bamboo | High | Very Light | Moderate | Sustainable, unique aesthetic |
As you ponder over your options, consider not just the physical properties of the wood, but also the environmental impact of your choice. Opting for sustainably sourced wood can make a significant difference. By choosing eco-friendly materials, you contribute to the preservation of our forests and promote responsible crafting practices. In the end, the wood you select should resonate with your vision for the birdcage while ensuring a safe and comfortable haven for your avian companions.
Essential Tools and Materials
Before embarking on the exciting journey of building your unique wooden birdcage, it's imperative to gather the that will make your project not only manageable but also enjoyable. Think of this stage as gathering your ingredients before whipping up a delicious meal; having everything on hand will streamline your process and allow your creativity to flow. The right tools can significantly impact the quality of your build, making it crucial to choose wisely.
First off, let’s talk about the materials. The primary component for your birdcage will be the wood. You want to select a type that is both durable and safe for your feathered friends. Hardwoods like maple, oak, or birch are excellent choices due to their strength and resistance to wear. On the other hand, softwoods like pine or cedar can also be used but ensure they are untreated and safe for birds. Additionally, you'll need some hardware such as screws, hinges, and possibly a latch mechanism to secure the door. Don’t forget about non-toxic paint or sealant if you plan to add color or protect the wood.
Now, moving on to the tools. The difference between hand tools and power tools can be likened to the difference between writing with a pen and typing on a keyboard; both get the job done, but each has its own flair and efficiency. Hand tools, such as saws, chisels, and sanders, allow for a more tactile experience and fine control, while power tools, like drills and jigsaws, can save you time and effort, especially for larger cuts.
When considering which tools to use, think about your comfort level and the scale of your project. Hand tools are perfect for detailed work and give you a chance to connect with your craft. However, if you’re looking to speed up the process, power tools can be incredibly beneficial. Here’s a quick breakdown:
| Tool Type | Pros | Cons |
|---|---|---|
| Hand Tools | More control, quieter, less expensive | Time-consuming, requires more physical effort |
| Power Tools | Faster, efficient, precise cuts | Can be expensive, requires safety precautions |
As for the recommended hand tools, you’ll definitely want to have a quality saw for cutting your wood, a chisel for shaping, and a good set of sandpaper for finishing. On the power tool side, a cordless drill is essential for driving screws, while a jigsaw will help you create intricate shapes and designs that make your birdcage truly unique.
Finally, sourcing your materials should not be overlooked. Local hardware stores often carry a variety of woods, and you might even find some hidden gems at reclaimed wood shops. Online retailers can also be a great resource, especially for specialty items. Just remember to check that all materials are safe for birds—after all, their safety is your top priority!
In summary, gathering the right tools and materials is a foundational step in your birdcage project. By investing time in selecting high-quality items, you set yourself up for a successful build that will be both functional and visually appealing. So, roll up those sleeves, and let’s get ready to create something beautiful!
As you embark on your birdcage building adventure, you might have some questions. Here are a few common inquiries that can help guide you:
- What type of wood is safest for birds? - Look for untreated hardwoods like maple or oak.
- Do I need special tools to build a birdcage? - Basic hand tools and a few power tools will suffice.
- How can I ensure the birdcage is safe for my birds? - Avoid toxic finishes and ensure there are no sharp edges.
Hand Tools vs. Power Tools
When it comes to building a unique wooden birdcage, one of the first decisions you'll face is whether to use hand tools or power tools. Each has its own set of advantages and disadvantages, and understanding these can help you make an informed choice that suits your skill level and project needs. Hand tools, like chisels, saws, and hand drills, offer a level of precision and control that many DIY enthusiasts appreciate. They allow for a more tactile experience, letting you feel the wood as you work. This can be particularly satisfying when crafting intricate designs or making adjustments on the fly. Plus, hand tools are generally less expensive and require minimal maintenance.
On the other hand, power tools—such as electric saws, drills, and sanders—can significantly speed up the construction process. They often provide more power and efficiency, allowing you to tackle larger pieces of wood and more complex cuts with ease. For instance, an electric miter saw can make precise angled cuts in a fraction of the time it would take with a hand saw. However, power tools can be intimidating for beginners and often require a bit of a learning curve. They also come with safety risks, necessitating a solid understanding of how to handle them properly.
To help you weigh your options, consider the following table that compares hand tools and power tools based on various factors:
| Factor | Hand Tools | Power Tools |
|---|---|---|
| Cost | Generally lower | Higher initial investment |
| Precision | High, requires skill | Moderate, can vary |
| Speed | Slower | Faster |
| Learning Curve | Less steep | Steeper |
| Safety | Generally safer | Requires caution |
Ultimately, the choice between hand tools and power tools depends on your personal preferences and the specific requirements of your birdcage project. If you're just starting out, you might find that a combination of both works best. For instance, you could use hand tools for detailed work and power tools for larger cuts. This hybrid approach allows you to enjoy the benefits of each type while minimizing their drawbacks. Remember, whether you opt for the finesse of hand tools or the efficiency of power tools, the most important thing is to enjoy the process of creating something unique for your feathered friends!
- What are the best hand tools for beginners? For beginners, essential hand tools include a hand saw, chisels, a hammer, and a measuring tape.
- Are power tools worth the investment? Yes, power tools can save time and effort, especially for larger projects, but they do require careful handling and maintenance.
- Can I build a birdcage with only hand tools? Absolutely! Many skilled craftsmen have created beautiful birdcages using only hand tools, showcasing their craftsmanship.
- What safety gear should I use when working with tools? Always wear safety goggles, gloves, and a dust mask when using power tools to protect yourself from debris and dust.
Recommended Hand Tools
When embarking on the journey of building a unique wooden birdcage, having the right hand tools is essential for both the quality of your work and your overall enjoyment of the process. Hand tools allow for greater control and precision, making them invaluable in crafting intricate designs. Here are some of the most recommended hand tools you should consider for your project:
First and foremost, a good handsaw is crucial. This tool will enable you to make clean cuts in your chosen wood. Opt for a fine-toothed saw for delicate work, especially if you're dealing with softwoods or thin pieces. Additionally, a chisel set is indispensable for shaping and detailing your birdcage. With different sizes available, you can achieve various effects and clean up edges with ease.
Another essential tool is the wood file. This tool is perfect for smoothing rough edges and ensuring that your birdcage is safe for its feathered inhabitants. When it comes to assembling your birdcage, a clamp will be your best friend. It holds pieces securely in place while you work, preventing any slips that could lead to mistakes. Don't forget about a reliable measuring tape and a square to ensure your dimensions are precise; after all, a well-measured birdcage is a happy birdcage!
For those intricate details, a set of wood carving tools can add a personal touch to your design. Whether you want to carve out decorative patterns or initials, these tools will help you express your creativity. Lastly, a workbench provides a sturdy surface to work on, making your entire building process smoother and more efficient.
In summary, having the right hand tools can make a significant difference in your birdcage project. Here’s a quick table summarizing the recommended tools and their uses:
| Tool | Use |
|---|---|
| Handsaw | For making clean cuts in wood |
| Chisel Set | For shaping and detailing |
| Wood File | For smoothing rough edges |
| Clamp | To hold pieces securely in place |
| Measuring Tape | For precise measurements |
| Square | To ensure right angles and accuracy |
| Wood Carving Tools | For adding decorative elements |
| Workbench | Provides a stable working surface |
With these tools in your arsenal, you're well on your way to creating a stunning and unique wooden birdcage that will not only be functional but also a beautiful addition to your home. Remember, the right tools can make all the difference in the world!
Q: What type of wood is best for building a birdcage?
A: Softwoods like pine and cedar are popular choices due to their workability and aesthetic appeal. Ensure the wood is untreated to keep your birds safe.
Q: Can I use power tools instead of hand tools?
A: Yes, power tools can speed up the process, but hand tools provide greater precision for detailed work. It's often beneficial to use a combination of both.
Q: How can I ensure the safety of my birds in the cage?
A: Always sand down rough edges, avoid toxic finishes, and ensure there are no small parts that could be swallowed. Regularly inspect the cage for wear and tear.
Power Tools for Efficiency
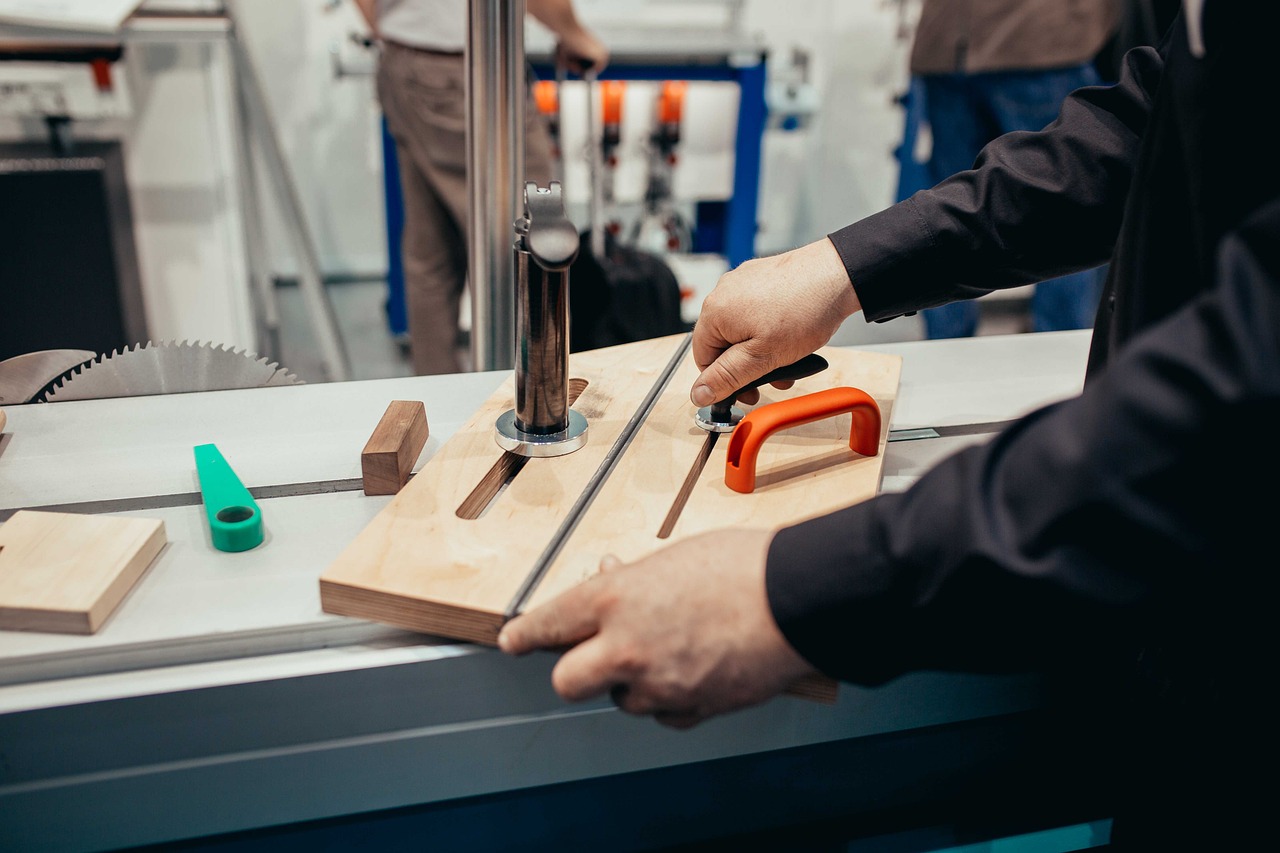
When it comes to building a unique wooden birdcage, utilizing power tools can significantly enhance your efficiency and precision. These tools are designed to make your woodworking tasks easier and quicker, allowing you to focus more on the creative aspects of your project rather than getting bogged down in manual labor. Imagine trying to cut through a thick piece of wood with a hand saw—it's slow, tedious, and can lead to uneven edges. Now, picture using a circular saw instead; it’s faster, cleaner, and gives you a professional finish.
Here are some essential power tools that can help you streamline your birdcage building process:
- Circular Saw: Perfect for making straight cuts quickly, a circular saw is a must-have for cutting wood panels to size. It’s versatile and can handle various thicknesses, making it an excellent tool for both the frame and the base of your birdcage.
- Jigsaw: For those intricate cuts and curves, a jigsaw is your best friend. It allows you to create unique designs that can make your birdcage stand out, such as decorative openings or shaped perches.
- Drill/Driver: This tool is essential for creating holes for screws or dowels. A drill/driver not only speeds up the assembly process but also ensures that your connections are secure, which is vital for the safety of your feathered friends.
- Sander: After your birdcage is assembled, a sander is crucial for smoothing out rough edges. This not only improves the appearance but also ensures that there are no splinters that could harm your birds.
While power tools can greatly enhance your efficiency, it’s important to remember that they require a certain level of skill and safety awareness. Always read the manual before using any tool, and practice on scrap wood if you're unfamiliar with a particular device. This way, you can avoid accidents and ensure that your birdcage turns out just as you envisioned.
Investing in quality power tools can also save you time and effort in the long run. Think of them as your trusty sidekicks in your woodworking adventure—tools that not only assist you but also inspire creativity. With the right equipment, you can turn a simple idea into a stunning reality, crafting a birdcage that is not only functional but an eye-catching piece of art.

Gathering Materials
When it comes to building your unique wooden birdcage, gathering the right materials is not just a step; it’s an adventure! Think of it as collecting treasures for a magical castle where your feathered friends will live. The quality of the materials you choose will greatly influence the final look and durability of your birdcage, so let’s dive into the essentials!
First and foremost, you’ll need to select the wood. Popular choices include pine, cedar, and birch, each offering different aesthetics and durability. Pine is lightweight and easy to work with, making it a fantastic choice for beginners. Cedar, on the other hand, is naturally resistant to decay and insects, ensuring your birdcage lasts a long time. Birch is known for its beautiful grain, adding a touch of elegance to your creation.
Next up, you’ll want to gather some hardware. This includes items like screws, hinges, and latches that will hold your birdcage together securely. Make sure to choose rust-resistant options, especially if your birdcage will be in a humid environment. You might also want to consider some decorative hardware to add a unique flair to your design.
Don’t forget about the interior! Your feathered friends will need perches, toys, and perhaps some fun climbing structures. You can use natural branches for perches, which are not only safe but also provide a more authentic feel. For toys, look for bird-safe materials—think untreated wood, cotton, and natural fibers. These will keep your birds entertained and healthy.
Here’s a quick overview of the materials you might consider:
| Material Type | Purpose | Notes |
|---|---|---|
| Wood (Pine, Cedar, Birch) | Structure of the birdcage | Choose based on aesthetics and durability |
| Screws & Hinges | Assembly and functionality | Opt for rust-resistant materials |
| Perches & Toys | Interior enrichment | Use bird-safe materials |
Finally, consider any finishing materials you might want to use. Paints and finishes should be non-toxic and safe for birds. Look for options labeled as “bird-safe” to ensure that your feathered companions can enjoy their new home without any health risks. With these materials in hand, you’re well on your way to creating a stunning and functional birdcage that your birds will love.
So, as you gather your materials, think about the personality of your birds and how you can reflect that in your design. Each piece you select is a step towards crafting a unique home that will not only house your feathered friends but also serve as a beautiful addition to your space.
Designing Your Birdcage
When it comes to creating a unique wooden birdcage, design is where the magic truly begins. It's not just about providing a home for your feathered friends; it's about crafting a space that reflects your style while ensuring the comfort and safety of your birds. So, where do you start? Think about the dimensions and features that will make your birdcage both functional and visually appealing. Consider the type of birds you’ll house—different species have different needs, and your design should cater to those requirements.
First, let’s talk about the style of your birdcage. Are you leaning towards a modern aesthetic, or perhaps something more traditional? The choice of style will influence not just the appearance but also the materials and construction techniques you’ll use. For instance, a sleek, contemporary cage might incorporate clean lines and minimalistic features, while a rustic design could showcase natural wood grains and intricate carvings. The possibilities are endless, and that's what makes this project so exciting!
Next, consider the dimensions of your birdcage. A larger cage provides more space for your birds to fly and play, which is essential for their well-being. However, you also need to ensure that the cage fits well within your home. Measure the space where you plan to place the birdcage, and keep in mind the height, width, and depth that will best suit both your birds and your living space. A good rule of thumb is to provide at least two square feet of space per bird, but this can vary depending on the species.
Moreover, don't forget about unique features that can enhance your birdcage design. Think about adding perches at different heights, which can mimic a natural environment and allow your birds to exercise their wings. You might also want to include toys and interactive elements that keep them engaged. Decorative touches, such as colorful accents or themed designs, can also personalize your birdcage. For example, if you love the beach, you could incorporate seashells or a nautical theme into your design.
To help visualize your ideas, creating a sketch can be incredibly beneficial. Grab a piece of paper or use design software, and start drafting your concept. Don’t worry about making it perfect; the goal is to get your ideas down. As you sketch, think about how the various elements will fit together. Will there be a removable base for easy cleaning? How will you ensure proper ventilation? These are important questions to consider as you formulate your design.
Finally, remember that designing your birdcage is not just about aesthetics; it's also about functionality and safety. Ensure that all materials used are non-toxic and safe for birds. Avoid sharp edges and small parts that could pose a choking hazard. As you finalize your design, keep your birds' health and happiness at the forefront of your thoughts. A well-designed birdcage can be a beautiful addition to your home while providing a safe haven for your feathered companions.
As you embark on this exciting journey of designing your birdcage, you might have some questions in mind. Here are a few common inquiries:
- What materials are safe for birdcages? Look for untreated wood, stainless steel, and non-toxic paints.
- How do I ensure my birdcage is well-ventilated? Incorporate bars or mesh that allow for airflow while keeping your birds secure.
- Can I customize the size of my birdcage? Absolutely! Just be sure to follow the space requirements for the type of birds you have.
Sketching Your Ideas
When it comes to building a unique wooden birdcage, is not just a preliminary step; it’s like laying the foundation of a house before you start constructing the walls. A well-thought-out sketch allows you to visualize the final product, making it easier to make adjustments and improvements before you even pick up a tool. So, grab a pencil and some paper, and let’s dive into the world of creativity!
Start by considering the dimensions of your birdcage. Think about the size of the birds you plan to house; different species require different amounts of space. For instance, a parakeet needs a cage that is at least 18 inches wide, while a cockatoo may need something much larger. Sketching out the basic shape and size of your birdcage will help you determine how much wood you need and how to arrange the interior space.
Next, think about the style of your birdcage. Do you envision a traditional rectangular cage, or perhaps something more whimsical, like a round or asymmetrical design? This is where you can really let your imagination fly! Consider incorporating elements that reflect your personality or the personality of your feathered friend. For example, if your bird loves to climb, you might want to sketch in multiple levels or perches that mimic a tree branch.
Additionally, it’s essential to think about the functional features you want to include in your design. Here are a few ideas to consider:
- Perches at varying heights for exercise and play.
- Toys and enrichment items to keep your bird entertained.
- Feeding stations that are easily accessible.
- Removable trays for easy cleaning.
Once you have a rough idea of the dimensions, style, and features, it’s time to refine your sketch. Use a ruler to draw straight lines and ensure your proportions are accurate. You might even want to use graph paper for a more precise layout. Don’t hesitate to create multiple drafts; sometimes, the best ideas come from trial and error. Remember, this is your chance to explore different configurations without any commitment!
Finally, consider how you can add personal touches to your design. Perhaps you want to paint the birdcage in vibrant colors or add decorative elements like carvings or stencils. Whatever it is, make sure your birdcage reflects your style and serves as a beautiful home for your feathered companions.
In summary, sketching your ideas is an essential part of the birdcage building process. It allows you to visualize your project, explore different styles and features, and ultimately create a unique and functional home for your birds. So, don’t rush this step; take your time and enjoy the creative process!
Q1: Do I need to be an artist to sketch my birdcage ideas?
A1: Absolutely not! Your sketches don’t have to be perfect. They just need to convey your ideas. Simple shapes and notes are enough to guide your project.
Q2: How detailed should my sketches be?
A2: Focus on the important aspects like dimensions, layout, and features. You can always add more detail as your design evolves.
Q3: Can I use digital tools for sketching?
A3: Yes! If you’re comfortable with digital design software or apps, they can be great for creating more precise and easily adjustable sketches.
Incorporating Unique Features
When it comes to building a wooden birdcage, incorporating unique features can transform a simple structure into a stunning sanctuary for your feathered friends. Think of your birdcage as a blank canvas; the more creative you get, the more it will reflect your personality and the needs of your birds. So, what kind of features can you add to make your birdcage truly special?
First off, consider adding custom perches. Birds love to perch, and having various options can keep them entertained and healthy. You could use natural branches from safe trees like apple or willow, as they provide a textured surface that helps your birds maintain their claws. Just ensure that the branches are free from pesticides and chemicals. You can also create perches of different diameters to encourage natural foot exercise.
Another fun idea is to include toys and enrichment items. Birds are intelligent creatures that thrive on stimulation. Hanging toys made from natural materials like wood, sisal, or even coconut shells can provide hours of entertainment. You might also consider adding swings or ladders to encourage climbing and play. The more interactive your birdcage is, the happier your birds will be!
Don't forget about the decorative touches. A splash of color can brighten up your birdcage and make it visually appealing. You can paint the exterior with non-toxic, bird-safe paint or add decorative elements like fabric or paper that can be easily replaced. Just remember to keep the interior simple and functional, focusing on your birds' needs rather than overwhelming them with too many distractions.
Lastly, think about incorporating a feeding station that is easy to access and clean. A well-designed feeding area not only makes your life easier but also ensures that your birds have a consistent supply of fresh food and water. Consider using removable bowls or a tray system that allows for easy refills without disturbing your birds too much.
In summary, adding unique features to your wooden birdcage is all about enhancing the environment for your birds while showcasing your personal style. Whether it's through custom perches, interactive toys, decorative elements, or efficient feeding stations, the possibilities are endless. So, let your imagination run wild and create a birdcage that is both functional and a feast for the eyes!
- What materials are safe for birdcages? Always opt for non-toxic wood, stainless steel, and bird-safe paints.
- How often should I clean my birdcage? It's best to clean the cage at least once a week, but spot cleaning daily is ideal.
- Can I use branches from my yard for perches? Yes, as long as they are from non-toxic trees and free from pesticides.
- What types of toys do birds prefer? Birds generally enjoy toys that they can chew, climb, and swing on, made from natural materials.
Construction Techniques
Building a wooden birdcage is not just about assembling pieces of wood; it’s an art form that combines functionality with creativity. To achieve a sturdy and visually appealing birdcage, you need to understand a variety of construction techniques. These techniques ensure that your birdcage not only looks good but also provides a safe and comfortable home for your feathered friends. Let's dive into the essential methods that will guide you through this rewarding project.
First and foremost, you’ll want to familiarize yourself with the basic assembly steps. Think of this as the foundation of your birdcage, much like the frame of a house. Start by preparing your wood pieces, ensuring they are cut to the right dimensions according to your design. You can use a miter saw for clean cuts, but if you’re going for a more rustic look, hand saws can add character. Once your pieces are ready, you’ll need to join them together. The most common methods include using wood glue, screws, or nails. Each method has its pros and cons:
| Joining Method | Pros | Cons |
|---|---|---|
| Wood Glue | Strong bond, invisible finish | Long drying time |
| Screws | Easy to remove, adjustable | Visible holes, requires drilling |
| Nails | Quick to apply, good for framing | Less strength than screws |
After you’ve joined your pieces, it’s time to think about the finishing touches. This stage is where your birdcage can really shine! Sanding is crucial to remove any rough edges that could harm your birds. Use progressively finer sandpaper to achieve a smooth finish. Once sanded, you can choose to paint or stain your birdcage. If you opt for paint, ensure it’s non-toxic and safe for pets. A sealant can also be applied to protect the wood from moisture and wear over time, ensuring longevity.
Another important construction technique involves creating a secure roof. The roof not only adds to the aesthetics but also protects your birds from external elements. You can consider a sloped roof for better water drainage or a flat roof for a modern look. Whichever style you choose, ensure it is securely fastened and easy to remove for cleaning purposes. Remember, a well-constructed roof can be the difference between a cozy home and a damp disaster!
Lastly, don’t forget about ventilation. Proper airflow is essential for the health of your birds. Incorporate small openings or mesh panels in your design to allow fresh air to circulate while keeping your pets safe. Think of it as giving your birds their own little window to the world!
With these construction techniques in mind, you’re well on your way to creating a unique and functional wooden birdcage. Remember, patience and attention to detail are key. Take your time, enjoy the process, and soon you'll have a beautiful home that your birds will love!
- What type of wood is best for a birdcage? - Softwoods like pine or cedar are often preferred for their ease of work and natural resistance to pests.
- How do I ensure my birdcage is safe? - Always use non-toxic materials, avoid sharp edges, and ensure there are no small parts that birds could ingest.
- Can I use recycled wood for my birdcage? - Yes, but ensure that it is free from chemicals and contaminants that could harm your birds.
Basic Assembly Steps
This article will guide you through the process of designing and building a unique wooden birdcage, covering materials, tools, techniques, and creative ideas to personalize your project.
Selecting the appropriate type of wood is crucial for durability and aesthetics. This section will explore various wood options, their properties, and how to choose the best one for your birdcage.
Before starting your project, gather the necessary tools and materials. This section will outline the essential items needed for building a wooden birdcage, ensuring you are well-prepared.
Understanding the difference between hand tools and power tools can help you make informed decisions. This subheading will discuss the pros and cons of each type for birdcage construction.
This section will provide a list of essential hand tools required for building a wooden birdcage, including their uses and tips for effective handling.
Discover the power tools that can streamline your birdcage building process. This part will highlight the tools that save time and enhance precision in your project.
Learn how to source quality materials for your birdcage. This subheading will cover where to find wood, hardware, and other supplies to create a stunning final product.
Design is a vital aspect of building a unique birdcage. This section will explore different design styles, dimensions, and features to consider for both functionality and aesthetics.
Creating a sketch of your birdcage design is the first step. This subheading will discuss techniques for drafting your ideas and visualizing the final product.
Adding unique features can make your birdcage stand out. This section will suggest creative elements like perches, toys, and decorative touches to enhance your design.
This section will detail the construction techniques necessary for building a sturdy and attractive birdcage. It will cover assembly methods, joining techniques, and finishing touches.
Understanding the basic assembly steps is crucial for a successful build. First, gather all your materials and tools in a well-lit workspace. It’s like preparing for a big cooking session; you wouldn’t want to run around looking for ingredients halfway through! Start by measuring and cutting your wood pieces according to your design specifications. Precision here is key, as even a slight miscalculation can throw off the entire assembly.
Next, lay out the pieces on a flat surface to visualize how they will fit together. This step is akin to putting together a jigsaw puzzle; seeing the pieces in front of you can help you understand the assembly process better. Begin with the base of your birdcage, attaching the side panels to the base using wood glue and screws for added strength. Remember to pre-drill holes to prevent the wood from splitting!
As you work your way up, ensure that each panel is square and level. This is where a carpenter's square comes in handy. Once the sides are attached, it’s time to add the top. Depending on your design, you might choose a sloped roof or a flat top. Secure it well, as this will provide structural integrity to your birdcage.
After the main structure is assembled, focus on adding the perches and any interior features you planned. This is where your creativity can shine! Finally, inspect all joints and connections to ensure they are secure and stable. A well-assembled birdcage not only looks good but also ensures the safety of your feathered friends.
Finishing touches can elevate your birdcage's appearance. This section will discuss sanding, painting, and sealing options to protect and beautify your creation.
Safety is paramount when building a birdcage. This section will highlight important safety tips to ensure a secure environment for both you and your feathered friends during the construction process.
Wearing the right safety gear is essential. This subheading will recommend protective equipment to use while working with tools and materials.
Creating a safe environment for your birds is crucial. This section will discuss considerations to keep in mind to ensure your birdcage is safe for its inhabitants.
1. What type of wood is best for a birdcage?
Softwoods like pine or cedar are popular due to their availability and ease of use, but hardwoods like oak can offer more durability.
2. How can I ensure the safety of my bird inside the cage?
Make sure all surfaces are smooth, and there are no sharp edges or toxic paints. Regularly check for wear and tear.
3. How often should I clean the birdcage?
Cleaning should be done weekly, with a deeper clean every month to maintain a healthy environment for your birds.
Finishing Touches
Once you've successfully built your wooden birdcage, it's time to focus on the that will not only enhance its aesthetic appeal but also ensure its longevity. Just like a painter adds the final strokes to a masterpiece, these finishing steps can transform your birdcage from a simple structure into a stunning home for your feathered friends. Let's dive into the essential aspects of this final phase.
First and foremost, sanding is critical. This step helps to smooth out any rough edges and surfaces, making the birdcage safe for your birds. Use a variety of sandpaper grits, starting with a coarser grit to remove larger imperfections, then progressing to finer grits for a polished finish. Take your time with this process; it’s all about creating a comfortable environment for your pets. Remember, a well-sanded birdcage not only looks better but also minimizes the risk of splinters that could hurt your birds.
Next, consider painting or staining your birdcage. This is where you can really let your creativity shine! Choose non-toxic paints or stains specifically designed for wood, ensuring they are safe for animals. You can opt for bright colors to make the cage pop or natural stains to highlight the wood’s grain. When applying paint or stain, make sure to do so in a well-ventilated area, and allow ample drying time before introducing your birds to their new home. A fresh coat can not only beautify the cage but also provide a protective layer against moisture and wear.
Lastly, sealing is an essential step that shouldn’t be overlooked. Applying a non-toxic sealant will help protect the wood from humidity and droppings, which can cause deterioration over time. This is particularly important if your birdcage is going to be placed in an area with fluctuating temperatures or humidity levels. Make sure the sealant is fully dry and cured before letting your birds inside, as this ensures a safe environment.
In addition to these steps, consider adding some decorative elements to personalize your birdcage. You might want to include:
- Colorful perches made from different materials
- Hanging toys or swings for entertainment
- Natural elements like branches or plants (ensure they are safe for birds)
These additions not only enhance the visual appeal but also provide your birds with a stimulating environment. With the right finishing touches, your birdcage will not only be a functional space but also a beautiful centerpiece in your home.
Q: What type of paint is safe for birdcages?
A: Always choose non-toxic, water-based paints or stains that are specifically labeled as safe for animals. Avoid oil-based paints and any products with strong fumes.
Q: How often should I clean and maintain my birdcage?
A: Regular cleaning is essential. Ideally, you should clean the cage daily to remove droppings and uneaten food. A deeper clean should be performed weekly, including washing all accessories and surfaces.
Q: Can I use untreated wood for my birdcage?
A: While untreated wood can be used, it is recommended to treat it with safe finishes to protect against moisture and pests. Always ensure that any treatment used is non-toxic and safe for birds.
Q: What should I do if my bird starts chewing on the wood?
A: If your bird is chewing on the wood, it might be bored. Consider adding more toys or perches to keep them entertained. Additionally, ensure that the wood used is safe for birds and non-toxic.
Safety Considerations
When it comes to building a wooden birdcage, safety should always be at the forefront of your mind. After all, you want to create a beautiful home for your feathered friends, but you also want to ensure that the construction process is safe for both you and your birds. There are several important considerations to keep in mind that can help you avoid accidents and create a safe environment.
First and foremost, using the right safety gear is crucial. This includes items such as safety goggles, dust masks, and gloves. Safety goggles will protect your eyes from wood splinters and dust, while a dust mask will help you avoid inhaling harmful particles. Gloves are essential for keeping your hands safe from cuts and scrapes while handling tools and materials. It's easy to underestimate the importance of these items, but they can make a significant difference in your overall safety.
Additionally, you should be aware of your workspace. Make sure that your working area is clean and organized. Clutter can lead to accidents, so keep tools and materials neatly stored away when not in use. Ensure that you have adequate lighting to see what you're doing clearly. A well-lit workspace can help prevent mistakes that could lead to injuries.
When using tools, whether they are hand tools or power tools, always follow the manufacturer's instructions. Each tool has specific safety guidelines that should be adhered to for optimal safety. For instance, when using a saw, ensure that you have a firm grip and are standing in a stable position to avoid any slips or mishaps. Never rush through tasks; taking your time can help you maintain focus and control.
Now, let’s talk about the birds themselves. When constructing the cage, it’s essential to consider their safety as well. Make sure that all materials used are non-toxic and safe for birds. For example, certain types of wood, like cedar and pine, can release harmful oils that may be toxic to birds. Instead, opt for bird-safe wood options like birch, maple, or oak. Additionally, ensure that there are no sharp edges or protruding nails that could harm your birds once the cage is completed.
As you build, think about the placement of perches and toys. Ensure that they are securely attached and positioned in a way that allows your birds to move freely without the risk of injury. A well-designed cage will not only be beautiful but will also provide a safe haven for your feathered companions.
Lastly, always keep your birdcage in a safe location within your home. Avoid placing it near windows where it could be exposed to drafts or direct sunlight for extended periods, as this can lead to temperature fluctuations that are harmful to birds. Instead, look for a stable, quiet area where your birds can feel secure and comfortable.
By paying attention to these safety considerations, you can ensure a successful and safe birdcage building experience. Remember, the goal is to create a stunning habitat for your birds while keeping both you and them safe throughout the process. Now that we've covered safety, let’s move on to some frequently asked questions to further assist you in your birdcage project.
- What type of wood is safe for birds? - Safe options include birch, maple, and oak, while cedar and pine should be avoided.
- What safety gear should I use? - Always wear safety goggles, dust masks, and gloves when working with tools.
- How can I ensure my birdcage is safe? - Regularly check for sharp edges, use non-toxic materials, and secure all elements properly.
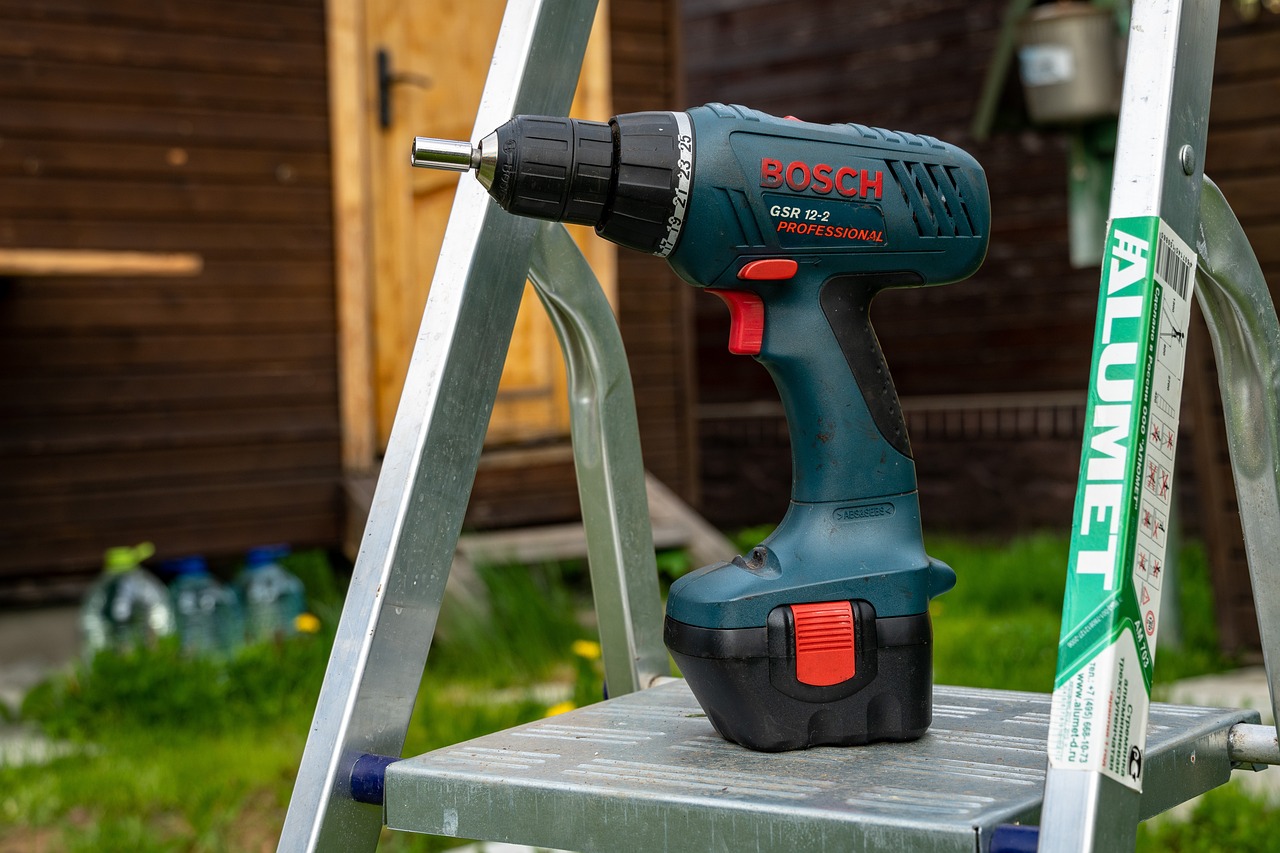
Using Safety Gear
When it comes to building your unique wooden birdcage, safety should always be your top priority. You might be excited about the creative process, but don’t let that enthusiasm overshadow the need for protective gear. Imagine working with sharp tools and heavy materials—it's like dancing with a partner that could step on your toes if you’re not careful!
To ensure you’re well-protected while crafting your masterpiece, here are some essential pieces of safety gear you should consider:
- Safety Glasses: These are your first line of defense against flying debris. Whether you’re cutting wood or sanding surfaces, a stray splinter can cause serious eye injuries.
- Dust Mask: Woodworking can create a lot of fine dust that isn’t good for your lungs. A dust mask will help filter out harmful particles, allowing you to breathe easy while you work.
- Ear Protection: If you’re using power tools, the noise can be quite loud. Earplugs or earmuffs can protect your hearing, especially during prolonged use of loud machinery.
- Gloves: While gloves can provide grip and protect your hands, be cautious about using them around power tools. They can get caught in moving parts, so it’s best to wear them only when handling materials manually.
- Steel-Toed Boots: Protect your feet from heavy materials that might accidentally fall. A sturdy pair of boots can make a world of difference in ensuring your feet stay safe.
Remember, wearing safety gear is not just about following rules; it’s about creating a safe environment for yourself. Think of it as your personal armor, allowing you to tackle your birdcage project with confidence. Before you even pick up a tool, take a moment to put on your safety gear. It’s a small step that can prevent big problems down the line.
In addition to personal safety, consider the safety of your feathered friends. Once your birdcage is complete, you’ll want to ensure that there are no sharp edges or toxic materials that could harm them. Always inspect your creation thoroughly. After all, a safe birdcage is a happy birdcage!
Q: What type of safety gear is essential for woodworking?
A: Essential safety gear includes safety glasses, a dust mask, ear protection, gloves, and steel-toed boots. Each of these items plays a crucial role in protecting you from potential hazards while you work.
Q: Why is it important to wear a dust mask?
A: A dust mask is important because it helps filter out harmful dust particles created during woodworking. Breathing in these particles can lead to respiratory issues over time.
Q: Are gloves necessary when working with hand tools?
A: Gloves can provide protection and better grip, but they should be used cautiously around power tools. Always assess the situation to determine if gloves are safe to wear.
Q: How can I ensure my birdcage is safe for my birds?
A: Inspect your birdcage for sharp edges, toxic materials, and any small parts that could be swallowed. Always prioritize using bird-safe finishes and materials in your construction.
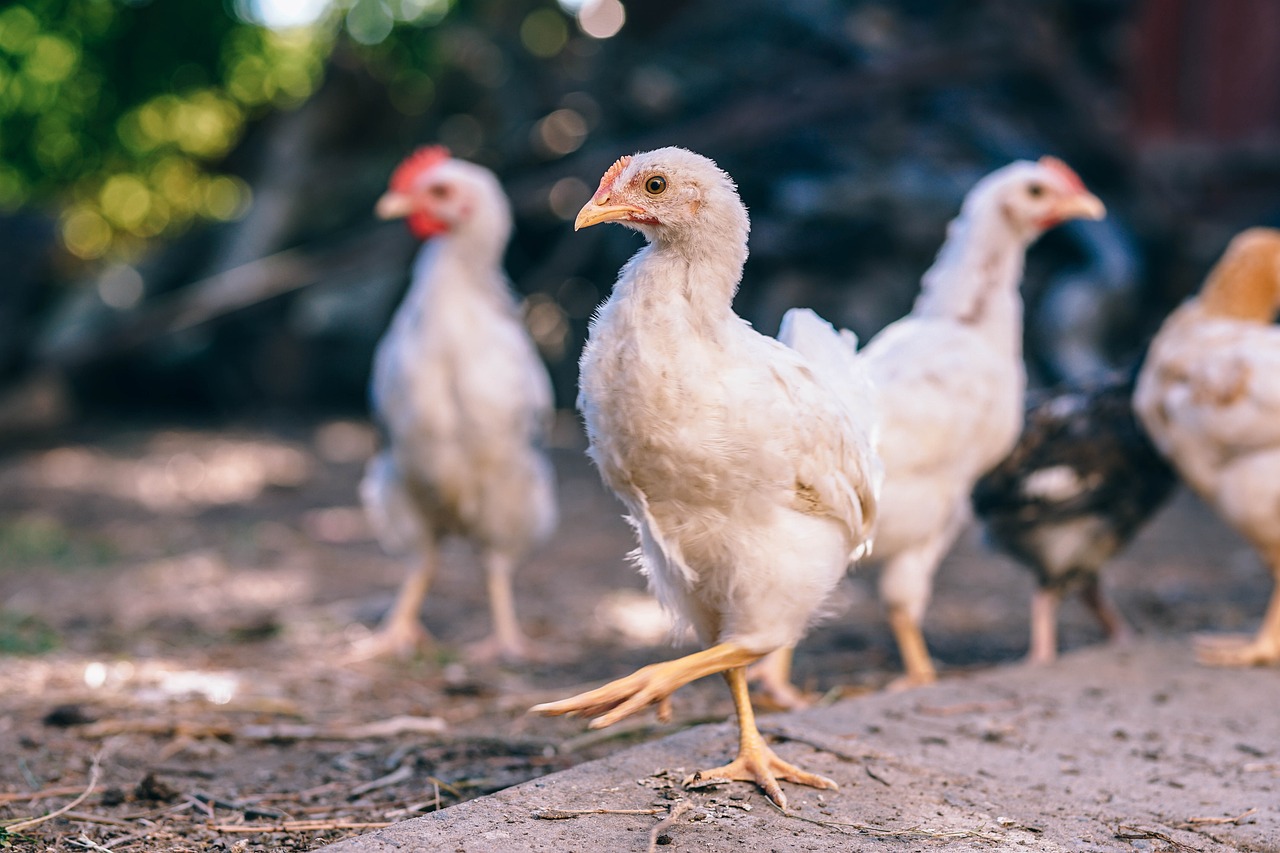
Ensuring Bird Safety
When it comes to building a birdcage, ensuring the safety of your feathered friends should be your top priority. After all, you want to create a cozy and secure home for them, not a potential hazard. Think of your birdcage as a fortress—a place where your birds can feel safe, explore, and thrive without any worries. To achieve this, there are several important considerations to keep in mind.
First and foremost, the materials you choose play a crucial role in the overall safety of the birdcage. Opt for non-toxic woods that are free from harmful chemicals. Certain woods, like cedar and pine, can release oils that may be harmful to birds. Instead, consider using hardwoods such as oak or maple, which are not only safe but also durable. Additionally, avoid using painted or varnished surfaces inside the cage, as these finishes can emit fumes that are detrimental to your birds' health.
Another critical aspect is the spacing of the bars in your birdcage. The distance between the bars should be appropriate for the size of your birds. If the bars are too far apart, your birds might escape or, worse, get their heads stuck. A general rule of thumb is to ensure that the spacing is no more than ½ inch for small birds and ¾ inch for larger species. This simple measurement can prevent many accidents and keep your birds secure.
Moreover, consider the design of the birdcage. Make sure there are no sharp edges or protruding parts that could injure your birds. Smooth out any rough surfaces, and double-check that all joints are securely fastened. You wouldn’t want your birds to get caught on anything while they’re having a playful time! Also, ensure that there are no small openings where they could get trapped or stuck.
Finally, it’s essential to provide a safe environment within the cage itself. This means avoiding any small toys or accessories that could pose a choking hazard. Instead, opt for bird-safe toys made specifically for their species. Regularly inspect the cage and its contents for wear and tear, and replace any items that show signs of damage. By keeping the environment clean and safe, you not only protect your birds but also enhance their well-being.
In summary, ensuring bird safety in your wooden birdcage involves careful consideration of materials, design, and the overall environment. By paying attention to these factors, you can create a beautiful yet secure space where your birds can flourish. Remember, a happy bird is a safe bird!
- What type of wood is safe for birdcages?
Hardwoods like oak and maple are excellent choices, while avoid cedar and pine due to their harmful oils. - How far apart should the bars be in a birdcage?
Bar spacing should be no more than ½ inch for small birds and ¾ inch for larger birds. - What should I avoid putting inside the birdcage?
Avoid painted or varnished items, sharp edges, and small toys that could pose choking hazards.
Frequently Asked Questions
- What type of wood is best for building a birdcage?
Choosing the right wood is essential for both durability and aesthetics. Hardwoods like oak, maple, or birch are excellent choices due to their strength and resistance to wear. If you're looking for something lighter, pine can also work, but be sure to treat it properly to prevent any decay.
- What tools do I need to build a wooden birdcage?
You'll need a mix of hand tools and power tools to make your project easier and more efficient. Essential hand tools include a saw, hammer, and screwdriver. For power tools, consider using a drill and a sander to save time and achieve precision. Having the right tools will make the building process smoother!
- How can I personalize my birdcage design?
Personalizing your birdcage can be as simple as adding unique features like colorful perches, fun toys, or decorative elements that reflect your style. Sketching out your ideas before you start building can help you visualize how these features will fit into your design.
- What safety precautions should I take while building?
Safety is crucial when working with tools and materials. Always wear protective gear such as goggles and gloves to protect yourself from splinters and flying debris. Additionally, ensure that your birdcage is safe for your feathered friends by avoiding toxic materials and sharp edges.
- How do I ensure my birdcage is safe for my birds?
To keep your birds safe, use non-toxic finishes and avoid using materials that can splinter or break easily. Ensure that the spacing between the bars is appropriate for the size of your birds, and check for any sharp edges or protruding screws that could harm them.


