Meticulous Wooden Miniatures: A Guide to Crafting
Welcome to the enchanting world of wooden miniatures, where creativity meets craftsmanship in the most delightful ways! Whether you're a seasoned artisan or just starting out, this guide is designed to illuminate the intricate art of crafting wooden miniatures. Here, we will delve into the essential techniques, materials, and tips that will help you elevate your skills and explore your creativity like never before. Crafting miniatures isn’t just about creating small objects; it’s about capturing the essence of your imagination in a tangible form. Imagine the satisfaction of holding a finely crafted piece that reflects your unique vision!
As we journey through this guide, we'll explore the nuances of selecting the right wood, understanding essential tools, mastering finishing techniques, designing your pieces, and overcoming common challenges in miniature crafting. Each element is crucial to achieving that perfect, polished look that makes your miniatures truly stand out. So, grab your tools, roll up your sleeves, and let’s embark on this artistic adventure together!
When it comes to crafting wooden miniatures, the choice of wood is paramount. Different types of wood offer various characteristics that can significantly influence the outcome of your project. For instance, basswood is a popular choice among crafters due to its softness, making it easy to carve and shape. On the other hand, oak is known for its durability and beautiful grain, perfect for miniatures that require a more robust structure.
Here’s a quick overview of some common wood types used in miniature crafting:
| Wood Type | Characteristics | Best For |
|---|---|---|
| Basswood | Soft, easy to carve | Intricate details |
| Oak | Hard, strong, beautiful grain | Durable structures |
| Pine | Lightweight, affordable | Basic projects |
| Maple | Hard, fine texture | High-quality finishes |
Choosing the right wood can make all the difference in your crafting experience, so take your time to experiment with different types and see which ones resonate with your style and projects!
Having the right tools is like having a magic wand in your crafting toolkit. The tools you choose can significantly impact the quality and precision of your miniatures. For starters, you'll need a good set of cutting tools. This includes various saws, such as coping saws for intricate cuts and band saws for larger pieces. Additionally, a sharp craft knife is essential for those fine details that bring your miniatures to life.
Understanding the different cutting tools and their uses is vital for any crafter. Each tool serves a specific purpose, and knowing when to use each one can save you time and frustration. Here’s a quick breakdown:
- Coping Saw: Ideal for intricate curves and detailed cuts.
- Band Saw: Great for cutting larger pieces quickly and efficiently.
- Craft Knife: Perfect for precision cuts and fine details.
Both hand tools and power tools have their unique advantages. Hand tools offer greater control and are often more affordable, while power tools can save time and effort. Consider your crafting style and the complexity of your projects when deciding which tools to invest in. A combination of both might be the best approach!
Proper maintenance of your tools ensures they last longer and perform better. Regularly clean your tools after use, sharpen blades as needed, and store them properly to avoid damage. A well-maintained tool is a happy tool, and it will serve you well in your crafting endeavors!
Finishing your miniatures is what truly enhances their appearance and durability. Techniques such as sanding, staining, and sealing are essential to achieving that professional look. Sanding smooths out rough edges, while staining adds depth and richness to the wood. Sealing your miniatures protects them from moisture and wear, ensuring they stand the test of time.
So, are you ready to dive into the world of meticulous wooden miniatures? With the right wood, tools, and techniques, you’ll be crafting stunning pieces in no time. Let’s keep exploring!
Q: What type of wood is best for beginners?
A: Basswood is often recommended for beginners due to its softness and ease of carving.
Q: Do I need power tools to craft miniatures?
A: No, many miniatures can be crafted using hand tools, but power tools can speed up the process.
Q: How can I fix mistakes in my projects?
A: Mistakes can often be fixed by sanding, adding more material, or creatively incorporating them into your design.

Choosing the Right Wood
When it comes to crafting wooden miniatures, the choice of wood can make or break your project. Just like a painter selects the perfect canvas, a miniature crafter must consider various wood types to bring their vision to life. The right wood not only affects the final look of your miniatures but also impacts the ease of crafting and durability of the finished piece. So, how do you choose the right wood? Let’s dive into the characteristics of different types of wood and how to select the best one for your projects.
First off, softwoods and hardwoods are the two main categories to consider. Softwoods, such as pine and cedar, are generally easier to work with, making them ideal for beginners. They are lightweight and can be cut and shaped with relative ease. On the other hand, hardwoods like oak, maple, and cherry are denser and more durable, providing a premium finish but requiring more skill and effort to manipulate. Each type of wood has its own unique grain patterns and colors, which can add character to your miniatures.
Here’s a quick overview of some popular wood types:
| Wood Type | Characteristics | Best For |
|---|---|---|
| Pine | Soft, lightweight, easy to carve | Beginners, basic projects |
| Cedar | Resistant to decay, aromatic | Outdoor miniatures, decorative pieces |
| Oak | Strong, durable, beautiful grain | Detailed miniatures, long-lasting projects |
| Maple | Hard, fine grain, takes stain well | High-quality finishes, intricate designs |
When selecting wood, consider the scale of your project. If you’re working on a large piece, a heavier wood like oak may be suitable, while smaller miniatures might benefit from lighter woods. Additionally, think about the finish you want to achieve. Some woods take stain better than others, allowing for a richer color and depth in your final product. It’s also worth noting that certain woods can be more expensive, so budget accordingly!
Another factor to consider is the availability of the wood. Some exotic woods may look stunning but can be hard to find and costly. Local hardware stores typically carry a good selection of common woods, making them accessible for most crafters. If you’re new to crafting, starting with something readily available like pine or cedar can help you build your skills without breaking the bank.
Lastly, don’t forget about the environmental impact of your wood choices. Opt for sustainably sourced wood whenever possible, as this not only supports responsible forestry practices but also contributes to a healthier planet. Look for certifications like the Forest Stewardship Council (FSC) label, which indicates that the wood has been harvested in an environmentally friendly manner.
In conclusion, choosing the right wood is a crucial step in the miniature crafting process. By understanding the characteristics of different wood types, considering your project's scale and finish, and being mindful of sustainability, you can select the perfect material that enhances your creativity and results in stunning wooden miniatures. Now that you have the basics down, are you ready to start crafting your mini masterpieces?
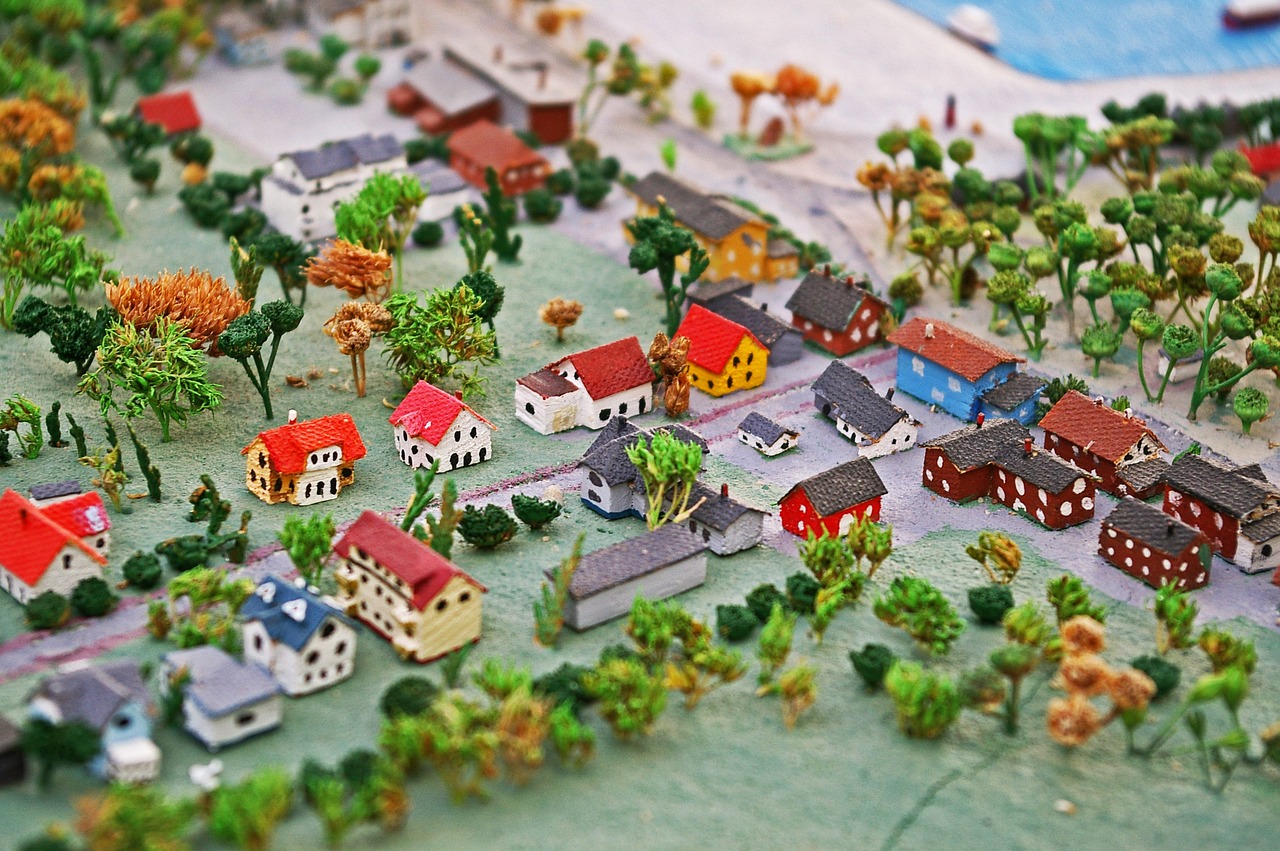
Essential Tools for Crafting
When it comes to crafting meticulous wooden miniatures, having the right tools at your disposal can make all the difference. Imagine trying to sculpt a masterpiece with a dull knife or a shaky hand saw; it would be like painting a portrait with a broom! Therefore, investing in quality tools is not just a suggestion; it's a necessity for both beginners and seasoned crafters alike. The essential tools can be categorized into several types, each serving a unique purpose in the crafting process.
First and foremost, cutting tools are the backbone of any miniature crafting toolkit. These tools allow you to slice through wood with precision, ensuring that every piece fits together seamlessly. The most common cutting tools include:
- Saws: From handheld coping saws to power band saws, these tools help you make straight and curved cuts effortlessly.
- Knives: A sharp craft knife is essential for detailed work, allowing you to carve intricate designs into your miniatures.
- Chisels: Perfect for adding fine details, chisels can help you shape and refine your miniatures.
Next, we have hand tools and power tools. Each has its own set of advantages and disadvantages. Hand tools offer greater control and are often more affordable, making them ideal for beginners. On the other hand, power tools can save you time and effort, especially for larger projects. Here’s a quick comparison:
| Tool Type | Advantages | Disadvantages |
|---|---|---|
| Hand Tools | More control, affordable, portable | Require more effort, can be slower |
| Power Tools | Faster, less physical effort, more versatile | More expensive, less control |
Regardless of your choice, maintaining your tools is paramount. Proper maintenance not only extends the life of your tools but also ensures optimal performance. Here are a few quick tips:
- Cleaning: After each use, make sure to clean your tools to prevent rust and buildup.
- Sharpening: Keep your blades sharp for clean cuts; dull tools can lead to mistakes.
- Storage: Store your tools in a dry, organized space to avoid damage and ensure easy access.
Lastly, don't forget about finishing tools. To give your miniatures that polished look, you’ll need sanding blocks, brushes for staining, and sealants to protect your work. Finishing is where your craftsmanship truly shines, transforming raw wood into stunning miniatures that you can be proud of.
In conclusion, having the right tools is essential for crafting exquisite wooden miniatures. Whether you opt for hand tools or power tools, understanding their uses and maintaining them properly will significantly enhance your crafting experience. So, gear up and get ready to dive into the fascinating world of miniature crafting!
Q: What is the best type of wood for beginners?
A: Basswood is often recommended for beginners due to its softness and ease of carving.
Q: Can I use regular household tools for crafting miniatures?
A: While some household tools can work, investing in specialized tools will yield better results.
Q: How often should I sharpen my cutting tools?
A: It depends on usage, but a good rule of thumb is to sharpen them whenever they start to feel dull.
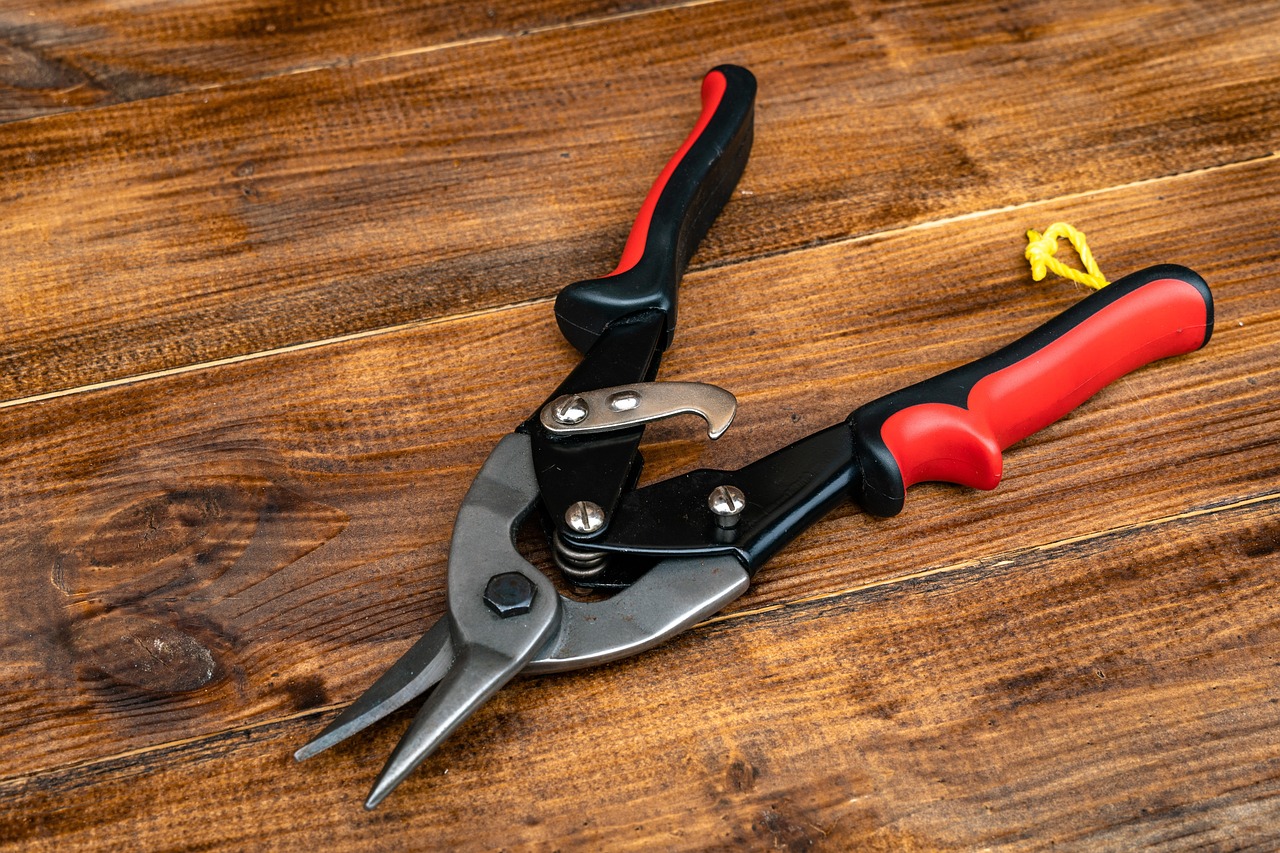
Cutting Tools
When it comes to crafting wooden miniatures, are your best friends. They are essential for achieving those precise cuts that can make or break your project. Whether you're a novice just starting out or a seasoned pro, understanding the different types of cutting tools available is crucial. Imagine trying to sculpt a masterpiece with a dull knife – it’s frustrating and often leads to mistakes. So, let’s dive into the world of cutting tools and discover which ones are right for you!
First off, you'll want to familiarize yourself with the various types of cutting tools. Each tool serves a unique purpose and can greatly influence the outcome of your miniatures. Here are some of the most common cutting tools you might consider:
- Hand Saws: Perfect for making straight cuts in thicker pieces of wood. They're simple to use and give you excellent control.
- Craft Knives: Ideal for intricate designs and fine details. These knives allow for precision cutting and are great for smaller projects.
- Scroll Saws: If you’re looking to create curves and intricate patterns, a scroll saw is your go-to tool. It’s like having a magic wand for wood!
- Chisels: Used for carving and shaping wood, chisels can help you add depth and dimension to your miniatures.
Now, let’s talk about the importance of technique. How you handle your tools is just as important as the tools themselves. For instance, when using a hand saw, make sure to maintain a steady hand and follow the grain of the wood. This will not only ensure cleaner cuts but also prevent splintering, which can ruin your project. Similarly, with craft knives, always cut away from your body to avoid accidents. Safety first, right?
Another factor to consider is the material of the blades. High-carbon steel blades are known for their durability and sharpness, but they can rust if not cared for properly. Stainless steel blades are resistant to rust, making them a great choice for those who might not be as diligent about maintenance. Always choose a blade that fits the type of wood you’re working with, as different woods require different levels of sharpness and cutting technique.
Lastly, let’s not forget about maintenance. A well-maintained tool is a happy tool! Regularly sharpening your blades and cleaning your tools will not only extend their lifespan but also enhance your crafting experience. A dull blade can lead to frustration and poor-quality cuts, so keep that sharpener handy!
In summary, the right cutting tools can elevate your miniature crafting to new heights. By understanding their uses, maintaining them properly, and honing your technique, you'll find that creating stunning wooden miniatures is not just a possibility – it’s an exciting adventure waiting to unfold!
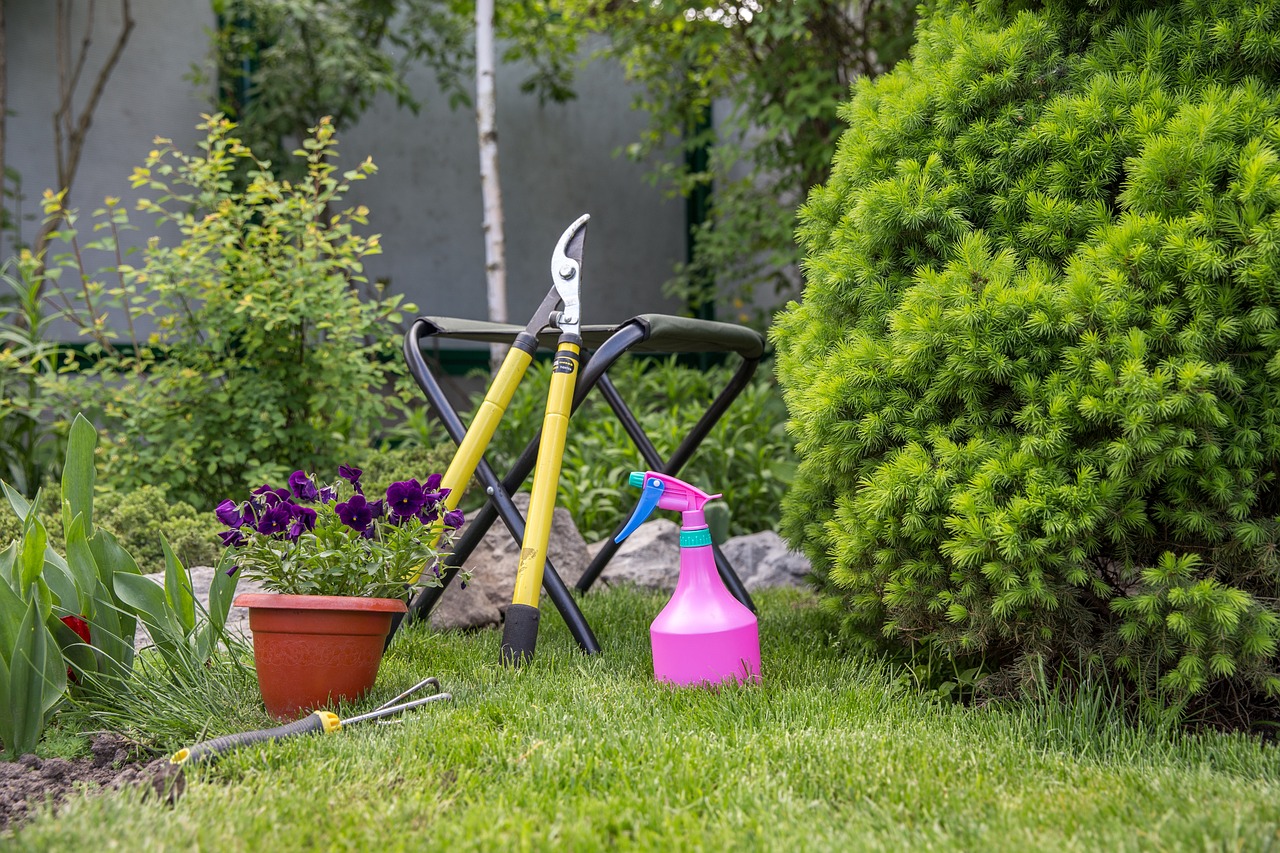
Hand Tools vs. Power Tools
When it comes to crafting wooden miniatures, the debate between hand tools and power tools is as old as time itself. Each type has its own unique set of advantages and disadvantages, making the choice largely dependent on your personal crafting style and the specific project at hand. Hand tools, like chisels and hand saws, offer a level of control that can be hard to achieve with their power counterparts. They allow for a more intimate connection with the material, giving you the chance to feel the wood and make adjustments as you go. This can be particularly beneficial when you’re working on intricate details or making delicate cuts that require a steady hand.
On the flip side, power tools, such as jigsaws and routers, can save you a considerable amount of time and effort, especially for larger projects or when you need to make repetitive cuts. They can handle jobs that would take a lot of muscle and time with hand tools. However, they can also be intimidating for beginners and may lead to mistakes if not used properly. The noise and speed of power tools can sometimes overshadow the meditative process of crafting, which many crafters cherish.
To help you make an informed decision, here’s a quick comparison of the two:
| Aspect | Hand Tools | Power Tools |
|---|---|---|
| Control | High - allows for precision and detailed work | Moderate - can be less precise without practice |
| Speed | Slower - requires more physical effort | Fast - can complete tasks quickly |
| Noise Level | Quiet - peaceful crafting experience | Loud - can be disruptive |
| Learning Curve | Gentler - easier for beginners to grasp | Steeper - requires practice and understanding |
| Portability | Highly portable - easy to take anywhere | Less portable - often requires a dedicated workspace |
Ultimately, the choice between hand tools and power tools boils down to your individual preferences and the specific requirements of your project. Some crafters find a balance by using a combination of both, leveraging the strengths of each to create stunning miniatures. Whether you choose to wield a hand saw or a power sander, what matters most is that you enjoy the process and let your creativity shine through.
Here are some common questions that often arise when discussing hand tools versus power tools:
- Which is better for beginners? Hand tools are generally recommended for beginners as they are easier to control and require less investment.
- Can I achieve professional results with hand tools? Absolutely! Many skilled artisans prefer hand tools for their precision and the craftsmanship they allow.
- Do I need both types of tools? Having both can be advantageous, as it allows you to choose the best tool for each specific task.
- How do I maintain my tools? Regular cleaning, proper storage, and occasional sharpening will keep both hand and power tools in excellent condition.
Maintenance of Tools
Taking care of your tools is not just about keeping them clean; it's about preserving the heart of your crafting experience. Imagine trying to carve a masterpiece with a dull knife or a rusty saw—frustrating, right? Proper maintenance ensures that your tools perform at their best, allowing you to create stunning wooden miniatures without a hitch.
First and foremost, cleaning is essential. After each crafting session, make it a habit to wipe down your tools with a damp cloth to remove sawdust and residue. For stubborn spots, a bit of mild soap can work wonders. Just be sure to dry them thoroughly afterward to prevent rust, especially on metal parts. Think of this as giving your tools a refreshing shower, keeping them in tip-top shape for your next project.
Next up is sharpening. A sharp tool is a happy tool! Regularly sharpening your cutting implements not only improves their performance but also enhances your safety. Dull tools require more force, increasing the risk of slips and accidents. Invest in a quality sharpening stone or a dedicated sharpener, and make it a routine to check your tools before you start crafting. It’s like preparing a sports car before a race—you want everything running smoothly!
Storage is another crucial aspect of tool maintenance. Proper storage prevents damage and prolongs the life of your tools. Use a dedicated toolbox or pegboard to keep everything organized. Ensure that your tools are stored in a dry place, away from humidity, which can cause rust. You can even label your storage spaces for quick access, making your crafting sessions more efficient. A well-organized tool space is akin to a well-tuned orchestra—everything in harmony, ready to create beautiful music (or in this case, beautiful miniatures).
Lastly, don’t forget about regular inspections. Periodically check your tools for any signs of wear and tear. Look for cracks in handles, rust on blades, or any other damage that could affect performance. Addressing these issues early on can save you from bigger problems down the road. Think of these inspections as routine check-ups for your tools, ensuring they remain healthy and ready for action.
In summary, maintaining your crafting tools involves a few simple yet vital steps: cleaning, sharpening, proper storage, and regular inspections. By investing a little time in their upkeep, you'll not only extend their lifespan but also enhance your overall crafting experience. After all, your tools are your companions on this creative journey, and treating them well will pay off in the form of beautifully crafted wooden miniatures.
- How often should I clean my tools? It's best to clean your tools after every use to prevent buildup of dust and debris.
- What is the best way to sharpen my tools? Using a sharpening stone or honing guide is recommended for maintaining a sharp edge.
- Can I store my tools outside? No, it's advisable to keep your tools in a dry, indoor environment to prevent rust and damage.
- What should I do if my tool gets damaged? Assess the damage and determine if it can be repaired; if not, consider replacing it to ensure safety and efficiency.
Finishing Techniques
When it comes to crafting exquisite wooden miniatures, play a pivotal role in elevating your creations from mere projects to stunning works of art. The finishing process not only enhances the visual appeal but also protects the wood, ensuring longevity and durability. There are several methods you can employ, each with its own unique benefits and applications. Let’s dive into some of the most popular techniques!
First up is sanding, a fundamental step in achieving a smooth surface. Proper sanding involves using progressively finer grits of sandpaper, starting with a coarse grit to remove any rough spots and gradually moving to finer grits for a polished finish. This technique is crucial because it prepares the wood for subsequent treatments and can dramatically affect the final appearance of your miniature. Remember, patience is key here; rushing through sanding can lead to an uneven surface that detracts from your hard work.
Next, we have staining, which allows you to bring out the natural beauty of the wood grain. Stains come in various colors and can be applied with a brush or cloth. They penetrate the wood, adding depth and richness while still allowing the grain to show through. If you want to achieve a specific look, consider testing the stain on a scrap piece of wood before applying it to your miniature. This way, you can see how it interacts with the wood type you've chosen and make adjustments as necessary.
After staining, sealing your miniatures is essential. Sealants provide a protective barrier against moisture, dirt, and wear. There are many types of sealants available, including polyurethane, varnish, and lacquer. Each has its own application method and finish type, so it’s important to choose one that aligns with your project’s needs. For instance, if you’re creating a miniature that will be handled frequently, a durable polyurethane sealant might be the best choice.
Finally, let’s not overlook the importance of detailing in your finishing process. Adding a coat of wax or using a polishing compound can give your miniatures a beautiful sheen, making them stand out even more. Detailing can also involve hand-painting intricate designs or applying decals, which can add a personal touch to your work. The goal here is to enhance the overall aesthetic without overwhelming the natural beauty of the wood.
In summary, mastering finishing techniques is an art in itself. Each step, from sanding to sealing, contributes to the final outcome of your miniature. Take your time, experiment with different products, and most importantly, enjoy the process! Your patience and attention to detail will surely reflect in the stunning miniatures you create.
- What is the best type of wood for miniatures?
Softwoods like pine and basswood are popular due to their workability, but hardwoods like oak and maple offer durability and a beautiful finish. - Do I need to sand my miniatures before painting?
Yes, sanding is crucial as it helps the paint adhere better and creates a smoother surface for a professional look. - How long should I wait between staining and sealing?
It’s best to wait at least 24 hours after staining before applying a sealant to ensure the stain is fully dry.

Designing Your Miniature
Creating a design is the foundation of any miniature project. It’s like laying the first brick of a grand castle; without it, everything else can crumble. Before you even pick up your tools, take a moment to visualize what you want to create. Are you aiming for a quaint little cottage, a bustling marketplace, or perhaps a whimsical treehouse? The possibilities are endless, and your imagination is the only limit. A well-thought-out design not only guides your crafting but also ensures that your final product is cohesive and visually appealing.
One effective way to start the design process is through sketching. Grab a pencil and some paper (or a digital drawing tool if you prefer) and let your creativity flow. Sketching helps you to visualize your ideas and can serve as a reference throughout your crafting journey. Don’t worry about making it perfect; the goal here is to capture your vision. You might find it helpful to create multiple sketches, experimenting with different angles, sizes, and details. Think of it as brainstorming on paper—each sketch can reveal new ideas and possibilities.
Once you have a solid sketch, consider making a prototype. This step is crucial as it allows you to test your ideas in a tangible form. Using inexpensive materials, you can create a rough version of your miniature. This prototype will help you identify any potential design flaws or areas that need improvement. It’s like a dress rehearsal before the big performance, giving you the chance to make adjustments without the pressure of working with your final materials.
As you refine your design, pay close attention to the details. Details are what truly bring your miniatures to life. Whether it’s the texture of the walls, the color of the roof, or the tiny flowers in the garden, these elements can make a significant difference in the overall impact of your piece. Consider incorporating unique features such as:
- Intricate window designs
- Hand-painted decorations
- Miniature furniture and accessories
Each detail adds personality and charm, making your miniature not just a project, but a reflection of your artistic vision.
Lastly, remember that designing is an iterative process. Don’t be afraid to revisit and revise your plans as you progress. Sometimes, the best ideas come after a bit of experimentation and reflection. Keep an open mind, and allow your creativity to evolve. After all, crafting is as much about the journey as it is about the final product.
Q: How do I choose the right design for my miniature?
A: Start by considering your interests and what inspires you. Look at existing miniatures for ideas, and think about themes or stories you want to convey. Sketch out your thoughts and see which designs resonate with you.
Q: Is it necessary to create a prototype?
A: While it’s not strictly necessary, creating a prototype can save you time and materials in the long run. It allows you to test your design and make adjustments before committing to the final piece.
Q: How can I add more detail to my miniatures?
A: Focus on small features that enhance the overall design, such as textures, colors, and tiny accessories. Research techniques like painting, carving, or using mixed media to add depth and interest.

Sketching and Prototyping
When it comes to crafting meticulous wooden miniatures, are your best friends. Think of sketching as the blueprint for your miniature—a roadmap that guides you through the intricacies of your project. Before you even pick up a tool, you should spend some time brainstorming ideas and putting them on paper. This initial step is crucial because it allows you to visualize the end product and make adjustments before committing to the wood. Plus, who doesn’t feel a little thrill when they see their ideas come to life, even if it’s just on paper?
So, how do you go about sketching your ideas? Start with simple shapes and outlines. Don’t worry about perfection at this stage; focus on getting your concepts down. You can use a variety of materials for this, from plain old pencil and paper to digital tools like tablets and design software. Each method has its perks, so choose what feels comfortable for you. Once you have a rough sketch, take a step back and evaluate it. Ask yourself questions like:
- Does this design convey what I want?
- Are there any elements that seem out of place?
- Can I simplify or enhance any parts of the design?
Once you’ve refined your sketch, the next step is prototyping. This is where the magic starts to happen! A prototype is essentially a rough version of your miniature, allowing you to test your design in a tangible form. It doesn’t have to be perfect; it just needs to give you a sense of scale and proportion. You can use scrap wood or even cardboard for this stage, which is a great way to save resources while you’re still figuring things out. As you prototype, pay attention to how the pieces fit together and make any necessary adjustments to your design.
Prototyping also serves as a fantastic opportunity to experiment with different techniques and materials. For instance, if you’re unsure about how a particular joint will hold up, try it out in your prototype before committing to the final piece. This trial-and-error approach not only helps in refining your design but also builds your confidence as a crafter. Remember, every great craftsman started with a few rough drafts!
In summary, sketching and prototyping are invaluable stages in the miniature crafting process. They allow you to envision your project, make necessary adjustments, and experiment with different techniques, all while minimizing waste. So grab those pencils and scrap materials, and let your creativity flow!
Q: How detailed should my sketches be?
A: Your sketches should capture the essential features of your design. They don’t need to be artistically perfect, but they should clearly communicate the dimensions and details you envision for your miniature.
Q: Can I use digital tools for sketching?
A: Absolutely! Digital sketching can offer flexibility and precision. Programs like Adobe Illustrator or Procreate allow you to easily modify your designs as you go along.
Q: What materials are best for prototyping?
A: While wood is ideal for the final piece, you can use cheaper alternatives like cardboard, foam board, or even plastic for your prototypes. The goal is to test your design without wasting valuable materials.
Q: How do I know if my prototype is successful?
A: A successful prototype should fit together well and reflect the design you had in mind. If there are issues, take notes and make adjustments before moving on to the final version.
Incorporating Details
When it comes to crafting wooden miniatures, the magic often lies in the details. These intricate features can transform a simple piece into a stunning work of art. Just think about it: what makes a model train captivating? Is it the size? The color? Or perhaps, it’s those tiny, meticulously crafted details that truly bring it to life! From the delicate windows of a dollhouse to the tiny rivets on a miniature vehicle, these little touches can make all the difference.
To effectively incorporate details into your miniatures, it’s essential to start with a clear vision of what you want to achieve. Begin by sketching out your ideas, focusing on the specific elements that will enhance your design. This could include texture, color variations, or even small accessories that complement the main structure. Remember, details don’t always have to be extravagant; sometimes, subtle touches can create a more profound impact.
Here are some strategies to consider while adding details:
- Scale Accuracy: Ensure that all details are proportionate to the overall size of your miniature. This helps maintain realism and visual appeal.
- Layering Techniques: Use layering to create depth. For example, adding multiple coats of paint or different materials can help achieve a rich, textured look.
- Color Contrast: Utilize contrasting colors to highlight specific features. A pop of color can draw attention to intricate designs, making them stand out.
Moreover, don't shy away from using various materials to enhance your miniatures. Incorporating metal, fabric, or even paper can add unique textures and visual interest. For instance, using fine wire for railings or fabric for curtains can take your project to the next level. The key is to experiment and see what combinations work best for your vision.
Lastly, remember that patience is your best friend in this process. Details require time and precision, so don’t rush through them. Take a moment to step back and assess your work. Are there areas that could benefit from more detail? Are there elements that feel too crowded? This reflective practice not only improves your current project but also sharpens your skills for future endeavors.
Q: What types of details should I focus on when crafting miniatures?
A: Focus on elements that enhance realism, such as textures, colors, and small accessories. Details like windows, doors, and decorative elements can greatly improve the overall look.
Q: How can I ensure that my details are to scale?
A: Use reference images and measurements to maintain scale accuracy. Tools like calipers can help you achieve precise dimensions.
Q: What materials can I use to add details to my miniatures?
A: You can use a variety of materials, including wood, metal, fabric, and plastic. Experimenting with different materials can lead to unique and interesting details.
Q: How do I know when to stop adding details?
A: It’s essential to step back and evaluate your work. If the details start to overwhelm the main structure or distract from the overall design, it may be time to stop.

Common Challenges in Miniature Crafting
Every crafter knows that the journey of creating stunning wooden miniatures isn't always smooth sailing. From the moment you pick up your tools to the final touches on your masterpiece, there are hurdles that can pop up out of nowhere, turning your crafting bliss into a puzzling challenge. But fear not! Understanding these common challenges can help you navigate through them with ease and confidence.
One of the most frequent issues encountered is precision in cutting. Whether you're using a saw or a knife, achieving the perfect cut can be tricky. A slight miscalculation can lead to uneven edges or pieces that don’t fit together as planned. To combat this, always measure twice and cut once. Consider creating a cutting guide or using clamps to hold your wood securely in place, ensuring that your cuts are as accurate as possible.
Another significant challenge is dealing with glue and adhesion. While it may seem straightforward, getting the right amount of glue and ensuring a strong bond can be a real test of patience. Too much glue can lead to messy excess that’s hard to clean, while too little can result in fragile joints. A good tip is to use a precision applicator for your glue to control the flow better. Additionally, allow ample time for the glue to dry completely before moving on to the next steps of your project.
Then there’s the issue of finishing techniques. Achieving that professional look can be daunting, especially if you’re new to sanding, staining, or sealing. Each technique requires its own set of skills and knowledge. For instance, if you’re staining, it’s crucial to choose the right stain for your type of wood, as some woods absorb stain differently. To simplify this process, consider creating a
| Wood Type | Recommended Finish |
|---|---|
| Pine | Water-based stain |
| Oak | Oil-based stain |
| Maple | Gel stain |
| Walnut | Clear varnish |
Additionally, many crafters struggle with time management. It’s easy to get lost in the details and spend hours on a single aspect of your miniature. To avoid this pitfall, set realistic goals for each crafting session. Break your project into smaller, manageable tasks, and allocate specific time slots for each. This way, you can maintain a steady pace without feeling overwhelmed.
Lastly, let’s talk about the inevitable mistakes that occur during the crafting process. Whether it’s a wrong cut, a glue mishap, or an unsatisfactory finish, errors can be disheartening. However, it’s essential to view these mistakes as learning opportunities. Instead of tossing your project aside, think creatively about how you can fix or incorporate the mistake into your design. Sometimes, what seems like a flaw can lead to a unique and unexpected feature in your miniature.
In conclusion, while the world of miniature crafting is filled with challenges, each obstacle can be overcome with a little preparation and creativity. By understanding these common issues and employing strategic solutions, you’ll find that your crafting experience can be as enjoyable as the final product itself. Remember, every master was once a beginner, and with each challenge you face, you’re one step closer to becoming a skilled miniature craftsman!
- What is the best wood for beginners? Basswood is an excellent choice for beginners due to its softness and ease of carving.
- How do I avoid mistakes in my projects? Take your time, measure carefully, and don’t rush through the process.
- Can I use regular paint on my miniatures? Yes, but ensure it’s suitable for wood and consider sealing it afterward for durability.

Dealing with Mistakes
Crafting wooden miniatures is a delightful journey, but let’s be honest: mistakes are part of the package. Whether you've accidentally cut a piece too short or miscalculated a measurement, these hiccups can feel like a roadblock. However, the way you deal with these errors can transform them from frustrating setbacks into valuable learning experiences. Think of mistakes as the seasoning in your crafting stew; they may not taste great at first, but they can add depth to your skills if you learn to embrace them.
First and foremost, it's crucial to maintain a positive mindset. Instead of viewing mistakes as failures, consider them as stepping stones on your path to mastery. When you encounter an error, take a moment to breathe and assess the situation. Ask yourself: What went wrong? and How can I fix it? By analyzing your mistakes, you can often find a solution that not only rectifies the issue but also enhances your overall craftsmanship.
For instance, if you find that a piece is too short, rather than starting from scratch, think creatively! You might be able to add a decorative element that cleverly hides the error, or even use the piece as a base for another design. This approach not only saves time and materials but also encourages your creativity to flourish. Remember, in the world of crafting, there are rarely any hard and fast rules; sometimes, the best creations come from unexpected twists.
Moreover, documenting your mistakes can be incredibly beneficial. Keep a crafting journal where you note down what went wrong and how you resolved it. This practice not only helps you avoid repeating the same mistakes in future projects but also serves as a record of your growth as a crafter. Over time, you’ll see how far you’ve come and how each mistake has contributed to your development.
Finally, don’t hesitate to seek advice from fellow crafters. Join online forums, social media groups, or local crafting clubs where you can share your experiences and learn from others. Often, you’ll find that many crafters have faced similar challenges and can offer insightful solutions. Remember, the crafting community is vast and supportive, and sharing your journey can lead to unexpected friendships and collaborations.
- What should I do if I make a major mistake in my project?
Take a step back, assess the situation, and think creatively about how to incorporate the mistake into your design or fix it without starting over.
- How can I prevent mistakes in the future?
Document your processes and keep a crafting journal to learn from your previous errors. Careful planning and measuring can also help reduce mistakes.
- Is it common to make mistakes when crafting?
Absolutely! Mistakes are part of the learning process and can lead to unexpected creativity and innovation in your projects.

Time Management Tips
Time management is a crucial skill for any miniature crafter looking to elevate their projects from mere ideas to tangible masterpieces. Imagine standing in front of a canvas, brush in hand, but realizing you have only a few minutes to create something beautiful. That’s the kind of pressure you might feel when you’re juggling multiple projects or trying to fit crafting into a busy schedule. To help you navigate these challenges, here are some effective strategies to manage your time wisely.
First and foremost, set clear goals. What do you want to achieve in your crafting session? Whether it's finishing a specific piece or mastering a new technique, having a clear objective helps you stay focused. Write down your goals and keep them visible as a constant reminder. This approach not only keeps you motivated but also helps you track your progress. You can even create a simple table to outline your goals and deadlines:
| Project | Goal | Deadline |
|---|---|---|
| Wooden Chair | Complete assembly | March 15 |
| Garden Shed | Finish painting | March 22 |
Next, consider breaking your projects into smaller tasks. Instead of viewing a miniature as a single, daunting project, break it down into manageable parts. For example, if you’re crafting a detailed model of a house, you could divide it into sections such as the foundation, walls, roof, and interior. This not only makes the project feel less overwhelming but also allows you to celebrate small victories along the way. Plus, it’s easier to fit smaller tasks into your schedule, making it less likely that you’ll procrastinate.
Another effective strategy is to establish a routine. Consistency is key in crafting. Set aside specific time blocks in your week dedicated solely to your miniature projects. This could be a couple of hours every Saturday afternoon or perhaps a few evenings during the week. By creating a crafting schedule, you’re more likely to stick to it, and soon enough, it will become a regular part of your life. Just like training for a marathon, the more you practice, the better you become.
Moreover, don’t underestimate the power of eliminating distractions. When you sit down to craft, create an environment that fosters focus. Turn off your phone notifications, set your workspace up for creativity, and let others know that you need some uninterrupted time. A clutter-free workspace can do wonders for your concentration. You might even find that playing some calming music or nature sounds can help you get into the right mindset.
Finally, remember to be flexible. Life happens, and sometimes your carefully laid plans might need adjustments. If you find that you’re not able to complete a task as scheduled, don’t beat yourself up over it. Instead, reassess your goals and timelines. Flexibility allows you to adapt and find new ways to make progress without feeling overwhelmed.
By implementing these time management tips, you’ll not only enhance your crafting experience but also find more joy in the process. Crafting should be a delightful escape, not a stressful obligation. So grab your tools, set your goals, and let your creativity flourish!
Q: How can I stay motivated during long crafting projects?
A: Break the project into smaller tasks and set mini-goals. Celebrate each completed task to keep your motivation high!
Q: What should I do if I run out of time during a project?
A: Don’t panic! Reassess your goals and timelines, and adjust your schedule accordingly. Flexibility is key!
Q: Are there any specific tools that can help with time management in crafting?
A: Yes! Consider using planners or digital apps to schedule your crafting sessions and track your progress.
Q: How do I handle distractions while crafting?
A: Create a dedicated crafting space, turn off notifications, and communicate your need for focused time to those around you.
Frequently Asked Questions
- What type of wood is best for crafting miniatures?
Choosing the right wood can make or break your miniature project! Generally, softer woods like pine or basswood are great for beginners due to their ease of cutting and shaping. However, hardwoods like oak or maple offer durability and a stunning finish for more advanced projects. It really depends on your skill level and the look you're going for!
- What essential tools do I need to start crafting miniatures?
To kick off your miniature crafting journey, you'll need a few key tools. Basic cutting tools like hobby knives, small saws, and precision cutters are essential. Additionally, having some sandpaper, clamps, and a good set of paints will help you refine and finish your creations. Remember, the right tools can significantly improve your crafting experience!
- Should I use hand tools or power tools?
This is a classic debate among crafters! Hand tools offer more control and precision, especially for detailed work, while power tools can save you time and effort for larger cuts. It ultimately depends on your personal preference and the complexity of your projects. Why not try both and see what suits your style best?
- How can I maintain my crafting tools?
Proper maintenance is key to keeping your tools in top shape! Regularly clean your tools after use, sharpen blades when they become dull, and store them in a dry place to prevent rust. Think of it like taking care of a pet; a little attention goes a long way in ensuring they perform well!
- What finishing techniques should I use for my miniatures?
Finishing techniques can really elevate your projects! Sanding is crucial for a smooth surface, while staining can add depth and character. Sealing your miniatures with a protective finish will also enhance durability. Experiment with different techniques to find what works best for your style!
- How do I effectively sketch and prototype my designs?
Sketching is a fantastic way to visualize your ideas before diving into crafting! Start with rough sketches to outline your concepts, then create a prototype using inexpensive materials. This process helps you identify potential issues early on, saving you time and frustration later!
- What should I do if I make a mistake while crafting?
Don’t sweat it! Mistakes are part of the learning curve in crafting. Instead of getting discouraged, view them as opportunities to improve your skills. You can often find creative solutions to fix errors, or even incorporate them into your design for a unique touch!
- How can I manage my time effectively while crafting?
Time management is crucial for any crafter! Start by setting clear goals for each project and break tasks into manageable chunks. Creating a schedule can help you stay focused and ensure you’re making progress without feeling overwhelmed. Remember, crafting should be fun, not stressful!


