10 Fun and Easy Crafts for Kids to Try this Weekend
This article explores ten engaging and simple craft projects that children can enjoy over the weekend, fostering creativity and hands-on skills while providing a fun bonding experience with family and friends. Crafting is not just about creating; it's about exploring, learning, and, most importantly, having fun! Whether it's a rainy day or a sunny afternoon, these projects will keep your little ones entertained and engaged. So, roll up those sleeves, gather your supplies, and get ready for a weekend filled with creativity!
Creating paper plate animals is a delightful craft that encourages imagination. Kids can transform simple plates into their favorite creatures using paint, markers, and other craft supplies. Imagine a lion made from a yellow plate with a mane of colorful yarn or a fish with shimmering scales created from glitter! The possibilities are endless, and this project can be tailored to fit any child's interests. Plus, it’s a great way to teach kids about different animals and their habitats while they craft.
Making friendship bracelets is a fun way for kids to express creativity and strengthen bonds with friends. Various techniques and colorful materials can be used to craft unique designs. Kids can use embroidery floss, beads, or even recycled materials to create their masterpieces. This activity not only promotes creativity but also teaches children about sharing and friendship. Imagine the joy on their faces as they gift these handmade treasures to their best pals!
Learning basic knot techniques is essential for making friendship bracelets. Kids can master simple knots to create beautiful patterns and understand the fundamentals of crafting jewelry. It’s like learning the ABCs of crafting! As they practice, they’ll gain confidence and skill, paving the way for more complex designs in the future.
Exploring color combinations can enhance the appeal of friendship bracelets. Kids can experiment with different hues to develop their unique style and preferences. This not only makes the bracelets visually appealing but also allows children to express their personalities through color. It's a fantastic way to introduce them to color theory in a fun and engaging way!
Handmade friendship bracelets make thoughtful gifts. Kids can create personalized bracelets for friends and family, adding a special touch to their presents. Imagine a birthday party where everyone wears matching bracelets made by the birthday child! It’s a memorable way to celebrate friendships and special occasions.
Once familiar with basic knots, kids can explore advanced patterns for more intricate designs. This challenges their skills and boosts their confidence in crafting. They can dive into more complex techniques like chevrons or spiral designs, making each bracelet a unique work of art.
Nature collages allow kids to connect with the outdoors while fostering creativity. They can collect leaves, flowers, and other natural materials to create stunning artwork. This project encourages them to appreciate the beauty of nature and understand the importance of preserving it. Plus, it’s a wonderful excuse for a family nature walk!
Collecting materials for nature collages can be a fun outdoor activity. Kids can explore parks or gardens to gather unique items for their projects. This scavenger hunt aspect adds excitement and a sense of adventure to the crafting process. Just be sure to remind them to collect responsibly and avoid picking protected plants!
Understanding assembly techniques is vital for creating visually appealing collages. Kids can learn how to arrange and glue materials creatively to enhance their artwork. This part of the process allows them to express their artistic vision and develop fine motor skills as they manipulate various elements.
Making homemade playdough is a simple and enjoyable activity that kids can do with minimal adult supervision. It’s a great way to encourage sensory play and creativity. The tactile experience of kneading and molding playdough is not only fun but also beneficial for developing fine motor skills. Plus, the best part? You can customize the colors and scents!
The basic playdough recipe is easy to follow and requires common kitchen ingredients. Kids can learn to measure and mix for a fun cooking experience. Here’s a quick overview of what you’ll need:
| Ingredient | Amount |
|---|---|
| Flour | 2 cups |
| Salt | 1/2 cup |
| Water | 2 cups |
| Vegetable Oil | 2 tablespoons |
| Food Coloring | As desired |
Customizing playdough colors adds an exciting twist. Kids can experiment with food coloring to create vibrant shades and enhance their sensory play experience. Mixing colors can also teach them about color blending and creativity. Imagine the rainbow of colors they can create!
Rock painting is a creative and relaxing craft that allows kids to express themselves artistically. They can use painted rocks to decorate their gardens or give as gifts. This project is not only fun but also encourages outdoor exploration as kids hunt for the perfect rocks to paint. Just think of the joy when they see their colorful creations brighten up a space!
Choosing the right rocks is essential for successful painting. Kids can explore their surroundings to find unique shapes and sizes that inspire their creativity. Smooth, flat rocks are perfect canvases for painting, while more textured rocks can add an interesting dimension to their artwork.
Exploring design ideas can spark creativity in rock painting. Kids can draw inspiration from nature, animals, or abstract patterns to create unique pieces of art. They can even turn their painted rocks into garden markers or whimsical decorations for their rooms!
Recycled art projects teach kids about sustainability while encouraging creativity. By using everyday materials, they can create unique art pieces and learn the importance of reusing items. This craft teaches valuable lessons about the environment and resourcefulness. Imagine transforming an old cereal box into a beautiful sculpture!
Finding materials for recycled art projects can be an adventure. Kids can gather items from home or community clean-up efforts to inspire their creations. This scavenger hunt aspect makes the crafting process even more exciting!
Exploring creative techniques in recycled art can lead to innovative projects. Kids can learn to combine materials in unexpected ways to create something new and exciting. This encourages them to think outside the box and develop their artistic skills.
Seasonal crafts allow kids to celebrate holidays and changes in nature. These projects can range from Halloween decorations to spring-themed art, fostering a sense of connection to time and tradition. Crafting with the seasons helps kids appreciate the beauty around them and the joy of celebrating special occasions.
Creating holiday decorations can be a fun way for kids to celebrate special occasions. They can craft ornaments, wreaths, and more to decorate their homes. Imagine the pride they’ll feel when their handmade decorations adorn the family tree or front door!
Seasonal nature crafts encourage kids to observe and appreciate the changing environment. They can create art that reflects the beauty of each season, enhancing their connection to nature. This can be a great way to teach them about seasonal changes and the importance of nature conservation.
Simple sewing projects introduce kids to the world of textiles and crafting. They can learn basic stitches while creating fun and functional items like bookmarks or small bags. Sewing is a fantastic way to develop fine motor skills and patience, as kids see their ideas come to life with each stitch.
Learning basic stitches is fundamental for kids interested in sewing. They can practice simple techniques to build their confidence and skills in this craft. Starting with easy projects helps them gain the necessary skills before moving on to more complex sewing tasks.
Exploring project ideas can inspire kids to create unique items. From fabric bookmarks to small stuffed animals, the possibilities are endless for beginner sewing projects. Each completed project boosts their confidence and encourages them to keep sewing!
Creative scrapbooking allows kids to preserve memories and express their artistic side. They can combine photos, drawings, and decorative elements to create personalized scrapbook pages. This activity not only fosters creativity but also teaches them the importance of cherishing memories and storytelling.
Gathering supplies for scrapbooking can be an exciting process. Kids can collect photos, stickers, and decorative papers to enhance their pages and tell their stories. This part of the process allows them to express their individuality and creativity as they curate their scrapbook.
Understanding layout techniques is essential for effective scrapbooking. Kids can learn how to arrange elements creatively to create visually appealing pages that capture their memories. This project encourages them to think critically about design and composition, skills that are valuable beyond crafting.
Fun with clay offers kids the opportunity to sculpt and mold unique creations. This hands-on activity enhances fine motor skills and encourages imaginative play. Working with clay is like bringing their dreams to life, as they shape and form whatever they can imagine!
Learning basic sculpting techniques can empower kids to create various shapes and figures. They can experiment with different methods to develop their skills in clay modeling. This project promotes creativity and allows them to express themselves through three-dimensional art.
Adding paint and finishing touches can elevate clay creations. Kids can explore color and texture to personalize their sculptures, making them truly one-of-a-kind. This final step is where their creativity shines, transforming simple clay into stunning works of art!
Q1: What materials do I need for these crafts?
A1: Most of these crafts require basic supplies like paper plates, markers, glue, scissors, and natural materials like leaves or rocks. Check each project for specific materials.
Q2: Are these crafts suitable for all ages?
A2: Yes! While some crafts may require adult supervision or assistance, most can be adapted for various age groups. Choose projects that align with your child's skill level.
Q3: How can I encourage my child to be creative?
A3: Provide a variety of materials and let them explore freely. Encourage them to express their ideas without judgment and celebrate their creations, no matter how simple!
Q4: Can these crafts be done indoors?
A4: Absolutely! Many of these projects can be done indoors, making them perfect for rainy days or when outdoor play is limited.
Q5: How can I incorporate learning into these crafts?
A5: Use these crafts as opportunities to teach kids about colors, shapes, and even environmental concepts. Discuss the materials used and their origins to enhance the learning experience.
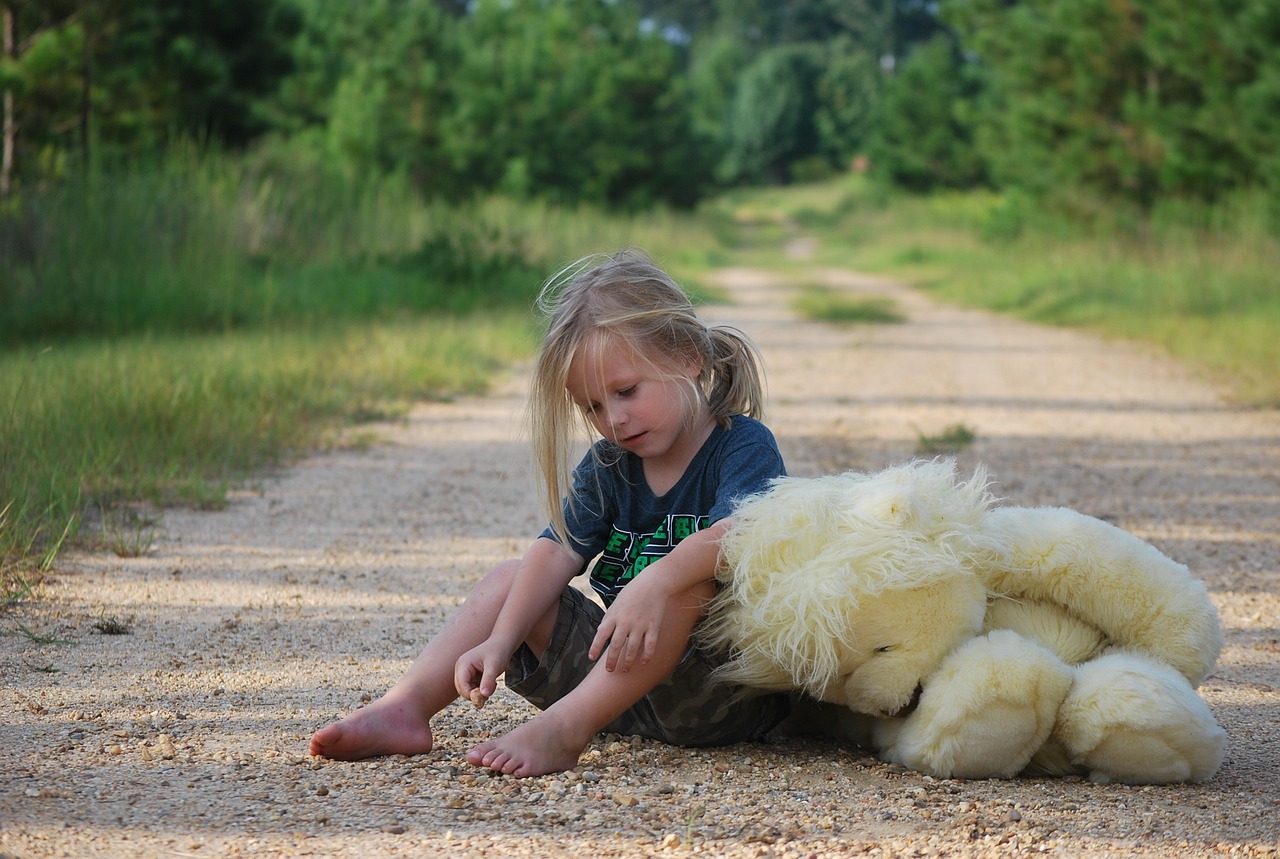
Paper Plate Animals
Creating is not just a delightful craft; it’s a fantastic way to spark your child's imagination and creativity. Imagine transforming a simple, round paper plate into a vibrant lion, a friendly owl, or even a colorful fish! This craft is incredibly versatile and can be adapted for kids of all ages, making it a perfect weekend activity. All you need are some basic supplies, a little creativity, and the willingness to get a bit messy!
To start, gather your materials. You will need:
- Paper plates
- Paints or markers
- Glue
- Safety scissors
- Craft supplies like googly eyes, feathers, and construction paper
Once you have everything ready, let the fun begin! Encourage your kids to choose their favorite animal and brainstorm how they want to represent it. This could involve painting the plate a specific color, adding ears made from construction paper, or even gluing on some fluffy cotton balls to create texture. The sky's the limit! You might be surprised at how creative they can get.
As they work, remind them that there’s no right or wrong way to create their animal. This is all about self-expression. If they want to make a purple elephant or a polka-dotted giraffe, let them go for it! This freedom not only enhances their artistic skills but also boosts their confidence. Plus, it’s a wonderful opportunity for you to bond with them, sharing stories about the animals they choose to create.
Once the animals are complete, you can take it a step further by organizing a mini-exhibition at home. Hang the finished creations around the house or set them up on a table for everyone to admire. This will not only give your kids a sense of accomplishment but also inspire them to keep creating. Who knows, maybe they will want to host a craft party with their friends!
In addition to being a fun activity, paper plate animals can also be educational. While crafting, you can discuss various animal facts, their habitats, and their behaviors. This way, you’re not just making art; you’re also engaging in a learning experience that could spark a lifelong interest in wildlife and nature.
So, grab those paper plates and get ready for a fun-filled crafting session this weekend. It’s a simple, engaging, and highly rewarding project that will leave your kids with beautiful creations and cherished memories!
- What age group is suitable for paper plate animals? This craft is suitable for kids of all ages, but younger children may need more assistance with cutting and gluing.
- Can I use other materials instead of paper plates? Absolutely! Cardboard, old CDs, or even thick paper can work as alternatives.
- How can I display the finished animals? You can hang them on walls, use them as party decorations, or even create a fun mobile to hang from the ceiling!
DIY Friendship Bracelets
Making friendship bracelets is an exciting way for kids to express their creativity while strengthening bonds with friends. These colorful accessories not only look great but also carry sentimental value, making them a perfect gift for special occasions or just because! With a variety of techniques and materials, the possibilities are endless. Imagine sitting down with your friends, surrounded by vibrant threads, beads, and laughter, as you craft something unique that symbolizes your friendship.
One of the best parts about creating DIY friendship bracelets is the variety of styles you can explore. From simple braided designs to intricate woven patterns, kids can choose what resonates with their personality. Plus, the process of making these bracelets can be a fun bonding experience, allowing friends to share tips, tricks, and inspiration. Whether you're a beginner or a seasoned crafter, there's a project suitable for everyone!
Before diving into the world of bracelet-making, it's essential to learn some basic knot techniques. These knots form the foundation of many bracelet designs and are crucial for creating beautiful patterns. Kids can start with simple knots like the square knot, which is easy to master and creates a sturdy base for their creations. Once they feel comfortable, they can experiment with more complex knots to elevate their designs and challenge their skills.
Here’s a quick overview of a few basic knots to get started:
| Knot Type | Description |
|---|---|
| Square Knot | A simple knot that is easy to learn and forms the basis for many bracelet designs. |
| Half Knot | Used to create a spiral effect; it’s a great way to add some flair to your bracelet. |
| Double Knot | A secure knot that helps to keep your bracelet intact during wear. |
When it comes to making friendship bracelets, color combinations can make all the difference. Kids can explore a rainbow of hues and learn about color theory as they mix and match different threads. For instance, they can create a bracelet using complementary colors for a striking effect or opt for analogous colors for a more harmonious look. This experimentation not only enhances their design skills but also allows them to develop a personal style that reflects their individuality.
Handmade friendship bracelets make for thoughtful gifts that carry a personal touch. Kids can craft unique bracelets for their friends or family members, adding special charms or beads that represent shared memories or inside jokes. Imagine gifting a bracelet that symbolizes a cherished friendship or a fun summer adventure! This not only strengthens relationships but also teaches kids the value of giving and thoughtfulness.
Once kids are comfortable with basic knot techniques, they can venture into the world of advanced patterns. This is where the fun really begins! Kids can learn to create intricate designs like chevrons, hearts, or even personalized initials. These advanced patterns challenge their skills and boost their confidence, allowing them to take pride in their creations. Plus, mastering these techniques can lead to a sense of accomplishment that encourages further exploration in the crafting world.
In conclusion, DIY friendship bracelets are not just a craft; they are a way to connect, create, and celebrate friendships. Whether it's through learning new techniques, experimenting with colors, or gifting their creations, kids can enjoy a fulfilling and fun experience. So gather your materials, invite some friends over, and let the creativity flow!
Q: What materials do I need to make friendship bracelets?
A: You will need embroidery floss or yarn, scissors, and tape or a clipboard to hold your bracelet while you work. Optional items include beads and charms for added flair.
Q: How long does it take to make a friendship bracelet?
A: The time it takes to make a bracelet depends on the complexity of the design. Simple bracelets can take about 30 minutes, while more intricate patterns might take a few hours.
Q: Can I wash my friendship bracelet?
A: Yes, most friendship bracelets made from embroidery floss are washable. However, it's best to hand wash them gently to preserve their colors and knots.

Basic Knot Techniques
When it comes to making friendship bracelets, mastering is essential. Not only do these knots form the foundation of beautiful designs, but they also empower kids to express their creativity in a fun and engaging way. Imagine each knot as a building block; the more you learn, the more intricate and stunning your creations can become!
To get started, let’s explore some of the most common knots used in bracelet making. The square knot, for instance, is a favorite among beginners. This knot is formed by tying two square knots in opposite directions, creating a sturdy and visually appealing design. The half hitch knot is another simple yet effective technique that allows for versatility in patterns. By varying the direction of the half hitch, kids can create spirals or stripes that add flair to their bracelets.
Here's a quick overview of some basic knot techniques:
| Knot Type | Description |
|---|---|
| Square Knot | A secure knot made by tying two square knots in different directions. |
| Half Hitch Knot | A simple knot that can be adjusted to create various patterns. |
| Double Knot | A knot tied twice for extra security, perfect for finishing off a bracelet. |
As kids practice these knots, they'll not only improve their dexterity but also gain a sense of accomplishment with each completed bracelet. It’s like learning to ride a bike—at first, it may seem tricky, but with practice, they’ll be zooming along in no time! Encourage them to experiment with different colors and materials, as this will enhance their understanding of how knotting techniques can change the look of their creations.
In addition to learning the knots, understanding how to combine different colors and patterns can make the crafting experience even more enjoyable. For example, using contrasting colors can make a square knot pop, while subtle shades can create a more sophisticated appearance. Kids can let their imaginations run wild, mixing and matching colors to develop their unique style.
Ultimately, mastering these basic knot techniques is just the beginning of a delightful journey into the world of crafting. As kids gain confidence and skill, they'll be ready to tackle more advanced patterns, creating stunning pieces of jewelry that they can proudly share with friends and family. So, gather those threads and let the knotting fun begin!
- What materials do I need to start making friendship bracelets?
You'll need embroidery floss or yarn, scissors, and tape or a clipboard to hold your work in place. - How long should the strings be for making a bracelet?
A good rule of thumb is to cut each string about 24-30 inches long, giving you enough length to tie knots and create patterns. - Can I use beads in my friendship bracelets?
Absolutely! Adding beads can enhance the design and make your bracelet even more special.

Color Combinations
When it comes to crafting friendship bracelets, the choice of colors can make all the difference. Kids can unleash their creativity by mixing and matching various hues, creating vibrant and unique designs that reflect their personal style. Imagine a rainbow of colors swirling together, each strand telling a story of friendship and fun. The beauty of crafting lies in the freedom to explore, and what better way to do this than by experimenting with color combinations?
To help kids get started, here are some popular color combinations that can inspire their bracelet-making journey:
- Bold and Bright: Neon pink, electric blue, and sunny yellow create a striking contrast that catches the eye.
- Pastel Dreams: Soft lavender, mint green, and pale pink offer a gentle, calming palette perfect for spring.
- Earthy Tones: Rich browns, deep greens, and burnt oranges evoke the beauty of nature, ideal for those who love the outdoors.
- Classic Combinations: Black and white never go out of style, and adding a pop of red can make the design even more dynamic.
Encouraging kids to explore these combinations not only enhances their crafting experience but also allows them to discover their favorite colors and styles. They can even create a color wheel to visualize how different colors interact with each other. This can be as simple as drawing a circle and dividing it into sections, each painted with a different color. By seeing how colors complement or contrast with one another, they can make informed choices that elevate their bracelet designs.
Moreover, kids can take their color exploration a step further by incorporating beads, charms, and other embellishments into their bracelets. This adds another layer of creativity and allows for even more color combinations. For instance, pairing a bright yellow bead with a deep blue thread can create a stunning focal point in an otherwise simple bracelet. The key is to encourage them to experiment and have fun with the process, as there are no strict rules when it comes to personal expression through art!
As they work on their bracelets, remind kids that color combinations can also carry meanings. For example, blue often symbolizes tranquility, while red represents love and passion. By choosing colors that resonate with them or that represent their friendship, they can create something truly special. It’s not just about the aesthetics; it’s about the emotions and stories behind each choice.
In conclusion, exploring color combinations in friendship bracelet making is a fantastic way for kids to express themselves. Whether they stick to classic pairings or venture into bold new territory, the possibilities are endless. So, gather those colorful threads, let the imagination flow, and watch as they create beautiful pieces of art that celebrate their creativity and friendships!
Q: What materials do I need to make friendship bracelets?
A: You will need embroidery floss or yarn, scissors, and a clipboard or tape to hold your work in place. Optional materials include beads and charms for added flair.
Q: How long does it take to make a friendship bracelet?
A: The time varies depending on the complexity of the design, but most simple bracelets can be completed in about 30 minutes to an hour.
Q: Can I use different types of thread?
A: Yes! While embroidery floss is popular, you can also use yarn, leather cord, or even ribbon for different textures and looks.
Q: Are there any specific techniques for beginners?
A: Beginners should start with basic knot techniques, such as the square knot or the chevron pattern, which are easy to follow and create beautiful results.
Q: How can I personalize my bracelet?
A: You can personalize your bracelet by choosing colors that represent your personality or by adding beads that have special meanings or represent your interests.
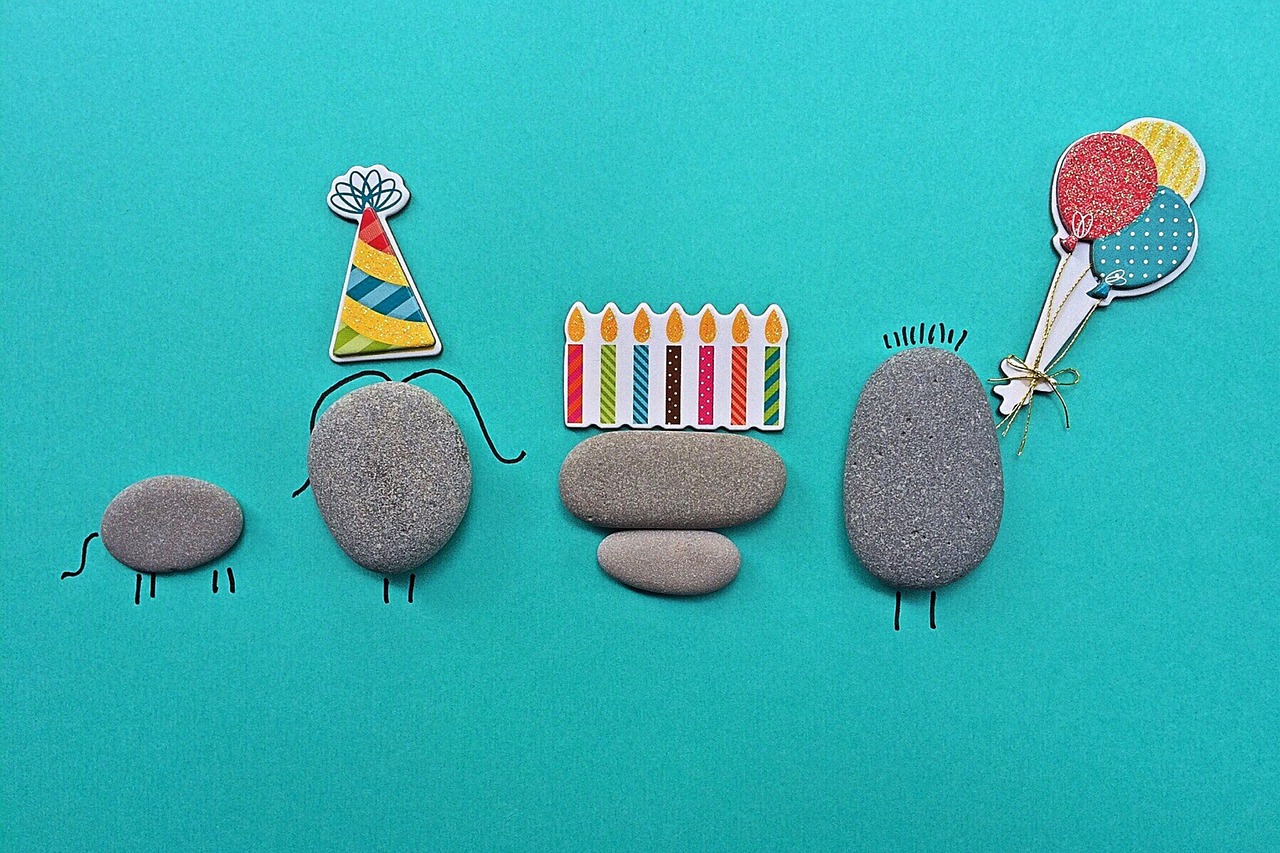
Gift Ideas
Handmade friendship bracelets are not just colorful accessories; they are heartfelt tokens of friendship that carry a special meaning. Kids can create personalized bracelets for their friends and family, making each piece unique and memorable. Imagine giving your best friend a bracelet made with their favorite colors or a design that symbolizes your friendship! These thoughtful gifts can strengthen bonds and create lasting memories.
When it comes to crafting these beautiful bracelets, the possibilities are endless. Kids can choose from a variety of materials, such as colorful threads, beads, and charms, to add a personal touch. For instance, incorporating a charm that represents a shared interest, like a soccer ball for sports enthusiasts or a musical note for music lovers, can make the gift even more special. The act of creating something with their own hands adds a layer of love and effort that store-bought gifts simply can't match.
Moreover, these handmade creations can be perfect for various occasions. Whether it's a birthday, holiday, or just a surprise gift, a friendship bracelet can brighten someone's day. It's like saying, “I thought of you,” and who wouldn't appreciate that? To inspire kids, here are a few creative gift ideas for their friendship bracelets:
- Birthday Gifts: Create a bracelet with the birthday person's favorite colors and add a special charm that represents their personality.
- Holiday Gifts: Design festive bracelets for holidays like Christmas or Valentine’s Day, using seasonal colors and decorations.
- Just Because: Surprise friends with a bracelet for no reason at all, simply to show appreciation and love.
In addition to the bracelets themselves, kids can also consider the presentation. Wrapping the bracelet in a handmade card or a small decorated box adds an extra touch of thoughtfulness. They could even write a little note explaining the significance of the colors or charms used, making the gift even more meaningful.
Ultimately, the joy of giving a handmade friendship bracelet lies not just in the craft itself but in the connections it fosters. It teaches kids the value of thoughtfulness and creativity, while also allowing them to express their feelings in a tangible way. So, as the weekend approaches, gather some materials, unleash their creativity, and let the kids create beautiful bracelets that will surely bring smiles to their friends’ faces!
Q: What materials do I need to make friendship bracelets?
A: Basic materials include embroidery floss or yarn, scissors, and a clipboard or tape to hold the bracelet while you work. Optional materials include beads and charms for added flair.
Q: How long does it take to make a friendship bracelet?
A: Depending on the complexity of the design, it can take anywhere from 30 minutes to a couple of hours to complete a bracelet.
Q: Can younger kids make friendship bracelets?
A: Yes! Younger kids can start with simple knot techniques, while older kids can explore more intricate patterns. Adult supervision may be needed for younger children, especially when using scissors.
Q: What if I make a mistake while crafting?
A: Mistakes are part of the creative process! Kids can easily undo knots or rearrange beads. Encourage them to embrace their creativity and enjoy the journey.
Advanced Patterns
Once your kids have mastered the basic knots for their friendship bracelets, it’s time to take their creativity to the next level by exploring . These intricate designs not only challenge their crafting skills but also boost their confidence as they see their ideas come to life in a more complex form. Imagine the joy on their faces when they successfully create a beautiful bracelet that showcases their hard work and creativity!
Advanced patterns can include a variety of techniques, such as Chevron, Diamond, and Twisted designs. Each pattern has its own unique charm and can be made using different colors and materials, allowing kids to express their individuality. For instance, the Chevron pattern creates a zigzag effect that is visually striking, while the Diamond pattern offers a more symmetrical and polished look. Kids can experiment with various color combinations to personalize their bracelets even further.
To help your kids get started, here’s a simple breakdown of some popular advanced patterns:
| Pattern Name | Description | Skill Level |
|---|---|---|
| Candy Stripe | A straightforward pattern that alternates colors in a stripe format. | Beginner |
| Chelsea | A more intricate pattern that forms a chevron-like design. | Intermediate |
| Diamond | Creates a diamond shape using a combination of knots. | Advanced |
| Twisted | A fun and colorful twist on traditional patterns. | Advanced |
Encouraging kids to try these advanced patterns not only enhances their crafting skills but also fosters a sense of accomplishment. As they navigate through the challenges of creating more complex designs, they develop patience and perseverance—qualities that are invaluable in all areas of life. Plus, making these bracelets can be a fantastic bonding experience, allowing them to collaborate with friends or family members and share tips and tricks along the way.
Finally, remind your kids that mistakes are part of the learning process. If a bracelet doesn’t turn out as expected, they can always unravel it and start anew. This aspect of crafting teaches resilience and creativity, proving that even setbacks can lead to new and exciting creations. So, gather those colorful threads, and let the advanced pattern-making begin!
Q: What materials do we need for making friendship bracelets?
A: You will need embroidery floss or yarn, scissors, and tape or a clipboard to hold the bracelet while you work. Optional items include beads or charms for added decoration.
Q: How long does it take to make a friendship bracelet?
A: The time it takes to create a bracelet varies depending on the pattern's complexity. Basic patterns might take about 30 minutes, while advanced ones could take a couple of hours.
Q: Can kids make friendship bracelets on their own?
A: Yes, kids can make them independently, especially if they are familiar with basic knot techniques. However, younger children might benefit from adult supervision for guidance and assistance.
Q: What if we run out of thread while making a bracelet?
A: If you run out of thread, you can simply tie on a new piece of thread to continue. Just make sure to secure the knot well to avoid it coming undone.
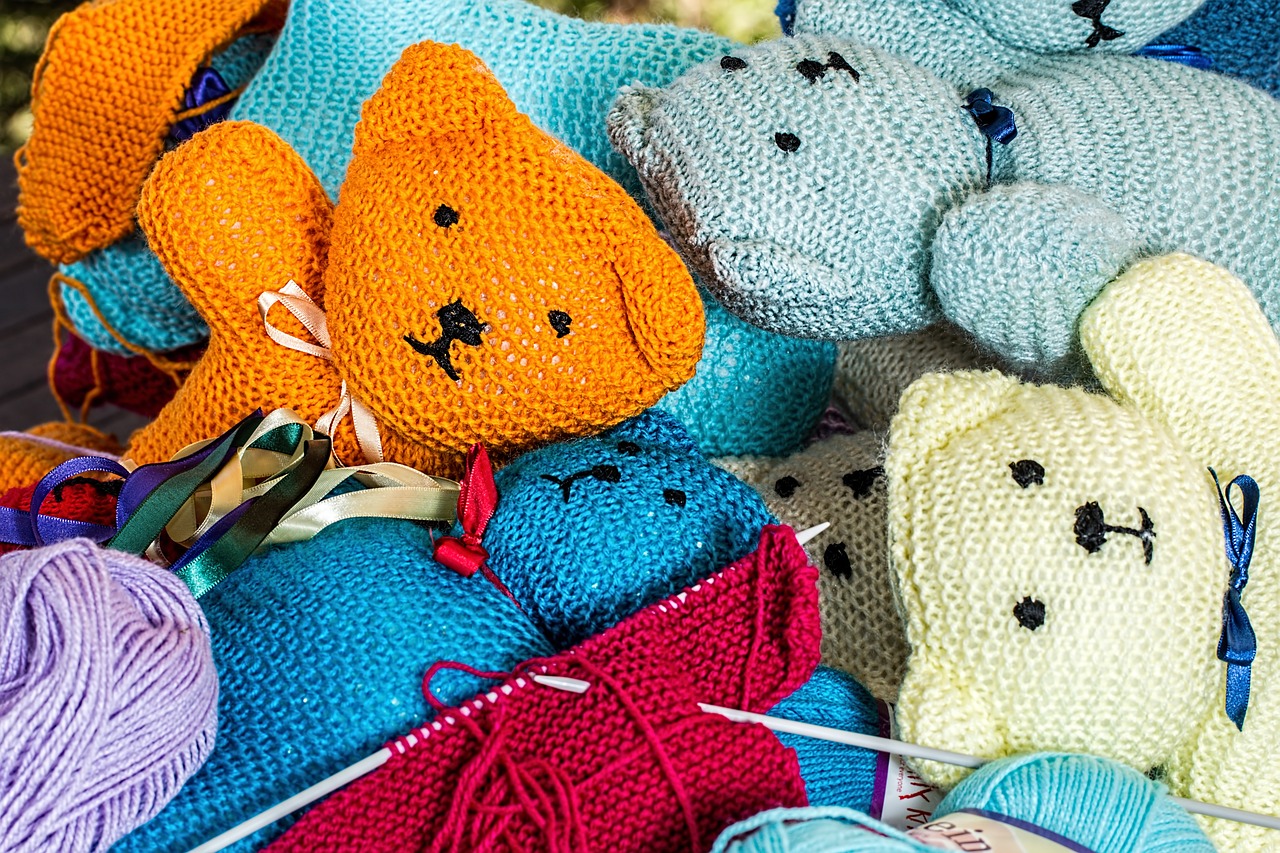
Nature Collages
Creating is not just a craft; it’s an adventure that connects kids with the great outdoors while unleashing their creativity. Imagine a sunny Saturday morning where children can step outside, breathe in the fresh air, and gather an assortment of leaves, flowers, twigs, and even pebbles. This hands-on activity encourages kids to explore their surroundings, observe the beauty of nature, and appreciate the little things that often go unnoticed. The best part? They get to bring their findings back home and transform them into stunning works of art!
To start their nature collage project, kids can collect various materials. Here are some ideas for what to gather:
- Leaves: Different shapes and sizes add texture.
- Flowers: Bright colors can make the collage pop.
- Twigs: Great for structure and dimension.
- Seeds: Tiny details that can enhance the overall design.
Once they have their materials, the next step is to assemble the collage. This is where creativity truly shines! Kids can lay out their materials on a piece of sturdy paper or cardboard, arranging them in ways that tell a story or simply look visually appealing. The process of gluing down their treasures can be incredibly satisfying. They can experiment with different arrangements, layering items to create depth and interest. This not only enhances their artistic skills but also teaches them about composition and balance in art.
In addition to the artistic aspect, creating nature collages can be an educational experience. As kids work on their projects, they can learn about the different types of plants and materials they are using. For example, they might discover how leaves change color in the fall or the unique patterns found in flower petals. This blend of art and education makes nature collages a fantastic weekend project for families looking to bond while exploring the wonders of nature.
When the collage is complete, it can be displayed proudly at home or even gifted to family members. This not only boosts the child's confidence but also teaches them the joy of sharing their creativity with others. So, grab some glue, gather those natural treasures, and let the crafting begin! Nature collages are a perfect way to celebrate the beauty of the outdoors while fostering creativity and hands-on skills in children.
1. What materials do I need to create a nature collage?
You will need a sturdy base like cardboard or thick paper, glue, and various natural materials such as leaves, flowers, twigs, and seeds. Feel free to add other decorative items like buttons or ribbons if desired!
2. Can this activity be done indoors?
While nature collages are best created outdoors, you can bring collected materials inside to assemble your collage. Just make sure to have a designated crafting space to avoid mess!
3. Is this suitable for all age groups?
Absolutely! Nature collages can be adapted for different age groups. Younger kids can focus on gathering and gluing, while older kids can experiment with more complex designs and techniques.
4. How can I make this activity more educational?
Incorporate lessons about the different plants and materials used in the collage. Discuss their characteristics, habitats, and the importance of nature conservation while working on the project.

Collecting Materials
Collecting materials for nature collages is not just about gathering items; it’s about embarking on an adventure! Imagine stepping outside with your kids, the sun shining, and the world bursting with colors and textures just waiting to be explored. This activity not only fosters creativity but also encourages children to appreciate the beauty of nature. They can stroll through parks, gardens, or even their own backyards to find unique elements like leaves, flowers, and twigs that can be transformed into stunning pieces of art.
As they collect these treasures, kids can learn to observe their surroundings more closely. Encourage them to look for different shapes, sizes, and colors. For example, they might find:
- Brightly colored leaves that showcase the changing seasons.
- Delicate flowers that add a pop of color.
- Interesting stones that can serve as a base for their collages.
- Feathers that can add texture and whimsy.
It’s also a great opportunity to teach kids about the importance of sustainability. Remind them to collect materials responsibly, ensuring they don’t disturb the environment or harm plants and wildlife. This can lead to discussions about nature conservation and respect for our planet, making the craft project not just a fun activity but a valuable learning experience.
Once they’ve gathered their materials, it’s time to unleash their creativity! Encourage them to think outside the box when it comes to arranging their found items. They can create a collage that tells a story or reflects their feelings about the season. The possibilities are endless, and the joy of crafting with natural materials can be immensely rewarding. So, grab a bag, head outside, and let the adventure of collecting begin!
Q: What types of materials can we use for nature collages?
A: You can use leaves, flowers, twigs, stones, feathers, and even small pieces of bark. Just make sure to collect items that are safe and won’t harm the environment.
Q: How can we preserve the collected items for crafting?
A: To preserve leaves and flowers, you can press them between heavy books or use a flower press. This helps maintain their shape and color for your collage.
Q: Are there any safety tips for collecting materials?
A: Always supervise younger children during outdoor excursions. Teach them to avoid collecting items from protected areas or private properties without permission. Also, be cautious of plants that may cause skin irritation.
Q: Can we use artificial materials in our collages?
A: Absolutely! While natural materials are great, you can also incorporate items like colored paper, buttons, and fabric scraps to enhance your collage.

Assembly Techniques
When it comes to creating nature collages, understanding is key to bringing your artistic vision to life. Kids can unleash their creativity by learning how to arrange and glue various materials in a way that not only looks appealing but also tells a story. The beauty of a collage lies in its ability to combine different textures, colors, and shapes into a cohesive piece of art. Imagine transforming a simple collection of leaves, flowers, and twigs into a vibrant masterpiece that reflects the beauty of nature!
To start, it’s essential to plan the layout before diving in. Encourage kids to spread out their collected materials on a flat surface to visualize how they might fit together. This initial step can be quite exciting, as it allows them to experiment with different arrangements without committing to glue just yet. They can play around with layering, overlapping, and rotating the pieces until they find a configuration that resonates with them.
Once they have a layout they love, it's time to talk about glue! Here are a few popular adhesive options that work well with nature collages:
- PVA Glue: A versatile choice that dries clear and is safe for kids.
- Glue Sticks: Great for lighter materials like paper and leaves.
- Hot Glue: Ideal for heavier items, but requires adult supervision.
After selecting the right adhesive, kids can start assembling their collages. Here are some techniques to enhance their projects:
- Layering: Layering materials can create depth and interest. For instance, placing a bright flower on top of a darker leaf can make the colors pop.
- Framing: Using twigs or leaves to create a natural frame around the collage can provide a polished look.
- Textural Variation: Encourage kids to incorporate materials with different textures, such as rough bark, soft moss, or smooth pebbles, to make their collages more dynamic.
Finally, once everything is glued down, kids can add their personal touch with embellishments. Stickers, glitter, or even a splash of paint can elevate their artwork from good to spectacular. The key takeaway is to let their imaginations run wild and remind them that there are no strict rules in art. Every collage is unique, just like the artist behind it!
Q: What materials can I use for nature collages?
A: You can use a variety of natural materials such as leaves, flowers, twigs, pebbles, and even sand. Additionally, craft supplies like paper, glue, and markers can enhance your collage.
Q: How do I preserve my nature collage?
A: To preserve your collage, consider using a sealant spray or placing it in a frame. This will protect it from dust and damage while allowing you to showcase your artwork.
Q: Can I use artificial materials in my collage?
A: Absolutely! While nature collages typically emphasize natural materials, incorporating artificial elements like ribbons, buttons, or paper can add an interesting contrast and enhance creativity.

Homemade Playdough
Making is not only a simple and enjoyable activity, but it also opens up a world of sensory exploration for kids. This delightful craft allows children to engage their creativity while developing their fine motor skills. Plus, it’s a fantastic way to bond with family as everyone can get involved in the mixing, kneading, and playing. Imagine the joy on your child’s face as they squish and mold their very own playdough creations!
To kick off this fun project, you’ll need just a few common kitchen ingredients that are likely already in your pantry. The basic recipe for homemade playdough is straightforward and can be made in under 30 minutes. Here’s what you’ll need:
| Ingredient | Amount |
|---|---|
| Flour | 2 cups |
| Water | 2 cups |
| Salt | 1/2 cup |
| Vegetable Oil | 2 tablespoons |
| Food Coloring | Optional |
Once you have gathered your ingredients, the fun really begins! Start by mixing the flour, salt, and vegetable oil in a large bowl. In a separate pot, combine the water and food coloring (if you choose to use it) and heat it on the stove. Once warm, gradually add the dry mixture to the pot while stirring continuously. This is where the magic happens! As the mixture thickens, it will start to form a dough.
After a few minutes of stirring, you’ll notice that the dough starts to pull away from the sides of the pot. This is your cue to take it off the heat. Allow it to cool for a few minutes before kneading it with your hands. This is a great time for kids to get involved! They can help knead the dough, which is a fantastic way to strengthen their hand muscles and improve coordination.
Now comes the exciting part—color customization! Kids can unleash their imagination by adding different shades to their playdough. By mixing in various food coloring, they can create vibrant hues that reflect their personalities. Encourage them to experiment with color combinations to see what unique shades they can come up with. It’s like being a scientist in the kitchen!
Once the playdough is ready, the possibilities for play are endless. Kids can create shapes, figures, or even entire worlds using their colorful dough. This activity not only fosters creativity but also encourages storytelling as children build and play with their creations. Plus, homemade playdough is non-toxic and safe for kids, making it a worry-free activity for parents.
When the playdough is no longer usable, it’s easy to make a new batch. Just remember to store any leftover playdough in an airtight container to keep it fresh for future play sessions. It’s a simple recipe that can be repeated time and again, providing countless hours of entertainment.
- How long does homemade playdough last? When stored properly in an airtight container, homemade playdough can last for several weeks.
- Can I use different types of flour? Yes! While all-purpose flour works best, you can experiment with whole wheat flour or even gluten-free options.
- Is it safe if my child eats a small amount? While the ingredients are non-toxic, it's best to supervise play and discourage eating playdough.
Basic Recipe
Making homemade playdough is not just a fun activity; it’s a fantastic way for kids to engage their senses while developing essential skills. The is incredibly simple and requires just a few common kitchen ingredients that you probably already have at home. With this easy-to-follow guide, you and your little ones can whip up a batch of soft, pliable playdough in no time!
Here’s what you’ll need:
- 2 cups of all-purpose flour
- 2 cups of water
- 1 cup of salt
- 2 tablespoons of vegetable oil
- 2 tablespoons of cream of tartar
- Optional: Food coloring
To make the playdough, simply follow these steps:
- In a large mixing bowl, combine the flour, salt, cream of tartar, and vegetable oil.
- In a separate pot, heat the water and add any food coloring you wish to use. Stir until the color is evenly mixed.
- Pour the colored water into the dry ingredients and mix well until the dough begins to form.
- Transfer the mixture to a stovetop over medium heat, stirring continuously until it thickens and pulls away from the sides of the pot.
- Once it cools down, knead the dough with your hands until it becomes smooth and elastic.
And just like that, you have a delightful batch of playdough ready for hours of imaginative play! One of the best parts about making your own playdough is that you can customize it to your heart’s content. Kids can add glitter, essential oils for scent, or even experiment with different colors. The possibilities are endless!
Don’t forget to store your homemade playdough in an airtight container to keep it fresh for future play sessions. If it starts to dry out, a little water can revive it. This simple recipe not only sparks creativity but also provides a wonderful opportunity for kids to learn about measuring and mixing ingredients, making it a perfect weekend project.
Q: How long does homemade playdough last?
A: When stored in an airtight container, homemade playdough can last for several weeks. Just make sure to keep it in a cool, dry place!
Q: Can I use other types of flour?
A: Yes! While all-purpose flour works best, you can experiment with whole wheat flour or even gluten-free options, although the texture may vary.
Q: What if my playdough is too sticky?
A: If your playdough turns out sticky, you can knead in a little extra flour until it reaches the desired consistency.
Q: Is it safe for young children?
A: Yes, homemade playdough is generally safe for children. However, it’s always a good idea to supervise younger kids to prevent them from putting it in their mouths.

Color Customization
Customizing playdough colors is an exciting aspect that allows kids to unleash their creativity while engaging in a sensory-rich activity. Imagine the thrill of mixing vibrant shades to create a rainbow of playdough! This simple process not only enhances the play experience but also teaches children about color theory and experimentation. Kids can start with a basic white or beige dough and then use food coloring to transform it into their desired shades. The beauty of this activity lies in the endless possibilities; they can create everything from bright reds and blues to pastel pinks and greens.
To get started with color customization, here’s a fun and easy method:
- Choose Your Base: Begin with a basic homemade playdough recipe, which typically includes flour, salt, water, and cream of tartar.
- Select Your Colors: Gather food coloring in various hues. Gel food coloring works particularly well as it provides more vibrant colors.
- Mixing Magic: Divide the playdough into smaller portions. Add a few drops of food coloring to each portion and knead until the color is evenly distributed. Kids will love watching the dough change color as they work it with their hands!
As children experiment with different combinations, they can learn how to create secondary colors by mixing primary colors. For instance, combining red and blue will yield a beautiful purple, while yellow and blue will create a cheerful green. This hands-on approach makes learning about colors engaging and memorable.
Furthermore, kids can take their creativity a step further by incorporating scents into their playdough. Adding a few drops of essential oils or extracts, such as vanilla or peppermint, can make the experience even more delightful. Not only will the playdough be visually appealing, but it will also engage their sense of smell, providing a multi-sensory experience. This kind of customization encourages children to think outside the box and enhances their imaginative play.
In essence, color customization is not just about making playdough look pretty; it’s a fantastic way for kids to explore their artistic side, learn about color mixing, and enjoy an interactive, sensory-rich experience. So, gather those supplies and let the color experiments begin!
| Question | Answer |
|---|---|
| Can I use natural food coloring? | Yes! You can use natural ingredients like beet juice, turmeric, or spinach to color your playdough. |
| How long does homemade playdough last? | When stored in an airtight container in the refrigerator, homemade playdough can last for several weeks. |
| Is it safe for younger children? | As long as you use non-toxic ingredients, homemade playdough is safe for young children. Always supervise playtime. |

Rock Painting
Rock painting is not just a craft; it’s a delightful way for kids to express their creativity while enjoying the great outdoors. Imagine wandering through a park, picking up smooth, flat stones, and turning them into vibrant pieces of art! This activity allows children to unleash their imagination, whether they choose to paint colorful patterns, animals, or even inspirational quotes. The best part? Once their masterpieces are complete, they can proudly display them in their gardens, give them as gifts, or even hide them around the neighborhood for others to find, spreading joy and creativity wherever they go.
To get started with rock painting, it’s essential to choose the right rocks. Kids can explore their surroundings—backyards, parks, or even beach shores—to find unique shapes and sizes that inspire them. A smooth, flat rock is often the best canvas, but sometimes, the most interesting shapes can lead to the most creative designs. After gathering their materials, it’s time to think about the design ideas. Here are some popular themes that can spark creativity:
- Nature-Inspired: Flowers, trees, or landscapes.
- Animals: Cute critters like ladybugs, cats, or birds.
- Abstract Patterns: Swirls, dots, and geometric shapes.
- Inspirational Quotes: Uplifting messages or personal mantras.
Once the design is in mind, kids can gather their supplies. Basic materials include acrylic paint, paintbrushes, and a sealant to protect their artwork from the elements. They can even use markers or paint pens for more detailed work. The process of painting is where the real fun begins! Kids can experiment with different techniques, such as blending colors or using sponges for texture. Encouraging them to let loose and enjoy the process is key, as the goal is to have fun and express themselves rather than create a perfect piece.
After the rocks have dried, applying a sealant is an important step. This not only protects the paint from fading but also ensures that the artwork can withstand the weather if placed outdoors. Once sealed, kids can proudly display their creations in their gardens, on their desks, or even gift them to friends and family. Rock painting is more than just a craft; it's an opportunity for kids to connect with nature, enhance their artistic skills, and create lasting memories.
Q: What type of paint should I use for rock painting?
A: Acrylic paint is highly recommended as it adheres well to stone and dries quickly. You can also use paint pens for finer details.
Q: Do I need to prep the rocks before painting?
A: While not necessary, washing the rocks to remove dirt and debris can help the paint adhere better.
Q: How do I seal my painted rocks?
A: Use a clear acrylic sealant spray or brush-on sealant to protect your artwork from the elements. Make sure the paint is completely dry before sealing.
Q: Can kids of all ages participate in rock painting?
A: Absolutely! Rock painting is suitable for kids of all ages, with supervision for younger children when using paint and sealants.
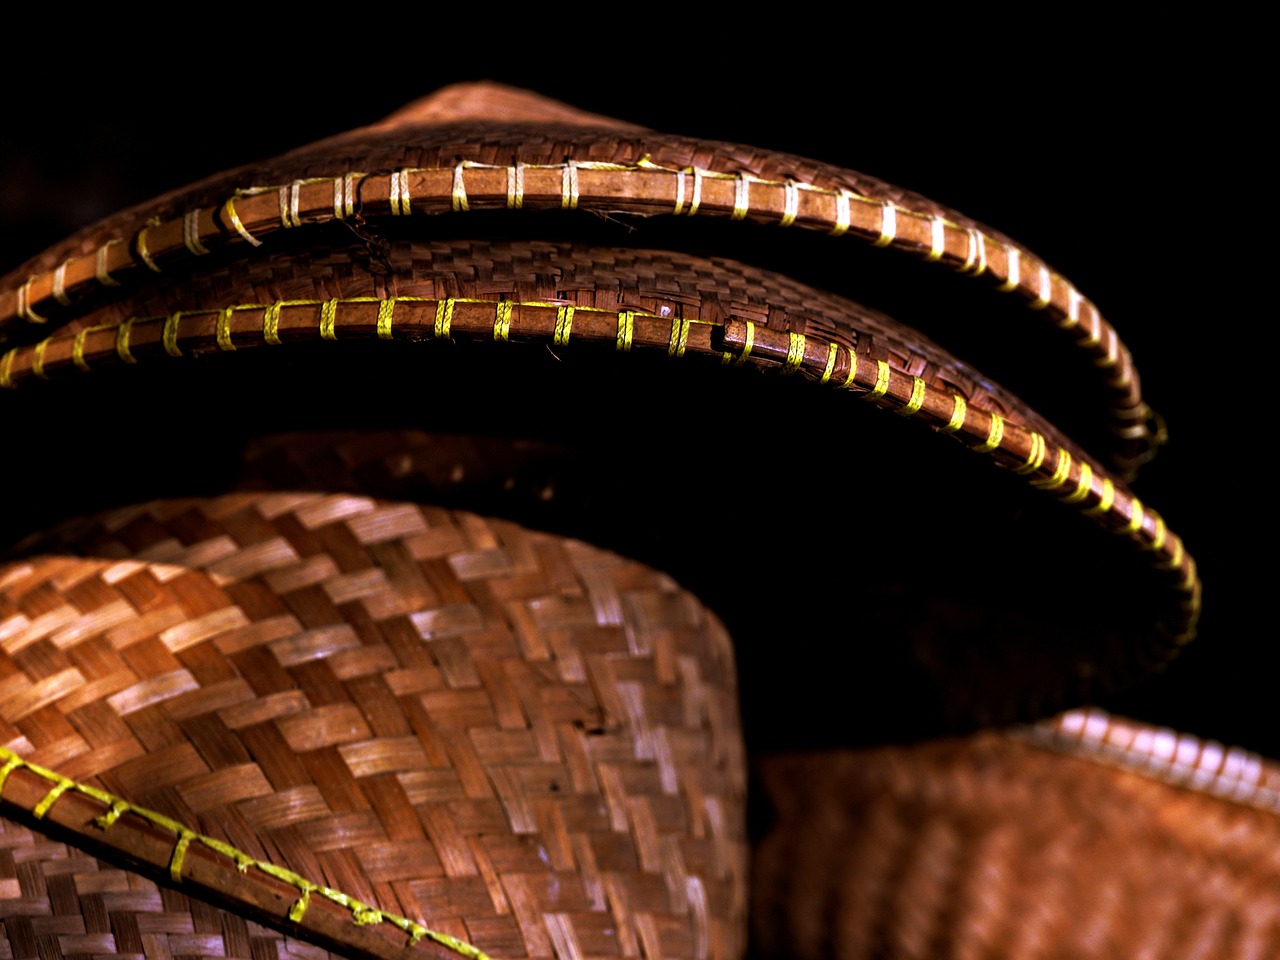
Choosing Rocks
When it comes to rock painting, the first step is to choose the right rocks. This might sound simple, but the type of rock you select can significantly impact your creativity and the final outcome of your artwork. Think of it this way: just like a painter chooses the perfect canvas, you want to find rocks that inspire you and suit your artistic vision. Here are some tips to help you find the most suitable rocks:
- Look for Unique Shapes: Explore your surroundings, whether it's a local park, beach, or even your backyard. Look for rocks that have interesting shapes or textures. A rock that resembles an animal or a heart can spark a fun idea for your painting.
- Size Matters: Consider the size of the rocks. Smaller rocks are great for quick designs or for creating a collection, while larger rocks can serve as statement pieces in your garden.
- Surface Texture: Smooth rocks are easier to paint on, while rougher surfaces can add a unique texture to your artwork. Don't shy away from experimenting with both!
- Color and Natural Patterns: Sometimes, rocks come with natural colors or patterns that can enhance your artwork. Keep an eye out for these natural beauties that could serve as a base for your designs.
After gathering your rocks, it’s essential to clean them properly. Rinse them under water to remove any dirt or debris, and let them dry completely before painting. This ensures that the paint adheres well and the colors pop! Once your rocks are ready, you can dive into the fun part—painting! With a bit of imagination, those ordinary stones can transform into extraordinary pieces of art that reflect your personality.
So, are you ready to embark on this creative adventure? Finding the perfect rocks is just the beginning. Let your imagination run wild and see where your artistic journey takes you!
Q: What type of paint should I use for rock painting?
A: Acrylic paints are the best choice for rock painting due to their vibrant colors and durability. You can also use paint markers for finer details.
Q: Do I need to seal my painted rocks?
A: Yes, sealing your painted rocks with a clear acrylic sealer will help protect your artwork from the elements, especially if you plan to display them outdoors.
Q: Can I use any type of rock for painting?
A: While you can technically paint on any rock, smoother stones like river rocks or slate work best because they provide a better surface for painting.
Q: How can I display my painted rocks?
A: You can place them in your garden, use them as decorative pieces indoors, or even give them as gifts. The possibilities are endless!
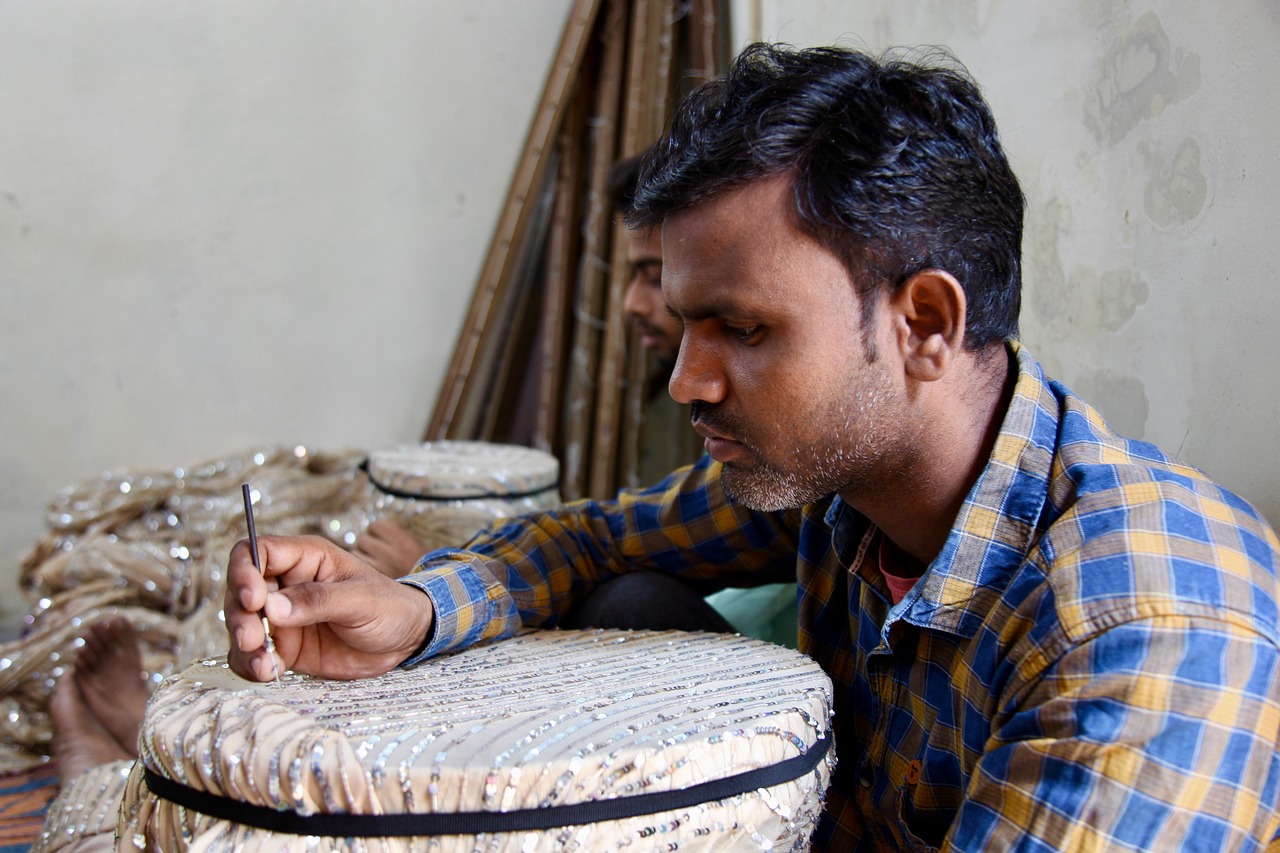
Design Ideas
When it comes to rock painting, the possibilities are as vast as your imagination! Kids can unleash their creativity by exploring various that can turn ordinary rocks into extraordinary pieces of art. One fun approach is to draw inspiration from nature. For instance, they can paint vibrant flowers, cute insects, or even their favorite animals right onto the surface of the rocks. Imagine a lovely ladybug perched on a rock, or a colorful butterfly fluttering across a garden scene!
Another exciting avenue for design is abstract patterns. Kids can experiment with swirls, dots, and zigzags using bright colors that pop. This not only allows them to express their artistic flair but also helps them understand the principles of color theory and composition. They can even try their hand at geometric designs, where shapes like triangles and circles come together to create stunning visual effects. The result? Unique pieces that can be used for decoration or as gifts!
To inspire creativity further, consider creating a theme for the rock painting session. For example, a ocean theme could include rocks painted as fish, seashells, and starfish, while a space theme could feature planets and shooting stars. This can turn the painting session into an imaginative adventure, where kids can learn about different subjects while they create. They might even want to name their rocks and tell stories about them, enhancing their engagement and making the experience even more memorable.
For those looking for a bit of guidance, here are some popular design ideas that kids can try:
- Animal Faces: Simple designs like cats, dogs, or owls can be painted on the rocks, making them adorable additions to any garden.
- Inspirational Words: Writing positive affirmations or fun quotes on rocks can serve as daily reminders of happiness and positivity.
- Seasonal Themes: Create designs that reflect the current season, such as pumpkins for fall or snowflakes for winter.
Ultimately, the key to successful rock painting is to encourage experimentation. Kids should feel free to mix colors, try different techniques, and even combine multiple ideas into one piece. This not only fosters creativity but also builds confidence in their artistic abilities. So grab some rocks, paint, and let the artistic adventure begin!
Q: What type of paint is best for rock painting?
A: Acrylic paint is highly recommended for rock painting due to its vibrant colors and durability. It adheres well to the surface and can withstand outdoor conditions if sealed properly.
Q: How do I seal painted rocks?
A: To protect your painted rocks from the elements, use a clear acrylic sealer. Spray or brush it on after the paint has dried completely to ensure longevity.
Q: Can kids participate in rock painting?
A: Absolutely! Rock painting is a fantastic activity for kids of all ages. Just ensure that they have supervision, especially when using paint and sealers.
Q: What if I don't have rocks?
A: No worries! You can use any smooth, flat surface for painting, such as pieces of wood or even old tiles. Get creative with what you have!

Recycled Art Projects
Recycled art projects are not just a fun way for kids to express their creativity; they also teach valuable lessons about sustainability and the importance of reusing materials. Imagine transforming everyday items that would typically end up in the trash into stunning works of art! This hands-on activity allows children to explore their imagination while learning about the environment. By using materials like cardboard boxes, plastic bottles, and old newspapers, kids can create unique art pieces that showcase their creativity and resourcefulness.
The beauty of recycled art lies in its accessibility. Almost every household has items that can be repurposed into art supplies. Think about the colorful cereal boxes, empty toilet paper rolls, or even those mismatched socks that have lost their partners. The possibilities are endless! Plus, this activity can be a fantastic bonding experience for families. Parents and children can work together to collect materials and brainstorm ideas, turning it into a memorable weekend project.
To kick-start your recycled art journey, consider these exciting project ideas:
- Cardboard Sculptures: Use old boxes to create 3D sculptures. Kids can cut, glue, and paint their designs to bring them to life.
- Plastic Bottle Planters: Transform plastic bottles into colorful planters. Just cut them in half, decorate them, and fill them with soil and plants.
- Magazine Collages: Gather old magazines and let kids cut out pictures and words to create vibrant collages that tell a story or express their feelings.
Finding materials for these projects can be an adventure in itself. Kids can embark on scavenger hunts around the house or even participate in community clean-up efforts to gather supplies. This not only makes the crafting process more engaging but also instills a sense of responsibility towards the environment. As they collect materials, they learn to appreciate the value of reusing items rather than discarding them.
Once the materials are gathered, understanding creative techniques is vital. Kids can experiment with different ways to combine materials, such as gluing, painting, or even sewing. For instance, they might decide to create a bird feeder using an old milk jug, or perhaps a decorative piece using bottle caps and cardboard. The only limit is their imagination! Encouraging children to think outside the box can lead to innovative and unexpected creations that truly reflect their personalities.
Incorporating recycled art projects into your weekend plans not only fosters creativity but also reinforces the importance of sustainability. As children create art from items that would otherwise be thrown away, they develop a deeper understanding of their impact on the environment. So, gather those recyclables and let the crafting begin!
Q: What materials can we use for recycled art projects?
A: You can use a wide variety of materials such as cardboard, plastic bottles, old newspapers, magazines, tin cans, and even fabric scraps. The key is to look for items that can be repurposed and transformed into something new.
Q: Do I need special tools for these projects?
A: While basic tools like scissors, glue, and paint are helpful, you don’t need anything fancy. Many projects can be done with simple household items. Just ensure that kids are supervised when using sharp tools.
Q: How can we ensure that these projects are safe for kids?
A: Always supervise children during crafting sessions, especially when using scissors or hot glue guns. Additionally, choose non-toxic paints and adhesives to keep the crafting environment safe.
Q: Can recycled art projects be educational?
A: Absolutely! These projects can teach kids about recycling, environmental conservation, and even art techniques. You can turn the crafting session into a learning experience by discussing the importance of sustainability.
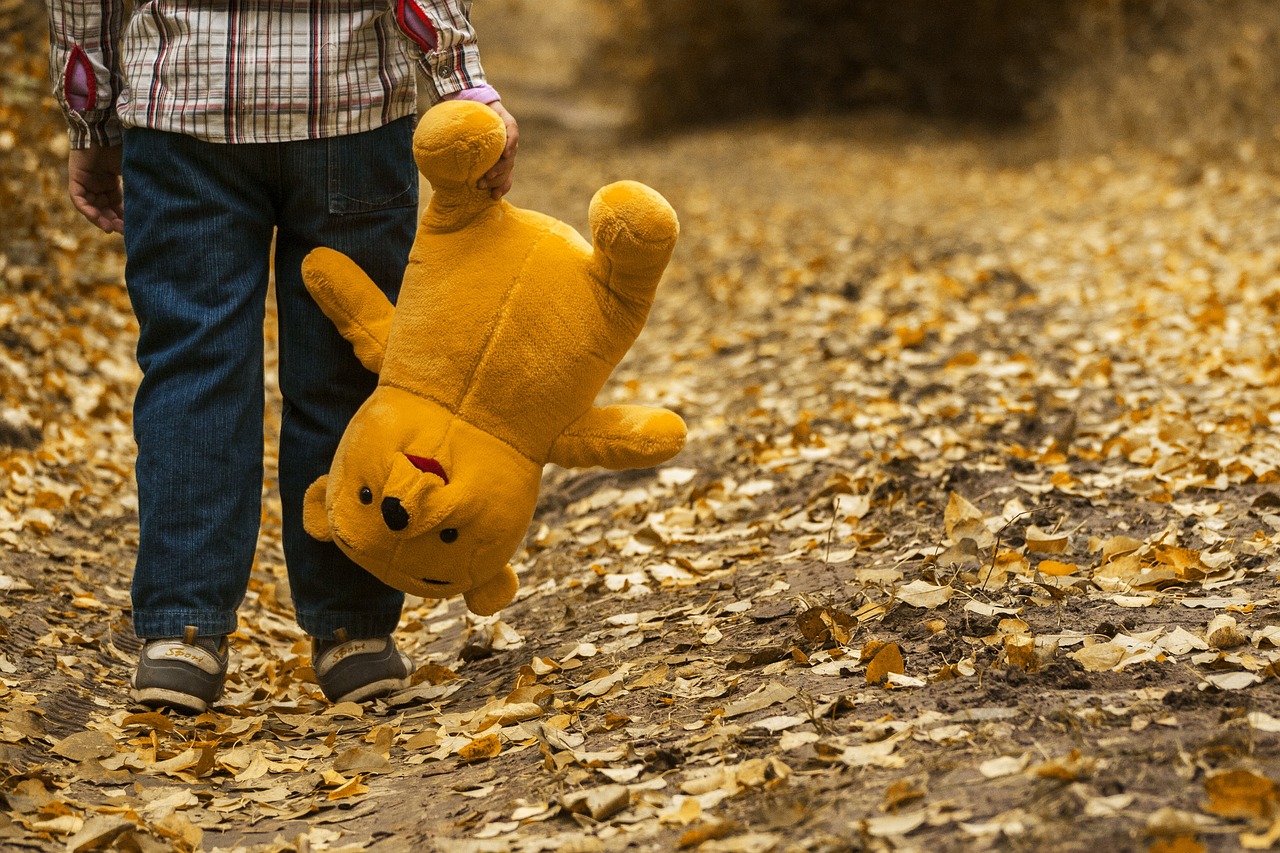
Finding Materials
Finding materials for recycled art projects can be an exciting adventure for kids and parents alike! Imagine embarking on a treasure hunt, where the treasures are everyday items that would otherwise end up in the trash. Not only does this activity spark creativity, but it also teaches children the importance of sustainability and resourcefulness. While rummaging through the house, kids can discover a variety of items that can be transformed into beautiful art pieces. Common materials include:
- Old newspapers and magazines
- Cardboard boxes
- Plastic bottles and caps
- Fabric scraps
- Egg cartons
- Buttons and beads
Encouraging kids to think outside the box can lead to unique creations. For example, an old cereal box can become a colorful puppet, while plastic bottle caps can be turned into a mosaic masterpiece. The key is to let their imagination take the lead. It’s also a great idea to involve them in community clean-up efforts, where they can gather discarded materials and learn about the environment. This not only provides them with a variety of resources but also instills a sense of responsibility towards nature.
When searching for materials, consider setting up a designated 'craft corner' at home. This can be a small box or a shelf where all collected items are stored, making it easy for kids to access them whenever inspiration strikes. Regularly updating this collection can keep the creative juices flowing and encourage kids to keep exploring. You might be surprised at how a simple cardboard tube can become a rocket ship or how a few bottle caps can turn into a vibrant caterpillar.
In summary, finding materials for recycled art projects is not just about collecting items; it's about fostering creativity, promoting sustainability, and encouraging kids to see potential in the ordinary. With a little imagination and a willingness to explore, the possibilities are endless!
Q: What types of materials can I use for recycled art projects?
A: You can use a wide range of materials, including old newspapers, cardboard, plastic bottles, fabric scraps, and any other items that can be repurposed creatively.
Q: How do I encourage my child to think creatively about materials?
A: Encourage them to look at everyday items differently. Ask questions like, "What else could this be?" or "How can we turn this into something fun?"
Q: Are there any safety precautions to consider?
A: Yes, always supervise young children when using scissors or glue. Make sure to use non-toxic materials and check for any small items that could be a choking hazard.
Q: Can recycled art projects be educational?
A: Absolutely! They can teach kids about sustainability, creativity, and even basic engineering concepts when constructing their projects.
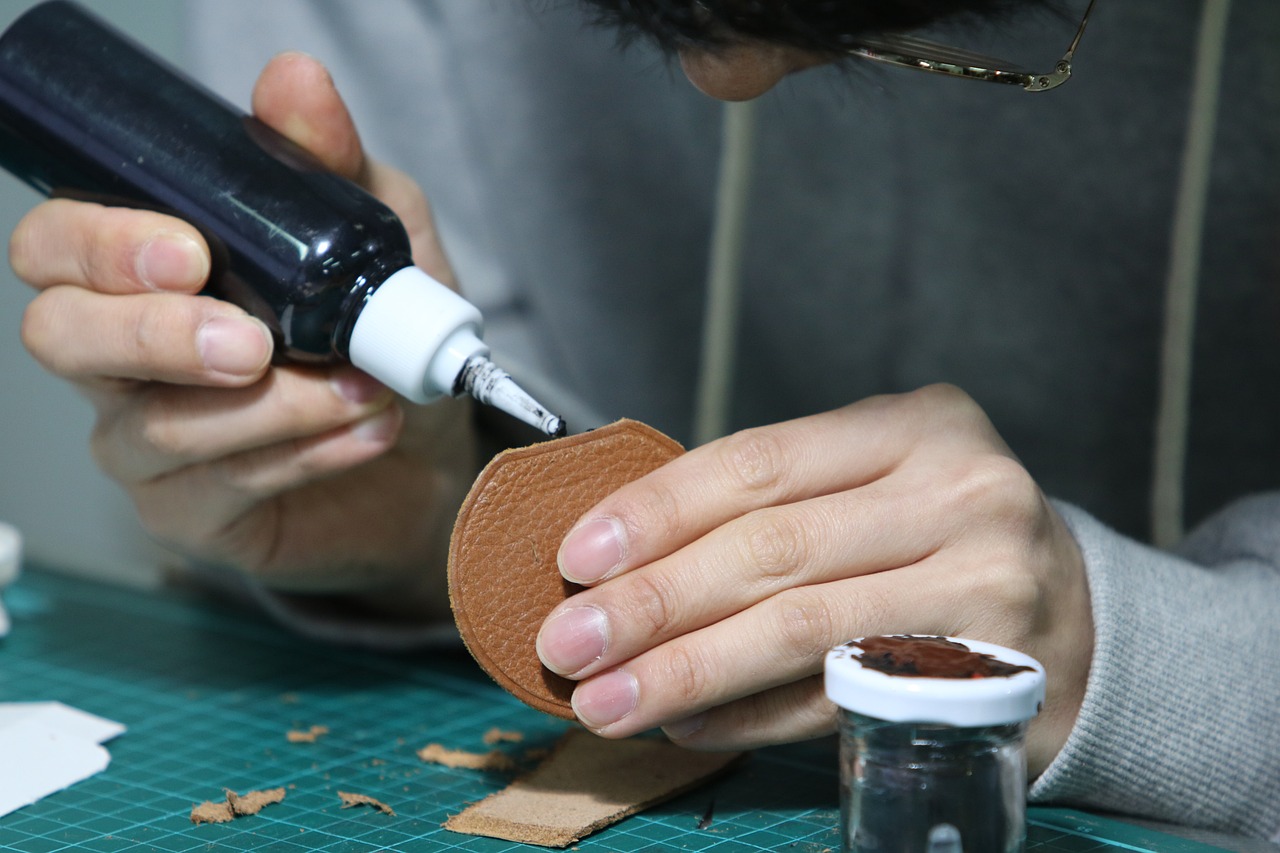
Creative Techniques
When it comes to recycled art projects, the sky's the limit! Kids can unleash their creativity by experimenting with various materials and techniques. The beauty of recycled art lies in its ability to transform everyday items into something extraordinary. For instance, an old cereal box can become a colorful treasure chest, or plastic bottle caps can turn into vibrant mosaics. The key is to encourage children to look at ordinary objects with a fresh perspective and imagine their potential.
One of the most exciting aspects of creative techniques in recycled art is the freedom to combine materials in unexpected ways. Kids can use items like:
- Cardboard
- Plastic containers
- Old magazines and newspapers
- Fabric scraps
- Egg cartons
By mixing and matching these materials, children can create unique sculptures, collages, and functional art pieces. For example, they can cut and layer magazine pages to create a vibrant collage or use egg cartons to make whimsical creatures. This process not only fosters creativity but also teaches kids about sustainability and the importance of reusing materials.
Additionally, incorporating different techniques can enhance the artistic process. Kids can try painting, gluing, weaving, and even sewing to bring their ideas to life. For instance, they might glue together pieces of cardboard to form a 3D structure or use fabric scraps to sew a colorful patchwork bag. Encouraging experimentation with textures and colors can lead to surprising outcomes, sparking joy and excitement in their artistic journey.
In conclusion, the world of recycled art is a playground for the imagination. By exploring creative techniques, children not only develop their artistic skills but also gain a deeper appreciation for the resources around them. So, gather those recyclables and let the crafting adventure begin!
Q: What types of materials can be used for recycled art projects?
A: You can use a variety of materials such as cardboard, plastic containers, old magazines, fabric scraps, and more. The more diverse the materials, the more creative the projects can be!
Q: How can I encourage my child to be more creative with recycled art?
A: Encourage your child to think outside the box! Ask them to brainstorm ideas before starting a project and highlight the importance of experimenting with different materials and techniques.
Q: Are recycled art projects suitable for all age groups?
A: Absolutely! Recycled art projects can be tailored to suit different age groups. Younger kids may need more guidance, while older children can take the lead and explore more complex techniques.
Q: How do recycled art projects promote sustainability?
A: By using materials that would otherwise be thrown away, kids learn the value of reusing and recycling. This not only reduces waste but also fosters a sense of responsibility towards the environment.
Seasonal Crafts
Seasonal crafts are an exciting way for kids to engage with the changing world around them. These projects not only allow children to express their creativity but also help them celebrate various holidays and the beauty of nature throughout the year. Imagine crafting a vibrant Halloween decoration one week and then creating a delicate spring-themed art piece the next! Each season brings a unique opportunity to explore different materials, colors, and themes.
For instance, during the fall, kids can gather colorful leaves to create stunning collages or use them to make leaf rubbings. In winter, they might enjoy making homemade ornaments to hang on the tree, adding a personal touch to their holiday decorations. Spring can inspire flower crowns or painted flower pots, while summer can be all about making colorful wind chimes to enjoy the gentle breezes. The possibilities are endless!
Here are some fun ideas for seasonal crafts:
- Autumn Crafts: Leaf art, pumpkin decorations, and acorn crafts.
- Winter Crafts: Snowflake cutouts, holiday ornaments, and gift wrapping decorations.
- Spring Crafts: Flower planting, Easter egg decorations, and butterfly crafts.
- Summer Crafts: Seashell art, tie-dye shirts, and nature-inspired collages.
Engaging in these crafts not only fosters creativity but also encourages kids to appreciate nature and the changing seasons. It can be a wonderful bonding experience for families as they work together on projects that celebrate the time of year. Plus, there’s something magical about seeing your child’s eyes light up as they create something beautiful with their own hands!
Creating holiday decorations can be especially fun! Kids can make their own ornaments, wreaths, and even garlands to adorn their homes during festive times. Imagine the joy of hanging a handmade ornament on the Christmas tree or displaying a colorful wreath on the front door. These decorations can become cherished keepsakes, reminding families of the special moments spent crafting together.
Seasonal nature crafts encourage kids to observe and appreciate the world around them. By creating art that reflects the beauty of each season, children can develop a deeper connection to nature. For example, they can gather wildflowers in spring to make pressed flower bookmarks or collect pinecones in winter to create adorable animal figures. These activities not only nurture creativity but also instill a sense of responsibility towards the environment.
Q: What materials do I need for seasonal crafts?
A: Most seasonal crafts can be made with simple materials like paper, glue, scissors, and natural items such as leaves and flowers. You can also incorporate recycled materials for a fun twist!
Q: How can I make seasonal crafts more educational?
A: You can incorporate lessons about the seasons, nature, and holidays. Discuss the significance of each holiday while crafting or explore the different types of leaves and flowers during nature crafts.
Q: Are seasonal crafts suitable for all age groups?
A: Absolutely! You can adapt the complexity of the craft to suit different age groups. Younger kids can focus on simple projects, while older children can take on more intricate designs.
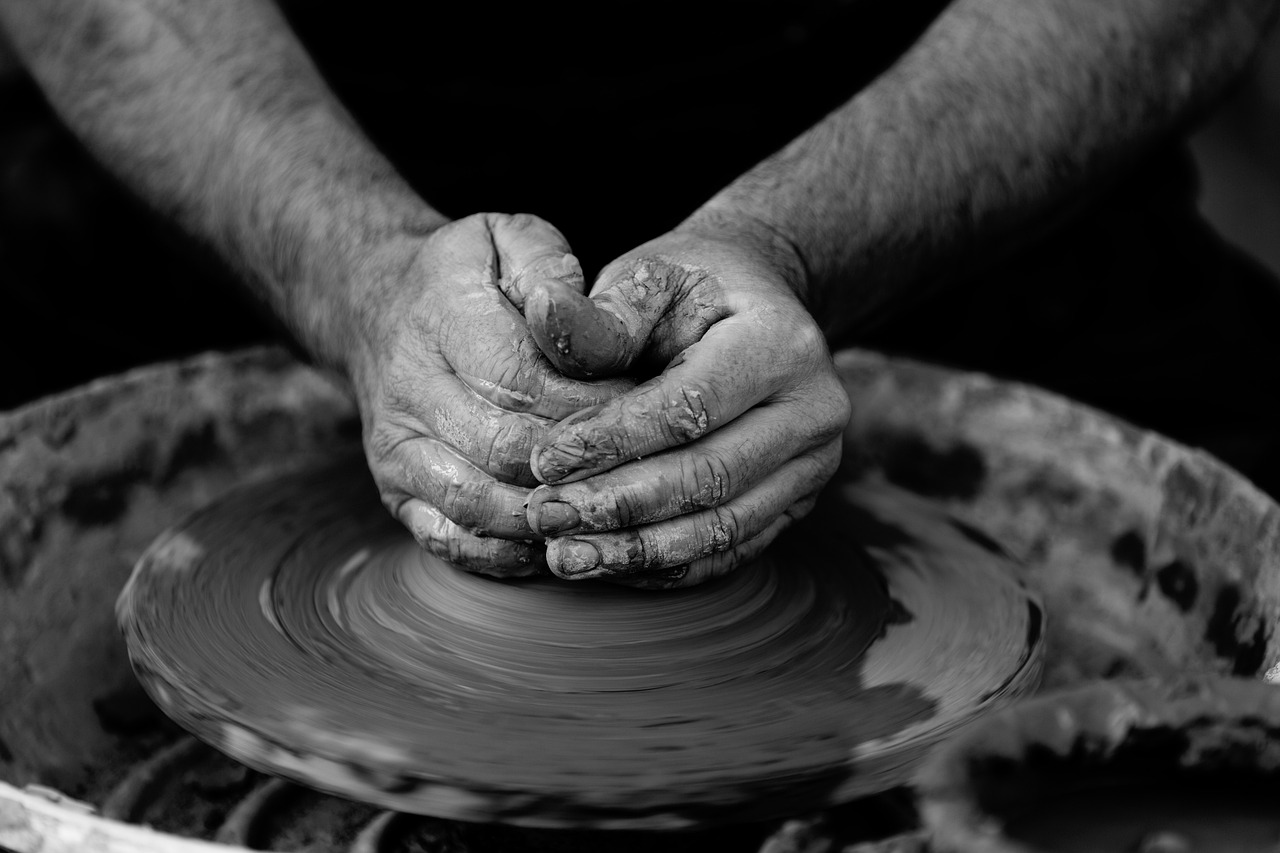
Holiday Decorations
Creating is not just a fun activity; it’s a wonderful way for kids to immerse themselves in the festive spirit. Whether it’s Christmas, Halloween, or any other holiday, children can unleash their creativity by crafting unique decorations that will add a personal touch to their home. Imagine the joy of hanging a handmade ornament on the Christmas tree or displaying a spooky, hand-painted pumpkin during Halloween. These projects not only foster creativity but also create lasting memories.
One of the best parts about making holiday decorations is the variety of materials that can be used. From recycled items like old cardboard boxes and fabric scraps to natural materials like pine cones and leaves, the options are endless. Kids can use paints, glitter, glue, and even their own drawings to bring their ideas to life. For instance, they can cut out festive shapes from colored paper and decorate them with stickers or markers. The process of crafting these decorations allows children to express their individuality and share their vision of the holidays.
Additionally, holiday decorations can serve as a fantastic bonding activity for families. Parents can join in on the fun, guiding their children through the crafting process while sharing stories and traditions associated with the holiday. This teamwork not only enhances the experience but also strengthens family ties. To make it even more special, families can set up a holiday crafting day each year, where they create new decorations together, building a collection that grows with each passing season. Here are some popular decoration ideas:
- Handmade Ornaments: Use clear plastic ornaments that can be filled with glitter, fake snow, or even small toys.
- Pine Cone Decor: Collect pine cones and paint them in festive colors or add glitter for a sparkling effect.
- Paper Chains: Create colorful paper chains by cutting strips of colored paper and gluing them together to hang around the house.
- Wreaths: Use a foam or cardboard base and decorate it with natural materials or craft supplies to create a beautiful wreath.
Incorporating these crafts into your holiday traditions not only makes the season brighter but also instills a sense of accomplishment in kids. They will take pride in seeing their creations displayed around the house, and each piece will remind them of the fun times spent crafting with family. So, gather your supplies, crank up some festive music, and get ready to create decorations that will warm your hearts and homes this holiday season!
Q: What age is appropriate for kids to start making holiday decorations?
A: Kids as young as 3 can start with simple crafts, while older children can handle more complex projects. Always consider the child's skill level and supervise when necessary.
Q: What materials do I need for making holiday decorations?
A: Common materials include paper, scissors, glue, paint, glitter, and natural items like leaves and pine cones. You can also use recycled materials like cardboard and fabric scraps.
Q: How can I involve my child in the decoration-making process?
A: Encourage your child to choose their favorite crafts and materials. Provide guidance and support, but let them lead the way in terms of creativity and design.
Q: Can these decorations be used year after year?
A: Absolutely! With proper care, many handmade decorations can be stored and reused each holiday season, adding a personal touch to your celebrations.
Seasonal Nature Crafts
Seasonal nature crafts are a fantastic way for kids to immerse themselves in the beauty of the changing seasons while sparking their creativity. These projects not only provide an opportunity to create beautiful art but also encourage children to observe their environment closely. Whether it's collecting vibrant leaves in autumn or crafting snowflakes in winter, each season offers unique materials and themes for crafting. By engaging in these activities, children can develop a deeper appreciation for nature and its cycles.
For instance, during the spring, kids can gather colorful flowers and foliage to create stunning flower crowns or nature-inspired collages. In the summer, they might collect seashells and sand to make beach-themed art. Autumn brings a bounty of leaves in various shades, perfect for leaf rubbings or wreaths, while winter invites children to use pinecones and twigs for festive decorations. Each project can be a wonderful way to celebrate the season while learning about the natural world.
Here are some engaging ideas for seasonal nature crafts:
- Spring: Create a flower collage using petals and leaves collected from the garden.
- Summer: Make a sun catcher using pressed flowers and clear contact paper.
- Autumn: Craft a leaf garland by stringing together colorful leaves.
- Winter: Build a bird feeder using pinecones, peanut butter, and birdseed.
These crafts not only enhance fine motor skills but also provide a platform for kids to express their thoughts and feelings about the world around them. Plus, they can be a fun family bonding experience! Parents can join in, helping to guide their children while sharing stories about the seasons and nature. It's a beautiful way to connect, learn, and create lasting memories together.
As kids work on their seasonal crafts, they can also explore themes related to each season. For example, they can learn about the importance of recycling during autumn by using fallen leaves for their projects or understand the significance of spring blooms in the ecosystem. This kind of integration of education and creativity can make crafting an enriching experience.
Q: What materials do we need for seasonal nature crafts?
A: You can use a variety of natural materials such as leaves, flowers, twigs, and stones. Additionally, basic craft supplies like glue, scissors, and paper will be helpful.
Q: How can I ensure that the crafts are safe for my kids?
A: Always supervise your children during craft activities, especially when using scissors or small items. Use non-toxic materials and ensure that any natural items collected are safe for handling.
Q: Can we do these crafts indoors?
A: Absolutely! While many nature crafts are best done outdoors, you can bring collected items inside to create art. Just make sure to have a designated crafting area to keep things tidy!
Simple Sewing Projects
Simple sewing projects are a fantastic way for kids to dip their toes into the world of textiles and crafting. Not only do these projects help develop fine motor skills, but they also ignite creativity and provide a sense of accomplishment. Imagine the joy on a child's face when they create something with their own hands! From fabric bookmarks to small bags, the possibilities are endless. Each project can be tailored to suit different skill levels and interests, making sewing accessible and fun for everyone.
One of the best things about simple sewing projects is that they often require minimal materials. A few fabric scraps, a needle, and some thread can go a long way! For beginners, starting with basic stitches is essential. Kids can learn to master techniques like the running stitch, backstitch, and whip stitch. These stitches form the foundation for more complex projects down the line. Not only will they be sewing, but they'll also be building confidence as they see their skills improve with each new project.
When it comes to project ideas, the options are practically limitless. Here are a few fun suggestions to get the creative juices flowing:
- Fabric Bookmarks: Simple to make and perfect for encouraging reading!
- Small Drawstring Bags: Great for storing treasures or as gift bags.
- Pillows: Kids can create small decorative pillows to personalize their space.
- Stuffed Animals: A bit more challenging, but incredibly rewarding!
As kids embark on these sewing adventures, it’s important to emphasize the process over the final product. Encourage them to express their unique style through fabric choices and embellishments. Whether they opt for bright colors or soft pastels, the end result should reflect their personality. Plus, sewing together can be a wonderful bonding experience for families. Parents or guardians can join in the fun, guiding and encouraging their little ones while sharing stories and laughter.
To wrap up a sewing session, kids can showcase their creations. Why not organize a mini fashion show or a "show and tell" at home? This not only boosts their confidence but also inspires them to take on more ambitious projects in the future. As they continue to explore the world of sewing, they’ll build valuable skills that will serve them well throughout their lives.
Q: What age is appropriate for kids to start sewing?
A: Kids can start sewing as early as 5 or 6 years old, depending on their interest and ability to follow instructions.
Q: What materials do I need to get started?
A: Basic materials include fabric, thread, a needle, scissors, and pins. You can also add a sewing machine for more advanced projects.
Q: Are there any safety tips to consider?
A: Always supervise young children while sewing, especially when using sharp tools like needles and scissors. Teach them to handle materials carefully and to ask for help when needed.
Q: How can I encourage my child to keep sewing?
A: Celebrate their successes, display their creations, and introduce them to new projects that match their interests. You can also explore sewing classes or online tutorials together!
Basic Stitches
When diving into the world of sewing, understanding is crucial for any young crafter. These fundamental techniques serve as the building blocks for more complex projects, allowing kids to express their creativity while developing fine motor skills. Imagine stitching as a dance; each stitch is a step that brings your creation to life. Whether it’s a simple straight stitch or a more intricate zigzag, mastering these techniques will empower kids to take on a variety of sewing projects with confidence.
To get started, here are a few essential stitches that every beginner should learn:
- Straight Stitch: This is the most basic stitch, perfect for sewing seams or hems. It’s as straightforward as it sounds—just a straight line of stitches!
- Zigzag Stitch: This stitch is versatile and can be used for finishing edges to prevent fraying. Think of it as a little wave, adding flair to your fabric!
- Backstitch: Great for creating strong seams, the backstitch allows for a sturdy finish. It’s like reinforcing your steps in that dance, ensuring you don’t trip!
- Running Stitch: This simple stitch is often used for gathering fabric or adding decorative touches. It’s a fun way to create patterns and designs in your sewing.
Once kids are comfortable with these stitches, they can experiment by combining them in their projects. For example, using a straight stitch for the main seams and a zigzag stitch for the edges can create a polished look. Kids can also personalize their creations by incorporating decorative stitches, which adds a unique touch to their work.
To help visualize these stitches, here’s a simple table outlining their uses:
| Stitch Type | Use |
|---|---|
| Straight Stitch | Basic seams and hems |
| Zigzag Stitch | Finishing edges |
| Backstitch | Strong seams |
| Running Stitch | Gathering and decoration |
In conclusion, learning these not only equips kids with valuable sewing skills but also encourages them to explore their creativity. As they practice and improve, they'll find joy in crafting unique items that reflect their personality. So, gather those materials, thread the needle, and let the sewing adventure begin!
- What age is appropriate for kids to start sewing? Generally, children aged 6 and up can start learning basic sewing skills with supervision.
- What materials do I need for beginner sewing projects? Basic materials include fabric, sewing needles, thread, scissors, and a sewing machine (optional).
- How can I encourage my child to enjoy sewing? Make it fun by choosing projects that interest them, and celebrate their creations, no matter how small!
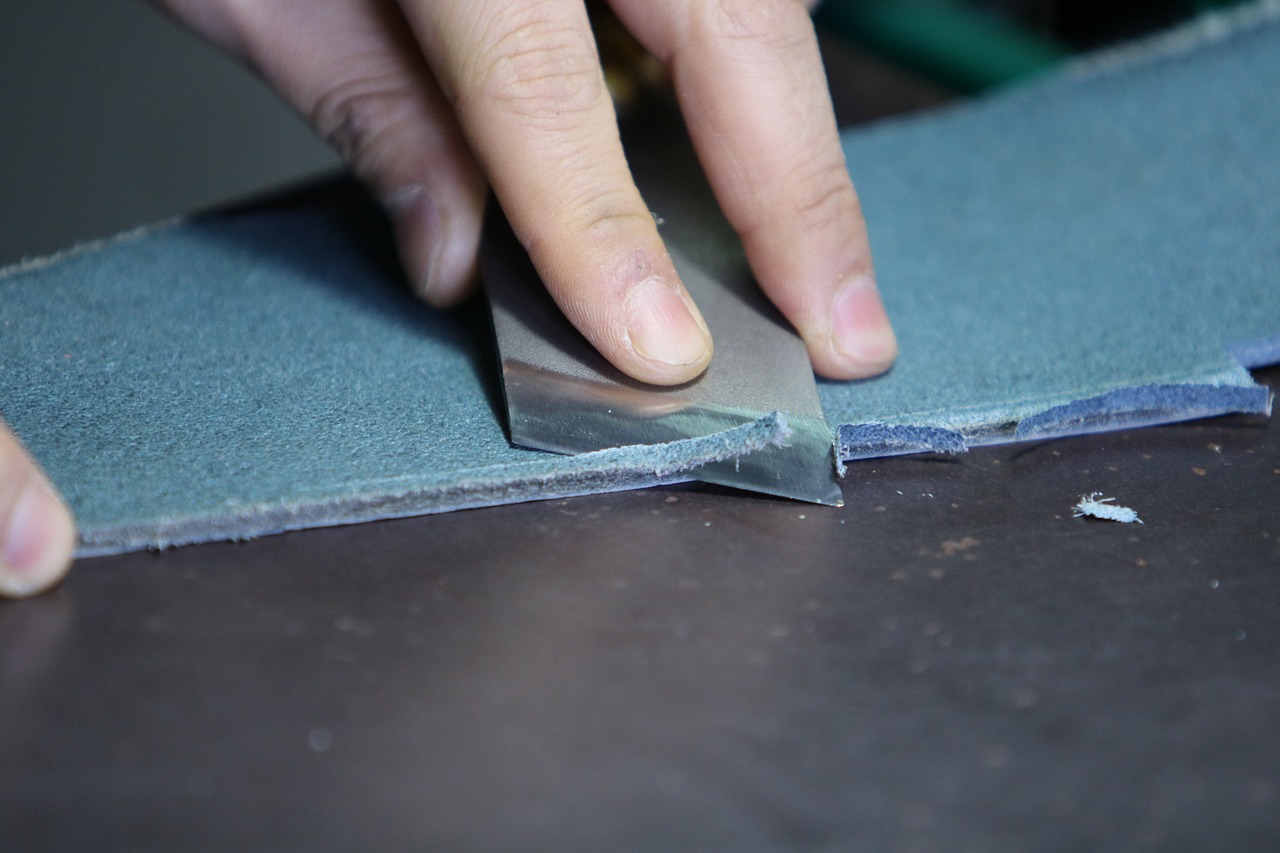
Project Ideas
When it comes to sewing projects for kids, the possibilities are as vast as their imaginations! Engaging in simple sewing tasks not only introduces children to the world of textiles but also helps them develop fine motor skills and boosts their confidence. Here are some fun and accessible project ideas that kids can tackle:
One of the easiest projects is creating fabric bookmarks. Kids can choose their favorite fabrics, cut them into rectangles, and then sew the edges to prevent fraying. They can even personalize their bookmarks by adding embellishments like buttons or fabric paint. This project is not only practical but also allows kids to express their unique styles.
Another delightful idea is making small stuffed animals. Children can cut out shapes from fabric, sew them together, and stuff them with cotton or fabric scraps to create their very own plush toys. This project encourages creativity as kids can design their stuffed animals in any way they like. They can use a variety of fabrics, patterns, and even add features like eyes and noses using buttons or embroidery.
For those looking for a bit more challenge, consider sewing simple bags. Kids can create small pouches or tote bags that can be used for carrying their treasures. By sewing a few straight lines, they can learn about the structure of bags while having fun choosing fabrics and colors. This project can also serve as a great introduction to the concept of sewing in a straight line, which is a fundamental skill for more complex sewing tasks.
To keep things interesting, kids can even host a sewing party with friends! They can all work on their projects together, sharing ideas and techniques. This not only makes the process more enjoyable but also fosters teamwork and collaboration. Imagine the joy of showing off their creations to one another!
Ultimately, the key to successful sewing projects lies in choosing the right materials and ensuring that the projects are age-appropriate. Here’s a quick table summarizing some project ideas along with the required materials:
| Project Idea | Materials Needed |
|---|---|
| Fabric Bookmarks | Fabric, scissors, thread, needle, embellishments (optional) |
| Small Stuffed Animals | Fabric, stuffing, thread, needle, buttons (for features) |
| Simple Bags | Fabric, scissors, thread, needle, optional straps |
These projects are not only fun but also perfect for sparking a lifelong interest in sewing and crafting. So, gather those materials and let the creativity flow!
Q: What age is appropriate for kids to start sewing?
A: Kids as young as 5-6 years can start with simple hand-sewing projects, while older children can use sewing machines with adult supervision.
Q: What materials are best for beginner sewing projects?
A: Lightweight cotton fabrics are great for beginners, along with basic sewing supplies like scissors, needles, and thread.
Q: How can I make sewing more engaging for my child?
A: Encourage creativity by letting them choose their fabrics and designs. Also, consider sewing together as a bonding activity!

Creative Scrapbooking
Creative scrapbooking is not just a hobby; it's a wonderful way for kids to preserve their most cherished memories while expressing their artistic flair. Imagine a blank canvas where every photo, drawing, or decorative element tells a story! Kids can dive into this colorful world, combining various materials to create personalized scrapbook pages that reflect their unique experiences and emotions. The beauty of scrapbooking lies in its versatility; there's no right or wrong way to do it! Whether it's a birthday party, a family vacation, or a simple day at the park, every moment can be captured and celebrated through this craft.
Gathering supplies for scrapbooking can be an exciting adventure in itself. Kids can raid their craft drawers or even go on a scavenger hunt around the house to find:
- Old photographs
- Colorful stickers
- Decorative papers
- Markers and crayons
- Glue and scissors
This treasure hunt not only fuels their creativity but also allows them to rediscover forgotten memories tucked away in drawers. Once they have their materials ready, the real fun begins! Kids can layout their pages in any way they desire, mixing and matching colors and textures to create visually appealing designs. They can even add captions or little notes to give context to their photos, making the pages more meaningful.
Understanding layout techniques is crucial for effective scrapbooking. Kids can learn how to arrange elements creatively to create visually appealing pages that capture their memories. Here are a few tips to get them started:
| Layout Technique | Description |
|---|---|
| Grid Layout | Organizing photos and elements in a structured grid pattern for a clean look. |
| Layering | Adding depth by overlapping photos and papers to create a 3D effect. |
| Asymmetrical Design | Creating a dynamic layout by placing elements off-center for visual interest. |
By experimenting with these techniques, kids can develop their own style and learn valuable skills in design and organization. The best part is that scrapbooking is an ongoing project; they can keep adding to their albums as new memories are made. This not only fosters creativity but also encourages them to cherish and reflect on their experiences. So, gather those supplies, spark your imagination, and let the creative journey begin!
1. What age is appropriate for kids to start scrapbooking?
Most kids can start scrapbooking around the age of 5, with adult supervision. As they grow older, they can take on more complex projects independently.
2. Do I need to buy special materials for scrapbooking?
While there are specialized scrapbooking materials available, kids can use everyday items like magazines, old photos, and craft supplies they already have at home.
3. How can I help my child with their scrapbook?
You can assist by providing guidance on layout techniques, helping them gather materials, or simply being there to share stories as they create!
4. Is scrapbooking an expensive hobby?
Scrapbooking can be as budget-friendly or as extravagant as you want. Using recycled materials and items from around the house can make it very affordable.
Gathering Supplies
Gathering supplies for scrapbooking is not just a task; it's an adventure that ignites creativity and excitement! Kids can dive into their treasure troves of memories and craft materials, transforming a simple activity into a delightful journey. Start by rummaging through old photo albums or digital photo collections to select images that tell a story. These could be snapshots from family vacations, birthday parties, or even candid moments that make everyone smile.
Next, let’s talk about decorative elements! Kids can explore their surroundings to find materials that will add flair to their scrapbook pages. This might include:
- Stickers that reflect their personality or interests.
- Colorful papers from old greeting cards or wrapping paper.
- Natural elements like dried flowers or leaves collected from a recent nature walk.
Encourage kids to think outside the box! They can even use everyday items like ticket stubs from movies, pressed flowers, or even snippets of their favorite songs printed out. All of these elements can add a personal touch to their scrapbook, making it a true reflection of their experiences.
Additionally, it's essential to have the right tools on hand. Here’s a quick table of must-have supplies that can help kids get started on their scrapbooking adventure:
| Supply | Purpose |
|---|---|
| Photo Album | To store and organize photos. |
| Adhesive (Glue or Tape) | To secure photos and decorations on the pages. |
| Scissors | For cutting photos and decorative materials. |
| Markers or Pens | To add captions and embellishments. |
| Decorative Papers | To create colorful backgrounds and borders. |
In the end, gathering supplies for scrapbooking is all about letting imagination run wild! The more diverse the materials, the more unique and personalized the scrapbook will be. So, encourage kids to gather items that resonate with them, and watch as they create a beautiful collection of memories that they'll cherish for years to come!
Q: What age is appropriate for kids to start scrapbooking?
A: Kids as young as 5 can start scrapbooking with supervision. As they grow older, they can take on more complex projects independently.
Q: Do I need expensive materials for scrapbooking?
A: Not at all! Scrapbooking can be done with simple materials found at home. The focus should be on creativity rather than cost.
Q: How can I help my child get started with scrapbooking?
A: Start by gathering supplies together, and then encourage them to choose a theme or story they want to tell. Offer guidance but let their creativity shine!
Layout Techniques
When it comes to scrapbooking, mastering layout techniques is essential for creating visually appealing pages that not only tell a story but also capture the viewer's attention. The layout is like the foundation of a house; without it, everything else can fall apart. Kids can experiment with various arrangements of photos, text, and decorative elements to find what works best for their unique style. One effective approach is to start with a central focal point, such as a large photo or a bold title, and build the rest of the page around it. This technique draws the eye and creates a natural flow.
Another popular method is the grid layout. By dividing the page into sections, children can organize their materials in a clean and structured way. This not only helps in maintaining balance but also allows for creativity within each section. For instance, they could have one area dedicated to photos, another for journaling, and yet another for embellishments. This can be particularly effective if they’re working with a theme, as it allows for a cohesive look. Additionally, using different shapes and sizes for photos can add an exciting dynamic to the layout.
To further enhance their scrapbooking skills, kids can explore the rule of thirds. This technique involves dividing the page into thirds both horizontally and vertically, creating a grid of nine sections. Placing key elements along these lines or at their intersections can lead to a more balanced and interesting composition. It's like painting a picture; the placement of each element matters. Encourage kids to think about how their eyes move across the page and to arrange elements in a way that feels natural and engaging.
Lastly, don’t forget about the power of negative space. This is the empty space around the main elements of the scrapbook page. It can provide breathing room and help to emphasize the focal points. Instead of crowding the page with decorations, sometimes less is more. A well-placed photo with ample negative space can make a stronger impact than a cluttered layout. Encourage kids to be mindful of this space as they arrange their materials, allowing their creativity to shine without overwhelming the viewer.
By experimenting with these layout techniques, kids can develop their own unique scrapbooking style while also gaining confidence in their artistic abilities. The process of creating scrapbook pages can be incredibly rewarding, as it not only preserves memories but also allows for personal expression. So, grab those photos, stickers, and decorative papers, and let the creative journey begin!
Q1: What supplies do I need for scrapbooking?
A1: Basic supplies include scrapbook paper, scissors, glue, stickers, and photos. You can also use decorative items like washi tape and stamps to enhance your pages.
Q2: How can I learn more about scrapbooking techniques?
A2: There are many resources available online, including tutorials, blogs, and videos. You can also join local crafting groups or workshops to learn from others.
Q3: Is scrapbooking suitable for all ages?
A3: Absolutely! Scrapbooking can be enjoyed by children and adults alike. It's a great way for families to bond while preserving memories together.
Q4: Can I use digital tools for scrapbooking?
A4: Yes! Digital scrapbooking is a popular option that allows you to create pages using software or apps. You can print your designs or keep them digital.
Fun with Clay
Fun with clay offers kids an exciting opportunity to unleash their creativity and develop their fine motor skills. Imagine the joy on their faces as they mold, sculpt, and create their very own masterpieces! Clay is not just a medium for art; it’s a gateway to a world of imagination where the only limit is their creativity. Whether it's a simple shape or an intricate figure, working with clay allows children to express themselves in a tactile and engaging way.
One of the best things about clay is its versatility. Kids can create a variety of items, from cute animals to decorative bowls, and even fantastical creatures that exist only in their minds. This hands-on activity not only enhances their artistic skills but also promotes problem-solving as they figure out how to bring their ideas to life. As they manipulate the clay, they are also developing crucial hand-eye coordination and dexterity.
To get started with clay, here are some basic sculpting techniques that kids can learn:
- Pinching: This technique involves using fingers to pinch and shape the clay, perfect for creating small bowls or cups.
- Rolling: Kids can roll the clay into balls or snakes, which can be used for various projects like snakes or beads.
- Coiling: By rolling long strips of clay and stacking them, children can make pots and other rounded shapes.
- Slabbing: This involves flattening the clay into slabs, which can be used to create structures like houses or tiles.
Once the kids have mastered these techniques, they can start experimenting with their own ideas. They might create a whimsical garden gnome or a fierce dragon, the possibilities are endless! Encouraging them to think outside the box will not only make the crafting session more enjoyable but also boost their confidence as they see their creations come to life.
After sculpting, the fun doesn’t end there! Kids can add a splash of color and personality to their clay creations. Painting is a fantastic way to personalize their sculptures. They can use acrylic paints to give their pieces vibrant hues, or even try techniques like sponging or splattering for a more artistic effect. Adding finishing touches like glitter or sequins can also make their creations stand out and shine!
In addition to being a fun activity, working with clay also provides a wonderful opportunity for bonding. Parents and children can sit together, share ideas, and even collaborate on projects. This shared experience not only strengthens their relationship but also fosters an environment of creativity and learning. Plus, it’s a great way to disconnect from screens and engage in some good old-fashioned hands-on fun!
In conclusion, clay is more than just a craft material; it’s a tool for creativity, learning, and connection. So, gather some clay, let your imagination run wild, and enjoy a delightful crafting session that will leave lasting memories!
Q: What type of clay is best for kids?
A: Air-dry clay is a great option for kids as it doesn't require baking and is easy to work with. Modeling clay is also good for temporary projects, but it won't harden.
Q: How can I ensure my child's clay creations last?
A: If using air-dry clay, let the pieces dry completely before painting. For baked clay, follow the instructions for baking times and temperatures to ensure durability.
Q: Can clay crafting be messy?
A: Yes, it can be a bit messy! It's a good idea to cover the workspace with newspapers or a plastic tablecloth to make cleanup easier.
Q: What age is appropriate for kids to start working with clay?
A: Children as young as 3 can start with playdough or soft clay, while older kids (around 6 and up) can handle more complex clay projects.

Basic Sculpting Techniques
Sculpting with clay is not just about molding a lump into a shape; it’s about understanding the artistry behind each creation. When kids dive into the world of clay, they unlock a treasure trove of imagination and creativity. To get started, it's essential to familiarize them with some basic sculpting techniques that will set the foundation for their artistic journey. One of the first techniques is the pinch method, where children can use their fingers to pinch and shape the clay into forms. This method is incredibly intuitive and allows for immediate feedback as they shape their creations. Another technique is the coil method, which involves rolling out long, thin pieces of clay and stacking them to build structures. This technique not only enhances their fine motor skills but also encourages them to think about how to create stable forms.
As they progress, kids can experiment with the slab technique, where they roll out flat pieces of clay to create more geometric shapes or even functional items like bowls and plates. This technique teaches them about dimensions and how to manipulate the material to achieve their desired shape. Additionally, the scoring and slipping method is crucial for joining different pieces of clay. By scratching the surfaces of the clay that they want to connect and applying a little water (the slip), they can create a stronger bond. This technique not only enhances their understanding of how to create intricate designs but also fosters a sense of accomplishment when they see their pieces come together.
To help visualize these techniques, here’s a simple table outlining each method and its description:
| Technique | Description |
|---|---|
| Pinch Method | Using fingers to pinch and shape clay into desired forms. |
| Coil Method | Rolling out long pieces of clay and stacking them to build structures. |
| Slab Technique | Rolling out flat pieces of clay to create geometric shapes. |
| Scoring and Slipping | Scratching surfaces and applying water to bond pieces together. |
Encouraging kids to practice these techniques can lead to a deeper understanding of clay's properties and how to manipulate them effectively. As they become more comfortable with these basic methods, they can begin to explore their unique styles and ideas, allowing their creativity to truly shine. Remember, the key to successful sculpting is patience and practice; every little creation is a step towards mastering this delightful art form!
- What type of clay is best for beginners? Air-dry clay or polymer clay is ideal for beginners as they are easy to work with and don’t require special tools.
- How can I ensure my clay sculptures last? Make sure to let the sculptures dry completely and consider sealing them with a clear varnish for added protection.
- Can clay be reused? Yes, if the clay hasn’t dried out, it can be kneaded and reshaped for new projects.
- What tools do I need for basic sculpting? Basic sculpting tools include a rolling pin, sculpting knife, and various shaping tools. However, many items from the kitchen can also be used!
Painting and Finishing Touches
Once your little ones have shaped their clay creations, the next exciting step is the . This is where their imagination can truly run wild! Painting not only adds color but also personality to their sculptures. It's like giving life to their creations, making them feel proud and accomplished. The process can be as simple or as intricate as they desire, depending on their age and skill level.
To begin, gather a variety of paints—acrylics work wonderfully for clay projects because they adhere well and dry quickly. You might want to consider a selection of colors to inspire creativity. Here’s a quick tip: mixing colors can lead to unexpected and beautiful results! Encourage kids to experiment with different shades and techniques. For instance, they can use sponges for a textured look or brushes for finer details.
After the painting is complete, it’s time for the finishing touches. This could include adding a glossy varnish to give their sculptures a shiny finish or even sprinkling some glitter for a magical effect. Here are a few ideas for finishing touches:
- Sealants: Applying a clear sealant can protect the painted surface and enhance the colors.
- Textures: Kids can use tools to add textures to their clay before painting, creating a more dynamic look.
- Accessories: Adding small beads or fabric pieces can give their sculptures a unique flair.
Lastly, remind the kids to let their creations dry completely before displaying them. This patience is key, as a rushed job might ruin all their hard work. Once dry, they can find a special spot in the house to showcase their art, or even give them as heartfelt gifts to family and friends. The joy of seeing their own artwork proudly displayed is a reward in itself!
| Question | Answer |
|---|---|
| What type of paint is best for clay projects? | Acrylic paint is highly recommended for its adherence and quick drying time. |
| Can I use regular school glue for sealing? | While regular glue can work, it’s better to use a clear sealant specifically designed for crafts to ensure durability. |
| How long should I let my clay creations dry? | It's best to let them dry for at least 24 hours to ensure they are fully set and ready for painting. |
| Can I mix different types of clay? | It’s generally not recommended as different clays may have varying drying times and properties. |
Frequently Asked Questions
- What materials do I need for paper plate animals?
To create paper plate animals, you will need paper plates, paint, markers, glue, scissors, and any additional craft supplies like googly eyes or feathers to bring your creations to life!
- How can I make friendship bracelets?
Making friendship bracelets is easy! Start by choosing colorful threads or beads, learn some basic knot techniques, and then get creative with patterns and colors. There are plenty of online tutorials to guide you!
- What can I use for nature collages?
You can use leaves, flowers, twigs, and even small stones to create stunning nature collages. Just go outside, collect what you find, and then arrange them on paper or cardboard to create your masterpiece!
- Is homemade playdough safe for kids?
Absolutely! Homemade playdough is safe for kids and can be made with common kitchen ingredients like flour, salt, and water. Just make sure to supervise younger children to avoid any accidental ingestion!
- How do I get started with rock painting?
To start rock painting, find some smooth rocks, gather your paints, brushes, and any design ideas you have in mind. Then, let your creativity flow as you paint your rocks with fun designs!
- What are some ideas for recycled art projects?
You can use items like old newspapers, cardboard boxes, plastic bottles, and even bottle caps to create unique art pieces. The possibilities are endless, and you’ll be amazed at what you can come up with!
- What types of seasonal crafts can we do?
Seasonal crafts can include making decorations for holidays like Halloween or Christmas, or creating art that reflects the changes in nature during spring and autumn. It's a fun way to celebrate the seasons!
- What are some beginner sewing projects for kids?
Beginner sewing projects can include making fabric bookmarks, small bags, or simple stuffed animals. These projects help kids learn basic stitches while creating something fun and functional!
- How do I start scrapbooking with kids?
Start scrapbooking by gathering photos, stickers, and decorative papers. Encourage kids to arrange these elements on pages, telling their stories through creative layouts. It’s a great way to preserve memories!
- What types of clay can we use for sculpting?
You can use air-dry clay, polymer clay, or even homemade clay for sculpting. Each type has its own unique properties, so choose one that suits your project and let your imagination run wild!


