Unleash Your Creativity with Wood Sculpting
Wood sculpting is more than just a craft; it’s a journey into the heart of creativity. Imagine transforming a simple block of wood into a stunning piece of art that tells a story. This timeless craft invites you to explore the depths of your imagination while honing your technical skills. Whether you’re a complete novice or someone looking to refine your abilities, wood sculpting offers a unique way to express yourself. The scent of freshly cut wood, the sound of chisels at work, and the sight of your vision taking shape are all part of this exhilarating experience.
In this article, we’ll dive into the world of wood sculpting, exploring essential tools, techniques, and sources of inspiration that will help you embark on your sculpting journey. Have you ever looked at a piece of wood and wondered what it could become? That’s the magic of sculpting! With the right guidance and a sprinkle of creativity, you can unleash your inner artist and create breathtaking sculptures that resonate with those who see them.
As we navigate through the different aspects of wood sculpting, you’ll learn about the various types of wood available, each with its own unique characteristics. Selecting the right wood can be the difference between a challenging project and a smooth sailing experience. We’ll also discuss the tools you’ll need—both hand and power tools—along with tips on how to maintain them effectively. After all, a well-maintained tool is like a trusted friend in your creative journey.
Moreover, we’ll cover fundamental techniques that every beginner should master. Carving may seem intimidating at first, but with practice and patience, you’ll find yourself becoming more comfortable with the process. And let’s not forget about finishing techniques, which can elevate your work from good to extraordinary. Imagine the satisfaction of seeing your sculpture shine and come to life with the right finish!
Lastly, inspiration is everywhere, but sometimes it takes a little digging to find it. We’ll explore how nature, art history, and personal experiences can fuel your creativity and help you develop unique ideas for your projects. So, are you ready to embark on this exciting adventure? Grab your tools, let your imagination run wild, and let’s sculpt something amazing together!
- What type of wood is best for beginners? Softwoods like pine or cedar are great for beginners due to their ease of carving.
- Do I need power tools to start wood sculpting? No, hand tools are sufficient for beginners, but power tools can speed up the process.
- How do I maintain my wood sculpting tools? Regular cleaning, sharpening, and proper storage are key to keeping your tools in top condition.
- Where can I find inspiration for my sculptures? Nature, art history, and personal experiences are excellent sources of inspiration for wood sculpting.
Understanding Wood Types
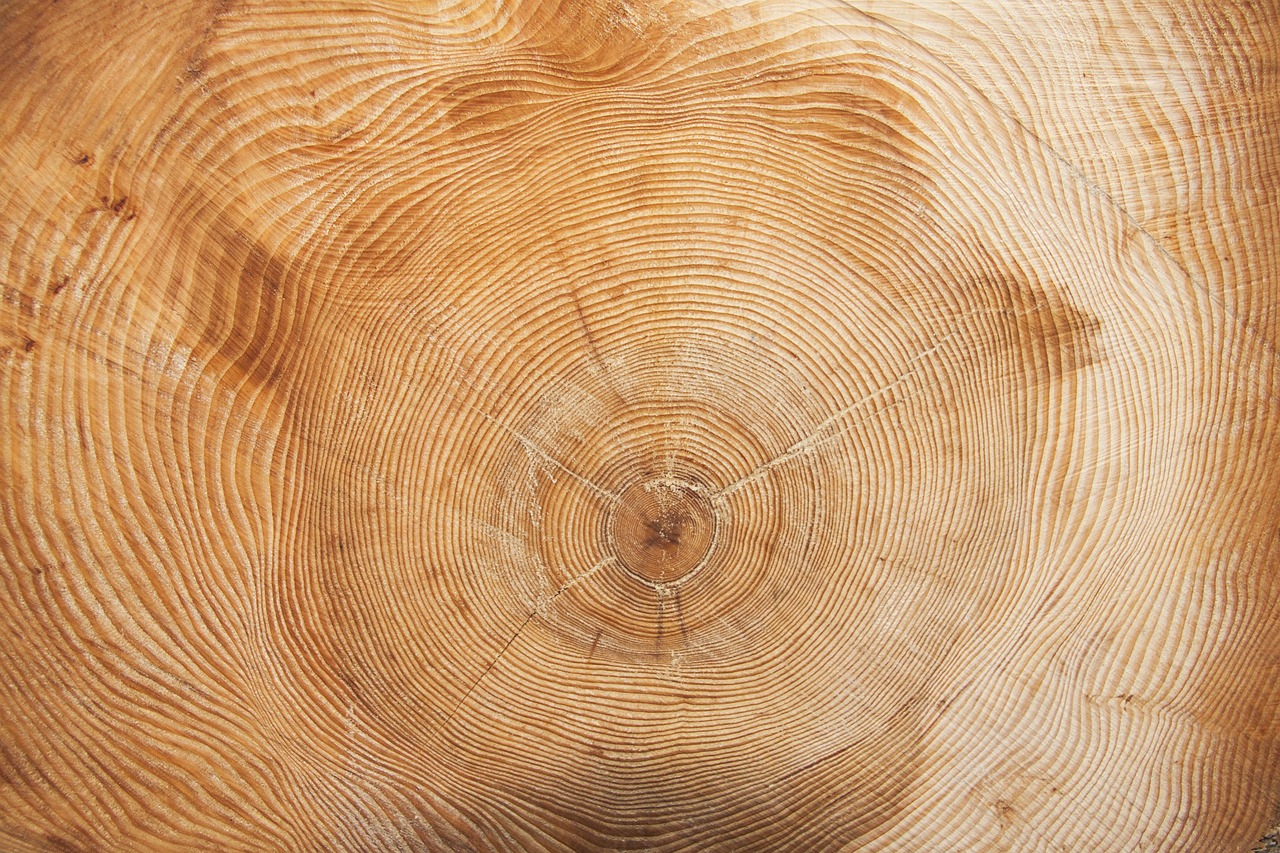
When it comes to wood sculpting, understanding the different types of wood is crucial for creating stunning pieces that resonate with both the artist and the audience. Each type of wood has its own unique characteristics, influencing not only the sculpting process but also the final appearance and durability of your work. For instance, some woods are softer and easier to carve, while others are denser and require more effort. This diversity can be likened to choosing the right paintbrush for a canvas; the type of wood you select can dramatically change your creative experience.
Here are some popular woods that sculptors often use, along with their properties:
| Wood Type | Characteristics | Best Uses |
|---|---|---|
| Basswood | Soft, lightweight, and easy to carve | Beginner projects, intricate details |
| Mahogany | Medium density, rich color, and fine grain | Decorative sculptures, furniture |
| Walnut | Hard, durable, with a beautiful dark hue | High-end pieces, functional art |
| Pine | Soft, affordable, and readily available | Large sculptures, practice pieces |
Choosing the right wood for your project can feel overwhelming, especially with so many options available. A good starting point is to consider the level of detail you wish to achieve. If you’re a beginner, basswood is often recommended due to its soft texture and ease of carving. For more advanced sculptors, mahogany and walnut offer rich colors and durability, making them perfect for pieces that you want to last.
Additionally, the moisture content of the wood plays a significant role in sculpting. Freshly cut wood, known as "green wood," can be easier to carve but may warp or crack as it dries. On the other hand, seasoned wood, which has been dried for a period, is more stable but can be more challenging to carve. It's important to weigh these factors when selecting your material to ensure that your artistic vision comes to life without unexpected complications.
Ultimately, the wood you choose should resonate with your personal style and the story you want to tell through your sculpture. Whether you opt for the soft touch of basswood or the rich tones of walnut, understanding the characteristics of each wood type will empower you to make informed decisions that enhance your creative journey.
Q: What is the best wood for beginners?
A: Basswood is often recommended for beginners due to its softness and ease of carving.
Q: Can I use green wood for sculpting?
A: Yes, green wood can be used, but it may warp as it dries, so it's essential to keep this in mind.
Q: How do I choose the right wood for my project?
A: Consider the level of detail you wish to achieve, the wood's density, and its moisture content.

Essential Tools for Wood Sculpting
When diving into the world of wood sculpting, having the right tools at your disposal can make all the difference. Just like a painter needs brushes and a canvas, a wood sculptor must equip themselves with essential instruments that not only enhance creativity but also ensure precision and safety. In this section, we’ll explore the key tools every wood sculptor should consider, along with tips on how to maintain them for optimal performance.
First and foremost, let’s talk about hand tools. These are the backbone of any wood sculptor's toolkit. They allow for a level of detail and control that power tools sometimes can’t achieve. Essential hand tools include:
- Chisels: These come in various shapes and sizes, allowing for different carving techniques. A good set of chisels can handle everything from fine details to rough shaping.
- Knives: A carving knife is perfect for intricate work and can help you achieve smooth edges and fine details.
- Files and Rasps: These tools are essential for smoothing out rough edges and refining your work.
While hand tools are vital, power tools also play a significant role in modern wood sculpting. They can significantly speed up the process, especially for larger projects. Some popular power tools include:
- Rotary Tools: These versatile tools are great for carving, sanding, and polishing. They can reach intricate areas that might be challenging with hand tools.
- Band Saws: Ideal for cutting larger pieces of wood into manageable sizes before starting detailed work.
- Angle Grinders: These can be used for removing large amounts of material quickly, perfect for rough shaping.
However, it’s essential to weigh the pros and cons of using hand tools versus power tools. Hand tools provide a sense of connection to the material, allowing for a more tactile and meditative sculpting experience. On the other hand, power tools can save time and effort, especially for beginners who may find the physical demands of hand tools challenging. Ultimately, the choice between the two will depend on your personal style and project requirements.
Regardless of the tools you choose, proper maintenance is crucial. Keeping your tools in top condition not only extends their lifespan but also enhances your sculpting experience. Here are some practical tips:
- Cleaning: After each use, clean your tools to remove wood shavings and residue. This prevents rust and maintains their sharpness.
- Sharpening: Regularly sharpen your chisels and knives to ensure clean cuts. Dull tools can lead to frustration and poor results.
- Storage: Store your tools in a dry place, preferably in a dedicated toolbox or on a wall-mounted rack to prevent damage.
In conclusion, equipping yourself with the right tools and maintaining them properly is the first step toward a successful wood sculpting journey. Whether you prefer the precision of hand tools or the efficiency of power tools, understanding their uses and benefits will empower you to create stunning wood sculptures that reflect your unique artistic vision.
Q: What are the best types of wood for beginners?
A: Softwoods like pine and basswood are great for beginners due to their ease of carving. They are forgiving and allow for mistakes, making them ideal for practice.
Q: How do I choose between hand tools and power tools?
A: It depends on your comfort level and the scale of your projects. Hand tools offer more control for detailed work, while power tools can help with larger projects more efficiently.
Q: How often should I sharpen my tools?
A: It’s best to sharpen your tools after every few projects or whenever you notice difficulty in cutting. Regular maintenance will keep your tools performing at their best.
Q: Can I use reclaimed wood for sculpting?
A: Absolutely! Reclaimed wood can add character and uniqueness to your sculptures, but be sure to check for nails or other hardware that may be embedded in the wood.

Hand Tools vs. Power Tools
When it comes to wood sculpting, the debate between hand tools and power tools is as old as the craft itself. Both types of tools have their unique advantages and can significantly impact your sculpting experience. Understanding the strengths and weaknesses of each can help you make the best choice for your projects, ensuring that your creative vision comes to life effectively.
Hand tools are often praised for their precision and control. They allow sculptors to work closely with the wood, making it easier to achieve intricate details and fine finishes. For example, a chisel can carve out delicate features or textures that power tools might overlook. Additionally, using hand tools can foster a deeper connection with the material, as each cut and stroke requires a thoughtful approach. However, they do demand more physical effort and can be time-consuming, especially for larger projects.
On the other hand, power tools offer efficiency and speed, making them ideal for larger pieces or when you need to remove significant amounts of material quickly. Tools like routers, jigsaws, and sanders can save you hours of labor, allowing you to focus more on the artistic aspects of your work rather than the grunt work. However, while they can expedite the process, power tools can sometimes lack the finesse that hand tools provide. There’s a risk of losing the delicate details that make a sculpture truly special.
Here’s a quick comparison of the two:
| Feature | Hand Tools | Power Tools |
|---|---|---|
| Precision | High | Moderate |
| Speed | Slow | Fast |
| Control | Excellent | Variable |
| Learning Curve | Steeper | Gentler |
| Cost | Generally Lower | Generally Higher |
Ultimately, the choice between hand tools and power tools comes down to your personal style and the demands of your project. Many sculptors find that a combination of both yields the best results. For instance, you might start with power tools to shape the bulk of your sculpture and then switch to hand tools for the finishing touches. This hybrid approach allows you to harness the strengths of both tool types, giving you the flexibility to create stunning pieces that resonate with your artistic intent.
As you embark on your wood sculpting journey, consider experimenting with both hand and power tools. You might be surprised at how each can complement the other, leading to a richer and more fulfilling sculpting experience. After all, the joy of sculpting lies not just in the finished product, but in the process of creation itself.
- What is the best type of wood for beginners? Softwoods like pine or basswood are great for beginners due to their ease of carving.
- Do I need both hand and power tools? While not necessary, using both can enhance your sculpting experience and efficiency.
- How do I maintain my wood sculpting tools? Regular cleaning, sharpening, and proper storage will extend the life of your tools.
Choosing the Right Hand Tools
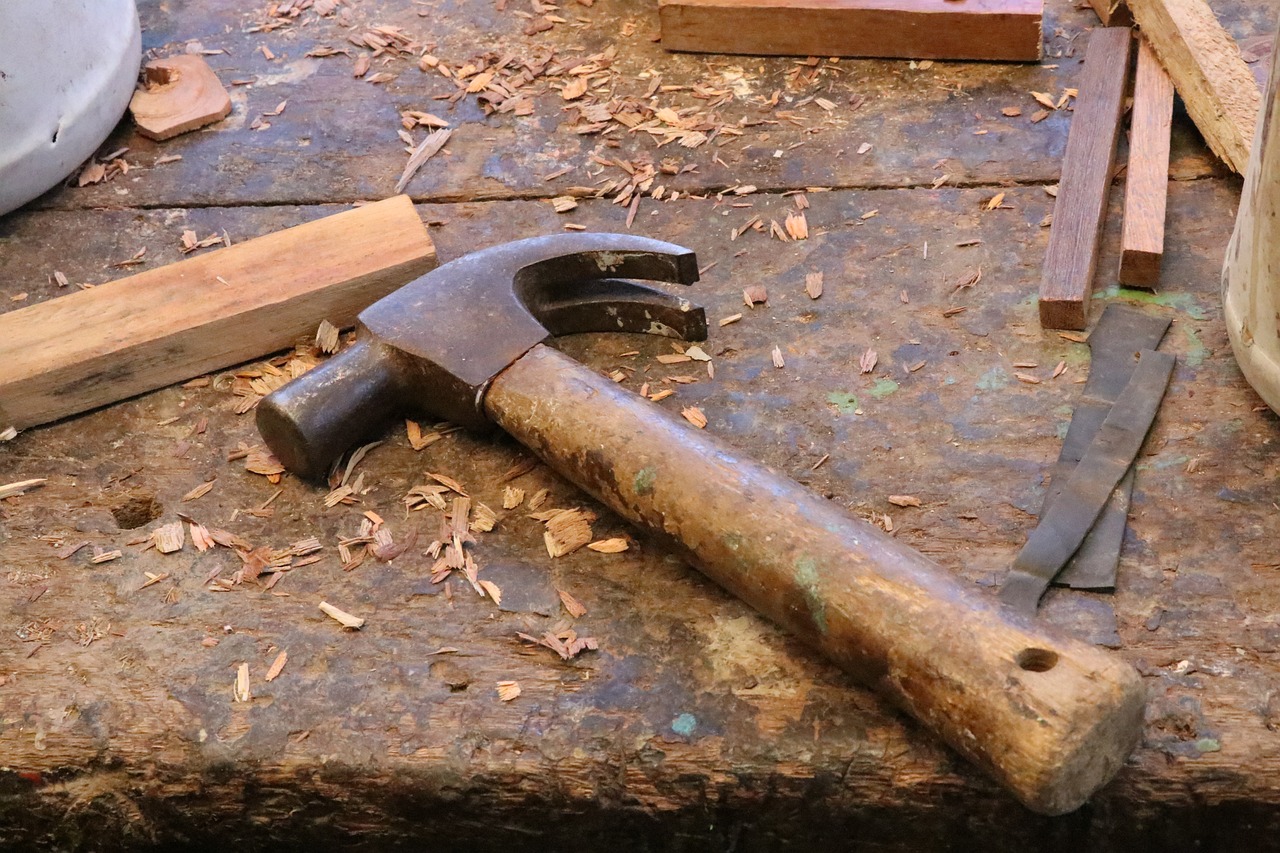
When it comes to wood sculpting, selecting the right hand tools is like choosing the right paintbrush for a masterpiece. The tools you use can greatly influence not only the quality of your work but also your overall sculpting experience. With so many options available, it can be overwhelming to figure out which tools are essential for your artistic journey. However, understanding the purpose and function of various hand tools will empower you to make informed choices that align with your sculpting style.
First and foremost, consider the type of projects you plan to undertake. Different tools serve different purposes, and having a well-rounded toolkit can make all the difference. For instance, if you're leaning towards detailed work, a set of chisels is indispensable. They come in various shapes and sizes, allowing for intricate carvings and fine details. On the other hand, if your focus is on shaping larger pieces, a good carving knife can help you remove material quickly and efficiently.
Another important factor to keep in mind is the material and quality of the tools. Investing in high-quality hand tools can save you time and frustration down the line. Look for tools made from durable materials such as high-carbon steel, which maintains its sharpness longer and withstands the rigors of wood sculpting. While it might be tempting to go for cheaper options, remember that quality tools can enhance your skills and yield better results.
To help you navigate through the myriad of options, here’s a brief overview of some essential hand tools for wood sculpting:
| Tool | Purpose |
|---|---|
| Chisels | Used for detailed carving and shaping wood. |
| Carving Knives | Ideal for removing larger amounts of wood and for fine detailing. |
| Gouges | Perfect for creating curved shapes and hollows. |
| Rasps and Files | Used for smoothing and refining surfaces. |
| Saws | Essential for cutting larger pieces of wood to size. |
As you select your tools, don’t forget about ergonomics. A tool that feels comfortable in your hand can make a significant difference during long sculpting sessions. Look for tools with well-designed handles that provide a good grip, reducing fatigue and allowing for more precise movements. Additionally, consider the weight of the tools; lighter tools can be easier to control, especially for detailed work.
Lastly, remember that the journey of wood sculpting is as much about personal preference as it is about technique. Experimenting with different tools will help you discover what feels best for you. As you gain experience, you’ll develop a deeper understanding of which tools suit your style and the types of projects you enjoy most. So, embrace the process, and don’t hesitate to invest in tools that inspire your creativity!
- What are the most essential hand tools for beginners?
For beginners, a basic set of chisels, a carving knife, and a couple of rasps are essential. These will allow you to explore various techniques without overwhelming you.
- How do I maintain my hand tools?
Regularly clean your tools after use, sharpen them as needed, and store them in a dry place to prevent rust. Proper care will extend their lifespan significantly.
- Can I use power tools instead of hand tools?
While power tools can speed up the process, hand tools offer precision and control that are often necessary for detailed work. Many sculptors use a combination of both.
Power Tools for Efficiency
When it comes to wood sculpting, efficiency can be a game changer, and that’s where power tools come into play. Imagine starting a project with a vision in your head, only to find out that your hand tools are slowing you down. Power tools can help you bring that vision to life much faster, allowing you to focus on the creative aspects of your work rather than the laborious ones. They can save you time and energy, making them an essential part of your sculpting toolkit.
Power tools come in various forms, each designed to tackle specific tasks. For instance, a router can create intricate designs with precision, while a jigsaw can cut through wood with ease, allowing for more complex shapes. These tools can handle larger pieces of wood and more demanding cuts than hand tools, making them ideal for larger sculptures or when working on more challenging projects.
However, it’s important to remember that with great power comes great responsibility. Safety should always be your top priority when using power tools. Here are some essential safety tips to keep in mind:
- Wear protective gear: Always use safety goggles and ear protection to shield yourself from debris and noise.
- Read the manual: Familiarize yourself with the tool’s operation and safety features before use.
- Secure your workpiece: Ensure that your wood is clamped down to prevent movement while cutting.
- Keep your workspace clean: A tidy workspace reduces the risk of accidents and helps maintain focus.
In addition to efficiency, using power tools can also expand your creative possibilities. With the right tools, you can experiment with different techniques and styles that may be difficult or impossible to achieve with hand tools alone. For example, a band saw allows for intricate curves and designs, opening up a world of artistic potential.
To help you choose the right power tools for your needs, here’s a simple comparison of some common power tools used in wood sculpting:
| Tool | Function | Advantages |
|---|---|---|
| Router | Carving detailed designs | Precision and versatility |
| Jigsaw | Cutting curves and shapes | Easy to handle and maneuver |
| Band Saw | Cutting thick wood and intricate shapes | Can handle large projects efficiently |
| Sander | Smoothing surfaces | Fast and effective finishing |
In conclusion, power tools can significantly enhance your wood sculpting experience by improving efficiency and expanding your creative capabilities. However, it’s crucial to use them responsibly and safely. As you embark on your sculpting journey, consider integrating power tools into your workflow—they might just be the key to unlocking your full artistic potential!
Q: Do I need to use power tools for wood sculpting?
A: No, power tools are not mandatory, but they can make the process faster and easier, especially for larger or more complex projects.
Q: Are power tools safe to use?
A: Yes, as long as you follow safety guidelines and use protective equipment, power tools can be safe and effective for wood sculpting.
Q: What is the best power tool for beginners?
A: A jigsaw is often recommended for beginners due to its versatility and ease of use, making it a great starting point for various projects.
Q: How do I maintain my power tools?
A: Regular cleaning, proper storage, and following the manufacturer's maintenance guidelines will help keep your power tools in good condition.
Tool Maintenance and Care
Proper maintenance of your wood sculpting tools is not just a chore; it's a crucial part of ensuring that your creative process flows smoothly. Imagine trying to carve a delicate design with a dull chisel or a rusty knife—frustrating, right? Regular care can save you from such headaches and extend the lifespan of your tools, making them more efficient and enjoyable to use. Here are some essential tips to keep your tools in top shape.
First, let's talk about cleaning. After each use, take a moment to wipe your tools down with a clean, dry cloth. This simple act removes any wood shavings, dust, or moisture that could lead to rust or corrosion. For stubborn residue, a little soap and water can do wonders, but make sure to dry them thoroughly afterward. Remember, water and metal don’t mix well!
Next up is sharpening. A sharp tool is not only safer but also more effective. Dull tools require more force, which can lead to slips and accidents. Invest in a good sharpening stone or a honing guide to maintain the edge of your chisels and knives. Regularly honing your tools will keep them ready for action, ensuring clean cuts and precise details in your sculptures. You might even find that sharpening becomes a meditative part of your process!
When it comes to storage, think about creating a dedicated space for your tools. A well-organized toolbox or a wall-mounted rack can prevent damage and make it easier to find what you need when inspiration strikes. Avoid tossing your tools into a drawer where they can bump against each other and get nicked. Instead, consider using protective sheaths or cases for your blades to keep them safe and sound.
Lastly, don’t forget about rust prevention. If you live in a humid area, tools are particularly susceptible to rust. A light coat of mineral oil can create a barrier against moisture, preserving the integrity of your tools. Just remember to reapply it periodically, especially if you notice any signs of wear or exposure.
In summary, maintaining your wood sculpting tools is essential for both safety and creativity. By incorporating these simple practices into your routine, you'll not only enhance the performance of your tools but also ensure that each sculpting session is enjoyable and productive. So, roll up those sleeves and give your tools the love they deserve!
- How often should I clean my tools? It's best to clean them after each use to prevent rust and build-up.
- What is the best way to sharpen chisels? Using a sharpening stone or honing guide is recommended for maintaining a sharp edge.
- How can I prevent rust on my tools? Applying a light coat of mineral oil can help protect against moisture.
- Is it necessary to store tools in a special way? Yes, organized storage can prevent damage and make tools easier to access.
Basic Techniques for Beginners
Starting your journey in wood sculpting can feel a bit like standing at the edge of a vast forest, unsure of which path to take. But fear not! This art form, filled with endless possibilities, is approachable with the right foundational techniques. As a beginner, mastering the basics will not only build your confidence but also set the stage for more intricate projects down the line. So, let’s roll up our sleeves and dive into the essential techniques that every novice sculptor should know!
First and foremost, carving is the heart of wood sculpting. This technique involves removing material from the wood to create your desired shape. There are various carving methods, but two primary styles stand out for beginners: relief carving and in-the-round carving. Relief carving is akin to creating a raised image on a flat background, while in-the-round allows you to sculpt a piece that can be viewed from all angles. Imagine relief carving as drawing on paper, where your image pops out, and in-the-round as crafting a three-dimensional sculpture that invites viewers to walk around it.
To get started with carving, you’ll need to familiarize yourself with a few essential tools. A good set of chisels and a carving knife are your best friends. Each tool serves a purpose: chisels are perfect for larger cuts and shaping, while knives excel at detail work. When you’re ready to carve, remember to take your time and work slowly. It’s tempting to rush, but patience will yield a more refined and polished result.
Another crucial technique is finishing. Once you've carved your masterpiece, it’s time to give it the love it deserves. Finishing involves sanding, staining, and sealing your sculpture to enhance its beauty and longevity. Start with sanding to smooth out rough edges and create a uniform surface. This step is vital because it prepares the wood for staining, which can dramatically change its appearance. Think of it as applying makeup before a big event; it enhances the natural beauty of your creation!
After sanding, choose a stain that complements the wood's natural grain. Apply it with a brush or cloth, following the wood's grain for a seamless finish. Finally, sealing your sculpture with a protective coat ensures that your hard work stands the test of time against the elements. It’s like putting a protective shell on your sculpture, keeping it safe and looking stunning for years to come.
Now, let’s not overlook the importance of practice. As with any craft, the more you sculpt, the better you’ll become. Set aside time each week to experiment with different techniques and styles. Don’t be afraid to make mistakes; they are often the best teachers. Each piece you create is a stepping stone toward developing your unique artistic voice.
In conclusion, embarking on your wood sculpting journey is all about embracing the basics. By mastering carving and finishing techniques, you’ll build a solid foundation that will allow your creativity to flourish. So grab your tools, let your imagination run wild, and start sculpting! The world of wood awaits you.
- What type of wood is best for beginners? Softwoods like pine and basswood are great for beginners due to their workability and availability.
- How do I choose the right tools? Start with a basic set of chisels and a carving knife. As you progress, you can expand your toolkit based on your needs.
- Is it necessary to finish my sculpture? While it's not mandatory, finishing enhances the appearance and durability of your work.
- How much time should I dedicate to practice? Consistency is key; even a few hours a week can lead to significant improvement over time.

Carving Techniques
Carving is the heart and soul of wood sculpting, where the magic truly happens. It’s not just about removing material; it’s about transforming a simple block of wood into a work of art that tells a story. Whether you’re a novice or a seasoned sculptor, mastering various carving techniques will elevate your skills and broaden your creative horizons. So, let’s dive into the fascinating world of carving!
One of the most fundamental techniques is relief carving. This method involves carving into the surface of the wood, creating a raised design that stands out. Imagine a beautiful landscape where the mountains pop out from the background, giving depth and dimension. Relief carving is perfect for those who want to create intricate designs without fully detaching elements from the base. It’s like painting with texture instead of color!
On the other hand, we have in-the-round carving, which is a three-dimensional approach. This technique allows sculptors to create fully rounded figures that can be viewed from all angles. Think of a life-sized statue of a person or an animal; every side tells a different part of the story. In-the-round carving requires more planning and skill, but the results can be absolutely breathtaking. You’ll find that the challenge is well worth the effort as you see your vision come to life.
Now, let’s talk about some essential tools that can help you achieve these carving techniques. While chisels and gouges are the backbone of any sculptor’s toolkit, the choice of tool can significantly affect the outcome. For relief carving, a set of V-tool chisels is invaluable, as they allow for fine detailing and precise cuts. Conversely, for in-the-round work, larger gouges and curved chisels can help you shape the wood more effectively.
It's also crucial to understand the different types of cuts you can make when carving. Here are a few basic cuts to get you started:
- Paring Cut: A gentle slicing motion that creates smooth surfaces.
- Chopping Cut: A more forceful cut that removes large amounts of material quickly.
- Stop Cut: A technique used to create a boundary for other cuts, preventing tear-out.
As you experiment with these techniques, remember that patience is key. Wood carving is not a race; it’s a journey of discovery. Each stroke of your tool is an opportunity to express your creativity and refine your skills. You might find that what works for one piece may not work for another, and that’s perfectly okay. Embrace the learning process, and don’t hesitate to make mistakes - they often lead to the most beautiful surprises!
Finally, as you progress in your carving journey, consider documenting your work. Keeping a journal of your projects, techniques, and thoughts can provide valuable insights over time. It’s a great way to track your growth as an artist and can serve as a source of inspiration for future projects.
Q: What type of wood is best for beginners in carving?
A: Basswood is highly recommended for beginners due to its softness and ease of carving. It allows for detailed work without being too challenging to cut.
Q: How do I prevent my tools from getting dull?
A: Regularly sharpening your tools after each use will keep them in top condition. Consider investing in a good sharpening stone or system to maintain the edge.
Q: Can I use power tools for carving?
A: Yes, power tools can be used for carving, especially for larger projects. However, they require a different set of skills and safety precautions. Always prioritize safety when using power tools.

Finishing Techniques
When it comes to wood sculpting, the finishing touches can make all the difference between a good piece and a truly stunning one. Finishing techniques are essential for achieving a polished look, protecting your work, and enhancing its visual appeal. So, what are the best methods to consider when you're ready to give your sculpture that final glow? Let’s dive into the world of wood finishing!
First up, sanding is a crucial step in the finishing process. It helps to smooth out rough edges and prepares the surface for any additional treatments. Using various grits of sandpaper, start with a coarser grit (like 80) to remove larger imperfections, and gradually work your way up to finer grits (like 220) for that silky-smooth finish. Remember, patience is key here; taking the time to sand properly can elevate your sculpture from ordinary to extraordinary.
Next, consider applying a stain to enhance the natural beauty of the wood grain. Stains come in a variety of colors and can dramatically change the appearance of your sculpture. They add depth and richness, allowing the wood's character to shine through. When choosing a stain, always test it on a scrap piece of wood first. This way, you can see how it reacts with the specific type of wood you’re using and make adjustments if necessary.
After staining, it’s time to seal your masterpiece. Sealers serve to protect the wood from moisture, dirt, and wear over time. There are several types of sealers available, including oil-based and water-based options. Oil-based sealers tend to penetrate deeper into the wood, providing a richer finish, while water-based sealers dry quickly and are easier to clean up. Whichever you choose, apply it evenly with a brush or cloth, following the wood grain for the best results.
To give you a clearer picture of the finishing process, here’s a quick comparison table of the main finishing techniques:
| Technique | Description | Benefits |
|---|---|---|
| Sanding | Using sandpaper to smooth the surface. | Prepares the wood for staining and sealing. |
| Staining | Applying color to enhance wood grain. | Adds depth and richness to the sculpture. |
| Sealing | Applying a protective layer over the wood. | Protects against moisture and wear. |
Finally, after applying your sealer, don’t forget to let your sculpture cure properly. Each product will have its own recommended drying time, so be sure to follow the instructions closely. Rushing this step can lead to smudges or an uneven finish, which is the last thing you want after all your hard work!
In conclusion, mastering finishing techniques is just as important as the sculpting itself. By sanding, staining, and sealing your wood sculptures, you not only protect your art but also enhance its beauty, making it a true reflection of your creativity and effort. So, roll up your sleeves, grab those tools, and let your sculptures shine!
- What is the best type of wood for beginners? Softwoods like pine or basswood are excellent for beginners due to their ease of carving.
- How long does it take for a wood sculpture to dry after finishing? It varies by product, but generally, you should wait 24-48 hours for the finish to cure completely.
- Can I use household items for finishing? Yes, items like olive oil or vinegar can be used as natural finishes, but they may not offer the same level of protection as commercial products.

Finding Inspiration for Your Projects
Finding inspiration for your wood sculpting projects can sometimes feel like searching for a needle in a haystack. But fear not! Inspiration is all around you, waiting to be discovered. Whether you're a seasoned sculptor or just starting out, tapping into your creative well can lead to remarkable transformations in your work. So, where do you start? Let’s dive into a few rich sources of inspiration that can spark your imagination and help you create stunning sculptures.
First and foremost, nature is an incredible muse. Just think about it: the intricate patterns of leaves, the smooth curves of river stones, and the rugged textures of tree bark can all ignite your creativity. Take a walk in the woods or visit a local park, and observe the forms and shapes that nature presents. You might find yourself captivated by the way a gnarled tree branch twists or the delicate way flowers bloom. These observations can translate into beautiful wood sculptures that reflect the natural world. For instance, you might want to explore how the lines in a piece of driftwood can inspire a flowing, organic design in your next project.
Another source of inspiration can be found in art history. Understanding the works of famous wood sculptors can provide valuable insights into techniques and styles that you can incorporate into your own creations. Artists like Henry Moore and Barbara Hepworth have left a significant mark on the world of sculpture. By studying their works, you can discover how they approached form, texture, and composition. This knowledge can help you develop your own style and push the boundaries of your creativity. Consider creating a mood board with images of their sculptures, as this can serve as a visual guide for your artistic journey.
Don’t underestimate the power of personal experiences as a source of inspiration. Your own life stories, memories, and emotions can be a wellspring for your art. Think about significant moments in your life or the people who have influenced you. Perhaps you want to create a sculpture that represents a cherished memory or a tribute to someone special. This personal connection can infuse your work with depth and meaning, making your sculptures not just objects, but stories waiting to be told.
To further enhance your creative process, consider keeping a journal or sketchbook. Documenting your thoughts, sketches, and inspirations can help you visualize your ideas and refine them over time. You can also use this journal to jot down quotes, images, or anything that resonates with you. When you’re feeling stuck, flipping through these pages can reignite your passion and lead you to your next project. Remember, creativity often thrives in an environment of exploration and experimentation.
In summary, finding inspiration for your wood sculpting projects can come from various sources, including:
- Nature: Observe the shapes and textures found in the natural world.
- Art History: Study the works of renowned sculptors to learn about different techniques.
- Personal Experiences: Reflect on your life and emotions to create meaningful art.
By tapping into these sources, you can unleash your creativity and embark on a fulfilling wood sculpting journey. Remember, inspiration is everywhere; you just have to keep your eyes and mind open to the possibilities!
Q1: Where can I find unique wood for my sculptures?
A1: Unique wood can often be found at local lumberyards, specialty wood suppliers, or even reclaimed wood stores. Each type of wood has its own character and can inspire different styles of sculpture.
Q2: How do I know if my sculpture is finished?
A2: A sculpture is often considered finished when you feel it conveys the message or emotion you intended. Sometimes, stepping away for a while can help you see if it needs any more work.
Q3: What if I run out of inspiration?
A3: Running out of inspiration is normal! Take a break, explore new environments, or try different artistic mediums. Sometimes, a change of scenery or routine can reignite your creativity.

Nature as Inspiration
When it comes to wood sculpting, nature serves as one of the most profound sources of inspiration. Just step outside and take a moment to observe the world around you. The intricate patterns of tree bark, the graceful curves of branches, and the organic shapes of leaves can spark your imagination and guide your artistic process. Imagine translating the fluidity of a river or the strength of a mountain into a wooden sculpture; it’s a thrilling challenge that can lead to stunning creations.
Nature’s beauty is not just in its forms but also in its textures and colors. Consider how the roughness of driftwood can evoke feelings of age and wisdom, while the smoothness of a polished maple can convey elegance and sophistication. These elements can be manipulated in your work to tell a story or evoke a particular emotion. For instance, a sculpture that mimics the flowing lines of a waterfall might incorporate smooth, rounded edges, while a piece that reflects the ruggedness of a mountain might use jagged, sharp angles.
As you embark on your sculpting journey, you might want to keep a nature journal. This could be a simple notebook where you jot down observations, sketch ideas, or collect inspiration. You can include:
- Sketches of interesting shapes you find in nature.
- Notes on colors and textures that catch your eye.
- Photographs of natural elements that inspire you.
This practice not only helps you connect with nature but also serves as a valuable resource when you’re ready to create. You can revisit your notes and sketches whenever you feel stuck or uninspired.
Moreover, nature is not just a source of visual inspiration; it can also influence the themes and stories behind your sculptures. Think about how the changing seasons can reflect different emotions or stages of life. A piece inspired by spring might symbolize renewal and hope, while a winter-themed sculpture could convey solitude and introspection. By tapping into these themes, you can create works that resonate on a deeper level with your audience.
In addition to observing nature in your local environment, consider visiting botanical gardens, parks, or even forests. Each location offers a unique perspective and a wealth of inspiration. You might find that the shapes of flowers can inspire delicate carvings or that the grandeur of ancient trees leads to more ambitious projects. The key is to keep your eyes open and your mind receptive.
Finally, don’t forget to incorporate elements of sustainability into your work. Using reclaimed wood or materials sourced from your environment not only enhances the authenticity of your sculptures but also honors the natural world that inspires you. This approach can create a beautiful synergy between your art and the environment, making your work not just a reflection of nature, but a part of it.
Q: How can I find inspiration in nature for my wood sculptures?
A: Start by observing the shapes, textures, and colors in your surroundings. Keep a nature journal to record your thoughts and sketches, and consider visiting different natural environments for fresh ideas.
Q: What types of wood are best for capturing natural forms?
A: Woods like oak, cedar, and mahogany are popular for their durability and beauty. However, the best wood often depends on the specific characteristics you want to achieve in your sculpture.
Q: How can I incorporate sustainability into my wood sculpting practice?
A: Consider using reclaimed wood or sourcing materials locally. This not only reduces your environmental impact but also adds a unique story to your sculptures.

Art History and Influences
When you dive into the world of wood sculpting, it's like opening a treasure chest filled with inspiration from centuries of artistic expression. Art history is not just a collection of old stories; it's a vibrant tapestry woven with the threads of creativity, culture, and innovation. Understanding the influences that shaped wood sculpting can provide you with a deeper appreciation for the craft and ignite your own creative spark.
Throughout history, wood has been a favored medium for artists, particularly in cultures where trees were abundant. From the intricate totem poles of the Indigenous peoples of North America to the elegant sculptures of the Renaissance, wood has served as a canvas for storytelling and expression. Each piece tells a story, not just of the artist's vision, but also of the time and place it was created. For instance, the sculptures of Giambologna in the 16th century showcased the fluidity and dynamism of the human form, influencing generations of sculptors to explore movement and emotion in their work.
In the modern era, artists like Henry Moore and Barbara Hepworth have taken wood sculpting to new heights. Their work emphasizes organic forms and the relationship between sculpture and the environment. This blending of nature and art offers a fresh perspective, encouraging contemporary sculptors to think outside the box and draw inspiration from their surroundings. By studying these artists, you can see how their innovative approaches can be adapted to your own projects, giving your work a unique flair.
Moreover, the influence of various cultures cannot be overstated. For instance, Japanese woodblock printing and its emphasis on simplicity and natural beauty have inspired many sculptors to embrace minimalism in their woodwork. The intricate carvings found in traditional African masks tell stories of identity and community, reminding us that every piece of art has a cultural significance that can resonate with viewers. By exploring these diverse influences, you can enrich your own sculpting practice and create pieces that reflect a broader narrative.
To summarize, art history is a wellspring of inspiration for wood sculptors. By studying the works of past masters and understanding the cultural contexts in which they were created, you can find new ideas and techniques to incorporate into your own practice. Whether you’re drawn to the elegance of classical sculptures or the boldness of contemporary pieces, there’s a wealth of knowledge waiting to be discovered that can elevate your artistry to new heights.
- What is the best type of wood for beginners? Softwoods like pine are great for beginners because they are easier to carve and more forgiving.
- How do I maintain my wood sculpting tools? Regularly clean and sharpen your tools, and store them in a dry place to prevent rust and damage.
- Can I use power tools for detailed work? Yes, but it's essential to follow safety guidelines and use the right attachments for precision work.
- Where can I find inspiration for my wood sculptures? Nature, art history, and personal experiences are excellent sources of inspiration for your projects.
Frequently Asked Questions
- What type of wood is best for beginners in sculpting?
For beginners, basswood is often recommended due to its softness and ease of carving. It allows for smoother cuts and less resistance, making it perfect for practicing your skills. Other great options include butternut and pine, which also provide a friendly experience for novice sculptors.
- What essential tools do I need to start wood sculpting?
To kick off your wood sculpting journey, you'll need a few key tools. A set of chisels, a carving knife, and a mallet are essential for hand carving. If you prefer power tools, consider investing in a rotary tool and a band saw. Each tool has its unique advantages, so choose based on your project needs.
- How do I maintain my wood sculpting tools?
Maintaining your tools is crucial for longevity and performance. Always clean them after use to remove wood shavings and moisture. Regularly sharpen your chisels and knives to ensure clean cuts. Finally, store them in a dry place to prevent rust and damage. A little care goes a long way!
- What are some basic carving techniques I should learn?
As a beginner, focus on mastering basic carving techniques like relief carving and in-the-round carving. Relief carving involves creating a design that protrudes from the background, while in-the-round carving results in a fully three-dimensional sculpture. These techniques will build a solid foundation for your skills.
- Where can I find inspiration for my wood sculptures?
Inspiration can be found everywhere! Nature is a fantastic source—observe the shapes, textures, and colors around you. Additionally, exploring art history and studying the works of famous wood sculptors can spark your creativity. Don't forget to reflect on your personal experiences; they can lead to unique and meaningful creations.
- What finishing techniques should I use for my sculptures?
Finishing your sculptures is key to achieving that polished look. Start with sanding to smooth out rough edges, then consider staining to enhance the wood's natural beauty. Finally, apply a sealer to protect your work from moisture and wear. These techniques will elevate your sculptures and make them stand out!


