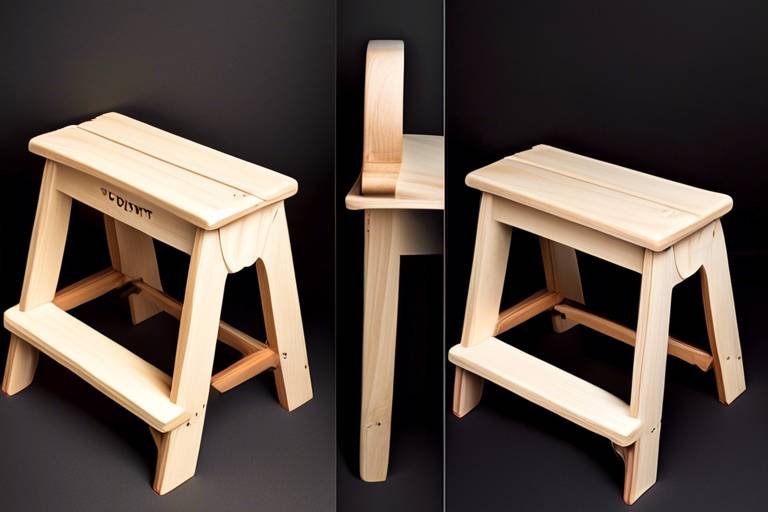
How to Design a Wooden Shoe Rack: A DIY Guide
Are you tired of tripping over shoes every time you walk into your home? Does your entryway look more like a shoe graveyard than a welcoming space? If so, it's time to take action and design a stylish wooden shoe rack that not only organizes your footwear but also enhances the aesthetics of your home. This DIY guide will walk you through the entire process, from selecting the right materials to adding those finishing touches that make your shoe rack truly one-of-a-kind.
When embarking on your wooden shoe rack journey, the first step is to select the right materials. This choice is crucial for both durability and aesthetics. You want to ensure that your shoe rack can withstand the test of time while also looking great in your space. Popular wood types for shoe racks include pine, which is affordable and easy to work with, and oak, known for its strength and beautiful grain. Additionally, consider using plywood for a more budget-friendly option that still offers durability.
When it comes to finishes, you have a variety of options to choose from. A simple clear sealant can protect your wood while showcasing its natural beauty, while a stain can add depth and character. If you're feeling adventurous, why not try a bold paint color that complements your home decor? The right finish can elevate your shoe rack from basic to stunning!
Now that you've got your materials sorted, it's time to dive into the fun part: design! When designing your shoe rack, think about the dimensions, styles, and storage solutions that will best fit your space and personal taste. For instance, do you have a small entryway or a spacious hallway? This will significantly influence the size and shape of your shoe rack.
Accurate measurements are vital for a well-fitting shoe rack. Start by measuring the width, height, and depth of the area where you plan to place the rack. This will help you avoid the common pitfall of building a beautiful piece that simply doesn't fit! Remember to account for any doors or furniture that may obstruct access to your new creation.
Understanding the ideal height and width for your shoe rack can enhance usability. Generally, a height of 30 to 36 inches works well for most people, allowing easy access to shoes without bending over too much. For width, consider how many pairs of shoes you want to store. A width of 24 to 48 inches is typical, but feel free to adjust based on your needs.
Accessibility is key in shoe rack design. You want to create a layout that allows easy access to all shoes while maximizing storage efficiency. Consider incorporating sliding shelves or pull-out bins for a modern touch that makes grabbing your favorite pair of shoes a breeze. Think of your shoe rack as a wardrobe for your footwear; it should be functional yet stylish!
A detailed sketch serves as a blueprint for your project. Grab a pencil and paper (or your favorite design software) and start drafting a design that incorporates your measurements and style preferences. Don't forget to include any special features you want, like hooks for bags or a top shelf for decorative items. This sketch will be your guide throughout the building process.
Having the right tools is essential for any DIY project. Before you start building, make sure you have the following equipment on hand:
- Measuring tape - For accurate measurements
- Level - To ensure your rack is straight
- Drill - For making holes and driving screws
- Saw - To cut your wood to the desired size
- Sander - To smooth edges and surfaces
Basic hand tools are often sufficient for creating a shoe rack. Essential hand tools you’ll need include a hammer, screwdrivers, and clamps. These tools will help you assemble your rack securely while ensuring a polished finish.
Power tools can greatly speed up the building process. If you have access to a circular saw, jigsaw, or power sander, they can make your construction much more efficient. Just remember to follow safety guidelines and wear protective gear!
The construction process is broken down into clear steps. Follow these guidelines to build your shoe rack from start to finish:
Properly preparing your wood is the first step in construction. Start by cutting your wood to the appropriate sizes based on your measurements. Next, sand the edges and surfaces to remove any splinters or rough spots. Treat the wood with a wood conditioner if you're planning to stain it; this will help achieve a more even finish.
Assembly is a crucial stage in building your shoe rack. Begin by attaching the side panels to the top and bottom pieces using screws or wood glue. Make sure everything is level and square. Once the frame is complete, add shelves at your desired intervals to accommodate various shoe types. Remember, a sturdy rack is a happy rack!
Finishing touches can elevate the appearance of your shoe rack. After assembly, it’s time to stain, paint, or seal your rack to enhance its aesthetics and protect the wood. Choose a finish that complements your home decor and provides the durability you need.
Selecting the right finish is essential for durability and look. Options include matte, satin, and glossy finishes, each offering a unique look. Consider how much wear and tear your shoe rack will endure; a more durable finish may be necessary for high-traffic areas.
Decorative elements can personalize your shoe rack. Think about adding hooks for bags, a small bench for sitting, or even a decorative plant on top. These creative ideas can enhance functionality while complementing your home decor.
Q: How much does it cost to build a wooden shoe rack?
A: The cost can vary significantly based on the materials you choose, but a basic wooden shoe rack can range from $50 to $150.
Q: Can I customize the size of my shoe rack?
A: Absolutely! One of the great things about building your own shoe rack is that you can tailor it to fit your space perfectly.
Q: What is the best wood for a shoe rack?
A: Popular options include pine for affordability, oak for durability, and plywood for a budget-friendly alternative.
Now that you have a comprehensive guide, it’s time to roll up your sleeves and get started on your wooden shoe rack. Happy building!

Choosing the Right Materials
When it comes to building a wooden shoe rack, the first step is to choose the right materials. This choice not only impacts the durability of your rack but also plays a significant role in its aesthetic appeal. You want a shoe rack that can withstand the test of time while also fitting seamlessly into your home decor. So, what materials should you consider?
First and foremost, the type of wood you select is crucial. Hardwoods like oak, maple, or cherry are excellent choices due to their strength and longevity. They can handle the weight of multiple pairs of shoes without warping or bending. However, if you're looking for a more budget-friendly option, softwoods like pine or cedar can also be suitable. They are lighter and easier to work with, though they may not last as long as hardwoods.
Next, let’s talk about finishes. The finish you choose can enhance the wood's natural beauty while providing protection against scratches and moisture. Here are some popular options:
- Stain: This option allows you to maintain the natural grain of the wood while adding color. It's perfect for those who want a rustic look.
- Paint: If you prefer a pop of color or a sleek modern look, painting your shoe rack can be a great choice. Just ensure you use a paint designed for wood surfaces.
- Sealant: Regardless of your choice of stain or paint, applying a sealant can protect your rack from spills and wear over time.
Additionally, consider the environmental impact of your materials. Opting for sustainably sourced wood can make your DIY project more eco-friendly. Look for certifications like FSC (Forest Stewardship Council) to ensure the wood is harvested responsibly.
Finally, don’t forget about the hardware! Choosing the right screws, brackets, and hinges can make a big difference in the overall stability and functionality of your shoe rack. Look for materials that are rust-resistant, especially if your rack will be placed in a humid area.
In summary, selecting the right materials for your wooden shoe rack involves considering the type of wood, the finish, environmental factors, and the hardware. By taking the time to choose wisely, you’ll create a shoe rack that is not only functional but also a beautiful addition to your home.
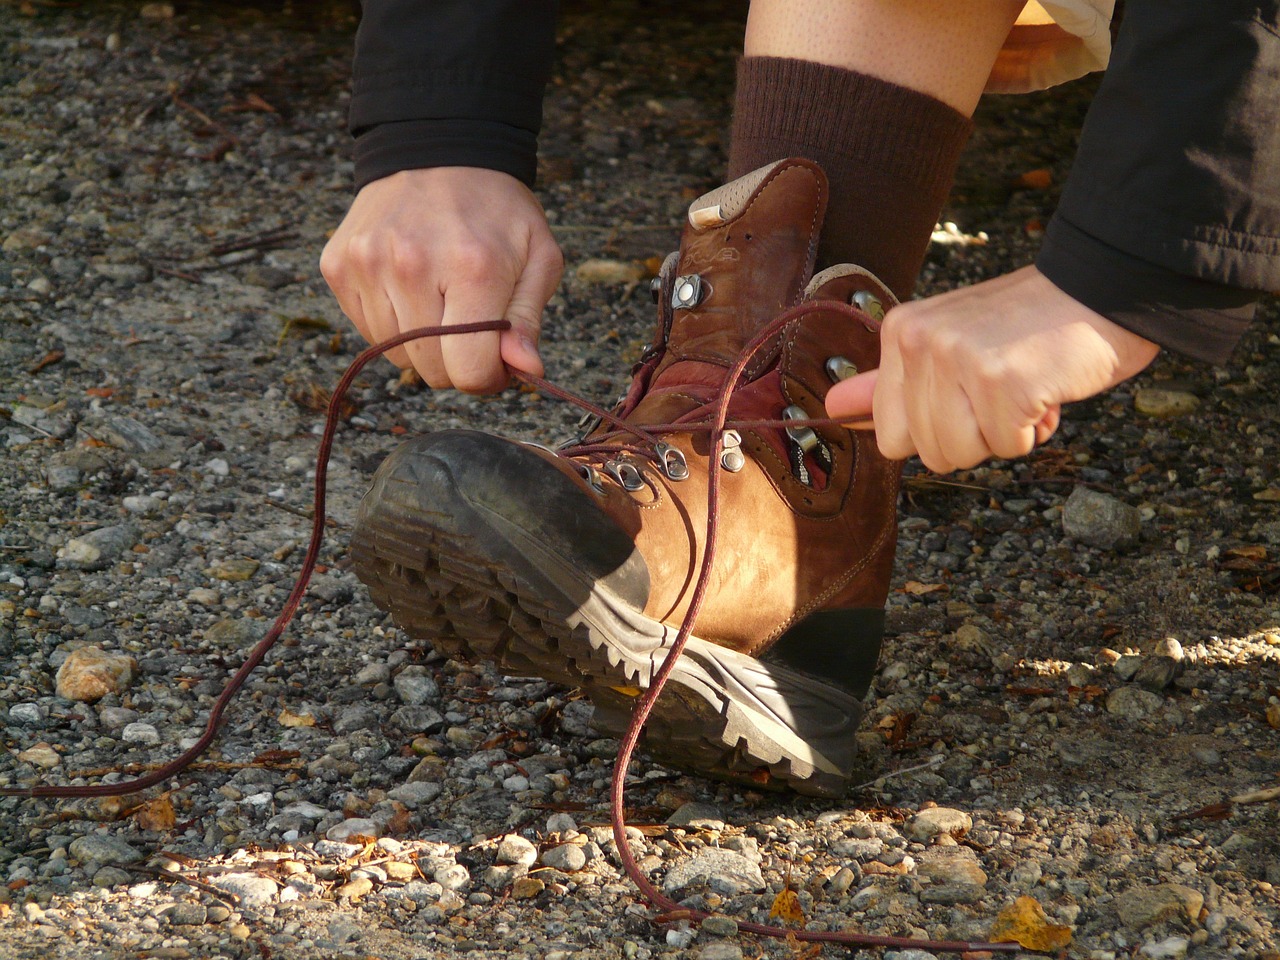
Design Considerations
When it comes to designing your wooden shoe rack, there’s a lot more to consider than just slapping some wood together. It’s about creating a functional piece that fits seamlessly into your home while catering to your personal style. The key is to think about dimensions, styles, and storage solutions that will not only meet your needs but also enhance your living space. Imagine walking into your entryway and seeing a beautifully crafted shoe rack that not only organizes your shoes but also adds a touch of elegance to the room. Sounds dreamy, right?
First off, let’s talk about the dimensions. You wouldn’t want to build a shoe rack that’s too tall to reach or too wide for your hallway. So, take a moment to measure your space. Consider the height of the rack; it should allow you to easily access your shoes without having to bend over awkwardly. The width should be proportionate to the area you have, ensuring that it doesn’t dominate the space. A good rule of thumb is to leave some extra room on either side for ease of movement. Think of it like creating a cozy nook for your shoes rather than a cluttered mess!
Next, let’s explore different styles. Are you going for a modern, minimalist look, or do you prefer a rustic charm? Your style will dictate the kind of wood you choose, the finish you apply, and even the overall shape of the rack. For instance, if you’re leaning towards a contemporary design, straight lines and a sleek finish might be your best bet. On the other hand, if rustic is your vibe, consider reclaimed wood with a distressed finish to add character and warmth.
Another important factor is storage solutions. You need to think about how many pairs of shoes you own and how you want to store them. Will you be stacking them, or do you prefer them displayed side by side? Perhaps you have a mix of heels, sneakers, and boots that require different storage solutions. For example, you might want to incorporate a few taller compartments for boots and a couple of shorter shelves for flats and sneakers. This way, you’ll have a dedicated spot for each type of shoe, preventing them from piling up in a chaotic heap.
Additionally, consider the layout of your shoe rack. It’s essential to design it in a way that maximizes accessibility. Imagine a shoe rack where every pair is within arm’s reach, making it easy to grab your favorite shoes on the go. You could design it with angled shelves or pull-out drawers, which can be a game-changer when it comes to accessing those shoes buried at the back. The goal is to create a practical yet stylish solution that makes your life easier.
Finally, don’t forget about the little details that can elevate your design. Adding hooks for bags or an umbrella stand can be a practical addition to your shoe rack. Maybe even think about including a small bench on top for putting on your shoes comfortably. These thoughtful touches can transform your shoe rack from a simple storage solution into a multifunctional piece of furniture that adds value to your home.
- What type of wood is best for a shoe rack? Hardwoods like oak or maple are durable and provide a beautiful finish, while plywood can be a more budget-friendly option.
- How tall should a shoe rack be? A standard height is around 30-36 inches, but consider your personal comfort and the type of shoes you’re storing.
- Can I customize the design? Absolutely! Customizing your shoe rack to fit your space and style is part of the fun of DIY projects.
- What finish should I use? A polyurethane finish is great for durability, while stains can enhance the wood's natural beauty.
Measuring Your Space
When it comes to designing a wooden shoe rack, accurately is absolutely crucial. Imagine crafting the perfect shoe rack only to find it can't fit in the designated area! To avoid this common pitfall, start by grabbing a tape measure and taking note of the dimensions of the space where you plan to place your shoe rack. It's not just about the width; you also need to consider the height and depth. This will ensure that your shoe rack not only fits but also complements the aesthetics of your room.
Here’s a simple approach to measuring your space effectively:
- Determine the Location: Decide where you want your shoe rack to go. Is it near the entrance, in a closet, or perhaps in the bedroom? Each location may have different space constraints.
- Measure Width: Use your tape measure to find the available width. Make sure to account for any adjacent furniture or walls that may restrict the rack's placement.
- Measure Height: Consider how tall you want your shoe rack to be. A taller rack can store more shoes, but it must fit comfortably in the space without overwhelming the room.
- Measure Depth: Don’t forget to check the depth! A shoe rack that’s too deep can make a narrow hallway feel cramped.
After taking these measurements, it’s wise to jot them down. You might even consider creating a small sketch of the area to visualize how the shoe rack will fit. This can help you avoid any surprises during the building process. Remember, a well-measured space leads to a well-designed shoe rack!
Additionally, consider the style and function you want your shoe rack to serve. If you have a large collection of shoes, you might want to design a multi-tiered rack. However, if you’re limited on space, a compact design that fits snugly against a wall might be your best bet. Understanding your space will not only guide your design choices but also enhance the overall functionality of your shoe rack.
In summary, measuring your space is a foundational step in the DIY process. By following these steps and keeping your measurements organized, you're setting yourself up for success in creating a shoe rack that is not only beautiful but also practical. So, take your time with this step; it’s worth the effort!
Height and Width Specifications
When it comes to designing your wooden shoe rack, understanding the ideal height and width is paramount. These specifications not only enhance usability but also ensure that your rack fits seamlessly into your space. Generally, the average height of a shoe rack ranges from 30 to 48 inches. This height allows for easy access to shoes without the need for bending excessively or reaching too high. If you're planning to store a variety of shoe types, consider a height that accommodates everything from flats to boots.
Width is equally important and can vary based on the number of shoes you intend to store. A width of 24 to 36 inches is often sufficient for a smaller rack, whereas larger racks can extend to 48 inches or more. Keep in mind that the width should also consider the available space in your entryway or closet. You wouldn’t want to design a beautiful shoe rack only to find it cramped in a corner!
To help you visualize the dimensions better, here’s a simple table summarizing the recommended height and width specifications based on shoe types:
| Shoe Type | Recommended Height (inches) | Recommended Width (inches) |
|---|---|---|
| Flats/Sandals | 30 - 36 | 24 - 36 |
| Heels | 36 - 42 | 24 - 36 |
| Boots | 42 - 48 | 30 - 48 |
Additionally, consider the depth of your shoe rack, which typically ranges from 12 to 16 inches. This measurement ensures that shoes are adequately supported and prevents them from toppling over. If you have bulky shoes, like winter boots, you might want to increase the depth slightly to accommodate their size.
In summary, when determining the height and width of your wooden shoe rack, think about the types of shoes you own, the space available, and how you want to access your footwear. By taking these factors into account, you can create a shoe rack that is not only functional but also visually appealing in your home.

Designing for Accessibility
When it comes to designing a wooden shoe rack, accessibility is not just a nice-to-have; it's a must! Imagine a beautifully crafted shoe rack that looks stunning but is a hassle to use. You want to ensure that your shoe rack is not only functional but also easy to access, especially when you're in a rush. After all, who wants to dig through a pile of shoes just to find their favorite pair? Here are some key considerations to keep in mind when designing your shoe rack for optimal accessibility.
First off, think about the height of your shoe rack. Ideally, the top shelf should be within arm's reach, allowing you to grab or store shoes without stretching too much. A common mistake is making the rack too tall, which can lead to awkward bending and stretching. A height of around 30 to 36 inches is generally comfortable for most users. However, if you're creating a rack for children or individuals with specific accessibility needs, consider adjusting the height accordingly.
Next, the depth and width of the shelves play a significant role in accessibility. You want to ensure that the shelves are deep enough to accommodate various shoe sizes, but not so deep that you have to reach into the abyss to find what you're looking for. A depth of 12 to 16 inches is usually sufficient for most shoes. Additionally, spacing between shelves should allow for easy access. A gap of at least 6 to 8 inches between each shelf is recommended to accommodate taller shoes like boots without cramping your style.
Another essential factor is the layout of your shoe rack. Consider a design that allows for easy visibility and access to all pairs. For instance, a tiered or angled shelf design can make it easier to see and reach your shoes. This way, you won’t have to pull out several pairs just to find the one you want. If you have a larger collection, you might also want to incorporate pull-out drawers or bins, which can keep your shoes organized while making it easier to access them without clutter.
Finally, don't forget about the material and finish of your shoe rack. A smooth finish is essential for easy cleaning, as dirt and dust can accumulate quickly in a shoe storage area. Additionally, consider using materials that are lightweight yet sturdy, so you can easily move the rack if needed. If you’re feeling creative, adding wheels to the bottom of your shoe rack can enhance mobility, making it simple to reposition the rack as your space needs change.
In summary, designing a shoe rack with accessibility in mind not only enhances functionality but also improves your overall experience. By considering height, depth, layout, and materials, you can create a shoe rack that is not just a storage solution but a stylish and convenient addition to your home. So, are you ready to build a shoe rack that makes your life easier?
- What is the best height for a shoe rack? A height of 30 to 36 inches is generally recommended for easy access.
- How deep should the shelves be? Shelves should be 12 to 16 inches deep to accommodate most shoe sizes comfortably.
- Can I make my shoe rack mobile? Yes! Adding wheels to the base can make it easy to move your shoe rack around.
- What materials are best for a shoe rack? Lightweight yet sturdy materials like plywood or MDF are ideal, with a smooth finish for easy cleaning.
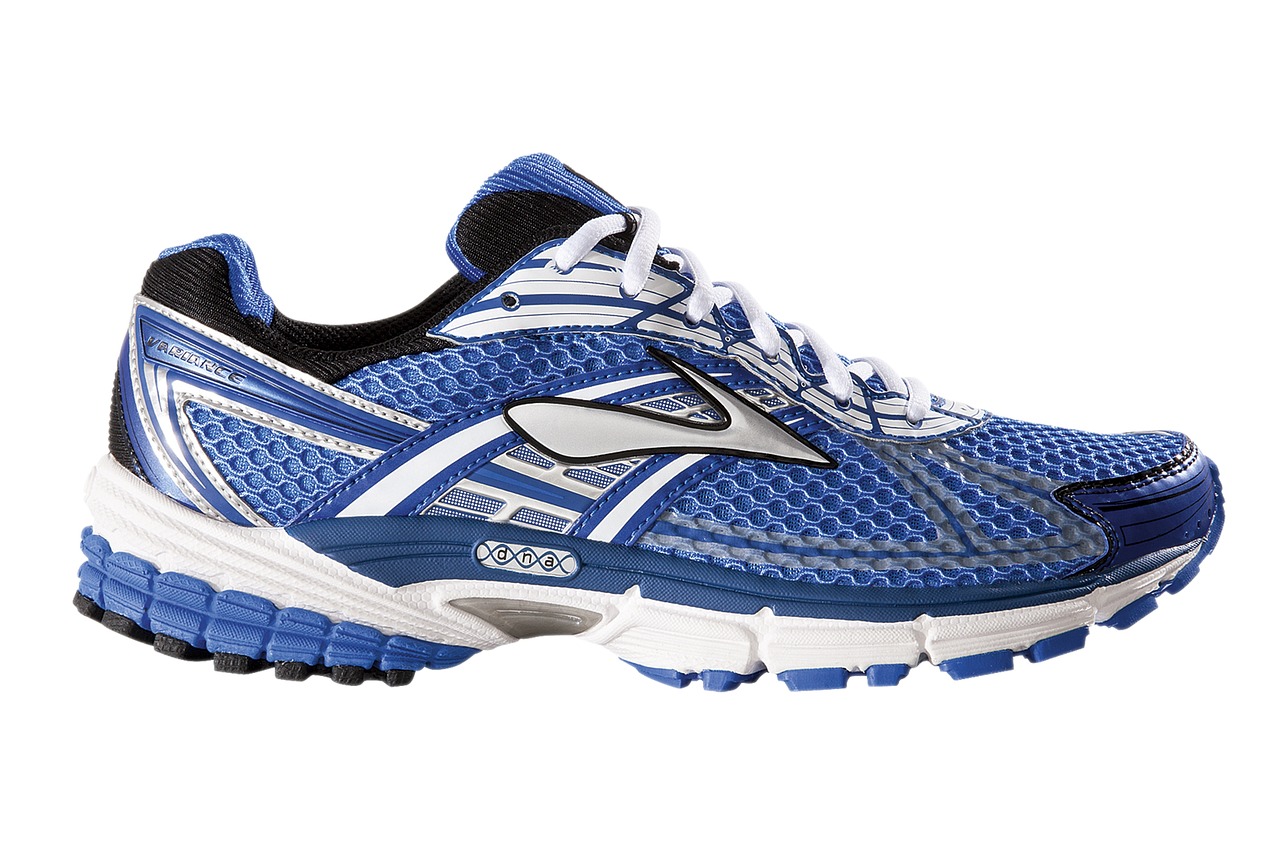
Creating a Sketch
When it comes to building your own wooden shoe rack, is an essential step that should not be overlooked. Think of your sketch as the roadmap for your project; without it, you might find yourself lost in a sea of wood and tools. Start by gathering all your measurements and design ideas, as these will guide the overall layout. A well-thought-out sketch will help you visualize the final product and ensure that everything fits together seamlessly.
Begin by drawing a simple outline of the shoe rack. Use a pencil, ruler, and graph paper to keep everything proportional. You might want to include the following elements in your sketch:
- Dimensions: Clearly mark the height, width, and depth of your shoe rack.
- Levels: Indicate how many shelves or compartments you want and their spacing.
- Design Features: Consider adding features like hooks for accessories or a top shelf for decorative items.
Once you have the basic outline, it’s time to get creative! This is your chance to incorporate your personal style into the design. You can choose a modern minimalist look or something more traditional with intricate details. Think about the overall aesthetics of your home and how the shoe rack will fit into that picture. You might even want to use different colors or textures in your sketch to get a better idea of how the finished product will look.
After finalizing your sketch, it’s a good idea to take a step back and review it. Ask yourself questions like: Does it look balanced? Will it fit in the designated space? Is it practical for my needs? This self-review process can save you from potential headaches during the construction phase. If you're unsure, don’t hesitate to consult with friends or family; sometimes a fresh pair of eyes can offer valuable insights.
Finally, once you are satisfied with your sketch, make several copies. Keep one for yourself and consider giving one to someone who can help with the construction, like a friend or a family member. This will help ensure everyone is on the same page as you move forward with your DIY project. Remember, a well-prepared sketch not only enhances the building process but also boosts your confidence as a DIYer!

Tools and Equipment Needed
When embarking on the exciting journey of building your own wooden shoe rack, having the right tools and equipment is essential. Think of it like gearing up for an adventure; without the right supplies, you might find yourself stuck halfway through your project, wishing you had that one tool that could make everything easier. So, let’s break down what you’ll need to ensure your DIY project goes off without a hitch.
First and foremost, you’ll want to gather some basic hand tools. These are the backbone of any woodworking project and will help you tackle most tasks with ease. Here’s a quick rundown of the essential hand tools you’ll need:
- Measuring Tape: Accurate measurements are crucial, so a good measuring tape is non-negotiable.
- Square: This tool is vital for ensuring your cuts are straight and your corners are square.
- Hand Saw: A reliable hand saw is perfect for making precise cuts in your wood.
- Hammer: You’ll need this for driving in nails and assembling your rack.
- Screwdriver: A good set of screwdrivers will help you secure joints and fittings.
Now, while basic hand tools can get you far, incorporating some power tools can significantly speed up the process and improve accuracy. If you’re serious about your DIY project, consider adding the following power tools to your arsenal:
- Power Drill: This tool is essential for making holes and driving screws quickly and efficiently.
- Jigsaw: A jigsaw is fantastic for making intricate cuts and curves in your wood pieces.
- Orbital Sander: This tool will save you a ton of time when it comes to smoothing out the surfaces of your wood.
In addition to tools, you’ll also need some equipment and materials to ensure a smooth building process. Here are a few items you shouldn’t overlook:
| Item | Purpose |
|---|---|
| Wood Glue | For securing joints and ensuring a strong bond. |
| Nails and Screws | To hold everything together; choose the right size for your project! |
| Sandpaper | For smoothing out rough edges and surfaces before finishing. |
| Wood Finish (stain/paint/sealant) | To protect your shoe rack and enhance its appearance. |
Having the right tools and equipment is like having a well-stocked toolbox on a treasure hunt; it sets you up for success. With these essentials in hand, you’ll be ready to dive into the exciting world of DIY woodworking. Remember, preparation is half the battle, so take the time to gather everything you need before you start building your beautiful wooden shoe rack!
Q: Do I need advanced woodworking skills to build a shoe rack?
A: Not at all! This project is great for beginners. Just follow the instructions carefully, and you’ll be surprised at what you can accomplish.
Q: Can I customize the size of the shoe rack?
A: Absolutely! Measure your space and adjust the dimensions to fit your needs. Personalization is part of the fun!
Q: What type of wood is best for a shoe rack?
A: Popular choices include plywood, pine, or oak, depending on your budget and desired finish. Each type offers durability and style.
Q: How long will it take to build my shoe rack?
A: The time can vary based on your skill level and the complexity of your design, but most DIYers can complete it within a weekend.
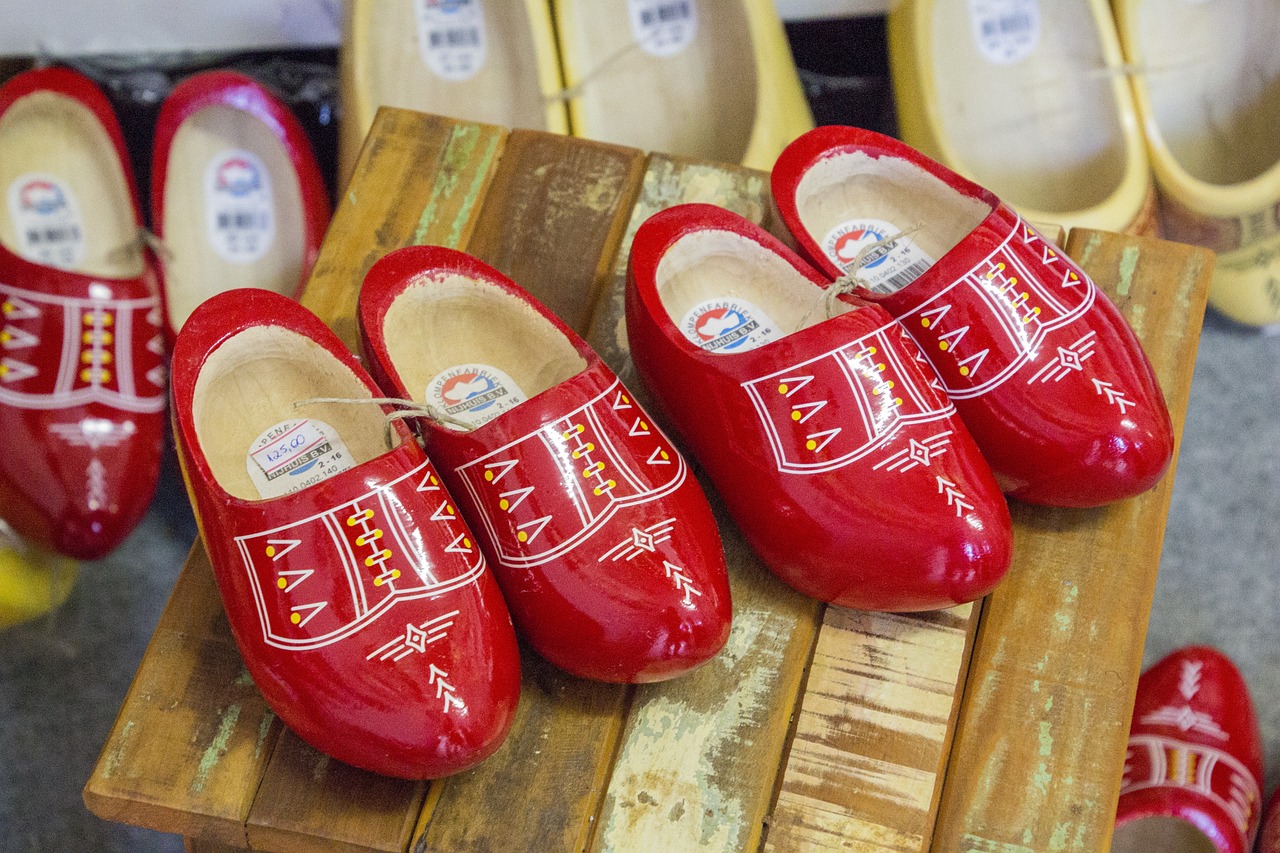
Basic Hand Tools
When embarking on your DIY journey to build a wooden shoe rack, having the right tools is crucial. You don't need a fancy workshop filled with high-end equipment; instead, a few essential hand tools can get the job done effectively. First up, you’ll want a reliable measuring tape. This tool is your best friend when it comes to ensuring that every piece of wood is cut to the correct length. After all, a shoe rack that’s too big or too small for your space isn't going to do you much good!
Next, consider investing in a good handsaw. Whether you choose a panel saw or a miter saw, the key is to have something that can handle the wood you’re working with. A handsaw will allow you to make precise cuts, which is essential for achieving that professional look. Alongside that, a chisel can come in handy for fine-tuning those edges and joints, making sure everything fits together seamlessly.
Don’t forget about a hammer! This tool is not just for driving nails; it can also be used to gently tap pieces into place. Pair it with some wood screws and a screwdriver, and you’ll be well-equipped to assemble your rack securely. Speaking of assembly, a level is essential to ensure that your shoe rack stands straight and doesn’t wobble. A crooked rack can be a real eyesore, not to mention it could lead to shoes tumbling off!
In addition to these tools, having a sandpaper selection will help you smooth out any rough edges, giving your finished product a polished look. You might also want to grab a clamp or two to hold pieces together while you work. This will make the assembly process much easier and more efficient.
To summarize, here’s a quick rundown of the basic hand tools you’ll need for your wooden shoe rack project:
- Measuring Tape
- Handsaw
- Chisel
- Hammer
- Wood Screws and Screwdriver
- Level
- Sandpaper
- Clamps
With these tools in hand, you’re ready to take on your DIY shoe rack project with confidence. Remember, the right tools not only make the job easier but also help you achieve a more professional finish. So, gather your tools, roll up your sleeves, and let’s get crafting!
Q: What type of wood is best for a shoe rack?
A: The best types of wood for a shoe rack include pine, oak, and plywood. Each offers durability and a nice finish, but your choice might depend on your budget and aesthetic preferences.
Q: Do I need power tools for this project?
A: While power tools can make the process quicker, they are not necessary. Basic hand tools are often sufficient for building a sturdy and attractive shoe rack.
Q: How much space should I leave between shelves?
A: A good rule of thumb is to leave about 6-12 inches between shelves, depending on the types of shoes you plan to store. This height accommodates most types of footwear comfortably.
Q: Can I customize the design of my shoe rack?
A: Absolutely! One of the best parts of a DIY project is that you can tailor the design to fit your space and style. Feel free to add decorative elements or adjust dimensions as needed!
Power Tools for Efficiency
When it comes to building your wooden shoe rack, having the right power tools can make a world of difference. Imagine trying to slice through a thick piece of wood with nothing but a butter knife; frustrating, right? That's why investing in the right tools is essential for making your DIY project not only easier but also more enjoyable. Power tools can significantly speed up the construction process, allowing you to focus on the creative aspects of your design rather than getting bogged down in laborious tasks.
First on the list is the circular saw. This tool is a game-changer for cutting large pieces of wood with precision. Whether you’re making straight cuts for the sides of your rack or angled cuts for decorative elements, a circular saw can handle it all. Pair it with a sturdy workbench, and you’ll find that your cutting becomes not only quicker but also more accurate.
Next, consider a power drill. This tool is essential for drilling holes and driving screws, which is crucial for assembling your shoe rack. A power drill can save you a significant amount of time compared to manual drilling, and it ensures that your screws are securely fastened. Look for a drill with variable speeds and torque settings, as this will give you greater control over your work.
Another invaluable tool is the jigsaw. If your design includes curves or intricate shapes, a jigsaw will be your best friend. This tool allows for more detailed cuts, enabling you to add unique features to your shoe rack that reflect your personal style. With a jigsaw, you can transform a simple design into something that stands out.
Finally, a sander is essential for achieving that smooth finish on your wood. After cutting and assembling, the last thing you want is rough edges that could snag on your shoes or create an unappealing look. A power sander will help you quickly smooth out all surfaces, making your shoe rack not only functional but also aesthetically pleasing.
To summarize, here’s a quick table of the power tools mentioned and their primary functions:
| Power Tool | Function |
|---|---|
| Circular Saw | For cutting large pieces of wood with precision. |
| Power Drill | For drilling holes and driving screws during assembly. |
| Jigsaw | For making intricate cuts and curves in the wood. |
| Sander | For smoothing surfaces and achieving a polished finish. |
By equipping yourself with these power tools, you’ll find that constructing your wooden shoe rack becomes not only a more efficient process but also a more enjoyable one. Remember, the right tools can turn a daunting task into a delightful experience, allowing you to unleash your creativity and build something truly special.
Q: Do I really need power tools for this project?
A: While you can use hand tools, power tools will save you time and effort, making the project much easier and more efficient.
Q: Can I borrow power tools instead of buying them?
A: Absolutely! Many communities have tool libraries where you can borrow power tools for your DIY projects.
Q: Are there safety precautions I should take when using power tools?
A: Yes! Always wear safety goggles, ear protection, and follow the manufacturer's instructions for each tool to ensure a safe working environment.
Q: How do I maintain my power tools?
A: Regular maintenance includes cleaning, checking for any loose parts, and ensuring blades and bits are sharp. This will prolong the life of your tools.

Step-by-Step Construction Process
Building your own wooden shoe rack can be a thrilling experience, transforming raw materials into a functional piece of furniture that adds charm to your home. The construction process can seem daunting, but by breaking it down into manageable steps, you’ll find it’s easier than you might think. Let's dive into the details!
The first step in your construction journey is to prepare the wood. This involves selecting the right pieces and ensuring they are cut to the appropriate sizes. Start by measuring your wood according to the dimensions you’ve established in your design sketch. Once you have your pieces, it’s time to cut them down to size using a saw. Make sure to wear safety goggles and follow all safety precautions when handling power tools. After cutting, sanding is crucial. Sanding not only smooths out rough edges but also prepares the wood for finishing. Use a medium-grit sandpaper followed by a fine-grit one to achieve a polished look. Don’t forget to clean off any dust with a damp cloth before moving on!
Next, we move on to the assembly stage. This is where your shoe rack starts to take shape! Begin by laying out all your pieces in the order they’ll be assembled. For a basic shoe rack, you’ll typically have a top, bottom, sides, and shelves. Use wood glue to bond the pieces together, applying it generously but not excessively, as you don’t want it to ooze out when you clamp the pieces together. Clamping is essential here; it ensures a tight fit and allows the glue to set properly. After clamping, you can reinforce the joints with screws for added stability. Make sure to pre-drill the holes to prevent the wood from splitting.
As you continue to assemble, keep an eye on alignment. A crooked shoe rack can be a real eyesore! Use a level to check that everything is even. If you’re feeling adventurous, consider adding a back panel to your shoe rack for extra support and a finished look. This can also prevent shoes from falling out the back. Once everything is assembled and secured, it’s time to move on to the finishing touches.
Speaking of finishes, this is where you can truly let your creativity shine! Consider whether you want to stain your shoe rack to enhance the natural wood grain or paint it to match your home decor. If you choose to stain, apply it evenly with a brush or cloth and allow it to soak in before wiping off the excess. For paint, a primer can help the color adhere better and provide a more vibrant finish. After the paint or stain dries, applying a sealant will protect your shoe rack from moisture and wear, ensuring it lasts for years to come.
Finally, don’t underestimate the power of decorative elements. Adding hooks for bags, a small shelf for keys, or even decorative baskets can elevate the functionality of your shoe rack. These little touches not only enhance usability but also make your shoe rack a unique reflection of your personal style.
With these steps, you’ll be well on your way to constructing a beautiful and functional wooden shoe rack that not only organizes your footwear but also adds a personal touch to your space. Remember, the key is to take your time and enjoy the process - after all, DIY is about creating something special with your own hands!
- What type of wood is best for a shoe rack?
Hardwoods like oak or maple are durable and aesthetically pleasing, while softer woods like pine are easier to work with and more affordable.
- How much space do I need for a shoe rack?
Measure your available space and consider the number of shoes you want to store. A standard shoe rack is usually between 30-36 inches high and 24-36 inches wide.
- Can I customize the design?
Absolutely! Feel free to modify dimensions, add shelves, or incorporate hooks to suit your needs and style.
- How do I maintain my wooden shoe rack?
Regularly dust your shoe rack and use a wood conditioner or polish to keep the wood looking fresh and vibrant.

Preparing the Wood
Before diving into the construction of your wooden shoe rack, properly is essential for achieving a polished and professional-looking end product. The first step in this process is to select quality wood that suits your design and budget. Common choices include pine, oak, and birch, each offering unique characteristics that can affect the overall aesthetic and durability of your shoe rack.
Once you've chosen your wood, it's time to cut it to size. This is where your measurements come into play. Utilize a circular saw or a miter saw for straight cuts, ensuring that you follow your design specifications closely. Accuracy is key here; even a small miscalculation can lead to a misfit during assembly. After cutting, it's crucial to sand the edges and surfaces of the wood to eliminate any splinters or rough spots. This not only enhances the appearance but also prepares the wood for finishing.
Here are the steps you should follow when preparing your wood:
- Measure Twice, Cut Once: Double-check all measurements to ensure accuracy.
- Cut the Wood: Use appropriate saws for clean cuts.
- Sand the Edges: Smooth out any rough areas with sandpaper.
- Treat the Wood: Apply a wood conditioner if necessary to enhance finish absorption.
After sanding, consider treating the wood with a wood conditioner, especially if you're planning to stain it. This will help the stain apply evenly and enhance the overall finish. Once you've treated the wood, allow it to dry completely before moving on to the next steps. This preparation phase may seem tedious, but taking the time to do it right will pay off in the long run, resulting in a shoe rack that not only looks great but also lasts for years to come.
Finally, remember that the type of finish you choose will also influence how you prepare your wood. If you're going for a natural look, a simple clear coat may suffice. However, if you want a vibrant color, you'll want to ensure your wood is well-prepared to absorb the stain. So, whether you’re going for a rustic charm or a modern vibe, the preparation of your wood is a crucial step in making your dream shoe rack a reality.
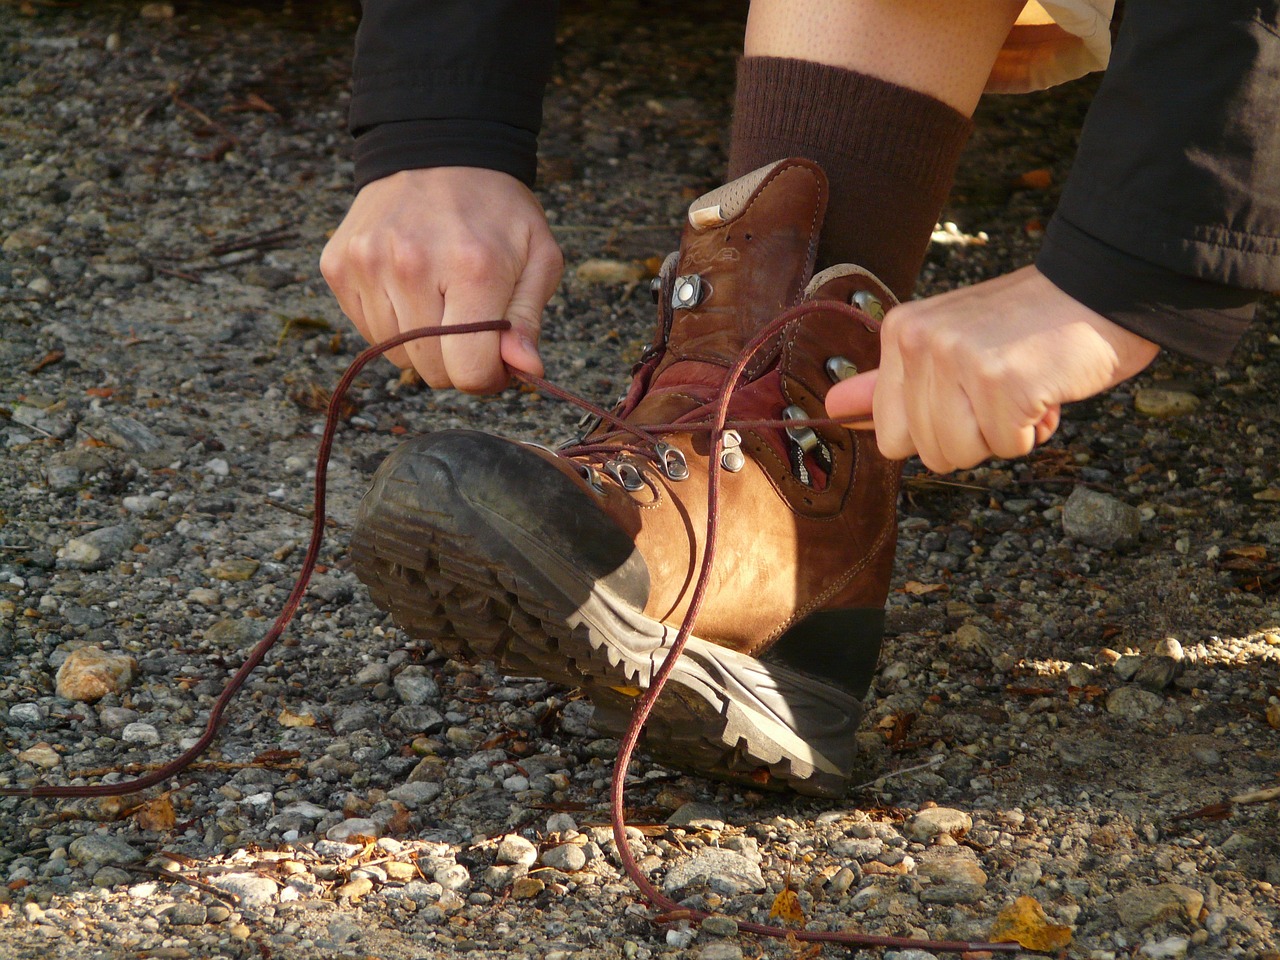
Assembling the Rack
Assembling your wooden shoe rack is where all your hard work in planning and preparing finally comes together. It's like piecing together a puzzle, and when you get it right, the satisfaction is immense! Before you dive in, make sure you have all your materials and tools ready. You don’t want to be halfway through and realize you’re missing a screw or a crucial tool. The assembly process can be broken down into several key steps, each requiring a bit of finesse and attention to detail.
Begin by laying out all your cut pieces on a flat surface. This helps you visualize the final product and ensures that you have everything you need. It’s akin to laying out ingredients before cooking; having everything in place makes the process smoother. You’ll want to identify which pieces will form the base, shelves, and back of the rack. Once you’ve organized your pieces, it’s time to start joining them together.
Start with the base of the rack. Using wood glue and screws, attach the side pieces to the bottom panel. Make sure to drill pilot holes to prevent the wood from splitting. This is a crucial step; think of it as creating a sturdy foundation for a house. If the base isn’t solid, the entire structure can become unstable. Once the sides are securely attached, move on to the back panel, which adds additional stability. Again, pilot holes are your best friend here.
Next, it’s time to add the shelves. Depending on your design, you might want to use adjustable shelf brackets, which allow you to customize the height of each shelf. This flexibility is fantastic for accommodating different shoe sizes, from flats to high-tops. To install the shelves, mark the desired heights on the side panels and secure the brackets in place. Then, simply place the shelves on the brackets and ensure they are level.
As you assemble, keep checking for squareness. You can do this by measuring diagonally from corner to corner; if the measurements are equal, your rack is square. This is an essential step that can save you a lot of headaches later on. If you notice any discrepancies, make adjustments before the glue dries and the screws are tightened.
Lastly, once everything is assembled, give your rack a thorough inspection. Look for any rough edges or areas that might need sanding. A smooth finish not only looks better but also prevents any injuries when handling the rack. If you’re feeling creative, now is the time to consider adding decorative elements or features that reflect your personal style. You could paint it a bold color or add stenciled designs to the sides—let your creativity shine!
In summary, assembling your wooden shoe rack is a rewarding experience that blends creativity with practicality. By following these steps and ensuring you take your time, you’ll end up with a beautiful and functional piece that not only organizes your shoes but also enhances your space. Remember, patience is key, and the end result will be worth every minute spent on assembly!
- What type of wood is best for a shoe rack? - Plywood and hardwoods like oak or maple are excellent choices due to their durability and aesthetic appeal.
- How can I ensure my shoe rack is stable? - Make sure to use sturdy joints, add a back panel for support, and check that everything is square during assembly.
- Can I customize the size of my shoe rack? - Absolutely! Measure your space and adjust the dimensions of your design accordingly.
- What finish should I use for my shoe rack? - Choose a finish that complements your home decor, such as paint, stain, or a clear sealant for a natural wood look.

Finishing Touches
Now that you've constructed your wooden shoe rack, it's time to think about the that will elevate its appearance and durability. Finishing is not just about looks; it plays a crucial role in protecting the wood from wear and tear, moisture, and potential pests. So, let’s dive into how you can make your shoe rack not only functional but also a stunning piece of furniture in your home.
When it comes to finishes, you have a variety of options to choose from, each with its unique benefits. For instance, stains can enhance the natural beauty of the wood grain, while paints offer a chance to express your creativity through color. If you’re leaning towards a natural look, a clear sealant may be the way to go. It’s essential to consider the overall aesthetic of your home when making your choice. Do you prefer a rustic charm, or are you aiming for a sleek modern finish? The right finish can tie your shoe rack into the existing decor seamlessly.
Here’s a breakdown of some popular finishing options:
| Finish Type | Description | Best For |
|---|---|---|
| Stain | Enhances wood grain, available in various shades | Natural wood appearance |
| Paint | Completely covers wood, available in endless colors | Bold color choices |
| Clear Sealant | Protects wood while maintaining its natural look | Durability and moisture resistance |
After selecting your finish, the application process is critical. Make sure to prepare the surface properly by sanding it down to a smooth finish. This step is crucial because it helps the finish adhere better and results in a more polished look. Use fine-grit sandpaper for the best results, and don’t forget to wipe away any dust with a damp cloth before applying your chosen finish.
Once your wood is prepped, apply the finish according to the manufacturer’s instructions. Whether you’re using a brush, roller, or spray can, work in a well-ventilated area to avoid inhaling fumes. Apply multiple coats if necessary, allowing adequate drying time between each coat. This will ensure that your shoe rack is not only beautiful but also well-protected.
To add a personal touch, consider incorporating decorative elements. These could be anything from stenciled designs to decorative knobs on the shelves or even a small plant holder integrated into the design. These little details can make your shoe rack uniquely yours and complement your home decor beautifully. Think of it as adding a personal signature to your work—something that reflects your style and personality.
Finally, remember to maintain your shoe rack regularly. Dust it off, and if you used a stain or paint, consider reapplying the finish every few years to keep it looking fresh and new. With these finishing touches, your wooden shoe rack will not only serve its purpose but also become a stunning focal point in your entryway or closet.
Q: How long does the finish take to dry?
A: Drying times can vary based on the type of finish and environmental conditions, but generally, you should allow at least 24 hours for a coat to dry before applying another.
Q: Can I mix different types of finishes?
A: It's best to stick with one type of finish to avoid adhesion issues. If you want a layered look, consult the manufacturer's guidelines on compatibility.
Q: How can I ensure my shoe rack lasts long?
A: Regular maintenance, such as cleaning and reapplying finish, will help extend the life of your shoe rack. Keeping it in a dry area will also prevent moisture damage.
Choosing the Right Finish
When it comes to your wooden shoe rack, the finish you choose is not just about aesthetics; it's also about protection and durability. Think of the finish as the armor your shoe rack wears, shielding it from scratches, moisture, and everyday wear and tear. So, how do you pick the right one? Let's dive into the options!
First off, you have several types of finishes to consider. Each has its unique properties and visual appeal. Here are some popular choices:
- Stains: These enhance the natural grain of the wood while adding color. They penetrate the wood, providing a rich hue without covering the grain.
- Paint: If you want to add a pop of color or match your shoe rack to your decor, paint is an excellent option. However, it can obscure the beauty of the wood grain.
- Varnish: This is a clear coat that adds a protective layer while allowing the natural beauty of the wood to shine through. It's great for durability.
- Sealants: If you're worried about moisture damage, a good sealant can provide an extra layer of protection, especially if your shoe rack is placed in a humid area.
Now, let's talk about how to choose the right finish based on your lifestyle and the environment where your shoe rack will live. For instance, if you have kids or pets, you might want a finish that is easy to clean and resistant to scratches. On the other hand, if your shoe rack is more of a decorative piece in a low-traffic area, you can opt for something that is purely aesthetic, like a beautiful stain.
Additionally, consider the wood type you are using. Some woods, like oak or pine, absorb stains differently. Therefore, testing a small area before committing to a finish can save you from potential heartache later. Imagine putting in all that hard work only to find out your chosen stain made the wood look dull or uneven!
Finally, don't forget about the application process. Some finishes are easier to apply than others. If you're new to DIY projects, you might want to start with something straightforward, like a varnish or a sealant, which generally requires less skill than a perfect paint job.
In conclusion, choosing the right finish for your wooden shoe rack is a blend of personal preference, practicality, and a touch of creativity. Remember, this is your project, and the finish you select will reflect your style while ensuring your shoe rack stands the test of time.
1. What is the best finish for a wooden shoe rack?
The best finish depends on your needs. For durability and ease of cleaning, varnish or sealants are great. If you want aesthetics, consider stains or paints.
2. Can I mix different finishes?
Yes, you can! Just ensure that the finishes are compatible. For example, you can stain the wood and then apply a clear varnish for protection.
3. How do I apply a finish?
Application methods vary by finish. Generally, you can use brushes, rags, or spray cans. Always follow the manufacturer's instructions for the best results.
4. How long does the finish take to dry?
Drying times can vary widely based on the type of finish and environmental conditions. Always check the label, but expect anywhere from a few hours to a couple of days.
Adding Decorative Elements
Once you've successfully constructed your wooden shoe rack, it's time to let your creativity shine through by adding some decorative elements. This is where you can truly personalize your creation and make it a standout piece in your home. Consider how the shoe rack will fit into your existing decor and choose embellishments that complement your style. For instance, if your home features a rustic vibe, you might want to incorporate elements like woven baskets or vintage labels to enhance the overall aesthetic.
One popular approach is to use decorative stencils or vinyl decals to add unique designs or quotes that resonate with you. Imagine walking into your entryway and being greeted by a cheerful quote about shoes or style! Additionally, you can paint the shoe rack in vibrant colors or soft pastels to match your interior theme. Just remember to use paint that's suitable for wood and easy to clean, ensuring your rack stays looking fresh.
Incorporating functional decorations can also be a clever way to enhance your shoe rack. For example, adding hooks on the side for accessories like hats or bags not only saves space but also adds a stylish touch. You might even consider using decorative bins or boxes on the shelves to store smaller items like shoe polish or laces, keeping everything organized while contributing to the look of the rack.
Another idea is to use plants as decorative elements. A small potted plant or a succulent can bring life to your shoe rack, creating a refreshing atmosphere. Just ensure that the plants you choose require minimal maintenance, especially if the rack is placed in a high-traffic area. You could even hang small planters from the sides of the rack for a unique vertical garden effect.
Lastly, don't underestimate the impact of lighting. If your shoe rack is in a dimly lit area, consider adding a small LED strip light underneath the top shelf. This not only highlights your beautiful shoes but also adds an inviting glow to the space. Remember, the goal is to create a shoe rack that is not just functional but also a beautiful addition to your home. By thoughtfully selecting decorative elements, you can transform a simple wooden shoe rack into a stunning statement piece that reflects your personal style.
- What type of wood is best for a shoe rack?
Hardwoods like oak or maple are durable and aesthetically pleasing, while softer woods like pine are more affordable and easier to work with.
- How can I ensure my shoe rack is stable?
Make sure to use proper joinery techniques and consider adding brackets or supports if the rack is particularly tall or holds a lot of weight.
- Can I customize the size of my shoe rack?
Absolutely! Measure your available space and adjust the dimensions of your design accordingly to fit perfectly.
- What finishes are best for protecting the wood?
Polyurethane or water-based sealers are excellent for providing a durable finish that protects against scratches and moisture.
Frequently Asked Questions
- What type of wood is best for a shoe rack?
When it comes to choosing wood for your shoe rack, durability and aesthetic appeal are key. Hardwoods like oak or maple are excellent choices due to their strength and longevity. If you're looking for something more budget-friendly, pine is a good option, but it may not hold up as well over time. Ultimately, it depends on your style and budget!
- How do I measure my space for a shoe rack?
Measuring your space accurately is crucial. Start by identifying the area where you want to place the rack. Use a tape measure to check the height, width, and depth of the space. Don’t forget to consider the height of your shoes! This way, you can design a rack that fits perfectly and meets your storage needs.
- What tools do I need to build a shoe rack?
You'll need a mix of hand tools and power tools for this project. Essential hand tools include a saw, hammer, and screwdriver. For a more efficient build, power tools like a drill and sander will save you a lot of time and effort. Make sure you have all your tools ready before you start to avoid any interruptions!
- Can I customize the design of my shoe rack?
Absolutely! Customizing your shoe rack is one of the best parts of a DIY project. You can play around with dimensions, styles, and even add decorative elements that reflect your personal taste. Sketching out your ideas beforehand will help you visualize the final product and ensure it fits your space perfectly.
- What finishes can I use to protect my shoe rack?
Choosing the right finish is essential for both aesthetics and protection. You can opt for stains, paints, or sealers. Stains enhance the wood's natural grain, while paints allow for a pop of color. Sealers protect against moisture and wear, making your shoe rack last longer. Just consider the look you want to achieve!
- How can I make my shoe rack more accessible?
Accessibility is key in any design. To make your shoe rack user-friendly, consider open shelving or a sliding design that allows for easy access. Organizing shoes by type or season can also help you grab what you need quickly. Think about your daily routine and design accordingly!


