
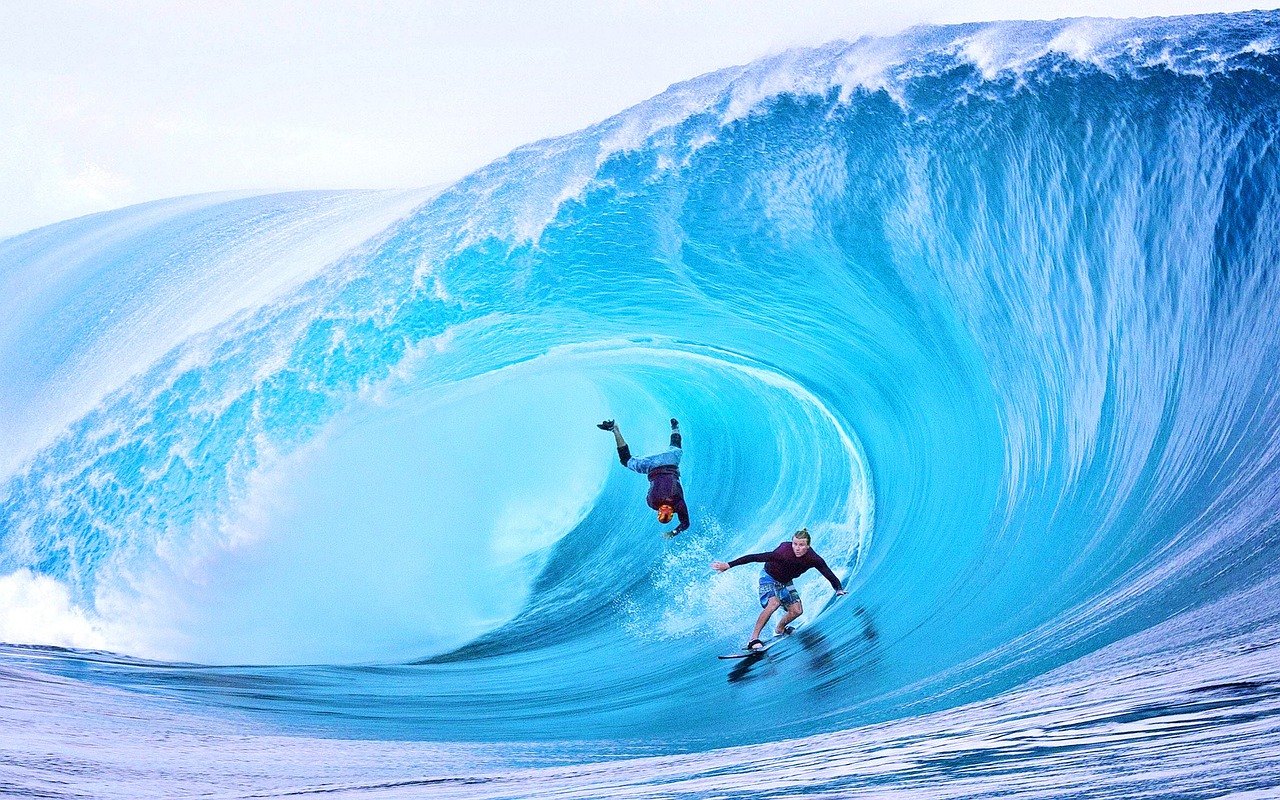
Mastering the Art of Ocean Waves: A Painting Tutorial
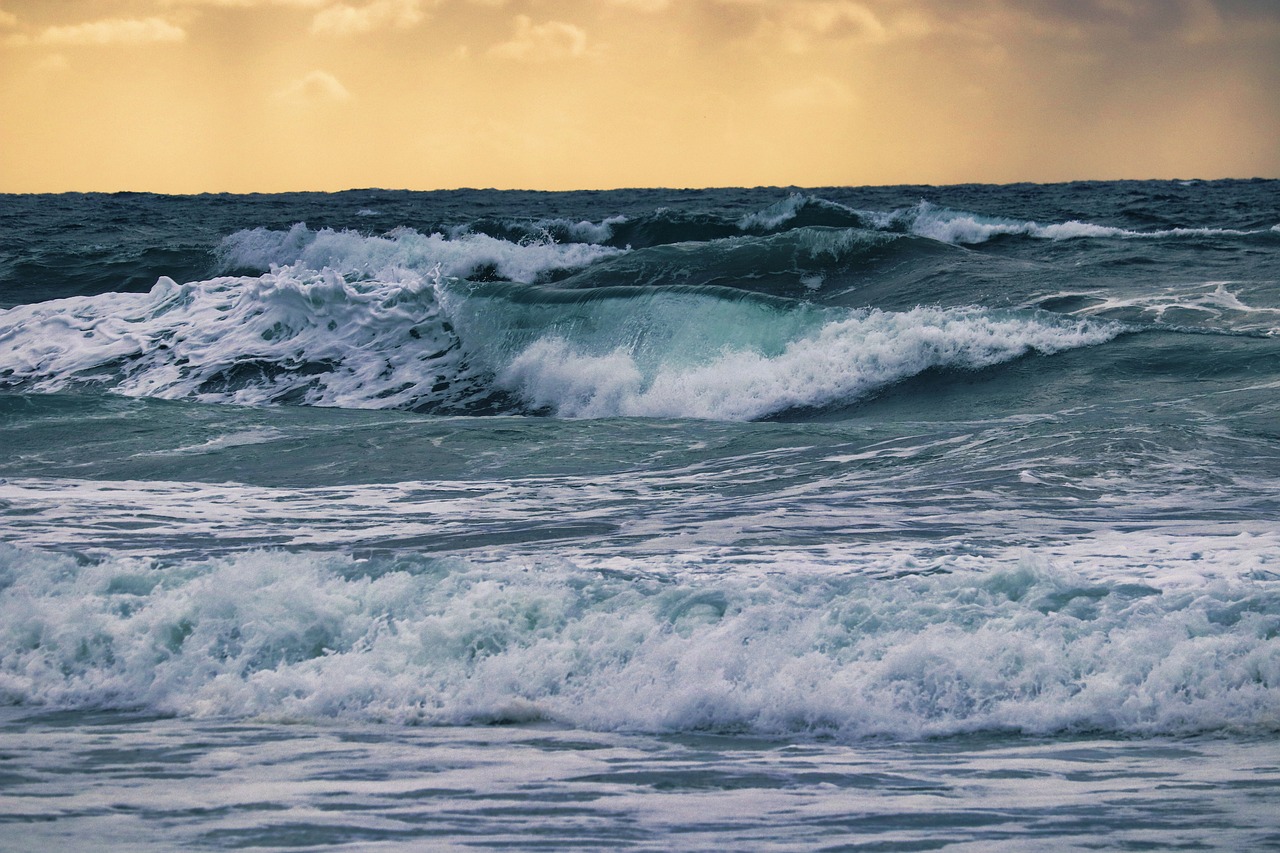
Welcome to the enchanting world of ocean waves, where the rhythm of the sea dances across your canvas! Painting ocean waves is not just about slapping some blue paint on a surface; it’s about capturing the very essence of movement, light, and emotion that water evokes. Whether you're a seasoned artist or a curious beginner, this tutorial will guide you through the intricate process of bringing those magnificent waves to life on your canvas. So, grab your brushes and let's dive into the art of painting ocean waves!
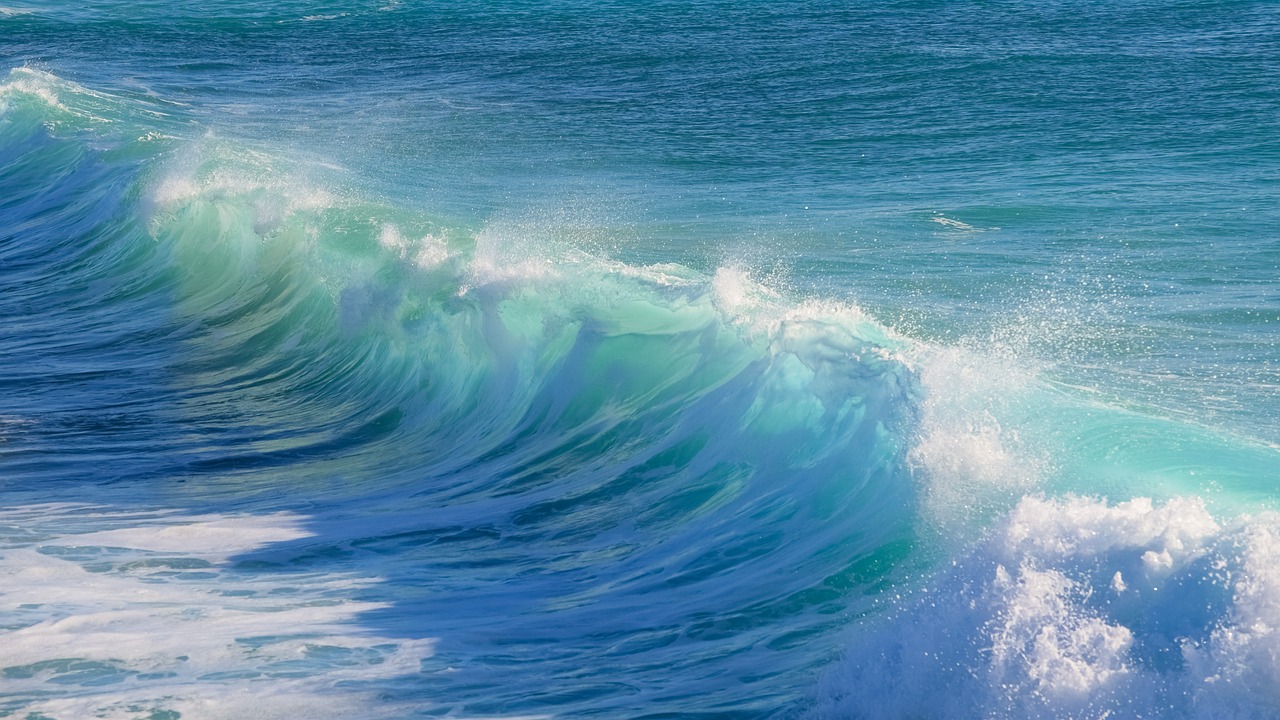
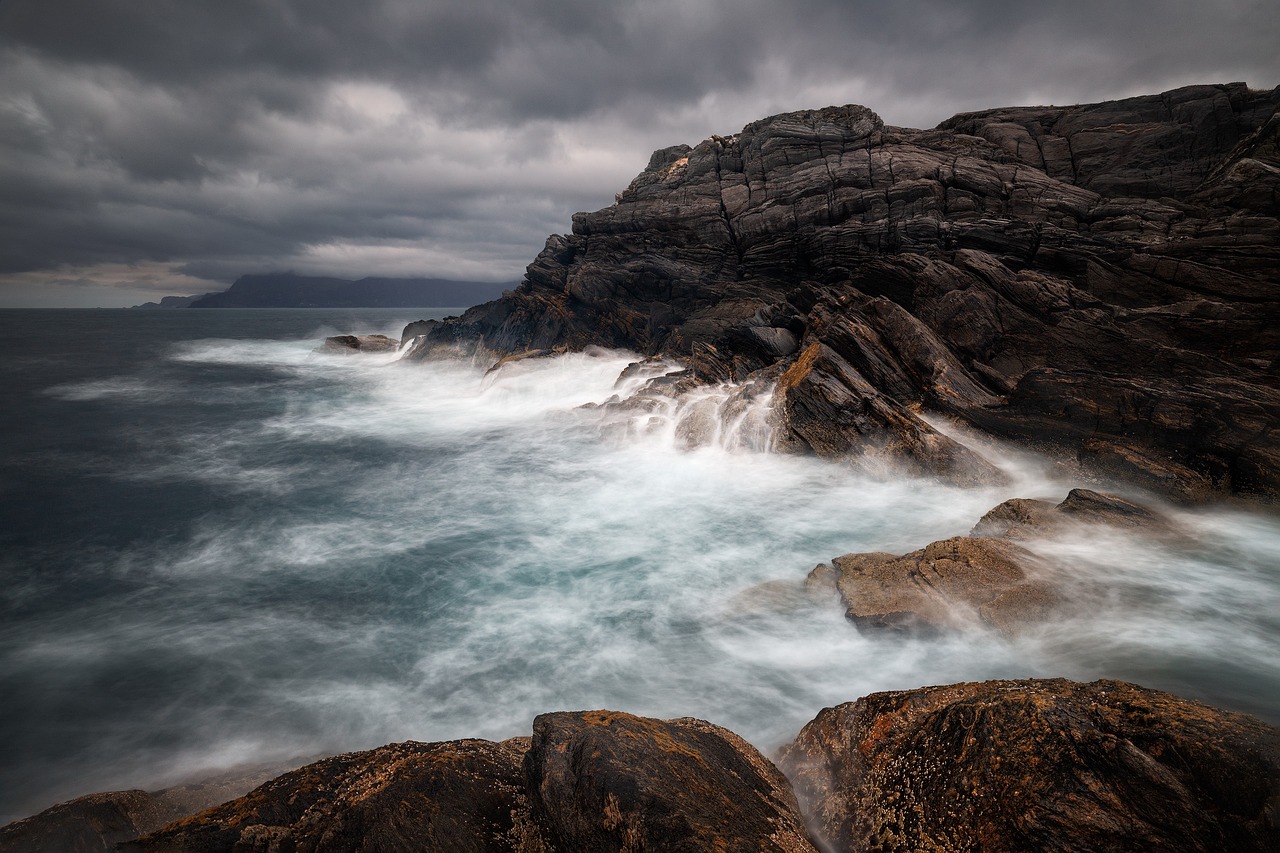
Before you even pick up a brush, it’s essential to understand the science behind ocean waves. Waves are formed by the wind as it blows across the surface of the water, creating ripples that grow into larger swells. These swells then travel across the ocean, and when they reach the shore, they break, creating the beautiful crashing waves we all love. Understanding this dynamic movement not only enriches your knowledge but also enhances your ability to paint them accurately. Think of it like learning the choreography of a dance; the more you know about the movements, the better you can replicate them in your artwork.
Now that you have a grasp of the science, let’s talk about materials. The right tools can make or break your painting experience. When it comes to painting ocean waves, the choice of paint, brushes, and canvases is crucial. Each material brings something unique to the table, and knowing how to select them can significantly impact your final piece. For instance, acrylic paints are fantastic for their quick-drying properties, allowing for layering and experimentation. On the other hand, oils can provide a depth and richness that is hard to achieve with other mediums. So, what should you choose? Here’s a quick breakdown:
| Material | Advantages |
|---|---|
| Acrylics | Fast-drying, versatile, excellent for layering. |
| Oils | Rich textures, longer working time, vibrant colors. |
| Watercolors | Soft, fluid effects, ideal for transparency. |
Each type of paint has its own personality. Acrylics are often the go-to for many artists because of their quick-drying nature. They allow you to layer colors and create intricate textures, which are perfect for depicting the frothy edges of waves. Oils, however, invite you into a world of richness and depth. They take longer to dry, which means you can blend colors seamlessly, creating stunning gradients that mimic the ocean's surface. Watercolors, with their ethereal quality, can capture the lightness and fluidity of water beautifully. It’s all about finding what resonates with your style!
When deciding between acrylics and oils, consider your painting style. If you love to work quickly and enjoy layering, acrylics might be your best friend. But if you want to spend more time perfecting textures and colors, oils could be your ideal match. Each medium has its quirks, so experiment and find what feels right for you!
Watercolors can be particularly magical when painting ocean waves. The way the pigments flow and blend can create stunning effects that mimic the transparency and movement of water. Techniques such as wet-on-wet and glazing can help you achieve the soft transitions and delicate highlights that characterize ocean scenes. Don’t be afraid to play around and see what happens when you let the water do some of the work!
Choosing the right brushes is like selecting the perfect dance partners for your artistic journey. Different brushes can create various textures and effects, essential for capturing the nuances of ocean waves. Flat brushes are great for broad strokes and the base of your waves, while round brushes can help you add the finer details of foam and splashes. Remember, the right brush can make all the difference in the world!
To truly capture the essence of ocean waves, you need to understand their movement. Waves are not static; they are constantly in motion, and your painting should reflect that dynamism. Techniques such as layering and using color wisely will play a significant role in showing the movement of water. When you layer your paint, you create depth, allowing the viewer to feel as if they are looking into the ocean itself.
Layering is a powerful technique in painting. Start with a base layer that represents the overall color of the water. Then, gradually build up layers, adding darker shades to create shadows and lighter shades for highlights. This method not only adds depth but also gives your waves a more realistic appearance. Think of it as sculpting with paint—each layer adds dimension and life to your artwork.
Color is your best friend when painting ocean waves. The hues you choose can evoke different moods and times of day. For instance, vibrant blues and greens can depict a sunny day at the beach, while darker, more muted tones can suggest a stormy sea. Mixing and layering colors can help you capture the light and shadow that play across the water's surface. Don't shy away from experimenting; sometimes, the most unexpected combinations can lead to stunning results!
Once you've laid down the foundation of your ocean waves, it’s time to add those all-important final touches. These details can elevate your painting from good to breathtaking. Highlights on the foam, shadows beneath the waves, and reflections on the water’s surface are what bring your artwork to life. Remember, it’s often the little things that make the biggest impact!
Foam and reflections are crucial in creating realism in your ocean waves. Use a small brush to add white or light-colored highlights where the waves crest and break. This will give the impression of frothy water dancing in the sunlight. For reflections, consider the colors of the sky and the surrounding landscape; adding these hues to the water can create a beautiful harmony in your painting.
Shadows are essential for creating depth in your ocean waves. Use darker shades of blue and green to add shadows beneath the waves, giving them a three-dimensional appearance. This technique helps to ground your waves and make them feel more substantial. Remember, shadows aren’t just dark spots; they help tell the story of movement and light in your artwork.
- What type of paint is best for beginners? Acrylics are often recommended for beginners due to their ease of use and quick drying time.
- How can I create realistic foam in my wave painting? Use a small brush to add white highlights and blend them with the underlying colors for a natural look.
- Is it necessary to understand wave dynamics to paint them? While not mandatory, understanding wave dynamics can significantly enhance the realism of your artwork.
- Can I use different mediums together? Yes, many artists combine mediums like acrylics and watercolors to achieve unique effects.
Understanding Ocean Wave Dynamics
Have you ever stood on the shore, mesmerized by the rhythmic dance of ocean waves? Understanding the dynamics of these waves is not only fascinating but also essential for accurately painting them. Ocean waves are formed through a combination of factors including wind, gravity, and the earth's rotation. When wind blows across the surface of the water, it transfers energy, creating ripples that eventually evolve into larger waves. The relationship between wind speed, duration, and fetch (the distance over which the wind blows) plays a crucial role in determining the size and power of the waves.
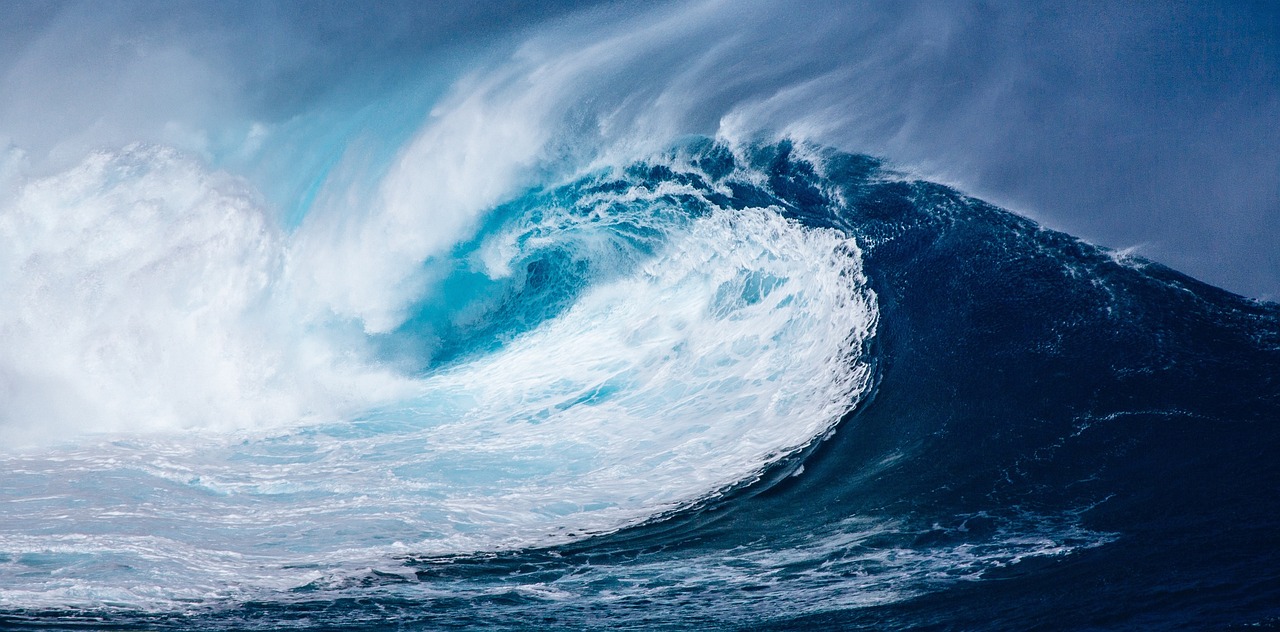
As waves move through the water, they exhibit a unique behavior. The energy travels through the water, causing it to rise and fall in a circular motion. This motion is often described as a wave's orbital motion, where the water particles move in small circles as the wave passes. As waves approach the shore, they interact with the ocean floor, causing them to slow down and increase in height—a phenomenon known as wave shoaling. This interaction creates the spectacular crashing waves we see at the beach.
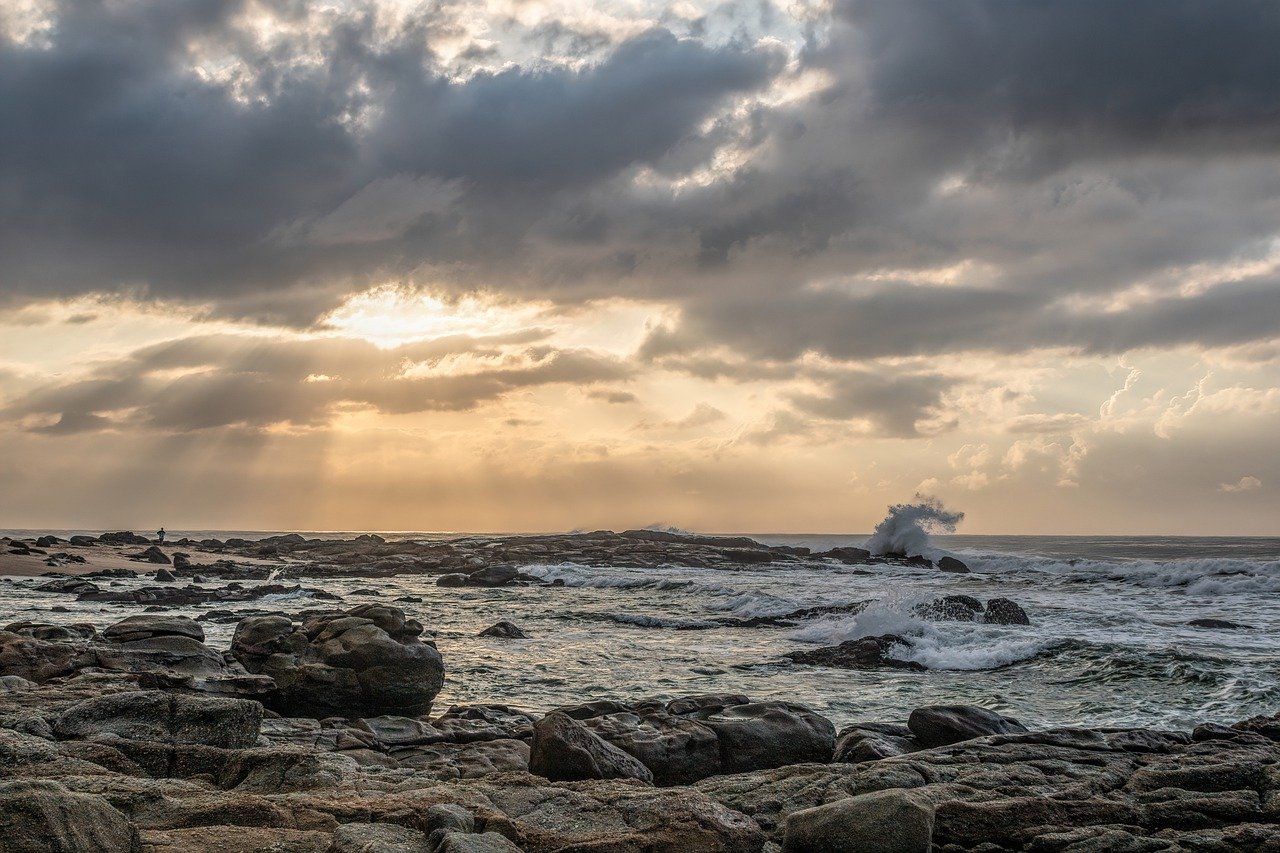
To paint ocean waves effectively, it’s important to grasp these concepts of wave dynamics. Understanding how waves are formed, how they travel, and how they behave when they reach the shore will give you the insight needed to depict them realistically. For instance, when painting a wave, consider the light and shadow created by the wave's crest and trough. The crest, where the wave breaks, often captures light, creating highlights, while the trough may appear darker due to the depth of the water.
Additionally, the impact of currents and tides cannot be overlooked. Currents can alter the shape and behavior of waves, leading to variations in their appearance. For instance, a wave breaking against a jetty may look different than one breaking on a sandy beach. Understanding these nuances can significantly enhance your painting technique.
In summary, the dynamics of ocean waves involve a complex interplay of natural forces. By studying these elements, you can elevate your artwork, making your ocean scenes not just visually appealing but also scientifically grounded. This knowledge allows you to capture the true essence of the ocean, making your paintings resonate with authenticity and depth.
- What causes ocean waves to break? Waves break when they become too steep to support themselves, usually due to the interaction with the ocean floor as they approach the shore.
- How can I depict movement in my ocean wave paintings? Use layering and varying brush strokes to create a sense of movement and depth in your waves.
- What time of day is best for painting ocean waves? Golden hour, shortly after sunrise or before sunset, can provide beautiful lighting that enhances the colors and textures of the waves.

Choosing the Right Materials
When it comes to painting ocean waves, the right materials can make all the difference. Imagine setting out to capture the beauty of the sea without the proper tools—it's like trying to catch fish with your bare hands! To truly bring your vision to life, you need to select materials that complement your artistic style and the effects you want to achieve. Let’s dive into the essential components that will help you create stunning ocean wave paintings.
First off, let’s talk about paints. The medium you choose can dramatically influence the final look of your artwork. Each type of paint has its own characteristics that can either enhance or hinder your ability to replicate the dynamic nature of ocean waves. For instance, acrylic paints are fantastic for their quick drying time, allowing you to layer colors without waiting too long. This is particularly useful when you want to create the illusion of movement in the water. On the other hand, oil paints are known for their rich textures and longer drying times, giving you the flexibility to blend colors seamlessly and create depth in your waves.
Watercolors, too, have their place in the ocean wave painting realm. They can produce soft, fluid effects that mimic the gentle ebb and flow of water. The transparency of watercolors can be particularly effective in depicting the shimmering surface of the ocean, capturing that elusive sparkle. However, mastering watercolor techniques requires practice, as the paint behaves quite differently compared to acrylics and oils.
Next, consider your brush selection. The right brushes can help you achieve the intricate details of ocean waves, such as foam and splashes. For instance, a fan brush can be excellent for creating the texture of wave crests, while a round brush is perfect for detailing the frothy edges. It’s essential to have a variety of brushes on hand, as different shapes and sizes will allow you to tackle different aspects of your painting.
Don't forget about the canvas or paper you’ll be working on. The surface can greatly affect how the paint adheres and appears. For acrylics, a primed canvas is ideal, as it provides a smooth surface for layering. If you’re working with oils, a canvas with a bit of texture can be beneficial, allowing the paint to grip better. For watercolors, opt for watercolor paper that can handle the moisture without warping.
In summary, choosing the right materials is crucial for painting ocean waves. By selecting the appropriate paints, brushes, and canvases, you set yourself up for success. Remember, each material has its unique qualities, and understanding these will empower you to create breathtaking ocean scenes that resonate with viewers. So, gather your supplies, and let’s make some waves!
- What type of paint is best for beginners? Acrylics are often recommended for beginners due to their ease of use and quick drying time.
- Can I use regular paper for watercolor painting? It's best to use watercolor paper as it can withstand the moisture without warping.
- How do I choose the right brush for ocean waves? A variety of brushes, including fan and round brushes, will help you achieve different textures and details.
Types of Paints
When it comes to painting ocean waves, the type of paint you choose can dramatically influence the outcome of your artwork. Each medium has its own unique characteristics that can either enhance or hinder your ability to capture the fluidity and movement of water. Let's explore the three primary types of paints: acrylics, oils, and watercolors. Understanding their distinct properties will help you make an informed decision about which one to use for your ocean wave masterpiece.
Acrylic paints are a favorite among many artists due to their versatility and quick-drying properties. They allow for rapid layering, meaning you can build up texture and detail without waiting long periods for each layer to dry. This is particularly advantageous when painting ocean waves, as you can swiftly replicate the dynamic nature of water. Additionally, acrylics are water-soluble, making them easy to clean up and ideal for beginners. However, their fast drying time can be a double-edged sword; if you’re not careful, you might find yourself racing against the clock to blend colors before they set.
On the other hand, oil paints offer a richness and depth that is hard to achieve with other mediums. They dry much slower than acrylics, which gives you ample time to work on blending and layering. This is particularly beneficial when painting the subtle gradients and shadows found in ocean waves. The creamy texture of oil paints allows for beautiful, smooth transitions that can mimic the natural flow of water. However, keep in mind that oils require more extensive cleanup and longer drying times, which might not suit everyone's working style.
Lastly, watercolors present a unique challenge and opportunity for artists looking to capture the essence of ocean waves. With their transparent quality, watercolors can create soft, flowing effects that perfectly mimic the fluidity of water. Techniques such as wet-on-wet and wet-on-dry can be employed to achieve stunning results, allowing colors to blend seamlessly on the paper. However, mastering watercolors requires practice and patience, as they can be unpredictable. The key is to embrace the medium’s spontaneity and allow for happy accidents that can lead to breathtaking results.
In summary, each type of paint has its own strengths and weaknesses when it comes to depicting ocean waves. Here’s a quick comparison:
| Type of Paint | Drying Time | Texture | Ease of Use |
|---|---|---|---|
| Acrylics | Fast | Flexible | Beginner-friendly |
| Oils | Slow | Rich and creamy | Requires more skill |
| Watercolors | Varies | Transparent | Challenging but rewarding |
Ultimately, the choice of paint will depend on your personal style, the effect you wish to achieve, and how comfortable you feel with each medium. So, whether you prefer the quick-drying convenience of acrylics, the luxurious depth of oils, or the fluidity of watercolors, each option has the potential to bring your ocean waves to life in stunning ways.
- Can I mix different types of paint? Mixing different types of paint can lead to unpredictable results. It's generally best to stick with one medium for a single piece.
- Which paint is best for beginners? Acrylics are often recommended for beginners due to their ease of use and quick drying time.
- How do I choose the right brushes for my paint type? Different paints require different brushes; for example, synthetic brushes work well with acrylics, while natural bristles are better for oils.
Acrylics vs. Oils
When it comes to painting ocean waves, the choice between acrylics and oils can significantly influence your artistic expression. Both mediums offer unique characteristics that can enhance your artwork, but they cater to different styles and preferences. Let’s dive into the key differences to help you decide which one suits your creative vision best.
Acrylic paints are known for their quick drying times, which can be both a blessing and a curse. On one hand, this allows artists to layer colors rapidly, enabling them to build up textures and details without waiting for long periods. Imagine painting a wave crest and then quickly adding another layer of color to depict the sunlight glistening on the water's surface. However, this fast drying time can also make it challenging to blend colors seamlessly, especially when trying to capture the smooth transitions found in ocean waves.
In contrast, oil paints have a much slower drying time, which can be advantageous for artists looking to create rich, textured effects. This extended working time allows for more blending and manipulation of the paint, making it easier to achieve the soft curves and dynamic movement of waves. If you want to capture the swirling nature of water or the delicate foam that forms at the crest of a wave, oils might be your best bet. However, keep in mind that this slower pace means you’ll need to be patient and plan your painting sessions accordingly.
To further illustrate the differences, here’s a quick comparison table:
| Feature | Acrylics | Oils |
|---|---|---|
| Drying Time | Quick | Slow |
| Texture | Flat and smooth | Rich and layered |
| Color Mixing | Fast but can dry too quickly | Slow but allows for extensive blending |
| Cleanup | Soap and water | Solvents required |
Ultimately, the choice between acrylics and oils depends on your personal style and the effect you wish to achieve. If you're someone who enjoys the speed of working and layering quickly, acrylics might be your go-to. On the other hand, if you prefer to take your time and create depth through blending, oils could be the perfect fit. As you experiment with both mediums, you may even find that a combination of the two can yield stunning results!
- Can I mix acrylics and oils? Mixing these two mediums is generally not recommended due to their different properties and drying times, but you can use acrylics as an underpainting for oils.
- How do I clean my brushes after using acrylics? Brushes can be cleaned easily with soap and water, making acrylics a convenient option for many artists.
- What is the best way to store my oil paints? Store oil paints in a cool, dry place, and consider using a palette with a lid to keep them fresh between sessions.
Watercolor Techniques
When it comes to painting ocean waves, watercolors offer a unique opportunity to capture the essence of water with their fluidity and transparency. The beauty of watercolors lies in their ability to mimic the natural movement and light of the ocean, allowing artists to create stunning seascapes that feel alive. To master this medium, it’s essential to understand specific techniques that can enhance your painting. One of the most effective methods is the wash technique, where you apply a large area of diluted paint to create a base for your ocean waves. This technique sets the tone for your painting, providing a soft background that can be built upon.
Another critical technique is wet-on-wet, where you apply wet paint onto a wet surface. This method is fantastic for capturing the unpredictable nature of waves, as the colors blend and flow into each other, mimicking the movement of water. To achieve this, start by wetting your paper with clean water before applying your paint. You'll be amazed at how the colors dance and swirl, creating a dynamic effect that can elevate your artwork.
To create the illusion of foam and splashes, consider using a lifting technique. This involves applying a darker color and then using a clean, damp brush to lift some of the paint away, revealing the lighter paper underneath. This technique is perfect for depicting the frothy edges of waves crashing against the shore. Additionally, don’t shy away from experimenting with salt and sponges. Sprinkling salt on wet paint can create interesting textures that resemble the rough surface of the ocean, while sponges can be used to dab on paint, adding depth and dimension to your waves.
Here’s a quick overview of some watercolor techniques that can help you achieve stunning ocean wave effects:
| Technique | Description |
|---|---|
| Wash Technique | Applying a large area of diluted paint to create a soft background. |
| Wet-on-Wet | Applying wet paint onto a wet surface for blending effects. |
| Lifting Technique | Removing paint with a damp brush to create highlights. |
| Salt Technique | Using salt on wet paint to create texture. |
| Sponging | Dabbing paint with a sponge for added depth. |
Finally, remember that practice is key when working with watercolors. Each technique may take time to perfect, but the results are well worth the effort. As you explore these methods, don’t hesitate to let your creativity flow. After all, painting is not just about replicating reality; it’s about capturing the feeling and energy of the ocean. So grab your brushes, mix those colors, and let the waves come to life on your canvas!
Q: What type of paper is best for watercolor painting?
A: It's recommended to use 100% cotton watercolor paper, as it absorbs water well and withstands multiple washes without warping.
Q: Can I use regular brushes for watercolor?
A: While you can use regular brushes, it's best to invest in brushes specifically designed for watercolors, as they hold more water and pigment.
Q: How do I prevent my colors from becoming muddy?
A: To avoid muddy colors, always clean your brush between colors and work from light to dark, layering gradually.
Q: How can I create a more vibrant ocean blue?
A: Mix different shades of blue, such as ultramarine and cerulean, and add a touch of green for a more dynamic ocean color.
Brush Selection
Choosing the right brushes is a critical step in your journey to master the art of painting ocean waves. The type of brush you use can dramatically affect the texture and movement of the water you’re trying to capture. Imagine trying to paint the frothy crest of a wave with a flat brush—it just wouldn’t convey the fluidity and energy of the ocean. Instead, you want to select brushes that will help you achieve the dynamic effects characteristic of ocean waves.
When it comes to painting ocean waves, consider using a variety of brush shapes and sizes. Each brush serves a unique purpose and can bring different qualities to your artwork. Here’s a quick overview of some essential brushes you might want to include in your toolkit:
| Brush Type | Use |
|---|---|
| Round Brush | Ideal for detailed work and fine lines, perfect for capturing the delicate foamy edges of waves. |
| Flat Brush | Great for broad strokes and filling in larger areas, useful for painting the body of the wave. |
| Fan Brush | Excellent for creating texture and the appearance of foam; it mimics the chaotic nature of ocean water. |
| Filbert Brush | Combines the benefits of round and flat brushes; perfect for soft edges and blending colors. |
In addition to these brushes, the material of the brush can also influence your painting experience. Synthetic brushes tend to hold their shape well and are great for acrylic paints, while natural bristle brushes are often preferred for oil paints due to their ability to hold more paint and create rich textures. So, when you’re out shopping for brushes, keep in mind the medium you’ll be using and how each brush can enhance your technique.
Lastly, don’t forget to consider the size of your brushes. Larger brushes can help you cover more area quickly and are great for the background, while smaller ones will allow for precision work in the details. It’s all about balance; having a range of sizes will give you the flexibility to create stunning ocean wave paintings that capture the essence of the sea.
- What type of brush is best for beginners? A round brush is often recommended for beginners due to its versatility in creating both fine lines and broader strokes.
- Can I use the same brushes for different types of paint? While you can use the same brushes for different mediums, it’s best to have dedicated brushes for acrylics and oils to maintain their integrity.
- How do I clean my brushes properly? Always rinse your brushes in water (for acrylics) or solvent (for oils) immediately after use to prevent paint from drying and damaging the bristles.
Techniques for Capturing Movement
When it comes to painting ocean waves, capturing their dynamic movement is key to creating a captivating seascape. Waves are not just static forms; they are constantly shifting and changing, influenced by the wind, tides, and the underlying currents. To effectively portray this motion on canvas, artists must employ a variety of techniques that bring the waves to life. One of the most effective methods is to observe the waves in real life or through videos, allowing you to grasp their rhythm and flow. This firsthand experience will inform your brush strokes and color choices, ensuring that your painting resonates with authenticity.
One technique to consider is layering. By building up layers of paint, you can create a sense of depth and movement that mirrors the ocean's natural flow. Start with a base layer of color that represents the water's surface, then gradually add darker tones to suggest the depths below. As you layer, use a variety of brush sizes and shapes to mimic the different textures found in waves. For instance, a flat brush can be used to create broad strokes that represent the swell of a wave, while a fan brush is perfect for detailing the frothy white caps that form at the crest.
Another crucial aspect of painting movement is using color wisely. The ocean is a vibrant tapestry of blues, greens, and whites, and these colors can be manipulated to convey motion. For example, lighter colors can be used to highlight the tops of waves, suggesting sunlight reflecting off the water, while darker shades can suggest depth and turbulence. Mixing colors directly on your palette and applying them wet-on-wet can create beautiful gradients that simulate the fluidity of water. Don't be afraid to experiment with color blends that evoke the mood you want to convey, whether it's the calm of a gentle surf or the intensity of a stormy sea.
To truly capture the essence of movement, consider the direction of your brush strokes. Waves move in a specific direction, and your brushwork should reflect this. Use sweeping strokes to emulate the rolling motion of the ocean, and quick, flicking motions to depict the spray of water as a wave crashes. This technique not only adds realism but also invites the viewer's eye to move across the canvas, mimicking the experience of watching waves in action.
Finally, remember to incorporate highlights and shadows effectively. Highlights can be added with a lighter color to emphasize the crest of a wave, while shadows can provide a sense of depth and volume. By carefully placing these elements, you can create a three-dimensional effect that makes your waves appear to be crashing right off the canvas. Pay attention to the light source in your composition; it will guide where you place your highlights and shadows, enhancing the overall realism of your painting.
In summary, mastering the techniques for capturing movement in ocean waves involves a combination of observation, layering, color usage, brushwork, and the strategic application of light and shadow. By practicing these techniques, you will not only improve your painting skills but also deepen your appreciation for the mesmerizing beauty of the ocean.
- What is the best medium for painting ocean waves? Acrylics are great for beginners due to their quick drying time, while oils provide richer textures and longer working times.
- How can I achieve realistic wave movement in my paintings? Focus on layering colors, using directional brush strokes, and incorporating highlights and shadows to create depth.
- Do I need to paint from a photograph or can I paint from memory? While painting from a photograph can help with accuracy, painting from memory allows for more creativity and personal expression.

Layering Techniques
When it comes to painting ocean waves, mastering can be the secret ingredient that transforms your artwork from ordinary to extraordinary. Think of layering as building a delicious cake; each layer adds flavor and depth, making the final product much more satisfying. In the case of ocean waves, layering allows you to create the illusion of movement and depth, which are essential for capturing the dynamic nature of water.
To start, it's essential to understand that layering is not just about applying paint one on top of the other; it's about creating a sense of transparency and depth. Begin with a base layer—this can be a light wash of color that sets the tone for your ocean scene. For instance, a soft blue or turquoise can mimic the shallow waters, while darker hues can represent deeper areas. Once this layer dries, you can start building upon it.
As you add more layers, consider the opacity of your paint. Using semi-transparent colors can help you achieve a more fluid look, allowing the layers beneath to show through. This technique is particularly effective when painting the crest of a wave, where the sunlight hits the water, creating a shimmering effect. You might also want to use a technique called glazing, where you apply a thin, transparent layer of paint over a dried layer to enrich the color and add complexity.
Another crucial aspect of layering is the order in which you apply your colors. Start with your darkest shades at the bottom to create a solid foundation. Then, gradually work your way up to lighter shades, which will give your waves that frothy, bubbly appearance. For example, when painting the foam at the crest of a wave, you can use a bright white or pale blue to mimic the sunlight reflecting off the water.
Don't forget about the textures that can be achieved through layering. Using different tools, like palette knives or sponges, can add unique textures to your waves. For instance, a palette knife can create sharp, jagged edges that mimic the churning of water, while a sponge can create soft, feathery textures that represent the foam. Experimenting with these tools will give your ocean waves a more realistic appearance.
Finally, as you layer, remember to step back and assess your work frequently. This allows you to see how the layers interact with each other and make adjustments as needed. Sometimes, less is more, and knowing when to stop can be just as important as knowing how to layer. So, grab your brushes and let your creativity flow as you explore the beautiful world of ocean waves through the art of layering!
- What is the best paint for layering ocean waves?
Acrylics are often recommended for layering because they dry quickly, allowing you to build layers without waiting too long. However, oils can also work well for those who prefer a longer working time. - How do I know when to stop layering?
It's essential to step back and look at your painting from a distance. If the layers start to look muddy or lose their vibrancy, it might be time to stop. - Can I use different tools for layering?
Absolutely! Experimenting with brushes, palette knives, and even sponges can help you achieve different textures and effects in your ocean wave painting.
Using Color Wisely
When it comes to painting ocean waves, color is your best friend. The hues you choose can dramatically influence the mood of your artwork, transforming a simple seascape into a breathtaking visual experience. Think about it: the ocean isn’t just blue; it’s a canvas of colors that shift and change with the light, the weather, and the time of day. To truly capture the essence of ocean waves, you need to understand how to mix and apply colors effectively.
Start by considering the different color palettes that evoke the feelings you want to convey. For instance, a bright, sunny day might call for vibrant blues and greens, while a stormy scene might use darker, more muted tones. Here are some essential colors to have on your palette:
- Cobalt Blue – Perfect for deep ocean water.
- Ultramarine Blue – Great for creating shadows in the waves.
- Phthalo Green – Adds a beautiful depth to the water.
- Titanium White – Essential for highlights and foam.
- Burnt Umber – Useful for creating depth and shadows.
Mixing colors is where the magic happens. To create a realistic wave, you’ll want to blend colors to reflect the light and movement of the water. For example, when painting a wave crashing onto the shore, you might start with a base of blue and then add touches of white for the foam and green for the water's depth. This layering of colors not only creates a more dynamic look but also helps in achieving the transparency that water embodies. Remember, the goal is to mimic how light interacts with water, which often requires a bit of experimentation.
Don’t forget about the importance of contrast. By placing lighter colors next to darker ones, you can create a sense of movement and depth. For instance, the white foam of a wave against a dark blue ocean can make the foam appear to pop out of the canvas. This technique can be particularly effective in portraying the energy and motion of crashing waves.
Finally, always take a step back to assess your work. Sometimes, you may find that the colors you initially thought would work beautifully might not create the desired effect. Don't hesitate to adjust your palette as you paint. The ocean is constantly changing, and so should your approach to color. Trust your instincts and let your creativity flow, just like the waves you’re trying to capture.
Q: What is the best paint type for ocean waves?
A: While all paint types can work, acrylics are often favored for their quick drying time and versatility. However, oils can provide richer textures.
Q: How do I create depth in my ocean wave painting?
A: Use layering techniques with darker colors at the bottom and lighter colors on top to create a sense of depth and dimension.
Q: Can I use a limited color palette?
A: Absolutely! A limited palette can help create a harmonious look. Focus on mixing different shades and tones to achieve the desired effects.
Q: How important is lighting in painting ocean waves?
A: Very important! Lighting affects how colors appear and can dramatically change the mood of your painting. Pay attention to how light interacts with the water.
Final Touches for Realism
When it comes to painting ocean waves, the final touches can make all the difference between a good painting and a truly stunning one. These finishing details are what breathe life into your artwork, transforming it from a simple depiction to a captivating scene that draws the viewer in. So, what are these magical elements that can elevate your ocean waves? Let's dive in!
One of the key aspects to focus on is the addition of highlights and shadows. These elements are crucial in creating a sense of depth and realism in your painting. Highlights, particularly on the crest of the waves, mimic the way sunlight dances on water. To achieve this effect, use a lighter shade of your base color, perhaps a touch of white or a pale blue. Apply these highlights sparingly but strategically, concentrating on the areas where the light hits the waves the most. This technique will make your waves appear more dynamic and lively.
On the flip side, shadows are equally important. They provide contrast and help define the shape of the waves. Shadows can be painted using a darker version of your wave color, and they should be placed in the troughs of the waves and beneath any foam. This not only adds depth but also enhances the three-dimensional quality of the water. Remember, the interplay of light and shadow is what makes your ocean waves feel like they are in motion, crashing against the shore.
Another vital element to consider is the texture of the water. The ocean is not a flat surface; it is full of movement and energy. You can achieve this texture by using a variety of brush strokes. For example, a fan brush can create the look of foam, while a flat brush can help in painting the smooth surfaces of the waves. Experimenting with different brushes will allow you to capture the unique characteristics of the ocean, from the gentle ripples to the powerful crashes of waves. Don't be afraid to layer your paint; this will add a richness and complexity to your piece.
To further enhance the realism of your ocean waves, consider incorporating reflections. Water is reflective, and capturing this quality can significantly elevate your painting. Look closely at how the colors of the sky and surrounding environment are mirrored in the water. Use a soft brush to gently blend these colors onto the surface of your waves, ensuring that the reflections appear fluid and natural. This technique not only adds realism but also creates a mood that can evoke feelings of tranquility or tumult, depending on your artistic intent.
Finally, don’t forget about the importance of overall composition. Step back from your painting periodically to assess how the elements come together. Are your waves balanced? Does the light source feel natural? Sometimes, a small adjustment can make a significant impact on the overall feel of the piece. Trust your instincts and don't hesitate to make changes that enhance the visual flow of your artwork.
- What is the best way to practice painting ocean waves? Try painting from photographs or real-life observations, focusing on different times of day to see how light affects the water.
- Can I use any type of paint for ocean waves? Yes, but acrylics and oils are often preferred for their blending capabilities and texture. Watercolors can also work well for softer effects.
- How do I know when my painting is finished? A painting is finished when you feel satisfied with the overall composition, depth, and realism. Trust your artistic intuition!
Highlighting Foam and Reflections
When it comes to painting ocean waves, one of the most captivating elements that can truly bring your artwork to life is the foam and reflections that dance atop the water's surface. These details not only add realism but also create a sense of movement and depth that draws the viewer in. Imagine standing on the shore, watching the waves crash and recede, the sunlight sparkling off the water, and the frothy white foam swirling around. Capturing this essence in your painting can be both challenging and rewarding.
To effectively highlight foam, you’ll want to consider the color palette you’re using. Typically, the foam is a bright white or off-white, which contrasts beautifully against the deeper blues and greens of the ocean. When applying paint, use a technique called dry brushing to create the texture of foam. This involves using a dry brush with a small amount of paint to lightly drag across the canvas, allowing the underlying colors to show through. This method mimics the light, airy quality of foam and gives it an ethereal appearance.
Additionally, reflections play an essential role in creating a realistic ocean scene. Water has a unique ability to mirror its surroundings, and capturing this effect can enhance the overall composition. To paint reflections, start by observing where the light hits the water. The reflection of the sky, clouds, and even the sun should be incorporated into your painting. Use a glazing technique to layer transparent colors over the base layer of water, allowing the colors to mix and create a shimmering effect. This technique not only adds depth but also gives the illusion of movement, as the water appears to ripple and flow.
Here’s a quick tip: when painting reflections, remember that they are typically darker and less vibrant than the actual objects. This subtlety is crucial for achieving a realistic look. Consider the following table as a guideline for understanding the differences between the colors of foam and reflections:
| Element | Color Characteristics | Technique |
|---|---|---|
| Foam | Bright white or off-white; high contrast with water | Dry brushing for texture |
| Reflections | Darker, muted colors; less vibrant than actual objects | Glazing for depth |
Incorporating these elements into your painting will not only enhance the visual appeal but also convey the dynamic nature of the ocean. So, the next time you sit down to paint, take a moment to focus on the foam and reflections. They are the finishing touches that can transform a good painting into a stunning masterpiece.
- What colors should I use for ocean foam?
Typically, a mix of bright whites and off-whites works best, often with hints of blue or green to reflect the water beneath. - How can I create realistic reflections in my ocean painting?
Using glazing techniques with darker, muted colors can help you achieve realistic reflections that mimic the movement of water. - What brush techniques are best for painting foam?
Dry brushing is highly effective for creating the light, airy texture of foam on ocean waves.
Creating Depth with Shadows
When it comes to painting ocean waves, shadows are the unsung heroes that can dramatically transform your artwork from flat to fabulous. Think of shadows as the secret ingredient in a recipe; they add depth, dimension, and realism to your seascape. Just like in photography, where the play of light and shadow can create a stunning image, in painting, shadows can help define the form and movement of your waves.
To create effective shadows, you need to start by understanding where the light source is coming from. Is it a bright sunny day, or are you capturing the moody essence of a stormy sea? The direction of your light will dictate where your shadows fall. For instance, if the sun is setting in the west, the shadows will stretch towards the east, creating a beautiful contrast against the vibrant colors of the waves. This interplay of light and shadow is what gives your painting a sense of realism and depth.
Next, consider the colors you use for your shadows. Many artists make the mistake of using pure black, which can flatten the painting. Instead, opt for darker shades of the colors already present in your waves. For example, if you have a rich blue wave, mix in a touch of purple or green to create a shadow that complements the wave's color scheme. This technique not only enhances the depth but also maintains the harmony of your palette.
When applying shadows, think about layering. Start with a base layer of color that represents the wave's body, then gradually build up your shadows. Use a slightly dry brush technique to softly blend the shadow into the wave, mimicking how the water interacts with light. This layering approach will help you achieve a three-dimensional look that makes your waves appear as if they are crashing right off the canvas.
Another essential aspect of creating shadows is the texture. The ocean is never still; it’s constantly moving, swirling, and crashing. Use different brush strokes to represent the dynamic nature of the water. For instance, a stippling technique can create the illusion of foam and turbulence, while smoother strokes can depict calmer water. By varying your brushwork, you can create shadows that feel alive and in motion, drawing the viewer into your ocean scene.
To help visualize these concepts, here’s a quick table summarizing the key points for creating depth with shadows:
| Aspect | Tip |
|---|---|
| Light Source | Determine the direction of light to place shadows accurately. |
| Color Choice | Avoid pure black; use darker shades of existing colors. |
| Layering | Build shadows gradually for a realistic effect. |
| Texture | Vary brush techniques to depict movement and depth. |
In conclusion, shadows are not just an afterthought; they are a critical component in painting ocean waves that can elevate your artwork to another level. By thoughtfully considering the light source, color choices, layering techniques, and texture, you can create shadows that enhance the realism and beauty of your seascape. So the next time you sit down to paint those captivating ocean waves, remember to give shadows the attention they deserve!
- What colors should I use for shadows in ocean wave paintings?
Use darker shades of the colors already present in your waves instead of pure black. - How can I make my shadows look more realistic?
Consider the direction of your light source and use layering techniques to build depth. - What brush techniques can help with shadow creation?
Experiment with stippling for foam and smoother strokes for calmer water to create dynamic shadows. - Is it necessary to paint shadows in ocean wave artwork?
Yes, shadows add depth and realism, making your painting more engaging.
Frequently Asked Questions
- What materials do I need to paint ocean waves?
To paint ocean waves, you'll need a selection of paints, brushes, and canvases. Acrylics are popular for their quick drying time, while oils offer rich textures. Watercolors can also be used for softer effects. Make sure to have a variety of brushes, including flat and round ones, to create different wave textures.
- Can I use any type of canvas for painting ocean waves?
While you can technically use any canvas, it's best to choose a canvas that can handle the medium you're using. For acrylics and oils, a primed canvas works well. If you're using watercolors, opt for watercolor paper to prevent warping and ensure the best results.
- What techniques should I use to depict the movement of waves?
To capture the movement of waves, layering is key. Start with a base layer and gradually add more colors and textures. Use a combination of sweeping brush strokes and stippling to create the illusion of motion. Remember, the goal is to make the water feel alive!
- How do I choose the right colors for my ocean wave painting?
Choosing the right colors is crucial for conveying the mood of your painting. Observe real ocean waves and note the colors you see, from deep blues to bright whites. Mixing colors can help you achieve the perfect shade. Don't be afraid to experiment to find what works best for your vision!
- What are some tips for adding realistic foam and reflections?
For realistic foam, use a lighter color and apply it with a small brush to create delicate details. Reflections can be painted by mirroring the colors of the waves below. Remember to keep your brush strokes light and fluid to mimic the natural flow of water.
- Is it necessary to use shadows in my ocean wave painting?
Yes! Shadows add depth and dimension, making your waves look more three-dimensional. Use darker shades of your base colors to create shadows in the troughs of the waves. This technique helps to ground your painting and enhances the overall realism.
- Can I paint ocean waves if I'm a beginner?
Absolutely! Painting ocean waves can be a fun and rewarding experience for beginners. Start with simple techniques and gradually build your skills. Remember, practice makes perfect, and don't be afraid to make mistakes—each one is a step towards improvement!


