
How to Draw a Mouth: A Step-By-Step Guide
Welcome to the fascinating world of mouth drawing! Whether you're a novice artist or a seasoned pro, mastering the art of drawing a mouth can significantly enhance your overall skills. Why is it so important, you ask? Well, the mouth is one of the most expressive parts of the face, capable of conveying a wide range of emotions—from joy and surprise to sadness and anger. In this guide, we’ll take you through a comprehensive, step-by-step process that will not only improve your technique but also help you understand the intricacies of mouth anatomy. So, grab your sketchbook and let’s dive in!
Before you even pick up your pencil, it’s crucial to have a solid grasp of mouth anatomy. Understanding the structure of the mouth and its function will greatly enhance your ability to capture realistic shapes and expressions. The mouth is made up of various components, including the lips, teeth, and gums, each playing a vital role in how we express ourselves. For instance, did you know that the upper lip is generally thinner than the lower lip? This knowledge is key when aiming for realism in your drawings. By familiarizing yourself with these features, you’ll be better equipped to portray emotions accurately. Think of it like learning the rules of a game before you play; the more you know, the better you’ll perform!
Now that you've got a grasp on the anatomy, let’s simplify the drawing process by starting with basic shapes. Drawing is all about breaking down complex forms into manageable components. Begin by sketching a simple oval for the overall shape of the mouth. From there, you can add guidelines to establish proportions and positions. These guidelines will serve as a roadmap, ensuring that your representation of the mouth is not only accurate but also aesthetically pleasing. Imagine constructing a house; you wouldn’t just start building without a blueprint, right? The same principle applies to drawing!
With your basic shapes and guidelines in place, it’s time to sketch the outline of the mouth. This step is all about creating a simple yet effective contour that will serve as the foundation for further detailing. Use light, fluid strokes to capture the natural curves of the lips. Don’t worry about perfection at this stage; the goal is to establish a solid framework. Think of it as laying the groundwork for a beautiful piece of art. Once you’ve sketched the outline, take a step back and assess the overall shape. Does it look balanced? If not, make adjustments before moving on.
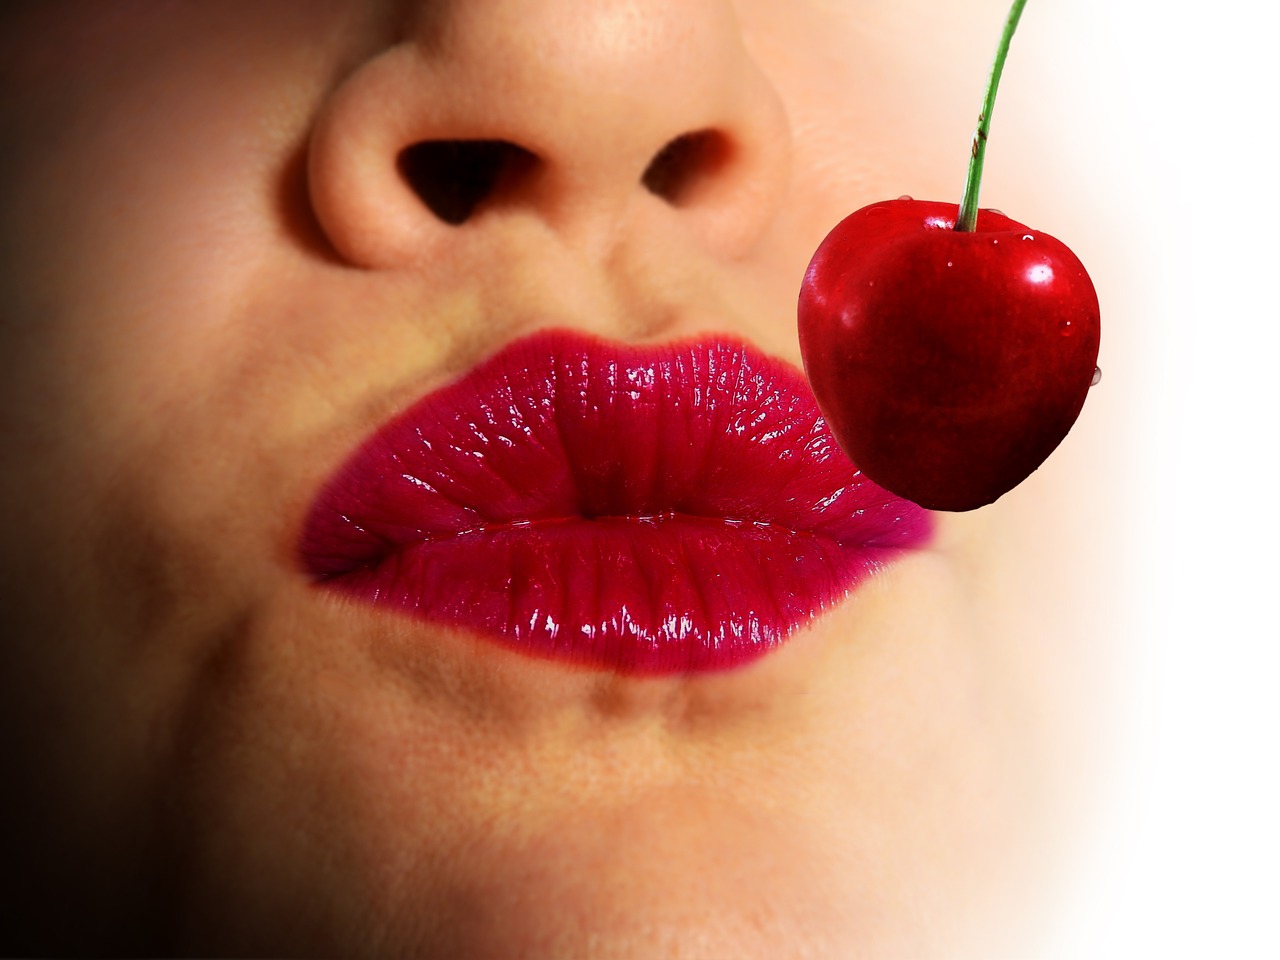
The upper lip has unique curves and shapes that are essential to capture accurately. Focus on its form, paying close attention to the Cupid's bow—the dip in the center of the upper lip. This small detail can dramatically change the character's expression and personality in your drawing. Remember, the upper lip is generally more pronounced when someone smiles or speaks, so keep this in mind as you sketch. Capturing this nuance is like adding the perfect seasoning to a dish; it elevates the entire flavor!
Just like the upper lip, the lower lip has its own characteristics that deserve attention. It often appears fuller and can vary greatly in shape from one person to another. Pay close attention to how it interacts with the upper lip. Is it slightly tucked in, or is it protruding? These subtle differences can enhance the realism of your mouth drawing. Think of it as sculpting; every little curve and contour can make a significant impact on the final piece.
Once the outline is complete, it’s time to add details that will bring your mouth drawing to life. Shading and texturing techniques can create depth and realism, making the lips appear fuller and more three-dimensional. Use a range of pencil pressures to achieve different shades, and don’t forget to include highlights where the light hits the lips. This step is akin to adding the finishing touches to a masterpiece; it’s what transforms a simple drawing into a captivating work of art!
Even the most experienced artists can fall into common pitfalls when drawing mouths. Understanding these mistakes can significantly improve your skills. Here are a couple of frequent errors to watch out for:
Many artists struggle with proportions, which can lead to unrealistic representations. Understanding the correct ratios between different parts of the mouth is essential for achieving a more harmonious appearance. For example, the width of the mouth should generally be about two-thirds the width of the face. Keeping these proportions in mind will help you avoid drawing a mouth that looks off-balance.
Expressions play a crucial role in mouth drawing. Failing to incorporate different emotions can lead to lifeless artwork. Always consider what emotion you want to convey—joy, sadness, anger—and adjust your drawing accordingly. Remember, the mouth is a powerful tool for expression; it’s like the cherry on top of a sundae, adding that final touch of flavor!
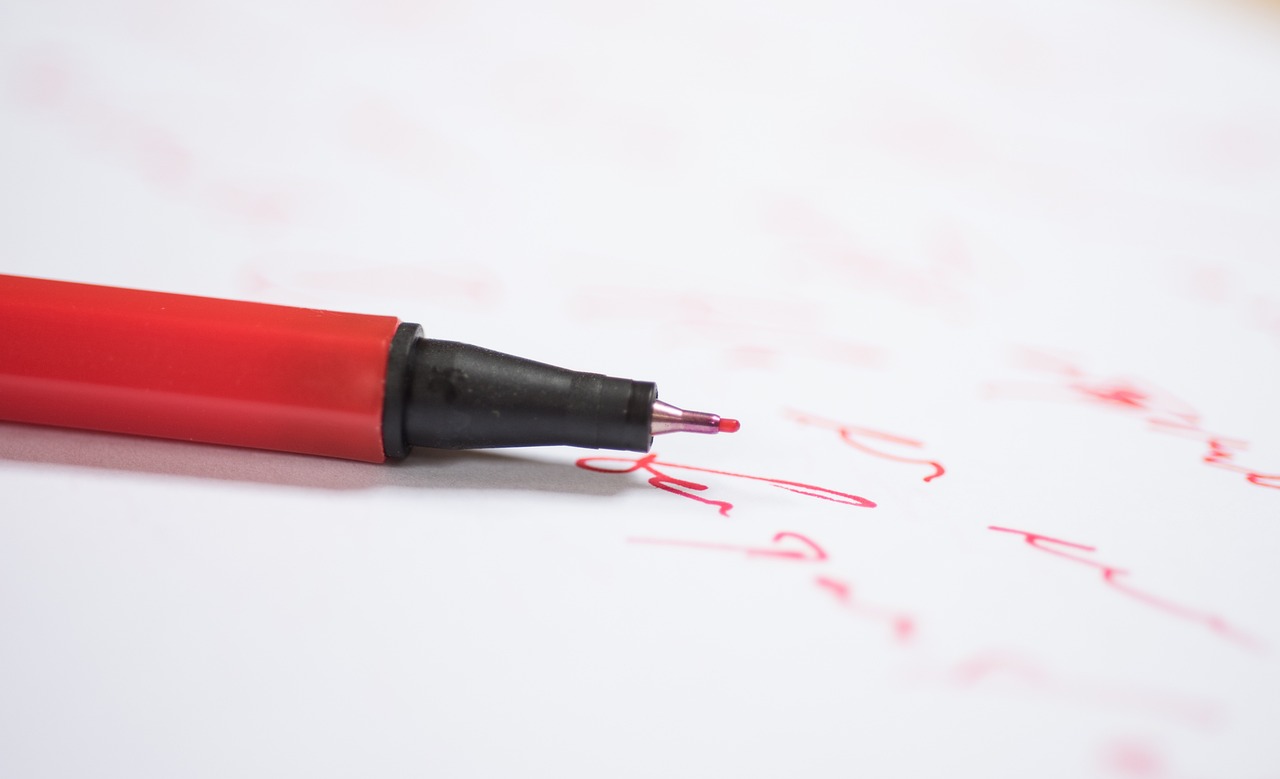
- What materials do I need to start drawing a mouth? You can start with just a pencil and paper, but having erasers, blending stumps, and colored pencils can enhance your work.
- How can I practice drawing mouths effectively? Regular practice is key! Try sketching from photographs or real-life references to improve your skills.
- Are there specific techniques for shading lips? Yes! Use varying pencil pressures and blending techniques to create realistic shading and texture.

Understanding Mouth Anatomy
Before you dive into the exciting world of drawing, it's crucial to grasp the intricate anatomy of the mouth. Think of the mouth as a fascinating landscape, full of curves and edges that tell a story. Understanding its structure and function not only enhances your artistic skills but also allows you to capture realistic shapes and expressions. The mouth is composed of various parts, each contributing to its overall appearance and function.
The mouth can be broken down into several key components:
- Upper Lip: This part has a distinct curvature, often described as a gentle wave. It's essential to note how it interacts with the lower lip and the surrounding facial features.
- Lower Lip: Typically fuller than the upper lip, the lower lip has its own unique shape and can vary significantly from person to person. Understanding its volume can add depth to your drawing.
- Teeth: While not always visible, the outline of the teeth can influence the mouth's overall appearance. Including them can add realism, especially in expressions like smiles or laughter.
- Tongue: The tongue is another critical element that can affect the mouth's shape, particularly in various expressions. It’s often hidden, but its presence can change the way the lips appear.
- Jawline: The relationship between the mouth and the jawline is vital for achieving accurate proportions. A well-defined jawline can enhance the overall strength of your drawing.
When drawing, consider how these components interact with each other. For instance, the way the lips curl when someone smiles or frowns creates different shapes that convey emotions. Understanding these nuances is akin to learning a new language; each expression has its own vocabulary and grammar. So, take a moment to observe how people use their mouths when they talk, laugh, or express emotions. This observation will enrich your drawing skills and help you create more lifelike representations.
Moreover, keep in mind that the mouth is not just a standalone feature; it works in harmony with the rest of the face. The positioning of the mouth can dramatically alter the perception of other facial elements, such as the nose and eyes. For example, a wide smile can make eyes appear larger and more expressive, while a frown can shrink the features around it. Therefore, always consider the mouth in the context of the entire face to achieve a balanced and realistic portrayal.
To sum up, understanding mouth anatomy is about more than just knowing the parts; it's about seeing how they come together to create a living, breathing expression. So, grab your sketchbook, observe those around you, and let your newfound knowledge guide your pencil as you bring your drawings to life!
Basic Shapes and Guidelines
When it comes to drawing a mouth, starting with basic shapes can make all the difference. Think of it like building a house; you wouldn’t start decorating before laying the foundation, right? Similarly, by establishing a solid base with simple shapes, you’ll create a more accurate and proportionate mouth. Begin with basic geometric forms such as ovals and curves. These shapes will serve as the skeleton for your drawing, allowing you to focus on the contours and details that bring your artwork to life.
To get started, you might want to visualize the mouth as a combination of a few key shapes:
- Oval: This can represent the overall shape of the mouth.
- Curves: Use curves to outline the lips and indicate the natural dip in the center.
- Triangles: These can help in defining the corners of the mouth and the shape of the lips.
Once you have your basic shapes in place, it’s time to refine them. This is where guidelines come into play. You can draw light lines to indicate the center of the mouth, which will help you maintain symmetry. A good trick is to lightly sketch a vertical line down the middle of your oval. This line acts as a reference point for aligning both the upper and lower lips. Remember, the mouth is not just a flat line; it has depth and dimension. So, don’t hesitate to add a slight curve to your guidelines to mimic the natural shape of the lips.
As you progress, keep in mind the proportions of the mouth in relation to the rest of the face. The mouth is typically about one-third of the distance between the nose and chin. Understanding this ratio is crucial for achieving a realistic look. If you’re unsure, you can always use a grid method to help maintain consistent proportions. By breaking down your reference image into a grid, you can replicate the shapes and placements more accurately in your drawing.
In summary, remember that mastering the mouth begins with understanding its basic shapes and guidelines. Think of these elements as the building blocks of your drawing. The more comfortable you become with these fundamentals, the more confident you’ll feel in adding details and expressions later on. So grab your pencil, let your creativity flow, and don’t forget to have fun with it!
Q: What if my mouth drawing looks uneven?
A: Uneven drawings are common, especially for beginners. Use your guidelines to check for symmetry and make adjustments as needed.
Q: How can I improve the realism of my mouth drawings?
A: Focus on observing real mouths and practicing different expressions. Adding shadows and highlights can also enhance realism.
Q: Should I use reference images?
A: Absolutely! Reference images can provide valuable insights into the anatomy and expressions of the mouth, helping you improve your skills.
Sketching the Outline
When it comes to drawing a mouth, the first step is to sketch the outline. This is where the magic begins! Imagine you’re an architect laying down the blueprints for a stunning building; you need a solid foundation before you can add the intricate details. Start by lightly drawing the general shape of the mouth using simple lines and curves. Don’t worry about perfection at this stage; the goal is to capture the essence of the mouth's form.
To help guide your sketch, consider the following key points:
- Proportions: The mouth should be proportionate to the face. A common guideline is that the width of the mouth should be roughly equal to the distance between the pupils of the eyes.
- Placement: Position the mouth correctly on the face. Typically, it sits about one-third of the way down from the nose to the chin.
- Curvature: Pay attention to the natural curves of both the upper and lower lips. The upper lip tends to have a more pronounced curve, while the lower lip is often fuller.
Once you have the basic shape, you can refine the outline. Use smooth, flowing lines to define the contours of the lips. Think of the mouth as a delicate ribbon; the curves should be gentle yet expressive. It’s helpful to visualize how the lips come together in the center, creating a subtle dip in the middle of the upper lip, often referred to as the cupid's bow.
As you sketch, don’t forget to consider the corners of the mouth. They can convey a multitude of emotions; a slight upward turn can indicate happiness, while a downward turn may suggest sadness. This is where character and personality start to shine through your drawing!
Finally, remember that practice makes perfect. Don’t hesitate to erase and redraw as needed. Each attempt will bring you closer to mastering the art of sketching a mouth. Embrace the process, and let your creativity flow!
- What materials are best for sketching a mouth? Pencils, charcoal, or fine liners work well for sketching. Choose what feels comfortable for you!
- How can I improve my mouth drawing skills? Regular practice and studying reference images can greatly enhance your skills. Try sketching mouths in different expressions!
- Should I draw the mouth in isolation or as part of the face? It’s beneficial to practice both. Start with isolated sketches, then incorporate the mouth into full face drawings.
Defining the Upper Lip
When it comes to drawing a mouth, the upper lip is often where the **magic** begins. It's not just a straight line; it has curves, dips, and unique shapes that can convey a multitude of emotions. Think of the upper lip as a delicate archway—it can be inviting, playful, or even mysterious, depending on how you choose to depict it. To truly capture its essence, you need to observe its structure closely. The upper lip is generally divided into three sections: the cupid's bow, the sides, and the center. Each of these areas has its own characteristics that contribute to the overall look of the mouth.
Start by sketching the cupid's bow, which is the prominent, **v-shaped** area in the center of the upper lip. This bow is crucial because it gives the lip its distinct shape and character. Notice how it dips in the middle and rises at the sides. You might want to think of it as the crest of a wave—smooth and flowing, yet defined. The sides of the upper lip should taper down gently, leading into the corners of the mouth. Here, you can add subtle curves that mimic the natural shape of the lips. It’s these little details that breathe life into your drawing.
Next, consider the thickness of the upper lip. While some people have fuller lips, others may have thinner ones. Pay attention to the **proportions** of the upper lip in relation to the lower lip, as they should complement each other. A common mistake is to make the upper lip too thick or too thin, which can throw off the balance of the entire mouth. Use a reference image if necessary, and don’t hesitate to adjust your sketch until you feel satisfied with the proportions.
To add depth and dimension to the upper lip, shading is essential. The lip is not a flat surface; it has highlights and shadows that give it a **three-dimensional** quality. Begin by identifying where the light source is coming from. Typically, the center of the upper lip will catch the most light, creating a natural highlight. Use a softer pencil or blending tool to create shadows along the edges and in the dips of the cupid's bow. This technique will not only make your drawing more realistic but also add an element of **expressiveness**.
In conclusion, defining the upper lip is about more than just drawing shapes; it's about understanding the nuances that make each mouth unique. By focusing on the cupid's bow, the proportions, and the play of light and shadow, you can create a mouth that truly reflects the character's emotions. Remember, practice makes perfect, so don’t hesitate to sketch multiple versions until you find the one that resonates with you. Each attempt will bring you closer to mastering this art form!
- What materials do I need to start drawing lips? You can use a pencil, eraser, and paper. Optional materials include colored pencils or charcoal for shading.
- How can I improve my lip drawing skills? Practice consistently, study real-life references, and consider taking a drawing class for structured learning.
- Should I focus on realism or stylization? It depends on your artistic goals! Both approaches can be rewarding, so experiment to find your style.

Defining the Lower Lip
The lower lip is a fascinating feature that adds depth and character to your drawing. Unlike the upper lip, which often appears more defined and pronounced, the lower lip tends to be fuller and rounder, creating a sense of softness and warmth. To truly capture the essence of the lower lip, it's vital to observe its unique characteristics closely. Think of the lower lip as a delicate cushion; it has a subtle curve that can change dramatically based on the expression being portrayed. This is where the magic happens!
When drawing the lower lip, start by identifying its shape. It typically has a **gentle curve** that extends from one corner of the mouth to the other. This curve can vary depending on the character's emotion—whether they are smiling, frowning, or simply relaxed. A **smiling lower lip** will stretch wider, while a **pouting lip** will appear more pronounced and rounded. Understanding these nuances will help you convey the right emotion in your artwork.
Next, consider the **fullness** of the lower lip. It is generally thicker than the upper lip, which gives it a luscious and inviting appearance. To emphasize this fullness, you can use shading techniques. For instance, adding a bit of shadow underneath the lip can create the illusion of depth, making it look more three-dimensional. Additionally, don't forget to include the **subtle highlights** on the lip's surface. These highlights mimic the way light reflects off the skin, enhancing the realism of your drawing.
As you refine your drawing, pay attention to the **corners of the mouth** where the lower lip meets the skin. These areas often have creases that can add to the expression. For example, when someone is smiling, there may be slight upward creases at the corners, while a sad expression might show downward creases. Capturing these details can significantly enhance the emotional impact of your drawing.
It's also essential to consider the **relationship between the lower lip and the chin**. The way the lower lip sits in relation to the chin affects the overall harmony of the face. A well-defined chin can give the lower lip more prominence, while a softer chin can create a more delicate appearance. Always keep this relationship in mind as you work on your drawing.
In summary, defining the lower lip involves understanding its shape, fullness, and emotional context. By applying these techniques, you can create a mouth that not only looks realistic but also conveys the character's feelings and personality. So, grab your pencil and start experimenting with these tips to bring your drawings to life!
- What is the best way to practice drawing lips? Regular practice is key! Try sketching lips in different expressions and from various angles to build your skills.
- How can I make my lip drawings look more realistic? Focus on shading and highlighting to add depth. Observing real lips and practicing will also help improve realism.
- Should I use color when drawing lips? While it's not necessary, adding color can enhance your drawing. Experiment with different shades to see what works best for your style.

Adding Details and Texture
Once you have the outline of the mouth sketched out, it’s time to breathe life into your drawing by . This stage is where your mouth transforms from a simple shape into a vibrant expression of emotion. Think of it as applying the finishing touches to a masterpiece; every detail counts! Start by looking closely at the mouth you’re drawing. Observe the subtle nuances that make it unique. Are the lips thin or full? Is there a slight curve that suggests a smile or a frown? These details will help convey the character’s mood and personality.
To create a realistic texture, it’s essential to consider how light interacts with the mouth. The lips are not flat; they have volume and depth. Use shading techniques to mimic the way light reflects off the surface. For instance, the area where the lips meet might be slightly darker due to shadows, while the center of the lips can be highlighted to suggest fullness. You can achieve this effect by using a range of pencil pressures or varying your brush strokes if you’re working digitally.
When adding texture, don’t forget about the small details that can make a significant difference. Tiny lines or creases on the lips can add realism. These can be represented with short, gentle strokes that follow the natural curves of the lips. Additionally, consider the surrounding skin texture. The skin around the mouth often has its own unique characteristics, such as pores or subtle shadows, which can be hinted at with soft shading.
Here’s a quick summary of techniques to enhance your mouth drawing:
- Use Gradation: Start with a light base and gradually build up darker tones to create depth.
- Highlight Strategically: Use an eraser or lighter pencil to create highlights on the fullest parts of the lips.
- Texture Techniques: Employ cross-hatching or stippling to add texture to the lips and surrounding skin.
Remember, practice is key! The more you observe and replicate the details you see in real life, the better your mouth drawings will become. Don't hesitate to experiment with different styles and techniques until you find what works best for you. Your artistic voice will shine through as you develop your skills and confidence.
Common Mistakes to Avoid
When it comes to drawing a mouth, even seasoned artists can fall into common traps that hinder their progress. One of the most prevalent issues is proportional errors. Artists often struggle with the correct ratios between the upper and lower lips, leading to a mouth that looks unnatural. For instance, if the upper lip is drawn too thick compared to the lower lip, or vice versa, it can throw off the entire facial balance. To avoid this, take a moment to observe your reference closely; measuring with your pencil can be a game changer. It’s like trying to bake a cake—if you don’t get the proportions right, the result can be disastrous!
Another critical mistake is neglecting expressions. The mouth is a powerful communicator of emotion, and failing to capture its nuances can leave your artwork feeling flat. Think about how a smile can transform a face or how a frown can convey sadness. A good practice is to study different expressions in the mirror or through photographs. When drawing, ask yourself: “What is this character feeling?” This simple question can guide your hand and help you infuse life into your work.
Additionally, many artists overlook the importance of details and texture. A mouth isn’t just a simple line; it has depth, shine, and texture that contribute to its realism. For example, the way light reflects off the lips can create a sense of fullness. To achieve this, consider using shading techniques and varying your pencil pressure. A well-defined outline combined with subtle shading can make your mouth drawing pop off the page, almost like it’s ready to speak!
To further illustrate these points, here’s a brief overview of common mistakes and tips to avoid them:
| Mistake | Tip to Avoid |
|---|---|
| Proportional Errors | Use a pencil to measure and compare lip sizes. |
| Neglecting Expressions | Study facial expressions and practice drawing them. |
| Ignoring Details | Incorporate shading and texture for depth. |
By being mindful of these common pitfalls, you’ll not only improve your mouth drawing skills but also enhance your overall artistic abilities. Remember, every artist makes mistakes—it’s all part of the learning process! The key is to recognize them and use them as stepping stones toward mastery.
Q: How can I practice drawing mouths effectively?
A: A great way to practice is by sketching from photographs or real-life references. Focus on different expressions and angles to build your skills.
Q: What tools are best for drawing mouths?
A: Pencils of varying hardness, blending stumps, and erasers are ideal. They allow you to create detailed textures and smooth shading.
Q: How important is the context of the drawing?
A: Context is crucial! The mouth’s expression should align with the character’s emotion and the overall scene to create a cohesive artwork.

Proportional Errors
When it comes to drawing a mouth, one of the most common hurdles artists face is . These mistakes can make your drawing appear awkward or unrealistic, and they often stem from a lack of understanding of the relationship between different parts of the mouth. Just like a well-tuned orchestra, every component of the mouth needs to harmonize with the others to create a visually appealing result.
To avoid these pitfalls, it's crucial to grasp the basic proportions of the mouth. For instance, the width of the mouth is generally about two-thirds the width of the eyes. This rule of thumb can serve as a starting point for establishing the correct size and placement of your mouth in relation to the rest of the face. Moreover, the distance between the upper and lower lips can vary significantly depending on the expression you're aiming to portray. Understanding these relationships not only enhances realism but also adds character to your drawings.
Another common proportional error is misjudging the curves of the lips. The upper lip typically has a more pronounced curve compared to the lower lip, which is often fuller and rounder. When sketching, take a moment to observe the subtle differences in shape and size. You might find it helpful to break down the lips into basic shapes before refining them. For example, think of the upper lip as a gentle wave and the lower lip as a soft pillow. This analogy can help you visualize their forms more accurately.
Additionally, consider the angle at which the mouth is positioned. A mouth drawn straight on will look very different from one that is turned slightly to the side. This perspective can alter the proportions dramatically, so be sure to adjust your guidelines accordingly. A useful technique is to use a grid method or light sketching to map out the basic shapes before committing to the final lines. This approach can help you see the overall proportions more clearly and make necessary adjustments before adding details.
In summary, avoiding proportional errors is about being aware of the relationships between different parts of the mouth and the face. By keeping these tips in mind and practicing regularly, you'll find that your ability to draw mouths improves significantly. Remember, every great artist was once a beginner, so don't be discouraged by mistakes; instead, let them guide your learning process.
- What are the common proportions for drawing a mouth?
Typically, the mouth should be about two-thirds the width of the eyes, and the distance between the upper and lower lips varies with expression. - How can I improve my mouth drawing skills?
Practice regularly, observe real-life mouths, and consider using guidelines to help maintain proportions. - What tools should I use for drawing mouths?
Pencils for sketching, erasers for corrections, and fine liners or colored pencils for detailing and shading.

Neglecting Expressions
When it comes to drawing a mouth, expressions are everything. They can transform a simple sketch into a vibrant portrayal of emotion, giving life to your artwork. Have you ever noticed how a slight change in the curve of the lips can convey joy, sadness, or even anger? This is the magic of expression, and as an artist, it's crucial to embrace this aspect fully. Ignoring the subtleties of expressions is akin to painting a sunset without capturing its colors; it simply falls flat.
To effectively depict expressions in your mouth drawings, consider the following key elements:
- Curvature of the Lips: The way the lips curve can dramatically change the mood. A gentle upward curve suggests happiness, while a downward tilt can imply sadness or disappointment.
- Thickness of the Lips: Full lips might convey sensuality or boldness, whereas thinner lips can suggest a more reserved or serious demeanor.
- Position of the Corners: The corners of the mouth are incredibly expressive. Raised corners can indicate a smile, while lowered corners often signal frowning or distress.
- Teeth Visibility: The presence of teeth can enhance expressions. A wide grin displaying teeth exudes joy, while tightly closed lips can suggest tension or discomfort.
To illustrate this, consider how different characters might use their mouths to express emotions. For instance, a cartoon character might have exaggerated features, making their expressions larger-than-life, while a realistic portrait would require a more subtle approach. Understanding these nuances is essential for artists who wish to convey deeper narratives through their work.
As you practice, take the time to observe real-life expressions. Watch how people react in various situations; their mouths are a treasure trove of information. Try to capture these moments in your sketches. You might even find it helpful to take photos or make quick sketches of friends or family as they express different emotions. This practice can significantly improve your ability to translate those feelings onto paper.
Ultimately, neglecting expressions in your mouth drawings can lead to lifeless artwork. By paying close attention to the nuances of how lips move and change with emotion, you can create more engaging and relatable characters. Remember, a mouth isn’t just a feature; it’s a storyteller, and it’s your job to listen and translate its tales into your art.
Q: How can I practice drawing expressions effectively?
A: One of the best ways to practice is by studying facial expressions in photographs or real life. Try capturing quick sketches of people showing different emotions to understand how the mouth changes with each feeling.
Q: Should I focus on realism or stylization when drawing mouths?
A: It depends on your artistic goals. If you aim for realism, pay attention to the subtle details and anatomical accuracy. If you prefer stylization, feel free to exaggerate features for effect, but maintain the essence of the expression.
Q: What tools can help me improve my mouth drawing skills?
A: Consider using a sketchbook for regular practice, along with reference images. Digital tools like drawing tablets can also be beneficial for experimenting with different styles and techniques.
Frequently Asked Questions
- What are the basic shapes to start with when drawing a mouth?
When drawing a mouth, it's best to start with simple shapes like ovals and curves. These shapes will help you establish the basic proportions and positions before adding details.
- How important is understanding mouth anatomy for drawing?
Understanding mouth anatomy is crucial! It allows you to capture realistic shapes and expressions. Knowing how the lips and surrounding areas work together will enhance your drawing skills significantly.
- What common mistakes should I avoid when drawing a mouth?
Some common mistakes include getting the proportions wrong and neglecting the expression. Make sure to pay attention to the ratios between the upper and lower lips, and always consider the emotion you want to convey.
- How can I add texture and detail to my mouth drawing?
To add texture and detail, focus on shading techniques. Use lighter and darker tones to create depth and dimension, making your drawing more lifelike. Pay attention to the natural highlights and shadows of the lips.
- Can I use references while drawing a mouth?
Absolutely! Using references can greatly improve your accuracy. Look at photos or real-life examples to understand how mouths look in different expressions and angles.
- What tools are best for drawing a mouth?
For drawing a mouth, you can use pencils for sketching and shading, along with erasers for corrections. If you prefer digital art, a drawing tablet with software like Photoshop or Procreate can be very effective!
- How can I practice drawing mouths effectively?
Practice makes perfect! Try drawing mouths in various expressions and from different angles. Regularly sketching will help you improve your skills over time. Don't forget to review your work and learn from it!


