
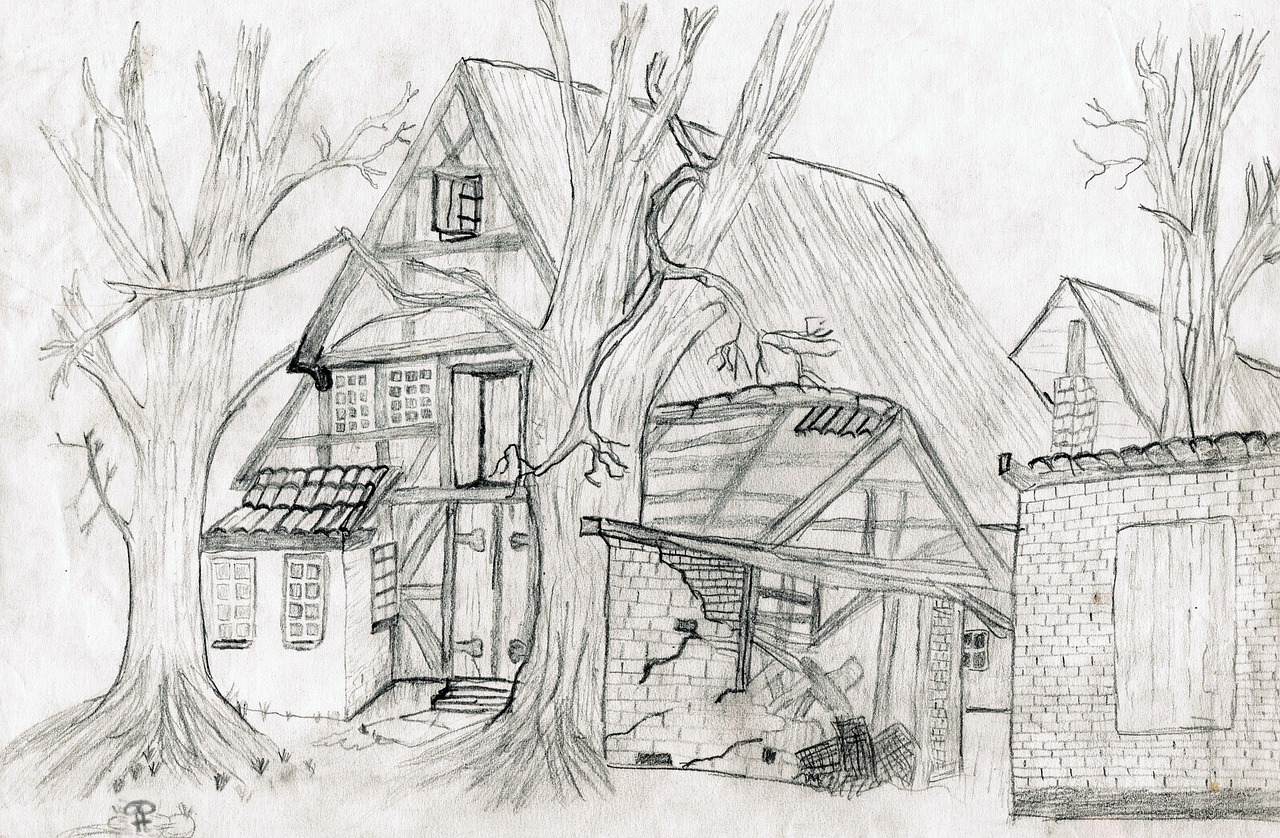
Understanding Tonal Shading in Drawing
Tonal shading is a fundamental aspect of drawing that can dramatically enhance the quality of your artwork. It’s not just about filling in shapes with color; it’s about creating a sense of depth and realism. Imagine how a simple sketch can transform into a breathtaking piece of art that seems to leap off the page. This transformation is largely due to the effective use of tonal shading. By mastering this technique, artists can convey emotions, create three-dimensionality, and ultimately engage viewers on a much deeper level.
Understanding tonal shading involves grasping how light interacts with objects. Think of a shiny apple sitting on a table. The way light hits the apple creates highlights and shadows, shaping its form in our perception. Similarly, in drawing, tonal shading allows you to replicate this effect, making your subjects appear more lifelike. This technique is essential not only for realism but also for expressing mood and atmosphere within your art. Whether you're aiming for a dramatic, moody scene or a bright, cheerful landscape, tonal shading is your secret weapon.
Moreover, tonal shading can be achieved through various techniques and tools, each offering unique textures and effects. For instance, using pencils, you can create soft gradients or sharp contrasts depending on how you apply pressure and the type of pencil you choose. The beauty of tonal shading lies in its versatility; it can be adapted to fit any style or subject matter. From delicate portraits to bold, abstract compositions, the principles of tonal shading remain a crucial element in the artist's toolkit.
As we delve deeper into the world of tonal shading, keep in mind that practice is key. Just as a musician must practice scales to master their instrument, artists must engage in exercises specifically designed to improve their shading skills. This journey of exploration and experimentation will not only refine your technique but also help you develop your own unique style. So, grab your sketchbook and let’s uncover the exciting world of tonal shading together!

The Importance of Tonal Shading
Tonal shading is not just a technique; it’s the very essence that breathes life into a drawing. Imagine gazing at a flat piece of paper and suddenly, with the right shading, it transforms into a three-dimensional object that seems to pop right off the page. This magical transformation is what tonal shading achieves, and understanding its importance is crucial for any artist looking to convey depth and realism. By mastering tonal shading, you can evoke emotions, create atmosphere, and present a more engaging narrative within your artwork.
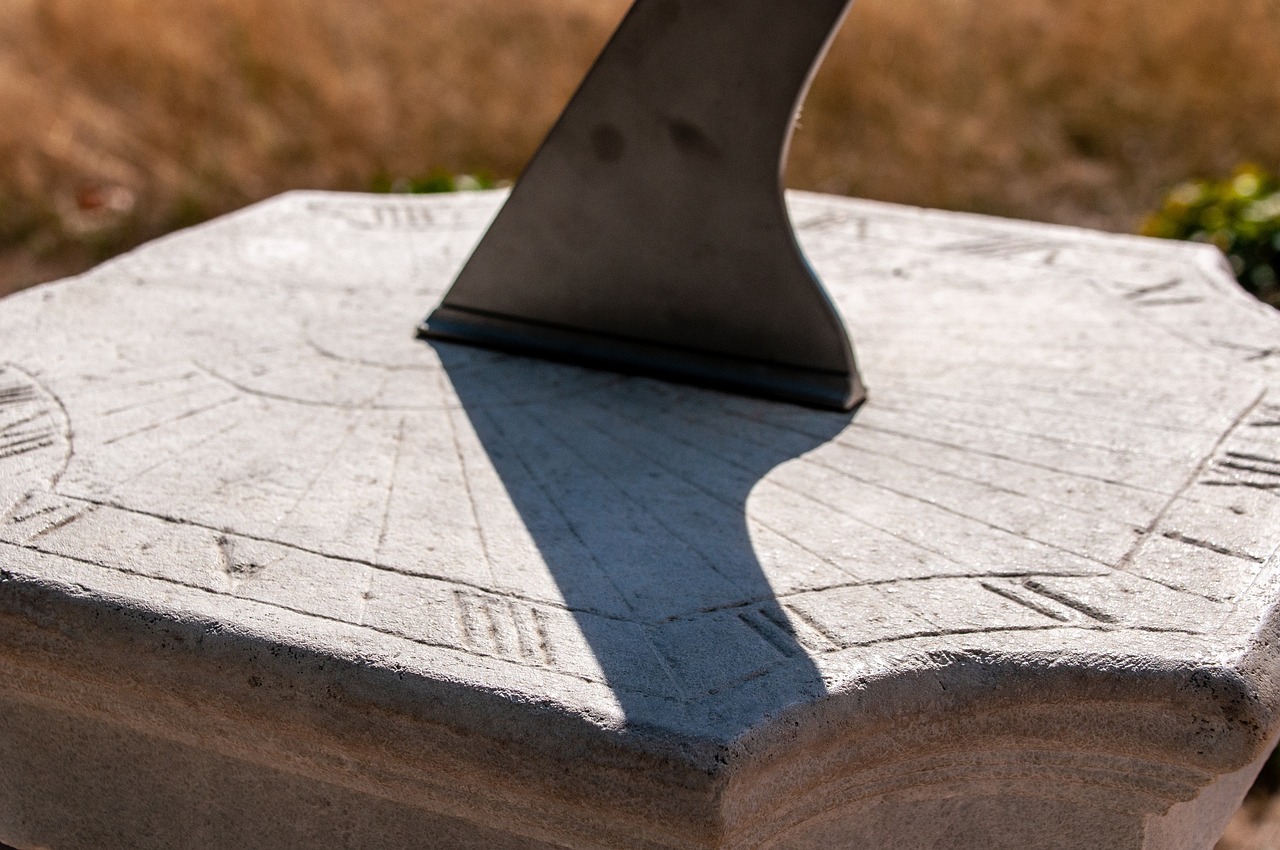
One of the most significant roles of tonal shading is its ability to convey light and shadow. Think of how the sun casts shadows on a tree or how the glow of a candle flickers across a room. Artists use tonal shading to replicate these natural phenomena, allowing viewers to perceive the light source and understand the spatial relationships between objects. This sense of depth is vital; without it, a drawing can feel flat and lifeless.
Moreover, tonal shading is a powerful tool for expressing emotions. The way you apply shading can alter the mood of your artwork dramatically. For instance, soft, gradual transitions can evoke feelings of calmness and serenity, while harsh, abrupt contrasts might generate tension or unease. By manipulating tonal values, artists can guide the viewer’s emotional response, effectively telling a story without uttering a single word.
To illustrate the importance of tonal shading, consider the following points:
- Realism: It enhances the lifelike quality of a drawing, making objects appear more three-dimensional.
- Depth: Proper shading creates the illusion of space, allowing for a more immersive experience.
- Emotion: It can convey feelings and moods, impacting how the audience connects with the artwork.
In summary, tonal shading is not merely an optional skill; it is a fundamental aspect of drawing that can elevate your work from ordinary to extraordinary. By understanding and mastering this technique, you can unlock a new level of creativity and expression in your art. So, the next time you pick up a pencil, remember: it’s not just about the lines you draw, but how you shade them that truly brings your vision to life.

Basic Techniques of Tonal Shading
Tonal shading is a fundamental aspect of drawing that allows artists to create depth and dimension in their work. By using various techniques, artists can manipulate light and shadow, bringing their drawings to life. Among the most popular methods are hatching, cross-hatching, and stippling. Each of these techniques has its own unique charm and can be used to convey different textures and emotions in art.
Hatching is the simplest form of tonal shading, involving the use of parallel lines. The key to effective hatching lies in the density and spacing of these lines. For instance, closer lines create a darker shade, while more spaced lines result in a lighter appearance. This technique is particularly useful for creating a smooth transition between light and dark areas, which can enhance the realism of a drawing. Imagine hatching as a way to weave a fabric of light and shadow, where each line adds a thread to the overall picture.
On the other hand, cross-hatching takes hatching to the next level. By layering lines in different directions, artists can achieve a more complex and nuanced shading effect. This technique allows for a wider range of tonal variation, making it ideal for creating intricate details and textures. Think of cross-hatching as building a structure; each layer adds strength and depth, resulting in a robust and visually captivating piece of art.
Another fascinating technique is stippling, which involves the use of small dots to create tonal variations. Stippling can produce soft gradients and is particularly effective for detailed work, such as portraits or intricate designs. The beauty of stippling lies in its ability to convey light and shadow through tiny, deliberate marks. It’s like painting with a brush made of dots, where each dot contributes to the overall image, allowing for a subtle play of light.
When mastering these techniques, it’s essential to practice regularly. Each method requires a different approach and understanding of how to manipulate tools to achieve the desired effect. Whether you prefer the straightforward nature of hatching, the complexity of cross-hatching, or the delicate touch of stippling, the important thing is to experiment and find what works best for you. Remember, practice is the key to unlocking your artistic potential!
The tools you select for tonal shading can significantly impact the final result. Pencils, charcoal, and blending stumps each offer distinct qualities that can enhance your shading techniques. For instance, softer pencils (like 4B or 6B) produce darker marks and are excellent for deep shadows, while harder pencils (like H or 2H) create lighter shades and are perfect for fine details. Charcoal, with its rich and velvety texture, can be blended easily to create smooth transitions. Blending stumps can help you achieve soft edges and gradients, making them invaluable for a polished finish.
Q: What is the best technique for beginners?
A: Hatching is often recommended for beginners due to its simplicity and ease of understanding. It helps build a strong foundation in tonal shading.
Q: Can I mix different techniques in one drawing?
A: Absolutely! Many artists combine hatching, cross-hatching, and stippling to create a rich and varied texture in their artwork.
Q: How can I improve my tonal shading skills?
A: Regular practice is essential. Try drawing from real life, focusing on light and shadow, and experimenting with different tools and techniques.

Hatching
Hatching is one of the most fundamental techniques in the world of drawing, and it serves as a gateway to understanding tonal shading. At its core, hatching involves drawing a series of parallel lines to create shading. The magic of this technique lies in the density and spacing of these lines. When you draw lines closer together, you create a darker tone, while lines that are spaced further apart yield lighter shades. This simple yet effective technique allows artists to manipulate light and shadow, giving their drawings a sense of depth and dimension.
Imagine hatching as the way a musician uses notes to create a melody. Just as a composer arranges notes in different sequences to evoke emotions, an artist can use varying line densities and directions to convey different feelings in their artwork. For instance, tightly packed lines can represent shadows in a dark corner, while more spaced-out lines can illustrate the gentle light filtering through a window. The beauty of hatching is that it is not just about the lines themselves; it’s about how they interact with each other to form a cohesive image.
To get started with hatching, you don’t need fancy tools—just a pencil and paper will do. Begin by practicing different line weights and angles. You might want to try the following:
- Light Pressure: Use a light touch to create soft, delicate lines.
- Medium Pressure: Apply a bit more pressure for medium-density lines.
- Heavy Pressure: Use firm strokes for bold, dark lines.
One important aspect of hatching is its versatility. It can be used in various styles, from realistic to abstract. Whether you’re sketching a portrait or creating a landscape, hatching can enhance your work by adding texture and depth. Additionally, combining hatching with other techniques, such as cross-hatching or stippling, can lead to even more complex and engaging results.
In summary, hatching is not just a technique; it's a foundational skill that every artist should master. By understanding how to manipulate lines effectively, you can create stunning artwork that captivates your audience. So grab your pencil, start practicing, and let the lines flow!
Cross-Hatching
Cross-hatching is a fascinating technique that elevates the art of tonal shading to new heights. By layering lines in different directions, artists can create a rich tapestry of texture and depth that breathes life into their drawings. Imagine painting with shadows instead of colors; that’s the magic of cross-hatching. This method allows for a nuanced interplay of light and dark, transforming a flat image into a three-dimensional experience. The beauty of cross-hatching lies in its versatility. You can use it to depict anything from the delicate folds of fabric to the rugged surfaces of rocks.
To master cross-hatching, it’s essential to understand the relationship between line density and tonal value. The closer the lines are to each other, the darker the area appears. Conversely, spacing them out creates lighter shades. This principle is crucial when you want to convey a gradual transition from light to dark. For instance, when shading a sphere, you might start with widely spaced lines on the highlighted side, gradually bringing them closer together as you move towards the shadowed area. This creates a smooth gradient that mimics the way light interacts with form.
One of the most exciting aspects of cross-hatching is the ability to experiment with different directions and angles. By varying the orientation of your lines, you can create unique textures and effects. For example, using diagonal lines can suggest movement or dynamism, while horizontal lines might evoke calmness and stability. It's like playing with the rhythm of your drawing; each stroke adds a new note to the symphony of your artwork. Don't be afraid to mix techniques! Combining cross-hatching with other shading methods, such as stippling or blending, can yield stunning results.
For those looking to refine their cross-hatching skills, practice is key. Here’s a simple exercise: take a piece of paper and draw a series of shapes—like circles, squares, and triangles. Then, apply cross-hatching to each shape, experimenting with different line directions and densities. Over time, you’ll develop a keen eye for how to manipulate lines to achieve the desired tonal effect. Remember, the goal is to create depth and dimension, inviting the viewer to explore the intricacies of your work.
In summary, cross-hatching is more than just a technique; it’s a powerful tool that can transform your drawings into captivating pieces of art. By mastering this method, you can add a layer of sophistication to your work, making it not only visually appealing but also emotionally resonant. So grab your pencil, start layering those lines, and watch as your drawings come to life!
Stippling
Stippling is a fascinating technique in the realm of tonal shading that employs small dots to create stunning tonal variations. It's almost like painting with a pointillist's brush, where each dot contributes to a larger picture, gradually building depth and texture. Imagine standing back from a canvas and seeing a vibrant landscape emerge from a multitude of tiny dots—this is the magic of stippling!
One of the greatest advantages of stippling is its ability to produce soft gradients. Unlike other shading techniques that may rely on continuous lines, stippling allows artists to create a more organic transition between light and shadow. This is particularly effective for detailed work, such as portraits or intricate patterns, where the subtle interplay of light can evoke a sense of realism that draws viewers in.
To get started with stippling, you'll need a few essential tools. A good quality pen or fine-tipped marker is ideal, but you can also use pencils or even brushes with ink. The key is to maintain a steady hand and a patient approach, as stippling is often a time-consuming process that rewards diligence. Here’s a quick overview of how to effectively utilize stippling in your artwork:
| Step | Description |
|---|---|
| 1 | Start with a light sketch of your subject to outline the areas where you want to apply shading. |
| 2 | Begin adding dots in the darker areas, gradually building up density to achieve the desired darkness. |
| 3 | As you move into lighter areas, reduce the density of your dots to create a smooth transition. |
| 4 | Step back frequently to assess your work from a distance, ensuring the overall effect is cohesive. |
It’s also important to note that stippling can be combined with other techniques to enhance your artwork further. For example, you might start with hatching in the darker areas and then transition into stippling for a softer finish. This blend can create a rich visual experience that captivates the viewer’s eye.
In conclusion, stippling is not just a method of shading; it’s a way to express your artistic voice through meticulous detail and patience. As you practice and refine your skills, you’ll find that stippling not only enhances your drawings but also allows you to explore new depths of creativity. So grab your tools, start dotting, and watch your art come to life!
- What is stippling? Stippling is a drawing technique that uses small dots to create tonal variations and textures in artwork.
- Can I use any pen for stippling? Yes, you can use fine-tipped pens, pencils, or brushes, but ensure they allow for precise dot placement.
- Is stippling time-consuming? Yes, stippling can be a slow process, but the results are often worth the effort!
- How can I improve my stippling technique? Regular practice, experimenting with dot density, and studying light and shadow will help enhance your skills.
Choosing the Right Tools
This article explores the essential aspects of tonal shading in drawing, including techniques, tools, and tips to enhance your artistic skills and create depth in your artwork.
Tonal shading is crucial for creating depth and realism in drawings. Understanding its significance helps artists convey emotions and three-dimensionality, making their artwork more engaging and lifelike.
Various techniques can be employed to achieve tonal shading, such as hatching, cross-hatching, and stippling. Each method offers unique textures and effects that can enhance the overall composition of the drawing.
Hatching involves drawing parallel lines to create shading. The density and spacing of these lines can influence the perceived darkness or lightness, making it a fundamental technique for artists.
Cross-hatching builds on hatching by layering lines in different directions. This technique adds complexity and depth, allowing for more nuanced shading and a richer visual experience.
Stippling uses small dots to create tonal variations. This method can produce soft gradients and is particularly effective for detailed work, giving artists a unique way to express light and shadow.
When it comes to tonal shading, the tools you select can significantly impact the final result. Think of your tools as the instruments in an orchestra—each one contributes to the overall harmony of your artwork. The right pencil, charcoal, or blending stump can elevate your shading techniques to a whole new level. Here’s a breakdown of some commonly used tools:
- Pencils: Graphite pencils come in various hardness levels, from soft (B) to hard (H). Softer pencils are great for rich darks, while harder pencils provide finer lines. A good range would be 2B to 6B for shading and 2H for details.
- Charcoal: This medium offers deep, rich blacks and can be easily blended for soft transitions. Compressed charcoal gives you darker tones, while vine charcoal is lighter and easier to erase.
- Blending Stumps: These are essential for smoothing out your shading and creating soft gradients. They help merge different tonal values seamlessly, giving your artwork a polished look.
Experimenting with different tools can lead to surprising results. For instance, using a blending stump with charcoal can create depth that a regular pencil might not achieve. Similarly, layering different pencil grades can enhance the texture of your drawing, making it feel alive. Remember, the key is to find what works best for your style and the specific effects you want to create.
Many artists, especially beginners, make mistakes in tonal shading that can detract from their work. Recognizing these errors is essential for improving skills and achieving desired outcomes.
Applying too much pressure can lead to harsh lines and an unnatural appearance. Learning to control pressure is vital for achieving smooth transitions and realistic shading.
Ignoring highlights can flatten a drawing. Incorporating highlights effectively enhances depth and dimension, making the artwork more vibrant and dynamic.
Regular practice is key to mastering tonal shading. Engaging in exercises and studies can help artists refine their skills, develop their style, and gain confidence in their abilities.
Q1: What is the best pencil for beginners?
A1: A good starting point is a range of pencils from 2H to 6B. This variety allows you to experiment with both light and dark shading.
Q2: Can I use colored pencils for tonal shading?
A2: Absolutely! Colored pencils can add a unique twist to tonal shading, allowing for vibrant and expressive artwork.
Q3: How do I maintain my drawing tools?
A3: Regularly sharpen your pencils, clean your blending stumps, and store your charcoal in a safe place to prevent breakage.
Q4: How often should I practice tonal shading?
A4: Aim for at least 30 minutes a day. Consistent practice will help you improve faster and gain confidence in your shading techniques.

Common Mistakes in Tonal Shading
Tonal shading can be a tricky beast to tame, especially for those just starting their artistic journey. Many budding artists fall into common pitfalls that can undermine their work, making it crucial to be aware of these mistakes. One of the most prevalent errors is overusing pressure when applying pencil or charcoal to the paper. It's easy to get carried away, pressing down too hard in an attempt to achieve darker shades. However, this often results in harsh lines that can make your drawing look unnatural and stiff. Instead, try to embrace a lighter touch; the beauty of shading lies in the subtlety of gradients. By varying your pressure, you can create smooth transitions that breathe life into your artwork.
Another frequent misstep is neglecting highlights. Highlights are essential for creating a sense of depth and dimension in your drawings. When you ignore these bright spots, your artwork can appear flat and lifeless. Think of highlights as the sparkle in your drawing; they are what make it pop! To effectively incorporate highlights, consider the light source in your composition. Ask yourself, "Where is the light coming from?" and then strategically leave areas of your drawing untouched or apply lighter shading. This technique will enhance the three-dimensionality of your work, making it feel more dynamic and engaging.
Additionally, many artists overlook the importance of consistency in shading. It’s tempting to focus on one area of your drawing at a time, but this can lead to uneven shading across the piece. Instead, step back frequently to assess the overall balance of tonal values. This practice allows you to maintain a cohesive look throughout your artwork. You might even find it helpful to create a small value scale to reference during your shading process. A simple table showcasing different shades can serve as a guide, helping you to visualize the range of tones you want to achieve.
| Value Level | Description |
|---|---|
| 1 | Very Light |
| 2 | Light |
| 3 | Medium Light |
| 4 | Medium |
| 5 | Medium Dark |
| 6 | Dark |
| 7 | Very Dark |
Lastly, don't forget that practice makes perfect. Many artists shy away from tonal shading exercises, thinking they can skip straight to the 'real' drawings. However, dedicating time to practice specific techniques can significantly improve your skills. Try setting aside a few minutes each day to work on hatching, cross-hatching, or stippling. The more you practice, the more you’ll develop a feel for how to manipulate your tools and create the desired effects. Remember, every great artist was once a beginner, and embracing the learning process is part of the journey!
Q: What is the best tool for tonal shading?
A: The best tool often depends on personal preference, but many artists find that a combination of pencils, charcoal, and blending stumps works well for achieving various shading effects.
Q: How can I improve my shading skills quickly?
A: Regular practice is key! Focus on specific techniques like hatching and stippling, and don't hesitate to experiment with different pressures and tools.
Q: Should I always include highlights in my drawings?
A: Yes! Highlights are crucial for creating depth and dimension. Always consider your light source and where highlights would naturally occur in your composition.
Overusing Pressure
One of the most common pitfalls that artists encounter when practicing tonal shading is . It’s like trying to hammer a nail into a wall with too much force; instead of driving it in smoothly, you risk bending it or creating a mess. When you press too hard with your pencil or charcoal, the lines become harsh and unnatural, which can undermine the overall quality of your artwork. The key to beautiful tonal shading lies in the ability to control pressure effectively, allowing for smooth transitions between light and dark areas.
Imagine you’re painting a sunset. If you were to slap on the paint with reckless abandon, you’d end up with a chaotic explosion of colors that wouldn’t evoke the serene beauty of the scene. Similarly, in drawing, applying too much pressure can create stark, jarring contrasts that lack the subtlety needed to convey depth. To avoid this, artists should focus on the following:
- Gradual Build-Up: Start with light strokes and gradually increase pressure as needed. This technique allows for better control and helps in achieving a more natural gradient.
- Varying Techniques: Experiment with different shading techniques like hatching and stippling, which can produce softer edges without the need for excessive pressure.
- Practice Pressure Control: Engage in exercises specifically designed to improve your ability to manage pressure. For instance, try shading a small area with varying degrees of pressure to see the differences in tone.
By understanding the importance of pressure control, artists can elevate their tonal shading skills significantly. It’s not just about making marks on paper; it’s about creating a dialogue between light and shadow, bringing your artwork to life. Remember, the goal is to create depth and dimension, not to overpower the viewer with harsh lines. So, next time you pick up your pencil or charcoal, think about how you can use pressure to enhance your artwork rather than detract from it.
- What is the best way to practice tonal shading? Regularly engage in exercises that focus on different shading techniques, such as hatching, cross-hatching, and stippling.
- How can I improve my pressure control? Practice shading with light strokes and gradually increase pressure, while also experimenting with different techniques to find what works best for you.
- Are there specific tools that help with tonal shading? Yes, using a variety of pencils, charcoal, and blending stumps can significantly enhance your shading techniques.

Neglecting Highlights
When it comes to tonal shading, one common pitfall that many artists, especially beginners, encounter is . You might be wondering, why are highlights so important? Well, think of highlights as the icing on the cake; they bring life to your drawing and create a sense of dimension that flat shading alone simply cannot achieve. Without highlights, your artwork can appear one-dimensional, lacking the vibrancy and depth that truly captivates viewers.
Imagine looking at a beautiful landscape painting. The sunlight glistening on water, the way it dances off the leaves of trees, or how it gently caresses the contours of a mountain—all these elements are enhanced by highlights. If an artist were to ignore these, the scene would look flat and lifeless. Highlights serve as a guide for the eye, drawing attention to focal points and creating a sense of realism. In essence, they help to tell the story behind your art.
When executing highlights, consider the following tips to enhance your tonal shading:
- Identify the Light Source: Before you even begin shading, it’s crucial to determine where your light is coming from. This will dictate where your highlights should be placed.
- Use a Lighter Touch: When applying highlights, a gentle hand will yield softer, more believable effects. This contrasts beautifully with the darker areas of your drawing, creating a stunning visual balance.
- Experiment with Different Mediums: Different tools can create varying effects. For instance, using a white pencil or gel pen can produce striking highlights on darker paper.
Incorporating highlights into your tonal shading not only enhances the overall composition but also invites viewers to engage with your work on a deeper level. It’s like adding a dash of spice to a dish; it elevates the experience, making it more enjoyable and memorable. So, next time you pick up your pencil, remember that highlights are not just an afterthought—they are essential components that breathe life into your artwork!
Q: How do I determine where to place highlights in my drawing?
A: Start by identifying your light source. The areas closest to the light will have the brightest highlights, while those further away will be less illuminated.
Q: Can I use white paint for highlights?
A: Absolutely! White paint can create stunning highlights, especially on darker backgrounds. Just be careful to blend it well to maintain a natural look.
Q: What if I make a mistake with highlights?
A: Don’t worry! Mistakes can often be corrected by layering additional shading or using an eraser to lighten areas. Art is all about experimentation!
Practicing Tonal Shading
Practicing tonal shading is not just about repetition; it's about exploration and discovery. As an artist, you want to push the boundaries of your creativity while honing your skills. Think of tonal shading as a dance between light and dark, where every stroke can transform a flat surface into a captivating three-dimensional form. To truly master this art, you need to engage in exercises that challenge your understanding of light, shadow, and texture.
One effective way to practice is by creating a series of studies focused on different objects. Choose simple forms like spheres, cubes, and cylinders to start. These shapes allow you to concentrate on how light interacts with surfaces. As you progress, you can introduce more complex subjects, such as still life arrangements or human figures. Each object you draw provides an opportunity to experiment with various shading techniques, enhancing your ability to depict depth.
Here are a few exercises to consider:
- Value Scales: Create a value scale from white to black using your chosen medium. This exercise develops your ability to see and replicate subtle tonal variations.
- Light Source Studies: Set up a simple still life with a single light source. Observe how the light falls on different surfaces and practice shading accordingly.
- Copying Masters: Find artworks from renowned artists and attempt to replicate their tonal shading techniques. Analyzing their work can give you insights into effective shading strategies.
Additionally, don't underestimate the power of feedback. Share your work with fellow artists or join online communities where you can receive constructive criticism. This exchange of ideas can open your eyes to new techniques and approaches you may not have considered. Remember, every artist has their unique style, and learning from others can enrich your own artistic journey.
Lastly, keep a sketchbook dedicated to tonal shading practice. Fill it with quick sketches, experiments with different tools, and notes on what works best for you. This sketchbook will not only serve as a record of your progress but also as a source of inspiration for future projects. The more you practice, the more confident you will become in your ability to create stunning, lifelike drawings that capture the essence of your subjects.
| Question | Answer |
|---|---|
| What is the best medium for practicing tonal shading? | Pencils and charcoal are excellent for beginners due to their versatility and ease of blending. |
| How can I improve my shading technique? | Regular practice, studying light sources, and seeking feedback can significantly enhance your skills. |
| Is it necessary to use a blending stump? | While not essential, blending stumps can help create smoother transitions between tones. |
Frequently Asked Questions
- What is tonal shading and why is it important?
Tonal shading refers to the technique of adding varying degrees of light and dark to a drawing to create depth and realism. It's essential because it helps artists convey emotions and three-dimensionality, making the artwork more engaging and lifelike. Think of it as the secret sauce that transforms a flat image into a vibrant scene!
- What are the basic techniques for achieving tonal shading?
There are several techniques to master tonal shading, including hatching, cross-hatching, and stippling. Hatching involves drawing parallel lines, while cross-hatching adds more complexity by layering lines in different directions. Stippling, on the other hand, uses small dots to create subtle tonal variations. Each technique has its unique charm and can dramatically alter the feel of your artwork!
- How do I choose the right tools for tonal shading?
Selecting the right tools can make a world of difference in your shading techniques. Pencils offer precision, charcoal provides rich blacks, and blending stumps help smooth out transitions. Experimenting with different tools will help you discover what works best for your style and desired effects.
- What are common mistakes to avoid in tonal shading?
Many beginners struggle with overusing pressure, which can create harsh lines and an unnatural look. It's crucial to learn how to control pressure for smooth transitions. Additionally, neglecting highlights can flatten your drawing, so remember to incorporate them to enhance depth and vibrancy!
- How can I practice and improve my tonal shading skills?
Regular practice is key to mastering tonal shading. Engaging in exercises, such as drawing simple shapes and gradually adding shading, can help refine your skills. Don't be afraid to experiment with different techniques and styles—it's all part of the journey to becoming a more confident artist!


