
How to Paint Portraits from Photographs: A Step-by-Step Guide
Painting portraits from photographs can be an incredibly rewarding experience that allows you to capture the essence of a person in a unique and artistic way. Whether you're a seasoned artist or just starting out, this guide will walk you through each step of the process, from choosing the right photograph to adding those final touches that make your portrait truly shine. By following these steps, you'll not only enhance your artistic skills but also learn how to bring a photograph to life on canvas.
The first step in creating a stunning portrait is to select an appropriate photograph. This decision is crucial because the photograph serves as your reference point throughout the painting process. When choosing a photograph, consider factors such as lighting, composition, and the subject's emotional expression. A well-lit photograph with clear details will make it easier to replicate features accurately. Additionally, look for images that evoke a strong emotion or tell a story, as these elements will add depth to your painting.
Before you begin painting, it's essential to gather all the necessary materials. Having the right tools at your disposal can significantly affect your painting experience. Here’s a list of essential supplies you’ll need:
- Paints: Choose between acrylics, oils, or watercolors based on your preference.
- Brushes: Various sizes and shapes for different techniques.
- Canvas: Pre-stretched canvases, panels, or textured surfaces.
- Palette: For mixing colors.
Each of these materials plays a vital role in the painting process, and understanding their characteristics will help you make informed choices.
When it comes to paints, each type has its own unique qualities. Acrylic paints are versatile and dry quickly, making them great for layering. Oil paints offer rich colors and longer drying times, allowing for more blending and detail work. On the other hand, watercolors are transparent and can create beautiful washes but require a different technique altogether. Understanding these differences will help you choose the best medium for your portrait.
The type of brushes you select can dramatically impact your painting style. For fine details, you’ll want to use smaller brushes, while larger brushes are better for broad strokes and backgrounds. Here are a few common brush types:
- Round Brushes: Great for detail work and thin lines.
- Flat Brushes: Ideal for bold strokes and filling in larger areas.
- Filbert Brushes: Perfect for blending and creating soft edges.
Choosing the right brushes can enhance your ability to achieve the desired textures and details in your portrait.
The choice of canvas can also impact your final result. You can opt for pre-stretched canvases, which are ready to use, or panels that offer a firmer surface. Textured canvases can add an interesting dimension to your painting but may require different techniques. Experimenting with various canvas types will help you find what best suits your style.
Creating a comfortable and organized workspace is vital for productivity. Ensure that you have good lighting, preferably natural light, to accurately see the colors and details of your work. Arrange your materials within easy reach and minimize distractions to keep your focus on the painting process. A well-set-up workspace not only enhances your efficiency but also fosters creativity.
Once you have your photograph and materials ready, it’s time to sketch the outline of your portrait. A strong outline serves as the foundation for your painting, so take your time with this step. Use light, gentle strokes to map out the subject’s features, paying close attention to proportions and positioning. Remember, this is just the beginning, and you can always adjust as you go along.
Understanding facial proportions is crucial for creating realistic portraits. The human face has specific measurements and guidelines that can help you accurately depict features. For example, the eyes are typically located halfway down the head, and the width of the face is roughly five eye lengths. Familiarizing yourself with these proportions will help ensure that your painting maintains a lifelike quality.
If you're struggling with proportions, consider using a grid method. By dividing your photograph and canvas into equal sections, you can easily transfer the details with greater accuracy. This technique helps in maintaining the correct placement and size of each feature, making the painting process smoother and more precise.
With the outline complete, it’s time to bring your portrait to life with color. This is where the magic happens! Start by mixing your colors and layering them onto the canvas. Understanding color theory is essential here; choosing the right colors can evoke different moods and emotions. For example, warm colors can create a sense of warmth and comfort, while cool colors may convey calmness or sadness.
Knowledge of the color wheel and complementary colors is vital for creating harmonious portraits. Experiment with different palettes to see how they affect the overall feel of your painting. Don’t be afraid to mix colors to find the perfect shades for skin tones, shadows, and highlights.
Layering is key to achieving depth and dimension in your portrait. Start with a base layer and gradually build up colors, creating shadows and highlights that enhance the three-dimensionality of your work. This technique not only adds realism but also allows you to correct any mistakes along the way.
As you near the completion of your portrait, the final touches can elevate your work to a professional level. Focus on refining details, adding highlights, and ensuring that every aspect of your painting is polished. Applying a varnish can protect your artwork from dust and fading, enhancing its longevity and vibrancy.
Q: How long does it take to paint a portrait from a photograph?
A: The time it takes to paint a portrait can vary greatly depending on your skill level, the complexity of the photograph, and the medium used. It can take anywhere from a few hours to several days.
Q: Can I use any photograph for painting?
A: While you can technically use any photograph, it's best to choose one with good lighting, clear detail, and an engaging expression to achieve the best results.
Q: What if I'm not good at drawing?
A: Don’t worry! Many artists use techniques like grids or tracing to help with proportions. The key is to practice and be patient with yourself.
Q: Do I need to be an experienced artist to paint portraits?
A: Not at all! Everyone starts somewhere, and with practice and dedication, you can improve your skills over time.
Choosing the Right Photograph
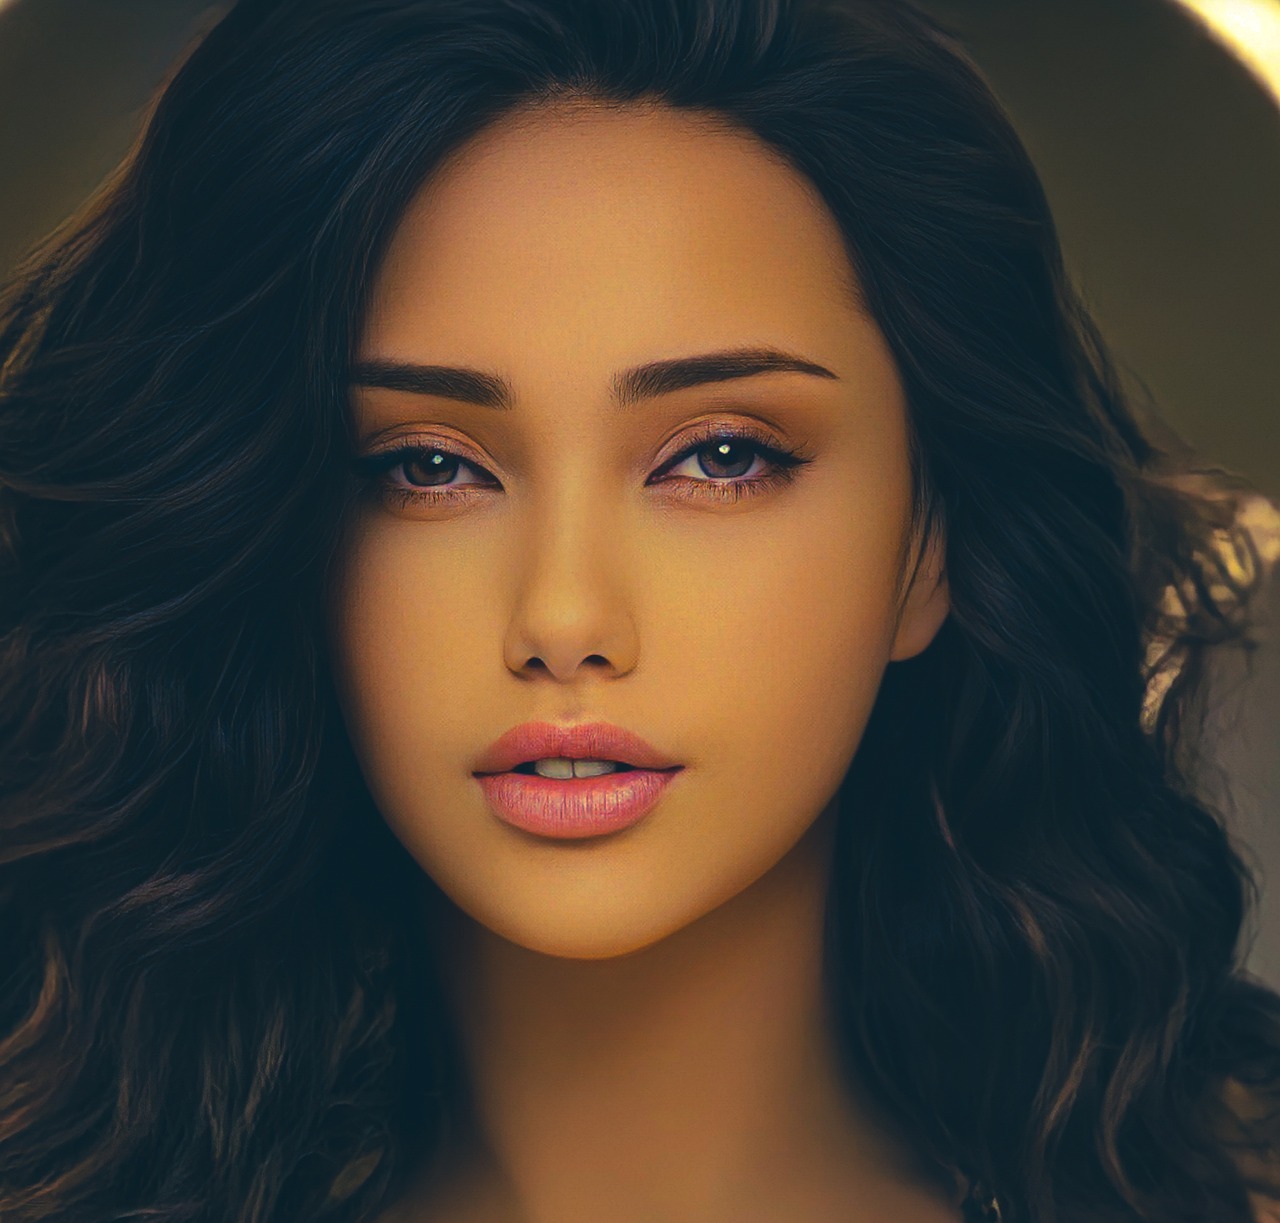
When it comes to painting portraits, is like laying the groundwork for a magnificent building. The photograph serves as your blueprint, guiding every brushstroke and color choice. So, what should you look for? First and foremost, consider the lighting. Natural light can create beautiful highlights and shadows, adding depth to your subject. A photograph taken in soft, diffused light—like during golden hour—can enhance the features and give a warm, inviting feel to the portrait.
Next, think about the composition. A well-composed photograph can draw the viewer's eye and create a sense of balance. Look for images where the subject is framed nicely, perhaps using the rule of thirds, which can make your painting more dynamic. Additionally, the emotional expression captured in the photograph is crucial. A genuine smile, a thoughtful gaze, or even a candid moment can bring life to your portrait, making it resonate with viewers on a deeper level.
It’s also important to consider the resolution of the photograph. A high-resolution image will provide more detail, allowing you to replicate textures and subtle features accurately. If the photo is blurry or pixelated, it may hinder your ability to achieve a lifelike representation. Finally, think about the background. A simple, uncluttered background can help your subject stand out, while a busy background might distract from the main focus of your portrait.
In summary, when choosing a photograph for your portrait, keep the following factors in mind:
- Lighting: Aim for natural, soft light.
- Composition: Use the rule of thirds for balance.
- Emotional Expression: Capture genuine moments.
- Resolution: Opt for high-quality images.
- Background: Choose simple and uncluttered settings.
By carefully selecting your photograph with these elements in mind, you'll set yourself up for success in creating a stunning portrait that captures not just the likeness of your subject but also their essence. Now, let’s dive into gathering the materials you’ll need to bring your artistic vision to life!
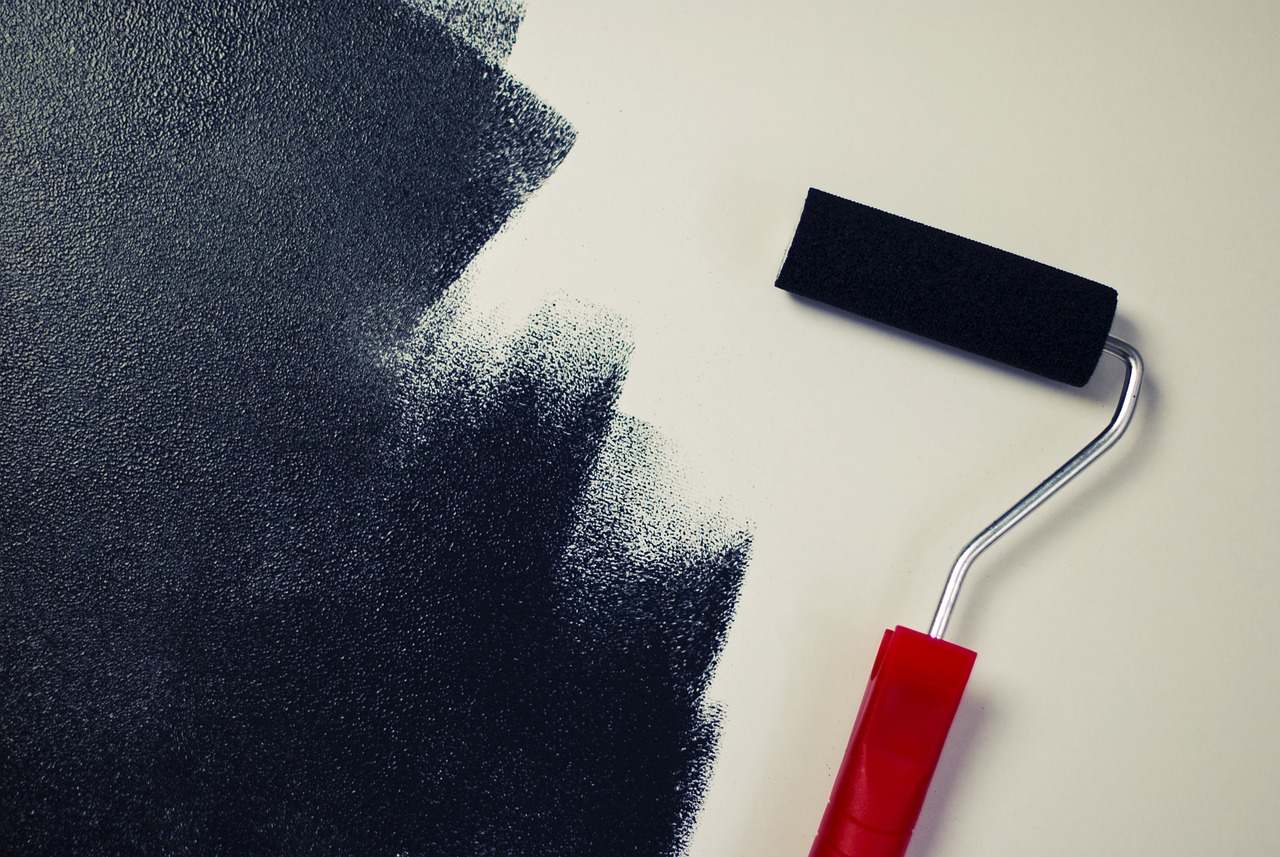
Gathering Your Materials
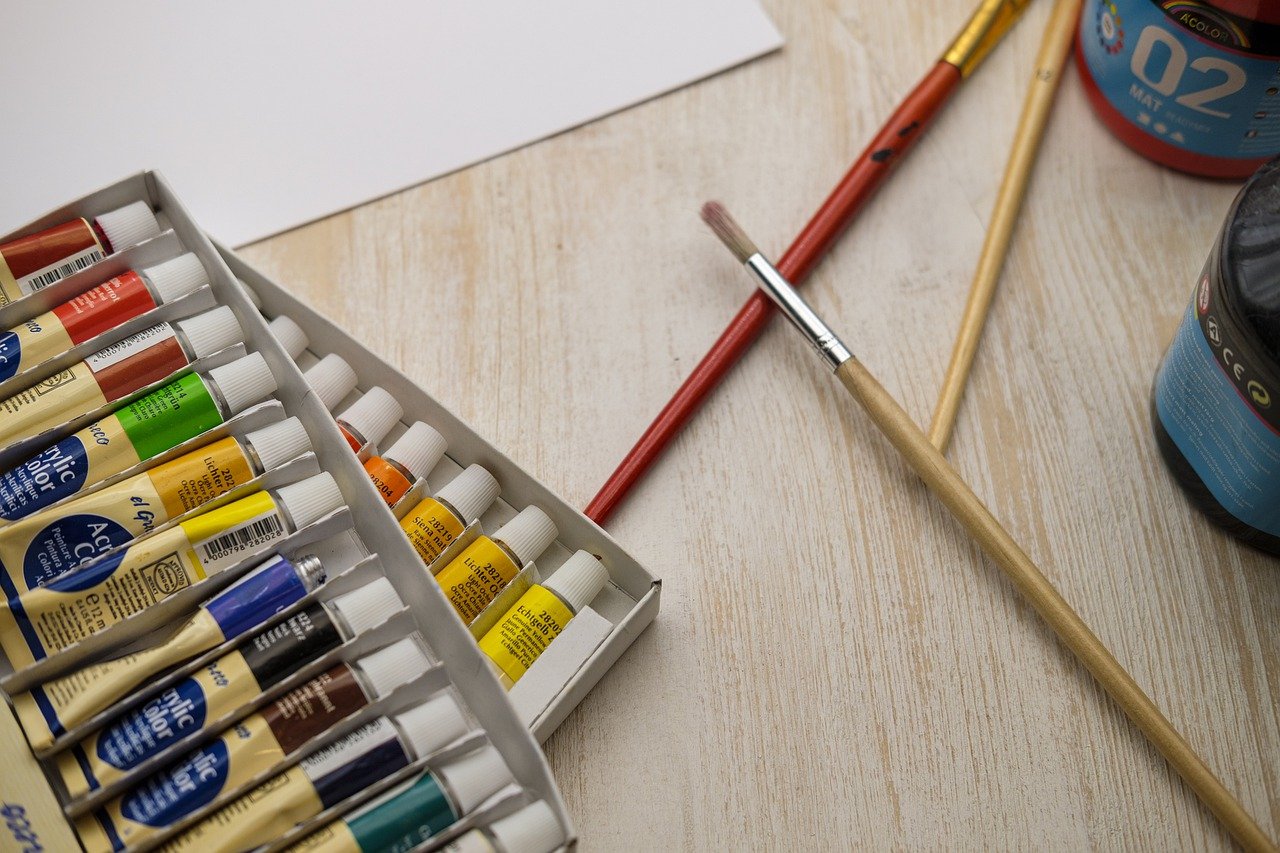
When it comes to painting portraits from photographs, having the right materials is not just a recommendation; it’s a necessity. Imagine embarking on a journey without the proper gear—it's bound to lead to frustration and less-than-stellar results. So, let’s dive into the essential supplies you’ll need to set yourself up for success. First and foremost, you’ll want to gather your paints. The choice of paint can significantly influence your artistic expression, so consider the following types:
- Acrylics: Fast-drying and versatile, acrylics are perfect for beginners and allow for easy layering.
- Oils: Known for their rich texture and blending capabilities, oil paints offer a longer drying time, giving you the chance to work on details.
- Watercolors: While they can be challenging for portraits, they provide a unique translucency that can create stunning effects.
Next, let’s talk about brushes. The right brush can make all the difference in achieving the textures and details you desire. A variety of brushes will be beneficial, including flat brushes for broad strokes, round brushes for detail work, and filbert brushes for a combination of both. Each brush type has its unique purpose, so consider investing in a quality set that suits your painting style.
Now, what about the canvas? The surface you choose to paint on can dramatically affect the outcome of your portrait. Options range from pre-stretched canvases to panels and textured surfaces. Pre-stretched canvases are convenient and ready to use, while panels offer sturdiness and a different texture. Textured surfaces can add an interesting dynamic to your work, so think about what aligns best with your artistic vision.
Additionally, having a palette for mixing colors is crucial. Whether you prefer a traditional wooden palette or a disposable one, what matters is that you have enough space to blend your colors effectively. And don’t forget about easels! A sturdy easel will provide the support you need while painting, allowing you to adjust your canvas to the perfect angle.
Lastly, consider your workspace. A well-organized area can enhance your creativity and focus. Ensure you have good lighting—natural light is often the best—along with a comfortable chair and minimal distractions. By gathering these materials and setting up your workspace thoughtfully, you will create an environment that fosters inspiration and productivity.
Types of Paints
When it comes to painting portraits, the choice of paint can dramatically influence both the process and the final outcome of your artwork. Each type of paint has its own unique characteristics, making it essential to understand the differences before diving into your portrait project. Let's explore the three most popular types of paints: acrylics, oils, and watercolors.
Acrylic paints are a favorite among many artists for their versatility and quick-drying properties. These paints are water-based, which means they can be easily thinned with water and cleaned up with soap and water. One of the standout features of acrylics is their ability to mimic the qualities of both oils and watercolors, depending on how they are used. For instance, you can create vibrant, opaque layers or thin them down for a more transparent wash. This adaptability makes acrylics suitable for various techniques, from bold strokes to delicate details.
Oil paints, on the other hand, are known for their rich texture and blending capabilities. They take longer to dry, allowing artists to work at a leisurely pace and make adjustments as needed. This extended drying time can be a double-edged sword; while it offers flexibility in blending colors seamlessly, it also requires patience. Oil paints are ideal for creating depth and luminosity in portraits, as they allow for intricate layering and glazing techniques that can bring your subject to life. However, working with oils often requires solvents for thinning and cleaning, which can be a consideration for those sensitive to chemicals.
Lastly, we have watercolors, which are celebrated for their transparency and fluidity. These paints are perfect for artists who enjoy a more spontaneous and loose style. While they can be more challenging to control compared to acrylics and oils, the ethereal quality of watercolors can produce stunning effects, particularly in portraits that capture light and atmosphere. However, it’s crucial to remember that watercolors require a different approach to layering, as adding too many layers can lead to muddiness.
To help you decide which paint type suits your portrait painting needs best, here’s a quick comparison:
| Type of Paint | Drying Time | Best For | Cleanup |
|---|---|---|---|
| Acrylic | Fast | Versatile techniques | Water and soap |
| Oil | Slow | Depth and blending | Solvents |
| Watercolor | Varies | Transparency and fluidity | Water |
Ultimately, the choice of paint will depend on your personal preferences, the style you wish to achieve, and the techniques you want to explore. Whether you lean towards the quick-drying convenience of acrylics, the rich textures of oils, or the delicate washes of watercolors, each medium offers a unique journey into the world of portrait painting. So, which paint will you choose for your next masterpiece?
- Can I mix different types of paints? Mixing different types of paints can yield interesting results, but it’s essential to understand how they interact. For example, mixing acrylics with watercolors can create unique effects, but be cautious as they may not adhere well to each other.
- Which paint is best for beginners? Acrylics are often recommended for beginners due to their ease of use, quick drying time, and simple cleanup process.
- How do I choose the right colors? Understanding color theory and experimenting with mixing colors can help you choose the right palette for your portrait. Don't hesitate to create color swatches to see how they look together before applying them to your painting.
Brush Selection
When it comes to painting portraits, the selection of brushes can make a world of difference in achieving the desired effects and details. Just like a chef needs the right knives to prepare a gourmet meal, an artist requires a variety of brushes to bring their vision to life. Each brush type serves a specific purpose, and understanding these can elevate your portrait from good to breathtaking.
Firstly, you should consider the size of the brushes. Larger brushes are fantastic for covering broad areas and laying down base colors, while smaller brushes are essential for intricate details, such as the eyes and lips. A good rule of thumb is to have a range of sizes on hand, from large flat brushes (for washes and backgrounds) to fine-tipped round brushes (for detailing). Here’s a quick overview:
| Brush Type | Use |
|---|---|
| Flat Brush | Ideal for broad strokes and filling in larger areas. |
| Round Brush | Great for detail work and fine lines. |
| Filbert Brush | Versatile for blending and soft edges. |
| Fan Brush | Perfect for texture and foliage effects. |
Moreover, the material of the brushes also plays a crucial role in the painting process. Brushes can be made from natural hair (like sable or hog) or synthetic fibers. Natural hair brushes tend to hold more paint and offer a smoother application, making them ideal for oil and watercolor paints. On the other hand, synthetic brushes are durable and often preferred for acrylics, as they can withstand the harsher nature of these paints. It’s wise to experiment with both types to see what feels best in your hand and suits your technique.
Don’t forget about the shape of the brush, which can impact the texture and style of your strokes. For instance, a filbert brush, with its oval shape, is excellent for softening edges and blending colors. If you want to create sharp lines or details, a round brush is your best bet. The right shape can help you achieve everything from delicate highlights to bold strokes, so be sure to choose wisely based on the effect you want to create.
Finally, maintaining your brushes is essential for ensuring longevity and performance. Always clean them thoroughly after each use, as dried paint can ruin the bristles and affect your next painting session. A simple wash with soap and water, followed by reshaping the bristles, can keep your brushes in top condition.
In summary, brush selection is a fundamental aspect of portrait painting that should not be overlooked. By understanding the different types, materials, and shapes available, you can equip yourself with the tools necessary to create stunning and lifelike portraits. Remember, the right brush can be the difference between a good painting and a masterpiece!
- What type of brush is best for beginners? A versatile round brush is often recommended for beginners, as it can handle a variety of techniques.
- How do I clean my brushes properly? Use warm water and mild soap, gently reshaping the bristles after cleaning.
- Can I use the same brushes for different types of paint? While it's possible, it's best to use specific brushes for each medium to maintain their quality.
Canvas Options
When it comes to painting portraits, the choice of canvas is more than just a surface; it’s the foundation upon which your artistic vision comes to life. Selecting the right canvas can profoundly affect the texture, appearance, and longevity of your artwork. There are several types of canvases available, each with its unique characteristics. Understanding these options will help you make an informed decision that aligns with your painting style and medium.
One popular choice is the pre-stretched canvas, which comes ready to use and is typically mounted on a wooden frame. This type is convenient for artists who want to dive straight into their work without the hassle of stretching the canvas themselves. Pre-stretched canvases are available in various sizes and textures, allowing you to select one that complements your project. However, it's important to check the quality of the canvas material, as cheaper options may not hold paint as well or may warp over time.
Another option is canvas panels, which are made from a rigid board covered with canvas material. These panels are often more affordable and portable, making them an excellent choice for artists who like to paint en plein air or travel. Canvas panels provide a sturdy surface that can handle a variety of paints, but they may not provide the same depth of texture as stretched canvases.
Textured canvases are also worth considering, especially if you want to add dimension to your portraits. These canvases have a pronounced surface texture that can create unique effects and add interest to your painting. They can be particularly effective for acrylics or oils, allowing for rich layering and blending techniques. However, keep in mind that the texture may require more skill to navigate, especially when it comes to fine details.
Ultimately, the choice of canvas should reflect your personal style, the techniques you plan to use, and the overall effect you want to achieve. Experimenting with different canvas types can lead to exciting discoveries in your painting journey. Here’s a quick comparison of the most common canvas options:
| Canvas Type | Pros | Cons |
|---|---|---|
| Pre-Stretched Canvas | Ready to use, available in various sizes | Can be expensive, quality varies |
| Canvas Panels | Affordable, portable, sturdy | Less texture, may warp if not handled properly |
| Textured Canvas | Unique effects, great for layering | Requires skill for fine details |
In conclusion, choosing the right canvas is an essential step in the portrait painting process. Whether you opt for a pre-stretched canvas, a panel, or a textured surface, make sure it aligns with your artistic goals and enhances your ability to express your creativity. Remember, the canvas is not just a backdrop; it’s an integral part of your artistic journey!
- What type of canvas is best for beginners? Pre-stretched canvases are often recommended for beginners due to their convenience and ease of use.
- Can I use acrylic paint on canvas panels? Yes, canvas panels work well with acrylics and provide a sturdy surface for painting.
- How do I prepare a raw canvas for painting? If you’re using raw canvas, it’s essential to stretch it and apply a primer, like gesso, to create a suitable painting surface.
- What should I look for in a high-quality canvas? Look for canvases made from 100% cotton or linen, as they tend to hold paint better and resist warping.
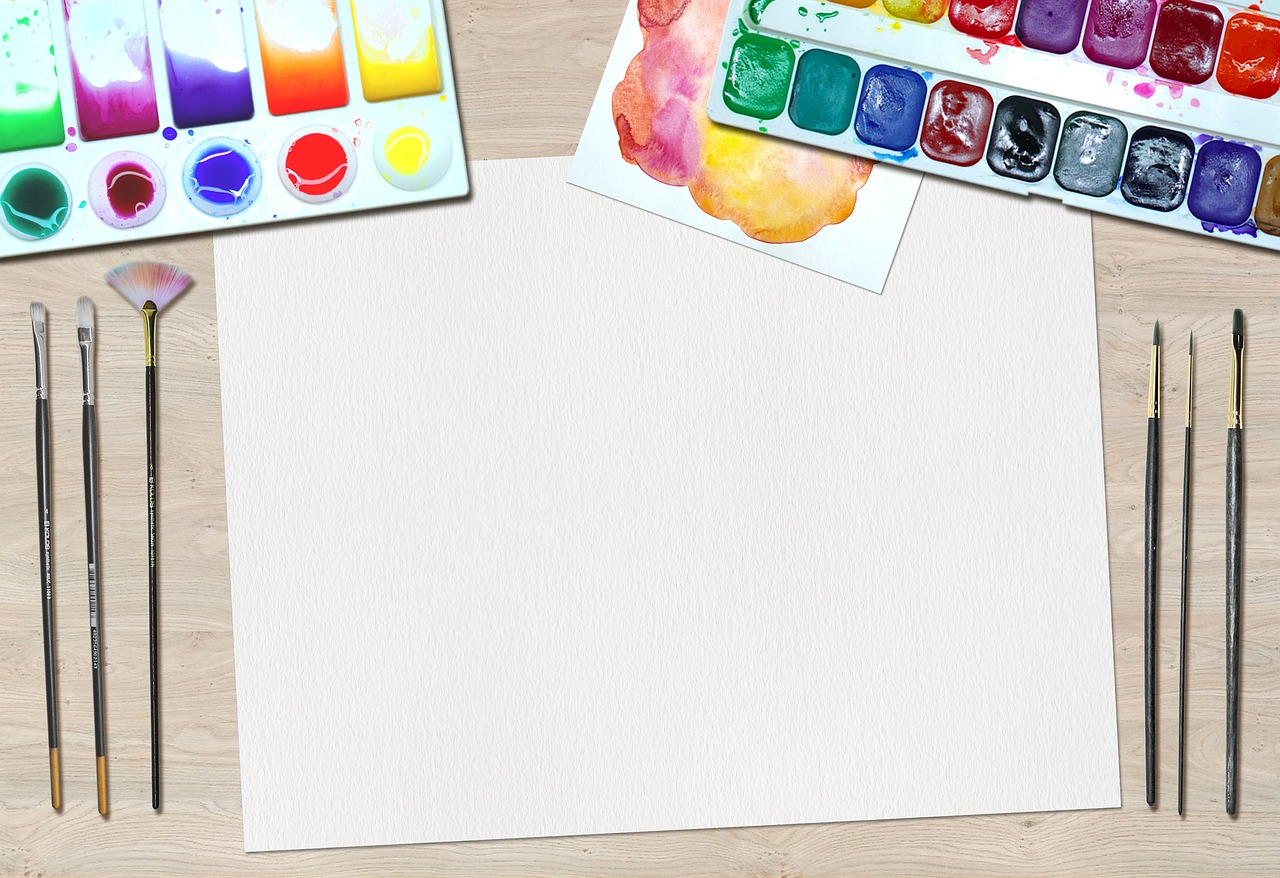
Setting Up Your Workspace
Creating an organized and comfortable workspace is essential for any artist looking to elevate their painting experience. Imagine stepping into a space where everything is in its place, colors are vibrant, and inspiration flows freely. This is what a well-set workspace can do for you! Start by selecting a location that offers good natural light, as this will help you see the true colors of your paints and the details of your subject. Position your easel or canvas in a way that maximizes this light, but avoid direct sunlight that could create harsh shadows.
Next, consider the layout of your materials. Having your paints, brushes, and tools within arm's reach can make a significant difference in your workflow. You might want to use a sturdy table or a dedicated art cart to keep everything organized. Here’s a simple breakdown of what to include in your workspace:
- Paints: Keep your acrylics, oils, or watercolors neatly arranged for easy access.
- Brushes: Organize brushes by size and type in a holder or container.
- Canvases: Store pre-stretched canvases or panels vertically to save space.
- Palette: Have a clean palette ready for mixing colors, and consider using a wet palette for acrylics to keep them moist.
- Cleaning Supplies: Don’t forget to include paper towels, water cups, and cleaning agents for your brushes.
Additionally, consider your comfort. A good chair that supports your back can make long painting sessions much more enjoyable. If you’re planning to paint for hours, having a comfortable setup will help you focus on your art rather than your discomfort. Make sure to take breaks and stretch; your body will thank you!
Lastly, minimize distractions. If you’re in a busy household or a noisy environment, think about using headphones to listen to music or ambient sounds that inspire you. This can create a bubble of creativity, allowing you to immerse yourself fully in your work. Remember, a well-organized and inviting workspace not only enhances your productivity but also fuels your creativity. So take the time to set it up right, and watch how it transforms your painting experience!
Q: What is the best lighting for a painting workspace?
A: Natural light is ideal, but if that's not possible, consider using daylight-balanced LED lights to mimic natural sunlight.
Q: How can I keep my workspace tidy while painting?
A: Use containers and organizers for your supplies and clean up regularly as you work to maintain a clutter-free environment.
Q: What should I do if I don’t have a dedicated art space?
A: You can create a portable workspace by using a folding table and storing your supplies in a tote or box that can be easily moved.
Sketching the Outline
When it comes to painting portraits, is like laying the groundwork for a beautiful building. It’s the foundation upon which your entire artwork will stand, so it’s essential to get it right. Start by choosing a medium that you feel comfortable with; many artists prefer using graphite pencils or charcoal for their initial sketches due to their ease of use and ability to make corrections. The goal here is to capture the essence of your subject without getting bogged down in details too early on.
As you begin sketching, focus on the proportions and positioning of the face. A common mistake is to rush through this stage, but taking your time will pay off later. Use light strokes to outline the main features: the head shape, eyes, nose, and mouth. Remember, you’re not just drawing what you see; you’re interpreting the photograph. To help with accuracy, you might want to consider using a grid method. This involves dividing both your reference photo and canvas into equal sections, making it easier to replicate the proportions accurately.
Here’s a simple breakdown of the steps to sketch a portrait outline:
- Start with basic shapes: Use circles and ovals to outline the head, and then add guidelines for the facial features.
- Focus on proportions: Measure the distances between features. For example, the eyes are typically one eye-width apart, and the bottom of the nose aligns with the bottom of the ears.
- Refine your lines: Once you’re satisfied with the basic shapes and proportions, start refining your lines to represent the actual features.
One useful technique is to step back and view your sketch from a distance. This can help you see any disproportionate areas or mistakes that need correcting. Don’t hesitate to erase and adjust as needed; remember, this is just the first step in your creative journey. The outline should serve as a guide rather than a strict rule, allowing for flexibility as you progress into the painting phase.
In conclusion, sketching the outline is a crucial step that sets the stage for your portrait. By investing time and effort into this phase, you’re laying a solid foundation for a stunning and lifelike painting. So grab your pencil, take a deep breath, and let your creativity flow!
Q: How important is the initial sketch in portrait painting?
A: The initial sketch is incredibly important as it serves as the foundation for your painting. A well-done outline ensures accurate proportions and placement of features.
Q: Can I use a photo reference while sketching?
A: Absolutely! Using a photo reference can help you capture details and proportions more accurately, making your painting process smoother.
Q: What should I do if I make a mistake in my outline?
A: Mistakes are part of the process. You can easily erase and adjust your sketch until you’re satisfied with the outline. Remember, it’s all about refining your work!
Proportions and Measurements
When it comes to painting portraits, understanding is absolutely essential. Think of your canvas as a map; if the landmarks are off, the whole picture can look distorted. The human face is a complex structure, and getting the proportions right is the key to achieving a lifelike representation. So, how do you ensure that your portrait captures the essence of your subject accurately?
First, let's break down the human face into manageable sections. The average adult face can be divided into three equal parts: the top of the head to the eyebrows, the eyebrows to the bottom of the nose, and the bottom of the nose to the chin. This method not only helps in setting the right proportions but also serves as a guideline for placing facial features. For example:
- The eyes are typically located halfway down the head.
- The width of the face is generally about five eyes wide.
- The distance between the eyes is roughly one eye's width.
Using these basic measurements allows you to create a framework that can lead to a more accurate representation. But how do you apply these measurements practically? One effective technique is to use a grid method. By overlaying a grid on your reference photograph and then drawing a corresponding grid on your canvas, you can focus on each square individually. This method simplifies the process, making it easier to capture the proportions without getting overwhelmed.
Additionally, keep in mind that every face is unique. While these measurements serve as a guideline, you should always be attentive to the specific characteristics of your subject. For instance, some individuals may have wider or narrower features, and it's crucial to adjust your measurements accordingly. A good practice is to take a few moments to observe your subject closely—notice the distinctions in their facial structure, the tilt of their head, and the way light interacts with their features.
Lastly, don't forget the importance of practice. The more you paint, the better you'll become at intuitively grasping proportions. Consider sketching from life or using photographs regularly to hone your skills. Over time, you'll develop an eye for what looks right and what needs adjusting, making your portraits not only accurate but also expressive and full of life.
- What is the best way to measure proportions for a portrait? Using the grid method can help you accurately transfer measurements from your reference photo to your canvas.
- How do I know if my proportions are correct? Regularly step back from your work to assess proportions from a distance, and compare them against your reference photo.
- Can I use digital tools to help with proportions? Absolutely! Many artists use digital applications that allow for grid overlays and proportion guides.
Using Grids for Accuracy
When it comes to painting portraits from photographs, achieving accuracy in proportions and placements can be a daunting task. This is where the grid method shines as a powerful tool in your artistic arsenal. By dividing both your reference photograph and your canvas into a grid, you can simplify the process of translating the intricate details of the image onto your canvas. It’s like having a cheat sheet that helps you maintain the correct scale and positioning of facial features.
To begin with, you will need to prepare your photograph. Start by drawing a grid over the photograph using a ruler. This grid can consist of equally sized squares, typically 1-inch by 1-inch, but you can adjust the size based on your preference and the size of your canvas. The goal is to create a series of squares that will guide you in accurately capturing the essence of your subject. Once your photograph is gridded, it’s time to prepare your canvas. You will repeat the same grid pattern on your canvas, ensuring that the squares match in size with those on your reference image.
As you work through your painting, focus on one square at a time. This method allows you to concentrate on smaller sections of the portrait, making it easier to replicate the details and proportions without feeling overwhelmed. For instance, if you notice that the eye in the first square seems too large, you can make adjustments before moving on to the next square. This technique not only enhances accuracy but also builds your confidence as you see each section coming together.
Here’s a simple breakdown of how to effectively use grids in your portrait painting:
- Step 1: Draw a grid on your photograph with a pencil or fine marker.
- Step 2: Create a matching grid on your canvas, ensuring the squares are the same size.
- Step 3: Start painting one square at a time, focusing on accurately transferring the details from the photograph.
- Step 4: Continuously step back and assess your work to ensure proportional accuracy.
Additionally, if you find yourself struggling with the grid method, don't hesitate to experiment with different grid sizes. Larger grids can simplify the process for beginners, while smaller grids may be more suitable for advanced artists seeking precision. Remember, the ultimate goal is to capture the likeness and emotion of your subject, and the grid method is just one of many tools to help you achieve that.
In summary, utilizing grids in your portrait painting can drastically improve your accuracy and confidence. It’s a straightforward technique that demystifies the complexities of facial proportions and placements, allowing you to focus on what truly matters—bringing your subject to life on canvas.
Q1: Do I need to use a grid for every portrait I paint?
A1: No, using a grid is not mandatory. It’s a helpful technique, especially for beginners, but experienced artists may prefer to rely on their skills and intuition.
Q2: What if my photograph is too small to draw a grid?
A2: You can always enlarge the photograph using a photocopier or a digital editing program to create a larger reference that is easier to grid.
Q3: Can I use the grid method for other types of artwork?
A3: Absolutely! The grid method is versatile and can be used for various forms of art, including landscapes and still life.
Q4: Will using a grid make my painting look less original?
A4: Not at all! The grid is merely a guide. Your unique style and interpretation will shine through, making the artwork distinctly yours.
Adding Color and Detail
Once you've laid down the outline of your portrait, the real magic begins—it's time to add color and detail! This stage is where your painting truly starts to come alive, transforming a simple sketch into a vibrant representation of your subject. But before you dive in, it’s crucial to understand a few foundational concepts that will guide your brush strokes and color choices.
First and foremost, color mixing is an essential skill for any artist. It’s not just about slapping paint on the canvas; it’s about creating a palette that reflects the nuances of your subject's skin tone, hair color, and the ambient light in your photograph. When mixing colors, consider the following:
- Primary Colors: Red, blue, and yellow are your building blocks. By combining these, you can create a wide range of hues.
- Complementary Colors: These are colors opposite each other on the color wheel. Using them can help make your portrait pop by providing contrast.
- Shadows and Highlights: Remember to mix darker shades for shadows and lighter shades for highlights to give depth to your portrait.
Next, let’s talk about layering techniques. Layering is essential for achieving depth and dimension in your painting. Start with a base layer of color, then gradually build up additional layers to create shadows and highlights. This technique not only adds realism but also allows you to make adjustments as you go along. Here’s a simple approach to layering:
- Begin with a thin wash of color to establish the base.
- Once dry, add darker tones to areas that require depth.
- Finally, apply lighter colors to the areas that catch the light, enhancing the three-dimensionality of your subject.
As you work on adding color, don’t forget about the details. This is where your portrait can really shine! Focus on the eyes, lips, and hair, as these features often convey the most emotion and personality. Pay attention to the subtle variations in color and texture. For instance, the whites of the eyes are not just plain white; they have nuances and reflections that bring them to life. Similarly, the hair can be a complex interplay of colors that require careful observation and skillful application.
Lastly, it’s important to step back from your work periodically. This will help you see your portrait from a different perspective and assess whether the colors and details are coming together as you envisioned. Sometimes, taking a break can provide the clarity you need to make those final adjustments that can elevate your painting from good to truly stunning.
- What type of paint is best for adding color to portraits? Acrylics are great for beginners due to their quick drying time, while oils offer richer colors and blending capabilities.
- How do I know when to stop adding details? A good rule of thumb is to stop when your painting feels balanced and you’ve captured the essence of your subject without overworking it.
- Can I use a reference photo while painting? Absolutely! Reference photos are invaluable for ensuring accuracy in color and detail.
Understanding Color Theory
Color theory is a fundamental aspect of painting that can transform your artwork from ordinary to extraordinary. It’s not just about choosing pretty colors; it’s about understanding how colors interact, how they can evoke emotions, and how they can bring your portraits to life. Think of color as the language of your painting; it speaks volumes about mood, depth, and character. To master this language, you need to familiarize yourself with the color wheel, which is a visual representation of colors arranged according to their chromatic relationship.
The color wheel is divided into primary, secondary, and tertiary colors. Primary colors—red, blue, and yellow—are the building blocks of all other colors. When you mix two primary colors, you create a secondary color (like green, orange, or purple). Mixing a primary color with a secondary color gives you a tertiary color, which adds even more depth to your palette. Understanding these relationships will help you create harmonious color schemes that enhance your portraits.
Another critical concept in color theory is complementary colors. These are colors that are opposite each other on the color wheel, such as blue and orange or red and green. Using complementary colors in your portraits can create striking contrasts that draw the viewer's eye and add vibrancy. For example, if you paint a subject with warm skin tones, consider using cool blues and greens in the background to make the subject pop. This technique not only adds depth but also creates a sense of balance in your composition.
Moreover, color can evoke specific emotions and set the mood of your painting. Warm colors like red, orange, and yellow tend to create feelings of warmth and excitement, while cool colors like blue, green, and purple can evoke calmness and serenity. When painting portraits, consider what emotions you want to convey. Are you capturing a joyful moment? A reflective mood? The colors you choose will play a significant role in expressing these feelings.
To help you better understand how colors can influence your artwork, here’s a simple table summarizing the emotional responses associated with different colors:
| Color | Emotional Response |
|---|---|
| Red | Passion, Energy |
| Blue | Calm, Trust |
| Yellow | Happiness, Optimism |
| Green | Growth, Harmony |
| Purple | Luxury, Creativity |
As you experiment with colors, remember to keep a color mixing chart handy. This chart will allow you to see how different colors blend and interact, helping you make informed choices in your paintings. Mixing colors is like cooking; sometimes, a little bit of this and a pinch of that can create a masterpiece. Don’t be afraid to play around with different combinations to see what works best for your artistic vision.
In conclusion, understanding color theory is essential for any artist looking to create impactful portraits. By mastering the color wheel, exploring complementary colors, and being mindful of the emotional responses that colors can evoke, you can elevate your artwork to new heights. So grab your brushes, mix those colors, and let your creativity flow!
- What is the color wheel? The color wheel is a visual representation of colors arranged according to their relationships, including primary, secondary, and tertiary colors.
- How do complementary colors work? Complementary colors are opposite each other on the color wheel and create contrast when used together, enhancing the vibrancy of your artwork.
- Can color theory help in achieving realistic skin tones? Yes! Understanding how to mix colors and use complementary shades can help you create more lifelike skin tones in your portraits.
- What is the best way to practice color mixing? Keep a color mixing chart and experiment with blending different colors to see how they interact, which will improve your understanding of color theory.
Layering Techniques
Layering is an essential technique in portrait painting that allows you to build depth, dimension, and realism in your artwork. Think of layering like constructing a sandwich; each layer adds its own flavor and texture, contributing to the overall experience. In painting, this means starting with a base layer of color and gradually adding more layers to create shadows, highlights, and intricate details. By mastering layering techniques, you can transform a flat image into a vibrant, lifelike portrait.
To begin layering effectively, it's crucial to understand the concept of glazing. Glazing involves applying thin, transparent layers of paint over dry underlayers. This technique can enhance the luminosity of colors and create a sense of depth that is hard to achieve with a single application. For instance, if you're painting skin tones, you might start with a warm base layer, then add a glaze of a cooler tone to create realistic shadows. The interplay of these layers will give your portrait a more dynamic and three-dimensional appearance.
Another important aspect of layering is the use of opacity. Different mediums allow for varying levels of transparency, and knowing how to manipulate this can significantly impact your painting. Acrylic paints, for example, dry quickly and can be layered effectively with both opaque and transparent applications. In contrast, oil paints allow for longer working times, which can be beneficial for blending and creating smooth transitions between layers. Each medium requires a slightly different approach, so it's essential to experiment and find what works best for you.
When layering, always remember the principle of “fat over lean.” This means that each subsequent layer should contain more oil (or fat) than the layer beneath it. This is particularly important when working with oils, as it prevents cracking and ensures that the paint adheres properly. If you start with a lean layer, such as a thinned paint, your next layer should be thicker to maintain the integrity of the painting.
As you progress, don't hesitate to incorporate different techniques within your layers. For instance, you can use a dry brush technique to create texture or a wet-on-wet method for blending colors seamlessly. Experimenting with these methods will not only enhance your layering skills but also add a unique touch to your portraits.
Finally, layering is not just about adding color; it’s also about refining details. As you build up your layers, step back and assess your work frequently. This will help you identify areas that need more definition or adjustments. Remember, every layer should contribute to the overall composition, so don’t be afraid to make changes or even scrape off layers if necessary.
- What is the best medium for layering in portrait painting? Acrylics and oils are both excellent choices, but they require different techniques. Acrylics dry quickly, while oils allow for more blending time.
- How many layers should I apply to my portrait? There’s no set number, but generally, 3-5 layers can provide good depth and dimension. It depends on your desired effect and the medium used.
- Can I layer different types of paint? It’s best to avoid mixing different types of paint (like acrylics and oils) in the same painting, as they have different drying times and properties.
- How do I know when to stop layering? Trust your instincts! Step back and assess your painting. If it feels complete and visually appealing, it’s likely time to finish.
Final Touches and Finishing Techniques
After pouring your heart and soul into transforming a photograph into a stunning portrait, the final touches can truly make or break your artwork. It's that magical moment when you take a step back, admire your work, and realize that you're almost there. But what exactly are these final touches? Well, let’s dive into some essential techniques that can elevate your painting to a whole new level!
First off, refining details is crucial. You might have a fantastic composition and color palette, but if the details are lacking, your portrait may not resonate as strongly as you’d like. This is where your fine brushes come into play. Use them to sharpen the edges of the eyes, add texture to the hair, and define the contours of the face. It’s like putting the icing on a cake; it’s the little things that add that extra flair.
Next, consider adding highlights. Highlights can breathe life into your painting by creating a sense of depth and dimension. When light hits a surface, it creates bright spots that can enhance the three-dimensionality of your subject. Use a lighter shade of your base color or even pure white sparingly on the high points of the face, such as the forehead, cheekbones, and nose. This technique can make your portrait pop, drawing the viewer's eye to the focal points.
Once you’ve added those finishing touches, it’s essential to protect your artwork. Applying a varnish not only safeguards your painting from dust and dirt but also enhances its vibrancy and longevity. There are different types of varnishes available—gloss, satin, and matte. Each offers a unique finish, so choose one that complements your artistic vision. If you're unsure, you might want to test a small area first to see how it interacts with your colors.
Finally, don't forget about the presentation of your portrait. A well-framed piece can elevate your work from a simple painting to a stunning centerpiece. Consider the style of your frame; it should harmonize with the colors and mood of your portrait. Whether you opt for a classic wooden frame or a sleek modern design, the right choice can enhance the overall impact of your artwork.
In summary, the final touches and finishing techniques are where your portrait truly comes to life. By refining details, adding highlights, applying varnish, and selecting an appropriate frame, you can ensure that your hard work pays off in a big way. Remember, this is the moment to showcase your talent, so take your time and enjoy the process!
- What type of varnish should I use for my portrait? It depends on your preference! Gloss varnish enhances colors, satin gives a soft sheen, and matte offers a more subdued finish.
- How do I know when my painting is finished? Trust your instincts! When you feel that you've captured the essence of your subject and all details are refined, it's likely time to stop.
- Can I add highlights after varnishing? It's best to add highlights before varnishing to ensure they blend seamlessly with the rest of your painting.
Frequently Asked Questions
- What type of photograph should I choose for my portrait?
Choosing the right photograph is crucial for a successful portrait. Look for images with good lighting, clear details, and emotional expressions that resonate with you. A photograph that captures the essence of the subject will make your painting more lifelike and engaging.
- What materials do I need to start painting portraits?
To get started, you’ll need essential materials such as paints (acrylics, oils, or watercolors), brushes of various sizes, a suitable canvas, and a palette for mixing colors. Having the right tools will ensure a smoother painting process and better results.
- How do I choose the right type of paint for my portrait?
Each type of paint has its unique qualities. Acrylics dry quickly and are versatile, oils offer rich colors and blending capabilities, while watercolors provide a softer look. Consider the effect you want to achieve and your personal comfort with each medium when making your choice.
- What is the best way to set up my workspace?
Creating an organized and comfortable workspace is essential. Ensure you have good lighting, minimize distractions, and arrange your materials in a way that everything is easily accessible. A tidy space helps boost creativity and productivity!
- How can I accurately sketch the outline of my portrait?
A solid outline is the foundation of your portrait. Use techniques like measuring proportions and angles or employing a grid method to ensure accuracy. This will help you capture the subject's features and positioning correctly before you start painting.
- What are layering techniques, and why are they important?
Layering techniques involve applying multiple layers of paint to build depth and dimension in your portrait. This method is crucial for creating realistic shadows and highlights, giving your painting a three-dimensional quality that brings it to life.
- How do I know when my portrait is finished?
Final touches can elevate your portrait significantly. Look for areas that may need refinement, such as highlights or details that can be enhanced. Applying varnish can also protect your artwork and give it a professional finish, signaling that it’s ready to be displayed!


