
Inspiring Autumn Painting Projects
Autumn is a magical season that transforms our surroundings into a vibrant canvas of colors. The leaves turn brilliant shades of orange, red, and yellow, while the air becomes crisp and invigorating. This is the perfect time to unleash your creativity and dive into some inspiring painting projects that capture the essence of this enchanting time of year. Whether you're a seasoned artist or a curious beginner, these ideas will spark your imagination and encourage you to embrace the beauty of the season through art.
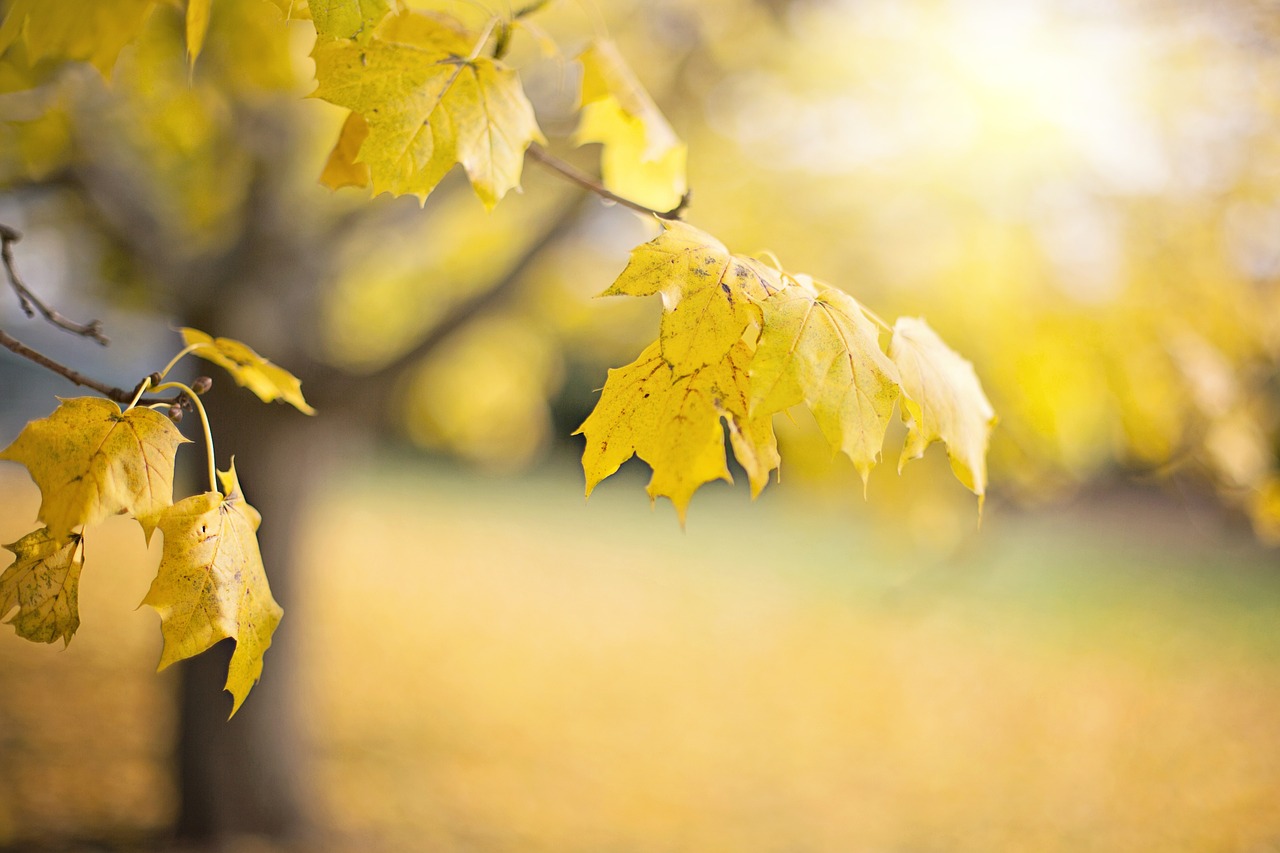
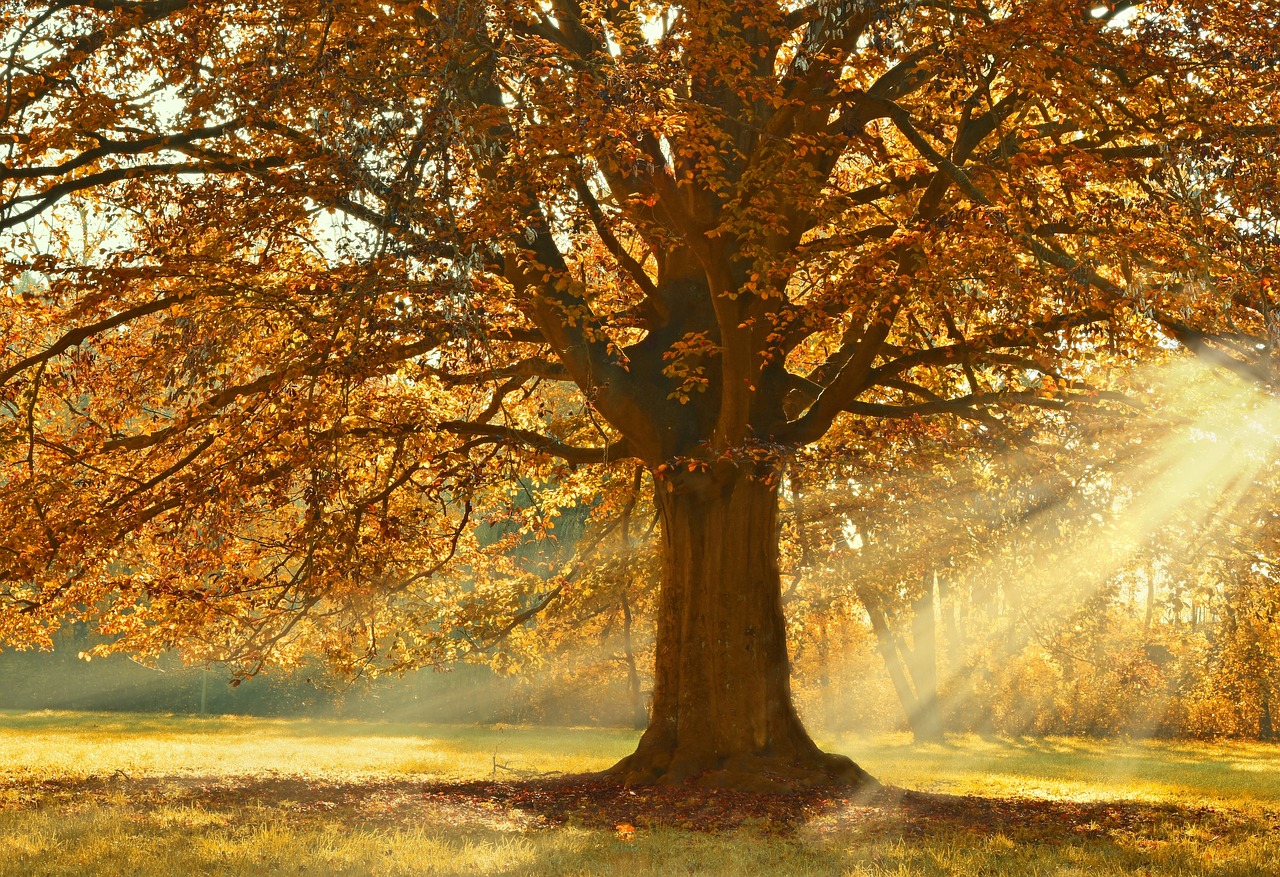
Imagine stepping outside and being greeted by the breathtaking sight of trees adorned with fiery foliage. The golden sunlight filtering through the branches creates a warm glow, inviting you to pick up your brushes and paint the world around you. In this article, we will explore a variety of creative painting projects inspired by autumn, from nature-inspired landscapes to abstract interpretations. So grab your palette, and let’s embark on a colorful journey!
One of the most rewarding ways to capture autumn is through landscapes that showcase the stunning transformation of nature. Think about serene lakes reflecting the fiery colors of the trees or rolling hills blanketed in fallen leaves. To effectively depict these scenes, consider using techniques such as layering and blending to create depth and dimension.
As you paint, allow yourself to be inspired by the surroundings. Pay attention to the way light interacts with the landscape; it can dramatically change the mood of your painting. Use a variety of brush strokes to convey the texture of the leaves and the smoothness of the water. The goal is to evoke the feeling of being enveloped in autumn's embrace.
Another captivating approach is to create still life compositions featuring autumnal elements. Picture a table adorned with pumpkins, gourds, and fallen leaves. These seasonal treasures can be arranged in a way that tells a story, inviting viewers to appreciate the beauty of autumn. When arranging your still life, consider the balance of colors and shapes to create a visually appealing composition.
Selecting the perfect color palette is crucial for autumn-themed paintings. The warm hues of the season can be represented through a combination of reds, oranges, and yellows. To enhance your artwork, you might also consider incorporating earthy tones like browns and greens.
To achieve the rich, inviting tones of autumn, learn how to mix warm colors effectively. For example, combining cadmium red with yellow ochre can create a stunning orange that captures the essence of fall foliage. Experiment with various combinations to find the perfect shades that resonate with your artistic vision.
While warm tones dominate autumn palettes, don’t forget about the power of cool colors! Incorporating shades of blue or purple can create balance and contrast in your paintings, enhancing the overall composition. A touch of coolness can evoke a sense of calm, reminiscent of the crisp autumn air.
Texture is a vital element that adds depth to your paintings. Explore different techniques such as layering, dry brushing, and palette knife work to bring your autumn scenes to life. For instance, using a palette knife to apply thick layers of paint can create a dynamic effect, making your artwork pop.
If you’re feeling adventurous, why not delve into abstract painting inspired by autumn’s colors and moods? This style allows you to express the essence of the season without the constraints of realistic representation. Think of it as capturing the feeling of autumn rather than its literal appearance.
Understanding the emotional impact of colors can elevate your abstract work. For example, warm reds and oranges can evoke feelings of warmth and nostalgia, while cooler shades might express a sense of tranquility. Use this knowledge to guide your color choices and create pieces that resonate with viewers on a deeper level.
In abstract art, shapes can convey the spirit of autumn in exciting ways. Experiment with various forms—curves, lines, and geometric shapes—to express your creativity. Allow your intuition to guide you, and don’t be afraid to let your brush dance freely across the canvas!
Taking your painting outdoors can be a refreshing way to capture the beauty of autumn in real-time. Set up your workspace in a park or your backyard, and let the scenery inspire you. However, remember that outdoor conditions can change quickly, so be prepared to adapt your techniques.
Finding the perfect outdoor location is essential for capturing autumn's beauty. Look for spots with a variety of colors and textures, such as a wooded area or a lakeside view. Consider the time of day as well; the golden hour can provide stunning lighting for your artwork.
Autumn weather can be unpredictable, so it's important to have strategies in place for dealing with different conditions. If it’s windy, secure your canvas or use a portable easel. On chilly days, dress in layers to stay comfortable while you paint.
For those looking to add an extra dimension to their artwork, exploring mixed media can be incredibly rewarding. By combining traditional painting methods with other materials, you can create unique textures and effects that celebrate the essence of autumn.
Incorporating leaves, twigs, and other natural elements into your artwork can provide a unique touch. You might use pressed leaves as part of your composition or glue twigs to create texture. The possibilities are endless, and these materials can enhance your connection to the season.
Collage can add depth and interest to your autumn paintings. Consider creating layered compositions that reflect the season’s beauty. Use magazine cutouts, fabric scraps, or even your own sketches to create a mixed media masterpiece that captures the spirit of fall.
- What materials do I need for autumn painting projects? You’ll need basic supplies like canvas, paints (acrylic or oil), brushes, and possibly mixed media materials like leaves or paper.
- Can I paint outdoors in autumn? Absolutely! Just be prepared for changing weather conditions and dress appropriately.
- How do I choose the right color palette? Focus on warm hues like reds, oranges, and yellows, and consider adding cool tones for contrast.
- What techniques can I use to add texture? Experiment with layering, dry brushing, and using a palette knife to create dynamic effects.
Nature-Inspired Landscapes
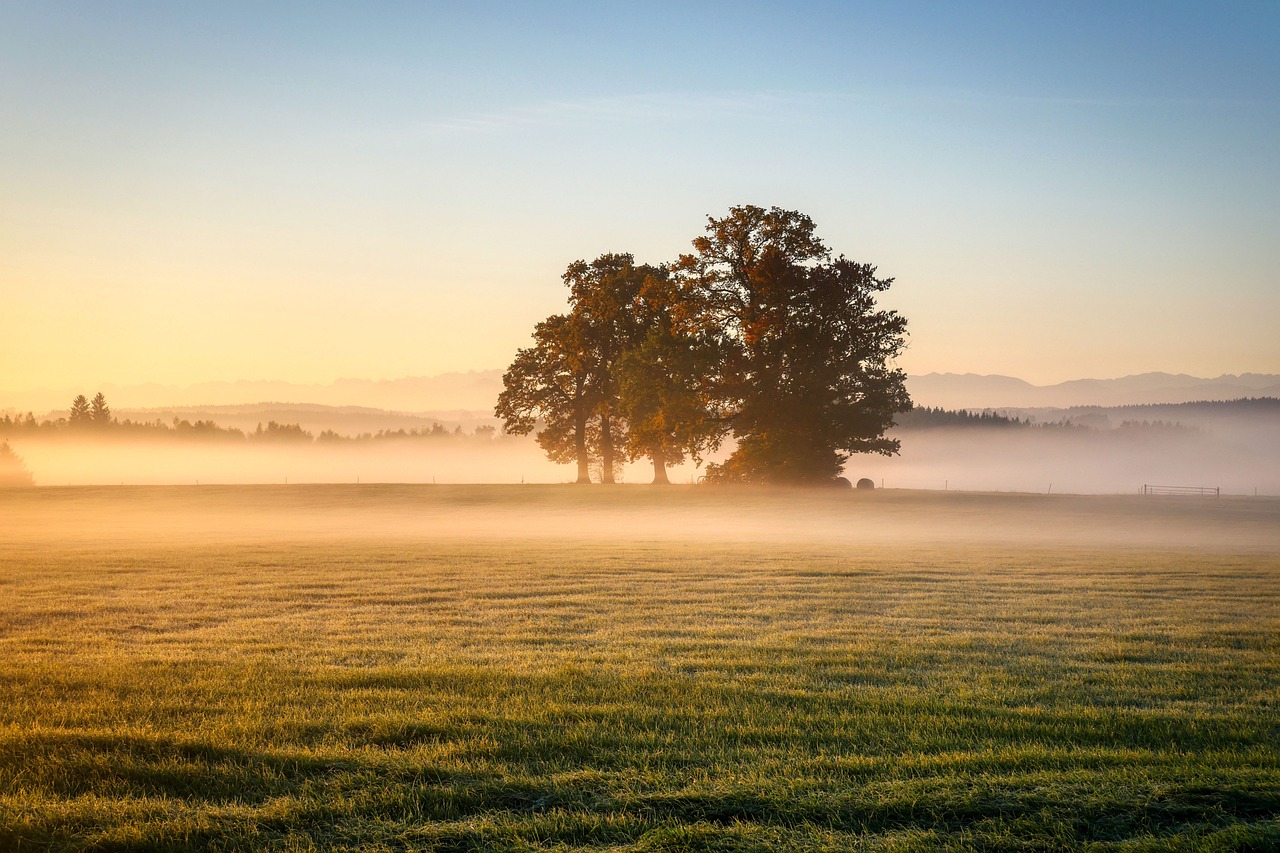
When it comes to capturing the essence of autumn, are a fantastic way to express the season's beauty. Imagine standing before a canvas that reflects the vibrant hues of falling leaves, the gentle ripples of a serene lake, or the crispness of an autumn sky. Each brushstroke can transport you to a tranquil place where the colors of nature come alive. But how do you translate these breathtaking scenes onto your canvas? Let's dive into some techniques that will help you depict the changing seasons in your artwork.
First, consider the color palette you'll use for your landscape. Autumn is known for its warm tones, such as rich reds, golden yellows, and burnt oranges. These colors are not just visually appealing; they evoke feelings of warmth and nostalgia. When selecting your palette, think about how you can blend these hues to create depth and dimension in your painting. For example, you might start with a base layer of golden yellow for the sunlight filtering through the trees, then add layers of orange and red to represent the leaves.
Next, let's talk about composition. A well-composed landscape draws the viewer's eye and creates a sense of balance. Consider the rule of thirds when placing elements in your painting. For instance, if you're depicting a lake surrounded by trees, you might position the horizon line one-third of the way down the canvas, allowing the vibrant foliage to dominate the upper two-thirds. This technique not only enhances visual interest but also guides the viewer's gaze through your artwork.
Texture plays a crucial role in bringing your autumn landscape to life. By incorporating various techniques, you can create a sense of realism that invites viewers to step into your painting. Here are a few methods to consider:
- Layering: Build up your colors in layers to add depth. Start with lighter colors and gradually work your way to darker shades.
- Brushwork: Experiment with different brush techniques, such as stippling or dry brushing, to create the texture of bark, leaves, and water.
- Palette knife: Use a palette knife to apply thick layers of paint for a more tactile quality, especially in areas like rocky outcrops or rough tree trunks.
Don't forget about the sky! An autumn sky can be a breathtaking backdrop to your landscape. Whether it’s a bright blue day or a moody, overcast afternoon, capturing the right atmosphere is essential. Use soft, sweeping brushstrokes for clouds and vibrant colors for the sunset to create a stunning effect. The sky can set the tone for your entire painting, so take your time to get it just right.
Ultimately, the goal of your nature-inspired landscape is to evoke emotion and convey the beauty of the autumn season. Each painting is a personal expression of how you perceive the world around you. So, grab your brushes, head outdoors, and let the vibrant colors of autumn inspire you. Remember, every landscape tells a story, and yours is waiting to be painted!
Q: What materials do I need for painting nature-inspired landscapes?
A: You’ll need a canvas or watercolor paper, a variety of brushes, acrylic or oil paints, a palette for mixing colors, and possibly a palette knife for texture. Don’t forget a jar of water (for acrylics) or turpentine (for oils) and some rags for cleaning your brushes.
Q: How do I choose a good reference photo for my landscape?
A: Look for photos that capture the essence of autumn—vibrant colors, interesting compositions, and elements that inspire you. You can also take your own photos during a walk in the park or countryside to find the perfect scene!
Q: Can I paint outdoors, or should I work from a photo?
A: Both options are valid! Painting outdoors (plein air) allows you to capture the atmosphere and colors directly from nature. However, if you prefer to work from a photo, choose one that resonates with you and provides a clear view of the elements you want to depict.
Seasonal Still Life
Creating a captivating still life that embodies the spirit of autumn is an exciting endeavor for any artist. Imagine a canvas filled with the rich colors of pumpkins, the texture of gourds, and the delicate beauty of fallen leaves. These elements not only celebrate the season but also provide a wonderful opportunity to explore composition, lighting, and color. The key is to arrange your objects in a way that tells a story. Think about how the soft curves of a pumpkin can contrast with the sharp edges of a leaf, creating visual interest and depth in your painting.
When setting up your still life, consider the following tips to enhance your composition:
- Choose a Focal Point: Decide which item in your arrangement will draw the viewer's eye first. This could be a vibrant orange pumpkin or a cluster of colorful gourds.
- Balance Your Composition: Distribute your objects evenly across the canvas, ensuring that no area feels too heavy or too sparse. This balance is crucial for creating harmony in your artwork.
- Play with Height: Vary the heights of your objects. Stack some gourds or place a small pumpkin on a pedestal to create levels that add dimension to your piece.
In addition to arrangement, lighting plays a vital role in the success of your still life. Natural light is often best for capturing the essence of autumn. Position your setup near a window to allow soft light to illuminate your objects, casting gentle shadows that add depth. Experiment with different times of day to see how the changing light affects the colors and textures of your items.
Now, let’s talk about color selection. The autumn palette is rich and inviting, filled with warm hues like deep reds, burnt oranges, and golden yellows. When painting your still life, aim to capture these colors in a way that feels both realistic and expressive. Mixing your paints to achieve the right shades can be a delightful experience. Consider using a limited palette to create a cohesive look, allowing the viewer to focus on the beauty of the season.
To help you visualize your still life arrangement, here’s a simple table that outlines some common autumn elements along with their colors and textures:
| Element | Color | Texture |
|---|---|---|
| Pumpkin | Orange | Smooth, round |
| Gourd | Green, yellow | Bumpy, varied shapes |
| Fallen Leaves | Red, brown, yellow | Crisp, fragile |
| Acorns | Brown | Hard, textured |
Finally, don’t forget to add a personal touch to your still life. Whether it’s a favorite scarf draped in the background or a cherished family heirloom nestled among the pumpkins, these details can make your artwork uniquely yours. As you paint, allow your emotions and memories of autumn to guide your brush. This connection will not only enhance your creativity but also resonate with anyone who views your work.
Q: What materials do I need for a still life painting?
A: You will need a canvas, brushes, a palette, and paints (acrylic or oil). Additionally, gather your chosen objects and a suitable surface to arrange them on.
Q: How can I improve my still life compositions?
A: Practice different arrangements, focus on lighting, and experiment with color palettes. Studying works by other artists can also provide inspiration.
Q: Is it important to paint from life or can I use photographs?
A: While painting from life offers a more authentic experience, using photographs can be helpful, especially if you want to capture details or if the lighting conditions are challenging.
Choosing the Right Palette
When it comes to capturing the essence of autumn in your paintings, is absolutely essential. The vibrant hues of fall foliage, the soft blues of clear autumn skies, and the warm browns of harvest time all play a pivotal role in conveying the mood of the season. Imagine stepping into a forest where the leaves are ablaze with color; you want your artwork to evoke that very same feeling. So, how do you go about selecting the perfect colors? Let's dive into the warm hues that define autumn and how to blend them effectively.
First off, it’s crucial to understand the characteristics of autumn colors. The season is renowned for its rich, warm tones—think deep reds, burnt oranges, and golden yellows. These colors not only represent the changing leaves but also evoke feelings of warmth and nostalgia. When you start your palette, consider incorporating the following colors:
- Cadmium Red - a vibrant red that captures the essence of maple leaves.
- Burnt Sienna - perfect for adding depth and warmth to your landscapes.
- Golden Yellow - reminiscent of sunlight filtering through the trees.
- Olive Green - a muted green that complements the warmer tones beautifully.
Once you have your basic colors, the next step is to experiment with blending. Mixing colors can yield stunning results, allowing you to create a palette that reflects your unique interpretation of autumn. For instance, mixing a bit of Cadmium Red with Burnt Sienna can give you a beautiful earthy tone that can be used for tree trunks or fallen leaves. Don't be afraid to play around with different combinations; sometimes the most unexpected mixes yield the most beautiful results.
Moreover, consider the emotional impact of your color choices. Colors can evoke feelings and set the mood of your painting. For example, while warm tones can create a sense of comfort and warmth, adding a few cool colors like teal or deep purple can introduce contrast and drama. This balance can make your artwork not just visually appealing but also emotionally resonant.
In summary, choosing the right palette for your autumn paintings is about more than just picking pretty colors. It’s about understanding the essence of the season and how you can express that through your art. By selecting a combination of warm hues and experimenting with blending, you can create a palette that not only enhances your artwork but also captures the spirit of autumn. So grab your brushes, mix those colors, and let your creativity flow!
Q: What are the best colors for an autumn palette?
A: The best colors for an autumn palette include warm tones like Cadmium Red, Burnt Sienna, Golden Yellow, and Olive Green. These colors reflect the vibrant hues of fall foliage.
Q: How can I create depth in my autumn paintings?
A: You can create depth by mixing warm colors and layering them. Using different shades of the same color can also add dimension to your artwork.
Q: Should I use cool colors in my autumn paintings?
A: Yes! Incorporating cool colors as accents can create balance and contrast, enhancing the overall composition of your autumn artwork.
Mixing Warm Tones
When it comes to capturing the vibrant essence of autumn, is essential. Think of the colors you see in a cozy sweater on a chilly day or the golden hues of leaves as they transition from green to fiery shades of orange and red. These warm tones not only bring warmth to your canvas but also evoke feelings of comfort and nostalgia. So, how do you achieve that perfect autumn palette?
First, let’s dive into the primary colors that define autumn: reds, oranges, yellows, and browns. These colors can be mixed in various ways to create a spectrum that reflects the season's beauty. For instance, if you want to create a rich pumpkin orange, start with a base of yellow and gradually add red until you achieve that vibrant hue. Remember, less is more; it’s easier to deepen a color than to lighten it once you’ve gone too far.
Another technique to consider is layering. By applying multiple layers of warm colors, you can create depth and richness in your artwork. Start with a lighter base and build up to darker tones, allowing each layer to dry before adding the next. This method not only enhances the vibrancy of your colors but also adds a dynamic quality to your painting. For example, layering a bright yellow under a deep orange can create an illuminating glow that mimics the autumn sun filtering through the leaves.
Don’t forget to experiment with complementary colors to make your warm tones pop. For instance, using a cool blue or green as a background can make those fiery reds and oranges stand out even more. This contrast can create a stunning visual effect that draws the viewer's eye and adds drama to your piece.
Lastly, consider the medium you’re using. Different paints behave differently when mixed. For example, acrylics tend to dry quickly, allowing you to layer colors without much waiting time, while oil paints offer a longer working time, giving you the flexibility to blend colors directly on the canvas. Each medium has its unique properties that can affect how your warm tones interact, so choose wisely based on the effect you want to achieve.
| Color | Mixing Tips |
|---|---|
| Orange | Mix equal parts red and yellow; adjust to your desired brightness. |
| Red | Start with a base of primary red, adding a touch of yellow for warmth. |
| Brown | Combine red, yellow, and a hint of blue for depth. |
In summary, mixing warm tones is all about experimentation and understanding how colors interact. By blending, layering, and contrasting your warm hues, you can create stunning autumn-inspired artworks that capture the season's essence. So grab your brushes, unleash your creativity, and let the warm colors of autumn inspire you!
- What colors are considered warm tones? Warm tones include reds, oranges, yellows, and browns, which evoke warmth and comfort.
- How do I create depth in my autumn paintings? Use layering techniques and mix complementary colors to enhance depth and vibrancy.
- Can I mix warm tones with cool colors? Absolutely! Using cool colors as accents can create a beautiful contrast that highlights your warm tones.
Incorporating Cool Accents
When creating your autumn-themed artwork, it's essential not to overlook the power of cool accents. While warm tones like reds, oranges, and yellows dominate the autumn palette, cool colors can provide a refreshing contrast that enhances your overall composition. Think of cool colors as the supporting actors in a movie: they may not always be in the spotlight, but they play a crucial role in making the main features shine. By strategically incorporating cool hues such as blues, greens, and purples, you can create a sense of depth and balance that draws the viewer's eye.
One effective way to incorporate cool accents is to use them to highlight specific areas of your painting. For instance, if you’re depicting a sunset over a lake, consider adding a touch of deep blue or teal to the water. This not only reflects the sky but also adds a serene quality to the scene. Similarly, using cool greens in the shadows of your autumn foliage can create a stunning contrast against the warm oranges and yellows of the leaves, making them appear more vibrant and alive.
Experimenting with the placement of these cool accents can lead to unexpected and delightful results. Here are some tips to help you effectively integrate cool colors into your autumn paintings:
- Use Cool Colors Sparingly: Less is often more when it comes to cool accents. A few well-placed strokes can elevate your painting without overwhelming the warm tones.
- Layering Techniques: Layering your cool colors over warm tones can create interesting effects. For instance, a light wash of blue over a warm background can produce a beautiful atmospheric effect.
- Consider the Light: The time of day and the direction of light can affect how colors appear. Cool colors can reflect the chill of early morning or the subtlety of twilight, adding emotional depth to your artwork.
Incorporating cool accents into your autumn paintings is not just about color; it’s about creating a mood and telling a story. Think about what emotions you want to evoke in your audience. Do you want them to feel the crispness of a fall morning or the warmth of a cozy evening by the fire? By thoughtfully using cool colors, you can enhance the narrative of your artwork, making it resonate on a deeper level.
Ultimately, the key to successfully incorporating cool accents lies in experimentation. Don’t be afraid to try different combinations and placements until you find what works best for your vision. Remember, art is a journey, and each stroke of your brush brings you one step closer to capturing the essence of autumn in all its breathtaking glory.
1. What are some examples of cool colors to use in autumn paintings?
Cool colors typically include shades of blue, green, and purple. These colors can be used to create contrast with the warm hues of autumn, enhancing the overall composition.
2. How can I effectively blend cool colors with warm tones?
To blend cool colors with warm tones, start with a light wash of the cool color over the warm base. Use a soft brush to gently mix the edges where the two colors meet, creating a seamless transition.
3. Should I use cool accents in every autumn painting?
Not necessarily! While cool accents can enhance many autumn paintings, it’s essential to consider the mood and message of your artwork. Use them where they add value and depth to your composition.
4. Can I use cool colors in a more abstract autumn piece?
Absolutely! Cool colors can be particularly effective in abstract art, where the emotional impact of color can take center stage. Experiment with different shapes and placements to convey the essence of autumn.
Techniques for Texture
When it comes to painting, especially in the vibrant season of autumn, texture plays a crucial role in bringing your artwork to life. It's not just about slapping on some paint; it's about creating a multi-dimensional experience for the viewer. Think of texture as the secret ingredient that adds depth, movement, and emotion to your paintings. So, how do you achieve this magical quality? Let’s dive into some effective techniques that will elevate your autumn art.
One of the most popular methods for adding texture is through layering. This technique involves applying multiple layers of paint, allowing each one to dry before adding the next. By using a variety of brush strokes and tools, you can create a rich tapestry of color and texture. For instance, when painting a landscape, you might start with a smooth underpainting to establish your base colors, followed by rougher strokes to depict the rugged bark of trees or the soft, fluffy clouds in the sky. The contrast between the smooth and rough areas can evoke the feeling of a crisp autumn day.
Another effective technique is impasto, where you apply paint thickly to create a raised surface. This method can be particularly striking when you want to emphasize certain elements in your painting, like the vibrant hues of fallen leaves or the swirling patterns in the sky. Imagine a canvas where the leaves seem to leap off the surface, inviting the viewer to touch them. To achieve this, use a palette knife or a stiff brush to apply the paint directly from the tube, allowing it to build up in places for that dramatic effect.
Additionally, brushwork can significantly enhance texture. Experiment with different brush types—flat, round, or fan brushes—to see how each one affects the paint's application. A fan brush, for instance, can create lovely, feathery strokes that mimic the delicate edges of autumn leaves. Meanwhile, a flat brush can produce bold, sweeping strokes that represent the vastness of an open field. The key is to let your brush do the talking and to be unafraid of making bold moves!
Lastly, don't overlook the potential of incorporating non-traditional tools into your texture arsenal. Items like sponges, old credit cards, or even your fingers can be used to create unique patterns and textures. For example, dabbing a sponge into paint and then onto the canvas can create a soft, mottled effect that resembles the dappled sunlight filtering through trees. This kind of experimentation can lead to unexpected and delightful results, so embrace your inner artist and let your creativity flow!
In summary, incorporating texture into your autumn paintings can transform your artwork from ordinary to extraordinary. By layering, using impasto techniques, varying your brushwork, and experimenting with unconventional tools, you can create stunning pieces that truly capture the essence of the season. So grab your paints and let the textures of autumn inspire you!
- What is the best way to create texture in paintings?
Layering, impasto techniques, and varied brushwork are great methods to add texture. - Can I use materials other than paint to create texture?
Absolutely! Natural materials like leaves and twigs can be incorporated for added dimension. - How do I know when to stop adding texture?
Step back and evaluate your painting; if it feels balanced and engaging, you may be done!
Abstract Autumn Art
When it comes to capturing the essence of autumn through abstract art, the possibilities are as endless as the falling leaves. This creative approach allows you to express the season's beauty without being tied down to realistic representation. Think of it as a dance of colors and forms, where you can let your imagination run wild. Imagine the vibrant oranges, deep reds, and golden yellows swirling together on your canvas, creating a symphony of autumnal hues that capture the spirit of this magical season.
One of the most exciting aspects of abstract autumn art is the emotional connection that colors can evoke. Each shade has its own personality and can stir different feelings within us. For instance, warm colors like burnt orange and golden yellow can bring about feelings of warmth and comfort, reminiscent of cozy sweaters and crackling fires. In contrast, cooler tones like deep blue or forest green can create a sense of calm and reflection, much like a peaceful walk through a serene autumn landscape. Understanding this emotional impact can elevate your artwork, turning a simple painting into a heartfelt expression of the season.
As you dive into the world of abstract autumn art, don't shy away from experimenting with shapes and forms. Think of leaves falling from trees, swirling winds, or the jagged outline of barren branches against a sunset sky. Using geometric shapes or organic forms can help convey the spirit of autumn. For example, you might create a series of circular shapes to represent the cyclical nature of the seasons or jagged lines to symbolize the brisk winds that accompany fall. The key is to let your creativity flow freely, allowing your intuition to guide your brushstrokes.
To help you get started, consider the following tips when creating your abstract autumn masterpiece:
- Start with a Vision: Think about what autumn means to you. Is it the vibrant colors, the crisp air, or the feeling of nostalgia? Let that vision guide your creation.
- Choose Your Colors Wisely: Select a palette that resonates with your emotional connection to autumn. Don't be afraid to mix unexpected colors for surprising results!
- Layer Your Work: Build depth by layering colors and shapes. This will not only add dimension to your painting but also create a more dynamic visual experience.
As you embark on this artistic journey, remember that abstract art is about exploration and self-expression. There are no strict rules—only the freedom to express your interpretation of autumn. So grab your brushes, embrace the season's colors, and let your creativity soar!
Q: What materials do I need for abstract autumn art?
A: You can use a variety of materials, including acrylic paints, watercolors, pastels, and even mixed media elements like paper or fabric. Choose what feels right for you!
Q: How can I improve my abstract painting skills?
A: Practice is key! Experiment with different techniques, take classes, or watch online tutorials. The more you paint, the more you'll discover your unique style.
Q: Is there a specific technique for blending colors in abstract art?
A: There are many techniques for blending colors, such as wet-on-wet, dry brushing, or using a palette knife. Don’t hesitate to try various methods to see what works best for your vision!
Emotional Color Use
When it comes to painting, colors are not just about aesthetics; they are about emotions. The colors you choose can evoke feelings that resonate deeply with the viewer, especially in the context of autumn. Think about the rich oranges, deep reds, and golden yellows that blanket the trees during this vibrant season. Each hue carries its own emotional weight, and understanding this can transform your artwork from mere representation to a powerful experience.
For instance, warm colors like red and orange can evoke feelings of warmth, excitement, and even nostalgia. They remind us of cozy evenings spent by the fireplace or the thrill of jumping into a pile of leaves. In contrast, cooler colors, such as blue and green, can create a sense of calm and tranquility, reminiscent of crisp autumn mornings and serene lakes reflecting the changing foliage.
To effectively use color to convey emotion in your autumn paintings, consider the following:
- Contrast: Combining warm and cool colors can create a dynamic balance. For example, a vibrant orange pumpkin next to a cool blue sky not only enhances visual interest but also evokes a sense of harmony between warmth and coolness.
- Shades and Tints: Experimenting with different shades (darker variations) and tints (lighter variations) of colors can add depth to your work. A muted palette can evoke a sense of melancholy, while bright colors can instill joy and energy.
- Color Associations: Remember that certain colors are often associated with specific feelings. For example, yellow is often linked to happiness and optimism, while brown can evoke feelings of stability and comfort.
By thoughtfully choosing your color palette, you can guide the viewer's emotional journey through your artwork. Imagine a painting where the warm hues of autumn leaves contrast with a cooler, overcast sky. This not only captures the essence of the season but also tells a story of change, transition, and the bittersweet nature of autumn.
Incorporating emotional color use into your autumn paintings can transform your work into something that resonates on a personal level with those who view it. The next time you pick up your brush, think about what emotions you want to convey and how your color choices can help tell that story.
- What colors are best for autumn paintings? Warm colors like reds, oranges, and yellows are ideal, often complemented by cool blues and greens to create balance.
- How can I evoke emotions through color in my art? Use contrasting colors, play with shades and tints, and consider the emotional associations of colors to guide the viewer's feelings.
- Can I mix media to enhance emotional expression? Absolutely! Combining traditional painting with mixed media can add texture and depth, further enhancing the emotional impact of your work.
Experimenting with Shapes
When it comes to painting, shapes are the building blocks of your artwork. They are not just mere outlines; they carry the essence of your subject and can evoke feelings without even needing to depict reality. In the context of autumn, experimenting with shapes allows you to convey the season's spirit in a way that is both personal and abstract. Imagine a swirling mass of orange and yellow leaves represented by bold, sweeping curves, or the jagged edges of a pumpkin's silhouette contrasted against a soft, blurred background.
To get started, consider how different shapes can represent various autumn elements. For instance, you might use round shapes to symbolize the fullness of harvest fruits, while sharp angles can evoke the crispness of the season. This contrast can create a dynamic tension in your artwork, drawing the viewer's eye and sparking curiosity. Don't be afraid to let your imagination run wild; use shapes that resonate with you personally. The beauty of art is that it doesn’t have to be perfect—it just has to be a reflection of your feelings and experiences.
Here are a few ideas to help you experiment with shapes:
- Abstract Leaves: Instead of painting realistic leaves, try creating a series of organic shapes that mimic their forms. Play with size and orientation to create a sense of movement.
- Layering Shapes: Use overlapping shapes to build depth in your painting. Layering can create a fascinating visual effect, much like the way leaves pile up on the ground.
- Geometric Forms: Incorporate geometric shapes to contrast with the natural forms of autumn. Think about how squares and triangles can represent fields and mountains against the soft curves of trees.
As you explore these concepts, remember that the goal is to express yourself and capture the essence of autumn in a way that feels authentic to you. Allow yourself to make mistakes and learn from them; sometimes, the most beautiful discoveries come from unexpected turns in your creative journey. So grab your brushes, let go of perfection, and dive into the world of shapes!
Q: How can I find inspiration for shapes in autumn?
A: Look around you! Nature is full of inspiration. Visit a park, take a walk, or simply observe the shapes of objects around your home. Sketching what you see can help you translate those observations into your artwork.
Q: Do I need to use traditional shapes to represent autumn?
A: Not at all! Feel free to experiment with abstract shapes that convey your feelings about the season. Art is about expression, so let your creativity guide you.
Q: How can I improve my shape experimentation?
A: Practice is key. Set aside time to create quick sketches or paintings focusing solely on shapes. Challenge yourself to create a piece using only a limited number of shapes and see what you come up with!

Outdoor Painting Sessions
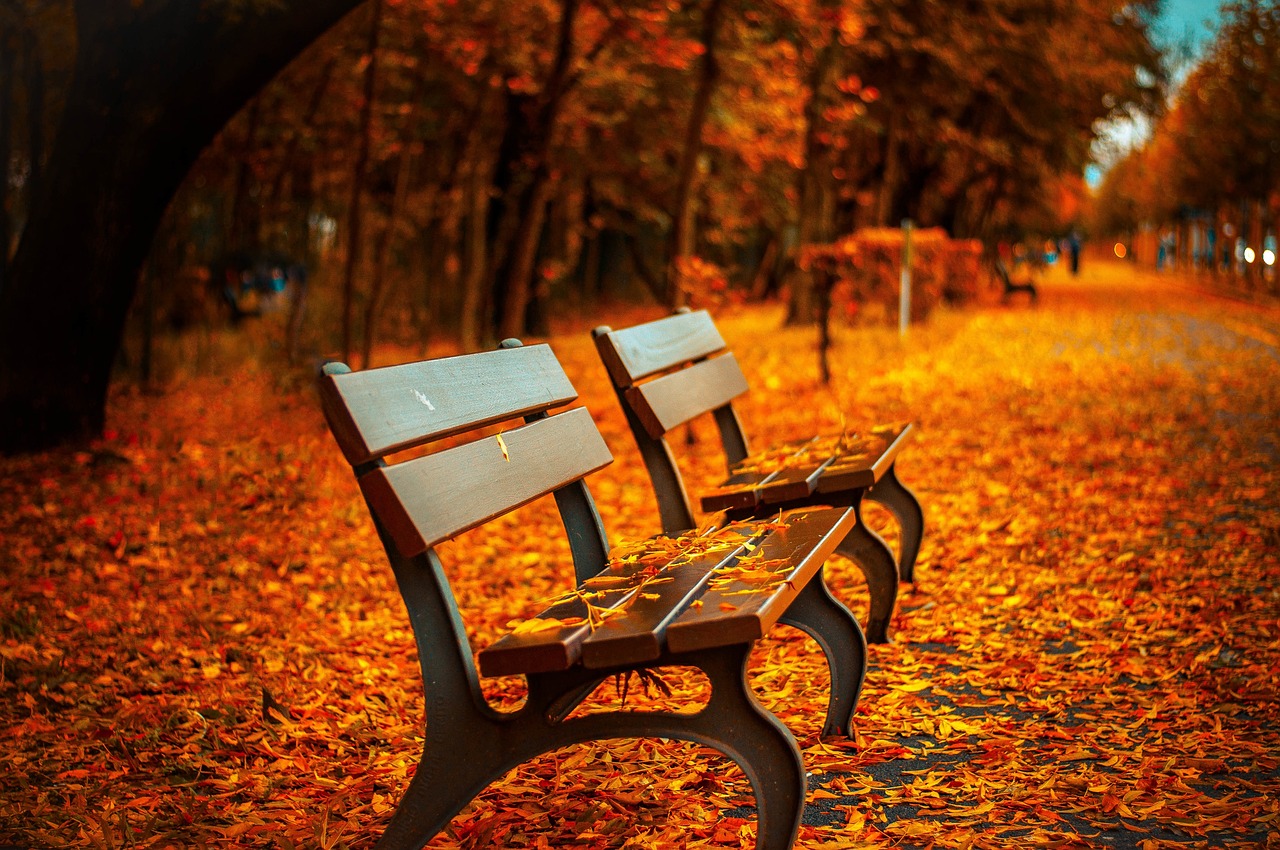
Taking your painting outdoors is like stepping into a vibrant, living canvas, where the colors of autumn burst forth in a spectacular display. Imagine setting up your easel surrounded by a kaleidoscope of red, orange, and yellow leaves, with the crisp air invigorating your creativity. Outdoor painting, or plein air painting, invites you to capture the fleeting beauty of the season in real-time. The experience is not just about the artwork; it’s about immersing yourself in the atmosphere and allowing nature to inspire your brushstrokes.
Before you grab your palette and brushes, it’s essential to consider a few key factors to ensure your outdoor painting session is both enjoyable and productive. First and foremost, choosing the right location is crucial. Look for spots that offer a breathtaking view of autumn foliage, perhaps near a tranquil lake or a rustic park. The ideal location should provide a mix of vibrant colors and interesting compositions. Don’t hesitate to explore local parks, nature trails, or even your backyard—each place has its unique charm waiting to be captured on canvas.
Once you’ve selected your location, it’s time to set up your workspace. Bring along a portable easel, a comfortable chair, and all your painting supplies. Make sure to pack your paints, brushes, palette, and a few canvases. It’s also wise to carry a sketchbook for quick studies or notes about the scenery that inspires you. This can be invaluable when you want to recreate the moment later in your studio. Additionally, consider the time of day; the golden hours of early morning or late afternoon provide the best lighting conditions, casting warm shadows and enhancing the colors of autumn.
However, autumn weather can be unpredictable. You might find yourself battling sudden gusts of wind or unexpected rain showers. To adapt to these conditions, it’s essential to dress in layers and bring along a waterproof cover for your supplies. If the wind picks up, consider using heavier canvases or weights to keep your materials stable. Embrace the spontaneity of outdoor painting; sometimes, the unexpected can lead to the most remarkable pieces of art.
To help you prepare for your outdoor painting sessions, here’s a quick reference table that summarizes essential tips:
| Tip | Description |
|---|---|
| Location | Choose a spot with vibrant foliage and interesting views. |
| Setup | Bring a portable easel, comfortable seating, and all painting supplies. |
| Timing | Paint during the golden hours for the best light. |
| Weather | Dress in layers and have waterproof covers for your supplies. |
Outdoor painting is not just about the final product; it’s about the journey and the connection you make with your surroundings. Each brushstroke captures not only the colors of autumn but also the emotions and experiences of the moment. So, grab your gear, find your perfect spot, and let the beauty of the season inspire your artistic expression. Who knows? You might just create a masterpiece that encapsulates the very essence of autumn.
Q: What supplies do I need for outdoor painting?
A: Essential supplies include a portable easel, canvases, paints, brushes, a palette, and a sketchbook. Don’t forget to bring water and snacks to keep your energy up!
Q: How do I choose the right location for outdoor painting?
A: Look for areas with vibrant autumn colors, interesting landscapes, and minimal distractions. Parks, nature trails, and lakesides are often ideal spots.
Q: What should I do if the weather changes unexpectedly?
A: Be prepared by dressing in layers and bringing waterproof covers for your materials. If rain starts, you can either wait it out or use it as an opportunity to experiment with new techniques.
Q: Can I paint in any season?
A: Absolutely! Each season offers unique colors and moods to capture. Autumn is particularly stunning, but winter, spring, and summer each have their own beauty.
Choosing the Right Location
When it comes to painting outdoors, selecting the right location can make all the difference in capturing the vibrant essence of autumn. Imagine standing in a picturesque spot where the golden leaves dance in the gentle breeze, and the sunlight filters through the branches, casting a warm glow on your canvas. The right location not only inspires creativity but also provides a stunning backdrop for your artwork. So, how do you find that perfect spot?
First, consider the scenic variety of your surroundings. Look for places that offer a mix of elements such as colorful trees, flowing water, and open skies. Parks, nature reserves, and even your own backyard can be transformed into a painter's paradise. For example, a serene lake surrounded by fiery red and orange foliage can provide a breathtaking view that captures the spirit of autumn.
Next, think about accessibility. You want to choose a location that is easy to reach and allows you to set up your painting gear comfortably. Whether you’re hauling an easel, paints, and brushes, or simply a sketchbook, ensure that the area is not too remote. A good rule of thumb is to scout locations that are within a reasonable distance from your home or car, allowing you to focus on your art rather than the journey.
Additionally, keep in mind the lighting conditions. The quality of light changes throughout the day, and certain times can enhance the colors of autumn. Early morning light often casts a soft, golden hue, while late afternoon can create dramatic shadows and highlights. It’s a good idea to visit your chosen location at different times to see how the light interacts with the landscape, helping you decide when to return for your painting session.
Lastly, don’t forget to embrace the local flora and fauna. Sometimes the most inspiring locations are the ones that feature unique natural elements. For instance, a grove of ancient trees or a field of wildflowers can add an unexpected twist to your autumn paintings. Take a moment to explore your surroundings and allow nature to guide your creativity.
In summary, choosing the right location for your autumn painting sessions is about finding a balance between beauty, accessibility, and lighting. With these considerations in mind, you’ll be well on your way to creating stunning artwork that captures the magic of the season. So grab your gear, head outside, and let the colors of autumn inspire your creativity!
- What should I bring for outdoor painting? It's essential to have your painting supplies, a portable easel, a comfortable chair, plenty of water, and snacks to keep your energy up!
- How do I protect my artwork from the elements? Consider using a portable umbrella or canopy to shield your work from rain or direct sunlight, and always bring a cover for your wet paintings.
- Can I paint in public parks? Yes, most public parks allow painting, but it's always a good idea to check local regulations or obtain any necessary permits.
Adapting to Weather Conditions
Painting outdoors during autumn can be both exhilarating and challenging due to the unpredictable weather. Imagine setting up your easel, ready to capture the stunning hues of fall, only to be met with a sudden gust of wind or an unexpected drizzle. But fear not! With a few strategies in your back pocket, you can adapt to these changing conditions and continue to create beautiful artwork.
First and foremost, it's essential to check the weather forecast before heading out. Knowing if a storm is brewing or if the sun will shine brightly can help you prepare adequately. For instance, if rain is expected, bringing a waterproof tarp can protect your supplies and allow you to keep painting even in light showers. Additionally, consider using water-resistant canvases or boards that can withstand a bit of moisture without warping.
When it comes to temperature, layering your clothing is key. Autumn can be chilly in the morning but warm up significantly by midday. Wearing layers allows you to adjust your comfort level without hindering your painting process. Moreover, don't forget to bring along a portable chair or stool for comfort, ensuring you can focus on your art rather than your discomfort.
Another vital aspect is having a flexible mindset. If the weather takes a turn, be ready to adapt your painting techniques. For example, if it suddenly gets windy, you might want to switch to a smaller brush or a more controlled painting style to prevent paint splatters. Embrace the elements; sometimes, a little wind can add motion to your artwork, creating dynamic effects that you wouldn't achieve on a calm day.
Lastly, consider the time of day you choose to paint. The golden hour—just before sunset—offers breathtaking light that can enhance your autumn palette. However, as the sun sets, temperatures can drop quickly. Being prepared with warm beverages in a thermos can keep your spirits high as you work into the evening.
By being proactive and adaptable, you can turn potential weather-related setbacks into opportunities for creativity. So grab your brushes and venture into the great outdoors—autumn is waiting for you!
- What should I bring for outdoor painting in autumn?
Essential items include waterproof supplies, layered clothing, a portable chair, and refreshments to keep you comfortable.
- How do I protect my artwork from sudden weather changes?
Using waterproof canvases and bringing a tarp can help shield your work from unexpected rain.
- What time of day is best for painting in autumn?
The golden hour, just before sunset, provides stunning light that enhances the colors of autumn.

Incorporating Mixed Media
Mixed media is an exhilarating way to elevate your autumn artwork by combining traditional painting techniques with a variety of materials. This approach not only adds texture and dimension to your pieces but also allows for a unique expression of the vibrant colors and themes of the season. Imagine the rich oranges and yellows of fallen leaves juxtaposed with the rough, natural textures of twigs and dried flowers. The possibilities are endless, and the results can be stunning!
When incorporating mixed media into your autumn paintings, consider using natural materials such as leaves, acorns, and even small branches. These elements can be integrated into your artwork either as collage pieces or as part of the painting itself. For instance, you might press leaves onto your canvas to create an imprint, or glue them down as a base layer before painting over them. This technique not only adds a tactile quality but also enhances the overall theme of your work, making it feel more connected to the season.
To help you get started, here are some exciting techniques for using mixed media in your autumn projects:
- Layering with Paper: Use different types of paper, such as tissue, craft, or even old book pages, to create layers in your painting. This can provide a beautiful backdrop for your autumn colors.
- Textured Backgrounds: Experiment with applying gesso or modeling paste to your canvas to create a textured surface. Once dry, paint over it with autumn hues to create depth.
- Natural Elements: Gather leaves, twigs, and other organic materials during your outdoor excursions. These can be glued onto your canvas or used to create prints.
As you experiment with these techniques, remember that the goal is to let your creativity flow. Mixed media is all about exploration and discovery. Don't be afraid to make mistakes; sometimes, the most unexpected outcomes can lead to the most beautiful pieces of art. The key is to embrace the process and allow your feelings about autumn to guide your choices.
By incorporating mixed media into your autumn painting projects, you not only celebrate the season's beauty but also engage with it in a more intimate and dynamic way. So grab your supplies, head outside, and let the colors and textures of autumn inspire you!
1. What materials can I use for mixed media art?
You can use a wide range of materials including paper, fabric, natural elements like leaves and twigs, acrylic gels, and even found objects. The key is to experiment and find what resonates with your artistic vision.
2. Do I need special tools for mixed media painting?
While traditional painting tools like brushes and palettes are essential, you may also want to include tools like palette knives, sponges, or even your fingers to apply and manipulate materials effectively.
3. Can I combine different types of paint in mixed media?
Absolutely! You can mix acrylics, watercolors, and even inks. Just be sure to understand how they interact, as some may require different drying times or techniques.
4. How do I preserve my mixed media artwork?
Once your artwork is complete, consider applying a clear sealant or varnish to protect it from dust and moisture. This will help preserve the colors and textures you've created.
Using Natural Materials
Incorporating natural materials into your autumn artwork is not only a creative choice but also a way to connect with the environment around you. Imagine walking through a vibrant forest, the crunch of leaves beneath your feet, and the rich scent of damp earth filling the air. Now, think about how you can bring that experience into your painting. By using elements like leaves, twigs, and even small stones, you can add a tactile dimension to your artwork that paint alone can't achieve. This technique allows your pieces to tell a story, evoking the essence of autumn in a truly unique way.
When you gather materials, consider the variety of shapes, colors, and textures available. For instance, maple leaves with their fiery reds and oranges can serve as stunning focal points, while pine needles can add a rustic touch. The key is to be selective about what you collect. You want materials that will enhance your composition rather than overwhelm it. Here are some ideas for natural materials you might consider:
- Leaves: Different shapes and colors can add vibrancy.
- Twigs: Use them to create borders or frames.
- Flowers: Dried petals can introduce delicate textures.
- Seeds: These can be used for detailed accents.
- Stone fragments: Add a natural weight to your pieces.
Once you've gathered your materials, think about how to integrate them into your painting. You could use leaves as stencils, creating beautiful imprints on your canvas. Alternatively, consider gluing small twigs around the edges of your artwork to create a frame-like effect. Not only does this enhance the visual appeal, but it also invites viewers to engage with your piece on a sensory level.
Moreover, the use of natural materials can lead to unexpected outcomes. For instance, when you apply paint over a textured surface, you might discover a delightful interplay between the colors and the textures beneath. This can create an organic feel that resonates with the viewer, making them feel as though they are part of the landscape you’ve captured. So, as you embark on your autumn painting journey, let nature inspire you. Embrace the imperfections and surprises that come with using organic materials, and watch your artwork flourish!
Q: What types of natural materials are best for autumn-themed paintings?
A: Leaves, twigs, dried flowers, seeds, and small stones are excellent choices. They add texture and a unique touch to your artwork.
Q: How can I preserve natural materials for use in my paintings?
A: You can press leaves between heavy books to flatten them, or dry them by hanging them upside down. Ensure they are completely dry before using them in your artwork.
Q: Can I use natural materials in mixed media art?
A: Absolutely! Natural materials can enhance mixed media pieces by adding depth and interest. Consider layering them with paint, paper, or fabric for a dynamic effect.
Experimenting with Collage
Collage is a fantastic way to add depth and interest to your autumn paintings. By layering different materials, you can create a multi-dimensional effect that captures the essence of the season in a unique way. Think of it as a visual feast, where each layer tells a part of the story. As you dive into the world of collage, consider incorporating various elements that reflect the beauty of autumn.
Start by gathering natural materials such as leaves, twigs, and even pieces of fabric that resonate with the warm hues of the season. These elements can serve as the foundation for your collage. For instance, dried leaves can be used to create a textured background that mimics a forest floor, while twigs can form the structure of trees in your artwork. The combination of these materials allows you to embrace the tactile nature of autumn, making your art not just visually appealing but also engaging to the touch.
When working with collage, the arrangement is crucial. You might want to start with a base layer and gradually add more materials. Consider the following tips to enhance your collage:
- Layering Techniques: Use various thicknesses of materials to create a sense of depth. Thin papers can be layered over thicker ones to create contrast.
- Color Coordination: Choose colors that complement the autumn palette. Warm oranges, deep reds, and golden yellows can evoke the season's spirit.
- Texture Play: Mix different textures, such as smooth paper with rough bark, to create visual interest.
As you experiment, don't be afraid to let your creativity flow. The beauty of collage lies in its freedom; there are no strict rules. You can tear, cut, or even paint over your materials to achieve the desired effect. Embrace imperfections, as they often lead to unexpected and delightful outcomes. Just like the leaves that fall from trees, each piece in your collage can represent a moment in time, capturing the fleeting beauty of autumn.
To give you an idea of how to structure your collage, here’s a simple table that outlines a basic collage project:
| Step | Description |
|---|---|
| 1 | Gather materials: Collect leaves, twigs, paper, and any other autumn-themed items. |
| 2 | Choose a base: Select a canvas or sturdy paper as the foundation for your collage. |
| 3 | Arrange your materials: Experiment with different layouts before gluing anything down. |
| 4 | Glue down the layers: Start with the background and work your way to the foreground. |
| 5 | Add finishing touches: Use paint, markers, or other embellishments to enhance your collage. |
Incorporating collage into your autumn art not only allows you to explore new techniques but also encourages a deeper connection with the season. Each piece you create can be a reflection of your personal experiences and emotions tied to autumn. So grab your materials, unleash your imagination, and let the spirit of the season guide you in your artistic journey!
Q: What materials are best for creating an autumn collage?
A: Natural materials like leaves and twigs work wonderfully, along with colored papers and fabrics that reflect autumn colors.
Q: Can I use glue for my collage?
A: Yes! Using a strong adhesive like PVA glue is ideal for securing your materials. Just ensure it's suitable for the surfaces you're working with.
Q: How can I ensure my collage lasts over time?
A: To preserve your collage, consider using a sealant or varnish once it's complete. This will help protect it from dust and fading.
Frequently Asked Questions
- What materials do I need for autumn painting projects?
To get started with your autumn painting projects, you'll need a few essential materials. Gather acrylic or oil paints in warm hues like oranges, reds, and yellows, along with cool colors for accents. Don't forget brushes of various sizes, a palette for mixing, canvas or watercolor paper, and a few natural elements like leaves and twigs for mixed media projects. Having a good set of paints and brushes will make your creative journey much more enjoyable!
- How do I choose the right color palette for autumn landscapes?
Selecting the perfect color palette for autumn landscapes is all about capturing the season's vibrancy. Focus on warm colors such as deep reds, burnt oranges, and golden yellows. Mixing these with some cool greens and blues can create a beautiful contrast. Experiment with different combinations on your palette to find the blend that resonates with you. Remember, the goal is to evoke the feeling of a crisp autumn day!
- Can I incorporate mixed media in my autumn paintings?
Absolutely! Incorporating mixed media into your autumn paintings can add incredible depth and texture. You can use natural materials like leaves and twigs, or even collage elements like fabric or paper. The key is to experiment and find ways to integrate these materials seamlessly into your artwork. This approach not only enhances your paintings but also makes them uniquely yours!
- What techniques can I use to create texture in my paintings?
Texture can bring your autumn scenes to life! Try layering your paints to build depth, or use different brush techniques like stippling or dry brushing. You can also experiment with palette knives for a more rugged texture. Don't be afraid to play around and see what works best for your style—texture can really elevate your artwork!
- How do I adapt my painting techniques to outdoor conditions?
Outdoor painting can be a thrilling experience, but it does come with its challenges! To adapt to changing weather conditions, be prepared with a portable easel and a selection of paints that can handle temperature variations. If it's windy, consider using a heavier canvas or securing your materials. Always keep an eye on the sky and be ready to pack up if the weather turns. Flexibility is key to enjoying your plein air sessions!


