Painting Techniques Every Artist Should Know
Are you ready to dive into the vibrant world of painting? Whether you’re a budding artist or a seasoned pro, mastering essential painting techniques can truly elevate your artwork and unleash your creativity. Think of painting as a dance between color, texture, and emotion; each brush stroke tells a story. In this article, we’ll explore a variety of techniques that every artist should know, from the foundational principles of color theory to the intricate methods of applying paint. So grab your brushes, and let’s get started on this colorful journey!
Color theory is like the secret sauce for artists. It’s not just about picking pretty colors; it’s about understanding how they interact with each other. At its core, color theory teaches us about color mixing, harmony, and contrast. Imagine walking into a gallery filled with vibrant paintings. What catches your eye? It’s often the way colors complement or clash with each other. Mastering color theory enables artists to create compositions that are not only visually appealing but also emotionally resonant. By mixing colors effectively, you can evoke feelings ranging from tranquility to excitement in your audience.
Now that we’ve got color down, let’s talk about the tools of the trade—brushes! Different brush techniques can dramatically affect the texture and feel of your painting. Think of your brush as an extension of your hand, each stroke adding personality to your canvas. From bold strokes that create energy to delicate touches that add finesse, mastering various brush techniques is essential. Here are a few techniques to get you started:
Have you ever seen a painting that feels alive with texture? That’s the magic of dry brushing! This technique involves using a dry brush to apply paint, creating subtle details and textures. It’s especially effective for landscapes, where you want to convey the roughness of tree bark or the softness of clouds. Imagine the feeling of a gentle breeze as you stroke your brush across the canvas, leaving behind a trail of textured beauty.
Scumbling is a delightful technique where a dry, stiff brush applies a thin layer of paint over a dry layer. This allows the underlying colors to peek through, creating a soft, luminous effect. Picture a sunlit sky with wispy clouds; that’s the kind of ethereal quality scumbling can bring to your work. It’s like adding a sprinkle of magic to your paintings!
If you love spontaneity, the wet-on-wet technique is your best friend. This method involves applying wet paint onto a wet surface, resulting in beautifully blended colors and soft edges. It’s especially popular in impressionistic styles, where the goal is to capture a moment in time. Imagine painting a sunrise; with wet-on-wet, you can create a seamless transition from deep orange to soft pink, just like the sky itself.
For those looking to add depth and luminosity to their paintings, glazing is a must-know technique. This involves applying transparent layers of paint over dried layers, enhancing the richness of the colors beneath. It’s often used in oil painting to achieve stunning results. Think of glazing as putting on a filter for your artwork; it adds a layer of sophistication and vibrancy that can make your piece truly shine!
Now that we’ve covered some brush techniques, let’s explore the various mediums available to artists. Each medium—be it oils, acrylics, or watercolors—offers unique properties and effects. Experimenting with different mediums can lead to unexpected discoveries and a broader range of expression. For instance, acrylic paints are fast-drying and versatile, making them a favorite among contemporary artists. On the other hand, watercolors require a delicate touch and specific techniques to manipulate effectively.
Acrylics are like the chameleons of the art world. They can mimic the qualities of both oil and watercolor paints, depending on how you use them. Layering and blending are two essential techniques that can help you achieve stunning effects. Imagine creating a vibrant sunset with rich layers of color that seamlessly blend into one another. The possibilities are endless!
Watercolor painting is an art form that requires finesse and a good understanding of the medium. Techniques like washes, wet-on-dry, and lifting can create stunning effects. A wash can set the mood for your painting, while lifting can help you correct mistakes or create highlights. It’s like having a conversation with your canvas, where every stroke adds to the narrative.
Effective composition is crucial for creating balanced and engaging artwork. It’s the backbone of your painting, guiding the viewer’s eye and enhancing visual storytelling. Understanding principles of design, such as the rule of thirds and focal points, can significantly improve the impact of your artwork. Imagine walking into a room and being drawn to a particular piece; that’s the power of good composition!
The rule of thirds is a compositional guideline that can help you create dynamic images. By dividing your canvas into thirds, you can strategically place elements for greater visual impact. It’s like a game of tic-tac-toe; where you place your subjects can change the entire feel of your artwork. Try it out and see how it transforms your compositions!
Establishing a focal point in your artwork directs the viewer’s attention and enhances the overall composition. Techniques for creating emphasis include using contrast, color, and strategic placement. Think of it as a spotlight on stage; it draws everyone’s eyes to the star of the show. By mastering focal points, you can lead your audience through your painting’s story.
- What is the best medium for beginners? Acrylics are often recommended for beginners due to their versatility and fast-drying properties.
- How can I improve my brush techniques? Practice different strokes regularly and experiment with various brushes to find what works best for your style.
- Is color theory really that important? Yes! Understanding color theory can significantly enhance your artwork and help you make informed decisions about color choices.
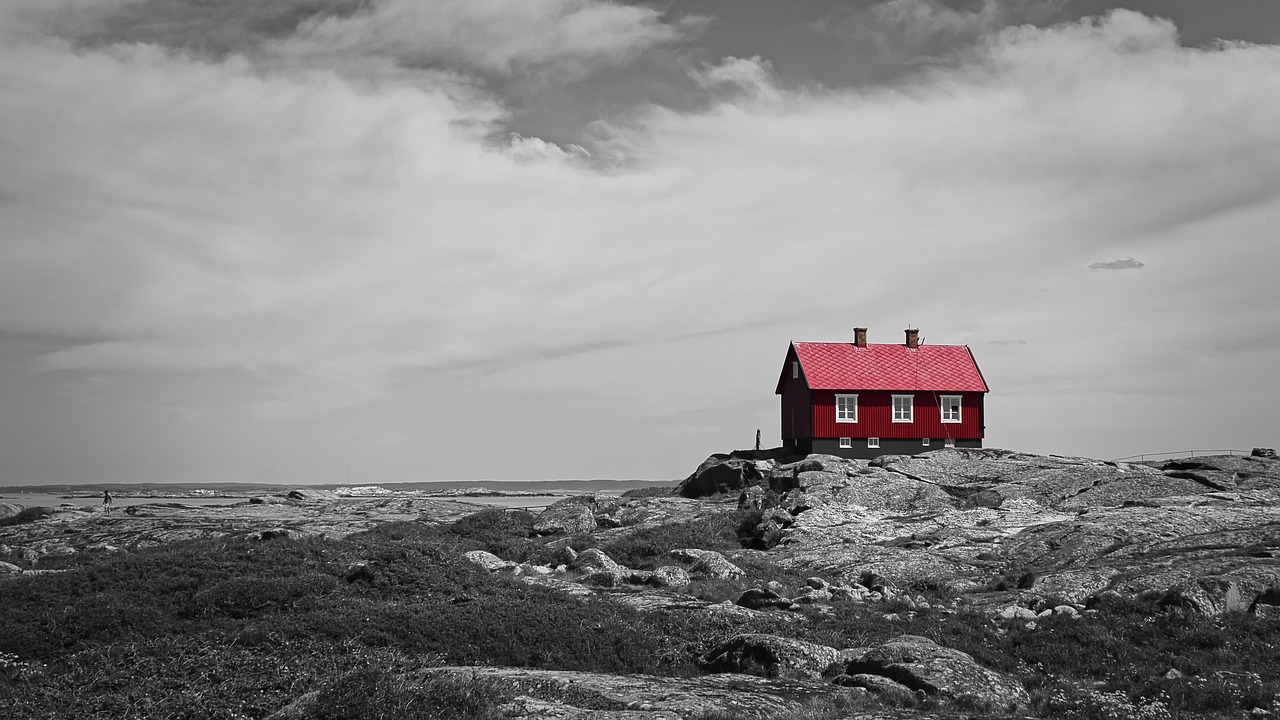
Understanding Color Theory
Color theory is the backbone of any artist's toolkit. It’s not just about picking pretty colors; it's about understanding how colors interact, how they can evoke emotions, and how they can transform a simple canvas into a breathtaking masterpiece. Think of color as the language of art—each hue, shade, and tone has its own story to tell. By mastering color theory, you can create compositions that resonate with viewers on a deeper level.
At its core, color theory revolves around the color wheel, which organizes colors in a way that makes it easy to see their relationships. The primary colors—red, blue, and yellow—are the building blocks. When you mix these colors, you create secondary colors: green, orange, and purple. From there, you can mix these secondary colors with primary colors to create a whole spectrum of tertiary colors.
Understanding how to mix colors is just the beginning. The concepts of harmony and contrast are essential for creating visually appealing artwork. Harmony refers to a pleasing arrangement of colors, while contrast can be used to draw attention to specific areas of your painting. For instance, pairing complementary colors—those opposite each other on the color wheel—can create a striking visual impact. Here’s a simple breakdown:
| Color | Complementary Color |
|---|---|
| Red | Green |
| Blue | Orange |
| Yellow | Purple |
But color theory goes beyond just mixing and matching. It also involves understanding how colors can invoke feelings and set the mood of your artwork. For example, warm colors like reds and oranges can evoke feelings of excitement and energy, while cool colors like blues and greens tend to have a calming effect. This emotional aspect of color can be a powerful tool for artists looking to convey specific messages or themes in their work.
Another important aspect of color theory is the concept of value. This refers to how light or dark a color is, which can dramatically affect the overall composition. A painting with a wide range of values can create depth and dimension, making the artwork more engaging. Similarly, understanding saturation—the intensity of a color—can help you create more vibrant or muted pieces, depending on the effect you want to achieve.
In summary, mastering color theory is essential for any artist who wants to elevate their work. By understanding the relationships between colors, how they can evoke emotions, and how to manipulate value and saturation, you can create artwork that not only looks good but also resonates with your audience. So next time you pick up your brush, remember: color is more than just a tool; it’s a powerful medium for expression and connection.

Brush Techniques
When it comes to painting, the brush is your magic wand. The way you wield it can completely transform your artwork, adding texture, depth, and emotion. Understanding various is essential for any artist looking to elevate their craft. Whether you're aiming for a smooth finish or a rough, expressive texture, the right technique can make all the difference. Let's dive into some fundamental brush techniques that can help you unlock new dimensions in your artwork.
Imagine creating a soft, ethereal landscape where the clouds seem to float above the horizon. That’s the beauty of dry brushing. This technique involves using a brush that is barely loaded with paint, allowing you to create subtle textures and details that bring your painting to life. It’s particularly effective for landscapes or any textured surfaces, adding a sense of depth and realism. To master dry brushing, try the following steps:
- Choose a stiff-bristled brush.
- Lightly dip it in paint and wipe off excess on a paper towel.
- Gently drag the brush across the canvas to create delicate textures.
With practice, you’ll find that dry brushing can add a magical touch to your artwork, making it feel more dynamic and engaging.
Next up is scumbling, a technique that can create a soft, luminous effect in your paintings. By using a dry, stiff brush to apply a thin layer of paint, you allow the colors underneath to peek through, creating a beautiful, textured finish. This technique is perfect for creating atmospheric effects, such as soft skies or misty landscapes. To get started with scumbling, follow these steps:
- Use a stiff brush and choose a lighter color than the base layer.
- Apply the paint using a circular motion to create a soft texture.
- Experiment with different colors to see how they interact.
The beauty of scumbling lies in its unpredictability; the underlying colors can surprise you and lead to stunning results!
If you’re looking for a technique that encourages spontaneity and creativity, the wet-on-wet method is for you. This technique involves applying wet paint onto a wet surface, allowing colors to blend seamlessly and create soft edges. It’s a favorite among impressionists and can lead to vibrant, fluid compositions. To master this technique, consider these tips:
- Work quickly to keep the paint wet.
- Experiment with different brush sizes for varied effects.
- Use a palette knife to add texture within wet paint.
Wet-on-wet painting can be exhilarating, as it invites you to embrace the unpredictable nature of paint. You’ll find that the colors dance together, creating unique blends that can’t be replicated.
Finally, let’s talk about glazing. This technique involves applying transparent layers of paint over dried layers, enhancing color depth and luminosity. Glazing can transform a flat painting into a vibrant masterpiece, allowing you to achieve rich, glowing colors. To effectively use glazing in your artwork, follow these steps:
- Choose transparent paint and mix it with a glazing medium.
- Apply a thin layer over your dried base layer.
- Build up layers gradually for a richer effect.
Glazing requires patience, but the results can be breathtaking. You’ll find that your colors become more complex and luminous, adding a new level of sophistication to your work.
In conclusion, mastering these brush techniques will not only enhance your skill set but also expand your creative possibilities. Each technique offers a unique way to express your artistic vision, so don’t hesitate to experiment and find what works best for you. Remember, the brush is your tool for storytelling; how you use it can change the narrative of your artwork completely!
Q: What is the best brush for dry brushing?
A: A stiff-bristled brush is ideal for dry brushing as it helps create texture without applying too much paint.
Q: Can I use scumbling with acrylic paints?
A: Absolutely! Scumbling works beautifully with acrylics, as long as you use a dry brush technique.
Q: How do I know when to use glazing?
A: Use glazing when you want to enhance the depth and luminosity of your colors, typically after your base layers have dried.
Q: Is the wet-on-wet technique suitable for beginners?
A: Yes! It’s a fun and forgiving technique that encourages experimentation, making it perfect for beginners.
Dry Brushing
Dry brushing is a fascinating painting technique that can truly transform your artwork. Imagine taking a brush that’s barely loaded with paint and using it to create texture and subtle details that breathe life into your canvas. This method is particularly effective for landscapes and textured surfaces, where the goal is to add depth and dimension without overwhelming the viewer with too much color or detail.
To get started with dry brushing, it’s essential to choose the right brush. A stiff-bristled brush works best, as it allows for better control and more pronounced texture. The key is to use minimal paint; a little goes a long way. When you load your brush, gently wipe off most of the paint on a paper towel or palette. This will leave just enough pigment to impart a delicate touch to your work.
One of the most exciting aspects of dry brushing is its versatility. You can use it to create various effects, from soft clouds in a sky to rugged textures on a mountain. The technique encourages spontaneity, allowing you to experiment with different strokes and pressures. For instance, a light flick of the wrist can create delicate highlights, while more pressure can yield bolder textures. This unpredictability can lead to some truly stunning results.
Here’s a quick overview of how to effectively utilize dry brushing:
- Choose your colors wisely: Opt for colors that complement your overall palette. Earthy tones often work well for landscapes.
- Practice on scrap paper: Before applying the technique to your main piece, practice on a scrap surface to get a feel for the brush and paint.
- Layering: You can build up layers gradually. Start with lighter colors and work your way to darker shades for added depth.
Ultimately, dry brushing is about finding your unique style and voice as an artist. It invites you to play and explore, making it a fantastic addition to your artistic toolkit. Whether you’re painting a serene landscape or a vibrant abstract piece, dry brushing can add that special touch that makes your artwork stand out. So grab your brush, load it up lightly, and let your creativity flow!
Q: What types of brushes are best for dry brushing?
A: Stiff-bristled brushes, such as bristle or hog hair brushes, are ideal for dry brushing as they create the best texture.
Q: Can I use dry brushing with acrylics?
A: Absolutely! Dry brushing works wonderfully with acrylic paints, allowing you to create vibrant textures and effects.
Q: How do I clean my brush after dry brushing?
A: Clean your brush thoroughly with water and soap to remove any residual paint. It's best to clean it immediately after use to maintain the brush's shape and bristles.

Scumbling
Scumbling is one of those magical techniques that can truly transform your artwork, adding a layer of complexity and depth that captivates the viewer. Imagine a soft, ethereal glow that seems to dance across your canvas, inviting the eye to explore every nook and cranny of your piece. This technique involves using a dry, stiff brush to apply a thin layer of paint, allowing the colors beneath to peek through. It's like a whisper of color that enhances rather than overwhelms, creating a beautiful balance in your work.
One of the best things about scumbling is its versatility. You can use it to create a variety of textures in your paintings, from the soft haze of a distant landscape to the rough, gritty surfaces of urban scenes. The key is to control the amount of pressure you apply with your brush. A light touch will yield a delicate effect, while a firmer stroke can produce a more pronounced texture.
To get started with scumbling, you'll want to choose your colors wisely. Lighter hues work particularly well when scumbled over darker shades, as they create a stunning contrast that can make your artwork pop. For instance, if you're painting a sunset, consider scumbling a light orange or pink over a deep blue sky to mimic the way light interacts with the atmosphere. This layering technique not only enhances the visual appeal but also adds a sense of realism to your paintings.
Here’s a quick guide to help you master scumbling:
- Choose the Right Brush: A stiff-bristled brush is ideal for this technique.
- Use a Dry Brush: Ensure that your brush is dry before applying the paint.
- Apply Lightly: Use a gentle touch to create soft textures.
- Experiment: Don’t be afraid to try different colors and pressures to see what effects you can achieve.
As you practice scumbling, you may find that it opens up new avenues for creativity. The technique encourages spontaneity, allowing you to express emotions and ideas that might be difficult to convey with more rigid methods. So, grab your brushes, put on some music, and let the colors flow. You might just discover that scumbling becomes one of your favorite techniques to use!
What is scumbling?
Scumbling is a painting technique that involves applying a thin layer of dry paint with a stiff brush, allowing the underlying colors to show through, which adds depth and texture to the artwork.
What types of brushes are best for scumbling?
A stiff-bristled brush is ideal for scumbling. It allows for better control and helps achieve the desired texture.
Can scumbling be used with any type of paint?
Yes, scumbling can be used with various types of paint, including oils, acrylics, and watercolors, though the technique may vary slightly depending on the medium.
How can I incorporate scumbling into my artwork?
You can incorporate scumbling by layering lighter colors over darker ones to create contrast, or by using it to add texture to specific areas of your painting.
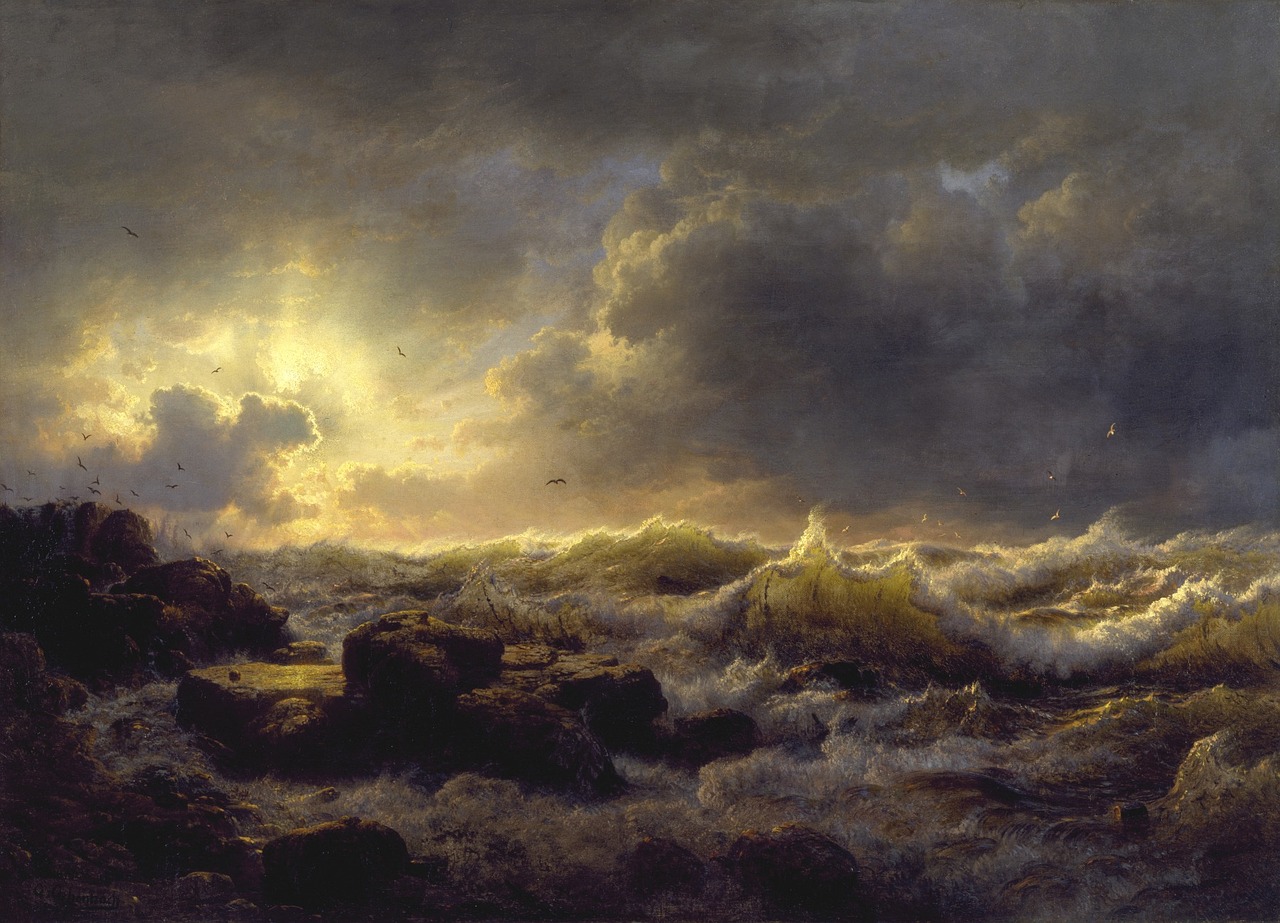
Wet-on-Wet Technique
The is a captivating and dynamic method that involves applying wet paint onto a wet surface. This technique is a favorite among artists who love to create soft edges and beautifully blended colors. Imagine a painter standing before a blank canvas, brush in hand, ready to unleash a wave of creativity. With each stroke, the colors mingle and dance, creating a mesmerizing spectacle that brings the artwork to life.
One of the most enchanting aspects of the wet-on-wet technique is its ability to promote spontaneous creativity. Unlike traditional methods where layers must dry before adding more paint, this approach allows for a fluid and organic process. Artists can layer colors directly on top of one another, resulting in soft transitions and ethereal effects. It’s almost like capturing a fleeting moment in time, where colors merge seamlessly, creating a dreamlike atmosphere.
To master the wet-on-wet technique, there are a few tips and tricks that can significantly enhance your results:
- Use Quality Paints: High-quality paints will have better pigmentation and flow, which is essential for achieving the desired effects.
- Experiment with Brushes: Different brush types can yield various textures. Try flat brushes for broad strokes or round brushes for finer details.
- Work Quickly: Since the paint is wet, you’ll want to work efficiently to maintain the fluidity of the colors.
- Layer Wisely: Start with lighter colors and gradually add darker shades to maintain luminosity.
Incorporating the wet-on-wet technique into your artwork can lead to stunning results. It’s particularly popular in impressionistic styles, where the emphasis is on capturing the essence of a scene rather than the minute details. Imagine painting a sunset, where the oranges, pinks, and purples blend effortlessly into one another, creating a breathtaking sky that evokes emotion and wonder.
However, it’s essential to embrace the unpredictability that comes with this technique. Each stroke can lead to unexpected outcomes, and that’s part of the beauty of it! Embrace those happy accidents, as they can often lead to unique and captivating pieces that you might not have envisioned initially. The wet-on-wet technique encourages artists to let go of control and allow the paint to guide them, making it a liberating experience.
So, whether you’re a seasoned artist or just starting your creative journey, don’t shy away from experimenting with the wet-on-wet technique. Dive into the world of colors, let them mingle and flow, and watch as your canvas transforms into a vibrant masterpiece. The only limit is your imagination!
1. What materials do I need for the wet-on-wet technique?
You will need high-quality paints (acrylics or oils work best), a suitable canvas or paper, and a variety of brushes. A palette knife can also be handy for mixing colors.
2. Can I use this technique with watercolors?
Yes, the wet-on-wet technique can also be applied in watercolor painting. It allows for beautiful blending and soft edges, perfect for creating atmospheric effects.
3. How do I prevent colors from becoming muddy?
To avoid muddy colors, start with clean brushes and work from lighter to darker colors. Limit the number of colors you mix on the palette to maintain vibrancy.
4. Is it necessary to use a specific type of canvas?
While you can use any canvas, a primed canvas specifically designed for wet techniques will yield the best results. Watercolor paper is also great for wet-on-wet watercolor techniques.
Glazing
Glazing is a fascinating technique that can transform your artwork from ordinary to extraordinary. Imagine taking a beautiful painting and adding a layer of sheer color that enhances the depth and luminosity of the piece. That’s exactly what glazing does! By applying transparent layers of paint over dried layers, artists can achieve a rich, vibrant result that captivates the viewer's eye. This method is particularly popular in oil painting but can be adapted for acrylics as well.
One of the key aspects of glazing is the choice of colors. When selecting your colors, think about how they will interact with the layers beneath. It's like building a sandwich; each layer contributes to the overall flavor. For instance, a warm glaze over a cool base can create a stunning contrast that adds intrigue to your artwork. Additionally, the transparency of the glaze allows the underlying colors to shine through, creating a sense of depth that flat colors simply can't achieve.
To get started with glazing, you’ll need to prepare your workspace and gather the right materials. Here’s a quick checklist:
- Transparent paint (oil or acrylic)
- Medium (like linseed oil for oils or glazing medium for acrylics)
- Brushes (soft, wide brushes work best)
- Palette for mixing
Once you have your materials ready, follow these steps to master the glazing technique:
- Start with a fully dried base layer of paint. It’s crucial that this layer is completely dry to avoid mixing with the glaze.
- Mix your transparent paint with a medium to achieve the desired consistency. The more medium you add, the more transparent your glaze will be.
- Using a soft brush, apply the glaze in thin, even layers. You can build up the intensity gradually, allowing you to control the final look.
- Let each layer dry before applying the next. This patience is key to achieving that stunning depth!
Glazing can be used for a variety of effects, from enhancing skin tones in portraits to adding atmospheric depth in landscapes. It’s like adding a filter to your artwork, allowing you to manipulate how light interacts with colors. By experimenting with different colors and layering techniques, you can discover unique combinations that make your art truly your own.
In conclusion, glazing is not just a technique; it's an art form in itself. It invites artists to explore and experiment, pushing the boundaries of creativity. So, grab your brushes, and let your imagination run wild with glazing!
Q: What is the best medium for glazing?
A: While glazing is traditionally done with oil paints, acrylics can also be used effectively. The key is to use a glazing medium to maintain transparency.
Q: How long does glazing take to dry?
A: Drying times can vary based on the medium used and the thickness of the glaze. Oil glazes may take several days to dry, while acrylics dry much faster, often within an hour.
Q: Can I glaze over an unfinished painting?
A: No, it's essential that the base layer is completely dry before applying a glaze. Otherwise, the colors may mix undesirably.
Q: How many layers of glaze should I use?
A: This depends on the desired effect. You can use multiple layers to build depth, but always allow each layer to dry before adding the next.
Exploring Different Mediums
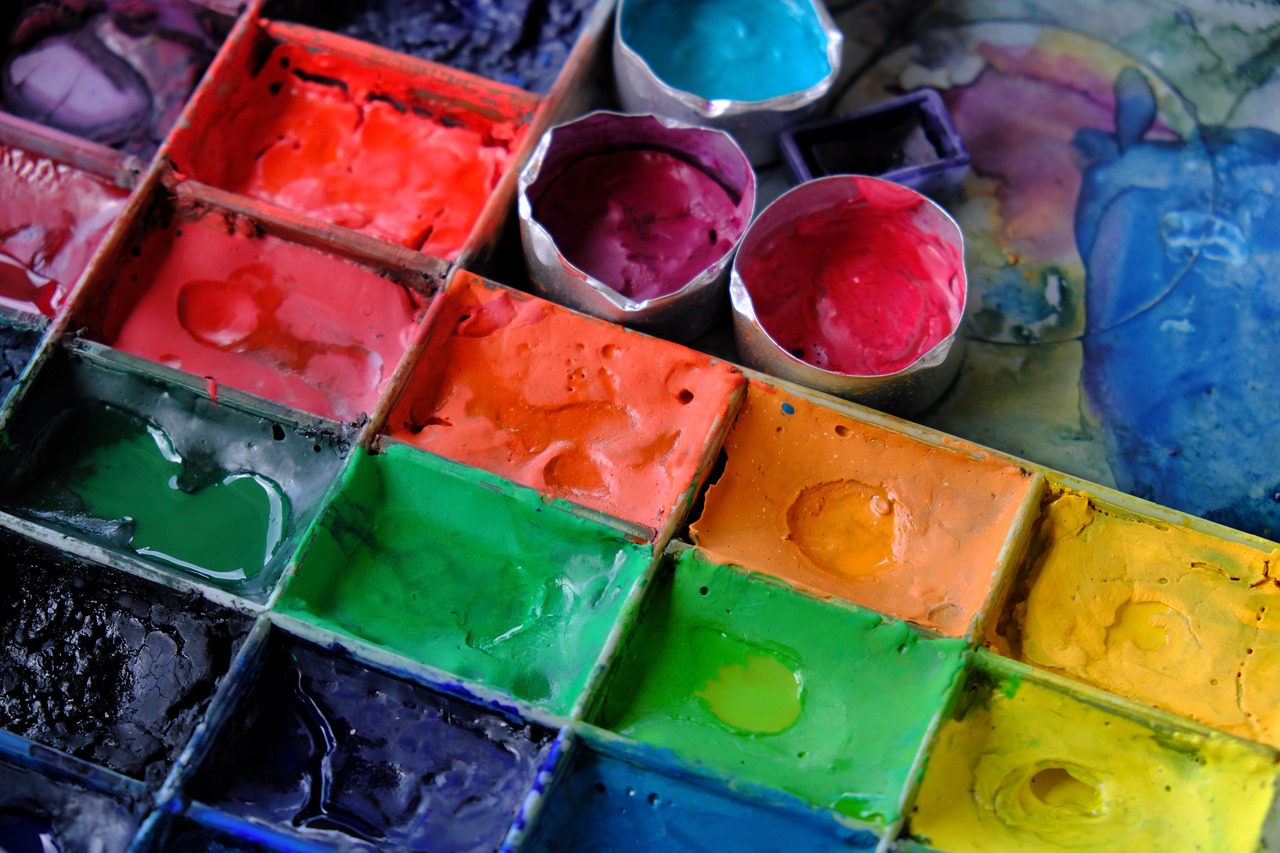
When it comes to painting, the medium you choose can make all the difference in your artistic expression. Each medium—be it oils, acrylics, or watercolors—has its own unique characteristics that can either enhance or challenge your creativity. Think of it like choosing the right instrument for a symphony; each one contributes to the overall harmony of your artwork. In this section, we’ll dive deep into the various painting mediums, exploring their individual properties and how they can be utilized to create stunning masterpieces.
Starting with oil paints, these have been a favorite among artists for centuries. The rich texture and vibrant colors they offer allow for incredible depth and detail. One of the standout features of oils is their slow drying time, which gives artists the luxury of blending colors directly on the canvas. This means you can work on a piece over several days, making adjustments as you go along. However, this can also be a double-edged sword; the extended drying time can lead to a longer overall creation process. If you're looking for a medium that allows for meticulous detail and layering, oil paints might just be your best friend.
On the other hand, acrylic paints have surged in popularity, especially among contemporary artists. Why? Well, for starters, they dry incredibly fast, which is a game-changer for those who thrive on spontaneity. This quick drying time allows for rapid layering and experimentation, making them perfect for artists who like to work in a more dynamic way. Plus, acrylics are water-soluble, meaning clean-up is a breeze compared to oils. However, this quick drying can also be a challenge; it requires a different approach to blending and layering. As you explore acrylics, you’ll discover techniques like wet blending and dry brushing that can help you maximize their potential.
Then we have watercolors, a medium that is both beautiful and challenging. Watercolors are known for their transparency and fluidity, allowing for soft washes and ethereal effects. However, mastering watercolors requires a good understanding of water control and pigment application. It's akin to dancing with the paint—too much water, and you lose the vibrancy; too little, and the colors can appear flat. Techniques such as wets-on-dry and lifting can help you manipulate the medium effectively, creating stunning visual effects that are unique to watercolor.
In addition to these primary mediums, there are also mixed media options that allow artists to combine different materials and techniques for innovative results. For instance, using acrylics with pastels or incorporating collage elements can lead to exciting new textures and dimensions in your work. The possibilities are endless, and this experimentation is often where the most exciting discoveries happen.
| Medium | Characteristics | Best For |
|---|---|---|
| Oil Paints | Rich texture, slow drying time | Detailed and layered artwork |
| Acrylic Paints | Fast drying, versatile | Dynamic and experimental styles |
| Watercolors | Transparency, fluidity | Soft washes and ethereal effects |
Ultimately, the choice of medium is a personal one, deeply tied to your artistic voice and the stories you wish to tell through your art. Experimenting with different mediums can open up new avenues of creativity and help you discover techniques that resonate with your style. So, grab your brushes, pick up some paint, and let the exploration begin!
- What is the best medium for beginners? Acrylics are often recommended for beginners due to their ease of use and quick drying time.
- Can I mix different mediums in one painting? Absolutely! Many artists enjoy experimenting with mixed media to create unique textures and effects.
- How do I choose the right medium for my style? Consider what effects you want to achieve and how much time you want to spend on drying and layering. Each medium has its strengths!
Acrylic Painting
Acrylic painting has become a favorite among artists for its versatility and fast-drying properties. Unlike oil paints, which can take days to dry, acrylics allow artists to work quickly and layer their creations without the long wait times. This unique quality enables artists to experiment freely, making adjustments on the fly, which is particularly appealing for those who thrive on spontaneity in their creative process.
One of the most exciting aspects of acrylics is their ability to mimic other mediums. With the right techniques, you can achieve the look of watercolor, oil paint, or even gouache. This adaptability opens up a world of possibilities for artists who want to explore different styles without needing to invest in multiple types of paint. For instance, by adding water to acrylic paint, you can create a transparent wash similar to watercolor, while using thicker paint can give you a more textured, oil-like appearance.
When working with acrylics, it's essential to understand some key techniques that can help you maximize their potential. Here are a few techniques that every acrylic painter should try:
- Layering: This involves applying multiple layers of paint to create depth and complexity in your artwork. The beauty of acrylics is that they dry quickly, allowing you to layer without muddying previous colors.
- Blending: While acrylics dry fast, you can still blend colors effectively if you work quickly. Use a wet brush to merge colors on the canvas for a smooth transition.
- Impasto: This technique involves applying paint thickly so that it stands out from the canvas. It creates an exciting texture and can add a three-dimensional quality to your work.
Additionally, acrylics can be mixed with various mediums to alter their properties. For example, adding a gloss medium can enhance the shine of your paint, while a matte medium can reduce glossiness, allowing for a more subdued finish. This flexibility means that artists can tailor their materials to achieve the exact effect they envision, making acrylics a powerful tool in the artist's arsenal.
In conclusion, acrylic painting is not just a technique but a gateway to endless creative possibilities. Whether you're a beginner or a seasoned artist, embracing acrylics can lead to exciting discoveries in your work. So grab your brushes, unleash your imagination, and let the vibrant colors of acrylic paint transform your artistic journey!
Q: What are the main advantages of using acrylic paint?
A: Acrylic paint dries quickly, is versatile, and can mimic the appearance of other mediums. It's also water-soluble when wet, making for easy cleanup.
Q: Can you use acrylics on any surface?
A: Yes, acrylic paint can be used on various surfaces, including canvas, wood, paper, and even fabric, as long as it's properly prepared.
Q: How do I prevent acrylic paint from drying too quickly?
A: You can slow down the drying time by using a palette with a lid, adding a slow-drying medium, or misting your palette with water as you work.
Q: Is it necessary to use a primer before painting with acrylics?
A: While it's not always necessary, using a primer can help the paint adhere better and enhance the vibrancy of the colors, especially on non-porous surfaces.
Watercolor Techniques
Watercolor painting is an enchanting art form that allows for a unique blend of fluidity and precision. Mastering is essential for any artist looking to harness the ethereal quality of this medium. One of the fundamental techniques is the wash, which involves applying a diluted layer of paint over the paper. This technique can create soft backgrounds or serve as a base for more intricate details. Imagine painting a serene sky at dawn; a light wash can beautifully capture the delicate hues of early morning light.
Another vital technique is the wet-on-dry method, where wet paint is applied to dry paper. This allows for sharper edges and more defined shapes, making it ideal for creating detailed elements within your artwork. Think of it as adding the final touches to a sculpture; the details can really make your piece stand out. Conversely, the wet-on-wet technique involves applying wet paint onto wet paper, resulting in soft edges and a beautiful blending of colors. This is particularly effective for creating dreamy landscapes or soft floral compositions, where the colors can mingle and dance together.
Additionally, lifting is a technique that allows artists to remove paint from the paper, creating highlights or correcting mistakes. Using a damp brush or a cloth, you can gently lift the paint, revealing the white of the paper underneath. This can be especially useful for creating clouds in a sky or adding highlights to a subject. It's like sculpting with light, where you can shape and define forms by removing rather than applying paint.
To further enhance your watercolor skills, consider experimenting with salt and alcohol techniques. Sprinkling salt onto wet paint creates a fascinating texture as it absorbs the pigment, resulting in unique patterns that can add depth to your work. Similarly, dropping alcohol onto wet watercolor can create stunning effects, causing the paint to repel and form intriguing shapes. These techniques are akin to adding spices to a dish; they can elevate your artwork and add unexpected flavors.
In summary, mastering watercolor techniques not only enhances your artistic repertoire but also opens up a world of creative possibilities. By understanding how to manipulate water and pigment, you can create breathtaking landscapes, vibrant portraits, and whimsical abstracts. So grab your brushes, dive into the world of watercolors, and let your creativity flow!
- What is the best paper for watercolor painting? Watercolor paper is specifically designed to absorb water without warping. Look for 100% cotton or cold-pressed (not) paper for best results.
- How do I prevent my watercolors from becoming muddy? To avoid muddy colors, always clean your brush between colors and use a limited palette to maintain color clarity.
- Can I use watercolors on canvas? Yes, but it's essential to use specially prepared watercolor canvas or boards to prevent the paint from beading up.
Composition and Layout
Effective composition is crucial for creating balanced and engaging artwork. Think of composition as the backbone of your painting; it’s what holds everything together and guides the viewer’s eye through your masterpiece. A well-composed piece can evoke emotions, tell stories, and create a connection between the artwork and the audience. As an artist, understanding the principles of composition can elevate your work from good to extraordinary. So, what are these principles? Let’s dive in!
One of the most fundamental concepts in composition is the Rule of Thirds. This guideline suggests that you divide your canvas into a grid of nine equal parts by drawing two horizontal lines and two vertical lines. By positioning the most important elements of your painting along these lines or at their intersections, you create a more dynamic and visually appealing image. It’s like placing the cherry on top of a sundae; it just makes everything better!
Another vital aspect of composition is creating focal points. A focal point is an area in your artwork that draws the viewer's attention and serves as the centerpiece of your piece. Think of it as the main character in a story—without it, the narrative feels flat and uninteresting. You can establish a focal point through various techniques, such as:
- Contrast: Use contrasting colors or values to make your focal point stand out.
- Color: Bright or saturated colors can attract attention, so consider using them strategically.
- Placement: Position your focal point in a way that aligns with the rule of thirds for maximum impact.
In addition to these techniques, understanding the flow of your composition is essential. The eye should move naturally across the canvas, guided by lines, shapes, and the arrangement of elements. This flow can be achieved by creating pathways with leading lines, such as roads, rivers, or even the direction of a figure's gaze. Think of it as choreographing a dance; every element should work together to create a harmonious movement.
Furthermore, consider the balance in your composition. Balance refers to the distribution of visual weight in a painting. You can achieve balance through symmetrical arrangements, where elements are evenly distributed on either side, or asymmetrical arrangements, where different elements are used to create a sense of equilibrium. For instance, a large object on one side of the canvas can be balanced by several smaller objects on the opposite side. It’s like a seesaw; both sides need to work together to maintain stability.
Finally, don’t forget about the negative space in your artwork. Negative space refers to the area around and between the subjects of your painting. It’s just as important as the positive space (the subjects themselves) because it helps define and emphasize the main elements. Think of it as the silence in music; it enhances the notes that are played. By strategically using negative space, you can create a sense of breathing room and allow your focal points to shine.
In summary, mastering composition and layout is an ongoing journey for every artist. By applying the principles of the rule of thirds, creating focal points, ensuring flow and balance, and utilizing negative space, you can transform your artwork into captivating visual stories. So grab your brushes and start experimenting—your canvas awaits!
- What is the rule of thirds?
The rule of thirds is a compositional guideline that suggests dividing your canvas into nine equal parts to position important elements for greater visual impact. - How can I create a focal point in my artwork?
You can create a focal point by using contrast, color, and strategic placement of elements in your composition. - What is negative space, and why is it important?
Negative space is the area around and between the subjects of your painting. It is important because it helps define and emphasize the main elements, creating balance and harmony.
Rule of Thirds
The is one of the most fundamental principles in visual composition, and it can dramatically enhance the quality of your artwork. Imagine dividing your canvas into nine equal parts by drawing two equally spaced horizontal lines and two vertical lines. This creates a grid of three columns and three rows, where the intersections of these lines are the key points of interest. By placing your focal elements along these lines or at their intersections, you can create a more balanced and dynamic composition that naturally draws the viewer's eye.
Why is this technique so effective? Well, our eyes tend to gravitate towards these intersection points, making them prime real estate for key elements in your painting. Rather than centering your subject, which can sometimes lead to a static and less engaging image, the Rule of Thirds encourages movement and flow within the artwork. For instance, if you're painting a landscape, you might position the horizon along one of the horizontal lines rather than in the center. This not only creates a sense of depth but also allows the viewer to explore both the sky and the foreground more fully.
Here are a few tips to effectively implement the Rule of Thirds in your paintings:
- Identify Your Focal Point: Decide what the main subject of your artwork is and place it at one of the intersection points.
- Balance Elements: Use the other intersection points to place secondary elements that support the main subject without overwhelming it.
- Experiment: Don’t be afraid to break the rules! While the Rule of Thirds is a great guideline, sometimes the magic happens when you go against it.
To illustrate how the Rule of Thirds can transform your artwork, consider the following table that compares two compositions: one that adheres to the Rule of Thirds and one that doesn’t.
| Composition | Adherence to Rule of Thirds | Effect on Viewer |
|---|---|---|
| Centered Subject | No | Static, less engaging |
| Subject at Intersection | Yes | Dynamic, eye-catching |
Incorporating the Rule of Thirds into your artistic practice can be a game changer. It encourages you to think critically about composition and helps you to create artwork that resonates more deeply with viewers. So, the next time you pick up your brush, take a moment to visualize that grid. You might just find that your paintings gain a new level of interest and engagement!
What is the Rule of Thirds?
The Rule of Thirds is a compositional guideline that suggests dividing your canvas into thirds, both horizontally and vertically, to create a grid. Placing focal points along these lines or their intersections can enhance the visual appeal of your artwork.
How do I apply the Rule of Thirds in my painting?
To apply the Rule of Thirds, visualize a grid over your canvas and place your main subject at one of the intersection points. Use the other points to balance secondary elements, creating a more dynamic composition.
Can I break the Rule of Thirds?
Absolutely! While the Rule of Thirds is a helpful guideline, art is about expression. Feel free to experiment and break the rules when it serves your creative vision.

Creating Focal Points
Establishing a focal point in your artwork is like setting the stage for a captivating story; it draws the viewer in and guides their gaze to the most important elements of your piece. Think of a focal point as the star of the show—without it, your painting might feel disjointed or lack direction. So, how do you create that magnetic pull in your artwork? Let's dive into some effective techniques!
One of the simplest ways to create a focal point is through contrast. By using contrasting colors, values, or shapes, you can make certain elements stand out. For instance, a bright red apple against a muted green background immediately attracts attention. This principle works because our eyes are naturally drawn to differences. Consider the following methods to enhance contrast:
- Color Contrast: Pair warm colors with cool colors to create visual tension.
- Value Contrast: Use light and dark shades to highlight specific areas.
- Shape Contrast: Combine geometric shapes with organic forms for added interest.
Another effective technique is to manipulate placement. By positioning your focal point according to the rule of thirds, you can create a more dynamic composition. Imagine your canvas divided into nine equal sections by two vertical and two horizontal lines. Placing your focal point at the intersections or along these lines can lead to a more engaging visual experience. This method isn't just about aesthetics; it’s about creating a natural flow that guides the viewer's eye through your work.
Additionally, you can use leading lines to direct attention toward your focal point. These lines can be actual lines in your painting, like roads or rivers, or implied lines created by the arrangement of objects. For example, a path that leads to a distant mountain can draw the viewer's eye right where you want it. It’s like setting up a treasure map that leads to the heart of your artwork!
Lastly, consider the use of negative space. This refers to the empty areas around your focal point. By strategically using negative space, you can isolate your subject, making it stand out even more. Think of it as giving your focal point some breathing room; it allows the viewer to appreciate the main subject without distractions. A well-placed background that doesn’t compete for attention can elevate your focal point significantly.
In summary, creating focal points is an art in itself. By utilizing contrast, strategic placement, leading lines, and negative space, you can guide your audience's gaze and enhance the storytelling in your artwork. Remember, your focal point is the heartbeat of your painting—it should resonate with emotion and draw viewers into the narrative you wish to convey.
Q: What is a focal point in art?
A: A focal point is the area in a painting that draws the viewer's attention. It is often the most visually interesting part of the artwork.
Q: How can I create a focal point?
A: You can create a focal point by using contrast, strategic placement, leading lines, and negative space to make certain elements stand out in your composition.
Q: Is it necessary to have a focal point in every artwork?
A: While it's not mandatory, having a focal point can enhance the visual impact and storytelling of your artwork, making it more engaging for the viewer.
Frequently Asked Questions
- What are some essential painting techniques for beginners?
For beginners, it's crucial to start with basic techniques such as color mixing, brush strokes, and understanding the properties of different mediums. Techniques like dry brushing and wet-on-wet can help you create texture and depth in your artwork.
- How does color theory impact my painting?
Color theory plays a significant role in painting as it helps you understand how colors interact with each other. Mastering color harmony and contrast can elevate your compositions, making them more visually appealing and meaningful.
- What is the difference between acrylic and watercolor painting?
Acrylics are fast-drying and versatile, allowing for layering and blending, while watercolors require specific techniques like washes and lifting. Each medium has its unique properties, offering different effects and styles for your artwork.
- Can you explain the rule of thirds in composition?
The rule of thirds is a compositional guideline that divides your canvas into a 3x3 grid. By placing key elements along these lines or at their intersections, you create a more balanced and dynamic image that draws the viewer's eye.
- What is glazing, and how is it used in painting?
Glazing involves applying transparent layers of paint over dried layers to enhance color depth and luminosity. This technique is particularly popular in oil painting, allowing artists to achieve rich, vibrant results without losing the underlying details.
- How can I create a focal point in my artwork?
To create a focal point, you can use contrast, color, and strategic placement of elements within your composition. This helps direct the viewer's attention to the most important part of your painting, enhancing the overall impact.
- What techniques can I use for watercolor painting?
Some effective watercolor techniques include washes for creating backgrounds, wet-on-dry for sharper edges, and lifting to remove paint for highlights. Experimenting with these methods can lead to stunning and unique watercolor pieces.
- Is it important to experiment with different painting mediums?
Absolutely! Experimenting with various mediums like oils, acrylics, and watercolors can expand your artistic range and help you discover your unique style. Each medium offers distinct properties that can inspire creativity in different ways.


