
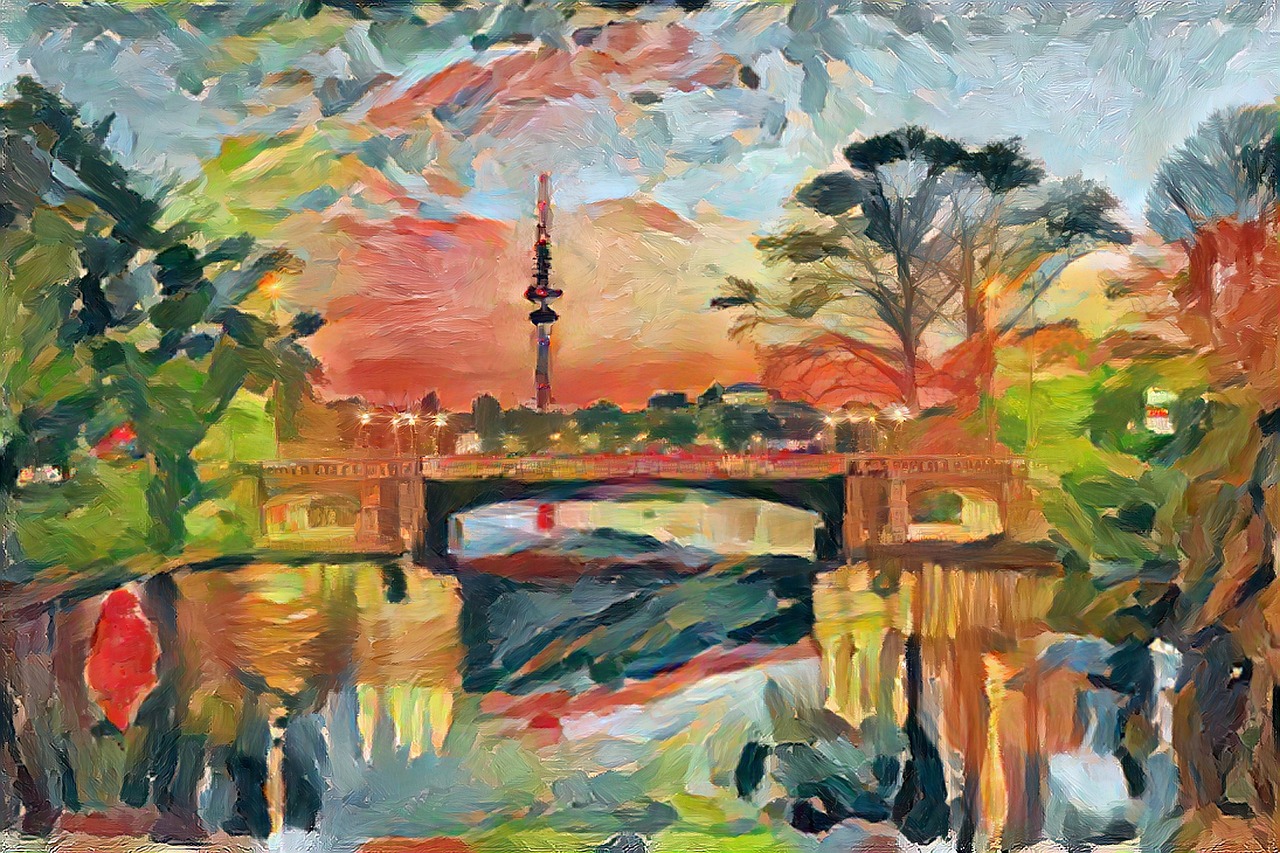
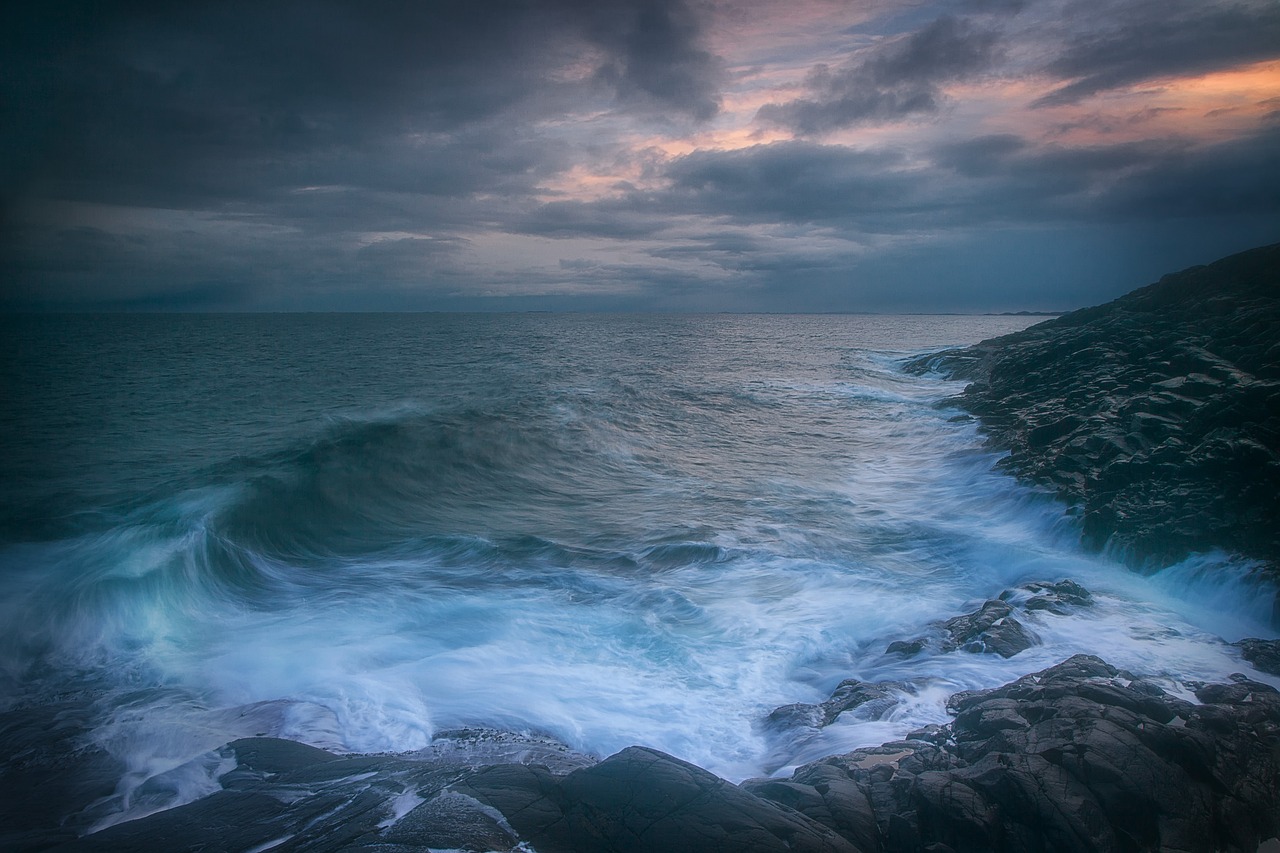
How to Paint a Glistening Ocean: A Step-By-Step Guide
Painting a stunning ocean scene can be one of the most rewarding experiences for an artist. The way light dances on the water, the myriad of colors that reflect the sky, and the dynamic movement of waves are just a few elements that can transform a simple canvas into a breathtaking masterpiece. In this guide, we will take you through the essential steps to create a vibrant and realistic ocean painting that captures the essence of the sea. Whether you're a beginner or an experienced artist, you'll find valuable tips and techniques to enhance your skills and bring your vision to life.
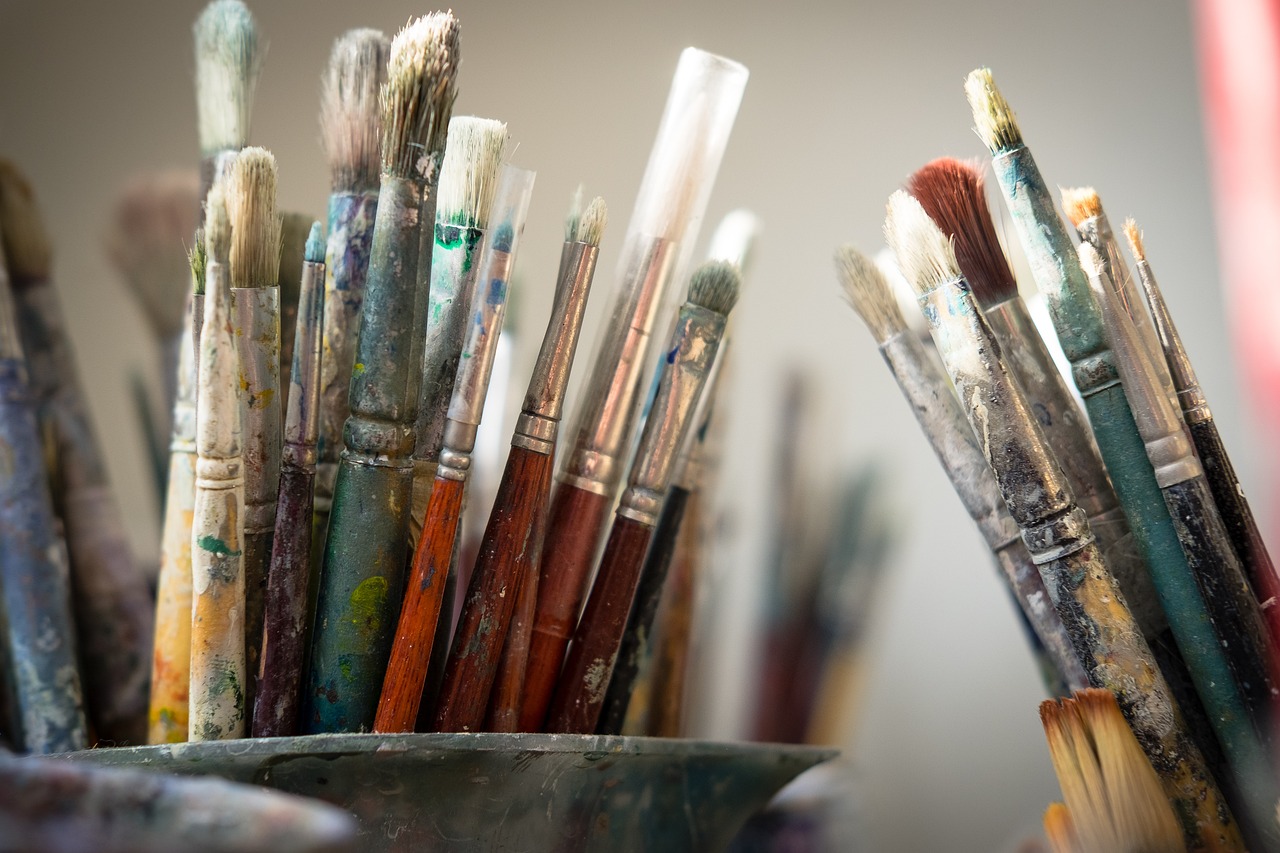
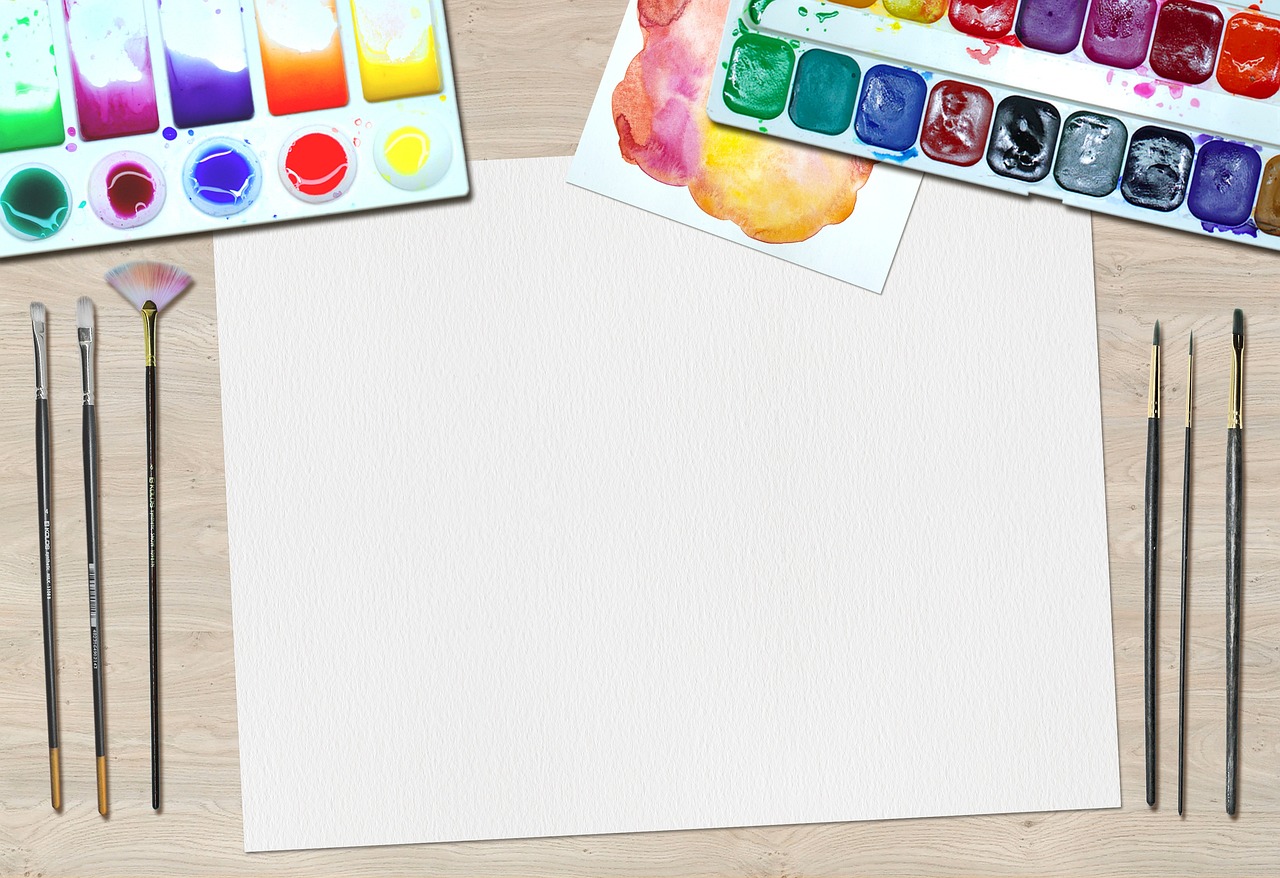
Before you dive into painting, it's crucial to select the right materials. The quality of your paints, brushes, and canvas can significantly affect the outcome of your artwork. For beginners, we recommend starting with acrylic paints due to their versatility and ease of use. They dry quickly and can be easily layered, making them perfect for capturing the essence of water. Here’s a quick rundown of essential materials:
- Paints: Acrylics or oils are ideal for ocean scenes.
- Brushes: A variety of sizes, including flat, round, and fan brushes, will help achieve different effects.
- Canvas: A stretched canvas or canvas board will work well.
- Palette: For mixing colors, a wooden or disposable palette is handy.
- Water Container: Necessary for cleaning brushes and mixing paints.
Color theory is the backbone of any successful painting, especially when it comes to capturing the beauty of the ocean. Understanding how to mix and match colors will allow you to create depth, light, and shadows in your work. For instance, the ocean is rarely just blue; it’s a blend of various hues that can range from deep navy to vibrant turquoise. Here’s how to effectively use color theory in your ocean painting:
- Primary Colors: Start with red, blue, and yellow to create a range of ocean tones.
- Mixing Techniques: Combine colors gradually to find the perfect shade.
- Complementary Colors: Use colors opposite each other on the color wheel to create contrast and vibrancy.
To achieve a realistic ocean color palette, you’ll want to mix a variety of tones. Start with a base of blue and gradually add small amounts of green or white to create lighter shades. For deeper waters, incorporate darker blues and even hints of purple. Here’s a simple formula:
| Ocean Color | Base Color | Mixing Suggestions |
|---|---|---|
| Deep Blue | Blue | Add a touch of black or purple |
| Turquoise | Blue + Green | Mix in white for lighter shades |
| Seafoam Green | Green | Add white for softness |
One of the most effective ways to add depth to your ocean painting is through layering. Start with a base layer of color, and once it dries, apply subsequent layers using lighter or darker shades to create the illusion of depth. This technique can mimic the way sunlight penetrates the water and creates different hues at various depths. Remember, patience is key! Allow each layer to dry before adding the next.
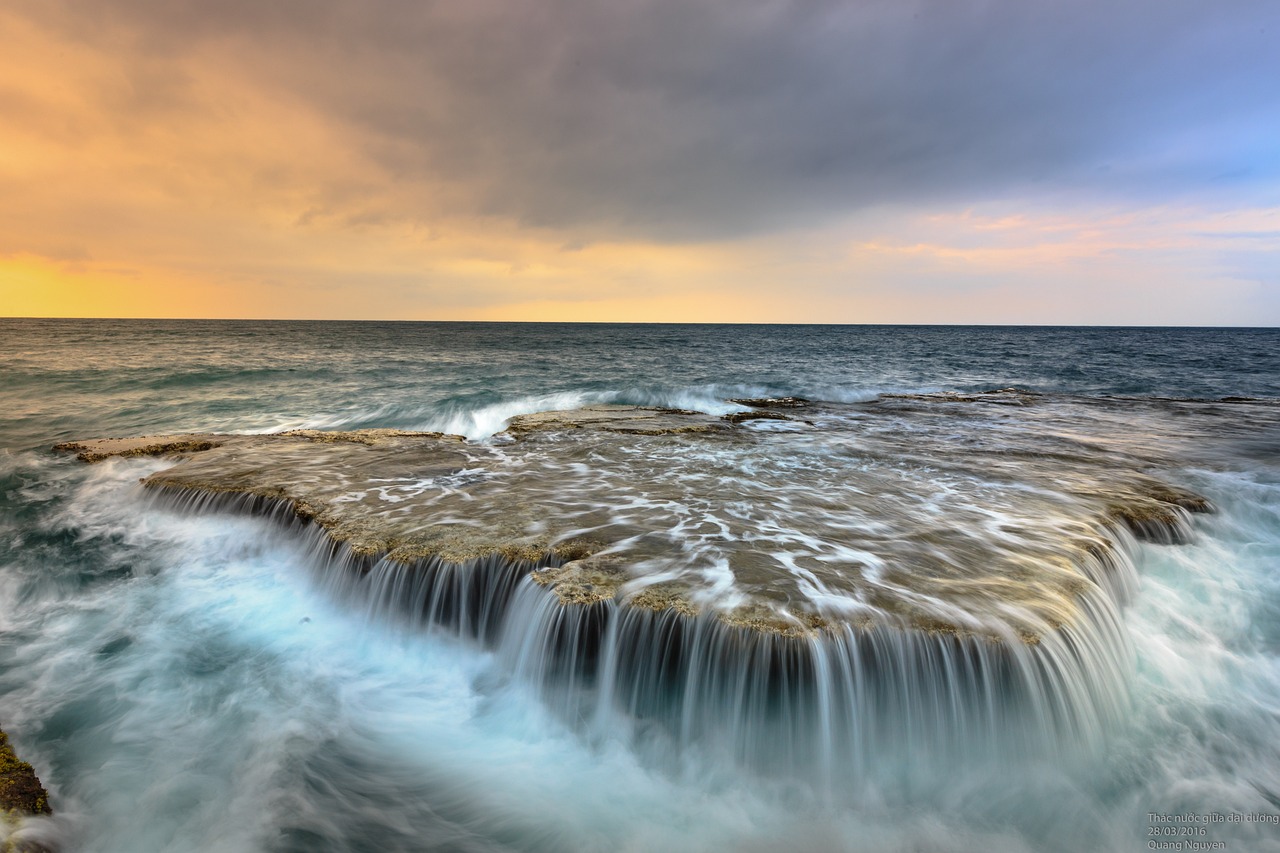
Reflections on water can create stunning visual effects that enhance the beauty of your ocean scene. To paint realistic reflections, observe how objects are mirrored in the water. Use horizontal strokes with lighter colors to depict the reflection of the sky and surrounding elements. This technique can make your painting feel more dynamic and alive.
Capturing the movement of water is essential for a dynamic ocean painting. Use quick, sweeping brush strokes to depict waves and ripples. Experiment with different brush sizes and shapes to create varied textures. For larger waves, a fan brush can be particularly effective, while a flat brush can help create the illusion of gentle ripples.
Finally, adding details such as foam, rocks, and marine life can bring your ocean painting to life. These elements add interest and can help guide the viewer's eye through the composition. When painting foam, use a dry brush technique or a palette knife to create texture and dimension. For rocks, consider using a stippling technique to mimic the rugged surface of stones beneath the water.
Including fish, shells, and other marine creatures can enhance your ocean scene without overwhelming it. Paint these elements in a way that complements the water, using colors that harmonize with your overall palette. For example, a bright orange fish can pop against the blues and greens of the ocean, drawing the viewer's attention while still feeling like a natural part of the scene.
Texture is what adds realism to your ocean painting. You can create texture using various methods, such as:
- Brush Techniques: Use different brush strokes to create varying textures.
- Palette Knife: Apply paint with a palette knife for a more dramatic effect.
- Sponges: Dabbing with a sponge can create unique textures for foam and waves.
Q: What type of paint is best for beginners?
A: Acrylic paints are recommended for beginners due to their ease of use and quick drying time.
Q: How do I create a realistic wave?
A: Use sweeping brush strokes and varying shades of blue and white to depict the crest and trough of a wave.
Q: Can I paint an ocean scene without prior experience?
A: Absolutely! With practice and the right techniques, anyone can create a beautiful ocean painting.
Q: What is the best way to start my ocean painting?
A: Begin by sketching your composition lightly on the canvas and then apply your base colors before adding details.
Choosing the Right Materials
When it comes to painting a stunning ocean scene, the materials you choose play a pivotal role in the final outcome. Whether you’re a novice just starting out or an experienced artist looking to refine your skills, having the right tools can make all the difference. So, let’s dive into the essentials you need to create that breathtaking ocean masterpiece!
First off, you’ll want to select your paint. Acrylics are a fantastic choice for beginners due to their quick drying time and versatility. They allow for easy layering and blending, making it simpler to achieve those vibrant ocean hues. On the other hand, if you’re aiming for a more traditional approach, consider using oil paints. While they take longer to dry, they offer a richness and depth that can bring your ocean scene to life in ways acrylics sometimes can’t. Here’s a quick comparison:
| Type of Paint | Drying Time | Color Depth | Ease of Use |
|---|---|---|---|
| Acrylic | Fast | Bright | Beginner-friendly |
| Oil | Slow | Rich | Requires more skill |
Next, let’s talk about brushes. The right brushes can help you achieve various textures and details. A good set should include:
- Flat brushes for broad strokes and backgrounds.
- Round brushes for fine details and lines.
- Fan brushes for adding texture, like foam on waves.
Don’t forget about the canvas! You can choose between stretched canvas or canvas boards, depending on your preference. Stretched canvases provide a more professional feel, while canvas boards are lightweight and easy to transport. If you’re looking for a unique twist, consider using watercolor paper for a softer effect.
Lastly, having a palette for mixing colors is essential. A simple wooden or plastic palette will do the trick. You might also want to invest in a palette knife, which can be used not only for mixing but also for applying paint in a textured manner. Remember, the right materials will set the foundation for your creativity, so choose wisely!
Understanding Color Theory
When it comes to painting a stunning ocean scene, color theory is your best friend. Understanding how colors interact with each other can elevate your artwork from ordinary to extraordinary. Imagine standing on a beach, gazing at the shimmering waves under the sun; the vibrant blues, greens, and whites dance before your eyes. To replicate this beauty on canvas, you need to grasp the fundamentals of color mixing and the emotional impact of colors.
At its core, color theory is all about the relationships between colors. The primary colors—red, blue, and yellow—are the building blocks for creating a vast array of hues. By mixing these primary colors, you can create secondary colors like green, orange, and purple. But don’t stop there! Tertiary colors, which are made by mixing a primary color with a secondary color, can add even more depth to your palette. For instance, mixing blue with green can yield a beautiful turquoise that perfectly captures the essence of tropical waters.
To help you visualize this, here’s a simple color wheel:
| Primary Colors | Secondary Colors | Tertiary Colors |
|---|---|---|
| Red | Green | Red-Orange |
| Blue | Orange | Yellow-Green |
| Yellow | Purple | Blue-Green |
Now, let’s talk about temperature—colors can be warm or cool, and this distinction can dramatically affect the mood of your painting. Warm colors like reds and yellows can evoke feelings of excitement and energy, while cool colors such as blues and greens tend to create a sense of calm and tranquility. In your ocean scene, using a mix of these color temperatures can help convey the feeling of a sunlit beach or a serene underwater world.
Another important aspect of color theory is the concept of value. Value refers to how light or dark a color is. By manipulating the value, you can create the illusion of depth and dimension. For instance, a lighter shade of blue can represent the sunlit surface of the water, while a darker blue can indicate deeper, shadowy areas. This interplay of light and dark is what makes your ocean painting feel alive and dynamic.
Don't forget about contrast as well! High contrast between colors can draw the viewer's eye to specific areas of your painting. For example, placing bright white highlights against deep blue water can create a stunning effect that mimics the way sunlight glints off the waves. Conversely, using softer contrasts can create a more harmonious and soothing look, perfect for depicting calm seas.
In summary, mastering color theory is essential for any artist looking to paint a captivating ocean scene. By understanding how to mix colors, consider their temperature, manipulate their value, and use contrast effectively, you can create a vibrant and realistic representation of water that truly captures the viewer's imagination.
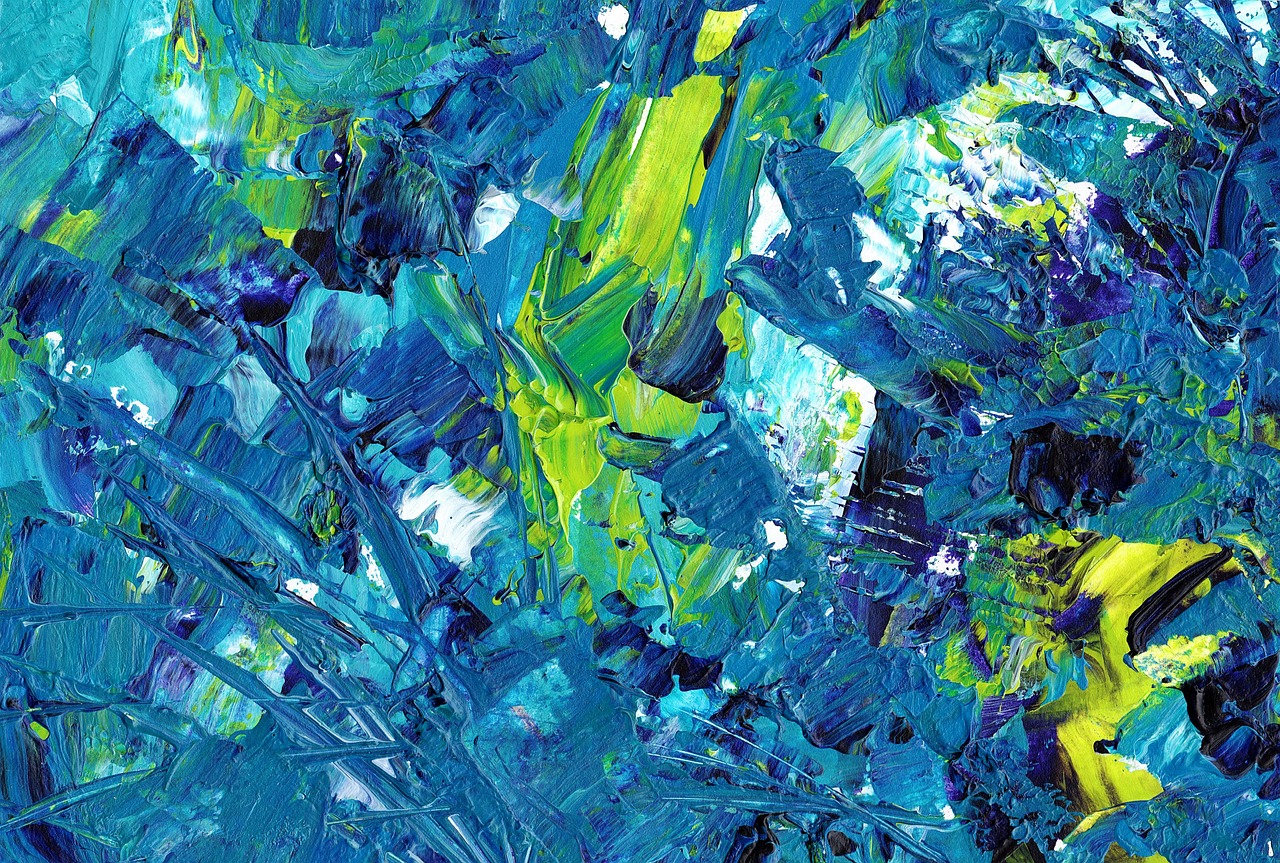
Mixing Ocean Tones
When it comes to painting a breathtaking ocean scene, the colors you choose can make or break the entire artwork. Mixing ocean tones is more than just throwing some blue paint on your palette; it’s about understanding the nuances of color and how they interact with each other. Imagine the ocean as a living entity, constantly shifting and changing with the light and atmosphere. To capture this essence, you need to create a range of colors that reflect its beauty.
Start with the primary colors: red, yellow, and blue. From these basics, you can create a variety of ocean hues. For instance, mixing blue with a touch of green can give you that stunning turquoise that’s so characteristic of tropical waters. On the flip side, if you want to depict deeper, more mysterious waters, consider adding a hint of black or dark blue. This will add richness and depth, making your painting feel more immersive.
Here’s a simple breakdown of how to mix your ocean tones:
| Color | Mixing Instructions | Resulting Tone |
|---|---|---|
| Turquoise | Mix blue and green | Bright tropical water |
| Deep Sea Blue | Mix blue with a touch of black | Rich, dark ocean |
| Seafoam Green | Mix green with white | Soft, frothy water |
| Sunset Reflection | Mix orange with pink and a hint of yellow | Warm reflections on the water |
Remember, the key to achieving the perfect ocean tone is to experiment. Don’t be afraid to play around with different ratios of colors. Sometimes, adding just a drop of a contrasting color can create a stunning effect that brings your painting to life. Keep a sketch pad handy to jot down your successful mixes for future reference. This way, you can build your own library of ocean tones that you can rely on every time you pick up your brush.
As you mix, consider the lighting in your scene. A bright, sunny day will require lighter, more vibrant colors, while a stormy or twilight scene will call for darker, more muted tones. Think of how the sun reflects off the water, creating shimmering highlights and deep shadows. The interplay of light and color is what gives your painting its dynamic quality and realism.
Incorporating these mixed tones into your painting will not only add depth but also create a more engaging experience for your viewers. The ocean is vast and full of life, and your color choices should reflect that. So grab your palette, mix those colors, and let the ocean come alive on your canvas!
Creating Depth with Layers
When it comes to painting a stunning ocean scene, one of the most effective techniques to achieve a sense of depth is through the use of layers. Imagine standing on a beach, watching the waves roll in. You can see how the colors change as the water moves closer to the shore, creating a beautiful gradient that draws the eye in. By layering your paint, you can replicate this mesmerizing effect in your artwork.
To start, you'll want to choose a base color for your ocean. This is typically a deep blue or teal. Apply this color generously across your canvas using a wide brush. This first layer sets the foundation for your ocean and gives it the richness it needs. Once this layer is dry, you can begin to add lighter shades to create the illusion of waves and movement.
As you add subsequent layers, think about how the ocean interacts with light. The surface of the water reflects the sky, so incorporating lighter hues such as aqua or even hints of white will help to mimic the sun's rays dancing on the waves. Remember, the key to creating depth is to work from dark to light. This technique not only adds dimension but also helps to create a more realistic representation of water.
Here’s a simple breakdown of how to layer effectively:
- Base Layer: Start with a deep blue or green as your foundation.
- Mid Layers: Gradually add lighter shades, blending them into the base layer to create a smooth transition.
- Top Layer: Finish with highlights and details, using white or very light colors to depict foam and waves.
Don’t be afraid to experiment with the thickness of your layers. Thicker applications can create a more textured look, while thinner layers can provide a smoother finish. Use a palette knife or a stiff brush to add dimension and texture to the waves. The goal is to create a dynamic scene that captures the viewer’s attention and evokes a sense of movement.
Finally, remember that patience is key. Allow each layer to dry completely before adding the next. This not only prevents colors from muddying but also gives you the opportunity to assess your work from a distance. Sometimes, stepping back can provide a new perspective on how your ocean is coming to life. So grab your brushes, and let’s dive into the depths of creativity!
Q: What type of paint is best for ocean scenes?
A: Acrylic paints are popular for ocean scenes due to their quick drying time and vibrant colors. However, oil paints can also be used for their blending capabilities and rich textures.
Q: How can I create realistic wave shapes?
A: Focus on the movement of water. Use curved brush strokes to mimic the flow of waves and don't forget to incorporate highlights to give them dimension.
Q: What brushes should I use for layering?
A: A variety of brushes can be used, but flat brushes are excellent for broad strokes, while round brushes work well for details and textures.
Q: Is it necessary to use a palette knife?
A: While not necessary, a palette knife can add texture and depth to your ocean painting, helping to create a more dynamic surface.
Highlighting Reflections
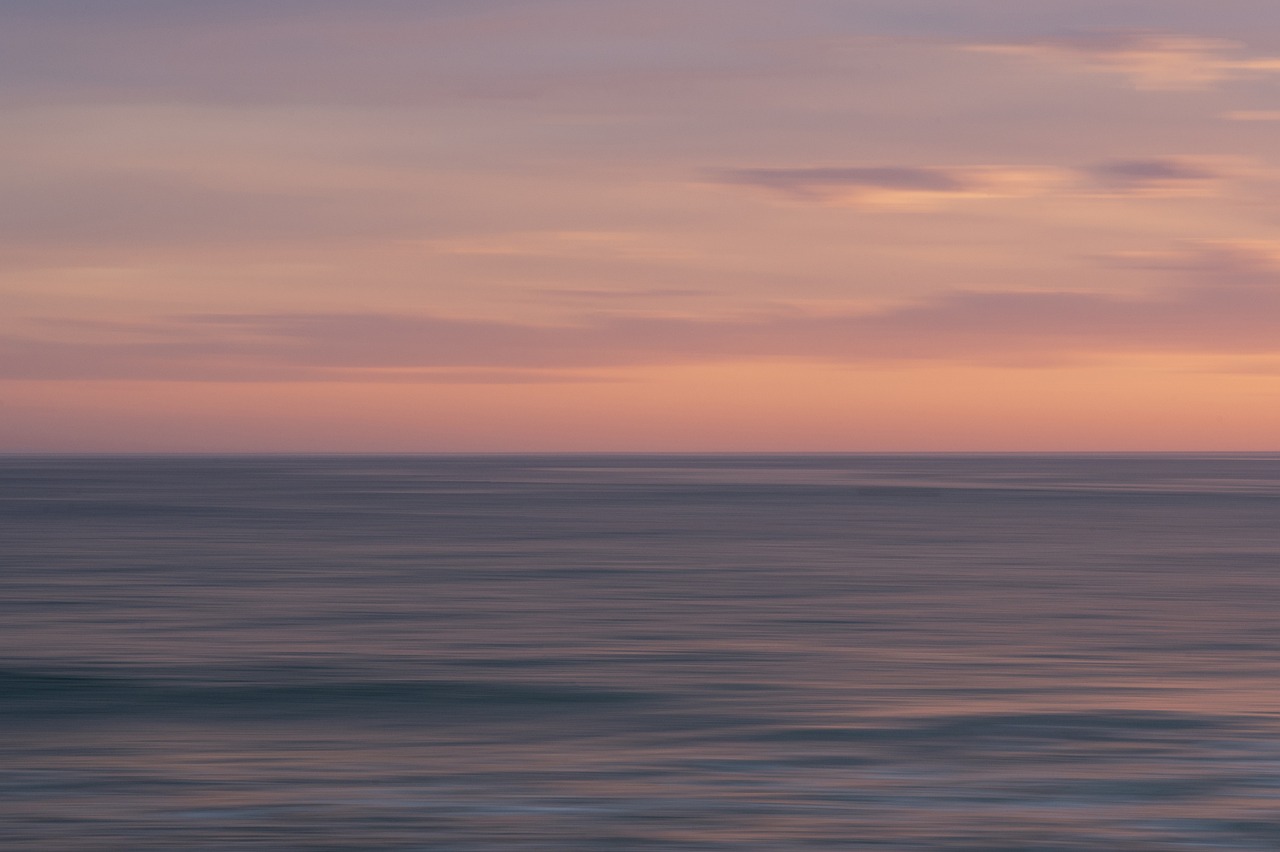
When it comes to painting an ocean scene, one of the most enchanting elements to capture is the reflection of light on water. Reflections can transform a simple painting into a breathtaking masterpiece, creating a sense of depth and realism that draws viewers in. To effectively highlight reflections, it’s essential to understand the nature of water and how it interacts with light. Water is not merely a flat surface; it dances and shimmers, bending light in various ways. So, how do you replicate that mesmerizing effect on your canvas?
First, consider the time of day you want to depict. The quality of light changes dramatically from dawn to dusk, and each moment offers a unique palette for your reflections. For instance, early morning light may cast a soft, golden hue, while the midday sun creates stark, bright reflections. Choose your colors accordingly and remember that the color of the water will often reflect the sky above it.
Next, let’s talk about the application technique. When painting reflections, it’s crucial to use a wet-on-wet technique. This means applying your paint to a wet surface, allowing the colors to blend seamlessly. Start with a base layer of your water color, then gently add the colors for reflections using horizontal strokes. This approach mimics the way light spreads across the surface of the water. A helpful tip is to use a soft brush for this task, as it allows for smoother transitions and softer edges.
Another key aspect to consider is the direction of the strokes. Reflections on water should be painted with horizontal strokes to mimic the natural flow of the waves. Avoid using vertical strokes, as they can disrupt the illusion of water. Remember, the goal is to create a harmonious blend that captures the essence of the scene. You might find it useful to practice on a separate piece of canvas or paper before applying these techniques to your main artwork.
Don’t forget about the texture of the water. The ocean is rarely still; it’s full of movement. To convey this, consider adding some ripples or gentle waves in your reflections. This can be achieved by lightly dragging a clean brush or palette knife through the wet paint, creating the illusion of movement. The key is to be subtle; too much texture can overwhelm the delicate beauty of the reflections.
Finally, highlighting is essential. Once your reflections are dry, you can add a few bright highlights to simulate the sparkle of sunlight dancing on the water. Use a fine brush and a lighter shade of your base color, applying these highlights sparingly to maintain a realistic look. A few well-placed strokes can make all the difference, transforming your painting from ordinary to extraordinary.
In summary, highlighting reflections in your ocean painting requires a blend of color choice, technique, and a keen eye for detail. By understanding how light interacts with water and practicing these techniques, you can create stunning reflections that elevate your artwork to new heights. So grab your brushes, and let your creativity flow like the waves!
- What colors should I use for ocean reflections? Consider using shades that mirror the sky, such as blues, greens, and even hints of pink or orange for sunrise or sunset scenes.
- How do I create realistic wave reflections? Use horizontal strokes and a wet-on-wet technique to blend colors, and don't forget to add highlights for sparkle.
- Can I use acrylics for painting reflections? Absolutely! Acrylics are versatile and can be manipulated easily to achieve the desired effects.
- Is it necessary to paint every detail in the reflection? No, focus on the overall impression rather than every detail. Less can often be more in creating a realistic effect.
Techniques for Water Movement
Capturing the dynamic essence of water is one of the most exhilarating challenges in painting an ocean scene. The movement of water can evoke a sense of energy and life, drawing viewers into your artwork. To achieve this, you need to understand the various techniques that can help you depict waves, ripples, and currents with realism and flair. Think of painting water like dancing; each brushstroke can be a step that adds to the overall rhythm of your piece.
One effective method to illustrate water movement is by using short, quick strokes for the surface of the waves. This technique mimics the way light reflects off the water and creates the illusion of motion. For example, when painting a crashing wave, consider using a fan brush or a flat brush held at an angle to create the frothy tips of the waves. This adds a touch of spontaneity and excitement to your scene, making it feel alive.
Another technique involves layering colors to depict the depth and turbulence of the ocean. Start with a base layer of darker blues and greens to represent the deeper parts of the water. Then, gradually add lighter shades and white highlights to convey the movement and foam of the waves. This layering technique not only adds dimension but also allows you to play with the contrast of light and shadow, which is crucial for creating a realistic effect.
When it comes to illustrating ripples and smaller waves, you might want to consider the dry brush technique. This involves using a brush with very little paint on it, allowing the bristles to lightly graze the canvas. The result is a soft, textured effect that mimics the gentle undulations of water. Pair this with a slightly darker color underneath to create a sense of depth, and you'll have a stunning representation of calm ocean waters.
Don't forget about the importance of reflections in your ocean painting. Water is a mirror, and capturing what it reflects can significantly enhance the sense of movement. When painting reflections, use a slightly blurred technique—think about how objects appear distorted in water. This can be achieved by gently blending the colors downwards, creating a soft transition that suggests the fluidity of the water's surface.
To further enhance the movement of water, consider incorporating wave patterns. Analyze how waves interact with each other and with the shore. For instance, the crest of a wave can create a dramatic curl, while the trough can show the water pulling back. By studying real ocean waves or even watching videos of ocean movements, you can begin to understand these patterns and replicate them in your painting.
Finally, remember that practice makes perfect. Experiment with different brushes, colors, and techniques to find what works best for you. Each painting is an opportunity to learn and grow as an artist. Whether you're capturing the thunderous crash of waves or the serene ripples of a calm sea, your unique style will shine through, making your ocean scene truly your own.
- What type of paint is best for ocean scenes? Acrylics and oils are both great choices, as they allow for vibrant colors and smooth blending.
- How do I create realistic foam on waves? Use a combination of white paint and a dry brush technique to create texture and highlights.
- Can I paint an ocean scene without a reference photo? While it's possible, having a reference can greatly enhance the accuracy and detail of your painting.
- What colors should I use for a sunset ocean scene? Incorporate warm colors like oranges, pinks, and purples alongside your ocean blues to create a stunning contrast.

Adding Details and Textures
When it comes to painting a captivating ocean scene, the magic often lies in the details and textures. These elements breathe life into your artwork, transforming a simple depiction of water into an immersive experience that draws viewers in. Think of your painting as a window into another world; the more intricate the details, the more inviting it becomes. So, how do you achieve this level of realism? Let’s dive in!
First and foremost, consider the foam created by crashing waves. This frothy white texture is essential for capturing the ocean's dynamic nature. To paint realistic foam, use a combination of white and a touch of blue or green to mimic the ocean's hue. Apply this mixture with a dry brush technique, gently tapping the canvas to create that soft, bubbly effect. Remember, less is more! Overdoing the foam can lead to a cluttered look, so focus on strategic placement.
Next, think about the rocks that often line the shore. These can add a dramatic contrast to the fluidity of the water. When painting rocks, use a palette knife to create jagged edges and texture. Start with a base of dark gray or brown, then layer lighter shades to highlight the edges where light hits. This technique not only adds depth but also creates a sense of realism as it mimics the natural erosion patterns found in coastal environments.
Don’t forget to incorporate marine life into your ocean painting. Fish, shells, and even seaweed can enhance your composition, making it more vibrant and engaging. When painting fish, remember to use bright colors to make them pop against the blue background. A simple technique is to use small, quick strokes to depict their movement, giving the impression that they are swimming through the water. To ensure these elements don’t overwhelm your painting, position them strategically, allowing the viewer’s eye to flow naturally across the canvas.
Texture is another crucial aspect of creating a lifelike ocean scene. Apart from traditional brush techniques, you can experiment with various tools to achieve different effects. For instance, using a palette knife can create sharp, defined lines that resemble the crest of a wave. Alternatively, a sponge can be used to dab on color, creating a soft, mottled effect that mimics the surface of the water. Each method contributes to the overall texture of the painting, adding layers of interest that invite closer inspection.
Finally, consider the overall composition of your painting. The placement of details is key. Too many elements can create chaos, while too few can make the scene feel lifeless. Aim for a balance that allows the ocean's beauty to shine through while also showcasing the intricate details that make it unique. A good rule of thumb is to follow the rule of thirds, placing focal points at intersection points to guide the viewer’s gaze.
- What type of paint is best for ocean scenes? Acrylics and oils are both excellent choices. Acrylics dry faster, while oils allow for more blending time.
- How can I make my ocean painting look more realistic? Focus on details like foam, reflections, and layering techniques to add depth.
- Is it necessary to include marine life in my painting? No, but including marine life can add interest and vibrancy to your scene.
- What tools can I use to create texture? Brushes, palette knives, sponges, and even your fingers can be effective for adding texture.
Incorporating Marine Life
When it comes to creating a captivating ocean scene, incorporating marine life can truly elevate your artwork. Imagine painting a serene beach with gentle waves, only to have it come alive with vibrant fish darting through the water or a playful dolphin leaping in the distance. These elements not only add interest but also tell a story within your painting. However, the key is to include these details without overwhelming the overall composition. Here are some tips to seamlessly integrate marine life into your ocean masterpiece.
First, consider the scale of the marine creatures you wish to include. Small fish can be painted in the foreground to create a sense of depth, while larger animals like whales or sea turtles can be placed in the background to add layers to your scene. This technique helps to maintain a balanced composition. For instance, a school of tiny fish can be depicted near the shore, while a majestic whale swims gracefully in the deeper waters. This contrast not only makes your painting visually appealing but also guides the viewer’s eye throughout the artwork.
Next, think about the colors you choose for your marine life. Bright colors can create a striking contrast against the blues and greens of the ocean, making the creatures pop out of the canvas. For example, a vibrant clownfish can be painted with shades of orange and white, while a school of tropical fish can be a mix of yellows, pinks, and blues. This not only enhances the visual impact but also captures the viewer's attention. Remember to use a variety of colors to reflect the diversity of marine life.
Incorporating marine life also involves understanding their natural habitats. For instance, if you’re painting coral reefs, you might want to include species like parrotfish or angelfish that are commonly found in such environments. On the other hand, if your scene depicts a rocky shoreline, consider adding crabs, starfish, or even sea urchins. This attention to detail not only enriches your painting but also educates viewers about the marine ecosystem.
Don't forget about the movement of marine life. Just like the water itself, fish and other creatures are rarely still. Capturing their movement can add dynamism to your painting. Use quick, fluid brush strokes to depict the motion of fish swimming or the gentle sway of seaweed in the current. This technique can create a sense of life and energy within your artwork, making it feel more realistic and engaging.
Finally, remember that less is often more. While it might be tempting to fill your painting with numerous creatures, focus on a few key elements that complement your scene. This allows each marine life form to stand out and prevents the composition from becoming too cluttered. Strategic placement and thoughtful selection of marine life will ensure that your ocean painting remains harmonious and visually appealing.
Q: What type of marine life should I include in my ocean painting?
A: The type of marine life you include can depend on the specific scene you are creating. Consider the habitat you are depicting—tropical scenes might feature colorful fish, while rocky shorelines could include crabs and starfish.
Q: How can I make the marine life in my painting look realistic?
A: Focus on details such as color, scale, and movement. Use vibrant colors to contrast against the ocean background and employ fluid brush strokes to depict the movement of the creatures.
Q: Should I include a lot of marine life or just a few elements?
A: It's best to include a few key elements that complement your painting rather than overcrowding it. This allows each piece of marine life to stand out and enhances the overall composition.
Texturing Techniques
When it comes to painting a captivating ocean scene, texture plays a pivotal role in bringing your artwork to life. It’s the difference between a flat image and one that seems to ripple with movement and depth. Think of texture as the secret ingredient that adds that extra layer of realism, enticing viewers to reach out and touch the canvas. So, how do you achieve this magical effect? Let’s dive into some effective texturing techniques that will elevate your ocean painting.
One of the most popular methods for adding texture is through the use of brush techniques. Different brushes can create various effects. For instance, a fan brush can produce soft, feathery strokes that mimic the look of ocean foam. On the other hand, a stiff-bristled brush can create more pronounced textures that resemble rocks or waves crashing onto the shore. Experimenting with different brushes can lead to delightful surprises in your artwork.
Another technique to consider is the use of a palette knife. This tool can be a game-changer when it comes to applying thick layers of paint. By using a palette knife, you can create sharp, jagged edges that represent the tumultuous nature of the ocean. Imagine the thrill of watching your canvas transform as you scrape and layer paint to mimic the rugged coastline or the frothy tops of waves! The tactile experience of using a palette knife can add a whole new dimension to your painting process.
Additionally, incorporating impasto techniques can enhance the dimensionality of your work. Impasto involves applying paint in thick layers, allowing the brush strokes to remain visible. This method can be particularly effective when painting the surface of the water, as it captures the light and shadow in a way that flat paint simply cannot. The result? A vibrant, lively ocean that seems to shimmer and dance under the sun.
You might also want to explore mixed media approaches. For example, consider adding sand or small pebbles to your paint mixture to create a textured shoreline. This not only adds a unique visual element but also invites viewers to engage with your art on a sensory level. Just imagine the surprise on their faces when they discover that the beach in your painting feels as real as the one they walk on!
As you experiment with these techniques, don’t forget the importance of layering. Each layer of paint can add depth and complexity to your ocean scene. Start with a base layer of color, then gradually build up using different textures and techniques. This process creates a rich tapestry of color and form that captures the essence of the ocean.
In conclusion, mastering texturing techniques is essential for any artist aiming to create a stunning ocean painting. Whether you prefer using brushes, palette knives, or mixed media, the key is to experiment and find what resonates with your artistic style. Remember, the ocean is a dynamic entity, and your painting should reflect that vitality. So grab your tools, let your creativity flow, and watch as your canvas transforms into a breathtaking seascape!
- What materials do I need to start painting an ocean scene?
You'll need acrylic or oil paints, various brushes, a palette knife, and a canvas. Don’t forget some water and a cloth for cleaning your brushes! - How do I create realistic waves in my painting?
Focus on using varying shades of blue and white to depict the waves. Use a fan brush for the foam and practice layering to create depth. - Can I use other materials for texture?
Absolutely! Consider adding sand, small stones, or even fabric to your canvas for a unique texture that enhances your ocean scene.
Frequently Asked Questions
- What materials do I need to paint an ocean scene?
To create a stunning ocean painting, you'll need high-quality acrylic or oil paints, a variety of brushes (flat, round, and detail brushes), a canvas or canvas board, and a palette for mixing colors. Don't forget to have some water and paper towels handy for cleaning your brushes!
- How do I mix the right colors for the ocean?
Mixing ocean colors is all about understanding the primary colors. Start with blues and greens as your base, then add whites for highlights and darker shades for depth. Experiment with different ratios until you find the perfect combination that captures the essence of the ocean.
- What techniques can I use to create depth in my painting?
Layering is key to adding depth. Start with a base layer of color and gradually build up with lighter and darker tones. Use glazing techniques to enhance transparency, allowing the underlying colors to show through and create a three-dimensional effect.
- How can I paint realistic reflections on water?
To achieve realistic reflections, first, observe how light interacts with water. Use a lighter version of the color you see in the water and apply it in a horizontal manner. Remember to soften the edges to mimic the way reflections blur and blend into the surface.
- What are some tips for depicting water movement?
Capturing water movement requires a good understanding of wave dynamics. Use quick, sweeping brush strokes to depict waves and ripples. Pay attention to the direction of the waves and use varying shades to indicate light and shadow.
- How do I add details like foam and marine life?
For foam, use a dry brush technique with white paint to create texture and movement. When adding marine life, start with basic shapes and gradually add details. Keep them subtle to avoid overwhelming the scene, ensuring they complement the overall composition.
- What texturing techniques can enhance my ocean painting?
Texture can be achieved through various methods. Use palette knives for thick applications of paint to create waves and foam. You can also experiment with sponges or cloths to dab on texture. Each technique adds a unique touch to your artwork, making it more captivating.


