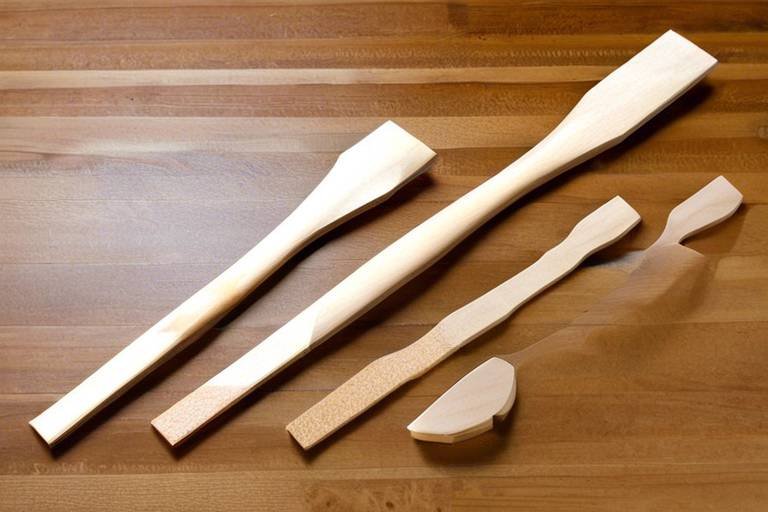
Creating a Wooden Serving Platter: A DIY Guide
Have you ever wanted to impress your guests with a stunning, handmade wooden serving platter? Well, you're in luck! This guide provides step-by-step instructions on how to craft a beautiful wooden serving platter, including material selection, design ideas, and finishing techniques to enhance your DIY project. Imagine the joy of serving your favorite snacks or appetizers on a platter that you created with your own hands. Not only does it serve a practical purpose, but it also becomes a conversation starter at any gathering. So, roll up your sleeves, grab your tools, and let's dive into the world of woodworking!
Selecting the appropriate type of wood is crucial for durability and aesthetics. You want a wood that not only looks good but can also withstand the wear and tear of serving food. Here are some popular wood options you might consider:
- Maple: Known for its hardness and fine grain, maple is a fantastic choice that resists scratches.
- Walnut: With its rich color and beautiful grain patterns, walnut adds a touch of elegance to your platter.
- Cherry: This wood darkens beautifully over time, giving your platter a warm, rich appearance.
- Beech: A great option for beginners, beech is affordable and easy to work with.
Each type of wood has its unique characteristics, so consider what will best suit your style and needs. Take your time to choose wisely; after all, the right wood is the foundation of your masterpiece!
Before starting your project, it's essential to gather all necessary tools and materials. This not only makes the process smoother but also ensures that you have everything at hand when creativity strikes. Here’s a breakdown of the essential items you'll need:
| Tool/Material | Purpose |
|---|---|
| Saw | For cutting the wood to your desired shape and size. |
| Sander | To smooth out rough edges and surfaces. |
| Wood Glue | To join pieces of wood securely. |
| Finish (Oil or Sealant) | To protect and enhance the beauty of the wood. |
With these tools and materials ready, you're set to embark on your woodworking journey with confidence!
Hand tools play a vital role in crafting your platter. They allow for precision and control, making your woodworking experience enjoyable and efficient. Some must-have hand tools include:
- Chisels: For detailed carving and shaping.
- Hand Saw: For making straight cuts.
- Clamps: To hold pieces together while the glue dries.
Investing in good quality hand tools will make a significant difference in the ease and quality of your work. Think of them as your trusty sidekicks in your DIY adventure!
Choosing the right saw is crucial for achieving clean cuts. A few options to consider are:
- Table Saw: Ideal for making precise cuts quickly.
- Jigsaw: Perfect for curved cuts and intricate designs.
- Hand Saw: A classic choice for those who prefer a more hands-on approach.
Each saw has its strengths, so think about the design of your platter and what will work best for you.
Sanding is essential for a smooth finish. A good sander can save you hours of work and frustration. Consider using:
- Orbital Sander: Great for covering large areas quickly.
- Detail Sander: Perfect for getting into tight corners and edges.
Finishing tools, like brushes and rags, will also be essential for applying your chosen finish to the platter.
Power tools can significantly speed up the process and enhance your woodworking experience. Some power tools to consider include:
- Router: For adding decorative edges.
- Drill: For making holes for handles or decorative elements.
While hand tools are great for precision, power tools can help you tackle larger projects with ease. Just remember to prioritize safety when using them!
Design is key to creating a unique serving platter. Think about what will best suit your style and needs. Do you prefer a classic round shape, or are you leaning towards something more modern and angular? The shape and size of your platter will impact its functionality and aesthetics.
Choosing the right shape and size impacts functionality and aesthetics. Popular shapes include:
- Round: Great for serving cheese or fruit.
- Rectangular: Ideal for appetizers or main courses.
- Square: A contemporary option that stands out.
Consider what you plan to serve on your platter to help guide your decision. The right shape can make all the difference in how your food is presented!
Personalization can elevate your platter from ordinary to extraordinary. Think about engraving your initials, painting a design, or even inlaying a decorative element. These personal touches not only make your platter unique but also reflect your style and personality.
A proper finish protects your platter and enhances its beauty. Whether you choose to oil or seal your platter, the finishing process is crucial for longevity and aesthetics.
Oiling is a crucial step in finishing your platter. Using food-safe oils, like mineral oil or walnut oil, not only protects the wood but also brings out its natural beauty. Apply the oil generously with a clean cloth, and let it soak in for a few hours before wiping off any excess.
Sealing your platter protects it from moisture and wear. Consider using a food-safe sealant to ensure your platter remains beautiful and functional over time. Apply it according to the manufacturer's instructions, and be sure to allow it to cure fully before using your platter.
Proper care extends the life of your wooden serving platter. Regular maintenance ensures that it remains a cherished piece in your kitchen for years to come.
Cleaning your wooden platter requires special care. Avoid soaking it in water; instead, wipe it down with a damp cloth and mild soap. For tough stains, a sprinkle of baking soda can work wonders. Always dry it immediately to prevent warping.
Storing your platter correctly is essential for its longevity. Keep it in a dry place away from direct sunlight to prevent cracking or fading. If possible, store it flat to avoid warping.
Once your platter is complete, it's time to showcase it! Whether you're hosting a dinner party or a casual gathering, your handmade platter deserves to shine.
Serving food on your platter can be an art. From cheese boards to appetizers, the possibilities are endless. Arrange a colorful assortment of fruits, cheeses, and meats for a visually appealing display that will impress your guests.
A handmade wooden platter makes a thoughtful gift. Consider wrapping it with a beautiful ribbon or pairing it with a selection of gourmet snacks for a unique present that friends and family will cherish.
Q: What type of wood is best for a serving platter?
A: Woods like maple, walnut, and cherry are excellent choices due to their durability and aesthetic appeal.
Q: How do I clean my wooden platter?
A: Clean your platter with a damp cloth and mild soap. Avoid soaking it in water.
Q: Can I use my platter for hot foods?
A: It's best to avoid placing hot foods directly on your wooden platter to prevent damage.
Q: How often should I oil my wooden platter?
A: Oil your platter every few months or whenever it looks dry to keep it looking its best.
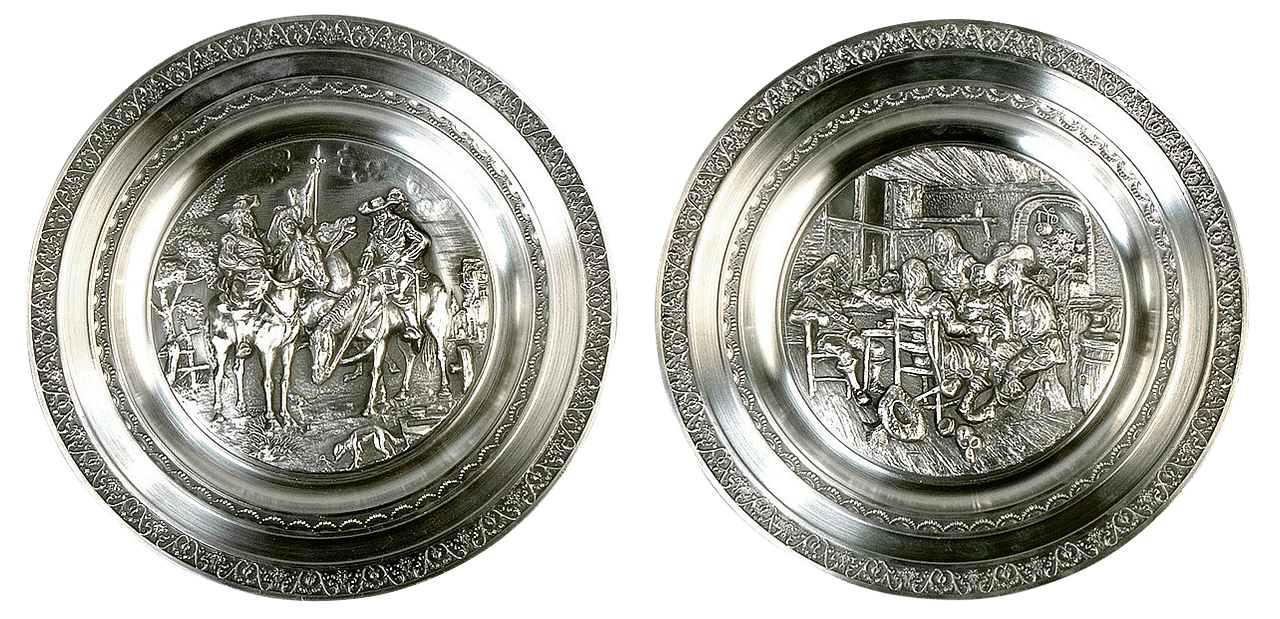
Choosing the Right Wood
When it comes to crafting a wooden serving platter, the choice of wood is not just a matter of aesthetics; it’s a critical decision that impacts both the durability and functionality of your creation. Different types of wood come with their unique characteristics, and understanding these can help you select the perfect material for your platter. For instance, hardwoods like maple and walnut are renowned for their strength and resistance to wear, making them ideal for kitchen use. On the other hand, softer woods, such as pine, may be easier to work with but can be more susceptible to scratches and dents.
Let’s break down some popular wood options to give you a clearer picture:
| Type of Wood | Characteristics | Best Uses |
|---|---|---|
| Maple | Hard, durable, and resistant to moisture. | Ideal for cutting boards and serving platters. |
| Walnut | Rich color, strong, and has a beautiful grain. | Perfect for decorative platters and high-end kitchenware. |
| Pine | Soft, lightweight, and easy to carve. | Great for beginners and decorative pieces. |
| Cherry | Beautiful reddish hue, ages well, and has a fine grain. | Excellent for both functional and decorative items. |
In addition to the type of wood, consider the grain pattern and color, as these elements will contribute to the overall look of your platter. For example, if you want a dramatic effect, you might opt for a wood with a pronounced grain, like oak. Alternatively, if you prefer a more subtle appearance, a fine-grained wood like birch could be your best bet.
Moreover, you should also think about the sustainability of the wood you choose. Opting for reclaimed wood or wood sourced from sustainable forests can add an eco-friendly touch to your project while also telling a story of its own. This not only enhances the beauty of your platter but also aligns your crafting with responsible practices.
Ultimately, the right wood for your serving platter should resonate with your personal style and the intended use of the platter. Take your time to visit local lumberyards or specialty woodworking stores to feel the wood grain and observe the colors up close. This hands-on approach will help you make a choice that you will be proud of for years to come.
Q: What is the best wood for a serving platter?
A: Hardwoods like maple and walnut are excellent choices due to their durability and resistance to wear.
Q: Can I use softwood for a serving platter?
A: While softwoods like pine can be used, they are more prone to scratches and may not last as long as hardwoods.
Q: How do I ensure the wood is food-safe?
A: Always choose food-safe finishes and oils, and ensure any wood you select is untreated and free from harmful chemicals.
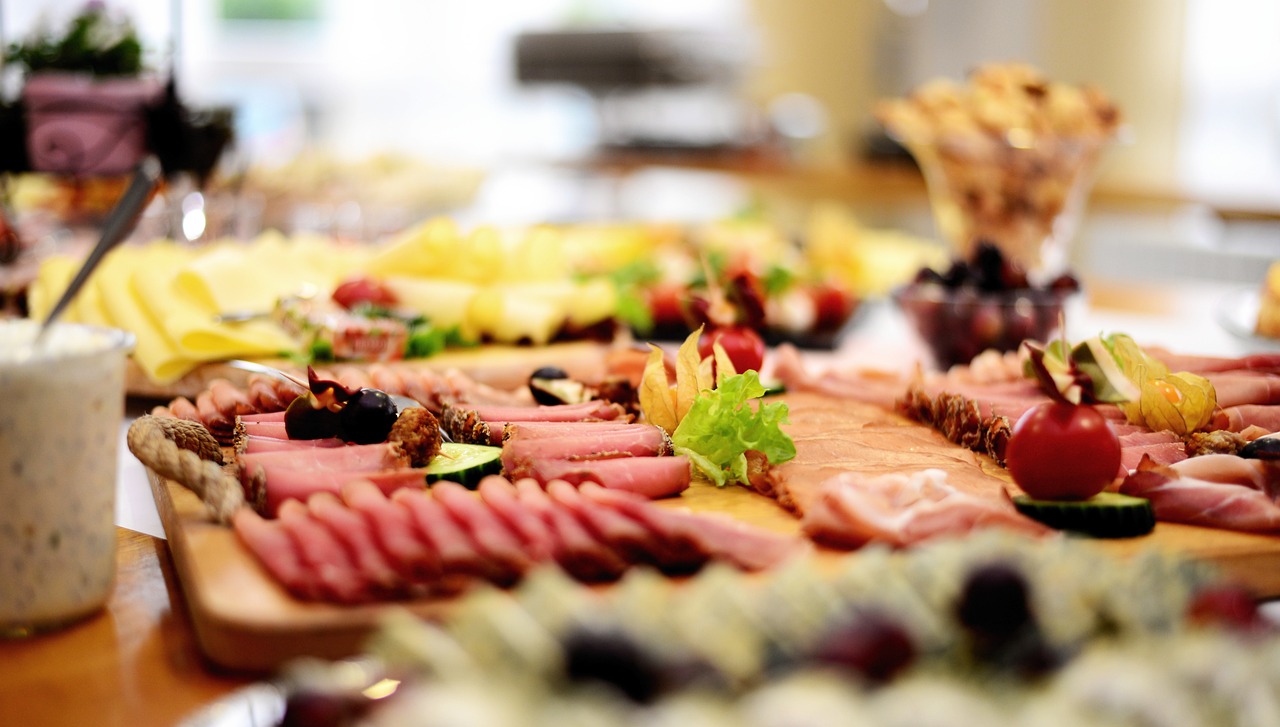
Tools and Materials Needed
Before diving into the exciting world of crafting your own wooden serving platter, it's essential to gather all the necessary tools and materials. Think of this step as laying the foundation for your masterpiece; without it, the entire project could crumble like a poorly made sandcastle. Having the right tools not only makes the process smoother but also ensures that your platter turns out beautifully. So, let's take a closer look at what you'll need to get started.
First and foremost, you'll need some essential hand tools. These are the backbone of woodworking and will help you achieve precision in your cuts and designs. Consider incorporating the following:
- Measuring Tape: Accurate measurements are crucial. A good measuring tape will ensure that your cuts are precise.
- Square: This tool helps you check the right angles, ensuring that your platter is symmetrical.
- Pencil: For marking your cuts and designs, a simple pencil will do the trick.
Next up are the saws and cutters. The type of saw you choose can significantly impact the quality of your cuts. For a wooden serving platter, a jigsaw or a bandsaw is often recommended because they allow for intricate designs and curves. If you're feeling adventurous, a scroll saw can also add unique patterns to your platter. Remember, clean cuts lead to a professional finish!
After cutting, you'll need to smooth out those edges and surfaces, and that's where sanders come into play. A random orbital sander is a fantastic choice for beginners, as it is easy to use and provides a smooth finish. Additionally, you'll want to have a variety of sandpaper grits on hand, ranging from coarse to fine, to achieve the desired smoothness.
Now, let’s not forget about the finishing tools! A good finish can elevate your platter from ordinary to extraordinary. You'll need food-safe oils, such as mineral oil or walnut oil, to nourish the wood. A brush or lint-free cloth will help you apply these finishes evenly. If you wish to seal your platter for added protection, consider using a food-safe sealant.
For those who prefer to speed up the process, power tools can be a game changer. A router can help you create beautiful edges and grooves, while a table saw can quickly cut larger pieces of wood with precision. Just remember to always prioritize safety when using power tools; wear protective glasses and follow the manufacturer's instructions.
Here's a quick summary of the tools and materials you'll need:
| Tool/Material | Purpose |
|---|---|
| Measuring Tape | For accurate measurements |
| Square | To check angles |
| Pencil | For marking cuts |
| Saws (Jigsaw, Bandsaw) | For cutting wood |
| Random Orbital Sander | For smoothing surfaces |
| Food-safe Oils | For finishing the wood |
| Router | For decorative edges |
With all these tools and materials at your disposal, you're now ready to embark on your DIY journey of creating a stunning wooden serving platter. Remember, the right preparation will not only make the process enjoyable but also ensure that your final product is a true reflection of your creativity and craftsmanship.
Essential Hand Tools
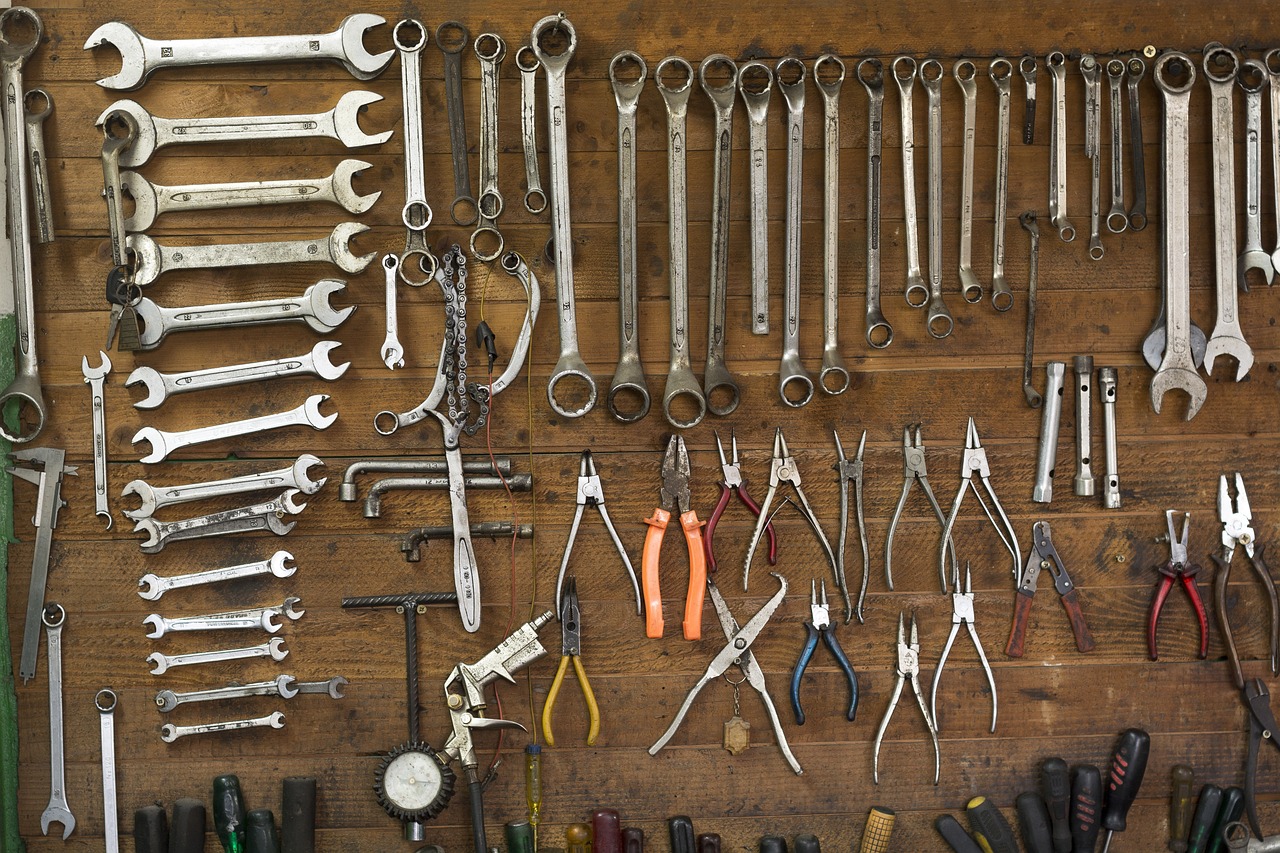
When it comes to crafting your own wooden serving platter, having the right hand tools is like having the perfect ingredients for a delicious recipe. Each tool plays a crucial role in ensuring your project turns out beautifully and efficiently. Whether you're a seasoned woodworker or a novice just starting out, investing in a few essential hand tools can make all the difference in your woodworking experience.
First and foremost, a sharp chisel is indispensable. A good chisel allows for precise cuts and helps you shape the wood with finesse. Think of it as your sculptor's tool, carving out the details that make your platter unique. Pair it with a reliable hand saw, which will enable you to cut your wood to the desired size. There are various types of saws available, such as the traditional panel saw or the more modern coping saw, each suited for different tasks. Choosing the right saw can be the difference between a clean cut and a ragged edge.
Next up is a block plane. This tool is perfect for smoothing the edges of your platter, giving it that polished look. Imagine running your fingers over a beautifully finished surface; a block plane helps you achieve that smoothness. Additionally, a ruler or a tape measure is essential for accuracy. You wouldn't bake a cake without measuring the ingredients, right? The same principle applies here; precise measurements ensure your platter is not only beautiful but functional.
Lastly, don’t underestimate the importance of a wood file or sanding block. These tools are your best friends when it comes to finishing touches. After cutting and shaping your wood, you'll want to smooth out any rough patches. A wood file can help you get into those tricky corners, while a sanding block allows for even smoothing over larger areas. The result? A platter that feels as good as it looks!
To summarize, here are the essential hand tools you should consider for your wooden serving platter project:
- Sharp Chisel
- Hand Saw
- Block Plane
- Ruler or Tape Measure
- Wood File or Sanding Block
With these tools in hand, you're well on your way to creating a stunning wooden serving platter that not only showcases your craftsmanship but also serves as a functional piece in your home. So, gather your tools, and let’s get started on this exciting DIY journey!
Q: Can I use any type of wood for my serving platter?
A: While you can technically use any wood, it's best to choose hardwoods like maple, walnut, or cherry for durability and aesthetics. Avoid softwoods, as they can dent easily.
Q: How do I ensure my platter is food-safe?
A: Use food-safe finishes like mineral oil or beeswax to treat your platter. Always verify that any products you use are labeled as food-safe.
Q: What should I do if my platter gets scratched?
A: Light scratches can often be sanded out. For deeper scratches, you might need to apply a bit of finish again after sanding.
Q: How can I personalize my platter?
A: You can engrave your platter, paint it, or even use inlays to add a unique touch that reflects your style.
Saws and Cutters
When it comes to crafting your wooden serving platter, selecting the right saw or cutter is absolutely vital. The precision of your cuts can make the difference between a stunning piece and a project that feels rushed or poorly executed. There are several types of saws that you might consider, each with its own unique advantages. For instance, a table saw is perfect for making straight cuts with speed and accuracy, while a jigsaw excels at cutting curves and intricate designs.
Let’s break it down a bit further. If you’re aiming for clean, straight edges, a table saw or a circular saw will be your best friends. These saws allow for rapid cutting of larger pieces, which can be especially helpful if you’re working with thicker wood. On the other hand, if your design includes rounded edges or unique shapes, then a jigsaw is the way to go. Its versatility makes it a great tool for those creative flourishes that can really elevate your platter.
Here’s a quick overview of some popular saw types that you might consider:
| Type of Saw | Best For |
|---|---|
| Table Saw | Long, straight cuts; ideal for larger pieces |
| Circular Saw | Versatile for various cuts; portable and easy to use |
| Jigsaw | Curved cuts and intricate designs |
| Band Saw | Curved and irregular shapes; resawing lumber |
In addition to these saws, a router can also be a fantastic tool to consider. Routers can help you add decorative edges to your platter, giving it a professional finish that will impress your guests. Plus, they’re quite user-friendly once you get the hang of them. Just remember to practice on scrap wood before diving into your main project.
Ultimately, the choice of saws and cutters will depend on your specific design and the type of wood you’re using. Don’t forget to prioritize safety; always wear protective gear, and ensure your workspace is clear. With the right tools in hand, you’ll be well on your way to creating a beautiful wooden serving platter that showcases your craftsmanship.
- What type of wood is best for a serving platter? Hardwoods like maple, walnut, and cherry are excellent choices due to their durability and aesthetic appeal.
- Can I use a jigsaw for straight cuts? While a jigsaw is primarily designed for curves, it can be used for straight cuts with the help of a straight edge or guide.
- How do I ensure my cuts are accurate? Always measure twice and cut once. Using a miter saw or table saw can also help achieve more precise cuts.
Sanders and Finishing Tools
When it comes to achieving that perfectly smooth finish on your wooden serving platter, having the right sanders and finishing tools is crucial. Think of sanding as the final polish on a diamond; it can truly make or break the visual appeal of your project. There are various types of sanders available, each serving a specific purpose, and understanding their functions will help you make an informed choice.
For starters, orbital sanders are a fantastic choice for general sanding tasks. They are easy to use and provide a smooth finish without leaving swirl marks, which is essential for a serving platter that will be seen by guests. On the other hand, if you’re dealing with intricate designs or tight corners, a detail sander can be incredibly helpful. Its small size allows you to get into those hard-to-reach areas, ensuring that every part of your platter is beautifully finished.
Another tool worth mentioning is the belt sander. This powerhouse is perfect for removing material quickly, making it ideal for initial shaping or when working with rough lumber. However, it’s important to use it carefully, as it can easily remove too much wood if not handled properly.
Once you've sanded your platter to perfection, the next step is applying a finish to protect the wood and enhance its natural beauty. Here are a few finishing tools and techniques you might consider:
- Brushes: A high-quality brush is essential for applying stains and finishes evenly.
- Rags: Soft, lint-free rags are perfect for wiping off excess stain and applying oil finishes.
- Sprayers: For those who prefer a faster application, a sprayer can deliver a fine mist of finish, ensuring an even coat.
In addition to these tools, it’s important to choose the right type of finish for your platter. Food-safe oils, such as mineral oil or tung oil, are great options as they not only protect the wood but also enhance its grain. Sealing your platter with a polyurethane finish can provide extra durability, especially if you plan to use it frequently.
In conclusion, investing in quality sanders and finishing tools is essential for creating a beautiful wooden serving platter. By choosing the right tools and techniques, you can ensure that your platter not only looks stunning but also stands the test of time. Remember, the finishing touches are what will elevate your DIY project from good to truly exceptional.
Q: What type of sander is best for beginners?
A: An orbital sander is highly recommended for beginners due to its ease of use and ability to provide a smooth finish without much risk of damaging the wood.
Q: How often should I sand my wooden platter?
A: It’s a good practice to sand your platter after each use, especially if it shows signs of wear or if food stains have set in. Regular maintenance will keep it looking its best.
Q: Can I use regular paint on my platter?
A: It’s best to use food-safe finishes and paints specifically designed for kitchenware to ensure safety and longevity.
Power Tools for Efficiency
When it comes to woodworking, especially in crafting a stunning wooden serving platter, having the right tools can make all the difference. Power tools can significantly enhance your efficiency, allowing you to achieve professional results with less effort. Imagine cutting through wood like a hot knife through butter; that’s the magic of power tools! They not only save time but also ensure precision in your cuts and finishes, which is essential for a project that you want to showcase.
Let’s dive into some of the most useful power tools you might consider for your platter-making project:
- Table Saw: A table saw is a powerhouse for making straight cuts. It’s perfect for ripping boards to the desired width, ensuring uniformity in your platter’s size.
- Router: This tool is fantastic for adding decorative edges or grooves to your platter. With a router, you can create beautiful designs that elevate the aesthetics of your serving piece.
- Orbital Sander: An orbital sander is essential for achieving that smooth finish you desire. It minimizes the risk of scratches and swirl marks, leaving your wood looking polished and professional.
- Jigsaw: If you’re opting for a unique shape for your platter, a jigsaw is your best friend. It allows for intricate cuts and curves that can really make your platter stand out.
Using these power tools can transform your woodworking experience. However, it’s important to remember that while power tools can make the job easier, they also require a level of respect and safety precautions. Always wear safety goggles and ear protection, and ensure your workspace is organized to avoid accidents.
In conclusion, investing in the right power tools not only boosts your efficiency but also enhances the overall quality of your wooden serving platter. So, whether you’re a seasoned woodworker or a curious beginner, these tools are worth considering for your next DIY project.
Q: Do I need to be an expert to use power tools?
A: Not at all! Many power tools are designed to be user-friendly. Start with the basics and gradually increase your skill level as you become more comfortable.
Q: Are there any safety tips I should follow when using power tools?
A: Yes! Always wear protective gear like goggles and ear protection, keep your workspace clean, and read the manuals for each tool before use.
Q: Can I use hand tools instead of power tools?
A: Absolutely! Hand tools can be just as effective, though they may require more time and effort. It ultimately depends on your comfort level and the tools you have available.
Q: What is the best power tool for beginners?
A: A good starting point is an orbital sander or a jigsaw. These tools are versatile and can be used for various projects, making them ideal for beginners.
Designing Your Platter
When it comes to crafting a wooden serving platter, design is where the magic truly happens. It's not just about functionality; it's about creating a piece that speaks to your personal style and enhances your dining experience. Think of your platter as a canvas, ready to showcase your culinary creations. The first step in the design process is to consider the shape and size that best fits your needs and aesthetic. Popular shapes like round, rectangular, and oval each offer unique advantages. For instance, a round platter is perfect for serving cheese and charcuterie, while a rectangular one is ideal for appetizers or main dishes.
Next, let your imagination run wild with personal touches. This could be anything from engraving a meaningful quote to painting a vibrant design that reflects your personality. You might even consider inlaying materials like resin or colorful wood to create a stunning visual effect. Remember, the goal is to make your platter not just a serving piece, but a conversation starter at your gatherings.
To help you visualize your design, here’s a simple table outlining some popular platter shapes along with their practical uses:
| Shape | Best For |
|---|---|
| Round | Cheese boards, fruits |
| Rectangular | Appetizers, main courses |
| Oval | Salads, bread |
| Square | Desserts, snacks |
As you brainstorm your design, consider how your platter will be used. Will it be a centerpiece at family gatherings, or will it serve as a functional piece in everyday meals? This will guide not only the size and shape but also the decorative elements you choose to incorporate. For example, if you plan to use it for casual gatherings, a rustic finish might be more appropriate than a polished, modern look.
In conclusion, designing your platter is an exciting opportunity to express your creativity. Whether you opt for a sleek, minimalist design or a vibrant, intricate piece, remember that this platter will not only serve food but also showcase your personality and style. So, take your time, experiment with different ideas, and enjoy the process of bringing your unique vision to life.
Q: What is the best wood for making a serving platter?
A: Hardwoods like walnut, maple, and cherry are excellent choices due to their durability and beautiful grain patterns.
Q: Can I use my platter for hot foods?
A: It's best to avoid placing very hot foods directly on wooden platters to prevent warping or damage. Instead, use a heat-resistant mat.
Q: How do I maintain my wooden platter?
A: Clean your platter with mild soap and water, avoid soaking it, and regularly apply food-safe mineral oil to keep the wood hydrated.
Q: Is it safe to use paint on my serving platter?
A: Only use food-safe paints or finishes if you choose to paint your platter. Always ensure the surface is sealed properly before serving food.
Shape and Size Considerations
When it comes to crafting your wooden serving platter, shape and size are crucial factors that can significantly impact both functionality and aesthetics. Think of your platter as a blank canvas; the shape you choose will dictate not just how it looks, but also its usability during gatherings. For instance, a round platter can be perfect for serving appetizers, while a rectangular one might be more suited for larger dishes. The size, on the other hand, should be dictated by your intended use. Are you planning to serve a small gathering or a large feast? A large platter can hold more food, but it may also require more storage space, so consider your kitchen's layout and storage options.
Here are some popular shapes and their practical uses:
- Round Platters: Ideal for serving cheese and crackers or for a fruit display, these platters encourage sharing and can easily accommodate a variety of items.
- Rectangular Platters: Great for serving meats, fish, or a selection of appetizers, these platters offer a more formal presentation and can line up neatly on a buffet table.
- Square Platters: A modern twist on the traditional serving platter, square shapes can be used for a variety of foods and add a contemporary flair to your dining experience.
- Oval Platters: These are versatile and can be used for everything from salads to main courses, providing a unique shape that stands out.
Additionally, consider the dimensions of your platter. A platter that is too small may limit your serving options, while one that is excessively large could become cumbersome. A good rule of thumb is to aim for a platter that is at least 12 to 14 inches in diameter for round shapes or around 16 by 12 inches for rectangular shapes. This size allows for ample space without overwhelming your table setting.
Ultimately, the shape and size of your platter should reflect both your personal style and your entertaining needs. Don't hesitate to experiment with different shapes or even create a set of platters in varying sizes. This way, you'll always have the right serving piece on hand, no matter the occasion!
Q: What is the best wood to use for a serving platter?
A: Hardwoods like maple, walnut, and cherry are excellent choices due to their durability and attractive grain patterns.
Q: Can I use my wooden platter for hot foods?
A: It's best to avoid serving hot foods directly on wooden platters, as the heat can warp the wood. Instead, use a heat-resistant liner.
Q: How do I clean my wooden serving platter?
A: Hand wash your platter with mild soap and warm water, then dry it immediately. Avoid soaking it or placing it in the dishwasher.
Q: How often should I oil my wooden platter?
A: Oiling your platter every few months will help maintain its beauty and prevent it from drying out.
Adding Personal Touches
When it comes to creating your wooden serving platter, the magic often lies in the personal touches you incorporate. These unique elements not only enhance the visual appeal but also make the platter a true reflection of your personality and style. Think of your platter as a canvas, ready to showcase your creativity! You can opt for engraving, painting, or even inlaying designs that resonate with you. Each choice adds a layer of meaning and uniqueness to your piece.
Engraving is a fantastic way to add a personal touch. Imagine having your family name or a meaningful quote etched into the wood. This not only makes your platter special but also transforms it into a cherished heirloom. You can use a wood-burning tool to create intricate designs or simple initials that tell your story. The beauty of engraving is that it can be as elaborate or as minimalistic as you desire, allowing you to express your creativity freely.
If you're feeling particularly artistic, why not consider painting your platter? Using food-safe paints, you can create vibrant designs that pop. From floral patterns to geometric shapes, the possibilities are endless! Painting allows for a burst of color and personality, making your platter a conversation starter at gatherings. Just ensure that the paint is safe for food contact, as you want your beautiful creation to be functional as well.
Another exciting option is inlaying, where you can embed different materials into the wood to create stunning designs. Think about using colorful resin, or even small pieces of glass or stone. This technique can give your platter a unique texture and depth that truly sets it apart. However, inlaying requires a bit more skill and precision, so if you're up for the challenge, it can lead to breathtaking results!
Ultimately, the key is to let your imagination run wild. Consider what represents you or your loved ones, and how you can translate that into your platter. Whether it’s a simple design or a complex work of art, your personal touches will ensure that your serving platter is not just a kitchen accessory, but a statement piece that carries your story. So grab your tools, unleash your creativity, and make that platter uniquely yours!
- What type of wood is best for a serving platter?
Hardwoods like maple, walnut, or cherry are excellent choices due to their durability and beautiful grain patterns.
- Can I use my platter for hot foods?
It's best to avoid placing hot items directly on your wooden platter to prevent warping and damage.
- How do I clean my wooden serving platter?
Use warm soapy water and a soft sponge, then dry immediately. Avoid soaking it in water.
- How often should I oil my platter?
Oiling your platter every few months will help maintain its beauty and prevent drying out.

Finishing Techniques
When it comes to creating a stunning wooden serving platter, the finishing techniques you choose can make all the difference. Not only do these techniques enhance the beauty of your platter, but they also protect it from the ravages of time and use. Think of finishing as the cherry on top of your woodworking sundae – it’s what elevates your project from good to truly exceptional. In this section, we’ll dive into the various finishing methods available, focusing on oiling and sealing, ensuring your platter not only looks great but stands the test of time.
First up, let’s talk about oiling. Oiling your platter is a crucial step that not only enhances the wood’s natural grain but also provides a protective barrier against moisture and food stains. When selecting an oil, it’s vital to choose one that is food-safe, especially since your platter will be used for serving food. Common options include mineral oil, walnut oil, and tung oil. Each of these oils has its unique characteristics:
| Type of Oil | Characteristics |
|---|---|
| Mineral Oil | Odorless, tasteless, and affordable; easy to apply and maintain. |
| Walnut Oil | Rich color enhances wood grain; not suitable for those with nut allergies. |
| Tung Oil | Provides a durable finish; takes longer to dry but offers excellent protection. |
To apply the oil effectively, you’ll want to follow a simple process. Start by ensuring your platter is clean and dry. Use a soft cloth to apply a generous amount of oil, working it into the wood in the direction of the grain. Allow the oil to soak in for at least 30 minutes, then wipe off any excess. For best results, repeat this process several times, especially for new wood, to build up a protective layer that will keep your platter looking fabulous.
Now, let’s move on to sealing. Sealing your platter is essential to protect it from moisture, which can warp the wood or lead to unsightly stains. There are various sealants available, each offering different levels of protection and finishes. Some popular options include polyurethane, shellac, and beeswax blends. Each of these sealants has its pros and cons:
- Polyurethane: Provides a tough, waterproof finish; available in matte or glossy options.
- Shellac: Offers a warm, natural look; not as durable as polyurethane but easier to repair.
- Beeswax Blend: Creates a soft sheen; natural and easy to apply, but requires more frequent reapplication.
To seal your platter, start with a clean and oiled surface. Apply the sealant using a brush or cloth, ensuring an even coat. Allow it to dry according to the manufacturer’s instructions, and consider applying multiple coats for added protection. Remember, a well-sealed platter is not only beautiful but also functional, allowing you to use it confidently for years to come.
In conclusion, the finishing techniques you choose for your wooden serving platter can greatly influence its appearance and longevity. By carefully selecting the right oils and sealants, and applying them correctly, you can create a stunning piece that will be the envy of your friends and family. So, roll up your sleeves, and let the finishing begin!
Q1: How often should I oil my wooden serving platter?
A1: It's recommended to oil your platter every few months or whenever it appears dry. Regular maintenance will keep the wood nourished and looking its best.
Q2: Can I use my platter for hot foods?
A2: While wooden platters are great for serving cold and room-temperature foods, avoid placing hot items directly on them as heat can damage the wood.
Q3: What should I do if my platter gets stained?
A3: If your platter gets stained, try cleaning it gently with a mixture of baking soda and water. For stubborn stains, sanding the affected area lightly can help.
Q4: Is it safe to put my wooden platter in the dishwasher?
A4: No, it is not safe to put wooden platters in the dishwasher. Hand wash them with mild soap and water, and dry them immediately to prevent warping.
Oiling Your Platter
Oiling your wooden serving platter is not just a finishing touch; it's a crucial step that enhances both the beauty and longevity of your creation. When you apply a food-safe oil, you're essentially nourishing the wood, allowing it to maintain its natural luster while also providing a protective barrier against moisture and stains. Think of it as giving your platter a refreshing drink that keeps it hydrated and vibrant!
There are several types of oils you can use, each with its unique properties. Some popular choices include:
- Mineral Oil: This is a non-toxic option that penetrates the wood well, providing excellent moisture resistance. It's commonly used for kitchen items.
- Walnut Oil: A natural oil that hardens upon exposure to air, walnut oil offers a beautiful finish but should be avoided by those with nut allergies.
- Tung Oil: Known for its durability and water resistance, tung oil creates a strong, protective layer, making it a great choice for high-use items.
To apply the oil effectively, start by ensuring that your platter is clean and dry. Use a soft cloth or paper towel to apply a generous amount of oil, rubbing it into the wood in the direction of the grain. This helps the oil soak in better and ensures an even finish. Allow the oil to penetrate for about 15-30 minutes, and then wipe off any excess with a clean cloth. For best results, repeat this process every few months, especially if you notice the wood starting to look dull or dry.
Remember, the goal of oiling is not only to protect your platter but also to enhance its natural beauty. The right oil can bring out the rich colors and grain patterns of the wood, making your serving platter a stunning centerpiece on your dining table. So, don't skip this step! It’s like giving your platter a spa day, ensuring it looks fabulous and lasts for years to come.
Here are some common questions about oiling wooden serving platters that might help you further:
- How often should I oil my platter? It's recommended to oil your platter every 1-3 months, depending on usage and how dry the wood appears.
- Can I use any oil for my platter? No, it’s crucial to use food-safe oils. Avoid using cooking oils like olive or vegetable oil as they can go rancid.
- What if my platter gets stained? If your platter gets stained, you can lightly sand the stained area and reapply oil to restore its appearance.
Sealing for Longevity
When it comes to creating a beautiful wooden serving platter, one of the most critical steps is sealing it properly. Sealing not only enhances the aesthetic appeal of your platter but also protects it from moisture, stains, and wear over time. Think of sealing as a protective armor that ensures your handcrafted piece remains stunning and functional for years to come. Without a good seal, your platter may absorb liquids, leading to warping, cracking, or even harboring bacteria. So, let's dive into the various sealing options available and how to apply them effectively.
There are several types of sealants you can choose from, each with its unique properties and benefits. Here’s a quick overview of some popular sealing options:
| Sealant Type | Benefits | Best For |
|---|---|---|
| Polyurethane | Durable and water-resistant | High-use items |
| Food-safe Mineral Oil | Natural and non-toxic | Serving platters |
| Beeswax | Moisture-repellent and adds shine | Low-use decorative pieces |
| Varnish | Hard finish and UV protection | Indoor items |
Choosing the right sealant is essential for the longevity of your wooden serving platter. For instance, if your platter will see a lot of action during family dinners or parties, a durable sealant like polyurethane might be your best bet. On the other hand, if you want a more natural option that's safe for food contact, food-safe mineral oil or beeswax can be excellent choices. The key is to ensure that whatever sealant you choose, it is compatible with food safety guidelines.
Applying the sealant is straightforward, but there are a few tips to keep in mind. Start by ensuring your platter is clean and completely dry. Use a clean cloth or a brush to apply the sealant evenly across the surface. It's often recommended to apply multiple thin coats rather than one thick coat. This approach not only ensures better absorption but also provides a more even finish. After applying each coat, allow sufficient drying time according to the manufacturer's instructions before applying the next one. Once you've reached your desired finish, let the platter cure for a few days before using it to ensure that the sealant has fully set.
In conclusion, sealing your wooden serving platter is not just a cosmetic enhancement; it's a crucial step in ensuring its longevity and functionality. By selecting the right sealant and applying it properly, you can enjoy your beautifully crafted platter for many gatherings to come, making it a cherished item in your kitchen.
- How often should I seal my wooden serving platter? It's a good practice to reseal your platter every 6-12 months, depending on its usage.
- Can I use regular varnish on my serving platter? No, make sure to use food-safe varnishes or sealants to ensure safety when serving food.
- What should I do if my platter gets stained? Try cleaning it with a mixture of baking soda and water. If the stain persists, you may need to sand and reseal the area.
Care and Maintenance
Caring for your wooden serving platter is essential to ensure it remains a cherished piece in your kitchen for years to come. Just like any beautiful item, a little love and attention can go a long way. First and foremost, it's important to clean your platter properly. Unlike plastic or metal, wood requires a gentler approach to maintain its integrity. A simple wash with warm, soapy water and a soft cloth is usually sufficient. Avoid soaking your platter or putting it in the dishwasher, as excessive moisture can warp the wood and compromise its structure.
After washing, it’s crucial to dry your platter immediately with a clean towel. Leaving it wet can lead to unwanted issues like mold or cracking. Think of your platter as a fine wine; it needs to breathe but also requires careful handling to preserve its quality. To maintain its beauty, consider applying a food-safe mineral oil every few months. This not only enhances the wood's natural color but also helps to create a protective barrier against stains and moisture.
When it comes to storage, keeping your platter in a dry, cool place is ideal. Avoid stacking heavy items on top of it, as this can lead to warping or dents. Instead, consider displaying it on a wall or a countertop as a decorative piece when not in use. Not only does this keep it safe, but it also showcases your craftsmanship to anyone who enters your kitchen.
To wrap it all up, here are some quick care tips to keep in mind:
- Clean with warm, soapy water and a soft cloth.
- Dry immediately after washing to prevent moisture damage.
- Apply food-safe mineral oil every few months.
- Store in a dry, cool place away from heavy items.
Q: Can I use my wooden platter for cutting?
A: It's best to avoid using your wooden platter as a cutting board. Instead, use it for serving to keep it in pristine condition.
Q: How do I remove stains from my wooden platter?
A: For tough stains, you can gently scrub the area with a mixture of baking soda and water. Rinse well and dry immediately.
Q: Is it safe to use my platter for hot foods?
A: While wooden platters can handle warm foods, avoid placing very hot items directly on the wood to prevent damage.
Q: How can I restore the shine to my platter?
A: Applying a thin layer of food-safe mineral oil can restore the shine and enhance the wood's natural beauty.
Cleaning Tips
Cleaning your wooden serving platter is more than just a quick rinse; it’s an essential part of maintaining its beauty and longevity. The first step is to avoid soaking the platter in water, as excessive moisture can warp the wood or cause it to crack. Instead, use a damp cloth to wipe down the surface, ensuring that you remove any food residue without subjecting the wood to unnecessary water exposure. For tougher stains or stuck-on food, a gentle scrub with a soft sponge and a mild dish soap can work wonders. Just remember to rinse the sponge thoroughly to avoid leaving soap residue behind.
After cleaning, it's important to dry your platter immediately with a soft towel. Leaving it to air dry can lead to unwanted moisture retention, which can compromise the integrity of the wood. Additionally, consider applying a food-safe mineral oil after cleaning to help maintain its natural sheen and protect it from future stains. This oil not only nourishes the wood but also creates a barrier against moisture and food particles.
For those who love to keep their platters looking pristine, here are a few to consider:
- Avoid Harsh Chemicals: Stick to natural cleaners or mild soaps to prevent damaging the wood.
- Use Baking Soda: For stubborn stains, a paste made from baking soda and water can gently lift grime without scratching the surface.
- Regular Maintenance: Regularly oil your platter to keep it hydrated and looking its best.
Lastly, always store your platter in a dry place, away from direct sunlight, as prolonged exposure can lead to fading and drying out. By following these cleaning tips, your wooden serving platter will not only remain functional but also a stunning centerpiece for years to come.
Here are some common questions regarding the care and maintenance of wooden serving platters:
| Question | Answer |
|---|---|
| Can I put my wooden platter in the dishwasher? | No, it's best to avoid the dishwasher as the heat and moisture can warp the wood. |
| How often should I oil my platter? | Every few weeks or whenever it looks dry is a good rule of thumb. |
| What should I do if my platter develops a smell? | Wash it with a mixture of vinegar and water, then dry it thoroughly and re-oil. |

Storage Recommendations
Storing your wooden serving platter correctly is crucial for preserving its beauty and functionality over time. Just like a fine wine needs the right conditions to age gracefully, your platter deserves a thoughtful storage approach. Here are some essential tips to keep in mind:
First and foremost, it's important to store your platter in a dry and cool environment. Excessive moisture can warp the wood and lead to mold growth, while extreme heat can cause cracking. Ideally, you should keep your platter in a cabinet or on a shelf away from direct sunlight, which can fade the wood's natural colors.
When it comes to positioning your platter, consider using a dedicated storage space where it won’t be piled under other dishes or utensils. This can prevent scratches and dents that could mar its surface. If you have multiple platters or wooden items, try to stack them with care or use dividers to keep them separated. This way, you can avoid any unwanted contact that might lead to damage.
Another great tip is to wrap your platter in a soft cloth or place it in a padded storage bag. This extra layer of protection can prevent dust accumulation and scratches while also providing cushioning against impacts. If you’re storing your platter for an extended period, consider applying a thin layer of food-safe mineral oil before wrapping it. This will help maintain the wood's moisture balance and keep it looking pristine.
Lastly, avoid storing your platter in areas with high humidity, such as near sinks or dishwashers. Instead, opt for a location that remains consistently dry. By following these simple storage recommendations, you’ll ensure that your wooden serving platter remains a cherished centerpiece in your kitchen for years to come.
- How often should I oil my wooden platter? It's recommended to oil your platter every few months or whenever it looks dry. This helps maintain its luster and prevents cracking.
- Can I put my wooden platter in the dishwasher? No, it's best to avoid dishwashers as the heat and moisture can damage the wood.
- What type of oil is best for my platter? Food-safe mineral oil is a popular choice, but you can also use walnut or coconut oil for a natural finish.
- How can I remove stains from my wooden platter? For minor stains, try using a mixture of baking soda and water to gently scrub the affected area, then rinse and dry thoroughly.
Showcasing Your Platter
Once your wooden serving platter is complete, it’s time to show off your hard work! Think of your platter as a blank canvas, ready to be adorned with delicious delights and presented to your guests. The way you showcase your platter can elevate any gathering, making it not just a functional item but a stunning centerpiece that sparks conversation. So, how can you make your platter the star of the show? Let’s dive into some creative ideas!
First off, consider the theme of your gathering. Whether it's a casual get-together, a formal dinner, or a festive holiday celebration, the items you choose to serve on your platter can set the mood. For instance, if you’re hosting a wine and cheese night, arrange a variety of cheeses, crackers, and fruits. Not only does this look visually appealing, but it also invites your guests to indulge in a delightful experience. Remember, presentation is key! Use different heights and colors to create an enticing display.
Another fun way to showcase your platter is by incorporating seasonal elements. During the fall, you might add small pumpkins or autumn leaves around your platter filled with roasted vegetables. In the summer, fresh herbs and vibrant fruits can complement a platter of grilled meats or seafood. This not only enhances the aesthetic but also ties your serving piece into the overall decor of your event.
Moreover, think about how you can use your platter for different types of food presentations. Here are a few serving ideas that can inspire you:
- Cheese Boards: Create an impressive cheese board with a variety of cheeses, nuts, dried fruits, and honey. The diversity in textures and flavors will surely wow your guests.
- Appetizer Displays: Arrange bite-sized appetizers like bruschetta, shrimp cocktails, or meatballs. This allows for easy snacking and encourages mingling.
- Fruit and Veggie Platters: A colorful assortment of fruits or vegetables not only looks fresh but also caters to health-conscious guests.
Lastly, don’t forget that your platter can also serve as a thoughtful gift. Imagine gifting a beautifully crafted wooden platter filled with homemade treats or a selection of gourmet snacks. This personal touch can make your gift memorable and cherished. Wrap it up with a lovely ribbon, and you’ve got a present that’s both functional and heartfelt.
Q: How do I clean my wooden serving platter?
A: To clean your wooden platter, simply wipe it down with a damp cloth and mild soap. Avoid soaking it in water and never put it in the dishwasher, as this can warp the wood.
Q: Can I use my platter for hot foods?
A: While wooden platters are generally safe for serving hot foods, it’s best to avoid placing extremely hot items directly on the wood to prevent damage.
Q: How do I maintain the finish of my platter?
A: To maintain your platter, regularly apply food-safe mineral oil to keep the wood hydrated and prevent cracking. Re-oiling every few months is recommended.
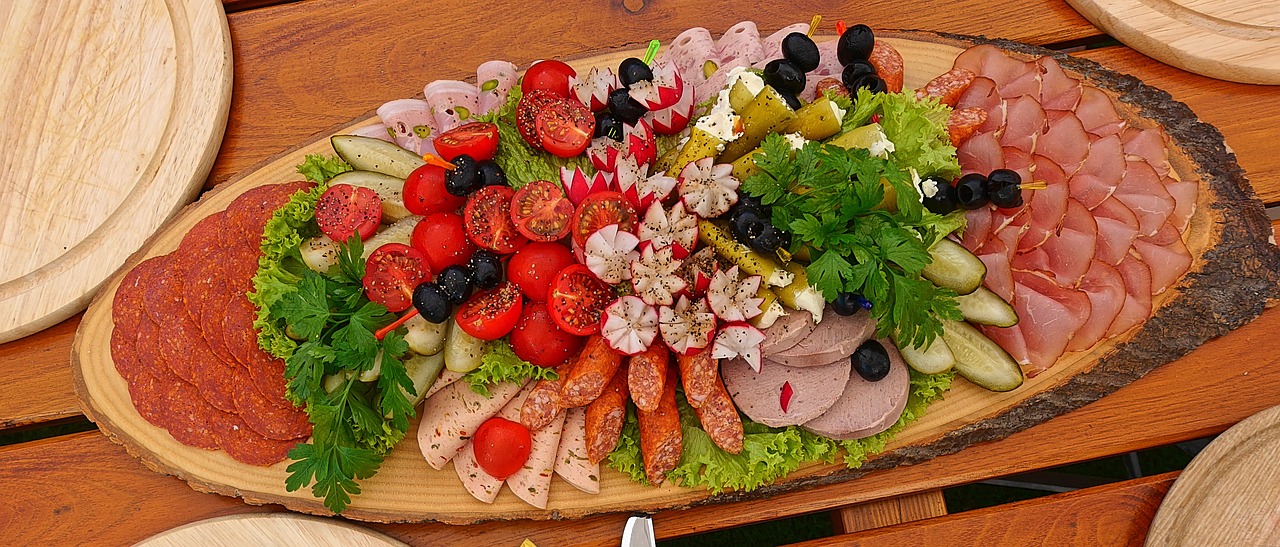
Serving Ideas
When it comes to showcasing your beautiful wooden serving platter, the possibilities are as vast as your imagination! This stunning piece isn’t just a functional item; it’s a statement of your style and creativity. Whether you’re hosting a casual get-together or a formal dinner party, your platter can be the star of the show. Think of it as a blank canvas waiting for your culinary masterpiece!
One of the most popular ways to utilize your serving platter is by creating a vibrant cheese board. Imagine an array of cheeses, from sharp cheddar to creamy brie, artfully arranged alongside a selection of fruits like juicy grapes and tart apples. You can even add some crunchy nuts and a drizzle of honey for that sweet touch. Not only does this make for an eye-catching presentation, but it also caters to various tastes, ensuring every guest finds something they love.
Another fantastic idea is to use your platter for appetizers. Picture a delightful spread of bite-sized treats: savory meatballs, stuffed mushrooms, and crispy spring rolls. You can create a theme for your platter, perhaps an Italian night with bruschetta and olives, or a Mediterranean vibe with hummus and pita chips. The key is to keep the colors and textures varied to create an inviting look that draws people in.
If you’re feeling particularly adventurous, consider using your platter for a dessert display. Layered cakes, assorted pastries, and fresh berries can turn your wooden platter into a sweet centerpiece. Just imagine the delight on your guests’ faces as they admire the beautiful arrangement before diving into the deliciousness!
For those who enjoy a more rustic approach, consider using your platter for a farm-to-table experience. Arrange seasonal vegetables, artisan bread, and dips like tzatziki or guacamole. This not only highlights the freshness of your ingredients but also promotes a healthy lifestyle, making your platter a conversation starter about sustainability and local produce.
Lastly, don’t forget about the versatility of your platter for serving drinks. You can use it to hold a selection of cocktails, wine glasses, or even a variety of craft beers. Pairing drinks with small snacks like popcorn or pretzels can elevate your hosting game, creating a well-rounded experience for your guests.
In summary, your wooden serving platter is more than just a surface; it’s a vessel for creativity and connection. So, the next time you prepare for a gathering, let your platter shine by serving up delightful arrangements that will not only please the palate but also the eyes. Happy serving!
Q: How do I clean my wooden serving platter after use?
A: To clean your wooden serving platter, simply wash it with warm, soapy water and a soft sponge. Avoid soaking it or putting it in the dishwasher, as this can damage the wood. After washing, dry it immediately with a towel and let it air dry completely.
Q: Can I use my platter for hot foods?
A: It's best to avoid serving very hot foods directly on your wooden platter, as this can warp the wood or cause it to crack. Instead, consider using a heat-resistant liner or serving hot foods in a separate dish placed on the platter.
Q: How often should I oil my wooden platter?
A: Oiling your wooden platter every few months is recommended, especially if you use it frequently. This helps to maintain its luster and protect it from moisture and stains. Use food-safe mineral oil or a specialized wood conditioner for the best results.
Q: Can I personalize my wooden platter?
A: Absolutely! You can engrave, paint, or inlay designs on your platter to make it uniquely yours. Just ensure that any materials used are food-safe, especially if you plan to serve food directly on it.
Gift Ideas
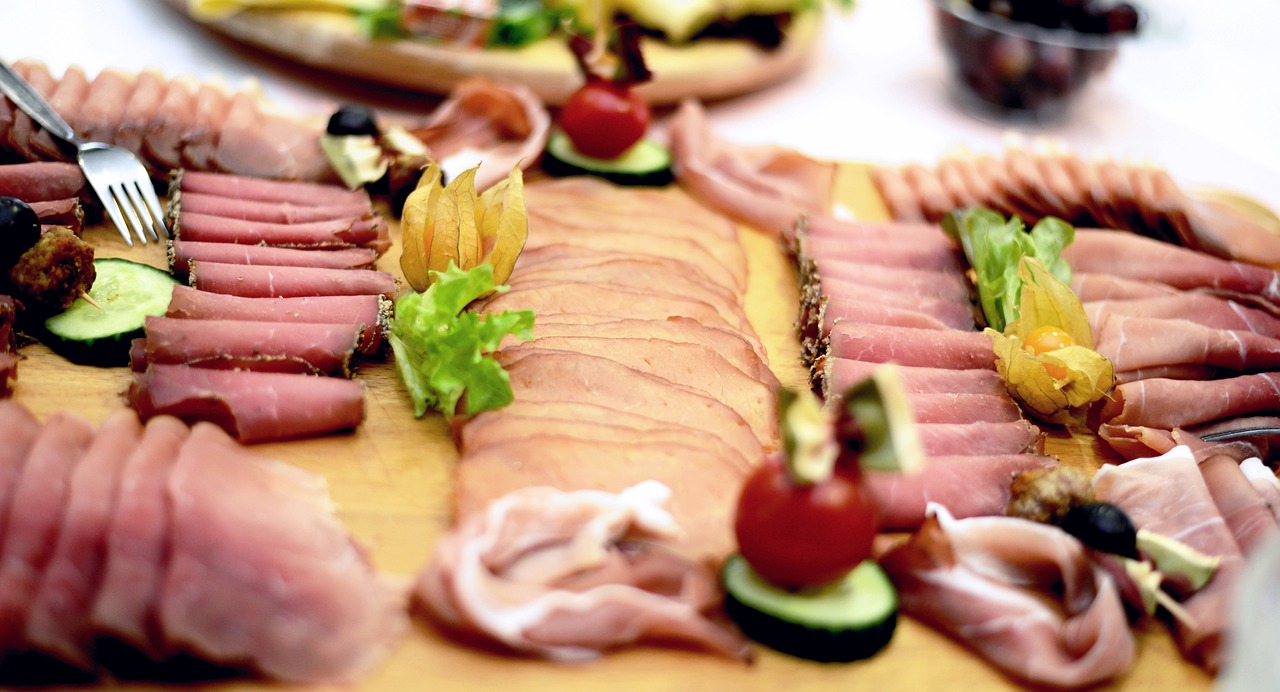
When it comes to gifting, a handmade wooden serving platter is not just a present; it’s a heartfelt gesture that speaks volumes about your thoughtfulness and creativity. Imagine the joy on your loved one's face when they unwrap a beautifully crafted platter that you poured your time and effort into! It’s truly a gift that keeps on giving, as it can be used for years to come during family gatherings, celebrations, or simply for a cozy dinner at home.
To make your platter even more special, consider personalizing it. Engraving a name, a special date, or a meaningful quote can transform your platter from a simple serving piece into a cherished keepsake. You might also think about pairing the platter with other items to create a delightful gift set. For example:
- Cheese and Wine Set: Include a selection of gourmet cheeses, a bottle of fine wine, and perhaps a cheese knife to create the ultimate entertaining package.
- Snack Board: Fill the platter with an assortment of snacks, such as nuts, dried fruits, and chocolates, making it a perfect gift for a friend who loves to host.
- Breakfast in Bed: Prepare a lovely breakfast spread with pastries, fruits, and coffee, all beautifully arranged on the platter for a delightful morning surprise.
Additionally, consider the occasion for which you are gifting the platter. For weddings, a personalized platter can serve as a stunning centerpiece at the reception, while for housewarming parties, it can be used to showcase the new homeowner's culinary creations. Birthdays, anniversaries, or even holidays can all be enhanced with this thoughtful gift. You could even create a themed platter, such as a holiday platter decorated with seasonal motifs, which can be used year after year.
Don't forget to wrap it beautifully! A simple yet elegant presentation can elevate the entire gifting experience. Consider using natural materials like burlap or kraft paper, adorned with twine or a sprig of greenery for that rustic charm. This way, your gift not only looks appealing but also reflects the love and care you put into creating the platter itself.
In the end, a handmade wooden serving platter is more than just a functional item; it’s a canvas for your creativity and a testament to your affection for the recipient. Whether it’s for a special occasion or just because, it’s a gift that is sure to be cherished and used time and time again.
Q: How do I care for a wooden serving platter?
A: To maintain your platter, wash it with mild soap and warm water, then dry it immediately. Avoid soaking it in water or putting it in the dishwasher. Regularly oiling the platter with food-safe mineral oil will keep it looking new.
Q: Can I use my platter for hot foods?
A: While wooden platters can handle warm foods, it's best to avoid placing very hot items directly on the wood to prevent warping or damage.
Q: What is the best wood for a serving platter?
A: Hardwoods like maple, walnut, and cherry are excellent choices due to their durability and beautiful grain patterns.
Q: Can I personalize my platter?
A: Absolutely! Engraving or painting designs on your platter can add a unique touch that makes it a special keepsake.
Q: Is it safe to serve food on my wooden platter?
A: Yes, as long as you use food-safe finishes and oils, your wooden platter is perfectly safe for serving food.
Frequently Asked Questions
- What type of wood is best for a serving platter?
When choosing wood for your serving platter, consider options like maple, walnut, or cherry. These woods are not only durable but also have beautiful grain patterns that enhance the aesthetic appeal of your platter. Each type of wood has its unique characteristics, so pick one that matches your style and intended use!
- Do I need special tools to make a wooden serving platter?
While you can use basic hand tools, having a few essential tools like a jigsaw, sanders, and finishing tools will make the process much easier and more enjoyable. Power tools can also speed things up, but if you're going for a more hands-on approach, hand tools are perfectly fine!
- How can I personalize my serving platter?
There are countless ways to add a personal touch to your platter! You can engrave a special message, paint designs, or even inlay different materials for a unique look. Think about what resonates with you—your platter should reflect your personality!
- What finishing techniques should I use?
To protect your platter and enhance its beauty, consider using food-safe oils and sealants. Oiling helps to nourish the wood, while sealing provides a protective barrier against moisture and wear. Make sure to follow the instructions for the products you choose to ensure the best results!
- How do I clean and maintain my wooden platter?
Cleaning your wooden platter is simple but requires care. Use warm soapy water and a soft cloth to wipe it down, avoiding soaking it in water. For maintenance, regularly oil your platter to keep it looking fresh and prevent cracking. Store it in a cool, dry place to ensure its longevity!
- What are some creative serving ideas for my platter?
Your serving platter can be the star of any gathering! Use it for cheese boards, charcuterie displays, or even as a decorative centerpiece with fruits and snacks. The possibilities are endless—let your creativity shine and make every meal a special occasion!
- Can I give a wooden serving platter as a gift?
Absolutely! A handmade wooden platter makes for a thoughtful and unique gift. You can present it beautifully by adding a personal note or pairing it with gourmet treats. It's a gift that friends and family will cherish for years to come!


