
Creating a Wooden Loom: A Beginner's Guide
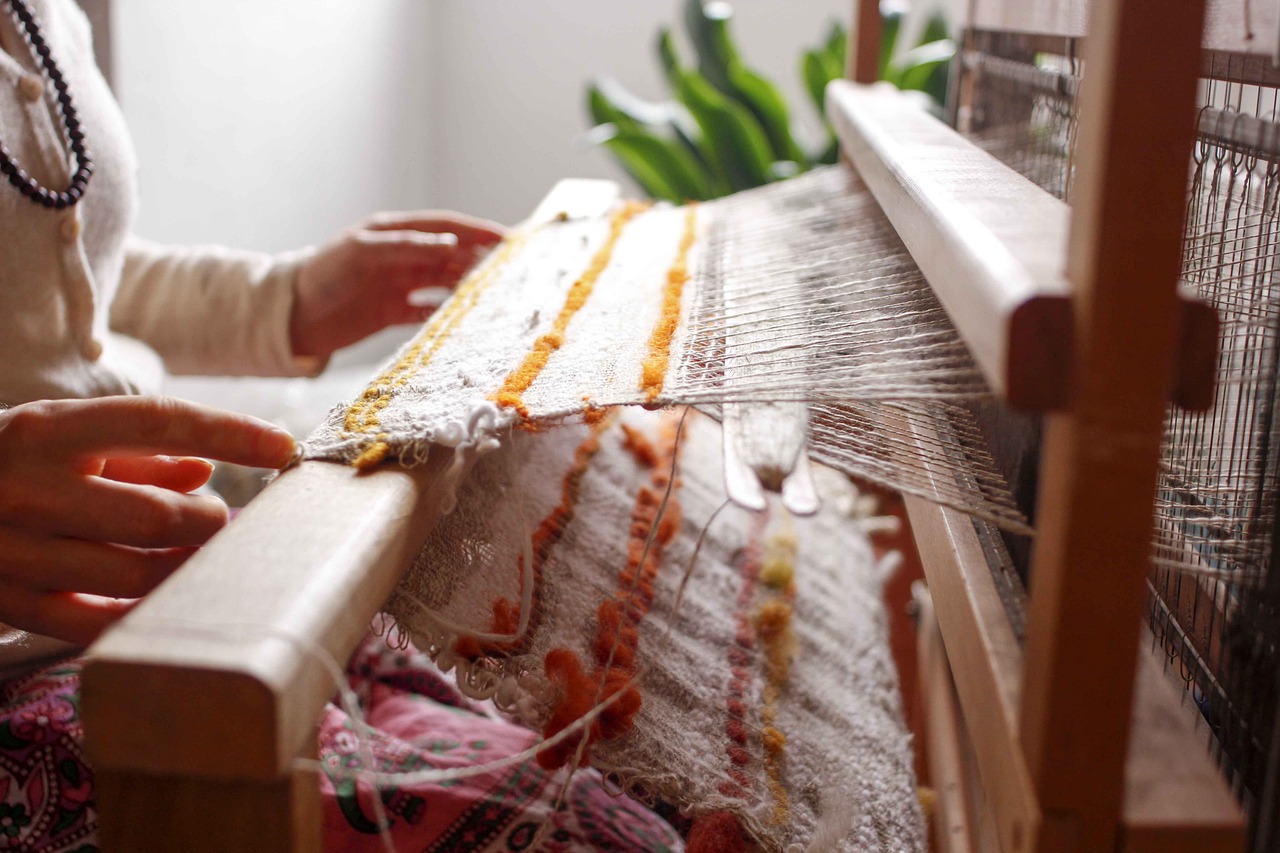
Welcome to the world of weaving! If you've ever gazed at a beautifully woven tapestry and thought, "I want to create something like that," you're in the right place. This guide provides essential insights into building a wooden loom, including necessary materials, tools, and step-by-step instructions, making it perfect for beginners looking to explore weaving. Crafting your own loom not only allows you to express your creativity but also gives you a deeper understanding of the art of weaving. So, grab your tools, and let’s get started on this exciting journey!
Before diving into the construction of your wooden loom, it's important to understand the different types of looms available. Each type serves various weaving techniques, and knowing which one suits your needs can significantly enhance your weaving experience. For instance, there are rigid heddle looms, which are great for beginners due to their simplicity, and floor looms, which offer more complexity and versatility for advanced projects. By familiarizing yourself with these options, you can make an informed decision that aligns with your weaving goals.
Choosing the right materials is crucial for building a sturdy loom. You want your loom to stand the test of time and provide a solid foundation for your weaving projects. Here, we discuss the best wood types, hardware, and additional materials you'll need for your project. The right materials will not only enhance the durability of your loom but also contribute to the overall aesthetics of your weaving space.
The type of wood you use can greatly affect the loom's durability and functionality. For a reliable loom, consider using hardwoods like maple or oak, which provide excellent strength and longevity. Alternatively, softwoods like pine are more affordable and easier to work with but may not offer the same durability. Your choice of wood will ultimately depend on your budget and the intended use of your loom.
Understanding the differences between softwoods and hardwoods will help you make informed choices for your loom project. Softwoods are generally lighter and less expensive, making them a great option for beginners. However, they may not withstand heavy use as well as hardwoods. On the other hand, hardwoods, while more costly, provide a sturdier structure and can last for generations. Think of it like choosing between a cozy, lightweight sweater and a robust, long-lasting winter coat; both have their place, but one will keep you warm longer.
Exploring various finishing techniques will enhance your loom's appearance and longevity. A well-finished loom not only looks great but also protects the wood from wear and tear. You can choose from a variety of stains, paints, and sealants suitable for wooden looms. For instance, a natural wood stain can highlight the grain, while a protective sealant can keep moisture at bay. Imagine your loom as a canvas; the right finish can make it a masterpiece!
A well-equipped workshop is essential for building a loom. You'll need various tools to ensure that your construction process goes smoothly. Here’s a quick rundown of some essential tools:
- Saw: For cutting wood to the desired lengths.
- Drill: To create holes for screws and dowels.
- Screwdriver: For assembling the loom.
- Sandpaper: To smooth out rough edges.
Having the right tools at your disposal can make all the difference in your building experience, helping you avoid frustration and achieve a professional finish.
Building a wooden loom can be broken down into manageable steps. This section provides a detailed, step-by-step guide to constructing your loom from start to finish. With patience and attention to detail, you'll soon have a functional loom ready for your weaving adventures!
Clear assembly instructions are crucial for beginners. Start by laying out all your materials and tools. Follow the blueprint carefully, ensuring that each piece is securely attached. Remember, a solid foundation is key to a successful loom. Don't hesitate to ask for help if you find yourself stuck at any point—there are plenty of online communities filled with experienced weavers willing to lend a hand!
Identifying and avoiding common pitfalls can save time and resources. Frequent mistakes made during loom construction include:
- Not measuring accurately, leading to mismatched pieces.
- Using the wrong type of screws or nails, which can compromise stability.
- Skipping the sanding process, resulting in splinters and rough edges.
By being aware of these common mistakes, you can take proactive steps to prevent them, ensuring a smoother building experience.
Once your loom is complete, learning weaving techniques is the next step. This section introduces basic weaving patterns and methods to get you started on your projects. Weaving can be a deeply satisfying craft, and with your new loom, you'll be able to create beautiful pieces that showcase your unique style.
Familiarizing yourself with basic weaving patterns will enhance your skills. Popular patterns that are perfect for beginners include plain weave, basket weave, and twill weave. Each pattern has its own charm and can be used to create a wide range of projects, from scarves to wall hangings. Think of these patterns as the building blocks of your weaving journey; mastering them will open the door to more complex designs.
As you gain confidence, you may want to explore more complex techniques. This section discusses ways to expand your weaving repertoire beyond the basics. Consider experimenting with color, texture, and different materials to create unique pieces. Joining a local weaving group or taking online classes can also help you learn new skills and techniques, making your weaving journey even more enjoyable.
Q: Do I need previous experience to build a wooden loom?
A: No, this guide is designed for beginners! With patience and the right materials, anyone can build their own loom.
Q: What is the best wood for a beginner's loom?
A: Softwoods like pine are a great choice for beginners due to their affordability and ease of use.
Q: How long does it take to build a loom?
A: The time can vary based on your skill level and the complexity of the loom, but most beginners can complete a basic loom in a weekend.
Q: Can I use my loom for different types of weaving?
A: Absolutely! Once you've built your loom, you can experiment with various weaving techniques and patterns.
Understanding Loom Types
When diving into the world of weaving, the first thing you'll notice is the variety of looms available. Each type of loom offers unique features and capabilities, making it essential to understand which one suits your needs best. Whether you're a complete novice or have some experience under your belt, knowing the differences between loom types can significantly impact your weaving journey.
There are primarily three types of looms you might encounter: frame looms, table looms, and floor looms. Each serves a different purpose and caters to various weaving techniques. Let’s break them down:
- Frame Looms: These are often the go-to choice for beginners. They are simple, portable, and allow for a wide range of projects. If you're looking to create wall hangings or small tapestries, a frame loom is ideal. They are typically made of wood and can be easily adjusted to fit different project sizes.
- Table Looms: A step up from frame looms, table looms offer more versatility and can handle more complex patterns. They are compact enough to fit on a table, making them perfect for small spaces. With a table loom, you can experiment with various weaving techniques while still having the convenience of a portable option.
- Floor Looms: If you're serious about weaving and plan to tackle larger projects, a floor loom is worth considering. These looms are larger and more complex, allowing for intricate designs and greater production speed. They require a dedicated space, but the results can be stunning, making them a favorite among experienced weavers.
Choosing the right loom can be compared to selecting the right tool for a job; using the wrong one can lead to frustration and unsatisfactory results. Think about what you want to create—if it's just a small decorative piece, a frame loom will do just fine. However, if you envision larger, more elaborate textiles, investing in a floor loom might be the way to go.
It's also important to consider the weaving techniques you wish to explore. Some looms are more suited for specific styles, while others offer a broader range of possibilities. For example, if you’re interested in creating intricate patterns, a table or floor loom might be necessary. On the other hand, if your goal is to simply learn the basics, a frame loom will suffice.
In summary, understanding the different loom types is a crucial step in your weaving adventure. Each type has its own strengths and weaknesses, and your choice should reflect your personal goals and the projects you wish to undertake. With the right loom in hand, you'll be well on your way to creating beautiful woven pieces that reflect your unique style and creativity.

Materials Needed
When embarking on the adventure of building your very own wooden loom, choosing the right materials is paramount. Not only do the materials influence the overall sturdiness and functionality of your loom, but they also play a significant role in your weaving experience. So, let’s dive into what you’ll need!
First and foremost, the type of wood you select is crucial. You want something that will withstand the test of time and the pressures of weaving. The best choices often include hardwoods like oak, maple, or birch, known for their strength and durability. Alternatively, you might consider softwoods such as pine or cedar if you’re looking for something lighter and more affordable. Each wood type has its unique characteristics, so think about what aligns best with your weaving goals.
Let’s break down the wood selection further. Hardwoods, while generally more expensive, provide a solid base for your loom. Their density means they can handle the tension of the warp threads without bending or warping over time. On the flip side, softwoods are easier to work with and can be a great option for beginners. They’re lighter, which can make your loom easier to manipulate and transport. However, they may not hold up as well under heavy use.
Understanding the differences between softwoods and hardwoods can help you make an informed choice:
| Type | Pros | Cons |
|---|---|---|
| Hardwoods | Durable, strong, long-lasting | More expensive, heavier |
| Softwoods | Lightweight, easier to work with | Less durable, may warp |
Next up, let’s talk about the hardware you’ll need. This includes screws, bolts, and nails that will hold your loom together. Opt for galvanized or stainless steel options to prevent rusting, which can compromise the integrity of your loom over time. Additionally, don’t forget about the loom heddles and warp beams, which are essential for the weaving process itself.
Once your loom is constructed, it’s time to think about the finishing touches. A good finish not only enhances the appearance of your loom but also protects the wood from wear and tear. Consider using natural oils, stains, or varnishes that will bring out the beauty of the wood while providing a protective layer. This is where you can let your creativity shine—choose colors and finishes that resonate with your personal style!
Now that you have a grasp on the materials, let’s discuss the essential tools you’ll need for construction. A well-equipped workshop is the backbone of any DIY project. You’ll require basic tools such as a saw, drill, and measuring tape. Additionally, clamps will be invaluable for holding pieces in place as you work. Investing in quality tools will make your loom-building experience smoother and more enjoyable.
In summary, building a wooden loom is a rewarding project that requires careful consideration of materials and tools. By selecting the right wood, hardware, and finishing options, you’ll set yourself up for success. Remember, a solid foundation is key to creating a loom that not only functions well but also inspires your creative weaving journey!
- What type of wood is best for a beginner's loom? Hardwoods like oak or maple are excellent for durability, while softwoods like pine offer ease of use.
- Can I use recycled wood for my loom? Absolutely! Just ensure it's in good condition and free from warping or major defects.
- What tools do I need to build a loom? Basic tools like a saw, drill, measuring tape, and clamps are essential for the construction process.
- How can I finish my loom? Consider using natural oils or stains to enhance the wood's appearance and protect it from wear.
Wood Selection
When it comes to constructing your wooden loom, the choice of wood is absolutely paramount. The wood you select not only influences the durability and functionality of your loom but also affects the overall aesthetic appeal of your weaving projects. So, what should you consider when choosing the right wood? First and foremost, think about the type of wood that will best suit your needs. Generally, there are two categories of wood: softwoods and hardwoods. Each has its own characteristics, benefits, and drawbacks that can impact your loom-building experience.
Softwoods, such as pine and cedar, are often lighter and easier to work with, making them a popular choice for beginners. They are typically less expensive and can be found in most hardware stores. However, while softwoods are great for a first loom, they may not offer the same level of stability and strength as their hardwood counterparts. On the other hand, hardwoods like oak, maple, and cherry are denser and more durable, providing a sturdier framework for your loom. Although they can be pricier and more challenging to work with, the end result is often a more resilient loom that can withstand years of weaving.
To help you decide, here's a quick comparison of softwoods and hardwoods:
| Feature | Softwoods | Hardwoods |
|---|---|---|
| Weight | Light | Heavy |
| Cost | Generally cheaper | Generally more expensive |
| Durability | Less durable | More durable |
| Workability | Easy to work with | Can be challenging to work with |
In addition to type, consider the finish of the wood. A well-finished loom not only looks great but also lasts longer. You can choose from a variety of finishes, including stains, paints, and sealants, to enhance the wood's natural beauty while protecting it from wear and tear. Remember that the finish you select will impact the loom's grip and the overall feel of the fabric you create.
Ultimately, the wood you choose should resonate with your personal style and the types of projects you plan to undertake. Whether you lean towards the affordability and ease of softwoods or the long-lasting quality of hardwoods, the key is to find a balance that suits your needs. After all, building your loom is not just about functionality; it's about creating a piece of art that reflects your personality and passion for weaving.
- What is the best wood for a beginner loom? Softwoods like pine are often recommended for beginners due to their ease of use and lower cost.
- Can I use reclaimed wood for my loom? Absolutely! Reclaimed wood can add character and uniqueness to your loom, but ensure it is sturdy and free from damage.
- How do I treat the wood before assembling my loom? Sanding the wood smooth and applying a suitable finish will help protect it and improve its appearance.

Softwoods vs. Hardwoods
When it comes to selecting the right wood for your loom, understanding the differences between softwoods and hardwoods is crucial. Each type of wood has its own unique characteristics that can significantly impact the durability, weight, and cost of your loom. Softwoods, such as pine and cedar, are generally lighter and easier to work with, making them an excellent choice for beginners. They are often less expensive, which is a big plus if you’re just starting out and want to keep costs down.
On the other hand, hardwoods like oak, maple, and walnut are known for their strength and durability. If you envision yourself weaving intricate patterns and using your loom frequently, investing in hardwood might be the way to go. Hardwoods can withstand more wear and tear, providing a stable base for your weaving projects. However, they can be more challenging to work with due to their density and weight.
Let’s break it down a bit further:
| Type of Wood | Weight | Durability | Cost | Best For |
|---|---|---|---|---|
| Softwoods | Light | Less durable | Lower | Beginners, casual use |
| Hardwoods | Heavy | More durable | Higher | Frequent use, advanced projects |
In summary, the choice between softwoods and hardwoods ultimately depends on your specific needs and preferences. If you’re looking for something lightweight and budget-friendly, softwoods are a great option. However, if you’re committed to serious weaving and want a loom that will stand the test of time, investing in hardwood is a wise decision. Think of it like choosing between a cozy, casual sweater and a sturdy, timeless jacket; both have their place, but your choice will depend on the occasion and your long-term goals.
- What is the best wood for a beginner loom? Softwoods like pine are recommended for beginners due to their ease of use and affordability.
- Can I mix softwoods and hardwoods in my loom? Yes, you can mix them, but be mindful of the differences in weight and durability when doing so.
- How do I maintain my wooden loom? Regularly check for any signs of wear and apply a suitable finish to protect the wood from moisture and damage.

Finishing Options
When it comes to crafting your wooden loom, the finishing touches can make all the difference. Not only do these finishes enhance the appearance of your loom, but they also play a crucial role in protecting the wood from wear and tear. Think of it as giving your loom a stylish outfit that also keeps it safe from the elements! There are several options to consider, each with its unique benefits and aesthetic appeal.
One popular choice is wood stains. Stains come in a variety of colors, allowing you to highlight the natural grain of the wood while adding a splash of personality. For instance, a rich walnut stain can bring out the warmth in softer woods, giving your loom an inviting look. On the other hand, if you prefer a more rustic vibe, a weathered gray stain can provide that charming, aged appearance.
Another option is to use paints. If you’re feeling adventurous, painting your loom can turn it into a true work of art! You can choose bold colors to make a statement or pastel shades for a more subtle look. Just keep in mind that paint can hide the wood grain, so if you love the natural beauty of the wood, staining might be the better route.
Lastly, don’t overlook the importance of sealants. These are essential for protecting your loom from moisture and other environmental factors. Sealants can be clear or tinted and provide a protective barrier that helps prevent warping and cracking over time. Applying a good sealant is like putting on sunscreen before heading out to the beach; it’s a necessary step to ensure your loom remains in pristine condition.
Here’s a quick comparison table to help you decide which finishing option might be best for your loom:
| Finishing Option | Pros | Cons |
|---|---|---|
| Wood Stains | Enhances natural grain, variety of colors | Can be less protective than sealants |
| Paints | Bold colors, artistic expression | Hides wood grain, may require more maintenance |
| Sealants | Protects from moisture, enhances durability | May alter the appearance of the wood |
In conclusion, the finishing options you choose for your wooden loom can significantly impact its overall look and longevity. Whether you decide to stain, paint, or seal, each choice offers a unique way to personalize your loom while ensuring it stands the test of time. So, take your time, explore your options, and let your creativity shine through!
Q: How long should I wait for the finish to dry?
A: Drying time can vary based on the type of finish used. Generally, stains can take anywhere from 1 to 24 hours to dry, while paint and sealants may require longer. Always check the manufacturer's instructions for specific guidance.
Q: Can I mix different finishes?
A: While it’s possible to layer finishes, it’s essential to ensure they are compatible. For example, applying a water-based stain over an oil-based paint can lead to poor adhesion and an uneven finish. Always test on a small area first!
Q: How often should I reapply the finish?
A: This depends on usage and environmental conditions. A well-maintained loom may only need a touch-up every few years, while one used frequently might require more regular attention. Keep an eye on the finish for signs of wear.

Essential Tools
When embarking on the exciting journey of building your own wooden loom, having the right tools at your disposal is crucial. Think of your tools as the magic wands that will help transform raw materials into a beautiful weaving instrument. Without them, you might find yourself stuck in a web of frustration, unable to bring your creative vision to life. So, let’s dive into the essential tools you’ll need for this project.
First and foremost, a good handsaw is indispensable. It’s your primary tool for cutting the wood into the necessary pieces. Whether you opt for a traditional hand saw or a power saw, ensure it’s sharp and suited for the type of wood you’ve chosen. Next, a drill will be your best friend when it comes to making holes for screws and dowels. A cordless drill is particularly handy, offering mobility and ease of use.
Another essential tool is a measuring tape. Precision is key in woodworking, and a measuring tape will help you get those dimensions just right. Alongside this, a square is vital for ensuring your cuts are straight and your angles are correct. This tool will help you avoid the common pitfalls of misalignment that can lead to a wobbly loom.
Additionally, you’ll need a sanding block or an orbital sander to smooth out your wood pieces. This step is crucial not only for aesthetics but also for safety, as rough edges can lead to splinters. For fastening your loom together, you’ll require a set of screws and dowels. A wood glue can also provide extra strength to your joints, ensuring that everything stays securely in place.
Don’t forget about a clamp. Clamps are essential for holding pieces together while the glue dries or while you screw them in place. Think of them as your helping hands, making sure everything is aligned perfectly. Lastly, a workbench or a sturdy table to work on will make your life so much easier. It provides a solid surface to assemble your loom and keeps everything organized.
In summary, here’s a quick rundown of the essential tools you’ll need:
- Handsaw
- Drill
- Measuring tape
- Square
- Sanding block or orbital sander
- Screws and dowels
- Wood glue
- Clamps
- Workbench
With these tools in hand, you’re well on your way to crafting a sturdy and functional wooden loom. Remember, the right tools not only make the job easier but also enhance the quality of your work. So, gather your tools, roll up your sleeves, and get ready to weave your dreams into reality!
Q: What type of wood is best for a loom?
A: Hardwoods like oak or maple are excellent choices for their durability, but softwoods like pine can also work well for beginners due to their ease of handling.
Q: Do I need any special skills to build a loom?
A: Basic woodworking skills are helpful, but with the right tools and instructions, even beginners can successfully build a loom.
Q: How long does it take to build a loom?
A: Depending on your experience and the complexity of your design, it can take anywhere from a few hours to a couple of days.
Q: Can I customize my loom?
A: Absolutely! Many weavers personalize their looms to fit their specific needs and styles, so feel free to get creative!

Step-by-Step Construction
Building your own wooden loom might seem like a daunting task, but with the right guidance, it can be an immensely rewarding experience. Imagine the satisfaction of creating something with your own hands, a tool that will allow you to express your creativity through weaving. The construction process can be broken down into a series of manageable steps, ensuring that even beginners can follow along without feeling overwhelmed. So, let’s roll up our sleeves and dive into the construction of your very own loom!
The first step in the construction process is to gather all the necessary materials and tools. Having everything on hand will streamline the process and reduce the chances of interruptions. You’ll need wood, screws, and some basic tools like a saw, drill, and measuring tape. It’s like preparing for a big cooking adventure; when your ingredients are prepped and ready, the magic happens much smoother!
Next, it’s time to measure and cut your wood pieces according to the loom design you’ve chosen. It’s crucial to measure twice and cut once—this old saying holds true! Taking the time to ensure accuracy at this stage will save you from headaches later on. For a basic loom, you will need:
- Two long pieces for the sides
- Two shorter pieces for the top and bottom
- Several cross pieces to create the frame
Once you’ve cut your wood, it’s time to assemble the frame. Start by laying out the pieces on a flat surface, aligning them according to your design. Use wood glue along with screws to secure the joints; this combination provides a strong hold while allowing for adjustments if needed. Think of it like building a house—if the foundation is solid, everything else will fall into place!
After constructing the frame, you’ll want to add the heddles and the warp beam. The heddles are essential for controlling the threads during weaving, while the warp beam holds the threads taut. This part can be a bit tricky, so take your time to ensure everything is aligned properly. You can use a simple table to visualize the layout:
| Component | Purpose |
|---|---|
| Frame | Structure of the loom |
| Heddles | Control the warp threads |
| Warp Beam | Holds the warp threads |
Once you’ve completed the assembly, it’s time for the finishing touches. Sand down any rough edges to ensure a smooth weaving experience. You wouldn’t want splinters ruining your creative flow, right? A good finish not only enhances the appearance of your loom but also protects the wood from wear and tear. You can choose to stain or paint your loom, or simply apply a clear sealant to showcase the natural beauty of the wood.
Finally, after everything is assembled and finished, it’s time to set up your loom for weaving! This involves threading the warp yarn through the heddles and winding it onto the warp beam. It’s like preparing a canvas for painting; the setup is critical for a successful project. Once you’ve threaded the loom, you're ready to start weaving!
As you embark on this journey of loom construction, remember that patience is key. Mistakes may happen, but they’re part of the learning process. Embrace them, learn from them, and soon you’ll have a beautiful wooden loom ready for all your creative weaving projects!
Q: How long does it take to build a wooden loom?
A: The time it takes can vary depending on your experience level and the complexity of the loom design, but most beginners can expect to spend a few hours to a couple of days on the project.
Q: What type of wood is best for a loom?
A: Hardwoods like oak or maple are great choices for durability, but softwoods like pine can also work well for a beginner’s loom.
Q: Can I customize my loom design?
A: Absolutely! Feel free to modify dimensions and features to suit your personal weaving style and preferences.
Assembly Instructions
Assembling your wooden loom may seem daunting at first, but with a little patience and the right guidance, it can be an enjoyable process. The journey of putting together your loom is not just about following instructions; it's about creating a tool that will help you express your creativity through weaving. So, let’s dive into the assembly process step-by-step!
First, gather all your materials and tools in one place. This includes your pre-cut wooden pieces, screws, nails, and any additional hardware you may need. Having everything at hand will save you time and keep you organized. The basic components you'll be working with typically include:
- Frame pieces: These form the structure of your loom.
- Beams: The warp beam and cloth beam are essential for holding your threads.
- Heddles: These are used to lift the warp threads for weaving.
- Foot Pedals: If your loom design includes them, they will help in controlling the heddles.
Now, let’s get into the nitty-gritty of assembly. Start by constructing the frame of the loom. Lay out the frame pieces on a flat surface, ensuring that they are in the correct orientation. Use wood glue to secure the joints initially, and then reinforce them with screws for added strength. It’s crucial to ensure that everything is square and level at this stage, as any misalignment will affect your weaving later on.
Once the frame is secure, it’s time to attach the warp beam. This beam should be positioned at the back of the loom. Make sure it rotates freely, as this will be essential for winding your warp threads. Next, install the cloth beam at the front. This beam will hold the woven fabric as you progress. Again, check for smooth rotation and secure it tightly.
After the beams are in place, you can proceed to add the heddles. Depending on your loom design, you may need to create a heddle frame where the heddles will be attached. Ensure that these are spaced evenly and can move freely to lift the threads as needed. If your loom has foot pedals, attach them now, making sure they are positioned for easy access while weaving.
Finally, take a moment to review your assembly. Check all connections, tighten screws, and ensure that everything operates smoothly. A well-assembled loom will not only function better but will also last longer. Once you’re satisfied with the assembly, you can proceed to finish the loom with your choice of stains or sealants to enhance its appearance.
In summary, assembling your loom is about patience, precision, and a bit of creativity. Take your time, follow these instructions, and soon you’ll have a beautiful wooden loom ready for weaving!
Q: How long does it typically take to assemble a wooden loom?
A: The assembly time can vary based on your experience and the complexity of the loom design. On average, it may take anywhere from a few hours to a full day.
Q: Do I need any special skills to assemble a loom?
A: Basic woodworking skills are helpful, but most beginners can successfully assemble a loom with careful attention to the instructions.
Q: What if I make a mistake during assembly?
A: Mistakes are part of the learning process! Most errors can be fixed by disassembling the parts and trying again. Just take your time and don’t rush.
Q: Can I customize my loom design?
A: Absolutely! Many weavers enjoy personalizing their looms to suit their specific needs and preferences. Just make sure any modifications maintain the structural integrity of the loom.

Common Mistakes to Avoid
Building a wooden loom can be an exhilarating journey, but it’s also littered with potential pitfalls that can trip up even the most enthusiastic beginners. One of the most common mistakes is underestimating the importance of precise measurements. Imagine trying to fit a square peg into a round hole—if your dimensions are off, your loom simply won’t work as intended. Always double-check your measurements and ensure that everything is aligned correctly before making any cuts.
Another frequent error is choosing the wrong type of wood. While it might be tempting to grab the cheapest option at your local hardware store, using subpar materials can lead to a flimsy loom that doesn't hold up over time. Instead, consider investing in quality wood that will provide both strength and durability. Remember, your loom is an investment in your crafting future, and using quality materials will pay off in the long run.
Additionally, many beginners rush through the assembly process. It's like trying to bake a cake without following the recipe—skipping steps or hurrying through assembly can lead to a poorly constructed loom. Take your time, follow the instructions carefully, and don’t hesitate to refer back to your plans if you feel lost. If you find yourself confused, it’s always better to pause and reassess than to proceed with uncertainty.
Finally, neglecting to sand and finish your loom properly is a mistake that can affect both its functionality and appearance. A rough surface can snag your yarn and make weaving a frustrating experience. Make sure to sand down all surfaces and apply a suitable finish to protect the wood and enhance its beauty. Whether you choose a stain or a sealant, this final touch not only prolongs the life of your loom but also makes it a joy to use.
In summary, avoiding these common mistakes can significantly enhance your loom-building experience. By paying close attention to measurements, selecting quality materials, taking your time during assembly, and finishing your loom properly, you’ll set yourself up for success. Remember, every mistake is just a stepping stone on your journey to becoming a skilled weaver!
As you embark on your loom-building adventure, you may have some questions. Here are a few commonly asked ones:
- What type of wood is best for a beginner loom?
Softwoods like pine are often recommended for beginners due to their workability and cost-effectiveness. - How long does it take to build a loom?
Depending on your skill level and the complexity of the design, it can take anywhere from a few hours to several days. - Can I use recycled wood for my loom?
Absolutely! Just ensure it’s in good condition and free from any rot or damage. - What tools do I need to build a loom?
A basic toolkit including a saw, drill, measuring tape, and sandpaper will suffice for most loom projects.

Weaving Techniques
Once your wooden loom is complete and ready to weave, it’s time to dive into the exciting world of weaving techniques. Weaving is not just a craft; it’s an art form that allows you to express your creativity while producing beautiful textiles. Whether you’re looking to create a simple scarf or a complex tapestry, understanding the foundational techniques is crucial. So, where do you start?
First, let’s explore some basic weaving patterns. These patterns are the building blocks of more intricate designs and are perfect for beginners. One of the most popular patterns is the plain weave, where the warp and weft threads cross each other at right angles, creating a simple yet sturdy fabric. Think of it as the foundation of a house; without it, everything else would collapse!
Another essential pattern is the twill weave, which creates a diagonal ribbing effect. This technique not only adds texture to your fabric but also increases its durability. If you’ve ever admired the intricate designs on a pair of jeans, you’ve seen twill in action. It’s like giving your weaving a stylish upgrade!
As you become more comfortable with these basic techniques, you can start experimenting with more complex patterns, such as basket weave and herringbone weave. These patterns can add depth and character to your projects, making them truly unique. But remember, practice makes perfect! Don’t be afraid to make mistakes; they’re often the best teachers.
To further enhance your weaving skills, consider incorporating various materials into your projects. Different yarns, threads, and even unconventional materials like ribbons or strips of fabric can introduce new textures and colors, allowing you to create one-of-a-kind pieces. The possibilities are endless!
As you gain confidence in your weaving abilities, you might want to explore even more advanced techniques. Techniques like double weave and shadow weave can add incredible complexity and visual interest to your work. These methods can transform a simple loom into a powerful tool for artistic expression.
In conclusion, mastering weaving techniques is a journey that combines patience, practice, and creativity. Remember, every weaver started as a beginner, so embrace the learning process. Soon, you’ll be creating stunning pieces that reflect your unique style and personality. Now, let’s address some of the frequently asked questions about weaving techniques to help you on your journey.
- What is the best type of yarn for beginners? For beginners, cotton or acrylic yarn is recommended due to its affordability and ease of use.
- How long does it take to learn weaving? The time it takes to learn weaving varies by individual, but with consistent practice, you can master the basics in a few weeks.
- Can I use a regular loom for different weaving techniques? Yes, most looms are versatile enough to accommodate various techniques; just ensure you adjust your setup accordingly.
Basic Weaving Patterns
Once you've built your wooden loom, the next exciting step is diving into the world of weaving! It’s like stepping into a vibrant tapestry of creativity where each thread tells a story. Understanding basic weaving patterns is essential, as they serve as the foundation for more intricate designs. Imagine your loom as a blank canvas, and these patterns as the brushstrokes that will transform it into a masterpiece.
One of the most fundamental patterns you’ll encounter is the Plain Weave. This technique involves alternating the warp (vertical threads) and weft (horizontal threads) in a simple over-and-under manner. It’s akin to the rhythm of a heartbeat, steady and reliable. Not only is it easy to master, but it also forms the basis for many other patterns. Think of it as the ABCs of weaving—once you know it, you can build upon it!
Next up is the Twill Weave, which introduces a bit more complexity. This pattern creates a diagonal ribbing effect, resembling the texture of denim. It’s achieved by passing the weft thread over two or more warp threads before going under one. The result? A beautiful, textured fabric that’s not only visually appealing but also incredibly durable. Twill is perfect for projects like table runners or sturdy bags, giving you both function and flair.
Then, there’s the Satin Weave. This pattern is all about creating a smooth surface with a luxurious feel. It’s achieved by weaving the weft over multiple warp threads and then under one, resulting in a fabric that shines and drapes beautifully. Think of satin as the silky finish on a cake—it elevates the entire project. This technique is great for items like scarves or elegant tablecloths, where you want to add a touch of sophistication.
To help you visualize these patterns, here’s a quick comparison table:
| Pattern | Description | Best For |
|---|---|---|
| Plain Weave | Simple over-and-under technique | Basic fabrics, beginners' projects |
| Twill Weave | Diagonal ribbing effect | Durable items, bags, table runners |
| Satin Weave | Smooth, shiny finish | Elegant items, scarves, tablecloths |
As you practice these basic patterns, you’ll start to develop your own style and preferences. You might find yourself experimenting with different colors and textures, creating unique combinations that reflect your personality. Remember, weaving is not just about the end product; it’s also about the journey. Each pattern you master will open up new possibilities, allowing you to expand your skills and tackle more complex designs.
So, grab your loom, thread your yarn, and let your creativity flow! You’re not just making fabric; you’re weaving your own story, one thread at a time. And as you become more comfortable with these basic weaving patterns, you’ll be ready to explore more advanced techniques that will truly showcase your talent.
Q: What is the easiest pattern to start with?
A: The Plain Weave is the easiest pattern for beginners. It’s simple and forms the basis for many other techniques.
Q: Can I use any type of yarn for these patterns?
A: Yes, you can use various yarn types, but it’s best to start with medium-weight yarn for easier handling.
Q: How long does it take to learn basic weaving patterns?
A: With practice, you can learn the basics in a few hours. The more you weave, the more comfortable you’ll become!

Expanding Your Skills
Once you've mastered the basics of weaving, it’s time to take your skills to the next level! Expanding your weaving repertoire can be as exhilarating as discovering a hidden treasure in your backyard. Imagine the satisfaction of creating intricate patterns that not only showcase your creativity but also challenge your dexterity. So, how do you go from a novice weaver to a seasoned artisan? Let’s dive into some exciting techniques and ideas!
One of the first steps in expanding your skills is to explore different **weaving techniques**. Why stick to the same old patterns when you can experiment with new styles? For instance, consider trying your hand at tapestry weaving. This technique allows you to create stunning images and designs using a variety of colors and textures. It’s like painting with yarn! You can also venture into rag rug weaving, which not only gives you a beautiful piece for your home but also helps you repurpose old fabric scraps.
Another great way to enhance your weaving skills is to join a local weaving group or online community. Surrounding yourself with fellow weavers can provide inspiration, motivation, and invaluable tips. These communities often share resources, host workshops, and even organize challenges to keep the creativity flowing. Plus, you can learn from their experiences and avoid common pitfalls. Think of it as joining a supportive family that shares your passion for weaving!
As you become more comfortable with your loom, don’t shy away from experimenting with different materials. While traditional cotton and wool are fantastic, consider incorporating materials like silk, hemp, or even unique fibers like bamboo into your projects. Each fiber has its own characteristics and can drastically change the look and feel of your finished piece. It’s like adding spices to a recipe; the right combination can elevate your weaving to gourmet levels!
To further challenge yourself, try weaving larger projects. Instead of small samples or scarves, think about tackling a blanket or a wall hanging. These larger items will not only test your skills but will also give you a sense of accomplishment when completed. Plus, they make great gifts or stunning decor for your home!
Lastly, consider taking a class or workshop focused on advanced techniques. Many local craft stores and community colleges offer courses that cover everything from advanced patterns to specialized weaving methods. It’s a fantastic opportunity to learn from experienced instructors and meet other enthusiasts. Think of it as a masterclass that can transform your weaving journey!
Q: How can I find local weaving classes?
A: Check with local craft stores, community centers, or online platforms like Meetup to find weaving classes in your area.
Q: What materials are best for beginners?
A: Start with cotton or wool yarns, as they are easy to work with and widely available. As you gain confidence, you can experiment with other fibers.
Q: Can I weave without a loom?
A: Yes! There are several techniques, like finger weaving or using a cardboard loom, that allow you to create woven items without a traditional loom.
Frequently Asked Questions
- What type of wood is best for building a loom?
When it comes to selecting wood for your loom, hardwoods like oak or maple are often recommended due to their strength and durability. However, softwoods like pine can also work well for beginners, as they are easier to work with and more affordable. Ultimately, the choice depends on your budget and the intended use of the loom.
- How long does it take to build a wooden loom?
The time it takes to build a wooden loom can vary widely, but for most beginners, it can take anywhere from a few hours to a couple of days. It really depends on your skill level and how detailed you want your loom to be. Remember, taking your time to ensure everything is done correctly will pay off in the long run!
- What tools do I need to construct a loom?
To build your loom, you’ll need some basic tools such as a saw, drill, measuring tape, and sandpaper. A level can also be helpful to ensure your loom is stable. If you have a more extensive workshop, tools like a miter saw or router can make the process smoother, but they’re not absolutely necessary for beginners.
- What are common mistakes to avoid when building a loom?
One of the most common mistakes is not measuring accurately, which can lead to a wobbly loom. Another pitfall is rushing through the assembly process; taking your time to ensure each step is done correctly can save you from headaches later. Lastly, not properly sanding the wood can result in splinters, which is something you definitely want to avoid!
- Can I use my loom for different types of weaving projects?
Absolutely! Once you have your loom set up, you can explore various weaving techniques and patterns. Whether you're interested in making scarves, blankets, or even wall hangings, your loom can adapt to different projects. Just remember that each type of project might require slight adjustments in technique!
- How can I expand my weaving skills after mastering the basics?
After you’ve got the basics down, consider exploring more complex patterns and techniques, such as twill or tapestry weaving. Joining a local weaving group or taking online classes can also help you learn new skills and get inspired by others. The world of weaving is vast, so keep experimenting and pushing your boundaries!


