Practical Skills: Building a Wooden Compost Bin
In today's world, where sustainability is more than just a buzzword, building a wooden compost bin is not only a practical skill but also a step towards a greener planet. Imagine turning your kitchen scraps and yard waste into nutrient-rich compost that can nourish your garden. Sounds magical, right? Well, it’s entirely possible with just a few tools, some quality wood, and a little bit of elbow grease. In this article, we’ll dive into the essential skills and steps involved in constructing a wooden compost bin, promoting sustainable gardening practices while enhancing your DIY abilities. So, grab your work gloves, and let’s get started!
Selecting the appropriate wood and hardware is crucial for durability and effectiveness. When it comes to building a compost bin, you want materials that can withstand the elements while providing a safe environment for your composting process. The best types of wood for this project are typically cedar or redwood, as they are naturally resistant to decay. However, if you're looking for a budget-friendly option, pressure-treated pine can also do the job, just be cautious about the chemicals used in treatment. Besides wood, you'll need some essential hardware like screws, hinges, and possibly a latch for added security. Here’s a quick overview of the materials you might consider:
| Material | Benefits |
|---|---|
| Cedar | Natural decay resistance, aromatic, and lightweight. |
| Redwood | Highly durable and resistant to moisture. |
| Pressure-treated Pine | Cost-effective and readily available; use with caution. |
Equipping yourself with the right tools makes the building process smoother. Before you start, gather the necessary tools, which will not only streamline your work but also ensure that you have everything at hand. Here’s a rundown of essential tools you’ll need:
- Measuring Tape: For accurate measurements.
- Circular Saw: For cutting the wood to size.
- Screwdriver: For assembling the parts.
- Drill: To make pilot holes for screws.
- Level: To ensure your compost bin is even.
Having these tools ready will make the entire process more enjoyable and less frustrating. Imagine trying to cut wood without the right saw—it’s like trying to bake a cake without an oven!
Accurate measurements and cutting are vital for a sturdy structure. One of the most common mistakes DIYers make is not measuring twice before cutting once. Always ensure that your measurements are precise; this will save you time and materials in the long run. When cutting the wood, use a circular saw for straight cuts and a miter saw for angled cuts. If you're unsure about your cutting skills, practice on scrap wood first. Remember, the goal here is to create a solid structure that can withstand the weight of compost and the elements.
Safety should always be a priority when using tools. Always wear protective eyewear and gloves to shield yourself from flying debris and sharp edges. Additionally, keep your workspace tidy to avoid tripping hazards. It’s also wise to have a first aid kit nearby, just in case. Remember, a little caution goes a long way in ensuring your DIY project is both fun and accident-free!
Understanding common mistakes can save time and resources. Here are a few frequent cutting errors to be aware of:
- Not using a straight edge for guidance.
- Cutting without measuring first.
- Forgetting to adjust the blade depth on the saw.
By being aware of these pitfalls, you can approach your project with confidence and skill.
Once the pieces are cut, assembly begins. Start by laying out the base and attaching the side panels using screws. It’s essential to ensure that everything is level and square as you go along. A well-assembled compost bin not only looks good but also functions efficiently. Follow these steps for a secure build:
- Attach the base to the side panels.
- Secure the back panel.
- Add the front panel, leaving space for a door if desired.
- Finish with a roof, if you want to protect your compost from rain.
By following these straightforward steps, you’ll have a sturdy compost bin ready to transform your waste into valuable compost!
Proper maintenance ensures longevity. A compost bin is an investment in your gardening future, so taking care of it is crucial. Regular inspections will help you catch any issues early on, such as rot or pest infestations. Keeping your compost bin clean and well-maintained will not only extend its life but also improve the composting process!
Regular cleaning helps prevent pests and odors. To maintain your compost bin’s hygiene and efficiency, follow these tips:
- Remove any leftover compost every few months.
- Wash the interior with a vinegar solution to deter pests.
- Inspect for any signs of damage or wear regularly.
Wear and tear can occur over time. It's essential to identify and repair common damages to extend the life of your wooden compost bin. Keep an eye out for:
- Cracked or rotting wood—replace as necessary.
- Loose screws—tighten them to maintain stability.
By addressing these issues promptly, you can ensure that your compost bin remains a reliable asset in your gardening toolkit.
1. How long does it take to build a compost bin?
Building a compost bin can take anywhere from a few hours to a full day, depending on your skill level and the complexity of your design.
2. Do I need a lid for my compost bin?
A lid can help keep moisture in and pests out, but it’s not strictly necessary. It depends on your local climate and pest situation.
3. Can I use treated wood for my compost bin?
While treated wood is durable, it may contain chemicals that could leach into your compost. If you choose treated wood, ensure it’s safe for gardening use.
Choosing the Right Materials
When it comes to building a wooden compost bin, is crucial for ensuring durability and effectiveness. Think of your compost bin as the foundation of your sustainable gardening practice; if the materials aren't up to par, you might find yourself in a sticky situation later on. So, what should you look for? First and foremost, the type of wood you select will significantly impact the longevity of your compost bin. Ideally, you want to go for rot-resistant woods such as cedar or redwood. These types of wood can withstand the elements and the moisture that comes with composting, making them a reliable choice.
Another important consideration is the thickness of the wood. Thicker boards will provide better insulation and sturdiness, which is vital for maintaining the right temperature and moisture levels in your compost. You might also want to consider using reclaimed wood, which not only helps the environment by reducing waste but can also add a rustic charm to your compost bin. Just ensure that the reclaimed wood is free from harmful chemicals or treatments that could leach into your compost.
In addition to wood, you'll need some hardware to hold everything together. This includes screws, nails, and possibly hinges if you plan to make a lid. Opt for galvanized or stainless steel fasteners, as these materials are resistant to rust and corrosion, ensuring that your compost bin remains intact for years. You might also consider using a liner made from wire mesh to keep pests out while allowing for airflow, which is essential for the composting process.
To summarize, here’s a quick look at the materials you'll need:
| Material | Recommendation |
|---|---|
| Wood | Cedar or Redwood (rot-resistant) |
| Thickness | At least 1 inch for durability |
| Hardware | Galvanized or Stainless Steel screws/nails |
| Optional | Wire mesh for pest control |
By carefully selecting your materials, you set the stage for a successful composting experience. Remember, your compost bin is not just a project; it’s a step towards sustainable living. So, invest a little time and effort into choosing the right materials, and you’ll reap the benefits for years to come!

Tools Required for Construction
When it comes to building your very own wooden compost bin, having the right tools at your disposal is essential. Imagine trying to bake a cake without a mixing bowl or a whisk—it's not going to end well! Similarly, your compost bin project will be much smoother and more enjoyable with the proper tools. So, let’s dive into what you’ll need to gather before you start cutting and assembling.
First and foremost, you'll want to have a measuring tape. This trusty tool is your best friend when it comes to ensuring all your pieces fit together perfectly. A good measuring tape allows you to measure lengths accurately, which is crucial for a sturdy structure. Alongside that, a square will help you check for right angles, ensuring that your compost bin is not only functional but also visually appealing.
Next up, you'll need a circular saw or a hand saw. The choice between the two depends on your comfort level and the tools you have available. A circular saw can make quick work of cutting through wood, while a hand saw might offer more control for those who are new to woodworking. Whichever you choose, make sure it’s sharp—nothing is more frustrating than struggling with dull blades!
Don’t forget about a drill! This tool will be essential for creating pilot holes and driving screws into the wood. If you want to speed up the assembly process, consider using a power drill with various drill bits. It’s like having a superhero in your toolbox—making everything faster and easier. Speaking of screws, having a collection of wood screws is a must. They’ll hold your compost bin together, so choose screws that are long enough to provide a solid grip.
Now, let’s talk about safety gear. Safety goggles and a dust mask should be on your list to protect your eyes and lungs from sawdust and debris. You wouldn’t want to end up with a splinter in your eye or breathing in harmful particles, right? Protecting yourself while working with tools is just as important as the tools themselves.
To give you a clearer picture, here’s a quick overview of the essential tools you’ll need:
| Tool | Purpose |
|---|---|
| Measuring Tape | For accurate measurements |
| Square | To ensure right angles |
| Circular Saw/Hand Saw | For cutting wood |
| Drill | To create pilot holes and drive screws |
| Wood Screws | To assemble the bin |
| Safety Gear | To protect yourself while working |
By gathering these tools, you’re setting yourself up for success. Each tool plays a specific role in the construction process, and together, they will help you create a compost bin that not only serves its purpose but also stands the test of time. Remember, building is not just about the end product; it's about the journey, the learning, and the satisfaction of creating something with your own hands. So, roll up your sleeves and get ready to dive into this exciting DIY project!
- What type of wood is best for a compost bin? Cedar and redwood are excellent choices due to their natural resistance to decay.
- Can I use treated wood for my compost bin? It's generally advised to avoid treated wood as it may contain chemicals that can leach into the compost.
- How long will my wooden compost bin last? With proper care and maintenance, a wooden compost bin can last several years, often over a decade.
Measuring and Cutting Techniques
When it comes to constructing your wooden compost bin, measuring and cutting the wood accurately is absolutely crucial. Think of it like baking a cake; if you don’t measure the ingredients properly, the cake might turn out lopsided or even inedible. Similarly, precise measurements ensure that each piece of wood fits together perfectly, creating a sturdy structure that will stand the test of time. So, grab your tape measure and let’s dive into some effective techniques!
First off, always start with a clear plan. Sketch out your compost bin design on paper, noting down the dimensions of each piece of wood you’ll need. This will serve as your roadmap and help you visualize the final product. Once you have your design, it’s time to gather your materials. A good rule of thumb is to measure twice and cut once. This means you should double-check your measurements before making any cuts. It’s a simple yet effective way to avoid costly mistakes!
Next, when measuring, ensure that you use a reliable tape measure. It’s best to use a tape measure that has both metric and imperial units, as this will give you flexibility depending on your preferences. When marking your wood for cutting, consider using a pencil or chalk for clear visibility. A straight edge, like a ruler or a level, can help you draw straight lines, ensuring that your cuts are clean and precise.
Now, let’s talk about the actual cutting. There are several tools you can use, depending on the type of wood and the cuts you need to make. A miter saw is ideal for making accurate crosscuts, while a circular saw is great for longer cuts. If you’re working with thicker wood, a jigsaw can also come in handy for making intricate cuts. Remember, safety first! Always wear protective eyewear and follow the manufacturer’s instructions when using power tools.
To summarize, here are some key points to remember when measuring and cutting:
- Plan your design: Have a clear sketch with dimensions.
- Measure accurately: Use a reliable tape measure and double-check your measurements.
- Mark clearly: Use a pencil or chalk for visibility and a straight edge for straight lines.
- Select the right tools: Choose the appropriate saw for the cuts you need to make.
- Prioritize safety: Always wear protective gear and follow tool instructions.
By following these measuring and cutting techniques, you’ll set a solid foundation for your compost bin project. Remember, the effort you put into this stage will pay off in the long run, resulting in a compost bin that is not only functional but also a testament to your DIY skills!
Q: What type of wood is best for a compost bin?
A: Untreated wood, such as cedar or pine, is ideal as it is durable and won't leach chemicals into your compost.
Q: How do I ensure my cuts are straight?
A: Use a straight edge or a guide when cutting, and take your time to align your saw properly.
Q: Can I use a hand saw instead of power tools?
A: Yes, a hand saw can be used, but it may require more effort and time. Make sure to use a saw that is sharp and suited for the type of wood.
Q: How do I maintain my compost bin after construction?
A: Regularly check for any signs of wear and clean it to prevent odors and pests. We will cover this in more detail later in the article!
Safety Precautions
When embarking on the exciting journey of building your own wooden compost bin, it's vital to prioritize safety above all else. You might think that DIY projects are all about creativity and skill, but without the right precautions, they can quickly turn into hazardous endeavors. So, let’s dive into some essential safety measures that will keep you protected while you work.
First and foremost, always wear personal protective equipment (PPE). This includes safety goggles to shield your eyes from flying debris, gloves to protect your hands from splinters and sharp edges, and a dust mask to avoid inhaling wood dust. Think of these items as your armor; they may not be flashy, but they are crucial for keeping you safe.
Next, ensure your workspace is clean and organized. A cluttered area can lead to accidents, so take a moment to clear away any unnecessary tools or materials. Imagine trying to dance in a crowded room—it's just not going to work out well! By keeping your space tidy, you'll reduce the risk of tripping or knocking over items.
When using power tools, it's essential to familiarize yourself with their operation. Read the manuals, watch tutorial videos, or even ask a knowledgeable friend for a demonstration. Knowing how to use your tools correctly can make a significant difference. For instance, when using a saw, always keep your hands a safe distance from the blade. This distance is your personal safety zone—never invade it!
Additionally, consider the environment where you are working. If you're outdoors, be aware of your surroundings. Watch out for uneven ground, and make sure there are no obstacles that could cause you to trip. If you’re using power tools, ensure that there is no moisture on the ground, as this can lead to slips or electrical hazards. A little awareness can go a long way in preventing accidents.
Lastly, don't hesitate to ask for help if you're unsure about something. Whether it’s lifting heavy materials or using a tool for the first time, there’s no shame in seeking assistance. Think of it like having a buddy system; two heads are always better than one, especially when it comes to safety!
By adhering to these safety precautions, you’ll not only protect yourself but also enhance your overall building experience. Remember, the goal is to create something wonderful while ensuring that you remain safe and sound throughout the process. Now, let’s move on to the next exciting phase of your compost bin project!
As you embark on your journey to build a wooden compost bin, you may have some lingering questions. Here are a few frequently asked questions that can help clear up any uncertainties:
- What type of wood is best for a compost bin? Cedar and redwood are excellent choices due to their natural resistance to decay.
- How big should my compost bin be? A typical size is around 3 feet by 3 feet, which allows for adequate aeration and heat retention.
- Can I use treated wood for my compost bin? It's best to avoid treated wood, as chemicals can leach into the compost.
- How often should I turn my compost? Aim to turn your compost every few weeks to aerate it and speed up the decomposition process.

Common Cutting Mistakes
When it comes to building your wooden compost bin, cutting mistakes can be more than just a minor inconvenience; they can derail your entire project. Imagine standing there with your saw, feeling like a woodwork wizard, only to realize you’ve just cut the wrong length. Frustrating, right? To help you avoid such mishaps, let’s dive into some of the most common cutting mistakes and how to steer clear of them.
First and foremost, one of the biggest blunders is failing to measure twice before making a cut. This old adage holds true in woodworking: if you measure once and cut, you might end up with a piece that’s too short or too long. Always take the time to double-check your measurements. Use a tape measure and a square to ensure accuracy. It’s a small step that can save you a lot of wood and headaches down the line.
Another frequent mistake is not accounting for the width of the saw blade, often referred to as the kerf. When you cut a piece of wood, the blade removes a small amount of material, which can lead to inaccuracies if you don’t factor this in. For example, if your measurement is 12 inches and you cut directly at that mark without considering the kerf, your piece may end up being slightly shorter. Always subtract the kerf width from your measurement before cutting, especially if precision is key for your compost bin’s structure.
Additionally, using dull blades can significantly impact the quality of your cuts. A sharp blade makes cleaner cuts and reduces the risk of splintering, which can make your compost bin look less than appealing. Regularly check your blades and replace or sharpen them as needed. Trust me, a sharp blade is your best friend in woodworking!
Lastly, improper support while cutting can lead to uneven cuts or even accidents. Make sure your wood is securely clamped down or supported on a stable surface. If it’s wobbling around, you’re more likely to make a mistake. Think of it like trying to slice a loaf of bread that’s rolling around on the counter—chaos ensues! So, ensure your workspace is safe and your materials are well-supported.
To sum it up, here’s a quick recap of common cutting mistakes to avoid:
- Failing to measure twice
- Not accounting for the kerf
- Using dull blades
- Improperly supporting the wood during cuts
By being mindful of these pitfalls, you can ensure that your cutting process is smooth and your compost bin turns out just as you envisioned. Remember, a little caution and preparation go a long way in DIY projects!
Q: What type of wood is best for a compost bin?
A: The best types of wood for a compost bin are untreated options like cedar or pine, as they resist rot and are safe for composting. Avoid treated wood, as it may contain harmful chemicals.
Q: How big should my compost bin be?
A: A compost bin should ideally be at least 3 feet wide, 3 feet deep, and 3 feet tall to allow for proper aeration and heat generation. Adjust the size based on your available space and composting needs.
Q: How often should I turn my compost?
A: It’s recommended to turn your compost every 1-2 weeks to aerate it and speed up the decomposition process. This helps to maintain a healthy compost environment.
Q: Can I compost meat and dairy products?
A: It’s best to avoid composting meat and dairy products as they can attract pests and create odors. Stick to vegetable scraps, yard waste, and other organic materials for a successful compost bin.
Assembling the Compost Bin
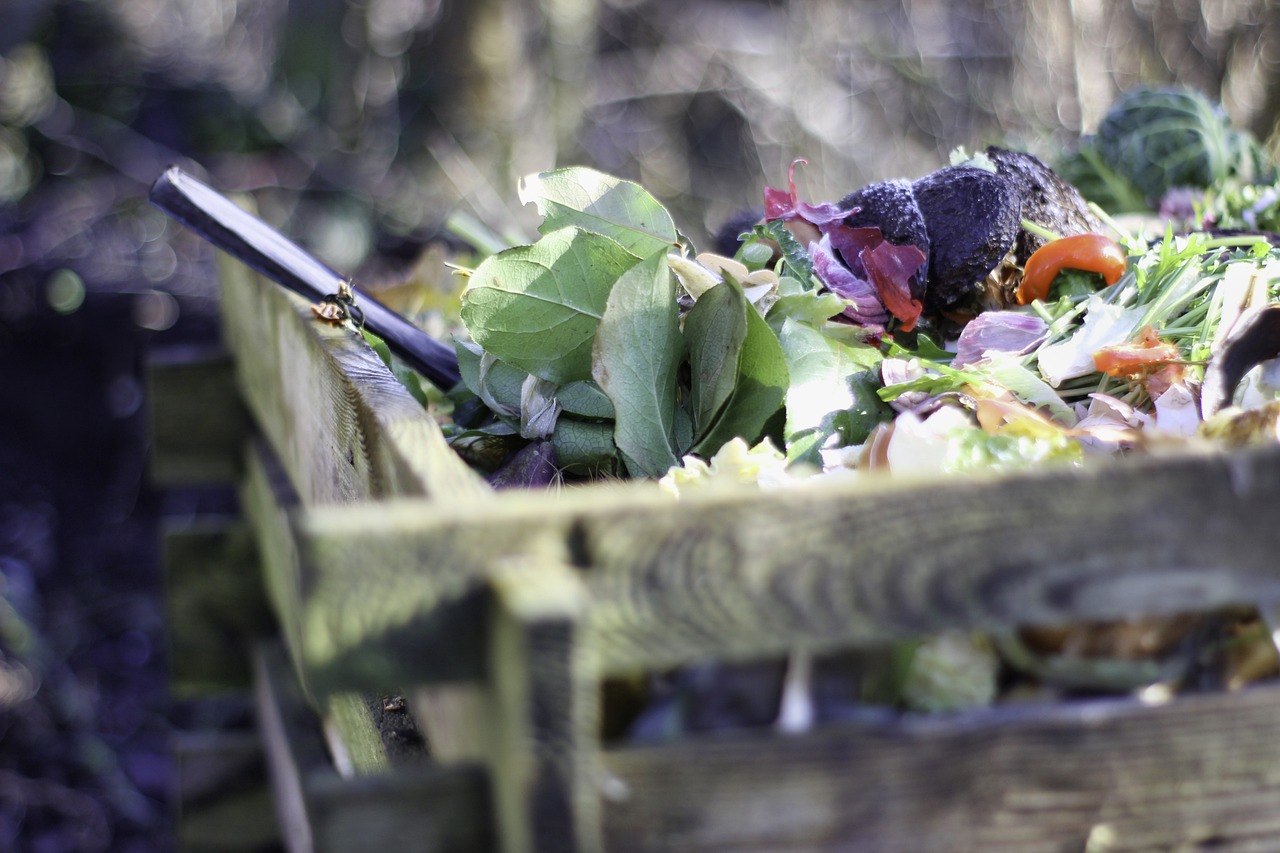
Now that you have all your materials cut and ready, it's time to dive into the exciting phase of assembling your wooden compost bin! This is where your vision starts to take shape, and trust me, it’s incredibly satisfying to see all those pieces come together. First, gather your cut wood pieces, screws, and tools. Make sure you have a clear workspace to avoid any unnecessary headaches. You wouldn’t want to trip over a stray piece of wood while you’re in the zone, right?
Start by laying out the base of your compost bin. It's essential to ensure that the base is level and sturdy, as this will support the entire structure. Use your measuring tape to confirm that the corners are square. A small mistake here can lead to a wobbly bin later on. Once you’re satisfied with the layout, secure the corners of the base with screws. It’s like putting together a puzzle; everything needs to fit just right. If you’re feeling adventurous, consider using corner brackets for added stability.
Next, attach the side panels to the base. You can use either vertical or horizontal slats, depending on your design preference. If you’re going for a more rustic look, vertical slats can add charm, while horizontal slats provide a modern feel. Whichever you choose, make sure to leave gaps between the slats for aeration. Good airflow is crucial for effective composting, as it helps to break down the organic material faster.
As you assemble, keep checking for squareness and levelness. It’s like when you’re baking a cake; if the layers aren’t even, you end up with a lopsided dessert! Use a level tool to ensure everything is straight. Once the side panels are secured, it’s time to add the back panel. This panel will help contain the compost and prevent it from spilling out the back. Secure it firmly using screws, making sure it aligns perfectly with the sides.
Now, let’s talk about the front of your compost bin. This is where you can get creative! Many people opt for a hinged door or removable slats for easy access. If you choose to go with a door, make sure it swings open easily and can be secured when closed. This will make it super convenient when it’s time to turn your compost or add new materials. Remember, composting is all about efficiency!
Once the front is in place, take a step back and admire your work. You’re almost there! Now, it’s time to add the lid. A well-fitted lid will help keep moisture in and pests out. You can make it hinged or simply lay it on top, depending on your preference. Just ensure that it’s easy to remove when you need to check on your compost.
Finally, give everything a good once-over. Tighten any loose screws, and check for stability. You want your compost bin to withstand the elements and the weight of the compost materials you’ll be adding. If you’ve followed these steps, you should now have a sturdy and functional compost bin ready to support your gardening endeavors!
- How long does it take for compost to break down? Composting can take anywhere from a few weeks to several months, depending on the materials used and the conditions of the compost bin.
- Can I use treated wood for my compost bin? It's best to avoid treated wood, as it may contain chemicals that can leach into your compost. Stick with untreated wood for a safer option.
- What can I compost? You can compost a variety of materials, including fruit and vegetable scraps, coffee grounds, eggshells, and yard waste. Just avoid meat, dairy, and oils.
Maintenance and Care
Maintaining your wooden compost bin is essential for ensuring its longevity and effectiveness. Just like any other structure in your garden, it requires a bit of TLC to keep it functioning optimally. Think of your compost bin as a living entity; it needs the right environment to thrive. Regular maintenance not only extends the life of the bin but also enhances the quality of your compost, making it a win-win situation for your gardening endeavors.
One of the primary aspects of maintenance is cleaning. Regular cleaning helps prevent pests and unpleasant odors that can arise from decomposing materials. To keep your compost bin in tip-top shape, consider the following cleaning tips:
- Remove Old Compost: Periodically remove the finished compost from the bottom of the bin. This not only makes room for new materials but also prevents the bin from becoming too compacted.
- Scrub the Interior: Use a stiff brush and warm soapy water to scrub the inside of the bin. This helps eliminate any buildup of mold or bacteria that could affect the composting process.
- Inspect for Pests: Regularly check for signs of pests such as rodents or insects. If you notice any, take appropriate measures to deter them, such as sealing any gaps.
Another crucial aspect of maintenance is repairing damage. Over time, exposure to the elements can lead to wear and tear on your compost bin. Identifying and repairing common damages early can save you time and money. Look out for:
- Rotting Wood: If you notice any rotting sections, replace them promptly to prevent further degradation.
- Loose Fittings: Tighten any loose screws or nails to ensure the structure remains sturdy.
- Cracks: Fill in small cracks with wood filler to maintain the integrity of the bin.
In addition to these maintenance tasks, consider applying a protective sealant to the exterior of the bin. This can help shield the wood from moisture and prolong its lifespan. However, be sure to choose a non-toxic sealant to avoid contaminating your compost.
Ultimately, the key to a successful compost bin lies in consistent maintenance and care. By being proactive and attentive, you can ensure that your compost bin remains a valuable asset in your gardening toolkit. Just like nurturing a plant, your compost bin will flourish with the right attention!
Q: How often should I clean my compost bin?
A: It's a good idea to clean your compost bin every few months, or whenever you notice a buildup of debris or odors.
Q: What should I do if my compost bin starts to smell?
A: If your compost bin emits a foul odor, it may be too wet or contain too many nitrogen-rich materials. Turn the compost to aerate it and add more carbon-rich materials like dry leaves or straw.
Q: Can I use treated wood for my compost bin?
A: It's best to avoid treated wood as it may contain chemicals that can leach into your compost. Opt for untreated wood or naturally rot-resistant wood types like cedar or redwood.
Cleaning Tips
This article explores the essential skills and steps involved in constructing a wooden compost bin, promoting sustainable gardening practices while enhancing your DIY abilities.
Selecting the appropriate wood and hardware is crucial for durability and effectiveness. This section discusses the best types of wood and additional materials needed for a successful compost bin.
Equipping yourself with the right tools makes the building process smoother. Here, we outline the essential tools you'll need to construct your wooden compost bin efficiently.
Accurate measurements and cutting are vital for a sturdy structure. This subsection covers tips and techniques for measuring and cutting wood precisely to fit your compost bin design.
Safety should always be a priority when using tools. This part emphasizes the necessary safety precautions to take while cutting and assembling your compost bin.
Understanding common mistakes can save time and resources. Here, we highlight frequent cutting errors and how to avoid them during your project.
Once the pieces are cut, assembly begins. This section provides step-by-step instructions on how to put together your wooden compost bin securely and effectively.
Proper maintenance ensures longevity. This section discusses how to care for your compost bin to keep it functional and looking good over time.
Keeping your compost bin clean is essential for maintaining its efficiency and preventing unpleasant odors. A well-maintained compost bin not only looks good but also functions better, making your gardening experience more enjoyable. To start, it’s important to regularly check the bin for any signs of pest infestations or mold, which can be a common issue if organic materials are not balanced correctly.
One effective cleaning routine involves using a mixture of water and vinegar, which can help eliminate any lingering smells and deter pests. Simply spray this solution on the interior surfaces of your compost bin and scrub with a stiff brush. Make sure to rinse thoroughly afterward to avoid any vinegar residue that might affect your compost. Additionally, it’s wise to empty the bin completely every few months to give it a thorough cleaning and allow the wood to breathe. This will help prevent rot and extend the life of your compost bin.
When you clean, also pay attention to the drainage holes at the bottom of the bin. These are crucial for allowing excess moisture to escape, preventing a soggy mess. If these holes become clogged, it can lead to anaerobic conditions, which are not ideal for composting. A simple tool like a wire coat hanger can be used to clear any debris.
Here’s a quick checklist for your compost bin cleaning routine:
- Inspect for pests and mold.
- Use a vinegar-water solution for scrubbing.
- Rinse thoroughly after cleaning.
- Clear any clogged drainage holes.
- Empty the bin every few months for deep cleaning.
By following these cleaning tips, you can ensure that your wooden compost bin remains in great condition, allowing you to enjoy the benefits of composting without the hassle of unpleasant odors or pests.
Wear and tear can occur over time. This subsection explains how to identify and repair common damages to extend the life of your wooden compost bin.
Q: How often should I clean my compost bin?
A: It's best to clean your compost bin every few months or whenever you notice odors or pests.
Q: Can I use bleach to clean my compost bin?
A: It's not recommended to use bleach, as it can harm beneficial microorganisms in your compost.
Q: What should I do if I notice pests in my compost bin?
A: Inspect the contents, remove any infested materials, and ensure a good balance of greens and browns to deter pests.
Q: How do I know when my compost is ready?
A: Finished compost is dark, crumbly, and has an earthy smell. It should not resemble the original materials you added.

Repairing Damage
Over time, even the sturdiest wooden compost bin can show signs of wear and tear. Whether it’s from exposure to the elements or the natural decay of wood, knowing how to repair damage is crucial to extending the lifespan of your compost bin. First, it's important to regularly inspect your bin for any issues. Look for signs such as cracks, rot, or loose boards, as catching these problems early can save you time and effort in the long run.
If you notice any cracks in the wood, don't fret! A little wood glue can work wonders. Apply the glue to the crack, squeeze it shut, and secure it with clamps until it dries. For larger cracks, you might want to consider using a wood filler. This not only fills the gap but also provides a smooth surface for painting or sealing later on.
When it comes to rot, the best course of action is to replace the affected boards. If the rot is caught early, you might be able to salvage some sections. Use a chisel to remove the rotten parts carefully, and then cut a new piece of wood to fit snugly into the gap. Secure it with screws or nails, and apply a wood preservative to prevent future decay.
Loose boards can be a nuisance, but they are easily fixed. Simply tighten the screws or nails that hold the boards in place. If the holes have become stripped, you can fill them with wood glue and a wooden dowel or toothpick to create a new anchor point for your screws.
To keep your compost bin looking great and functioning optimally, consider applying a protective sealant every couple of years. This will help shield the wood from moisture and UV rays, significantly reducing the chances of damage.
In summary, repairing damage to your wooden compost bin is not just about fixing what's broken; it's about maintaining the integrity and functionality of your composting system. By taking proactive measures and addressing issues as they arise, you can ensure that your compost bin remains a valuable asset in your sustainable gardening efforts for years to come.
- How often should I inspect my compost bin for damage?
It's a good practice to check your compost bin at least once a season, or more frequently if you live in an area with extreme weather. - What type of wood is best for a compost bin?
Cedar and redwood are excellent choices due to their natural resistance to rot and insects. Pressure-treated wood is also an option, but be cautious about chemicals that may leach into your compost. - Can I use paint on my compost bin?
It's best to avoid paint, as many contain harmful chemicals. Instead, consider using a non-toxic wood sealant to protect the wood without compromising the compost quality.
Frequently Asked Questions
- What materials are best for building a wooden compost bin?
When it comes to choosing materials for your compost bin, opt for durable woods like cedar or redwood. These types of wood are naturally resistant to rot and insects, making them ideal for outdoor use. You’ll also need galvanized screws or nails to ensure everything holds together nicely without rusting.
- What tools do I need to build a compost bin?
Building a compost bin requires some basic tools. You’ll need a saw for cutting the wood, a measuring tape for accuracy, a drill to assemble the pieces, and a level to make sure everything is even. A safety gear like gloves and goggles is also essential to keep you protected during the process.
- How do I ensure accurate measurements and cuts?
To achieve precise measurements, always double-check your dimensions before cutting. Use a measuring tape and mark your cuts clearly with a pencil. When cutting, make slow, steady movements to avoid mistakes. Remember, measure twice, cut once!
- What safety precautions should I take while building?
Safety first! Always wear protective eyewear to shield your eyes from sawdust and debris. Use gloves to protect your hands from splinters and sharp edges. Make sure your workspace is clean and organized to prevent accidents, and never rush while using power tools.
- What are some common mistakes to avoid when cutting wood?
Some frequent cutting mistakes include not measuring accurately, cutting too quickly, and not using the right blade for the material. To avoid these, take your time, ensure your measurements are spot on, and choose the appropriate saw blade for the type of wood you’re using.
- Can I assemble the compost bin alone?
While it’s possible to assemble a compost bin by yourself, having an extra pair of hands can make the process much easier. If you can, enlist a friend or family member to help hold pieces in place while you secure them together.
- How do I maintain my wooden compost bin?
To keep your compost bin in good shape, regularly check for any signs of wear or damage. Clean it periodically to prevent pests and odors, and consider applying a wood preservative to extend its lifespan. A little maintenance goes a long way!
- What cleaning tips can help maintain my compost bin?
For effective cleaning, remove any old compost material and debris. Use a mixture of water and vinegar to scrub down the interior surfaces, which helps eliminate odors. Make sure to rinse it well and allow it to dry completely before adding new compost.
- How can I repair damage to my compost bin?
If you notice any damage, such as loose boards or rot, it’s important to address it quickly. Replace any rotting wood with new pieces and tighten any loose screws. Regular inspections will help you catch issues early and extend the life of your compost bin.


