
Bringing Wood to Life: Sculpting Wood Faces
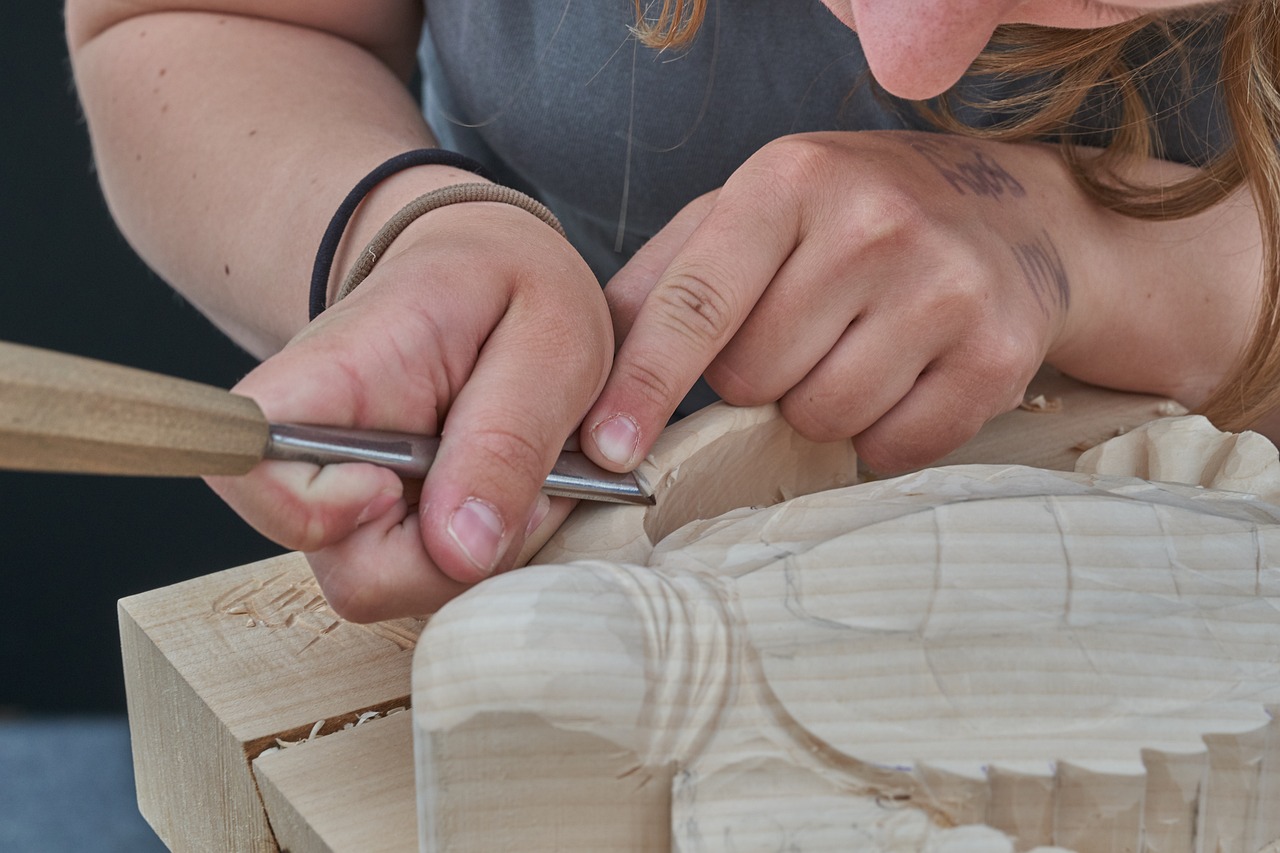
Wood sculpting is not just a craft; it is an art form that breathes life into the raw material. When you sculpt wood faces, you are not merely carving; you are telling a story, capturing emotions, and preserving moments in time. Imagine the thrill of transforming a simple block of wood into a lifelike face, each curve and detail reflecting the character and spirit of the subject. This journey into the world of wood sculpting invites you to explore the techniques, tools, and inspiration that can help you create stunning wooden faces that resonate with viewers.
In this article, we will dive deep into the intricacies of wood sculpting, focusing on essential aspects such as understanding different types of wood, the tools you need, and the techniques that can make your sculptures stand out. Whether you're a beginner or an experienced sculptor, there’s always something new to learn in this ever-evolving art form. So, grab your tools, and let’s embark on this creative adventure together!
Before you start sculpting, it’s crucial to understand the different types of wood available. Each type offers unique textures, colors, and densities that can significantly impact your final piece. For instance, softer woods like pine are easier to carve, making them perfect for beginners, while hardwoods like oak and maple provide a more durable finish, ideal for intricate details.
Here’s a quick overview of some popular wood types for sculpting:
| Wood Type | Characteristics | Best For |
|---|---|---|
| Pine | Soft, lightweight, easy to carve | Beginners, large sculptures |
| Oak | Hard, strong, and durable | Detailed work, long-lasting pieces |
| Walnut | Rich color, fine grain, moderate hardness | Elegant pieces, intricate designs |
| Mahogany | Beautiful color, resistant to warping | High-end sculptures, furniture |
Choosing the right wood type is essential for achieving the desired outcome in your sculptures. Not only does it affect the ease of carving, but it also influences the final aesthetic of your work. So, take some time to explore different woods and select the one that resonates with your artistic vision.
Just like a painter needs brushes, a wood sculptor requires a specific set of tools to bring their vision to life. From chisels and knives to power tools, each instrument plays a crucial role in the sculpting process. Understanding the function of each tool will allow you to work more efficiently and effectively.
Here are some essential tools for wood sculpting:
- Chisels: These are your primary tools for carving. They come in various shapes and sizes, each designed for specific tasks.
- Knives: Used for finer details and finishing touches, knives can help you achieve intricate designs.
- Power Tools: While traditional hand tools are invaluable, power tools can speed up the process and allow for more complex cuts.
When it comes to sculpting, the debate between hand tools and power tools is as old as the craft itself. Hand tools offer a level of precision and control that many artists cherish. They allow for a more intimate connection with the wood, letting you feel every grain and curve. On the other hand, power tools can save time and effort, especially for larger projects. The choice between the two often comes down to personal preference and the specific requirements of the sculpture.
When selecting chisels, it’s essential to understand their various types and functions. For instance, a gouge chisel is perfect for creating rounded shapes, while a flat chisel is ideal for smoothing surfaces. Having a variety of chisels at your disposal allows you to tackle different aspects of your sculpture with ease.
While power tools can enhance your sculpting experience, safety should always be your top priority. Here are some key tips to keep in mind:
- Always wear protective gear, including goggles and gloves.
- Ensure your workspace is clean and well-lit.
- Read the manual for any power tool you are using to understand its operation.
To keep your sculpting tools in optimal condition, regular maintenance is key. Clean your tools after each use to prevent resin buildup, and store them in a dry place to avoid rust. A well-maintained tool not only performs better but also lasts longer, allowing you to create beautiful sculptures for years to come.
Sculpting faces is an intricate process that requires a keen understanding of human anatomy and expression. It’s not just about carving; it’s about capturing the essence of a person. The techniques you employ can make all the difference in how lifelike your wooden face appears.
The first step in sculpting a face is establishing the basic shape. Start by sketching the outline on the wood, marking key features like the eyes, nose, and mouth. This foundational work is crucial, as it sets the proportions and overall structure of your sculpture. Think of it like building a house; without a solid foundation, everything else will fall apart.
Once you have the basic form, it’s time to add details that bring your sculpture to life. Focus on the eyes, as they are often considered the windows to the soul. The right expression can convey a myriad of emotions, from joy to sorrow. Use your chisels and knives to carve subtle lines and curves, enhancing the character of your wooden face.
Q: What type of wood is best for beginners?
A: Pine is often recommended for beginners due to its softness and ease of carving.
Q: How long does it take to sculpt a wooden face?
A: The time varies depending on the complexity of the sculpture and the sculptor's skill level, but it can range from a few hours to several days.
Q: Do I need special training to start sculpting?
A: While formal training can be beneficial, many sculptors are self-taught. Practice and experimentation are key to developing your skills.
Q: Can I use power tools for detailed work?
A: Yes, power tools can be used for detailed work, but it’s important to have a steady hand and a good understanding of the tool's operation to avoid mistakes.

Understanding Wood Types
When it comes to wood sculpting, selecting the right type of wood is like choosing the perfect canvas for a painter; it can make all the difference in the final piece. Each type of wood brings its own unique textures, colors, and characteristics to the table, influencing not just the appearance of your sculpture but also the ease of working with it. Let's dive into some of the most popular choices for sculpting and what makes each one special.
One of the most favored woods among sculptors is basswood. Known for its fine, even grain and soft texture, basswood is exceptionally easy to carve, making it an ideal choice for beginners. Its light color allows for easy painting and staining, which can enhance the final look of your wooden face. Another excellent option is butternut, which offers a warm, rich hue and a slightly more pronounced grain, providing a beautiful aesthetic that can add depth to your sculptures.
Oak, on the other hand, is a hardwood that is renowned for its durability and strength. While it can be more challenging to carve compared to softer woods, the stunning grain patterns and the ability to hold fine details make it a favorite among experienced sculptors. Additionally, oak takes stain beautifully, allowing for a range of finishing options that can elevate your sculpture to new heights.
For those looking to create a more dramatic effect, mahogany is a luxurious choice. This tropical hardwood features a deep, rich color and a fine grain that can make your sculptures stand out. However, it can be more expensive and requires a bit more skill to work with due to its density. If you're aiming for something truly unique, consider experimenting with exotic woods like teak or zebrawood, both of which offer striking patterns and colors that can add a distinctive flair to your work.
In summary, the choice of wood is crucial in wood sculpting. Each type brings its own set of characteristics that can affect not only the look but also the feel of your finished piece. As you embark on your journey of sculpting lifelike wooden faces, consider the following factors when choosing your wood:
- Workability: How easy is it to carve?
- Grain and Texture: How will it affect the final appearance?
- Durability: Will it stand the test of time?
- Cost: Is it within your budget?
By understanding the different types of wood and their characteristics, you'll be better equipped to select the perfect material for your next wooden face sculpture. Remember, the right wood can not only enhance the beauty of your work but also make the sculpting process more enjoyable and fulfilling.

Essential Tools for Sculpting
When it comes to the enchanting world of wood sculpting, having the right tools is like having a magician’s wand. Each tool serves a unique purpose, enabling artists to transform a simple block of wood into a breathtaking piece of art that tells a story. Whether you’re a seasoned sculptor or just starting out, understanding the essential tools for sculpting can significantly enhance your experience and the quality of your work.
First and foremost, chisels are the backbone of any sculptor's toolkit. These come in various shapes and sizes, each designed for specific tasks. For instance, a gouge chisel is perfect for hollowing out areas, while a straight chisel is ideal for making clean cuts. Choosing the right chisel can make a world of difference when it comes to detailing your wooden faces. It's akin to picking the right brush for a painter; the right tool can elevate your work to new heights.
In addition to chisels, knives play a crucial role in wood sculpting. They allow for precision and finesse, enabling you to carve intricate details that breathe life into your sculptures. A good carving knife should feel comfortable in your hand, allowing for smooth, controlled movements. Think of it as the sculptor's pen, allowing for delicate strokes that define character and emotion.
Power tools also have their place in the sculpting world. Tools like rotary tools and sanders can make the rough shaping process much quicker and more efficient. However, it's essential to use them wisely. While they can save time, they can also remove material faster than intended, so caution is key. Below is a table summarizing the essential tools and their uses:
| Tool | Use |
|---|---|
| Chisels | Carving and detailing |
| Knives | Precision cuts and details |
| Rotary Tools | Rough shaping and sanding |
| Saws | Cutting larger pieces |
| Sanding Tools | Smoothing surfaces |
Another vital aspect of wood sculpting is the maintenance of your tools. Keeping your chisels sharp and your knives clean not only ensures better performance but also enhances safety while you work. Dull tools can slip and cause accidents, so invest some time in learning how to sharpen and care for your tools properly. It’s like nurturing a garden; with the right care, your tools will flourish and serve you well.
Lastly, always remember to have a good workbench or a solid surface to work on. A stable workspace is essential for precision and safety. You wouldn’t try to paint on a wobbly easel, right? The same principle applies here. A sturdy workbench allows you to focus on your art without distractions or concerns about stability.
In conclusion, mastering the art of wood sculpting requires not only skill and creativity but also the right tools. By familiarizing yourself with the essential chisels, knives, power tools, and maintenance practices, you’ll be well on your way to creating stunning wooden faces that capture emotion and character. So, gather your tools, let your imagination run wild, and start sculpting your masterpiece!
- What type of wood is best for sculpting faces? Softwoods like pine or basswood are popular among beginners due to their ease of carving, while hardwoods like oak or cherry offer durability and beauty for more advanced projects.
- How do I maintain my carving tools? Regularly sharpen your chisels and knives, clean them after use, and store them in a dry place to prevent rust.
- Can I use power tools for detailed work? Yes, power tools can be used for rough shaping, but for detailed work, hand tools are often preferred for better control.

Hand Tools vs. Power Tools
When it comes to sculpting wood faces, the debate between hand tools and power tools is as old as the craft itself. Each type of tool brings its own unique advantages to the table, making the choice largely dependent on personal preference and the specific demands of the project at hand. Hand tools, like chisels and knives, offer a level of precision that many sculptors cherish. They allow for a more tactile connection with the wood, enabling artists to feel the grain and contours as they carve. This intimate interaction often leads to a more organic and lifelike finish, especially when sculpting intricate facial features.
On the other hand, power tools, such as rotary tools and saws, can significantly speed up the process, especially when working with larger blocks of wood or when removing substantial material. They are particularly useful for roughing out the basic shape of the sculpture before moving on to finer details. However, the speed and power of these tools can sometimes lead to a loss of control, making it critical to have a steady hand and a clear vision of the final piece. The choice between hand and power tools often comes down to a balance of efficiency versus control.
To help you understand the key differences, here’s a quick comparison:
| Feature | Hand Tools | Power Tools |
|---|---|---|
| Precision | High | Moderate |
| Speed | Slow | Fast |
| Control | Excellent | Variable |
| Learning Curve | Steeper | Shallower |
Ultimately, many sculptors find that a combination of both tools serves them best. Using power tools for the initial rough work can save time and energy, while hand tools can then be employed for the delicate finishing touches that truly bring a wooden face to life. The key is to experiment with both types to discover what feels right for your style and project.
As you embark on your wood sculpting journey, consider what you want to achieve with your art. Are you aiming for a quick project, or are you prepared to invest the time to perfect every detail? This question will guide your choice of tools and techniques. Remember, whether you choose the finesse of hand tools or the efficiency of power tools, the most important aspect of sculpting is the passion and creativity you bring to each piece.
- What is the best wood for sculpting faces?
Softwoods like pine are easier to carve, while hardwoods like oak offer durability and detail. - Can I use both hand and power tools in the same project?
Absolutely! Many artists find that using both can enhance their workflow and results. - How do I maintain my sculpting tools?
Regular cleaning and proper storage are key to keeping your tools in top condition.

Choosing the Right Chisel
When it comes to wood sculpting, particularly for creating lifelike faces, selecting the right chisel is vital. A chisel is not just a tool; it's an extension of your artistic vision. Imagine trying to paint a masterpiece with a brush that's too coarse; similarly, using the wrong chisel can hinder your ability to achieve fine details and smooth finishes. Therefore, understanding the different types of chisels available and their specific functions can drastically enhance your sculpting experience.
There are several types of chisels to consider, each designed for specific tasks. For instance, gouges are perfect for removing larger amounts of wood quickly, while v-tools are ideal for creating intricate details and textures. If you're aiming to carve delicate features, a straight chisel can help you achieve clean lines and precise cuts. Here’s a quick breakdown of some common chisels and their uses:
| Chisel Type | Use |
|---|---|
| Gouge | Ideal for removing large sections of wood and shaping |
| V-tool | Perfect for detailing and adding texture |
| Straight Chisel | Used for clean cuts and precise lines |
| Skew Chisel | Great for smoothing surfaces and creating angles |
When choosing a chisel, consider the size and angle of the blade. A smaller chisel allows for more control and is better suited for detailed work, while larger chisels are advantageous for broader strokes and rough shaping. Additionally, the angle of the blade affects how the chisel interacts with the wood. A steeper angle can cut more aggressively, while a shallower angle offers more finesse.
It's also essential to think about the material of the chisel. High-carbon steel chisels are favored by many sculptors due to their sharpness and durability, but they require regular maintenance to prevent rust. Stainless steel chisels, on the other hand, are more resistant to corrosion but may not hold an edge as well as high-carbon options. Finding the right balance between maintenance and performance is key to enjoying your sculpting journey.
Finally, ergonomics should not be overlooked. A chisel with a comfortable grip can significantly reduce fatigue during long carving sessions. Look for chisels that fit well in your hand and allow for a natural wrist position. Remember, a comfortable sculpting experience can lead to better results and more enjoyable creative sessions.
In conclusion, taking the time to choose the right chisel tailored to your specific needs will not only improve your sculpting skills but also enhance the overall quality of your wooden faces. Each chisel has its unique purpose, and understanding these nuances will empower you to bring your artistic vision to life.
- What is the best type of wood for face sculpting? - Softwoods like pine are great for beginners, while hardwoods like oak or cherry provide more detail.
- How do I maintain my chisels? - Regularly clean them after use, sharpen them as needed, and store them in a dry place to prevent rust.
- Can I use power tools instead of chisels? - Yes, power tools can speed up the process, but hand tools offer more precision for detailed work.

Power Tool Safety Tips
When it comes to sculpting wood faces, power tools can be a sculptor's best friend, but they can also be a source of danger if not used properly. Safety should always be your top priority. Imagine wielding a chisel like a painter’s brush, but instead of paint, you’re working with hard wood. Just like any artist, you need to protect your canvas—yourself! Here are some essential safety tips to keep in mind while using power tools:
First and foremost, always wear appropriate personal protective equipment (PPE). This includes safety goggles to protect your eyes from flying debris, ear protection to shield your hearing from loud tools, and a dust mask to avoid inhaling fine wood particles. Think of your PPE as your armor; it might not make you invincible, but it certainly helps to reduce risks significantly.
Next, ensure that your work area is clean and well-lit. A cluttered workspace can lead to accidents, especially when you’re handling sharp tools. Imagine trying to paint in a messy studio—distractions can lead to mistakes. Keep your tools organized and your workspace tidy to maintain focus and efficiency.
Before you start any project, always inspect your tools for damage or wear. A faulty tool can be more dangerous than a sharp one. Check the power cords for frays, and ensure that blades are sharp and securely attached. If a tool seems off, it’s better to take a moment to fix it than to risk injury.
When using power tools, maintain a firm grip and a stable stance. You wouldn’t want to be like a tightrope walker on a windy day! Stand with your feet shoulder-width apart to keep your balance and control over the tool. This will help you manage the tool’s power and minimize the risk of slipping or losing control.
Additionally, always follow the manufacturer's instructions for each tool. Each power tool is designed with specific safety features and operational guidelines. Ignoring these instructions is like trying to bake a cake without a recipe—it can lead to disastrous results. Familiarize yourself with the functions and limitations of your tools to ensure safe usage.
Lastly, never rush your work. Sculpting is an art that requires patience and precision. When you’re in a hurry, you’re more likely to make mistakes or overlook safety precautions. Take your time, enjoy the process, and remember that each piece you create is a reflection of your dedication and skill.
In conclusion, power tools can greatly enhance your ability to sculpt lifelike wooden faces, but they come with responsibilities. By following these safety tips, you can ensure a safer and more enjoyable sculpting experience. Remember, the goal is to bring wood to life, not to risk your well-being in the process!
- What kind of power tools are best for beginners in wood sculpting?
Beginners should start with a rotary tool, a jigsaw, and a sander. These tools are versatile and user-friendly, making them ideal for initial projects.
- How can I maintain my power tools for longevity?
Regularly clean your tools after use, check for any signs of wear, and store them in a dry, safe place. Proper maintenance helps keep them in good working condition.
- Are there any specific safety features to look for in power tools?
Look for tools with safety guards, automatic shut-off features, and ergonomic designs to reduce strain and enhance safety during use.
Maintenance of Tools
When it comes to wood sculpting, maintaining your tools is not just a good practice; it's essential for ensuring that your work remains efficient and your results are stunning. Imagine trying to carve a beautiful face from wood with a dull chisel—frustrating, right? Regular maintenance not only prolongs the life of your tools but also enhances your overall sculpting experience. Here are some key practices to keep your tools in top shape:
First and foremost, always clean your tools after each use. Residue from wood shavings and dust can accumulate and cause rust or dullness over time. A simple wipe with a clean cloth can do wonders. For chisels and knives, a bit of mineral oil can help protect the metal from moisture, preventing rust and keeping the blades sharp. Think of it as giving your tools a refreshing spa day!
Next, sharpening your tools is crucial. A sharp chisel or knife requires less effort to use and provides cleaner cuts, which is especially important when sculpting intricate details in wood faces. You can use a sharpening stone or a honing guide to maintain the edge. Remember, a well-maintained tool is like a trusted friend that always delivers when you need it most.
Additionally, storing your tools properly is vital. Avoid leaving them scattered around your workspace where they can get damaged. Instead, invest in a dedicated tool box or a pegboard to keep everything organized. This not only protects your tools but also saves you time when you need to find that specific chisel for detailing.
Lastly, regularly inspect your tools for any signs of wear and tear. If a handle is loose or a blade is chipped, it’s better to repair or replace it than to risk injury while sculpting. Keeping an eye on your tools is like checking the oil in your car—it’s a small task that can prevent bigger problems down the road.
By incorporating these maintenance practices into your routine, you’ll ensure that your sculpting tools are always ready to help you bring your artistic vision to life. After all, a sculptor is only as good as their tools, and with proper care, your tools can become your most reliable partners in the creative process.
- How often should I sharpen my chisels? It's best to sharpen your chisels every few uses, or whenever you notice they are starting to dull.
- Can I use household oils for tool maintenance? While some household oils can work, it's recommended to use mineral oil or specialized tool oils for the best protection against rust.
- What’s the best way to store my chisels? Storing chisels in a wooden block or a tool roll can help protect their edges and keep them organized.
- How can I tell if my tools need replacing? If you notice significant damage, such as a cracked handle or a chipped blade that cannot be sharpened, it’s time to replace the tool.
Techniques for Sculpting Faces
Sculpting faces in wood is not just about carving; it’s an intricate dance of understanding anatomy, emotion, and expression. The journey begins with a solid grasp of the basic structure of the human face. Think of it like building a house; without a strong foundation, everything else crumbles. The first step is to outline the basic shape of the head, which can be done using a rough sketch or by marking the wood directly. This initial stage is crucial as it sets the proportions and overall dimensions. The face can be divided into three main sections: the forehead, the nose, and the chin. By visualizing these sections, you can create a more accurate representation of the human visage.
Once the basic form is established, the next challenge is to add details and expressions. This is where the magic happens! Using your tools, you can start to refine the features of the face. Pay special attention to the eyes, as they are often considered the windows to the soul. A well-carved eye can convey a myriad of emotions, from joy to sorrow. Don’t forget to shape the eyebrows and cheekbones, as these elements play a significant role in defining character. Remember, every curve and angle contributes to the overall expression. For instance, a slight tilt of the mouth can turn a neutral expression into a smile or a frown.
To help you visualize the facial features, here’s a simple breakdown of the key areas to focus on during the detailing process:
| Facial Feature | Importance | Techniques |
|---|---|---|
| Eyes | Convey Emotion | Use small tools for precision |
| Nose | Defines Character | Carve from the bridge downwards |
| Mouth | Expressive Element | Focus on the curvature of lips |
| Cheekbones | Add Depth | Use chisels for sharper edges |
As you delve deeper into the facial features, it’s essential to step back occasionally and assess your work from different angles. This practice can reveal areas that may need more refinement or adjustment. It’s akin to a painter stepping back from the canvas to see the bigger picture. Don't rush this process; take your time to perfect each detail. Also, consider using reference images of real faces or even your own reflection in a mirror to capture subtle nuances that can elevate your sculpture.
In addition to the physical aspects of sculpting faces, emotional expression is equally vital. To truly bring your wooden faces to life, think about the story behind each sculpture. What emotion are you trying to convey? Is it happiness, sadness, or perhaps a sense of mystery? By focusing on the emotion, you can guide your carving techniques to enhance the expression. For instance, a joyful face may have a broader smile and raised eyebrows, while a more somber expression could feature downturned lips and furrowed brows.
Ultimately, the art of sculpting faces in wood is a blend of technique, creativity, and emotional depth. With practice, patience, and a keen eye for detail, you can create lifelike sculptures that resonate with viewers. So grab your tools, unleash your creativity, and let the wood tell its story through the faces you sculpt!
Q: What type of wood is best for sculpting faces?
A: Softwoods like pine or basswood are often preferred for beginners due to their ease of carving. Hardwoods like oak or walnut offer durability and detail but require more skill.
Q: How long does it take to sculpt a face?
A: The time varies greatly depending on the complexity of the design and the sculptor's skill level. Simple faces may take a few hours, while intricate designs could take days or even weeks.
Q: Do I need special training to start sculpting?
A: While formal training can be beneficial, many sculptors are self-taught. Starting with basic techniques and gradually advancing is a common path.

Shaping the Basic Form
When it comes to sculpting wood faces, is like laying the foundation of a house; it’s the crucial first step that sets the stage for everything that follows. Imagine standing before a blank canvas—only this canvas is a solid block of wood, full of potential and waiting to be transformed into a lifelike visage. The key to success here is understanding proportions and outlines. You wouldn’t start painting a masterpiece without sketching first, right? The same principle applies to wood sculpting.
To begin, it’s essential to visualize the final piece in your mind. What kind of expression do you want to capture? Is it a joyful grin, a pensive frown, or perhaps a mischievous smirk? Once you have an idea, take a moment to sketch it out on paper or even directly onto the wood. This initial outline will serve as your roadmap, guiding you as you carve away the excess material. Use a pencil or a soft marker to create light guidelines on the wood. These lines will help you maintain proportions and keep your design aligned as you work.
Next, it’s time to start removing material. This is where the excitement begins! Using a roughing tool, such as a large chisel or a gouge, begin to chip away at the block. Focus on creating the overall shape of the head first—this includes the jawline, forehead, and cheekbones. Don’t worry about the details just yet; think of it like sculpting a rough clay model before refining it into a masterpiece. It’s all about getting the basic form right before diving into the fine details.
As you carve, keep stepping back to assess your work. This is a crucial part of the process. Much like a painter stepping back to view their canvas, you need to ensure that the proportions are correct and that you’re heading in the right direction. If you find that something looks off, don’t hesitate to adjust your approach. Remember, wood is forgiving; you can always take off more, but you can’t put it back once it’s gone!
Once you’ve established the basic shape, it’s time to refine the features. This is where you’ll begin to carve out the eyes, nose, and mouth. Pay attention to the anatomical structure of the face. Each feature has its unique shape and placement that contributes to the overall expression. For instance, the eyes are often considered the windows to the soul, so take your time to get them right. You can use smaller chisels and detail knives to add these features delicately.
In the end, shaping the basic form is all about patience and practice. Don’t rush through this stage; it’s the backbone of your sculpture. With each cut and carve, you’re bringing your vision to life, transforming a simple block of wood into a character that can convey emotion and tell a story. So grab your tools, embrace the journey, and let your creativity flow!
- What type of wood is best for beginners? Softwoods like pine and basswood are ideal for beginners due to their ease of carving.
- How do I know if my proportions are correct? Regularly stepping back to view your work from a distance can help you assess proportions effectively.
- Can I use power tools for shaping the basic form? Yes, power tools can speed up the process, but it's essential to have a steady hand and control for detailed work.
- What if I make a mistake while carving? Mistakes can often be fixed by adjusting your design or even incorporating the error into the final piece.

Adding Details and Expressions
When it comes to sculpting wooden faces, the magic truly lies in the details. Just like a painter brings a canvas to life with brush strokes, a sculptor breathes life into wood by meticulously carving out the nuances of expression and personality. Imagine looking at a wooden face and feeling an instant connection; that’s the power of detail! Every curve, contour, and line plays a vital role in conveying emotions. In this section, we will explore the techniques that can transform a simple block of wood into a captivating character.
To effectively add details, it’s crucial to first understand the anatomy of the face. Start by visualizing the underlying structure—bones, muscles, and skin. This knowledge will guide you in creating realistic proportions and features. For instance, consider the placement of the eyes: they are often referred to as the "windows to the soul." If they are too high or too low, the entire expression can change dramatically, leading to a lifeless sculpture. Therefore, taking the time to sketch the face on paper before you start carving can be incredibly beneficial. It allows you to visualize the proportions and placements accurately.
Once the basic shape is established, it’s time to dive into the details. Begin with the eyes, as they are the focal point of any face. Use a fine chisel to carve out the eyelids and pupils, ensuring they reflect the desired emotion—whether it’s joy, sorrow, or contemplation. The shape of the eyebrows can also significantly alter the expression. For example, arched eyebrows can convey surprise, while furrowed brows might suggest anger or concern. It’s fascinating how such small features can have a profound impact on the overall perception of the sculpture!
Next, let’s talk about the nose and mouth. These features are essential for expressing a range of emotions. A wide smile can radiate happiness, while a downturned mouth can express sadness or disappointment. Pay attention to the subtle curves and lines that define these features. For instance, the nasolabial folds (the lines that run from the nose to the corners of the mouth) can add depth and realism to your sculpture. Don’t rush this process; take your time to refine these details. The more effort you put into these features, the more life your wooden face will exude.
Texture is another critical aspect when adding details. The grain of the wood can be your ally in creating lifelike skin texture. You can use various tools to create patterns that mimic pores, wrinkles, and other skin characteristics. For example, a small wire brush can help achieve a rough texture, while finer tools can smooth out areas for a more polished look. Remember, the goal is to create a piece that tells a story—one that invites the viewer to explore every detail.
Finally, let’s not forget about the finishing touches. Once you’re satisfied with the carving, consider applying a finish that enhances the wood’s natural beauty. Oils, stains, or varnishes can bring out the grain and add depth to the colors. This step can make a significant difference in the overall appearance of your sculpture. A well-finished piece not only looks stunning but also protects the wood, ensuring that your hard work stands the test of time.
In summary, adding details and expressions to wooden faces is an art that combines skill, patience, and a keen eye for anatomy. By focusing on the features that convey emotion, understanding the underlying structure, and paying attention to texture and finishing, you can create lifelike sculptures that resonate with viewers. So, grab your tools and let your creativity flow—there's a world of expression waiting to be carved into the wood!
- What type of wood is best for sculpting faces? While many types of wood can be used, softer woods like basswood or butternut are popular choices for beginners due to their ease of carving.
- Do I need special tools for detailing? Yes, having a variety of chisels and carving knives can help you achieve finer details. Smaller tools are essential for intricate work.
- How do I ensure my sculpture is durable? Proper finishing with oils or varnishes can protect your sculpture from moisture and damage, ensuring its longevity.
- Can I use power tools for detailing? While power tools can speed up the process, hand tools are often preferred for detailing to maintain control and precision.
Frequently Asked Questions
- What type of wood is best for sculpting faces?
When it comes to sculpting lifelike wooden faces, the choice of wood is crucial. Popular options include basswood for its softness and ease of carving, butternut for its warm color and fine grain, and mahogany for its durability and rich hue. Each type of wood brings its own unique texture and character, so experimenting with different kinds can lead to fascinating results!
- What essential tools do I need for wood sculpting?
To get started with wood sculpting, you’ll need a few essential tools. A set of chisels is crucial for shaping, while knives help with finer details. Don’t forget about power tools like rotary tools for more intricate work. Having the right tools can make the process smoother and more enjoyable!
- Should I use hand tools or power tools for sculpting?
This really depends on your personal preference and the project at hand! Hand tools provide a greater level of control and are perfect for detailed work, while power tools can save time and effort on larger projects. Many sculptors find a balance between the two, using hand tools for finishing touches and power tools for initial shaping.
- How do I maintain my sculpting tools?
Keeping your tools in top condition is key to successful sculpting! Always clean your tools after use to prevent resin buildup, and regularly sharpen your chisels and knives for precise cuts. Storing them in a dry place and using protective cases can also prolong their lifespan. Think of your tools as your best friends in sculpting; treat them well, and they’ll treat you well in return!
- What techniques should I use for adding details to wood faces?
Adding details is where the magic happens! Start by shaping the basic form of the face, then gradually work on features like the eyes, nose, and mouth. Use reference images to understand proportions and expressions better. Remember, patience is key—take your time to refine each detail, as this will bring your wooden face to life!
- Are there safety tips I should follow when using power tools?
Absolutely! Safety should always come first. Always wear protective gear such as goggles and gloves, and ensure your workspace is clean and organized. Familiarize yourself with the tool’s manual before use and never rush the process. Think of your safety as the foundation of your creative journey; without it, the art can’t flourish!


