Getting Started with Wooden Spoon Carving
Welcome to the wonderful world of wooden spoon carving! If you’ve ever marveled at the beauty and craftsmanship of a handmade spoon, you’re not alone. This art form is not just about creating a functional kitchen tool; it’s about expressing your creativity, connecting with nature, and embracing a meditative craft that has been passed down through generations. In this article, we’ll guide you through the essentials of spoon carving, from the tools you’ll need to the techniques that will help you create stunning, one-of-a-kind pieces.
Imagine standing in front of a block of wood, a simple piece of nature, and envisioning the spoon that lies within. It’s almost like uncovering a hidden treasure! But before you dive into this captivating craft, it’s important to equip yourself with the right knowledge and tools. Whether you’re a complete novice or someone with a little experience under your belt, this guide will provide you with all the insights you need to embark on your spoon carving journey.
Throughout this article, we’ll explore the fundamental aspects of spoon carving, including:
- The essential tools you’ll need to get started
- How to select the right type of wood for your projects
- Basic carving techniques that will set you up for success
- Finishing touches that will make your spoons shine
- Safety tips to ensure a smooth and enjoyable carving experience
- Common mistakes to avoid, so you can carve with confidence
- Resources for finding inspiration and connecting with fellow enthusiasts
So, grab your carving knife, find a cozy spot, and let’s get started on this exciting adventure of wooden spoon carving! You’ll not only create beautiful, functional art but also enjoy the therapeutic benefits of working with your hands. Let’s dive in!
Q: Do I need prior experience to start carving spoons?
A: Not at all! Spoon carving is a fantastic hobby for beginners, and with a little patience and practice, you’ll be amazed at what you can create.
Q: What type of wood is best for beginners?
A: Softwoods like pine or basswood are excellent choices for beginners because they are easier to carve and more forgiving if you make mistakes.
Q: How long does it take to carve a spoon?
A: The time it takes can vary widely depending on the design and your skill level, but a simple spoon can usually be carved in a couple of hours.
Q: Can I use power tools for spoon carving?
A: While some carvers do use power tools for roughing out shapes, traditional hand tools are recommended for beginners to help develop your skills and technique.
Essential Tools for Spoon Carving
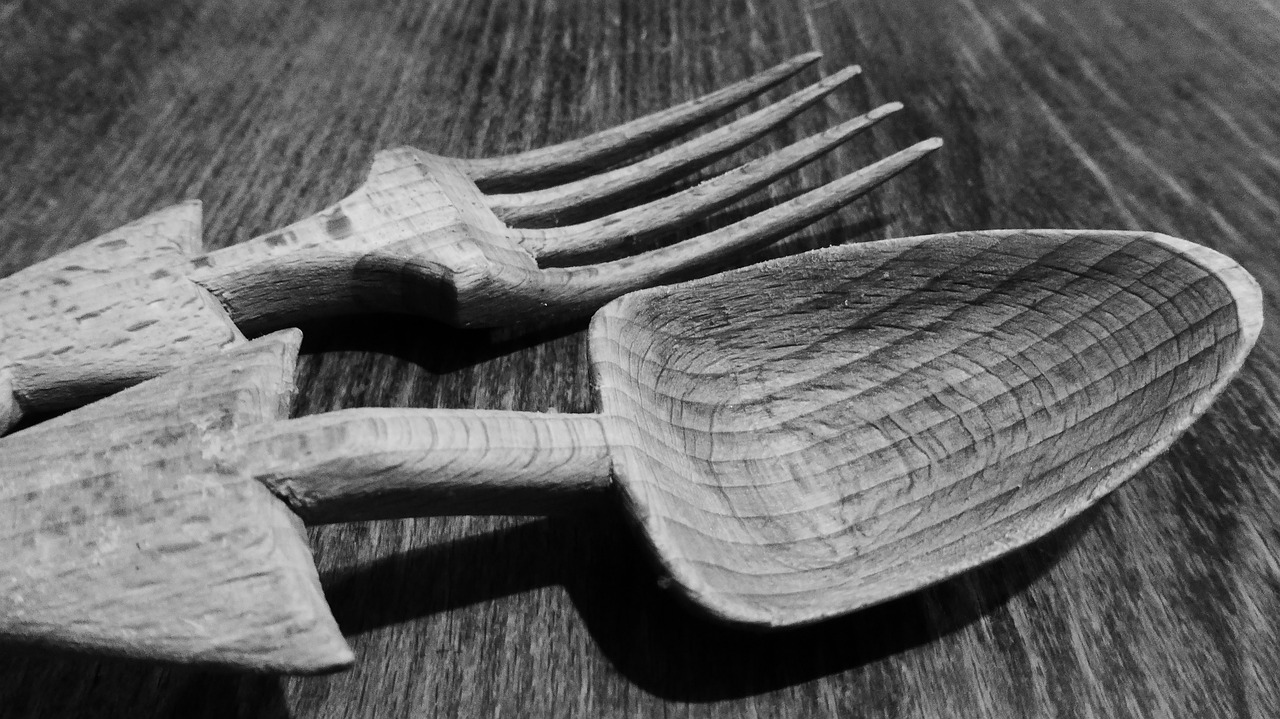
When diving into the world of spoon carving, having the right tools is like having a well-stocked kitchen for a chef. It sets the stage for creativity and ensures you have everything you need to bring your ideas to life. So, what tools should you consider essential for your carving journey? Let's break it down!
First and foremost, you'll want to invest in a good quality carving knife. This is your primary tool, and it will be your best friend throughout the process. A carving knife allows you to make precise cuts and is essential for shaping the spoon. Look for one with a comfortable grip and a sharp blade to make your carving experience smooth and enjoyable.
In addition to a carving knife, a hook knife is another indispensable tool. This specialized knife is designed for hollowing out the bowl of the spoon, allowing you to create that perfect scoop. The hook knife's unique shape makes it easier to carve deeper curves without straining your hands. If you’re serious about spoon carving, this tool is a must-have!
Now, you might be wondering about the safety gear. Yes, safety should never be overlooked! A pair of cut-resistant gloves can provide an extra layer of protection, especially for beginners who are still mastering their technique. It’s always better to be safe than sorry, right?
Another tool worth mentioning is a spoon gouge. This tool is fantastic for adding intricate details and refining the shape of your spoon. It can help you achieve a smooth finish and is particularly useful for creating decorative elements. If you want your spoon to stand out, investing in a gouge can be a game-changer!
To keep everything organized, consider getting a tool roll or a small toolbox. This way, you can safely store your tools and ensure they remain sharp and ready for action. Trust me, a well-organized workspace can significantly enhance your carving experience.
Lastly, don't forget about sandpaper! While not a carving tool per se, it plays a crucial role in finishing your spoon. Sandpaper comes in various grits, so you can start with a coarser grit to remove any rough spots and finish with a finer grit for a smooth, polished surface. It’s the cherry on top of your spoon-making adventure!
To summarize, here’s a quick table of essential tools for spoon carving:
| Tool | Purpose |
|---|---|
| Carving Knife | Primary tool for shaping the spoon |
| Hook Knife | For hollowing out the bowl of the spoon |
| Spoon Gouge | For adding details and refining shapes |
| Cut-Resistant Gloves | For safety during carving |
| Sandpaper | For finishing touches and smoothing |
| Tool Roll/Box | For organizing and storing tools |
With these tools in your arsenal, you’re well on your way to creating stunning wooden spoons. Remember, the journey of spoon carving is as rewarding as the final product, so enjoy the process and let your creativity flow!
Selecting the Right Wood
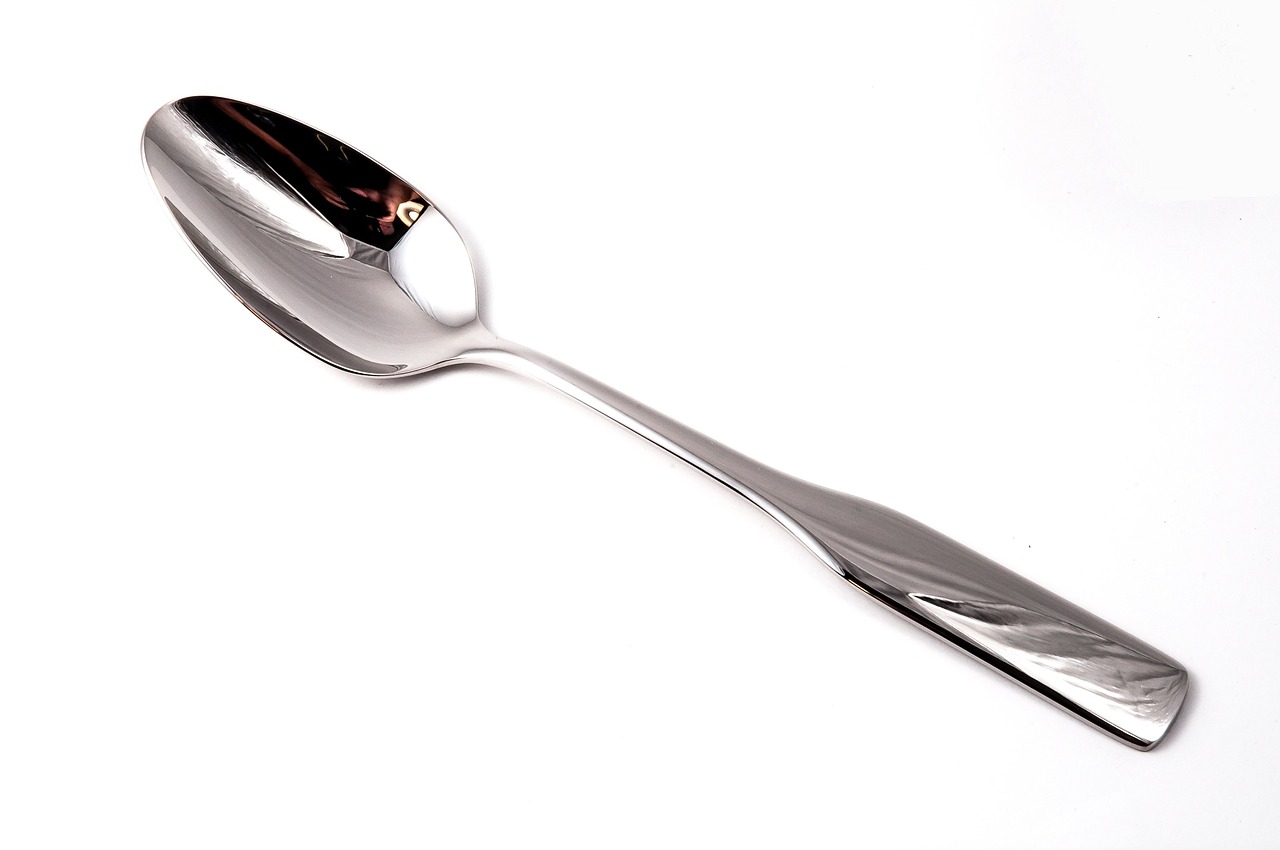
When it comes to wooden spoon carving, one of the most crucial decisions you'll make is . The type of wood you choose can significantly influence not just the ease of carving but also the final appearance and durability of your spoon. Imagine trying to create a masterpiece with a material that just won't cooperate—frustrating, right? So, let’s dive into the world of wood and explore what makes certain types better suited for your carving journey.
First off, it’s essential to understand that not all woods are created equal. Some woods are harder and more challenging to carve, while others are softer and easier to work with, especially for beginners. Softwoods, such as pine or cedar, are generally easier to carve but might not hold up as well over time compared to hardwoods like oak or maple. Therefore, for those just starting, it’s often recommended to stick with softer woods until you get the hang of the techniques.
However, if you’re ready to take on a bit of a challenge, hardwoods can offer stunning results. They usually provide a finer finish and greater durability, making your spoon not just a tool but a piece of art. Here’s a quick comparison of hardwoods vs. softwoods to help you decide:
| Type of Wood | Durability | Workability | Finish Quality |
|---|---|---|---|
| Hardwoods | High | Moderate | Excellent |
| Softwoods | Low to Moderate | Easy | Good |
Now, let’s talk about some of the popular wood types that are favored by spoon carvers:
- Cherry: Known for its beautiful color and fine grain, cherry is a favorite among many woodworkers. It carves well and ages beautifully, developing a rich patina over time.
- Birch: This wood is light in color and has a fine grain, making it an excellent choice for beginners. It’s relatively easy to carve and holds detail well.
- Maple: Hard and durable, maple is perfect for creating sturdy spoons. Its tight grain allows for intricate designs, but it can be a bit challenging for novice carvers.
Before you start carving, proper wood preparation is key. Seasoning your wood properly can prevent cracking and warping, which is crucial for achieving the best results. Cutting your wood into manageable pieces is also important; you don’t want to wrestle with a massive block when you’re just trying to carve a simple spoon! So, take your time to prepare your wood, and you’ll thank yourself later when you’re gliding your carving tools through the grain.
In summary, selecting the right wood for spoon carving is not just about preference; it’s about understanding the characteristics of each type. Whether you choose a softwood for ease or a hardwood for durability and beauty, the right choice will make all the difference in your crafting experience. So, as you embark on this exciting journey, remember to choose wisely and enjoy the process!

Hardwoods vs. Softwoods
When diving into the world of spoon carving, one of the first decisions you'll face is whether to work with hardwoods or softwoods. Understanding the differences between these two categories of wood can significantly impact your carving experience and the quality of your finished product. So, let's break it down!
Hardwoods come from deciduous trees, which are trees that lose their leaves annually. These woods are generally denser and more durable, making them ideal for items that will see a lot of use, like spoons. Common hardwoods include oak, maple, and cherry. They often have beautiful grain patterns and can take on a fine finish, which is perfect for creating a spoon that not only functions well but also looks stunning on your kitchen table. However, hardwoods can be more challenging to carve due to their density, requiring sharper tools and more effort.
On the flip side, we have softwoods, which are sourced from coniferous trees, such as pines and spruces. These woods are typically lighter and easier to carve, making them a fantastic choice for beginners. Softwoods tend to be less expensive and more readily available, which can be a significant advantage if you're just starting out. However, they may not hold up as well over time compared to hardwoods, particularly if you're crafting something that will be used frequently.
To illustrate the differences, here's a quick comparison:
| Characteristic | Hardwoods | Softwoods |
|---|---|---|
| Density | Higher | Lower |
| Durability | More durable | Less durable |
| Ease of Carving | More difficult | Easier |
| Cost | Generally more expensive | Generally less expensive |
Ultimately, the choice between hardwoods and softwoods boils down to your personal preference and the type of spoon you wish to create. If you're looking for a spoon that can withstand the rigors of daily use while showcasing exquisite craftsmanship, hardwoods might be your best bet. However, if you're just starting and want to practice your skills without breaking the bank, softwoods could be the way to go. Each type of wood has its unique charm and challenges, and experimenting with both can be a rewarding experience!
Remember, whether you choose hardwoods or softwoods, the key is to enjoy the process of carving and to let your creativity flow. Happy carving!
- What is the best wood for beginners in spoon carving? Softwoods like pine or cedar are often recommended for beginners due to their ease of carving.
- Can I use any type of wood for carving? While many types of wood can be carved, it's best to avoid woods that are too resinous or prone to splintering.
- How do I maintain my carving tools? Regular sharpening and proper storage will help keep your tools in good condition for years to come.
Popular Wood Types
When it comes to wooden spoon carving, the choice of wood can make all the difference in your crafting experience and the final product. Different types of wood possess unique characteristics that can influence not only the ease of carving but also the aesthetic and functional qualities of the spoon. Let’s explore some of the most popular wood types favored by spoon carvers, each bringing its own charm and benefits to the table.
One of the top choices among woodworkers is cherry wood. Known for its beautiful, rich color that deepens over time, cherry is a hardwood that offers a fine grain, making it relatively easy to carve. It has a smooth finish, which is perfect for creating utensils that are not only functional but also visually appealing. The durability of cherry wood ensures that your spoon can withstand regular use while maintaining its beauty.
Next up, we have birch wood, another favorite among beginners. Birch is a soft hardwood that is readily available and affordable, making it an excellent option for those just starting out. Its light color and fine grain allow for detailed carving, and it holds up well over time. Plus, birch is quite forgiving, meaning you can practice your techniques without worrying too much about damaging the wood.
Another popular choice is maple wood, renowned for its strength and durability. Maple is a dense hardwood that can be a bit more challenging to carve, but the results are often worth the effort. It has a creamy white color with a subtle grain pattern, which can create stunning pieces when finished correctly. Maple spoons are perfect for everyday use, as they resist wear and tear remarkably well.
For those looking for something a bit different, walnut wood offers a beautiful dark finish that can add a touch of elegance to your spoon collection. While it is a bit more challenging to work with due to its density, walnut is incredibly rewarding once mastered. The rich hue and intricate grain patterns make walnut spoons stand out, turning them into conversation starters at any dinner table.
Finally, let’s not forget about ash wood. Known for its excellent shock resistance, ash is often used in tools and sports equipment, making it a robust choice for spoon carving as well. Its light color and pronounced grain can create striking pieces, and it carves easily, making it suitable for both beginners and experienced carvers.
In summary, the choice of wood can significantly affect your spoon carving journey. Here’s a quick comparison of these popular wood types:
| Wood Type | Hardness | Color | Grain | Ease of Carving |
|---|---|---|---|---|
| Cherry | Hard | Rich reddish-brown | Fine | Easy |
| Birch | Soft Hardwood | Light cream | Fine | Very Easy |
| Maple | Hard | Creamy white | Subtle | Moderate |
| Walnut | Hard | Dark brown | Intricate | Challenging |
| Ash | Hard | Light | Pronounced | Easy |
Choosing the right wood type can elevate your spoon carving experience and result in stunning, functional pieces that you can be proud of. Experimenting with different woods will not only enhance your skills but also allow you to discover which types resonate with your personal style and preferences.
- What is the best wood for beginners? Birch is often recommended for beginners due to its ease of carving and affordability.
- Can I use any wood for spoon carving? While many types of wood can be used, it’s best to avoid softwoods like pine, as they can splinter and are less durable.
- How do I finish my carved spoon? Common finishing techniques include sanding, oiling, and sealing to enhance the wood's appearance and protect it from moisture.
Wood Preparation Techniques
Before you dive into the exciting world of spoon carving, it's essential to understand the importance of proper wood preparation. Just like a chef wouldn’t start cooking without prepping their ingredients, you shouldn’t start carving without getting your wood ready. The process of preparing your wood not only sets the stage for a successful carving experience but also enhances the overall quality and durability of your final product.
One of the first steps in wood preparation is seasoning. This involves drying out the wood to reduce its moisture content, which is crucial because wood that’s too wet can warp or crack as it dries. Seasoning can be done naturally by leaving the wood in a dry, well-ventilated area for several months. Alternatively, you can use a kiln if you need a quicker solution. Regardless of the method, the goal is to reach a moisture content of about 6-8%, which is ideal for carving.
After seasoning, the next step is to cut the wood into manageable chunks. You want to select a piece that has a good grain structure with minimal knots, as these can complicate your carving. When cutting your wood, aim for a size that feels comfortable to handle; typically, a block that is around 2 inches thick and 8-12 inches long is a great starting point. This size allows you to create a spoon without being overly cumbersome.
Additionally, consider the orientation of the grain when cutting. Ideally, you want the grain to run lengthwise along the spoon; this will provide strength and help prevent splitting during the carving process. If you're unsure, take a moment to examine the wood grain carefully, as it can make a world of difference in the final product.
Once you have your wood cut and seasoned, it’s time to get your tools ready. Make sure your carving tools are sharp and clean. A dull tool can lead to more accidents and less precise cuts, which is the last thing you want when trying to create a beautiful spoon. You might even want to spend some time learning how to sharpen your tools properly, as this skill alone can significantly enhance your carving experience.
Finally, before you start carving, it’s a good practice to draw your design on the wood. This can be as simple as sketching the outline of your spoon with a pencil. Having a visual guide can help you stay on track and make sure you're carving the right shape. It’s like following a map on a road trip; it keeps you from getting lost!
In summary, the key steps in wood preparation include:
- Seasoning: Allow the wood to dry out to a suitable moisture level.
- Cutting: Choose a manageable size and ensure the grain runs in the right direction.
- Tool Maintenance: Keep your carving tools sharp and ready for action.
- Design Planning: Sketch your spoon design on the wood before carving.
By following these wood preparation techniques, you’ll set yourself up for a successful and enjoyable spoon carving adventure. Remember, the effort you put into preparing your wood will pay off in the quality and beauty of your finished spoon.
Q: How long should I season my wood?
A: Seasoning can take anywhere from a few weeks to several months, depending on the thickness of the wood and the drying conditions. Aim for a moisture content of 6-8%.
Q: What type of wood is best for beginners?
A: Softwoods like pine are often recommended for beginners due to their ease of carving. However, hardwoods like cherry and birch can also be good choices once you're comfortable.
Q: How can I tell if my tools are sharp enough?
A: A sharp tool will slice through the wood cleanly without excessive pressure. If you find yourself struggling, it’s time to sharpen your tools.
Q: Can I carve green wood?
A: Yes, green wood can be easier to carve because it’s softer. However, it’s important to remember that it may warp as it dries.
Basic Carving Techniques
When it comes to wooden spoon carving, mastering the basic carving techniques is essential for crafting beautiful and functional pieces. Think of this as the foundation of your woodworking skills; without a solid base, even the most intricate designs can crumble. So, let’s dive into the essential methods that will turn a simple block of wood into a stunning spoon!
First off, you'll want to start with the roughing out technique. This is where you take your block of wood and begin to shape it into the general form of the spoon. Using a carving knife or a hatchet, you'll remove large chunks of wood to create the basic outline. Imagine sculpting a clay figure; you remove the excess to reveal the form within. As you work, don't fret about perfection just yet; focus on getting the shape right. This step is all about removing material efficiently and effectively.
Next comes the refining details. Once you have your spoon's basic shape, it's time to switch to more precise tools, like a detail knife or a smaller gouge. This is where you’ll start to carve out the bowl of the spoon, adding curves and contours that make it not only functional but also aesthetically pleasing. Think of this as painting a canvas; the finer details will bring your piece to life. Pay attention to the grain of the wood as you carve; it can guide you in achieving the best finish.
As you refine your spoon, remember to frequently check your progress. Hold the spoon in your hand to see how it feels. Does it fit comfortably? Is the bowl deep enough? This is a vital part of the process. You want to create a spoon that not only looks good but also feels good to use. If something feels off, don’t hesitate to go back and make adjustments.
One technique that many beginners overlook is shaping the handle. The handle should be comfortable to grip, so take your time to carve it down to a shape that fits your hand well. You might want to try different shapes and sizes to see what feels best. This is your spoon, after all, and it should reflect your personal style and comfort.
Finally, once you're satisfied with the shape and details of your spoon, it's time to smooth out the surface. Use sandpaper or a sanding block to gently smooth the entire surface, making sure to follow the grain of the wood. This step is crucial; a well-sanded spoon not only looks better but also feels better in your hand and is more pleasant to use. Think of it as polishing a gemstone; the smoother the surface, the more it shines!
In summary, here are the basic carving techniques to keep in mind:
- Roughing Out: Shape the general form of the spoon.
- Refining Details: Use smaller tools to carve out the bowl and add curves.
- Shaping the Handle: Ensure the handle is comfortable to grip.
- Smoothing the Surface: Sand the spoon for a polished finish.
With these techniques under your belt, you're well on your way to creating beautiful wooden spoons that not only serve their purpose but also tell a story of craftsmanship and creativity. Remember, practice makes perfect, so don’t be afraid to experiment and find your unique style!
Q: What tools do I need to start carving wooden spoons?
A: At a minimum, you'll need a carving knife, a hook knife for the bowl, and some sandpaper. As you progress, you might want to invest in more specialized tools.
Q: What type of wood is best for beginners?
A: Softwoods like pine are great for beginners due to their ease of carving. However, hardwoods like cherry or maple provide a more durable and beautiful finish once you're more comfortable with the techniques.
Q: How long does it take to carve a wooden spoon?
A: The time it takes can vary based on the complexity of the design and your skill level. A simple spoon can take anywhere from 1 to 3 hours, while more intricate designs may take longer.
Q: Can I carve spoons indoors?
A: Yes, you can carve indoors as long as you have a suitable workspace. Just make sure to keep your area clean and be mindful of any wood shavings or debris.

Finishing Your Spoon
Once you've carved your wooden spoon to perfection, it's time to give it the finishing touches that will elevate its beauty and functionality. Finishing is not just about aesthetics; it plays a crucial role in enhancing the durability of your creation. Think of it as the cherry on top of a delicious cake! So, what are the essential steps to finish your spoon effectively?
First, you'll want to start with sanding. This step is vital to achieve a smooth surface that feels great in your hand. Begin with a coarser grit sandpaper, around 80 to 120 grit, to remove any rough spots or tool marks. Gradually move to finer grits, such as 220 and even up to 400 grit, to create a silky finish. Remember, the smoother the surface, the better the finish will be!
After sanding, it’s time to apply a finish. Oiling is a popular choice among spoon carvers, as it not only enhances the wood's natural grain but also provides a protective barrier against moisture. Food-safe oils like mineral oil, walnut oil, or coconut oil are excellent options. Apply a generous amount of oil with a soft cloth, allowing it to soak in for a few hours or overnight. Wipe off any excess oil to prevent a sticky residue.
Another option for finishing is sealing your spoon. This is particularly important if you plan to use it regularly in the kitchen. A food-safe sealant can protect the wood from stains and moisture. However, be cautious with sealants; always ensure they are safe for food contact. Follow the manufacturer's instructions for application, usually involving a few coats with drying time in between.
Finally, let’s not forget about the importance of maintenance. A well-finished spoon will last longer, but it still requires care. Regularly reapply oil to keep the wood nourished and prevent it from drying out. Think of it like moisturizing your skin; it keeps it healthy and looking good!
In summary, finishing your wooden spoon is an art in itself. By mastering the techniques of sanding, oiling, and sealing, you can create a beautiful and functional piece that will serve you well for years to come. Remember, the finishing touches are what transform a simple spoon into a cherished kitchen tool.
- What type of oil is best for finishing wooden spoons? Food-safe mineral oil, walnut oil, and coconut oil are all excellent choices for finishing wooden spoons.
- How often should I reapply oil to my spoon? It’s best to reapply oil every few weeks, or whenever the wood looks dry or dull.
- Can I use varnish or polyurethane on my spoon? No, these products are not food-safe and should be avoided. Stick to food-safe oils and sealants.
- How can I remove scratches from my finished spoon? Lightly sand the scratched area with fine-grit sandpaper and reapply oil to blend it in.

Safety Tips for Carving
When it comes to wooden spoon carving, safety should always be at the forefront of your mind. Carving can be an incredibly rewarding hobby, but it also comes with its own set of risks. To ensure that you have a fun and accident-free experience, consider these essential safety tips. First and foremost, always wear the right protective gear. A good pair of cut-resistant gloves can save your fingers from unexpected slips, while safety glasses will protect your eyes from wood shavings and chips flying around as you carve.
Another crucial aspect of safety is maintaining a clean and organized workspace. A cluttered area can lead to accidents, so make sure your carving station is tidy and well-lit. When you’re carving, always be mindful of your posture and grip. Hold your carving tools firmly, but not too tightly, and carve away from your body. This simple practice can prevent serious injuries should your tool slip unexpectedly.
Additionally, consider using a carving bench or a stable surface to work on. This helps to minimize movement and gives you better control over your tools. It’s also a good idea to invest in a good-quality carving knife that feels comfortable in your hand. Dull tools can be more dangerous than sharp ones because they require more force to cut through wood, increasing the chance of slips.
Lastly, don’t rush the process. Carving is as much about patience as it is about skill. Take your time to enjoy each cut and remember to take breaks to avoid fatigue. If you’re feeling tired or distracted, it’s best to step away and return when you’re feeling focused and refreshed. By following these safety tips, you can make your spoon carving experience both enjoyable and safe.
Curious about the world of spoon carving? Here are some common questions that beginners often ask:
- What type of wood is safest for beginners? Softwoods like pine are great because they are easier to carve and less likely to cause injury.
- How can I prevent my tools from getting dull? Regularly honing your tools and using them correctly will keep them sharp and efficient.
- What should I do if I get a cut? Clean the wound immediately with soap and water, apply an antiseptic, and cover it with a bandage.
Common Mistakes to Avoid
When diving into the world of wooden spoon carving, it's easy to get caught up in excitement and overlook some fundamental practices. One of the most common mistakes beginners make is underestimating the importance of proper tool maintenance. Imagine trying to paint a masterpiece with a brush that has bristles falling out—frustrating, right? Similarly, dull or poorly maintained carving tools can lead to uneven cuts and a lot of wasted time. Always keep your tools sharp and clean to ensure a smooth carving experience.
Another frequent pitfall is choosing the wrong type of wood. Not all wood is created equal, and using a type that is too hard or too soft for your skill level can make the process daunting. For instance, while exotic hardwoods like ebony may look stunning, they can be incredibly difficult to work with for a beginner. Instead, opt for woods like basswood or butternut, which are more forgiving and easier to carve. This choice can significantly enhance your carving journey, making it more enjoyable and less stressful.
Additionally, many novices rush through the initial roughing out phase. This phase is crucial for establishing the overall shape of your spoon. If you skip it or try to refine details too early, you might find yourself struggling to correct mistakes later on. Think of it like building a house; if the foundation isn’t solid, the entire structure is at risk. Take your time to create a well-defined shape before moving on to finer details.
Another common mistake is neglecting safety precautions. Carving can be a fun and rewarding hobby, but it also comes with its risks. Always use a carving glove and ensure your work area is well-lit and free from distractions. It’s easy to get lost in the moment, but a moment's lapse in attention can lead to accidents. Remember, safety should always come first!
Lastly, many beginners fail to embrace the learning process. Carving is an art that takes time to master. It’s easy to get disheartened by imperfections or mistakes, but every carving is a step toward improvement. Instead of viewing mistakes as setbacks, consider them valuable lessons that will enhance your skills over time. Celebrate your progress, no matter how small, and keep pushing forward!
- What is the best wood for beginners? Basswood and butternut are excellent choices due to their softness and ease of carving.
- How can I maintain my carving tools? Regularly sharpen your tools and clean them after each use to ensure longevity and performance.
- What safety gear should I use? A carving glove, safety glasses, and a well-lit work area are essential for safe carving.
- Is it normal to make mistakes while carving? Absolutely! Mistakes are part of the learning process and can help improve your skills over time.

Inspiration and Resources
Finding inspiration is crucial in the art of spoon carving, as it fuels your creativity and drives your passion for this beautiful craft. Whether you're a novice or an experienced carver, tapping into various resources can significantly enhance your skills and broaden your understanding of techniques and design. One of the best ways to ignite your imagination is by exploring the work of other artisans. You can find stunning spoon designs on platforms like Instagram and Pinterest, where carvers from around the world showcase their creations. These platforms are not just about visuals; they often provide insights into the tools and techniques used, giving you a peek into the creative process.
Books are another fantastic resource for spoon carving enthusiasts. Titles like The Spoon Carver's Apprentice by James Krenov and Wooden Spoon Carving by Barn the Spoon offer step-by-step guides, illustrations, and personal anecdotes that can inspire your journey. Additionally, local libraries or online bookstores often have a plethora of resources that can help you dive deeper into the craft. Don’t overlook the power of video tutorials, either! Platforms like YouTube are treasure troves of knowledge, featuring experienced carvers demonstrating techniques and sharing tips that can be invaluable for your learning process.
Connecting with fellow spoon carvers is another excellent way to find inspiration. Online communities, such as forums or Facebook groups, allow you to share your work, ask questions, and receive feedback. Engaging with others who share your passion can provide motivation and new ideas, making your carving experience even more enjoyable. You might even discover local carving clubs or workshops where you can meet in person, exchange ideas, and learn from each other.
To summarize, here are some key resources to explore:
- Social Media: Instagram, Pinterest
- Books: "The Spoon Carver's Apprentice," "Wooden Spoon Carving"
- Online Video Tutorials: YouTube
- Online Communities: Carving forums, Facebook groups
Remember, inspiration can come from anywhere. Whether it's a walk in the woods, observing the natural curves of branches, or even a simple kitchen utensil, keep your eyes open and your mind curious. The journey of spoon carving is as much about personal expression as it is about the end product. So, go out there, explore, and let your creativity flow!
Q1: What is the best wood for beginners to start with?
A1: Basswood is often recommended for beginners due to its softness and ease of carving. However, woods like cherry and birch are also great choices as you gain more experience.
Q2: How long does it take to carve a wooden spoon?
A2: The time it takes to carve a spoon can vary greatly depending on your skill level and the complexity of the design. A simple spoon might take a couple of hours, while more intricate designs could take several days.
Q3: Do I need special tools for spoon carving?
A3: While you can start with basic tools like a carving knife and a hook knife, investing in specialized tools can make the process easier and more enjoyable as you progress.
Q4: Is it safe to carve wood?
A4: Yes, but safety is paramount. Always use sharp tools, keep your hands clear of the blade, and wear protective gear if necessary. Following safety guidelines will help you enjoy the experience without accidents.
Frequently Asked Questions
- What tools do I need to get started with wooden spoon carving?
To kick off your spoon carving journey, you'll need a few essential tools. A carving knife, a hook knife, and a saw are crucial for shaping the wood. Don't forget a good sharpening stone to keep your tools in tip-top shape! Having a sturdy workbench and safety gear like gloves and goggles will also enhance your carving experience.
- What type of wood is best for beginners?
When starting out, it's wise to choose softer woods like basswood or butternut. These woods are easier to carve and allow you to practice your techniques without too much resistance. As you gain confidence, you can venture into harder woods like cherry or maple, which offer beautiful finishes but require more effort.
- How do I prepare my wood before carving?
Preparing your wood properly is a game changer! Start by seasoning your wood to reduce moisture content, which helps prevent cracking. Cut your wood into manageable sizes, and always inspect it for knots or defects that could complicate your carving process. A well-prepared piece of wood is the foundation of a great spoon!
- What are some common mistakes to avoid while carving?
Ah, the classic pitfalls! One common mistake is rushing through the carving process. Take your time to enjoy each step! Another is neglecting tool maintenance; dull tools can lead to accidents and frustration. Lastly, don't forget to pay attention to the grain of the wood; carving against it can lead to splintering.
- How can I finish my wooden spoon for durability?
Finishing your spoon is all about enhancing its beauty and longevity. Sanding the surface smooth is a must, followed by applying food-safe mineral oil or beeswax to protect the wood. Sealing it properly will keep moisture out and ensure your spoon lasts for years to come!
- Where can I find inspiration and resources for spoon carving?
The internet is a treasure trove for spoon carving enthusiasts! Websites, YouTube tutorials, and online communities like forums or social media groups are fantastic places to connect with fellow carvers. Books on woodworking can also provide valuable insights and inspire new designs. Dive in and discover your creative spark!


