
How to Draw Human Anatomy Accurately
Drawing human anatomy accurately is an art that requires a blend of observation, practice, and understanding of the human form. Whether you're an aspiring artist or an experienced one looking to refine your skills, mastering the intricacies of human anatomy can elevate your artwork to new heights. The human body is a complex structure, composed of various shapes, proportions, and movements. By focusing on these elements, you can create drawings that not only capture the physical appearance but also convey emotions and stories.
So, how do you start? First, it's essential to understand the basic proportions of the human body. This involves learning the standard measurements and ratios that define human figures. For instance, did you know that the average adult human body is about 7.5 heads tall? Recognizing these proportions can serve as a foundation upon which you can build more detailed and realistic representations. From there, you can explore different tools and techniques that will aid you in your drawing journey.
In addition to understanding proportions, using the right tools is crucial. Imagine trying to paint a masterpiece with a broken brush; the same principle applies to drawing. High-quality materials, such as graphite pencils, charcoal, and inks, can significantly enhance your sketches. Each medium offers unique characteristics that can help bring your anatomical drawings to life. For example, graphite pencils are fantastic for detailed work, while charcoal can provide rich textures that add depth and drama to your pieces.
Moreover, studying anatomy through various references is vital. There’s a treasure trove of resources available, from anatomy books to online tutorials, and even live models. Engaging with these resources not only deepens your understanding of the human body but also allows you to observe how muscles and bones interact in real life. Observational drawing from live models is particularly beneficial, as it challenges you to capture movement and posture in real-time, honing your skills in a way that static images cannot.
As you embark on this journey, remember that practice makes perfect. Regularly sketching the human form, whether through daily exercises or a structured study schedule, will build your confidence and muscle memory. Over time, you’ll notice improvements in your ability to depict the human figure accurately. Keep challenging yourself with new techniques, and don't shy away from making mistakes—they're often the best teachers.
In summary, drawing human anatomy accurately is an enriching experience that combines technique, observation, and creativity. With the right tools, a solid understanding of proportions, and a commitment to practice, you can develop your skills and create artwork that resonates with viewers. So grab your sketchbook and start exploring the fascinating world of human anatomy!
- What are the best resources for learning human anatomy? There are many excellent books and online resources available. Look for anatomy textbooks, art tutorials, and websites dedicated to figure drawing.
- How can I improve my proportions in drawing? Practice measuring the human figure using the head as a unit of measurement. Also, consider using a grid system to help maintain accurate proportions.
- Is it necessary to draw from live models? While it’s not mandatory, drawing from live models provides invaluable experience and helps you understand movement and anatomy in a way that photographs cannot.
- What should I focus on when starting to draw human anatomy? Start with basic shapes and proportions before moving on to details like muscle structure and facial features. Building a strong foundation is key to success.

Understanding Human Proportions
Grasping the basic proportions of the human body is crucial for accurate anatomy drawing. The human figure is often simplified into a set of standard measurements and ratios that serve as a foundation for artists. Understanding these proportions is like having a roadmap; it guides you through the complexity of the human form, ensuring that your drawings have a sense of realism and balance.
To start, it's essential to recognize that the average adult human body can be divided into eight equal parts, which are commonly referred to as "heads." This means that if you measure the height of the head, you can use that measurement to determine the overall height of the figure. For instance, if the head is 10 inches tall, the entire figure would be approximately 80 inches tall. This method helps maintain correct proportions, making it easier to visualize and draw the body accurately.
Here’s a quick breakdown of the standard proportions:
| Body Part | Proportion (in heads) |
|---|---|
| Total Height | 8 heads |
| Shoulders | 2 heads wide |
| Waist | 1.5 heads wide |
| Knees | 4 heads down |
| Feet | 8 heads down |
These proportions can vary based on age, gender, and individual differences, but they provide a solid starting point. For example, children have different proportions; their heads are larger in relation to their bodies, which can be about 4 to 5 heads tall. As you practice, you'll start to notice these variations and how they affect the overall appearance of your drawings.
It's also essential to consider the dynamic nature of human proportions. When a person is in motion, their body can stretch and compress, altering these standard measurements. This is where understanding the underlying structure of the body becomes invaluable. Think of it like a rubber band; when you pull it, it changes shape, but it still has its original form. By studying the human body in various poses, you can learn to capture this dynamism in your drawings.
In addition to the head-to-body ratio, understanding the placement of key landmarks such as the shoulders, hips, and knees can significantly enhance your drawings. For instance, when the arms are raised, the shoulder line shifts, and the torso elongates. Paying attention to these changes will help you create more lifelike and expressive figures.
To wrap it up, mastering human proportions is not just about memorizing numbers; it's about developing a keen eye for detail and understanding the relationships between different parts of the body. Remember, practice makes perfect! The more you draw, the more intuitive these proportions will become, allowing you to focus on creating stunning and realistic artwork.
- What is the most important aspect of human proportions? Understanding the head-to-body ratio is crucial, as it serves as a foundation for accurate representation.
- How can I practice human proportions effectively? Regularly sketching from life or using reference images can significantly improve your understanding of proportions.
- Are there exceptions to the standard proportions? Yes, proportions can vary based on individual anatomy, age, and body type, so it's important to observe and adapt.

Essential Tools for Anatomy Drawing
When it comes to anatomy drawing, having the right tools can make all the difference between a mediocre sketch and a stunning piece of art. Imagine trying to build a house without the right tools—it's simply not going to turn out well! Similarly, the tools you choose will significantly impact your ability to capture the intricate details of the human body. In this section, we will explore the essential tools you need to elevate your anatomical sketches to the next level.
One of the most important tools in your arsenal is the humble graphite pencil. These versatile instruments come in various hardness levels, allowing you to create everything from fine lines to deep, rich shadows. For example, a softer pencil (like 4B or 6B) is perfect for shading, while a harder pencil (like 2H or H) is ideal for detailed line work. Understanding how to use these different pencils will help you achieve a range of textures and depths in your drawings.
Another fantastic medium to consider is charcoal. Charcoal is known for its ability to create bold, expressive lines and rich, velvety blacks. It can be a bit messy, but that's part of its charm! When using charcoal, you can experiment with blending and smudging techniques to create realistic muscle definitions and shadows. However, it’s essential to have a good set of charcoal pencils and sticks, as well as a blending stump to help you achieve those smooth transitions.
In addition to graphite and charcoal, inks can also add a unique flair to your anatomy drawings. Using ink can help you develop a strong sense of line and contrast. Whether you're using a brush pen for fluid strokes or a technical pen for precise details, ink can bring a dynamic quality to your work. Just remember to practice your line work, as ink is unforgiving and doesn’t allow for easy corrections!
Lastly, don’t forget about the importance of paper. The type of paper you choose can greatly affect how your medium interacts with the surface. For graphite, a smooth, heavyweight paper is ideal for detailed work, while charcoal requires textured paper to grip the medium better. Experimenting with different types of paper can also inspire new techniques and styles in your drawings.
In summary, the essential tools for anatomy drawing include:
- Graphite Pencils - For detailed sketches and shading.
- Charcoal - For bold lines and expressive textures.
- Inks - For strong contrasts and dynamic line work.
- Quality Paper - To enhance the effects of your chosen medium.
With the right tools in hand, you're well on your way to mastering the art of anatomy drawing. Remember, just like a chef needs the right knives, an artist needs the right instruments to create their masterpiece. Now that you have a grasp on the essential tools, let’s move on to how you can study anatomy effectively to improve your skills even further.
Q: What type of pencil is best for beginners?
A: For beginners, a range of pencils from H to 6B is recommended. This allows for versatility in shading and line work.
Q: Can I use regular printer paper for charcoal drawings?
A: While you can use printer paper, it’s better to use textured paper specifically designed for charcoal to achieve better results.
Q: How often should I practice anatomy drawing?
A: Regular practice is key! Aim for at least a few times a week to build muscle memory and improve your skills.
Q: Are there specific books you recommend for learning anatomy?
A: Yes, books like "Anatomy for Sculptors" and "Figure Drawing: Design and Invention" are excellent resources for understanding human anatomy.
Graphite Pencils
When it comes to drawing human anatomy, are your best friends. These versatile tools allow for a range of techniques, from light sketching to intricate detailing. But not all pencils are created equal! Understanding the different types of graphite pencils can elevate your drawing game significantly. Generally, pencils are categorized by their hardness, which is indicated by a grading scale. The scale ranges from H (hard) to B (black), with F (fine point) sitting in the middle. Here's a quick breakdown:
| Grade | Characteristics |
|---|---|
| H | Produces a lighter mark; good for fine details and precise lines. |
| B | Creates darker marks; ideal for shading and expressive lines. |
| F | A balance between hard and soft; versatile for various styles. |
For anatomical sketches, a combination of HB and 2B pencils often works best. While the HB pencil is perfect for initial outlines, the 2B pencil adds depth through shading. But don't stop there! Experimenting with different grades can help you find your unique style.
Now, let’s talk about techniques. When using graphite pencils, layering is key. Start with light strokes to establish your basic shapes and proportions. Gradually build up darker tones and details. This method not only improves your control but also allows for corrections along the way. Remember, mistakes are just opportunities for creativity!
Another important technique is blending. You can use tools like blending stumps or even your fingers to smooth out transitions between light and dark areas. This creates a more realistic texture that mimics the soft curves of the human form. However, be cautious not to over-blend; you still want to retain some of the pencil's texture for a dynamic look.
Finally, keep your pencils sharp! A sharp pencil allows for cleaner lines and more precise details, which are crucial when capturing the intricacies of human anatomy. Regularly sharpening your pencils can make a world of difference in the quality of your sketches. So, next time you sit down to draw, make sure you have a variety of graphite pencils at your disposal, and don’t hesitate to experiment with different techniques!
Charcoal and Inks
When it comes to drawing human anatomy, charcoal and inks are two of the most powerful mediums at your disposal. Not only do they allow for a wide range of expressive possibilities, but they also bring a unique texture and depth to your artwork that other materials might struggle to achieve. Charcoal, with its rich, velvety blacks, can create dramatic contrasts and soft transitions, making it ideal for capturing the subtle nuances of the human form. Meanwhile, inks can add a crispness and clarity that can enhance the details of your anatomical sketches.
To get started with charcoal, consider the different types available. You can choose from vine charcoal, which is great for fine lines and soft shading, or compressed charcoal, which provides darker, more intense marks. Each type has its own unique properties, so experimenting with them can lead to exciting discoveries in your artistic process. The beauty of charcoal lies in its ability to be easily manipulated; you can smudge it for softer edges or use an eraser to lift off highlights, creating a three-dimensional effect on your paper.
Inks, on the other hand, offer a different kind of challenge. They require a steady hand and a bit of practice to master, but the results can be stunning. When using ink for anatomical drawings, consider using a variety of nibs and brushes to achieve different line qualities. For instance, a fine nib can help you create delicate details, while a broader brush can be used for bold strokes and shading. One of the best ways to practice with ink is to try ink wash techniques, where you dilute the ink with water to create gradients that mimic the soft shadows found in human anatomy.
Here’s a quick comparison table to help you understand the differences between charcoal and ink:
| Medium | Characteristics | Best Used For |
|---|---|---|
| Charcoal | Soft, blendable, rich blacks | Shading, texture, expressive lines |
| Ink | Crisp, permanent, varied line quality | Detail work, strong outlines, dynamic contrasts |
When using these mediums, it’s important to remember that practice makes perfect. Don’t be afraid to experiment and make mistakes; some of the best art comes from unexpected accidents. As you become more comfortable with charcoal and inks, you’ll find your own style emerging, allowing you to express the complexities of human anatomy in ways you never thought possible. So grab your materials and start exploring the fascinating world of charcoal and ink drawing!
- What is the best paper to use with charcoal and ink?
For charcoal, a textured paper works best as it holds the medium well, while for ink, a smooth paper is ideal to prevent bleeding.
- Can I mix charcoal and ink in the same drawing?
Absolutely! Mixing these mediums can create beautiful contrasts and enhance the overall depth of your artwork.
- How do I clean my tools after using ink?
Use water for water-based inks, and for permanent inks, you may need to use solvents or alcohol to clean your brushes and nibs.
Studying Anatomy Through Reference
When it comes to mastering human anatomy drawing, one of the most effective strategies is to immerse yourself in anatomical references. These references serve as the backbone of your studies, providing you with the necessary information to understand the complexities of the human body. Whether you are a beginner or an experienced artist, having a solid foundation in anatomy is essential for creating realistic and proportionate figures in your artwork.
Anatomical references can come in various forms, each offering unique insights into the human form. For instance, books dedicated to anatomy are treasure troves of knowledge. They often contain detailed illustrations, explanations of muscle groups, and insights into skeletal structure. Moreover, they can guide you through the intricacies of human proportions and movement. A few recommended books include:
- “Anatomy for Sculptors” - This book is perfect for visual learners, as it breaks down anatomy with clear illustrations.
- “Figure Drawing: Design and Invention” - A fantastic resource that combines theory with practical exercises.
- “Atlas of Human Anatomy” - A comprehensive guide that provides in-depth anatomical details.
In addition to books, the internet is brimming with online resources that can enhance your understanding of anatomy. Websites like Proko and YouTube channels dedicated to art tutorials offer video demonstrations, which can be incredibly helpful for visualizing complex structures. Online courses can also provide structured learning paths, allowing you to progress at your own pace.
Another invaluable method for studying anatomy is to work with live models. Drawing from live models offers a dynamic learning experience that no book or video can replicate. Observational drawing forces you to engage with the subject in real-time, enhancing your understanding of posture, movement, and the subtleties of human anatomy. Here are some tips for maximizing your experience when working with live models:
- Focus on the basics: Start with simple shapes to capture the overall form before diving into details.
- Take your time: Don’t rush your sketches. Observing the model for longer periods can help you notice finer details.
- Experiment with angles: Try drawing the model from different perspectives to understand how the body changes shape.
By combining anatomical books, online resources, and live model sessions, you’ll develop a comprehensive understanding of human anatomy that will significantly improve your drawing skills. Remember, the key is to be patient and consistent in your studies. Just like learning a new language, mastering anatomy takes time, but with dedication and the right references, you’ll be well on your way to creating stunning anatomical drawings.
Q: How often should I study anatomy?
A: It's beneficial to incorporate anatomy studies into your daily routine, even if it's just for a short period. Consistency is key!
Q: Can I use photographs as references?
A: Yes! Photographs can be excellent references, but be sure to choose high-quality images that accurately represent the anatomy you wish to study.
Q: What if I struggle with proportions?
A: Don't worry! Proportions can be tricky. Focus on breaking down the body into simpler shapes and use measuring techniques to help maintain accuracy.
Q: Are there specific tools I should use for studying anatomy?
A: While any drawing tool can work, consider using a combination of graphite pencils for sketching and charcoal for shading to capture details effectively.

Books and Online Resources
When it comes to mastering human anatomy drawing, the right resources can make all the difference. Imagine trying to navigate a new city without a map; you might get lost or miss out on the best sights. Similarly, having access to quality books and online resources can guide you through the intricate landscape of human anatomy. Whether you’re a beginner or an experienced artist, these materials will help you deepen your understanding and refine your skills.
Let’s start with books. There are numerous texts that serve as invaluable references for artists at all levels. For instance, “Anatomy for Artists” by J. Paul Getty Museum is a classic that breaks down complex anatomical structures into digestible information, making it easier to grasp the essentials. Another must-have is “Figure Drawing: Design and Invention” by Michael Hampton, which combines anatomy with design principles, providing a holistic approach to figure drawing.
In addition to traditional books, the internet is a treasure trove of resources. Websites like Proko offer video tutorials that cover everything from basic anatomy to advanced techniques. These videos not only demonstrate how to draw but also explain the underlying anatomical concepts, making the learning process engaging and interactive. Furthermore, platforms like Skillshare and Udemy host various courses focused on anatomy drawing, allowing you to learn at your own pace.
Don't forget about online communities! Joining forums and social media groups can provide you with feedback and support from fellow artists. Websites like DeviantArt and ArtStation not only showcase artwork but also offer tutorials and discussions on anatomy drawing. Engaging with these communities can help you stay motivated and inspired as you embark on your artistic journey.
To summarize, the combination of books and online resources creates a rich learning environment for aspiring artists. Here’s a quick table highlighting some recommended resources:
| Resource Type | Title | Author/Platform |
|---|---|---|
| Book | Anatomy for Artists | J. Paul Getty Museum |
| Book | Figure Drawing: Design and Invention | Michael Hampton |
| Online Course | Figure Drawing Fundamentals | Proko |
| Online Course | Drawing the Human Figure | Skillshare |
By utilizing these resources, you can enhance your understanding of human anatomy and elevate your drawing skills to new heights. Remember, the journey to mastering anatomy is ongoing, and with the right tools at your disposal, you’ll be well-equipped to tackle even the most complex figures.

Working with Live Models
When it comes to mastering human anatomy drawing, is one of the most effective methods you can employ. Drawing from a live model allows you to observe the nuances of the human form in real-time, capturing details that photos simply can't convey. Imagine trying to paint a sunset from a picture versus standing on a hill, feeling the breeze, and watching the colors change before your eyes. That’s the difference between static images and live models!
One of the primary benefits of drawing from live models is the opportunity to understand dynamic poses. Unlike photographs, a live model can shift their weight, change their posture, and even express emotions, all of which contribute to the depth and realism of your artwork. This dynamic quality can help you develop a more intuitive grasp of human anatomy, allowing you to depict movement and emotion effectively in your drawings.
However, it’s not just about observing; it’s also about interacting. Engaging with your model can provide insights into how the body moves and functions. For instance, asking them to adjust their pose can help you see how muscles contract and relax, providing a deeper understanding of muscle structure and function. This interaction can be beneficial for both the artist and the model, creating a collaborative environment that enhances the learning experience.
Here are some tips for effectively working with live models:
- Communicate Clearly: Make sure your model understands what you want. Discuss the poses and any specific angles you’re interested in capturing.
- Start with Quick Sketches: Begin with gesture drawings to warm up. This will help you capture the essence of the pose and get comfortable with the model’s form.
- Take Notes: While drawing, jot down observations about the model’s anatomy. This can include muscle groups, proportions, and how they relate to each other.
- Be Respectful: Always maintain a professional atmosphere. Respect the model’s comfort and boundaries to ensure a positive experience for everyone involved.
It’s also worth noting that practicing with live models can significantly boost your confidence. As you gain experience, you’ll find it easier to translate what you see onto paper. You’ll develop a sharper eye for detail and a better understanding of how to represent the human figure accurately. This confidence can lead to more expressive and impactful artwork, making your drawings not just representations, but stories that resonate with viewers.
In conclusion, working with live models is an invaluable practice for anyone serious about mastering human anatomy in their art. It’s not just about the act of drawing; it’s about experiencing the human form in a way that enriches your understanding and enhances your skills. So, grab a sketchbook, find a model, and let the magic of live drawing unfold!
Here are some common questions artists have about working with live models:
- How do I find live models for drawing? You can look for local art schools, community centers, or online platforms that connect artists with models.
- What should I bring to a live drawing session? Bring your sketchbook, a variety of pencils or charcoal, and any other tools you prefer to use. Don’t forget your eraser!
- How long should a drawing session last? Sessions can vary, but typically, 2-3 hours is a good duration, allowing for breaks and different poses.
- Can I work with a model alone? Yes, many artists work with models one-on-one. Just ensure that both parties are comfortable and clear about expectations.

Sketching Techniques for Anatomy
When it comes to mastering the art of anatomy drawing, effective sketching techniques are your best friends. These techniques not only help you capture the complexities of the human form but also allow you to express the dynamism and fluidity of movement. Let's dive into two essential sketching methods that can elevate your artwork to new heights.
Gesture drawing is like a warm-up for your artistic muscles. It focuses on capturing the essence of movement and posture in a short amount of time, usually ranging from a few seconds to a couple of minutes per pose. Think of it as sketching the heartbeat of the human figure; it’s all about the energy and flow rather than the details. This technique is particularly useful for understanding how the body moves and how different poses interact with gravity.
To practice gesture drawing, find a model or use online resources that provide dynamic poses. Set a timer and challenge yourself to capture the pose in as little time as possible. You might be surprised at how much you can convey with just a few lines! Here are some tips to keep in mind:
- Focus on the overall shape and flow of the body.
- Use quick, loose strokes to represent movement.
- Don’t worry about perfection; the goal is to convey energy.
Contour drawing, on the other hand, emphasizes outlines and shapes. It’s like tracing the silhouette of the human body, allowing you to develop a keen eye for form and detail. This technique encourages you to observe the subject closely, as you will be drawing without looking at your paper too much. It’s a fantastic way to enhance your observational skills and build confidence in your ability to capture what you see.
To practice contour drawing, choose a subject—whether it’s a live model or a photograph. Start by looking at the subject and drawing its outline without lifting your pencil from the paper. This continuous line technique forces you to really engage with the shapes and proportions of the figure. Here’s how you can make the most out of your contour drawing sessions:
- Start with simple shapes before moving to complex figures.
- Don’t erase; let your mistakes inform your learning process.
- Experiment with different line weights to add depth.
Both gesture and contour drawing are invaluable techniques that can significantly improve your anatomy drawing skills. By incorporating these methods into your practice, you’ll not only enhance your understanding of human anatomy but also develop a unique artistic style that captures the essence of life itself.
Q: How often should I practice gesture drawing?
A: Aim for at least a few sessions per week. The more you practice, the better you’ll become at capturing movement.
Q: Can I use photos for contour drawing?
A: Absolutely! Photos can be great references, but try to challenge yourself with live models for the best learning experience.
Q: What if I struggle with proportions?
A: It's common to struggle with proportions at first. Regular practice and using tools like grids or reference points can help you improve.
Q: How long should I spend on each drawing?
A: For gesture drawings, keep it short—30 seconds to 2 minutes. For contour drawings, take your time to really observe the details.
Gesture Drawing
Gesture drawing is an exciting and dynamic approach to capturing the essence of human movement and posture. It’s like trying to catch a fleeting moment in time, where every line and curve tells a story. Think of it as the artist's way of freezing a moment, much like a photographer captures a smile or a dancer's leap. The beauty of gesture drawing lies in its ability to convey energy and emotion through swift, fluid strokes. This method is particularly beneficial for artists who want to understand the human form better, as it emphasizes the overall movement rather than getting bogged down in intricate details.
When you engage in gesture drawing, you're not just sketching; you're observing and interpreting the world around you. This practice encourages you to work quickly—often within a time limit of just a few minutes per pose. By doing so, you train your eye to recognize the fundamental shapes and proportions of the body. The goal is to capture the spirit of the pose rather than focus on perfection. It’s a liberating experience that allows you to experiment with your style and develop your unique artistic voice.
To get started with gesture drawing, consider the following tips:
- Use a Timer: Set a timer for 30 seconds to 2 minutes for each pose. This will push you to work quickly and efficiently.
- Focus on Lines of Action: Begin with a single line that represents the flow of the figure. This line of action will serve as the backbone for your drawing.
- Emphasize Movement: Capture the energy of the pose by exaggerating the curves and angles. Don’t be afraid to let your lines flow freely.
- Practice Regularly: The more you draw, the better you’ll become. Incorporate gesture drawing into your daily routine.
Moreover, it’s important to understand that gesture drawing is not just for beginners. Even seasoned artists can benefit from revisiting this practice. It can help break through creative blocks and reignite your passion for drawing. As you become more comfortable with capturing movement, you’ll find that your overall understanding of anatomy improves, leading to more lifelike and dynamic artworks.
In conclusion, gesture drawing is a fundamental skill that every artist should embrace. It’s a playful yet powerful way to enhance your drawing abilities and deepen your understanding of the human figure. So grab your sketchbook, set a timer, and let the lines flow!
What is the purpose of gesture drawing? Gesture drawing helps artists capture the essence of movement and posture quickly, focusing on the overall form rather than intricate details.
How long should I spend on each gesture drawing? Typically, each pose should be sketched within 30 seconds to 2 minutes to encourage quick observation and fluidity.
Can gesture drawing improve my overall drawing skills? Absolutely! Regular practice of gesture drawing enhances your understanding of anatomy, proportions, and movement, which are crucial for creating realistic figures.
Do I need special materials for gesture drawing? No special materials are required; a simple pencil and paper will suffice. However, some artists prefer charcoal or ink for their expressive qualities.

Contour Drawing
Contour drawing is a fascinating technique that focuses on the outlines and shapes of objects, particularly the human figure. Imagine tracing the edges of a sculpture with your eyes, capturing every curve and contour without getting caught up in the details. This method is not just about drawing what you see; it’s about seeing what you draw. By practicing contour drawing, you train your eye to recognize the fundamental shapes that make up the human anatomy, which can significantly enhance your overall drawing skills.
To start with contour drawing, you don’t need to worry about perfection. In fact, the beauty of this technique lies in its imperfections. You can use a single continuous line to outline the figure, which helps in developing a fluid understanding of the form. As you draw, focus on the connection between different parts of the body; for instance, how the shoulder flows into the arm or how the waist curves into the hips. This holistic approach allows you to appreciate the body as a cohesive whole rather than a collection of disjointed parts.
Here are some tips to make your contour drawing practice more effective:
- Start slow: Take your time to observe the model or reference image. Rushing can lead to errors in proportions and shapes.
- Use your non-dominant hand: This can challenge your brain to think differently about shapes and enhance your observational skills.
- Practice blind contour drawing: This involves drawing without looking at your paper. It forces you to focus entirely on the subject, improving your hand-eye coordination.
Incorporating contour drawing into your routine can be a game-changer. Not only does it sharpen your skills, but it also boosts your confidence in handling complex forms. As you become comfortable with outlines, you can start layering in details and shading, creating a more comprehensive representation of the human body. Remember, the goal of contour drawing is not just to create a finished piece but to develop a deeper understanding of the anatomy you’re studying.
As you continue to practice, you’ll find that your ability to perceive and depict the human figure improves dramatically. Contour drawing is more than a technique; it’s a way to connect with the art of drawing itself, allowing you to express the beauty and complexity of human anatomy in a way that is both simple and profound.
What is the purpose of contour drawing?
Contour drawing helps artists improve their observational skills, focusing on the outlines and shapes of subjects without getting distracted by details. It encourages a deeper understanding of form and proportion, essential for realistic anatomy drawing.
How can I practice contour drawing effectively?
To practice effectively, start with slow observations, consider blind contour techniques, and don’t hesitate to use your non-dominant hand. Regular practice will help you develop a keen eye for shapes and forms.
Can contour drawing be used for other subjects besides the human figure?
Absolutely! Contour drawing can be applied to any subject matter. Whether it’s still life, landscapes, or animals, the principles of observing outlines and shapes remain the same.

Common Mistakes to Avoid
When it comes to mastering human anatomy drawing, avoiding common mistakes is just as crucial as honing your skills. Every artist has been there—struggling with proportions, feeling frustrated when a drawing doesn’t come out as envisioned. But don't worry! Recognizing these pitfalls can save you time and enhance your artistic journey. One major mistake many artists make is ignoring proportions. It’s easy to get caught up in the details of a face or a hand, but if the overall proportions are off, the entire piece can feel unbalanced. The human body follows specific ratios, and understanding these can dramatically improve the realism of your work.
For instance, did you know that the average adult human is about eight heads tall? This proportion can serve as a guideline for your drawings. If you’re unsure about your proportions, try sketching a grid over your reference images or using measuring techniques with your pencil to compare sizes. This method can help you maintain accuracy throughout your drawing process.
Another frequent error is overlooking muscle structure. Many artists focus solely on the outer shape of the body, neglecting the underlying muscle anatomy that gives the figure its form and depth. Think of muscle structure as the foundation of a house; without it, everything else can crumble. Incorporating muscle details not only adds realism but also helps convey movement and tension in your artwork. To avoid this mistake, consider studying anatomical diagrams or even using anatomical models to understand how muscles interact with the skin.
Finally, a common trap is skipping the practice of gesture drawing. Gesture drawing is all about capturing the essence of movement and the flow of the human body. If you only focus on detailed renderings, you might miss out on the dynamic quality that makes your drawings come alive. Set aside time for quick sketches where you focus on the action and posture of the figure rather than getting lost in details. This practice will enhance your ability to depict realistic poses and expressions.
In summary, by being aware of these common mistakes and actively working to correct them, you can elevate your anatomy drawing skills significantly. Remember, every artist makes mistakes; it’s how you learn and grow from them that truly counts!
- What is the best way to learn human anatomy for drawing? The best way is through a combination of studying anatomy books, using online resources, and practicing with live models. Each method provides unique insights that can enhance your understanding.
- How often should I practice anatomy drawing? Regular practice is key! Aim for daily sketching sessions, even if they’re short. Consistency will help build muscle memory and improve your skills over time.
- Are there specific tools I should use for anatomy drawing? Yes! Graphite pencils, charcoal, and inks are excellent tools. Each medium offers different textures and effects, allowing you to explore various styles in your anatomical sketches.

Ignoring Proportions
When it comes to drawing human anatomy, one of the most common pitfalls artists encounter is . It's like trying to build a house without a blueprint; without a solid understanding of proportions, your figures can end up looking distorted or unnatural. The human body follows specific ratios that define its structure, and grasping these can make a world of difference in your artwork.
To illustrate this, consider the classic human proportion model, often referred to as the “8-heads tall” rule. This guideline suggests that the average adult human body is approximately eight heads high. Here’s a quick breakdown of how this works:
| Body Part | Proportion (in heads) |
|---|---|
| Head | 1 |
| Torso | 2-3 |
| Legs | 4 |
| Feet | 0.5 |
By keeping these proportions in mind, you can create a more realistic representation of the human form. For instance, if you draw a figure that is only six heads tall, it may appear childlike or cartoonish, while a figure that is too tall may look unnatural. The balance between different body parts is crucial; each section should relate to the others in a harmonious way.
Additionally, it's important to remember that proportions can vary based on factors such as age, gender, and body type. For example, children have different proportions compared to adults; their heads are proportionally larger, while their limbs are shorter. Therefore, when drawing, you should always consider the context of your subject. A little bit of research into the specific body type you are drawing can greatly enhance the accuracy of your work.
One effective way to practice maintaining proportions is to use a grid method. By overlaying a grid on your reference image and your drawing surface, you can break down the figure into manageable sections. This technique helps ensure that you capture the correct proportions and relationships between body parts. It’s like having a roadmap that guides you through the complexities of human anatomy.
In conclusion, paying attention to proportions is essential for anyone looking to master human anatomy drawing. By understanding the basic ratios, practicing regularly, and utilizing helpful techniques like the grid method, you can avoid the common mistake of ignoring proportions and create more lifelike and engaging figures in your artwork.
- What are the best resources for learning about human proportions?
There are many books and online resources available, such as "Figure Drawing for All It's Worth" by Andrew Loomis and various anatomy websites that provide detailed guides and illustrations. - How can I improve my understanding of body proportions?
Regular practice is key! Try sketching from life or using reference images. Additionally, consider using the grid method to help visualize proportions better. - Are there different proportions for different body types?
Absolutely! Different body types, such as children, adults, and athletes, have unique proportions. Researching specific types can help you draw them more accurately.
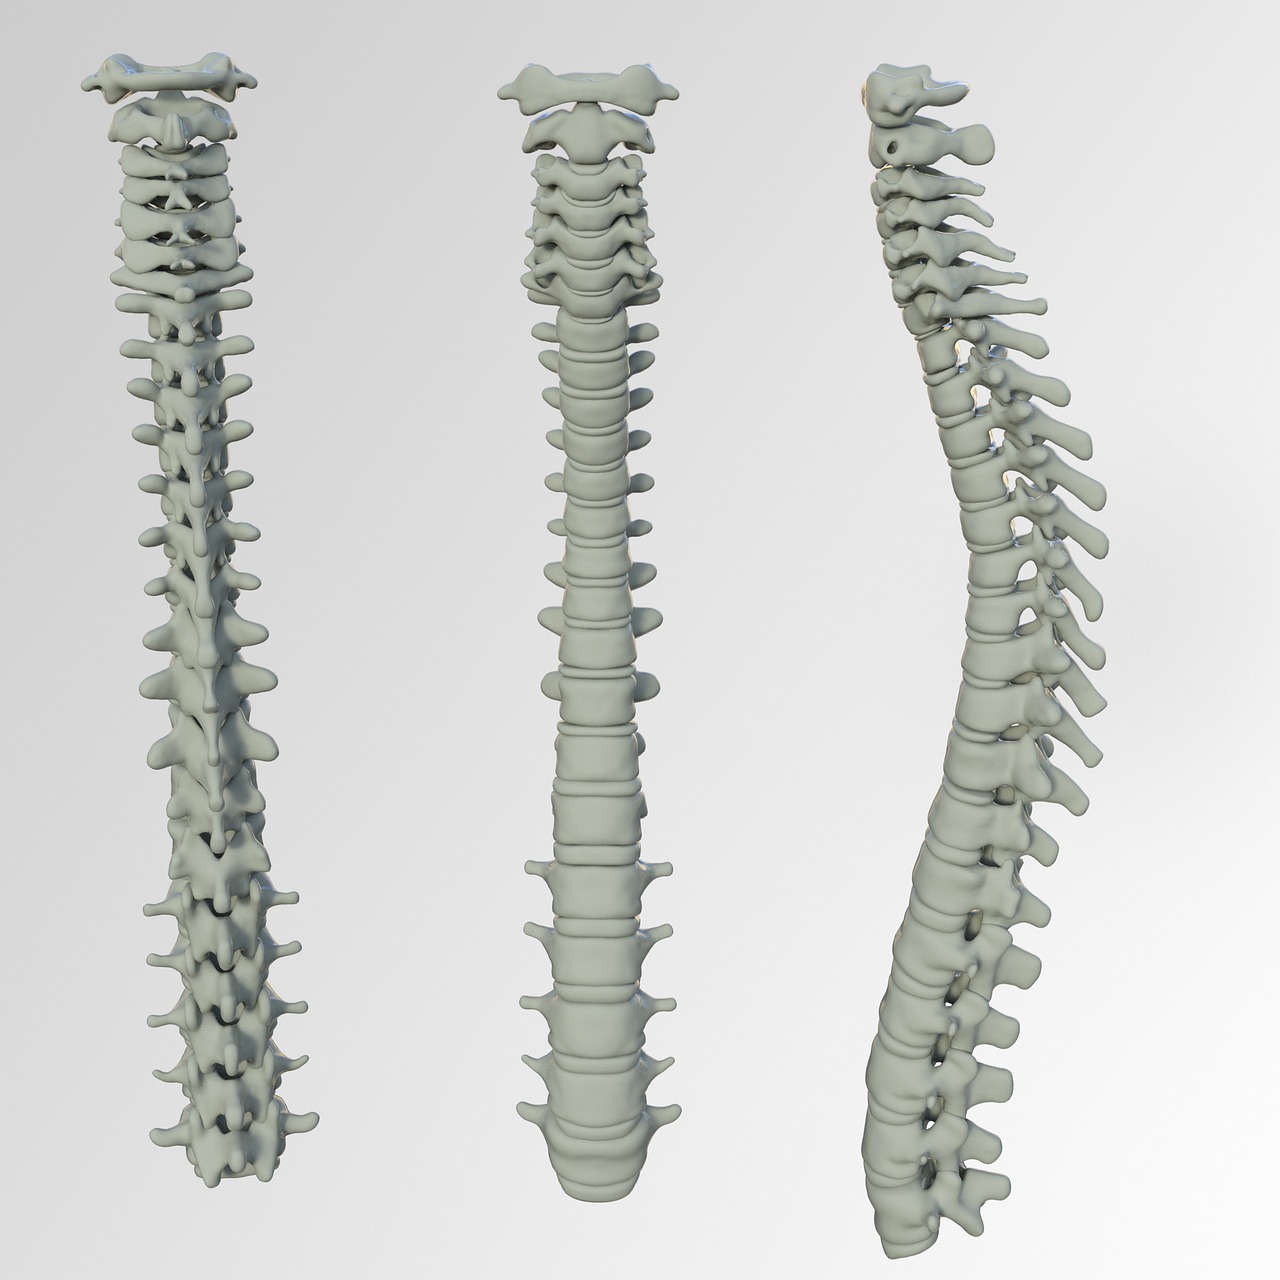
Overlooking Muscle Structure
When it comes to drawing human anatomy, many artists make the mistake of . This oversight can significantly impact the realism and depth of your artwork. Understanding how muscles interact with the skeleton and skin is crucial for creating lifelike figures. Muscles aren't just there for aesthetics; they define the form and movement of the body. By neglecting this aspect, your drawings may appear flat or lack the dynamic quality that captures the viewer's attention.
To truly grasp the importance of muscle structure, consider how muscles work in conjunction with bones. Imagine a puppet; without the strings (muscles) pulling the limbs, the puppet would be lifeless. Similarly, in human anatomy, muscles provide the necessary tension and movement that bring figures to life. Therefore, when sketching, it's essential to study the underlying muscle groups and how they affect the surface appearance. For instance, the biceps bulge when flexed, while the triceps create a distinct contour on the back of the arm.
Here are some key muscle groups to focus on when drawing:
- Deltoids: These muscles shape the shoulders and are vital for arm movement.
- Pectorals: Located in the chest, they play a significant role in the upper body's form.
- Abdominals: The core muscles define the waist and contribute to posture.
- Quadriceps: These muscles in the thighs are crucial for leg movement and stability.
- Hamstrings: Located at the back of the thighs, they balance the quadriceps and aid in bending the knee.
Incorporating these muscle details into your drawings will not only enhance their realism but also give you a deeper understanding of human anatomy. Observing how muscles interact during different poses can provide invaluable insights. For example, when a person raises their arm, the deltoid and pectoral muscles engage, creating a unique shape that should be reflected in your drawing.
Moreover, don't just rely on photographs or illustrations. If possible, work with live models or study anatomical references that showcase muscle structure in various poses. This practice will help you visualize how muscles shift and change with movement, allowing for more dynamic and accurate representations in your artwork. Remember, the goal is to create drawings that not only look good but also convey a sense of life and motion.
- Why is understanding muscle structure important for artists?
Understanding muscle structure is vital because it helps artists create more realistic and dynamic figures. Muscles define the shape and movement of the body, and by accurately portraying them, artists can enhance the lifelike quality of their work. - How can I improve my knowledge of human anatomy?
Improving your knowledge of human anatomy can be achieved through various methods, including studying anatomical books, using online resources, and practicing with live models. Regular sketching and focused exercises can also help solidify your understanding. - What are some common mistakes in anatomy drawing?
Common mistakes include ignoring proportions, overlooking muscle structure, and failing to capture movement and posture accurately. Being aware of these pitfalls can help artists improve their skills.
Practicing Anatomy Drawing
Regular practice is the cornerstone of mastering human anatomy drawing. Just like a musician perfects their craft through daily rehearsals, artists must also dedicate time to hone their skills. The journey of becoming proficient in anatomy drawing is not a sprint; it's a marathon that requires patience, persistence, and a structured approach. By incorporating daily sketching exercises into your routine, you can significantly enhance your technique and build confidence in your abilities.
One effective way to improve is by engaging in daily sketching exercises. These exercises can range from quick 10-minute gestures to more detailed studies that take an hour or more. The key is consistency. For instance, you might start your day with a few quick gesture drawings to warm up. These sketches help capture the essence of movement and fluidity in the human form, allowing you to understand how different poses interact with gravity and space.
Another important aspect of practicing anatomy drawing is creating a study schedule. A well-structured plan can help you stay focused and ensure that you're covering all necessary areas of anatomy. You could dedicate specific days of the week to different aspects of drawing, such as:
- Monday: Gesture drawing to capture movement.
- Wednesday: Contour drawing to focus on outlines and shapes.
- Friday: Detailed studies of muscle structure and proportions.
- Weekend: Longer sessions with live models or reference materials.
Additionally, consider setting aside time each week to review your progress. This reflection is crucial; it allows you to identify areas where you need improvement and celebrate the progress you've made. You might even keep a sketchbook dedicated solely to your anatomy practice, documenting your journey from initial sketches to more refined works. This not only serves as motivation but also as a valuable resource for future reference.
Finally, don't underestimate the power of community in your practice. Joining an art group or participating in online forums can provide you with feedback and encouragement. Sharing your work with others can open your eyes to new techniques and ideas, enriching your learning experience. Remember, the road to mastering anatomy drawing is filled with challenges, but with dedication and the right approach, you will see significant improvement over time.
Q: How often should I practice anatomy drawing?
A: Ideally, you should practice anatomy drawing daily. Even short sessions can be beneficial. Consistency is key!
Q: What are some good resources for learning anatomy?
A: There are numerous books and online resources available. Look for reputable anatomy books or websites that offer tutorials and reference images.
Q: Is it necessary to draw from live models?
A: While it's not strictly necessary, drawing from live models provides invaluable experience and helps you understand the human form in three dimensions.
Q: How can I improve my proportions in anatomy drawing?
A: Focus on understanding the basic measurements of the human body. Practice using guidelines and reference points to maintain accurate proportions.

Daily Sketching Exercises
In the journey of mastering human anatomy drawing, play an indispensable role. Just like a musician practices scales or an athlete trains for endurance, artists too must dedicate time to honing their craft. The beauty of sketching lies in its ability to enhance your observational skills, improve your hand-eye coordination, and build muscle memory. Imagine your hand as a finely tuned instrument, each sketch a note that contributes to the symphony of your artistic expression.
To get started, set aside a specific time each day for your sketching practice. Consistency is key! You might want to begin with just 15 to 30 minutes a day, gradually increasing the duration as you become more comfortable. During this time, focus on various aspects of human anatomy. For instance, you could dedicate one day to sketching the human head, another to the torso, and so on. This focused approach allows you to delve deeper into the intricacies of each body part.
Here are a few exercises you can incorporate into your daily routine:
- Timed Gesture Drawings: Spend 1-2 minutes on quick sketches to capture the essence of movement. This exercise helps you understand the flow and dynamics of the human body.
- Proportional Studies: Use a reference image to draw the human figure while paying close attention to proportions. You can break the figure down into simple shapes to make it easier.
- Contour Drawings: Focus on the outlines of the figure without lifting your pencil from the paper. This technique sharpens your eye for detail and helps you see the shapes that make up the body.
As you practice, don't forget to keep a sketchbook dedicated solely to your anatomy studies. This will not only track your progress but also serve as a visual diary of your artistic journey. Consider revisiting your earlier sketches after a few weeks. You'll be amazed at how much your skills have improved!
Finally, remember that the goal of these exercises is not perfection but rather progress. Embrace the mistakes you make along the way; they are stepping stones to growth. Each line you draw brings you closer to understanding the complexities of human anatomy, so keep sketching, keep exploring, and most importantly, have fun!
Q: How long should I practice sketching each day?
A: Start with 15 to 30 minutes a day and gradually increase as you feel more comfortable. The key is consistency!
Q: What materials do I need for daily sketching?
A: A simple sketchbook and a set of pencils or charcoal are sufficient to get started. As you progress, you might want to experiment with different mediums.
Q: Is it necessary to use reference images?
A: Yes, using reference images is crucial for understanding human anatomy accurately. They provide context and help you visualize proportions and details.
Q: How can I track my progress?
A: Keep a dedicated sketchbook for your anatomy drawings. Regularly revisit your earlier sketches to see how much you've improved over time.

Creating a Study Schedule
Establishing a structured study schedule is essential for mastering human anatomy drawing. Think of your study schedule as a roadmap; without it, you might find yourself lost in a sea of techniques and materials. A well-thought-out plan not only helps you stay organized but also ensures that you allocate sufficient time to each aspect of your learning journey. So, how do you create an effective study schedule? It all starts with understanding your goals and availability.
First, consider how much time you can realistically dedicate to drawing each week. Are you a busy student juggling classes, or a professional artist looking to refine your skills? Whichever category you fall into, it's vital to carve out specific time slots in your calendar. For instance, you might decide to draw for an hour every morning before work or dedicate weekends for longer sessions. The key is consistency; even short, regular practice can yield significant improvements over time.
Next, break down your study schedule into manageable chunks. Instead of trying to cover everything at once, focus on one aspect of anatomy each week. For example, you might spend one week studying human proportions, the next on muscle structure, and the following week practicing gesture drawing. This approach allows you to dive deeper into each topic and truly absorb the information. To help visualize this, consider creating a simple table:
| Week | Focus Area | Activities |
|---|---|---|
| 1 | Human Proportions | Study reference images, practice sketches |
| 2 | Muscle Structure | Analyze anatomy books, draw muscle diagrams |
| 3 | Gesture Drawing | Attend live drawing sessions, quick sketches |
| 4 | Contour Drawing | Practice contour sketches, focus on outlines |
In addition to focusing on specific topics, it’s beneficial to incorporate a variety of activities into your schedule. For example, you might alternate between drawing from references, practicing live models, and reviewing anatomy books. This variety keeps your practice fresh and engaging, preventing burnout. Don't forget to include time for reflection and assessment. After each week, take a moment to evaluate your progress. Are there areas where you struggle? Are there techniques that excite you? Adjust your schedule accordingly to ensure you’re always moving forward.
Lastly, be flexible with your schedule. Life happens, and sometimes you might miss a session or two. Instead of feeling discouraged, adapt and make adjustments as needed. Remember, the journey to mastering human anatomy drawing is a marathon, not a sprint. Celebrate your progress, no matter how small, and keep pushing yourself to explore new techniques and styles. By following these guidelines, you’ll create a study schedule that not only enhances your skills but also keeps you motivated and excited about your artistic journey.
- How often should I practice anatomy drawing? Aim for at least a few times a week, even if it’s just for a short session. Consistency is key!
- What resources should I use for studying anatomy? Look for anatomy books, online tutorials, and live model sessions. A mix of resources will give you a well-rounded understanding.
- Can I use digital tools for anatomy drawing? Absolutely! Digital tools can enhance your practice and offer unique features for sketching and editing.
Frequently Asked Questions
- What are the basic proportions of the human body?
The basic proportions of the human body are typically measured in head lengths. An average adult is about 7.5 to 8 heads tall. Understanding these proportions will help you create more realistic figures in your drawings. For instance, the width of the shoulders is generally about 2 to 3 head widths, while the length of the arms can be roughly equal to the height of the torso.
- What tools do I need for drawing human anatomy?
To draw human anatomy accurately, you'll want to have a few essential tools at your disposal. Graphite pencils are a must for detailed sketches, while charcoal can add depth and texture. Inks are also great for expressive line work. Don't forget about erasers, blending stumps, and quality drawing paper, as these can enhance your overall drawing experience!
- How can I effectively study human anatomy?
Studying human anatomy effectively involves using a combination of resources. Books and online tutorials are invaluable for learning the basics, while drawing from live models can provide practical experience. Observational drawing is key—pay attention to how muscles and bones interact in different poses to gain a deeper understanding of the human form.
- What are some common mistakes in anatomy drawing?
Common mistakes include ignoring proportions and overlooking muscle structure. Many artists struggle with keeping their figures in proportion, which can lead to unrealistic results. Additionally, not paying attention to the muscle details can make your drawings look flat. Always remember to check your proportions and include muscle structure to add depth and realism!
- How often should I practice anatomy drawing?
Regular practice is the key to mastering anatomy drawing. Aim for daily sketching exercises to build muscle memory and improve your technique. Even short, focused practice sessions can lead to significant improvements over time. Establishing a structured study schedule can also help keep you motivated and on track!


