Creating DIY Bathroom Shelving for Extra Storage
Are you tired of clutter in your bathroom? Do you wish you had more space to store your essentials without sacrificing style? Well, you’re in the right place! This article dives into the exciting world of DIY bathroom shelving, where you can enhance your storage capabilities while adding a personal touch to your space. Imagine transforming those empty walls into functional and stylish storage areas that reflect your personality. With a little creativity, the right materials, and some handy tips, you can create beautiful shelves that not only organize your items but also elevate the overall aesthetic of your bathroom.
Whether you’re a seasoned DIY enthusiast or just starting, building your own bathroom shelves can be a rewarding project. Not only will you save money compared to store-bought options, but you’ll also have the satisfaction of saying, “I made that!” Plus, DIY shelving allows you to customize the size, style, and color to perfectly fit your bathroom’s theme. So, let’s roll up our sleeves and explore the various methods and ideas for creating your own bathroom shelving. Get ready to discover tips, materials, and designs that will inspire you to start your project!
When it comes to building bathroom shelves, selecting the right materials is crucial for both durability and aesthetics. You want shelves that can withstand the humidity and moisture of a bathroom while also looking good. Here are some popular options:
- Wood: A classic choice, wood adds warmth and character to your bathroom. Opt for moisture-resistant types like cedar or teak for longevity.
- Metal: For a modern, industrial look, metal shelves are a great option. They’re sturdy and can handle heavier items, making them ideal for storing towels and toiletries.
- Composite Materials: If you’re looking for something budget-friendly, composite materials offer a balance between durability and cost. They can mimic the look of wood while being more resistant to moisture.
Understanding the benefits of each material will help you make an informed decision that suits your needs and style.
Design plays a vital role in both functionality and style when it comes to bathroom shelving. You want to create designs that not only fit your bathroom’s layout but also reflect your personal taste. Think about the items you need to store and how much space they require. This will help you maximize your storage effectively.
One popular option is floating shelves, which offer a modern, sleek look. They can be installed at various heights and can hold everything from small plants to larger towels. On the other hand, corner shelves are perfect for utilizing often-overlooked spaces, allowing you to make the most of every inch in your bathroom.
Floating shelves are not only stylish but also incredibly functional. They give the illusion of more space, making your bathroom feel airy and open. To install them securely, make sure to use proper wall anchors and brackets. This will ensure that your shelves can hold the weight of your items without sagging or falling.
Strategic placement of floating shelves can enhance accessibility and visual appeal. Consider the following tips for optimal storage and design impact:
- Install shelves above the toilet for extra storage without taking up floor space.
- Place them near the sink for easy access to toiletries.
- Vary the heights of the shelves to create visual interest.
Incorporating decorative elements can elevate the look of your floating shelves. Think about using small plants, decorative baskets, or stylish containers to store your items. This not only keeps things organized but also adds a cohesive aesthetic to your bathroom.
Corner shelves make use of often-overlooked spaces and can be a game-changer in small bathrooms. They can be designed in various shapes and sizes, allowing you to create a unique storage solution that fits your style. Consider using triangular shelves or tiered designs to add depth and interest to your corner spaces.
Proper installation is key to ensuring your shelves are sturdy and safe. Explore various techniques, including wall mounting and bracket systems, to secure your shelves effectively. Make sure to follow the manufacturer's instructions for the best results.
Knowing the right tools for installation can simplify the process. Here’s a quick list of essential tools you’ll need:
- Drill
- Screwdriver
- Level
- Tape measure
- Stud finder
Safety should always be a priority in DIY projects. Always wear safety goggles when drilling and ensure that your shelves are securely mounted to prevent accidents. Following best practices can make your project enjoyable and safe.
Regular maintenance ensures your shelves remain functional and attractive. Here are some tips for cleaning and maintaining your DIY bathroom shelving:
- Wipe down wooden shelves with a damp cloth to prevent moisture damage.
- Check metal shelves for rust and treat them promptly.
- Reorganize items periodically to keep the shelves looking fresh and tidy.
By following these simple maintenance tips, you can prolong the lifespan and appearance of your DIY bathroom shelves.
Q: What is the best material for bathroom shelves?
A: It depends on your style and needs. Wood offers warmth, metal provides durability, and composite materials are budget-friendly.
Q: How do I ensure my floating shelves are secure?
A: Use proper wall anchors and brackets, and make sure to mount them into wall studs for maximum support.
Q: Can I install shelves in a small bathroom?
A: Absolutely! Floating and corner shelves are perfect for maximizing space in smaller bathrooms.
Choosing the Right Materials
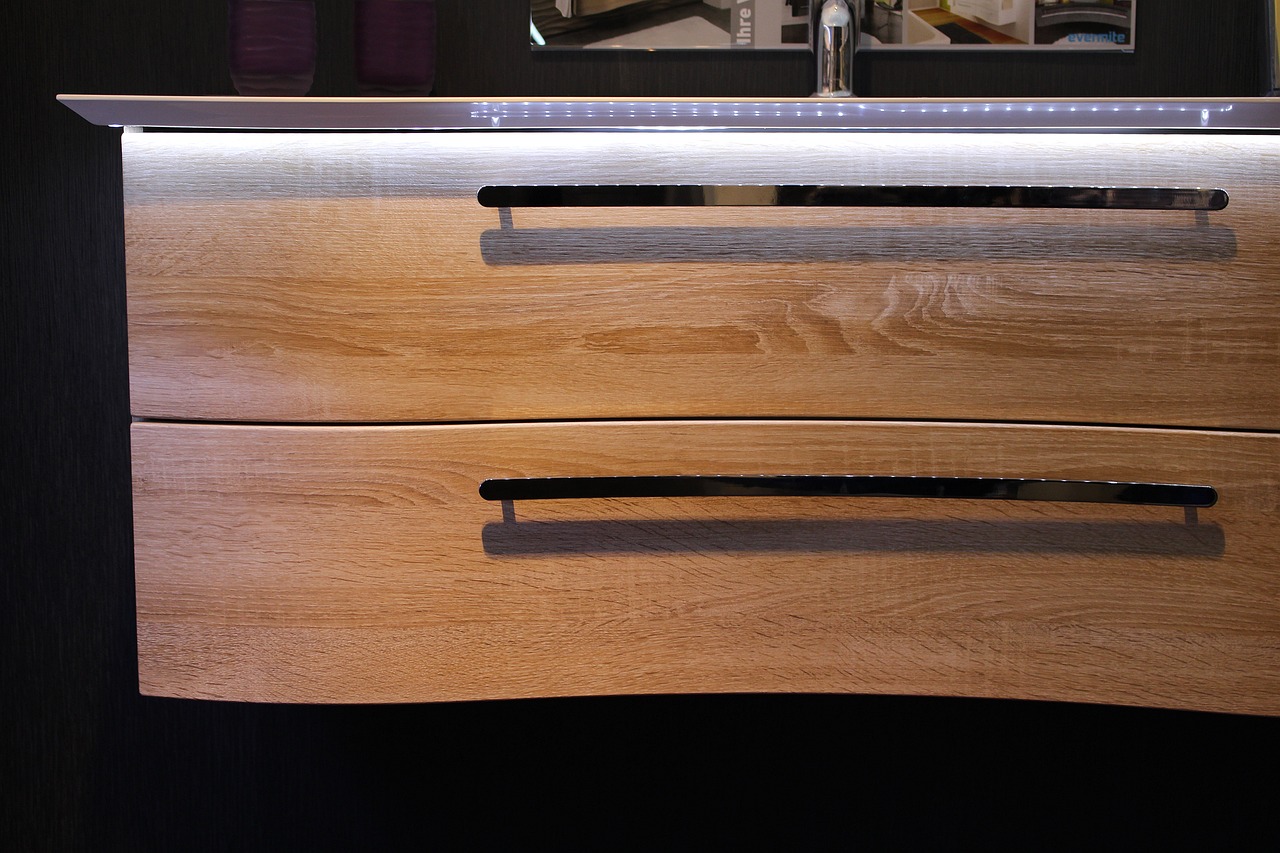
When it comes to creating your own bathroom shelves, is absolutely essential. Not only do the materials affect the durability and functionality of your shelves, but they also play a significant role in the overall aesthetic of your bathroom. Imagine walking into your bathroom and being greeted by beautifully crafted shelves that not only hold your essentials but also enhance the visual appeal of the space. So, what materials should you consider? Let's dive into some popular options!
First up, we have wood. This classic material is a favorite for a reason. It's versatile, can be stained or painted to match your decor, and offers a warm, inviting feel. However, keep in mind that not all woods are created equal. For a bathroom environment, where moisture can be a concern, look for hardwoods like oak or maple, or opt for treated plywood that can withstand humidity. You can even use reclaimed wood for a rustic touch that tells a story!
Next, there's metal. If you’re going for a modern or industrial look, metal shelves might be your best bet. They are incredibly sturdy and can handle heavier items without bending or warping. Stainless steel or powder-coated options are particularly good for bathrooms since they resist rust and corrosion. Picture sleek, shiny metal shelves that reflect light and give your bathroom a contemporary edge.
Another option worth considering is composite materials. These are engineered products made from a combination of wood fibers and plastic, which makes them resistant to moisture and easy to maintain. They can mimic the look of wood but with added durability. If you're concerned about the environmental impact, many composite materials are made from recycled content, making them an eco-friendly choice.
To help you decide, here's a quick comparison table of the materials mentioned:
| Material | Durability | Aesthetic | Moisture Resistance |
|---|---|---|---|
| Wood | Moderate | Warm, Classic | Varies (choose treated) |
| Metal | High | Modern, Industrial | Excellent |
| Composite | High | Versatile, Modern | Excellent |
Ultimately, the choice of material will depend on your personal style, the bathroom's overall design, and how much wear and tear you expect your shelves to endure. Don't forget to consider the finish as well; a good finish can protect your shelves from moisture and enhance their longevity. So, whether you lean towards the warmth of wood, the sleekness of metal, or the practicality of composite materials, each option has its unique charm and benefits.
Designing Your Shelves
When it comes to , the possibilities are as vast as your imagination! The right design can not only enhance the functionality of your bathroom but also add a personal touch that reflects your style. Think about it—your bathroom is more than just a place to freshen up; it’s a sanctuary where you start and end your day. So, why not make it beautiful and organized? Let's dive into some essential tips and ideas that will help you create the perfect shelving solution.
First and foremost, consider the layout of your bathroom. Is it spacious or cozy? Does it have high ceilings or a more compact feel? Understanding the dimensions and layout will guide you in designing shelves that fit seamlessly into your space. For instance, if you have a small bathroom, opting for vertical shelves can draw the eye upwards, creating an illusion of height while maximizing storage. On the other hand, if your bathroom is more spacious, you might want to incorporate wider shelves to hold larger items or decorative pieces.
Next, think about your personal taste. Are you drawn to a modern aesthetic, or do you prefer a more rustic charm? The materials and colors you choose can significantly impact the overall look of your shelves. For a contemporary vibe, sleek metal or glass shelves might be your go-to. In contrast, if you lean towards a cozy, farmhouse feel, reclaimed wood could be the perfect choice. You can even mix materials for a unique touch—imagine wooden shelves paired with metal brackets for that trendy industrial look!
Now, let’s talk about functionality. Your shelves should not only look good but also serve their purpose effectively. Consider what items you plan to store. Are you looking to display beautiful towels, essential toiletries, or perhaps some decorative plants? This will determine the depth and height of your shelves. For example, if you want to store taller items like shampoo bottles, ensure the shelves are spaced adequately apart. A good rule of thumb is to leave at least 12 inches between shelves for taller items, while smaller items can be placed on shelves spaced closer together.
Additionally, incorporating floating shelves into your design can create a chic and modern look. These shelves give the illusion of more space, as they don't have visible supports. You can install them at varying heights to create visual interest while making sure they are securely anchored to the wall. The beauty of floating shelves is their versatility; they can be used to display anything from small potted plants to decorative jars filled with cotton balls.
Another often-overlooked option is corner shelves. These clever designs make use of those awkward corners that typically go unused. A corner shelf can be a fantastic way to showcase decorative items or store extra toiletries without taking up valuable wall space. You can design them to be triangular or even circular, depending on your style preference.
As you finalize your design, don’t forget to incorporate decorative elements. Your shelves can serve as a canvas to showcase your personality. Think about adding items like stylish baskets for organization, framed photos, or even a small collection of your favorite books. Mixing textures and colors can create a cohesive aesthetic that ties your bathroom together beautifully.
In summary, designing your bathroom shelves is an exciting opportunity to blend functionality with style. By considering your bathroom's layout, your personal taste, and the items you wish to store, you can create a shelving solution that not only meets your needs but also enhances the overall look of your space. So grab your tools, unleash your creativity, and let your bathroom shelves tell your story!
- What materials are best for bathroom shelves?
Materials like wood, metal, and composite are great choices. Wood adds warmth, while metal offers a modern touch. Composite materials can be moisture-resistant, making them ideal for bathrooms.
- How high should I install my shelves?
It depends on the items you're storing. Generally, shelves should be installed at a height that makes it easy to access items without stretching or straining.
- Can I mix different styles of shelves?
Absolutely! Mixing styles can create a unique and personalized look. Just ensure that the colors and materials complement each other for a cohesive design.

Floating Shelves
When it comes to modern home decor, are all the rage! They not only provide a sleek and contemporary look but also offer a practical solution for maximizing space in your bathroom. Imagine transforming that bare wall into a stylish display of your favorite toiletries, plants, or decorative pieces. The beauty of floating shelves lies in their ability to create an illusion of more space while keeping your essentials organized and accessible.
Installing floating shelves in your bathroom is a project that can be tackled by DIY enthusiasts of all skill levels. To get started, you’ll need to gather a few materials, including sturdy wood or metal for the shelves, brackets for support, and the right tools for installation. The key is to ensure that the shelves are securely mounted, as they will need to hold the weight of various items. A common mistake is underestimating the importance of proper installation; you wouldn’t want your carefully arranged decor to come crashing down!
One of the most exciting aspects of floating shelves is the variety of designs you can choose from. Whether you prefer a minimalist approach with clean lines or a more rustic feel with reclaimed wood, the options are endless. You can even experiment with different shapes and sizes to create a unique look that reflects your personal style. Consider using shelves of varying lengths to add visual interest and break up the monotony of a flat wall.
Another advantage of floating shelves is their versatility. They can be placed in various locations throughout your bathroom, such as above the toilet, next to the sink, or even in the shower area (with the right waterproof materials, of course!). This flexibility allows you to utilize every inch of space efficiently. Plus, you can easily change the decor on these shelves to match the seasons or your mood, making them a dynamic addition to your home.
To enhance the appeal of your floating shelves, consider incorporating decorative elements. A few well-placed plants can bring life to your bathroom, while decorative baskets can keep smaller items organized and out of sight. You might also want to add some candles or framed photos to create a warm, inviting atmosphere. Remember, the goal is to create a cohesive aesthetic that marries functionality with style.
In summary, floating shelves are a fantastic way to add both storage and style to your bathroom. With the right materials, design, and decorative touches, you can create a chic and functional space that reflects your personality. So grab your tools and get ready to elevate your bathroom decor with these stunning shelves!
- How much weight can floating shelves hold? - The weight capacity of floating shelves depends on the materials used and the installation method. Generally, well-installed wooden shelves can hold between 20 to 50 pounds.
- Can I install floating shelves in a bathroom? - Absolutely! Floating shelves are perfect for bathrooms, as long as you use moisture-resistant materials.
- What tools do I need to install floating shelves? - Basic tools include a drill, level, stud finder, and a screwdriver. Make sure to have everything ready before you start!
- Can I customize the size of my floating shelves? - Yes! You can cut the shelves to any size that fits your space and needs.
Placement Tips
When it comes to maximizing the functionality and aesthetic appeal of your bathroom shelves, strategic placement is key. Think of your bathroom as a canvas, and the shelves as the brushstrokes that can either enhance or disrupt the overall picture. First and foremost, consider the height at which you will install your shelves. Ideally, you want them to be at a level that is easily accessible without requiring a step stool. A good rule of thumb is to place the bottom shelf about 30 inches from the floor, which is generally comfortable for most users.
Another factor to consider is the proximity to frequently used items. For instance, placing a shelf near the sink can be incredibly convenient for storing hand towels, soaps, or toiletries you use daily. However, don't just think about practicality—think about aesthetics too! Aligning your shelves with existing fixtures, like mirrors or lighting, can create a harmonious look. If your bathroom has a window, consider how natural light will play off your shelves and the items displayed on them.
Additionally, corner shelves can be a game-changer, especially in smaller bathrooms. These shelves not only utilize often-overlooked spaces but also draw the eye upward, making the room feel larger. When placing corner shelves, ensure they are not too high to reach easily; a height of around 60-66 inches from the floor works well for most adults.
To help visualize placement, here’s a simple table illustrating some ideal shelf placements:
| Location | Recommended Height (inches) | Best For |
|---|---|---|
| Above the sink | 36-48 | Toiletries, Hand Towels |
| Next to the shower | 48-60 | Shampoo, Conditioner, Bath Products |
| Above the toilet | 60-72 | Decorative Items, Extra Storage |
| In the corner | 60-66 | Plants, Decorative Baskets |
Lastly, don't forget to consider the visual balance of your shelves. If you have multiple shelves, spacing them evenly can create a more organized appearance. You can also play with different depths and widths of shelves to add interest. Remember, the goal is to create a space that feels both functional and visually appealing. So, take your time to plan the placement of your DIY bathroom shelves, and don't hesitate to experiment until you find the perfect arrangement!
Q: How high should I install my bathroom shelves?
A: A good height for the bottom shelf is about 30 inches from the floor, while the upper shelves can be placed between 60-72 inches depending on your needs.
Q: What items should I store on my bathroom shelves?
A: Consider storing toiletries, towels, decorative items, and plants to create a functional and stylish look.
Q: Can I install shelves in a small bathroom?
A: Absolutely! Corner shelves and floating shelves are great options for utilizing space efficiently in smaller bathrooms.
Decorative Elements
When it comes to bathroom shelving, adding can truly transform a simple storage solution into a stunning focal point. Think of your shelves as a blank canvas; they’re not just for holding toiletries or towels, but also for showcasing your personal style. Incorporating decorative accessories allows you to express yourself while enhancing the overall aesthetic of your bathroom.
One popular option is to use plants. Whether you choose lush greenery or low-maintenance succulents, plants can breathe life into your space. They add a splash of color and a touch of nature, making your bathroom feel more inviting. Just imagine a few small pots of vibrant plants sitting on your floating shelves, creating a serene oasis right in your home. Not only do they look great, but they also help purify the air!
Another fantastic way to elevate your shelves is by using baskets. These not only serve a practical purpose by organizing smaller items, but they also add texture and warmth to your bathroom. Opt for woven baskets in natural materials to bring a rustic charm or go for sleek, modern designs for a contemporary vibe. You might even consider labeling your baskets for a tidy, organized look that is both functional and stylish.
Don't forget about decorative trays. These can be used to corral smaller items like perfumes, lotions, or candles, creating a cohesive look. A tray can act as a boundary for your decorative items, preventing clutter and chaos. Choose a tray that complements your bathroom’s color scheme and style—perhaps a chic metal one for a modern look or a wooden one for a more traditional feel.
Additionally, consider using framed art or photographs on your shelves. This is a unique way to personalize your space and make it feel more like home. You can switch out the art seasonally or whenever you’re in the mood for a change, keeping your bathroom fresh and interesting. Just be sure to choose frames that are suitable for a humid environment to avoid any damage.
Lastly, don’t underestimate the power of lighting. Adding small LED lights or decorative string lights around your shelves can create a warm, inviting atmosphere, especially in the evenings. It’s like giving your bathroom a little glow-up! Just imagine stepping into a softly lit space where your decorative elements shine, creating a relaxing retreat.
In summary, when decorating your bathroom shelves, think beyond mere functionality. Embrace the opportunity to showcase your personality and style through plants, baskets, trays, art, and lighting. By carefully selecting these elements, you can create a visually appealing and organized space that reflects who you are.
- What types of plants are best for bathrooms? Look for low-light and humidity-loving plants like pothos, snake plants, or ferns.
- How do I prevent mold in my bathroom baskets? Choose baskets made of materials that resist moisture, and ensure they are well-ventilated.
- Can I use regular art in my bathroom? It’s best to use artwork that is moisture-resistant or framed behind glass to protect it from humidity.
- What kind of lighting works best for bathroom shelves? LED lights are energy-efficient and come in various styles, making them a great choice for accent lighting.
Corner Shelves
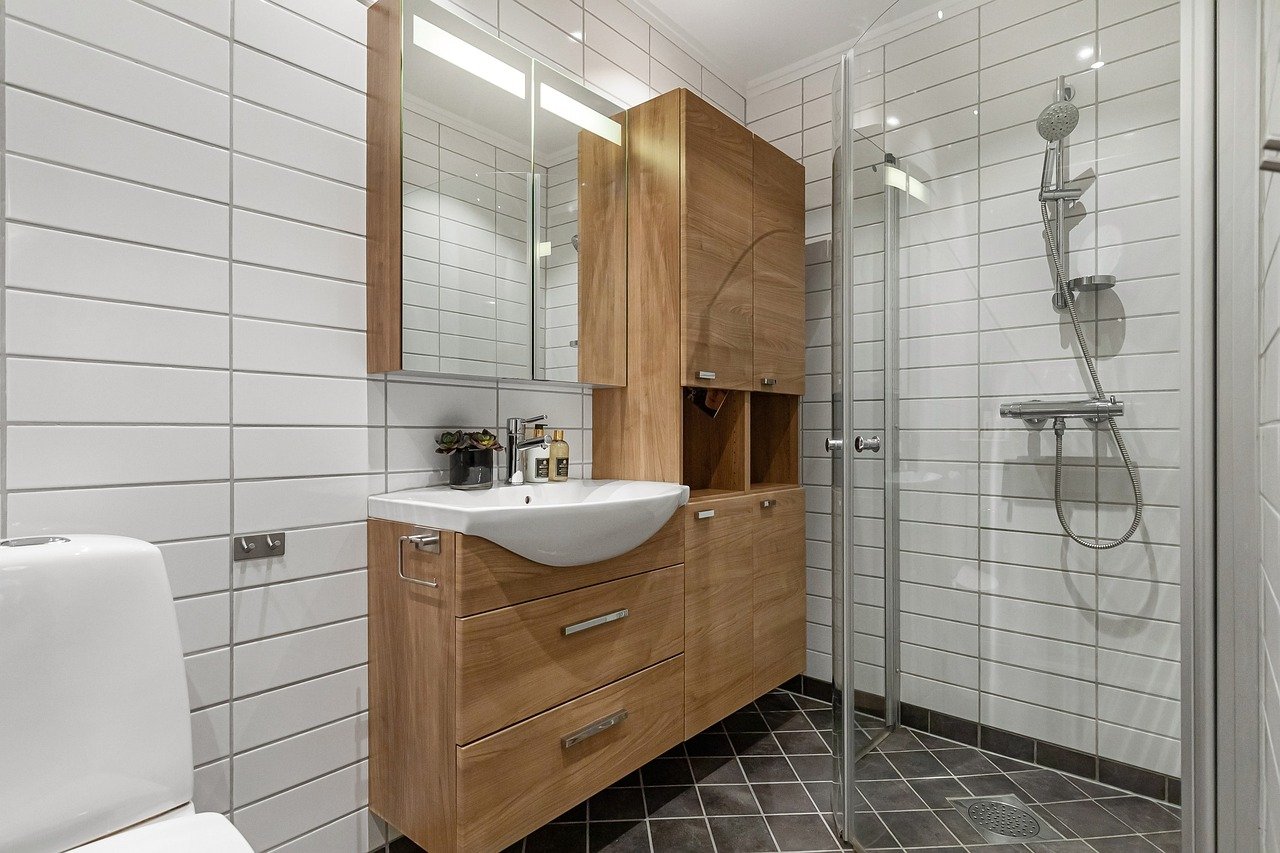
When it comes to maximizing storage in your bathroom, are a game changer. These clever little additions allow you to utilize those often-overlooked corners, transforming them into stylish and functional spaces. Imagine this: you walk into your bathroom, and instead of a dull, empty corner, you see a beautifully arranged shelf filled with your favorite toiletries, plants, or decorative items. It not only saves space but also adds a touch of personality to your bathroom decor.
Designing corner shelves can be a fun and creative process. You can choose from a variety of materials, including wood, metal, or even acrylic, depending on your style and the overall theme of your bathroom. For a rustic look, reclaimed wood can add warmth and charm, while sleek metal shelves might suit a more modern aesthetic. The key is to select materials that can withstand the humidity of a bathroom while still looking fabulous.
Installation is relatively straightforward, but it does require some planning. Before you start, measure your corner space accurately to ensure a perfect fit. You can opt for floating corner shelves, which give a clean, contemporary look, or you can go for tiered corner shelving units that provide multiple levels for storage. Whichever style you choose, make sure to secure them properly to avoid any accidents.
Here are a few tips to keep in mind when designing your corner shelves:
- Keep it Balanced: When arranging items on your shelves, balance is key. Mix larger items with smaller ones to create visual interest.
- Use Decorative Baskets: Baskets can help keep your items organized while adding texture and color to your shelves.
- Incorporate Greenery: Plants are a great way to liven up your corner shelves. Consider low-maintenance options like succulents or ferns that thrive in humid environments.
Incorporating corner shelves into your bathroom not only enhances storage but also allows you to express your personal style. Whether you want a minimalist look or something more eclectic, corner shelves can adapt to your vision. Plus, they’re a great conversation starter when guests visit! So, roll up your sleeves, get creative, and turn those neglected corners into beautiful, functional spaces.
Q: What materials are best for corner shelves in a bathroom?
A: The best materials are those that can withstand humidity, such as treated wood, metal, or moisture-resistant composites.
Q: Can I install corner shelves myself?
A: Yes! With the right tools and measurements, DIY installation of corner shelves is manageable for most homeowners.
Q: How do I maintain my corner shelves?
A: Regularly dust your shelves and clean them with a damp cloth. Avoid harsh chemicals that might damage the finish.
Installation Techniques
When it comes to installing your DIY bathroom shelves, the right techniques can make all the difference between a sturdy, functional storage solution and a precarious disaster waiting to happen. First and foremost, you need to ensure that your shelves are securely mounted. This not only guarantees safety but also enhances the overall aesthetic of your bathroom. There are several popular installation methods you can choose from, such as wall mounting, bracket systems, and even using floating shelf hardware. Each method has its own set of advantages and considerations, so let’s dive into the details.
Wall mounting is perhaps the most straightforward approach. This technique involves attaching the shelves directly to the wall studs, providing maximum support. To do this effectively, you’ll want to use a stud finder to locate the studs behind your drywall. Once you’ve identified the studs, mark their positions with a pencil. This is crucial because simply screwing into drywall without hitting a stud can lead to your shelves sagging or, worse, collapsing under weight. After marking the studs, you can drill pilot holes and then secure the shelves using screws that are appropriate for the weight they will bear.
Another popular method is using bracket systems. This approach allows for more flexibility in terms of shelf height and placement. Brackets come in various styles and materials, making it easy to find ones that match your bathroom decor. When installing brackets, it’s important to ensure they are level and evenly spaced to support the shelves adequately. A common practice is to install two brackets per shelf, but for larger shelves, you might want to consider adding a third bracket in the center for extra support.
If you're leaning towards a modern look, floating shelves are a fantastic choice. They create the illusion of more space while providing a sleek and minimalist design. Installing floating shelves requires a bit more precision as they are mounted on concealed brackets. You’ll need to ensure that these brackets are securely anchored to the wall studs or use wall anchors if you’re mounting them on drywall. A level is your best friend here; it will help you ensure that your shelves are perfectly horizontal.
Here’s a quick comparison of the three installation techniques:
| Installation Technique | Pros | Cons |
|---|---|---|
| Wall Mounting | Strong support, straightforward | Requires stud finding, less flexible |
| Bracket Systems | Flexible placement, various styles | Can be more visible, requires leveling |
| Floating Shelves | Modern look, space-saving | Requires precise installation, can be tricky |
Before you start installing, make sure you have all the necessary tools at your fingertips. Some essential tools include a drill, level, stud finder, measuring tape, and a screwdriver. Having everything ready will streamline the process and help you avoid unnecessary trips to the hardware store. And don’t forget about safety! Always wear protective eyewear and follow the manufacturer’s guidelines for any hardware you are using.
In conclusion, taking the time to choose the right installation technique for your DIY bathroom shelves will pay off in the long run. By ensuring that your shelves are securely mounted, you’ll not only enhance their functionality but also add a personal touch to your bathroom decor. Happy building!
Q: How much weight can my DIY shelves hold?
A: The weight capacity of your shelves will depend on the materials used and the installation method. Generally, if properly installed, wooden shelves can hold 20-50 pounds, while floating shelves may hold less due to their design.
Q: Can I install shelves in a small bathroom?
A: Absolutely! In fact, small bathrooms can benefit greatly from shelves. Consider using vertical space and corner shelves to maximize storage without taking up too much room.
Q: What types of materials are best for bathroom shelves?
A: Moisture-resistant materials like treated wood, metal, or composite materials are ideal for bathroom shelving as they can withstand humidity and prevent warping.
Q: How do I maintain my bathroom shelves?
A: Regularly dust and clean your shelves with a damp cloth. Avoid harsh chemicals that may damage the finish. Inspect for any signs of wear or looseness periodically.

Tools Required
When embarking on your DIY bathroom shelving project, having the right tools is essential for achieving a professional finish and ensuring your safety. Imagine trying to bake a cake without the proper utensils; it simply wouldn’t work out! Similarly, the tools you choose can make or break your shelving project. Here’s a rundown of the key tools you’ll need:
- Measuring Tape: This is your best friend when it comes to ensuring everything fits perfectly. Measure twice, cut once!
- Level: To ensure your shelves are straight, a level is crucial. Nothing looks worse than a shelf that tilts!
- Drill: A power drill will make your life easier when it comes to creating holes for screws. If you’re serious about your DIY skills, investing in a cordless drill can give you the freedom to move around without being tethered to a power outlet.
- Screwdriver: You’ll need both a flathead and a Phillips screwdriver for securing your shelves. Don’t underestimate the importance of a good screwdriver; it can save you a lot of frustration!
- Stud Finder: This handy tool helps locate the studs in your wall, ensuring that your shelves are anchored securely. Trust me, no one wants a shelf full of toiletries crashing down!
- Wood Glue: If you’re using wood for your shelves, wood glue can provide extra support, especially for joints and corners.
- Sandpaper: To achieve a smooth finish on your wood, sandpaper is vital. It’s the difference between a professional-looking shelf and a rough, unfinished one.
In addition to these tools, you might also want to have a clamp on hand to hold pieces together while the glue dries, and a safety goggles to protect your eyes during drilling and cutting. Remember, safety first! The last thing you want is to end up with an injury instead of a beautiful shelf.
Finally, don’t forget about your materials! Depending on the design you choose, you might need brackets, screws, or even decorative elements to take your shelves to the next level. Having everything organized and ready to go will make your project smoother and more enjoyable. So, gather your tools, roll up your sleeves, and let’s get building!
Now that you’re equipped with the necessary tools and knowledge to tackle your DIY bathroom shelving project, you might have a few questions. Here are some frequently asked questions that can help clarify any doubts:
- How much weight can my shelves hold? - The weight capacity of your shelves largely depends on the materials used and how well they are installed. Generally, floating shelves can hold around 20-30 pounds if properly secured.
- What type of wood is best for bathroom shelves? - Moisture-resistant woods like cedar or treated pine are ideal for bathrooms due to their durability and resistance to humidity.
- Can I install shelves without drilling into the wall? - Yes! There are adhesive shelf brackets available that don’t require drilling, but their weight capacity may be limited.
- How can I maintain my shelves? - Regularly dust your shelves and clean them with a damp cloth. Avoid harsh chemicals that could damage the finish.
Safety Considerations
When embarking on your DIY bathroom shelving project, safety should be your top priority. It's easy to get caught up in the excitement of building something new, but neglecting safety can lead to accidents that could be easily avoided. First and foremost, always wear appropriate personal protective equipment (PPE). This includes safety goggles to protect your eyes from dust and debris, as well as gloves to shield your hands from sharp edges and splinters. Additionally, a dust mask can be a great idea, especially if you're working with materials that generate a lot of fine particles.
Before you begin any construction, make sure to assess your workspace. Clear away any clutter and ensure you have enough room to move around safely. It’s also wise to check your tools; ensure they are in good condition and appropriate for the job. For instance, using a dull saw can lead to accidents as you may exert more force than necessary, increasing the risk of slipping.
When it comes to installation, proper anchoring is crucial. Floating shelves, while stylish, need to be securely mounted to the wall to prevent them from falling. Always locate wall studs using a stud finder, as this will provide the necessary support for heavier items. If you’re installing shelves in a space that may be exposed to moisture, like a bathroom, consider using water-resistant materials and fasteners to avoid deterioration over time.
Furthermore, be mindful of the weight capacity of your shelves. Each shelf should be able to support the items you plan to place on it without risk of sagging or collapsing. A good rule of thumb is to distribute weight evenly across the shelf. If you're unsure, consult a load capacity chart for the materials you're using, or err on the side of caution by keeping heavier items on lower shelves.
Lastly, always keep your workspace ventilated, especially when using adhesives or paints. Fumes can build up quickly, leading to headaches or more serious health issues. Open windows, use fans, or wear a respirator if necessary to ensure you're breathing clean air while you work.
By following these safety considerations, you’ll not only protect yourself but also ensure that your DIY bathroom shelving project is a success. Remember, a safe workspace leads to a more enjoyable and productive building experience!
- What tools do I need for building bathroom shelves? You will need a drill, a level, a stud finder, screws, and potentially a saw, depending on your design.
- How do I determine the weight capacity of my shelves? Check the specifications of the materials you are using and consider distributing weight evenly across the shelves.
- Can I use regular wood in a bathroom? It’s best to use moisture-resistant wood or seal regular wood with a waterproof finish to prevent damage.
- What is the best placement for bathroom shelves? Place shelves where they are easily accessible but not obstructing pathways; above toilets or next to sinks are popular options.
Maintaining Your Shelves
Regular maintenance is essential for ensuring your DIY bathroom shelves remain both functional and attractive. Just like any other piece of furniture in your home, your shelves require some love and attention to keep them looking their best and serving their purpose effectively. Think of your shelves as the unsung heroes of your bathroom—they hold all your essentials, and a little upkeep can go a long way in preserving their integrity.
First off, let's talk about cleaning. Depending on the materials used, your shelves may need different cleaning methods. For wooden shelves, a damp cloth with a mild soap solution can work wonders. Be sure to avoid soaking the wood, as excess moisture can lead to warping or mold. Metal shelves, on the other hand, can be wiped down with a soft cloth and a gentle cleaner to avoid scratches. If you have composite materials, check the manufacturer's instructions for the best cleaning practices. Regularly dusting your shelves is also a good habit to adopt; it not only keeps them looking fresh but also prevents the buildup of grime that can be harder to remove later.
Next, it’s important to keep an eye on the structural integrity of your shelves. Over time, heavy items can cause sagging or even damage. To prevent this, periodically assess the weight distribution on your shelves. If you notice any sagging, consider redistributing the items or reinforcing the shelves with additional brackets or supports. This can be especially crucial for floating shelves, where the mounting system bears the entire weight. A little bit of preventative care can save you from a potential disaster!
Another aspect to consider is moisture control. Bathrooms are notoriously humid environments, and this can take a toll on your shelves. To combat this, ensure proper ventilation in your bathroom, whether through an exhaust fan or by opening windows. Additionally, placing moisture-absorbing products, like silica gel packets or activated charcoal, can help reduce humidity levels and protect your shelves from mold and mildew.
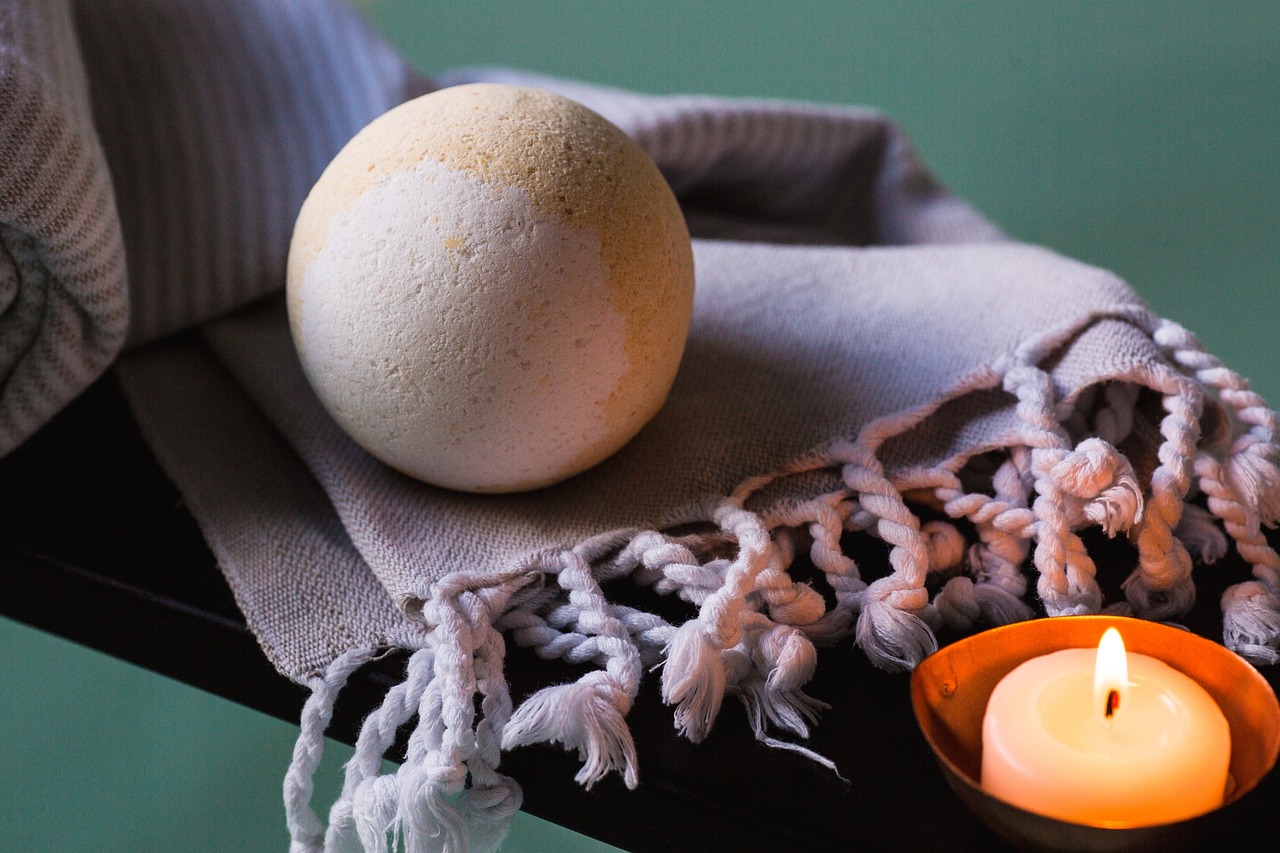
Lastly, don’t forget about the decorative elements on your shelves. Items like plants, candles, or decorative baskets not only add character but can also collect dust and moisture. Regularly check these items for signs of wear or damage, and clean or replace them as necessary. This not only keeps your shelves looking great but also ensures that everything stored on them is in good condition.
- How often should I clean my bathroom shelves? It’s best to clean your shelves at least once a month, or more frequently if they accumulate dust or moisture.
- What should I do if my wooden shelves start to warp? If you notice warping, try to reduce moisture in the bathroom and consider reinforcing the shelves with additional brackets.
- Can I use regular household cleaners on my shelves? Always check the material of your shelves. For most, a mild soap solution is safe, but avoid harsh chemicals that can damage the finish.
Frequently Asked Questions
- What materials are best for DIY bathroom shelving?
When it comes to DIY bathroom shelving, the best materials are those that can withstand humidity and moisture. Wood is a popular choice, especially when treated with water-resistant finishes. Metal is another great option, providing a modern look and durability. Finally, composite materials are perfect for those looking for a cost-effective and versatile solution. Each material has its own benefits, so consider your bathroom's style and your budget when making a choice.
- How do I design shelves that fit my bathroom layout?
Designing shelves that fit your bathroom layout involves measuring your available space and considering the items you plan to store. Think about floating shelves for a sleek, modern look or corner shelves to utilize those tricky nooks. Sketch out your ideas and visualize how they will complement your existing decor. Remember, functionality is key, so ensure that your design maximizes storage without overcrowding the space.
- What tools do I need for installing DIY bathroom shelves?
For a successful installation of your DIY bathroom shelves, you'll need a few essential tools. A drill is crucial for making holes in the wall, while a level ensures your shelves are straight. Don't forget a stud finder to locate secure mounting points, and a tape measure to get accurate dimensions. Having these tools on hand will make your installation process much smoother!
- Are there any safety precautions I should take?
Absolutely! Safety should always be a priority in DIY projects. Make sure to wear protective eyewear when drilling, and keep your workspace tidy to avoid accidents. If you're using ladders, ensure they are stable and positioned correctly. Additionally, always double-check that your shelves are securely mounted to prevent any accidents in the future. Following these precautions will help keep your project safe and enjoyable!
- How can I maintain my DIY bathroom shelves?
Maintaining your DIY bathroom shelves is essential for their longevity. Regularly dust and clean them with a damp cloth to prevent moisture buildup. If you've used wood, consider applying a protective sealant every few months to keep it looking fresh. Also, periodically check for any loose screws or brackets and tighten them as needed. A little maintenance goes a long way in keeping your shelves functional and attractive!


