Create a Rustic Charm: DIY Wooden Decor Projects
Are you ready to dive into the enchanting world of DIY wooden decor? There’s something truly magical about transforming raw wood into stunning pieces that can elevate the rustic charm of your home. Whether you’re a seasoned woodworker or just starting out, these projects are not only fun but also offer a personal touch that mass-produced items simply can't replicate. Imagine walking into your living room and being greeted by handcrafted wooden decor that reflects your style and creativity. Sounds inviting, right?
In this article, we’ll explore various DIY projects that will inspire you to pick up your tools and get creative. From selecting the right type of wood to the essential tools you’ll need, we’ll cover everything to help you succeed. You’ll learn about popular projects, finishing techniques, and even how to incorporate natural elements to enhance the rustic feel of your creations. So, grab a cup of coffee, roll up your sleeves, and let’s get started on this exciting journey of crafting beautiful wooden decor!
Before you start hammering away, it’s crucial to select the right type of wood for your projects. Each type of wood comes with its unique characteristics, textures, and finishes that can dramatically affect the final outcome. For instance, if you’re looking for a warm, inviting feel, consider using pine or cedar. On the other hand, if you desire a more robust and durable piece, oak or maple might be your best bet.
Here are a few popular wood types to consider:
- Pine: Affordable and easy to work with, perfect for beginners.
- Cedar: Naturally resistant to moisture, great for outdoor projects.
- Oak: Strong and durable, ideal for furniture.
- Maple: Hard and dense, excellent for intricate designs.
Choosing the right wood not only influences the aesthetic but also the longevity of your decor. So, take your time and pick wisely!
Having the right tools can make or break your woodworking experience. Imagine trying to create a beautiful wooden shelf with a rusty old saw – not the best scenario, right? Investing in some essential tools will help you achieve professional results right from the comfort of your home.
Every DIY enthusiast should have a set of basic hand tools. These tools are not just for the pros; they’re perfect for anyone looking to create something unique. Here’s a quick rundown of some must-have hand tools:
- Hammer: For driving nails and assembling pieces.
- Screwdriver: A versatile tool for screws of all types.
- Chisels: Great for carving and detailing your wood.
- Hand Saw: Essential for making precise cuts.
With these tools in hand, you’ll be well on your way to crafting beautiful wooden decor.
Accurate measurements and cuts are vital for successful projects. No one wants a crooked shelf or an uneven table! Invest in a good tape measure, a square for right angles, and a reliable miter saw for those clean cuts. Trust me, your future self will thank you!
Once your project is complete, it’s time to enhance its appearance with finishing tools. Sanding blocks, brushes for staining, and sealants are essential for giving your wooden decor that polished look. A well-finished piece not only looks great but also lasts longer!
For those looking to speed up their woodworking tasks, power tools are a game changer. While hand tools are great for precision, power tools can help you tackle larger projects with ease. A circular saw, drill, and jigsaw are among the top choices that can elevate your DIY projects to the next level.
The beauty of DIY wooden decor is the endless possibilities it offers. Whether you want to create a stunning centerpiece or a functional piece of furniture, there’s a project for everyone. Let’s explore some popular ideas that can add rustic charm to any space in your home.
Creating wooden wall art allows for personalization and creativity. Imagine crafting a piece that reflects your personality and style. You can use reclaimed wood for a more rustic look or paint it for a pop of color. The techniques are endless, and the satisfaction of hanging your own creation on the wall is unmatched!
Building rustic furniture can transform your living space. Whether it’s a coffee table, a bench, or a bookshelf, these projects can add functionality and charm to your home. Plus, they make fantastic conversation starters when guests come over!
The finishing touches can truly elevate your wooden decor projects. Techniques for staining, painting, and sealing are essential to achieve the desired look and durability. Staining enhances the natural beauty of the wood, while sealing protects it from wear and tear.
Staining wood is an art in itself. It enhances the natural beauty and brings out the richness of the wood grain. You can experiment with different stains to find the perfect shade that complements your decor.
Protecting your wooden decor is essential for longevity. There are various sealing options available, from polyurethane to natural oils, that will safeguard your projects from scratches and moisture.
Integrating natural elements into your wooden decor can enhance the rustic feel. Think about using stones, plants, and other organic materials to bring your projects to life. It’s like adding nature’s touch to your creations!
Natural stones can add texture and contrast to your wooden projects. Imagine a wooden table adorned with smooth river stones as a centerpiece. It’s a beautiful way to blend rustic and natural aesthetics.
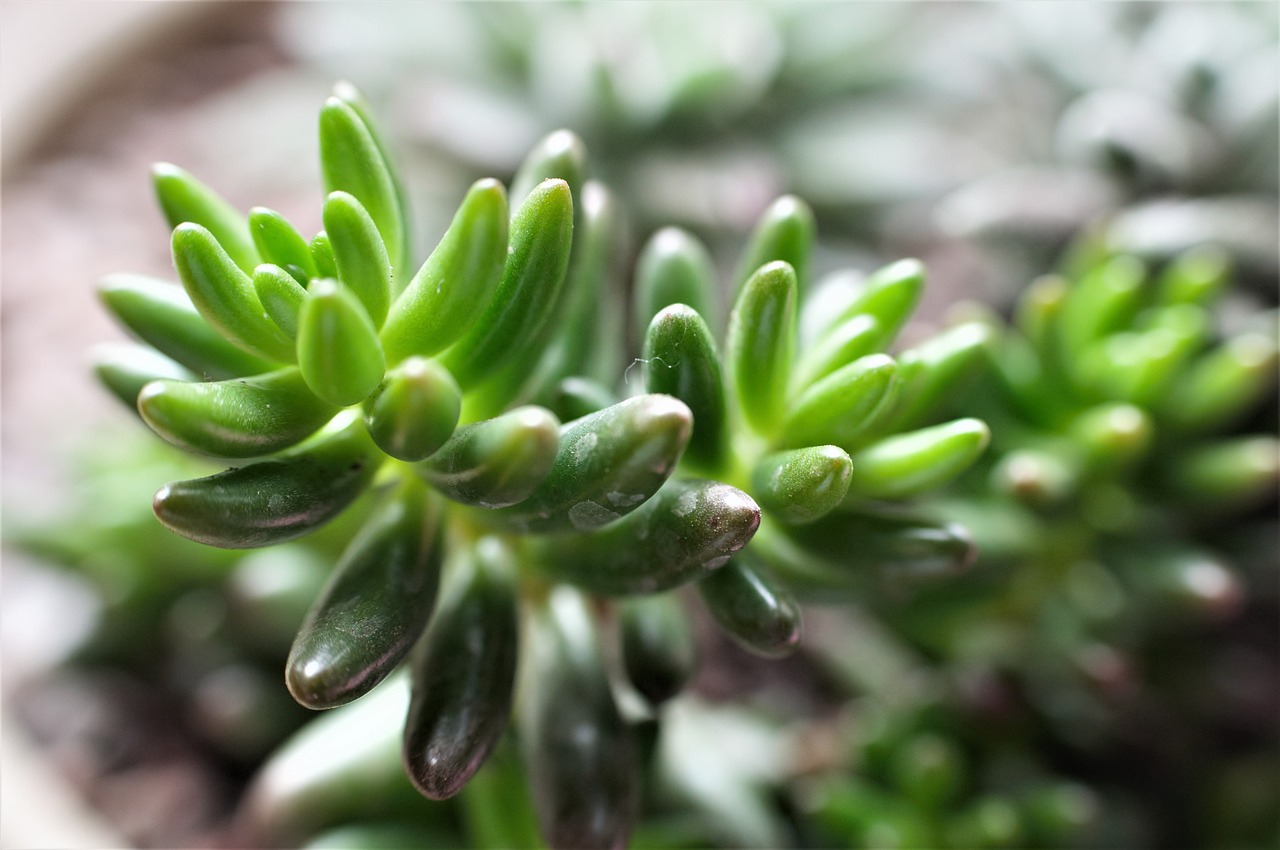
Plants breathe life into wooden decor. Consider incorporating small potted plants or succulents into your projects for a fresh, vibrant look. It’s a simple way to bring the outdoors in!
If you're new to woodworking, don’t worry! Everyone starts somewhere, and with the right tips, you’ll be crafting beautiful decor in no time. Start by choosing small, manageable projects that will build your confidence and skills.
Beginner projects should be simple and manageable. Think about creating small items like coasters or picture frames. These projects will help you practice your skills without feeling overwhelmed.
Mistakes are part of the learning process. Embrace setbacks as valuable lessons in your DIY journey. Remember, every expert was once a beginner!
Q: What type of wood is best for beginners?
A: Pine is a great choice for beginners due to its affordability and ease of use.
Q: Do I need power tools for DIY projects?
A: While power tools can speed up the process, many projects can be completed with hand tools alone.
Q: How do I protect my finished wooden decor?
A: Use a sealant like polyurethane to protect your projects from moisture and wear.
[Choosing the Right Wood]
When it comes to DIY wooden decor projects, selecting the right type of wood is absolutely crucial. The wood you choose not only impacts the durability of your project but also plays a significant role in the overall aesthetic and feel of your decor. Each type of wood comes with its own unique characteristics, such as grain patterns, colors, and textures, which can dramatically influence the final look of your creations.
For instance, if you're aiming for a rustic charm, you might want to consider woods like pine, cedar, or oak. These options are not only readily available but also come with beautiful grains that can enhance the natural beauty of your projects. On the other hand, if you're looking for something a bit more modern, hardwoods like maple or cherry can provide a sleek and polished finish.
Here are a few factors to consider when choosing your wood:
- Durability: Ensure the wood can withstand wear and tear, especially for furniture pieces.
- Grain and Texture: The grain pattern can add character and style to your decor.
- Cost: Some woods are more expensive than others; choose one that fits your budget.
- Availability: Check if the wood is easily accessible in your area.
Additionally, you might want to consider the sustainability of the wood you choose. Opting for reclaimed wood or certified sustainable sources not only supports eco-friendly practices but also adds a unique story to your projects. Imagine crafting a beautiful shelf from reclaimed barn wood that has its own history; it’s like bringing a piece of the past into your home!
To help you make an informed decision, here’s a quick comparison table of some popular types of wood used in DIY projects:
| Type of Wood | Characteristics | Best Uses |
|---|---|---|
| Pine | Soft, light-colored, easy to work with | Furniture, shelving, wall art |
| Cedar | Resistant to moisture and insects, aromatic | Outdoor decor, garden furniture |
| Oak | Strong, durable, with an attractive grain | Tables, chairs, cabinetry |
| Maple | Hard, fine grain, light color | Modern furniture, cabinetry |
| Cherry | Rich color, smooth texture, ages beautifully | High-end furniture, decorative items |
In conclusion, choosing the right wood for your DIY projects is a blend of personal preference, functionality, and aesthetic appeal. Take your time to explore different types, and don't hesitate to experiment with various finishes and techniques. Remember, the wood you select will ultimately set the tone for your entire decor, so choose wisely!
[Essential Tools for DIY Projects]
When diving into the world of DIY wooden decor projects, having the right tools is like having a trusty map in uncharted territory. It can make the difference between a smooth sailing experience and a frustrating adventure. Whether you're a seasoned woodworker or just starting out, understanding the essential tools will empower you to create stunning pieces with ease and confidence.
First and foremost, let’s talk about hand tools. These are the backbone of any DIY toolkit. You might think of them as the classic tools that have stood the test of time. Tools like a hammer, saw, and chisel are indispensable. They allow for precision and control that power tools sometimes can’t match. For instance, a good quality hand saw can be your best friend when it comes to making clean cuts on smaller projects. Meanwhile, a chisel set can help you achieve intricate details that add character to your wooden decor.
Now, let’s get a bit more specific. When you're measuring and cutting, accuracy is key. This is where tools like a measuring tape, square, and a level come into play. Imagine trying to hang a shelf that’s not level; it would be a disaster! Using a measuring tape ensures you have the right dimensions, while a square guarantees your corners are perfect. And don’t forget about a level—it’s essential for ensuring your projects look professional and polished.
Next up are the finishing tools. These are what will take your project from good to great. Sanding is crucial for achieving a smooth surface that feels as good as it looks. You can use sandpaper for small areas, or invest in a power sander for larger surfaces. Additionally, staining and sealing are vital steps that protect your wood while enhancing its natural beauty. You might want to explore options like wood stains and sealants to find the perfect finish that complements your style.
Speaking of power tools, let’s not overlook their importance in speeding up your projects. While hand tools are fantastic for precision, power tools can save you time and effort. A drill is a must-have for making holes quickly and efficiently, while a circular saw can cut through wood like butter. If you’re looking to invest in a few power tools, consider starting with these essentials, as they can handle a variety of tasks and are great for beginners.
To give you a clearer picture, here’s a simple table summarizing the essential tools you'll need for your DIY wooden decor projects:
| Tool Type | Purpose |
|---|---|
| Hand Tools | For precision cutting and shaping |
| Measuring Tools | Ensures accurate dimensions and level surfaces |
| Finishing Tools | For sanding, staining, and sealing |
| Power Tools | Speeds up tasks and makes cutting easier |
With this toolkit in hand, you're well on your way to creating beautiful wooden decor that reflects your personal style and adds that sought-after rustic charm to your home. Remember, the journey of DIY is about experimenting, learning, and most importantly, enjoying the process. So, gather your tools, unleash your creativity, and let the woodwork begin!
Q: What if I don't have all the tools listed?
A: Start with the basics and gradually build your toolkit as you take on more projects. Many DIYers find that they can borrow or rent tools for specific tasks.
Q: Are power tools necessary for beginners?
A: Not necessarily! While power tools can make tasks easier, many beginners start with hand tools to learn the fundamentals of woodworking.
Q: How do I know which wood to choose for my projects?
A: Consider the look and feel you want to achieve. Softwoods like pine are easier to work with for beginners, while hardwoods like oak offer durability and a beautiful finish.
[Basic Hand Tools]
When it comes to embarking on your DIY wooden decor journey, having the right tools is like having a trusty compass on a road trip; it guides you to your destination with ease. Basic hand tools are essential for any DIY enthusiast, whether you're a seasoned pro or just starting out. They not only help you execute your ideas but also allow you to express your creativity in the most efficient way possible.
First off, let’s talk about the measuring tools. Accurate measurements are the backbone of any woodworking project. A good tape measure, a square, and a level are your best friends. They ensure that your cuts are precise and your pieces fit together seamlessly. Imagine trying to assemble a puzzle with pieces that just don’t fit; that’s what it feels like when you skip these crucial steps.
Now, onto the cutting tools. A reliable handsaw is a must-have for any DIY toolkit. It’s versatile and can handle various types of cuts, whether you’re making a simple shelf or a complex piece of furniture. Additionally, consider investing in a chisel set. These little gems allow you to carve out details and create intricate designs, giving your projects that personalized touch that store-bought items often lack.
Next, let’s not forget about the importance of finishing tools. Sandpaper is your go-to for smoothing out rough edges and surfaces. It’s like the icing on the cake; it transforms your project from good to great. A sanding block can make this process easier and more effective, especially for larger surfaces. And if you want to add some flair, a paintbrush or a foam applicator will help you apply stains or paints evenly, enhancing the beauty of the wood.
To sum it up, here’s a quick overview of the basic hand tools you should have in your arsenal:
| Tool | Purpose |
|---|---|
| Tape Measure | For precise measurements |
| Saw | For cutting wood |
| Chisels | For carving and detailing |
| Sanding Block | For smoothing surfaces |
| Paintbrush/Foam Applicator | For applying finishes |
Incorporating these basic hand tools into your DIY projects will not only make your life easier but will also enhance the quality of your work. Remember, the right tools can make the difference between a project that feels like a chore and one that is a joy to create. So, gather your tools, roll up your sleeves, and let your creativity flow!
- What are the most essential hand tools for beginners?
For beginners, a tape measure, handsaw, chisels, and sandpaper are crucial tools to start with.
- How can I ensure accurate measurements?
Always double-check your measurements before cutting, and use a square to ensure right angles.
- What type of wood is best for beginners?
Pine is a great choice for beginners due to its softness and ease of handling.
[Measuring and Cutting Tools]
When diving into the world of DIY wooden decor projects, one of the most critical aspects you need to consider is precision. This is where measuring and cutting tools come into play. Without accurate measurements and clean cuts, even the most beautiful wood can end up looking like a jigsaw puzzle gone wrong. Think about it: would you trust a chef who can’t measure ingredients properly? The same principle applies to woodworking!
First and foremost, a reliable tape measure is your best friend. It’s essential for ensuring that you know exactly how much wood you need and where to make your cuts. A good tape measure can extend up to 25 feet, which is usually more than adequate for most home projects. Additionally, consider investing in a speed square. This handy tool helps you mark and cut perfect angles, making it invaluable for creating frames and other geometric shapes.
Another must-have tool is the miter saw. This power tool enables you to make precise crosscuts and miter cuts, which are essential for creating clean edges on your wooden pieces. If you’re serious about woodworking, this tool will save you time and frustration. For those who prefer hand tools, a hand saw can still do the job, but it requires a bit more skill and patience.
In addition to these, a carpenter's square is crucial for checking the squareness of your cuts. It’s like having a second pair of eyes that ensure everything is aligned correctly. After all, nobody wants to put together a project only to find out that it’s slightly off-kilter!
Lastly, let’s not forget about safety gear. When cutting wood, debris can fly, and accidents can happen. Always wear safety goggles and a dust mask to protect yourself. It may seem like a hassle, but trust me, your future self will thank you!
Here's a quick overview of essential measuring and cutting tools:
| Tool | Function |
|---|---|
| Tape Measure | To measure lengths and distances accurately. |
| Speed Square | To mark and cut angles accurately. |
| Miter Saw | For making precise crosscuts and miter cuts. |
| Carpenter's Square | To check the squareness of your cuts. |
| Hand Saw | For manual cutting, requires skill. |
In summary, having the right measuring and cutting tools is essential for achieving that professional look in your DIY wooden decor projects. Remember, precision is key! So, gear up, measure twice, and cut once, and you’ll be well on your way to creating stunning pieces that add rustic charm to your home.
- What is the most important tool for beginners? A tape measure is crucial for accurate measurements.
- Can I use a hand saw instead of a power saw? Yes, but it requires more effort and skill.
- How do I ensure my cuts are straight? Use a carpenter's square to check your angles before cutting.
[Finishing Tools]
When it comes to achieving that professional look in your DIY wooden decor projects, the right finishing tools are absolutely essential. These tools not only enhance the aesthetic appeal of your creations but also protect them from the elements and everyday wear and tear. Let's dive into the must-have finishing tools that will help you take your woodworking projects to the next level.
First on the list is the sander. A good sander can make a world of difference in your project. Whether you opt for a random orbital sander for a smooth finish or a detail sander for those tight spots, having a sander will save you hours of manual labor and provide a flawless surface ready for staining or painting. Remember, the smoother the wood, the better the finish will look!
Next up, we have paintbrushes and rollers. While it may seem trivial, the quality of your brushes can greatly affect the outcome of your finish. A good brush can prevent streaks and ensure even coverage, especially when it comes to applying stains or sealants. You might want to invest in a variety of sizes to tackle different areas of your projects. For larger surfaces, rollers can speed up the application process, allowing you to cover more area quickly.
Speaking of stains, stain applicators are crucial for achieving that rich, deep color you desire. You can use foam applicators, rags, or even brushes, but the key is to apply the stain evenly and wipe off any excess to avoid blotchiness. This is where practice comes in; don’t be discouraged if your first attempt isn’t perfect. Just remember, practice makes perfect!
Finally, let’s talk about sealants. After you’ve put in all that hard work, you’ll want to protect your project. Sealants come in various forms, including polyurethane, varnish, and wax. Each has its own set of benefits, so it's essential to choose one that suits your project’s needs. For instance, if you’re working on a piece that will see a lot of use, a durable polyurethane might be your best bet. On the other hand, for a more natural look, a wax finish can provide a lovely sheen.
In summary, the right finishing tools can elevate your DIY wooden decor projects from ordinary to extraordinary. By investing in quality sanders, brushes, applicators, and sealants, you’re setting yourself up for success. Remember, the finishing touches are what truly bring your creations to life!
- What is the best type of sander for beginners? A random orbital sander is often recommended for beginners due to its versatility and ease of use.
- How do I choose the right stain for my project? Consider the type of wood you’re using and the look you want to achieve. Test different stains on scrap wood to see how they look before committing.
- Can I use water-based sealants on oil-based stains? It’s best to use a compatible sealant. If you use an oil-based stain, stick with an oil-based sealant for the best results.
- How long should I wait before applying a second coat of stain? Typically, you should wait at least 4-6 hours, but it’s best to check the manufacturer's instructions for specific products.

[Power Tools Overview]
When it comes to DIY woodworking projects, having the right power tools can be a game changer. Imagine trying to cut through a thick piece of wood with nothing but a hand saw—frustrating, right? Power tools not only save you time but also provide a level of precision that hand tools often can’t match. Whether you're a seasoned pro or just starting out, understanding the essential power tools can elevate your projects from basic to breathtaking.
Let's dive into some of the must-have power tools that can transform your woodworking experience:
- Power Drill: This versatile tool is essential for drilling holes and driving screws. With various attachments, a power drill can be used for everything from assembling furniture to creating intricate designs.
- Table Saw: If you're looking for accuracy in cutting large pieces of wood, a table saw is your best friend. It allows for straight cuts and can handle various wood types, making it indispensable for bigger projects.
- Jigsaw: Perfect for making curved cuts or intricate designs, the jigsaw is a must-have for creative projects. It’s lightweight and easy to maneuver, making it ideal for DIY enthusiasts.
- Sander: Achieving a smooth finish is crucial for any wooden decor project, and a power sander can make this task a breeze. Whether you choose a belt sander for larger surfaces or a detail sander for corners, your wood will thank you!
- Router: A router is fantastic for adding decorative edges and grooves to your wood projects. This tool can help you achieve a professional look with minimal effort.
Now, you might be wondering: Do I really need all these tools? While it might seem overwhelming, you don't have to invest in everything at once. Start with a few essential tools that suit your immediate projects and gradually build your collection as your skills and interests grow. The key is to choose tools that will enhance your ability to create and enjoy the woodworking process.
In conclusion, power tools are invaluable assets in your DIY toolkit. They not only make your tasks easier but also open up a world of possibilities for creativity and craftsmanship. So, gear up, get your hands on some essential power tools, and watch your woodworking dreams come to life!
Q: What power tools should a beginner start with?
A: For beginners, a good starting point would be a power drill, a jigsaw, and a sander. These tools are versatile and will cover a wide range of projects.
Q: Are power tools safe to use?
A: Yes, power tools are safe when used correctly. Always follow safety guidelines, wear protective gear, and read the instruction manual before using any tool.
Q: How can I maintain my power tools?
A: Regular maintenance includes cleaning your tools after use, checking for any wear and tear, and storing them in a dry, safe place. Keeping blades sharp and lubricating moving parts will also extend their lifespan.
[Popular DIY Wooden Decor Projects]
When it comes to adding a touch of rustic charm to your home, DIY wooden decor projects are the way to go! Not only do they showcase your creativity, but they also provide a unique, personalized flair that store-bought items simply can't match. Imagine walking into your living space and being greeted by stunning wooden pieces that you've crafted with your own two hands. Sounds amazing, right? Let's dive into some popular projects that can transform any room into a cozy haven.
One of the most sought-after DIY projects is wooden wall art. This is where your creativity can truly shine! Whether you're a fan of abstract designs or prefer something more traditional, the possibilities are endless. You can use reclaimed wood for a more rustic feel or opt for smooth, new wood for a contemporary look. Techniques such as wood burning or painting can add an extra layer of personality. Just think about creating a piece that tells your story—how exciting is that?
Another fantastic project is building rustic furniture pieces. Imagine crafting a beautiful coffee table or a set of shelves that not only serve a purpose but also become conversation starters. Simple projects like a pallet coffee table or a wooden bench can be completed in a weekend and will add both functionality and charm to your space. Plus, you can customize the size and finish to perfectly match your decor.
If you're looking for something a bit more adventurous, consider making wooden planters. These not only provide a home for your favorite plants but also enhance the rustic aesthetic of your decor. You can create tiered planters or even hanging ones that add dimension to your space. The beauty of working with wood is that you can integrate it seamlessly with natural elements, creating a cohesive look that feels inviting.
For those who love a challenge, crafting wooden signs can be a rewarding experience. Whether you're creating a welcoming sign for your front porch or a personalized piece for your kitchen, wooden signs allow for a unique expression of your style. You can use stencils for precise lettering or go freehand for a more organic feel. The choice is yours, and the satisfaction of seeing your work displayed is unparalleled.
Lastly, don’t underestimate the charm of wooden candle holders. With just a few cuts and some sanding, you can create stunning centerpieces that will warm up any room. Whether you opt for a simple design or something more intricate, these candle holders can be customized to fit any decor style. Plus, they make great gifts for friends and family!
In summary, the world of DIY wooden decor projects is vast and filled with opportunities for creativity. From wall art to furniture, each project allows you to express your personal style while adding a cozy, rustic charm to your home. So grab your tools, unleash your creativity, and let’s get crafting!
Q: What type of wood is best for DIY projects?
A: The best type of wood depends on your project. For indoor decor, softer woods like pine or poplar are easy to work with. For outdoor projects, consider using cedar or redwood for their durability.
Q: Do I need special tools to start DIY woodworking?
A: While some projects may require power tools, many beginner projects can be completed with basic hand tools like saws, hammers, and screwdrivers.
Q: How can I ensure my projects last a long time?
A: Proper finishing techniques, including staining and sealing, can protect your wooden decor from wear and tear, ensuring they last for years to come.
Q: Can I use reclaimed wood for my projects?
A: Absolutely! Reclaimed wood adds character and is often more sustainable than new wood. Just make sure to check for any damage or contaminants before using it.

[Wooden Wall Art]
Creating wooden wall art is a fantastic way to express your creativity while adding a personal touch to your home decor. Imagine walking into a room and being greeted by a stunning piece that reflects your unique style and personality. The beauty of wooden wall art lies not just in its aesthetic appeal but also in its versatility. You can craft everything from intricate geometric designs to rustic, organic shapes that tell a story. So, how do you get started on this exciting journey?
First, consider the type of wood you want to use. Different woods offer varying textures, colors, and grains, which can significantly impact the final look of your art. For instance, pine is light and easy to work with, while walnut provides a rich, dark hue that can add sophistication to any piece. You might also want to experiment with reclaimed wood, which not only gives a rustic flair but also promotes sustainability.
Once you've chosen your wood, it's time to unleash your imagination! You can sketch out your design on paper before transferring it onto the wood. Alternatively, you could use stencils for more intricate patterns. The key is to ensure that your design resonates with your personal style. Don't be afraid to think outside the box—consider incorporating elements like quotes, nature scenes, or even abstract shapes to make your piece truly one-of-a-kind.
Next comes the fun part—cutting and assembling your wall art. Whether you choose to use hand tools or power tools, precision is crucial. A jigsaw can help you achieve smooth curves, while a circular saw is perfect for straight cuts. Remember, safety first! Always wear protective gear and work in a well-ventilated area. Once your pieces are cut, you can start assembling them. Use wood glue or small nails to secure the parts together, ensuring that your art is durable and ready to hang.
Now, let’s talk about finishes. The finishing touches can make or break your wooden wall art. You might want to opt for a natural stain to enhance the wood grain, or go bold with a pop of color using paint. If you prefer a more rustic look, consider leaving the wood raw or applying a clear sealant to protect it while maintaining its natural charm. Remember, the finish you choose should complement your overall home decor.
Finally, think about how you'll display your masterpiece. Wall art can be hung in various ways, depending on its size and weight. For larger pieces, consider using wall anchors to ensure they are securely mounted. You could also create a gallery wall by grouping smaller pieces together, allowing for a dynamic and visually appealing arrangement.
In conclusion, wooden wall art is not just a project; it's an opportunity to immerse yourself in creativity and craftsmanship. Whether you’re a seasoned DIYer or a beginner, the process of designing and creating wooden wall art can be incredibly rewarding. So gather your materials, unleash your imagination, and let your creativity flow!
Q: What type of wood is best for wall art?
A: The best wood for wall art depends on your design and desired finish. Pine is great for beginners due to its workability, while hardwoods like oak or walnut offer durability and a beautiful grain.
Q: Do I need special tools to create wooden wall art?
A: While basic hand tools can suffice, power tools can make the process easier and more efficient. A jigsaw, for example, is ideal for intricate cuts.
Q: How can I protect my wooden wall art?
A: Applying a clear sealant or varnish will protect your art from dust and moisture while enhancing its appearance. Make sure to follow the manufacturer’s instructions for the best results.
[Rustic Furniture Pieces]
Building rustic furniture pieces can truly transform your living space into a cozy retreat that reflects your personal style. Imagine crafting a stunning coffee table from reclaimed wood, or a charming bookshelf that tells a story of its own. The beauty of rustic furniture lies not only in its aesthetic appeal but also in its functionality. Each piece you create can serve a purpose while adding a touch of warmth and character to your home.
When you think of rustic furniture, what comes to mind? Perhaps it's the rough-hewn edges, the natural imperfections, or the rich, earthy tones that evoke a sense of nostalgia. These elements are what make rustic furniture so appealing. They remind us of simpler times and bring a sense of authenticity to our modern lives. Furthermore, you don’t have to be a master craftsman to create stunning pieces. With a bit of creativity and the right approach, you can start making your own rustic furniture.
Here are a few popular projects you might consider:
- Rustic Dining Table: A large, sturdy dining table made from reclaimed wood can become the centerpiece of your dining area. It’s perfect for family gatherings and can be customized to fit your space.
- Wooden Benches: Simple benches can be made to complement your dining table or placed in entryways. They add both seating and charm.
- Accent Tables: Small side tables can be crafted from leftover wood pieces and can serve as great spots for plants or lamps.
One of the most rewarding aspects of creating rustic furniture is the ability to personalize each piece. You can choose the wood type, finish, and design elements that resonate with you. For instance, using distressed wood adds character, while smooth finishes can provide a more refined look. Moreover, incorporating elements like metal accents or vintage hardware can elevate your creations, making them truly one-of-a-kind.
It's also essential to think about the functionality of your furniture. Consider how each piece will be used in your home. A rustic coffee table can double as storage if designed with drawers or shelves. Similarly, a bench can serve as both seating and a place to store shoes or blankets. By merging aesthetics with practicality, you can create furniture that not only looks great but also serves a purpose.
As you embark on your rustic furniture-making journey, don't shy away from experimenting. Each project is an opportunity to learn and refine your skills. Remember, the charm of rustic furniture often lies in its imperfections—embrace those quirks! Whether it’s a wobbly leg or a slightly uneven surface, these features can add to the character of your piece, making it even more special.
In conclusion, creating rustic furniture pieces is not just about crafting; it's about telling a story and creating a space that feels warm and inviting. So grab your tools, let your imagination run wild, and start building pieces that reflect your unique style and personality.
Q: What type of wood is best for rustic furniture?
A: Reclaimed wood, pine, and cedar are popular choices due to their durability and natural beauty.
Q: Do I need special tools to build rustic furniture?
A: While basic hand tools can suffice, having power tools can make the process easier and more efficient.
Q: How can I protect my rustic furniture?
A: Use sealants or furniture wax to protect the wood from wear and moisture, ensuring longevity.
[Finishing Touches and Techniques]
When it comes to DIY wooden decor, the finishing touches are what truly bring your projects to life. Think of these techniques as the icing on the cake; they enhance the beauty of your work and provide that polished look that makes your creations stand out. Whether you're looking to add a splash of color, bring out the natural grain of the wood, or ensure your projects can withstand the test of time, the right finishing techniques are essential.
One of the most popular methods of finishing wood is staining. This technique not only deepens the color of the wood but also highlights its unique grain patterns. When choosing a stain, consider the type of wood you’re working with and the overall aesthetic you want to achieve. For instance, if you're working with oak, a dark walnut stain can create a stunning contrast that adds depth and richness. On the other hand, lighter woods like pine can benefit from a clear or light stain that showcases their natural beauty.
After staining, you might want to apply a protective finish. This is where sealing comes into play. Sealing your projects is crucial for durability, especially if your decor will be exposed to moisture or heavy use. There are several options available, including polyurethane, varnish, and shellac. Each has its own unique properties, so it’s important to choose one that aligns with your project needs. For example, for a dining table, a polyurethane finish provides a tough, water-resistant barrier, while a shellac finish offers a more traditional look with a warm glow.
In addition to staining and sealing, painting is another fantastic option for finishing your wooden decor. Painting allows for endless creativity and personalization. You can choose bold colors to make a statement or soft hues for a more subtle touch. When painting, it’s important to use a primer first, especially on raw wood, to ensure the paint adheres properly and provides an even finish. After priming, apply at least two coats of paint for maximum coverage and durability.
Once you’ve completed the staining, sealing, or painting process, don’t forget about the final touches. Sanding your project lightly between coats can create a smoother finish, while adding decorative elements like stencils or hardware can elevate your design even further. For example, consider adding metal handles to a wooden storage box or using stencils to create intricate patterns on a wooden sign. These little details can make a big difference in the overall look of your project.
To summarize the finishing techniques, here’s a quick reference table:
| Technique | Description | Best For |
|---|---|---|
| Staining | Enhances the natural color and grain of the wood. | Furniture, wall art |
| Sealing | Protects the wood from moisture and wear. | Tables, outdoor decor |
| Painting | Adds color and personality to wooden projects. | Signs, decorative pieces |
Finishing touches are not just about aesthetics; they also play a vital role in the longevity of your wooden decor. By investing time and effort into these techniques, you're ensuring that your projects will not only look fabulous but also stand the test of time. So, grab your brushes, stains, and sealants, and get ready to transform your wooden creations into stunning pieces of art!
Q: What is the best type of stain for beginners?
A: Water-based stains are often recommended for beginners as they are easy to clean up and dry quickly.
Q: How long should I wait before applying a second coat of stain?
A: It’s generally best to wait at least 2-4 hours, but always check the manufacturer’s instructions for specific recommendations.
Q: Can I use paint over a stained surface?
A: Yes, but it's advisable to use a primer first to ensure better adhesion of the paint.
Q: How do I choose between oil-based and water-based finishes?
A: Oil-based finishes are more durable and provide a warm glow, while water-based finishes dry faster and are easier to clean up.
[Staining Techniques]
Staining wood is an art that can dramatically enhance the natural beauty of your wooden decor projects. Whether you're aiming for a rich, deep hue or a light, airy finish, the right staining technique can make all the difference. One of the first things to understand is that wood stains come in two primary types: oil-based and water-based. Each type has its own unique characteristics and application methods, which can affect the final look of your project.
Oil-based stains tend to penetrate deeper into the wood, providing a more vibrant color and a longer-lasting finish. They also have a longer drying time, allowing you to work the stain into the wood without rushing. On the other hand, water-based stains dry quickly and are easier to clean up, making them a great option for beginners. However, they may not bring out the wood's natural grain as effectively as oil-based stains.
When it comes to applying stain, preparation is key. Start by sanding your wood surface to create a smooth finish. This step is crucial as it opens up the wood's pores, allowing for better stain absorption. After sanding, remove any dust particles with a clean cloth. Once your surface is prepped, you can move on to the staining process. Here are some popular techniques to consider:
- Wipe-On Staining: This method involves applying the stain with a cloth, allowing for more control over the amount of stain used. It’s perfect for achieving a lighter finish.
- Brush-On Staining: Using a brush can help you cover larger areas more quickly. Just be sure to follow the wood grain to avoid streaks.
- Spray Staining: For those looking for a uniform finish, spray staining can be a game-changer. It’s fast and provides an even coat, but it requires some practice for best results.
After applying the stain, it’s essential to let it dry completely before adding any protective finishes. This step ensures that the stain sets properly and doesn’t smudge or run. Once dry, you might want to consider adding a topcoat to seal the stain and protect your project from wear and tear. Polyurethane is a popular choice for its durability, while a wax finish can give your piece a soft, natural look.
Finally, remember that staining is as much about experimentation as it is about technique. Don’t be afraid to try different stains on scrap pieces of wood to see how they react. You might discover a unique blend that perfectly suits your style! The beauty of DIY wooden decor is that you have the freedom to create something truly one-of-a-kind.
Q: How long does stain take to dry?
A: Drying times can vary based on the type of stain used and environmental conditions, but generally, oil-based stains take about 6 to 8 hours to dry, while water-based stains can dry in about 1 to 2 hours.
Q: Can I apply stain over paint?
A: It’s not recommended to apply stain over paint, as the stain won’t adhere properly. If you want a stained look, it’s best to strip the paint off the wood first.
Q: How do I clean up after staining?
A: For oil-based stains, use mineral spirits for cleanup. For water-based stains, soap and water will suffice. Always clean your brushes and tools immediately after use for the best results.

[Sealing and Protecting Your Projects]
When it comes to woodworking, sealing and protecting your projects is essential for ensuring their longevity and beauty. Imagine putting all that effort into crafting a stunning wooden decor piece, only to see it fade, crack, or get damaged over time. To avoid that heartache, you’ll want to consider the right sealing methods that not only protect your work but also enhance its natural beauty.
First off, let’s discuss why sealing is so important. Wood is a natural material that can be vulnerable to moisture, dirt, and UV rays. Without proper protection, your beautiful creations can warp or develop unsightly stains. By applying a sealant, you create a barrier that safeguards against these elements. There are various types of sealants available, and choosing the right one depends on your project's needs and the desired finish.
Here are some popular sealing options you might consider:
- Polyurethane: This is a durable, water-resistant sealant that works wonders for high-traffic items like furniture. It’s available in both oil-based and water-based formulas, allowing you to choose based on your project’s requirements.
- Varnish: Varnish provides a hard, protective finish and is great for outdoor projects. It’s designed to withstand the elements, making it ideal for garden furniture or decor.
- Shellac: This natural sealant gives a warm, amber tone to your wood and dries quickly. It’s perfect for smaller projects or pieces that won’t be exposed to moisture.
- Wax: While not as durable as other options, wax can provide a beautiful, soft sheen to your projects. It’s best used on items that won’t see heavy use.
Before applying any sealant, ensure that your wood surface is clean and smooth. Sanding your project not only prepares the surface but also enhances adhesion. After sanding, wipe down the wood with a damp cloth to remove any dust, allowing the sealant to adhere better.
Once you’ve selected your sealant, application is key. Most sealants can be applied with a brush, roller, or cloth, depending on the type. Always follow the manufacturer's instructions regarding the number of coats and drying times. For best results, apply multiple thin coats rather than one thick coat; this helps avoid drips and uneven finishes.
Finally, remember that while sealing protects your wood, it’s also essential to maintain it. Regular cleaning and reapplication of sealants will keep your wooden decor looking fresh and vibrant. By taking these steps, you will not only preserve your hard work but also enjoy your rustic charm for years to come!
Q: How often should I reseal my wooden projects?
A: It depends on the type of sealant used and the exposure of the piece to elements. Generally, you should check your projects annually and reseal as needed.
Q: Can I use sealants on painted wood?
A: Yes, but ensure the paint is fully cured before applying any sealant. Test a small area first to ensure compatibility.
Q: What’s the best way to clean sealed wood?
A: Use a soft cloth and mild soap solution. Avoid harsh chemicals that can damage the sealant.
[Incorporating Natural Elements]
Integrating natural elements into your wooden decor can truly enhance the rustic feel of your home. Imagine a space where the warmth of wood meets the raw beauty of nature—it creates a harmonious balance that can be both calming and inspiring. Whether you're a seasoned DIYer or just starting out, adding elements like stones and greenery can elevate your projects to a whole new level.
One of the easiest ways to incorporate natural elements is by using natural stones. These can add texture and contrast to your wooden pieces, creating a stunning visual appeal. Think about using smooth river rocks as a base for a wooden candle holder or embedding small stones into the design of a wooden shelf. The variations in color and shape of the stones can provide a unique touch to each project. You might even consider creating a small stone mosaic as a backdrop for a wooden art piece, allowing the natural patterns of the stones to complement your craftsmanship.
Another fantastic way to breathe life into your wooden decor is by adding greenery. Plants not only bring color but also infuse your space with a sense of vitality. Consider creating wooden planters or shelves specifically designed to hold potted plants. Hanging planters made from reclaimed wood can serve as beautiful wall art while providing a home for your favorite greenery. Additionally, trailing plants can soften the hard edges of wooden decor, making your space feel more inviting. You can also use small succulents, which require minimal maintenance and can thrive in various lighting conditions, making them perfect for beginners.
When you think about incorporating these elements, remember that balance is key. You don't want your wooden decor to feel overcrowded or chaotic. Instead, aim for a cohesive look where the wood and natural elements complement each other. For example, if you have a rustic wooden table, consider placing a few strategically arranged stones and a small potted plant in the center. This not only draws the eye but also creates a focal point that celebrates both the wood and the natural world.
Finally, don't shy away from experimenting. The beauty of DIY projects is that you can tailor them to your personal taste. Try combining different types of wood with various natural elements to see what resonates with you. Remember, the goal is to create a space that feels uniquely yours, a sanctuary that reflects your personality and style.
- What types of natural stones work best for decor? Generally, smooth river stones, slate, and granite are popular choices due to their aesthetic appeal and durability.
- How can I care for the greenery in my wooden decor? Ensure that you choose plants suitable for your home's lighting conditions and remember to water them according to their specific needs.
- Can I use reclaimed wood for my projects? Absolutely! Reclaimed wood not only adds character but is also an eco-friendly choice.

[Using Natural Stones]
Integrating natural stones into your wooden decor projects can truly elevate the aesthetic appeal of your home. Imagine the rustic charm that a beautiful stone can bring to a wooden piece—it's like pairing a classic wine with a gourmet meal. Not only do stones add texture and contrast, but they also create a connection to nature, enhancing the overall ambiance of your space.
When considering how to incorporate stones into your designs, think about the variety of options available. You can use smooth river stones for a sleek, modern look, or rough-hewn granite for a more rugged, earthy feel. The key is to choose stones that complement the wood you are using. For instance, pairing light-colored woods with darker stones can create a striking visual contrast, while similar tones can provide a more harmonious appearance.
Here are some creative ways to integrate natural stones into your wooden decor:
- Table Centerpieces: Create stunning centerpieces by combining a wooden base with an arrangement of beautiful stones. This can serve as a conversation starter during dinner parties.
- Wall Art: Incorporate stones into wooden wall art for added depth. You can arrange stones in a pattern or create a scene that tells a story.
- Functional Decor: Use stones in functional pieces like coasters or trivets, where the natural texture can be both practical and aesthetically pleasing.
To ensure a cohesive look, consider using a consistent color palette for both the wood and the stones. This will help your decor feel intentional and well-thought-out. Additionally, you can use adhesives or grout to secure stones in place, ensuring they stay put while adding a seamless finish to your projects.
Remember, the beauty of using natural stones lies in their imperfections. Each stone has its own unique shape and color, making your decor one-of-a-kind. Embrace these differences as they add character and charm to your DIY projects. So why not take a stroll through your local riverbed or garden center to find the perfect stones that will complement your wooden creations? Your home will thank you for it!
Q: What types of stones work best for DIY projects?
A: Smooth river stones, granite, slate, and even quartz are great options. Choose based on the look you want to achieve.
Q: How do I adhere stones to wood?
A: Use a strong adhesive like epoxy or construction adhesive. For a more permanent solution, you can also use grout.
Q: Can I paint stones before using them in my projects?
A: Absolutely! Painting stones can add a pop of color and allow for more creative freedom in your designs.
Q: Are there any maintenance tips for stone and wood decor?
A: Regular dusting and occasional cleaning with a damp cloth can keep your decor looking fresh. Avoid harsh chemicals that may damage the wood finish.
[Adding Greenery]
Incorporating greenery into your wooden decor projects can truly breathe life into your creations. Imagine walking into a room where the warm tones of rustic wood are beautifully complemented by vibrant green plants. It's like nature and craftsmanship have teamed up to create a welcoming atmosphere! But how do you effectively blend plants with your wooden pieces? Let’s dive into some creative ideas.
First off, consider using potted plants. They’re an easy way to add a splash of color and freshness without overwhelming your space. For instance, you can place a small potted fern or succulent on a wooden shelf or table. This not only adds visual interest but also creates a dynamic contrast between the earthy tones of the wood and the lively greens of the plants. If you're feeling adventurous, why not create a wooden planter box? It’s a fun DIY project that allows you to showcase multiple plants in one stylish piece!
Another option is to incorporate hanging plants. If you have wooden beams or hooks in your home, consider using them to hang planters. This not only saves space but also creates a stunning visual display. Imagine trailing vines cascading down from a rustic wooden shelf—it's like nature is draping your decor in a beautiful, green curtain! Plus, hanging plants can be a great conversation starter when guests come over.
For those who enjoy a more artistic approach, you can create wooden wall art that integrates plants. Think of a wooden frame with small openings for air plants or moss. This fusion of wood and greenery can serve as a striking focal point in any room. You can even paint the wood in a color that complements your plants, enhancing the overall aesthetic.
Lastly, don’t underestimate the power of herbs. If you love cooking, why not incorporate a small herb garden into your wooden decor? You can use wooden crates or even repurpose old wooden pallets to create a rustic herb garden right in your kitchen or on your patio. Not only does this add greenery, but it also provides fresh ingredients at your fingertips!
In summary, adding greenery to your wooden decor projects is not just about aesthetics; it’s about creating a harmonious environment that feels alive and inviting. Whether you choose potted plants, hanging options, or even an herb garden, the key is to let your creativity flow. Think of your space as a canvas where wood and nature can coexist beautifully!
- What types of plants work best with wooden decor?
Succulents, ferns, and herbs are great choices as they thrive in various conditions and complement wooden textures beautifully.
- How can I maintain the plants integrated into my decor?
Ensure they get adequate light and water. For hanging plants, check for drainage to prevent water damage to your wooden pieces.
- Can I use artificial plants instead of real ones?
Absolutely! Artificial plants can offer the same aesthetic appeal without the maintenance, making them a great alternative.

[Tips for Beginners]
Starting your journey into the world of DIY wooden decor can be both exciting and daunting. It’s like stepping into a new adventure where every cut and measurement unlocks your creativity. But fear not! With the right approach, you can navigate this journey smoothly. Here are some essential tips to help you get started and build your confidence along the way.
First and foremost, starting small is key. As a beginner, it's wise to choose projects that are manageable and don’t require advanced skills. Think of simple items like a wooden shelf or a small planter box. These projects not only help you grasp the basics of woodworking but also allow you to see tangible results quickly. Completing these smaller tasks can be incredibly fulfilling and boost your confidence for more complex endeavors later on.
Additionally, embracing mistakes is crucial in your DIY journey. Every skilled woodworker has faced their fair share of mishaps. Instead of viewing mistakes as failures, think of them as valuable lessons. For instance, if a cut doesn’t turn out as planned, consider it an opportunity to learn about precision and measuring techniques. Reflect on what went wrong, and use that knowledge to improve your next project. Remember, each setback is just a stepping stone towards mastering your craft!
Another tip is to invest time in learning the tools you’ll be using. Familiarize yourself with both hand tools and power tools. Understanding how each tool works and its best applications will not only make your projects easier but also safer. If you’re unsure about a tool, don’t hesitate to watch tutorial videos or read guides. The more informed you are, the more confident you’ll feel when working on your projects.
Moreover, consider joining a local woodworking group or online community. Surrounding yourself with like-minded individuals can provide you with inspiration, support, and valuable advice. You’ll find that sharing your experiences and learning from others can significantly enhance your skills. Plus, it’s a fantastic way to make new friends who share your passion for woodworking!
Lastly, don’t forget to enjoy the process! Woodworking is not just about the end product; it’s about the journey of creating something with your own hands. So, take your time, play around with different techniques, and let your creativity flow. Who knows? You might just surprise yourself with what you can create!
- What tools do I need to start woodworking? A basic set of tools includes a saw, hammer, measuring tape, and sandpaper. As you progress, you might want to invest in more advanced tools.
- How can I find project ideas? Websites like Pinterest or woodworking forums are excellent resources for inspiration. You can also find books dedicated to beginner woodworking projects.
- Is woodworking expensive? It can be, but starting with small projects and using reclaimed wood can help keep costs low. Over time, you can gradually invest in higher-quality materials and tools.
- Can I learn woodworking on my own? Absolutely! Many people are self-taught. With dedication and the right resources, you can become proficient in woodworking.

[Starting Small]
When diving into the world of woodworking, it’s easy to feel overwhelmed by the vast array of tools, techniques, and project ideas. However, the key to becoming a proficient DIYer is to start small. Tackling smaller projects not only helps you build your skills gradually but also boosts your confidence as you see tangible results from your efforts. Imagine learning to ride a bike; you wouldn’t start by attempting to conquer a mountain trail, right? You’d begin with a flat, open space to get comfortable. The same principle applies to woodworking.
Consider beginning with simple projects that require minimal materials and tools. For instance, creating a basic wooden shelf or a small planter box can be a fantastic way to familiarize yourself with the basics of measuring, cutting, and assembling wood. These projects are not only manageable but also functional, allowing you to enjoy the fruits of your labor in your home.
Here are a few beginner-friendly project ideas to ignite your creativity:
- Wooden Coasters: These are quick and easy to make, requiring just a few cuts and some sanding. You can personalize them with paint or wood burning techniques.
- Picture Frames: Crafting frames allows you to practice your cutting skills while creating something that showcases your favorite memories.
- Simple Birdhouses: A birdhouse is a delightful project that can help you learn about assembly and finishing, all while providing a home for local birds.
As you embark on your DIY journey, remember that learning from mistakes is part of the process. Don’t be discouraged if things don’t turn out perfectly the first time. Each error is a stepping stone toward mastering your craft. Keep a positive mindset and view each challenge as an opportunity to improve. Just like a sculptor chiseling away at a block of marble, with each cut, you reveal the masterpiece hidden within.
Finally, make sure to document your projects. Taking photos of your work not only allows you to track your progress but also serves as a motivational reminder of what you’ve accomplished. Share your journey with friends or on social media; you might inspire others to pick up a saw and create something beautiful!
Q: What tools do I need to start woodworking?
A: For beginners, a basic toolkit should include a saw, hammer, measuring tape, level, and sandpaper. As you progress, you can invest in more specialized tools.
Q: How do I choose the right wood for my projects?
A: Start with softwoods like pine or cedar, which are easier to work with. As you gain experience, you can explore hardwoods like oak or maple for more durability and aesthetics.
Q: What is the best way to learn woodworking skills?
A: Consider taking a local woodworking class, watching online tutorials, or reading books on the subject. Practice is essential, so don’t hesitate to experiment with different techniques.
[Learning from Mistakes]
When diving into the world of DIY wooden decor projects, it's almost a guarantee that you'll encounter some bumps along the way. But here's the kicker: those bumps are not just obstacles; they're stepping stones to becoming a better woodworker! Embracing your mistakes can be one of the most valuable lessons in your DIY journey. Think of it like learning to ride a bike; you might fall a few times, but each tumble teaches you how to balance better the next time.
One of the best ways to learn is by reflecting on what went wrong. Did you miscalculate a measurement? Perhaps you chose the wrong type of wood for your project? Instead of getting frustrated, take a moment to analyze the situation. Write down the mistakes you made and what you could do differently next time. This simple practice can transform your approach to woodworking and make you more resilient.
Here are a few common mistakes that beginners often make, along with tips on how to avoid them:
- Overestimating Your Skills: It's easy to get excited and take on a project that's beyond your current skill level. Start with simpler projects and gradually increase the complexity as you gain confidence.
- Neglecting Safety: Always prioritize safety by wearing protective gear and following tool instructions. A small oversight can lead to accidents.
- Skipping Preparation: Rushing into a project without proper planning can lead to errors. Take the time to sketch your design and gather all necessary materials before starting.
Remember, every expert was once a beginner. Each mistake you make is an opportunity to learn something new. Instead of seeing a failed project as a waste of time, view it as a lesson that brings you one step closer to mastering your craft. The beauty of DIY is that it allows for creativity and experimentation, so don’t shy away from trying different techniques, even if they don’t always work out as planned.
Additionally, sharing your experiences with fellow DIY enthusiasts can provide valuable insights. Join online communities or local workshops where you can exchange stories and tips. You might find that others have faced similar challenges, and their solutions could inspire your next project. So, the next time you find yourself grappling with a mistake, remember: it's not the end of the world—it's just another chapter in your DIY story!
1. What should I do if I make a mistake during my project?
Don't panic! Take a step back, assess the situation, and determine how you can fix it. Often, small mistakes can be corrected with a little creativity.
2. How can I avoid making mistakes in the future?
Practice makes perfect! Start with simpler projects, follow tutorials closely, and always double-check your measurements before cutting.
3. Is it normal to feel frustrated when starting out?
Absolutely! Frustration is a natural part of learning. Embrace it as part of the process and remember that every expert was once a beginner.
Frequently Asked Questions
- What type of wood is best for DIY projects?
Choosing the right wood depends on your project and desired aesthetic. Softwoods like pine are great for beginners due to their workability and affordability. Hardwoods like oak or walnut offer durability and a beautiful finish but can be more challenging to work with.
- Do I need expensive tools to start woodworking?
No, you don't need to break the bank to get started! Basic hand tools like a saw, hammer, and measuring tape are sufficient for many projects. As you gain experience, you can gradually invest in power tools to make your work easier and more efficient.
- What are some easy DIY wooden decor projects for beginners?
Some great beginner projects include wooden coasters, simple shelves, or rustic picture frames. These projects are manageable and will help you build confidence while allowing for creativity.
- How can I finish my wooden projects to enhance their appearance?
Finishing techniques like staining, painting, or sealing can dramatically change the look of your wood. Staining highlights the natural grain, while sealing protects your project from damage. Choose a finish that complements your decor style!
- Can I incorporate natural elements into my wooden decor?
Absolutely! Adding stones, plants, or even shells can elevate your wooden decor. Natural elements provide texture and a unique touch, making your projects truly one-of-a-kind.
- What should I do if I make a mistake during my project?
Don't worry! Mistakes are part of the learning process. Assess the error, and see if it can be fixed or incorporated into your design. Embrace these moments as valuable lessons that will make you a better DIYer.


