
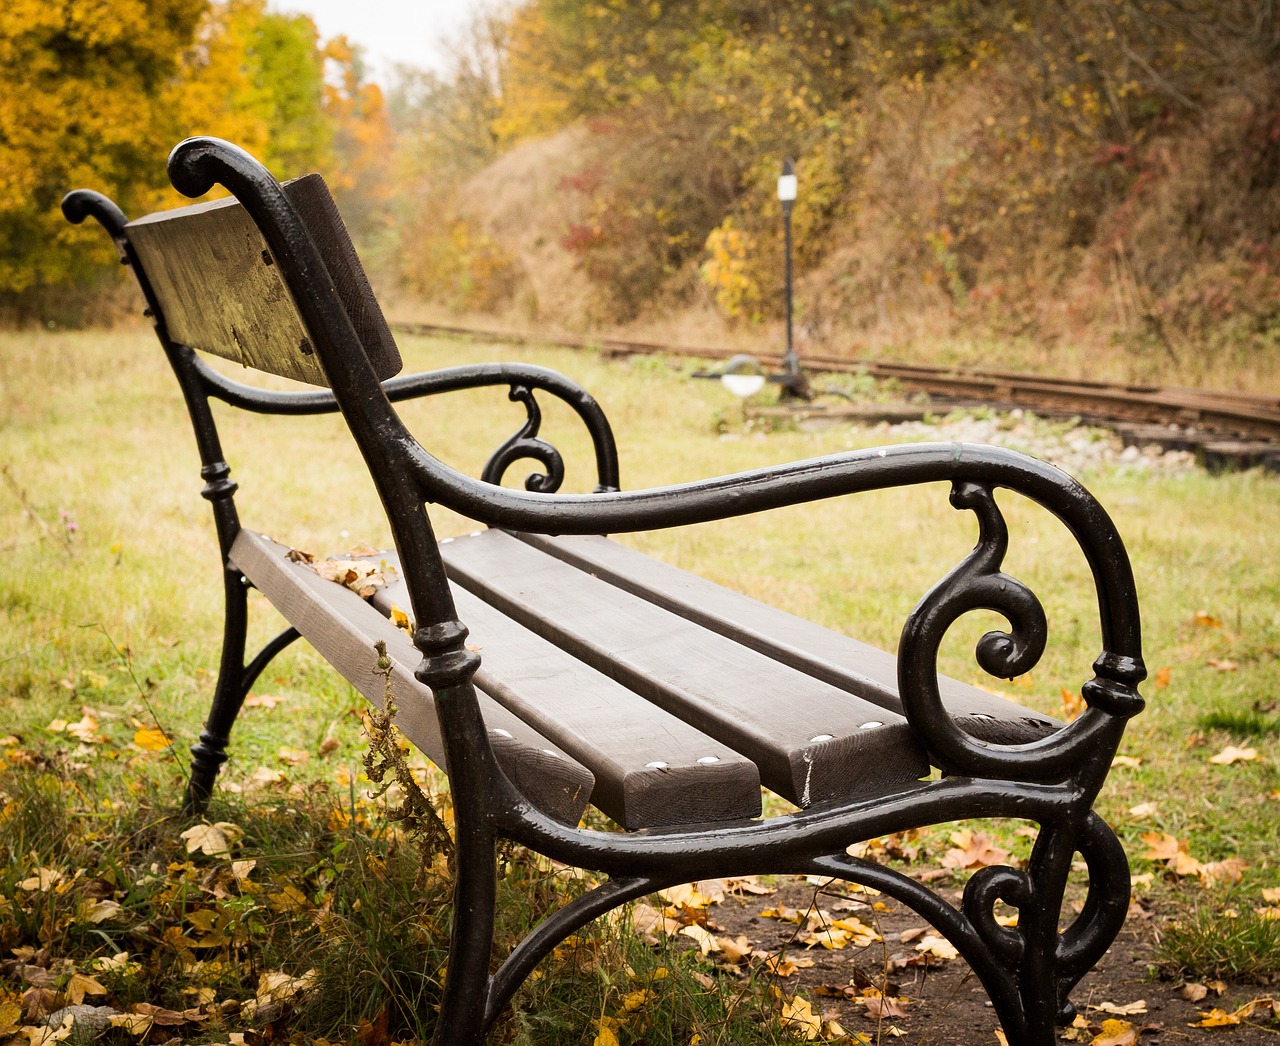
Easy DIY Project: Making a Bench Out of Crates
This article guides you through creating a stylish and functional bench using wooden crates. Perfect for beginners, this project combines creativity with practicality, transforming simple materials into a beautiful addition to your space. Imagine stepping into your backyard or living room and seeing a bench that you crafted with your own hands! Not only does it serve as a functional piece of furniture, but it also adds a personal touch to your decor. The best part? You don’t need to be a master carpenter to pull this off! With just a few crates and some basic tools, you can create a stunning bench that will make your friends say, "Wow, you made that?" So, roll up your sleeves, and let’s dive into this fun and rewarding DIY project!
Selecting the right type of crates is crucial for your bench project. You want to ensure that the crates you choose are not only visually appealing but also sturdy enough to withstand daily use. When considering crates, think about the following factors:
- Size: Make sure the crates are large enough to provide a comfortable seating area.
- Material: Wooden crates are ideal, but ensure they are made from durable wood that can hold weight.
- Condition: Look for crates that are in good shape—no splinters or broken slats!
By paying attention to these details, you’ll set yourself up for success and ensure that your bench not only looks great but also stands the test of time.
Gathering the necessary tools and materials is essential for a smooth DIY experience. Here’s a quick rundown of what you’ll need:
| Tools | Materials |
|---|---|
| Drill | Wooden crates |
| Screws | Screws |
| Screwdriver | Sandpaper |
| Measuring tape | Paint or stain (optional) |
Having these tools and materials ready will make your DIY journey smooth and enjoyable. Remember, preparation is key!
Properly preparing your crates is key to achieving a polished look. Start by cleaning the crates thoroughly to remove any dirt or debris. Next, grab some sandpaper and smooth out any rough edges. This not only makes the crates safer to use but also enhances their appearance. If you’re feeling creative, consider painting or staining the crates to match your personal style or existing decor. A fresh coat of paint can transform an ordinary crate into a chic piece of furniture!
Now comes the fun part—assembling your bench! Begin by laying out your crates in the desired configuration. You can stack them vertically or arrange them in a row, depending on your space and preference. Use your drill to securely connect the crates with screws, ensuring stability and strength. Don’t forget to double-check that everything is aligned properly; a crooked bench is never a good look! Once assembled, give it a gentle shake to test its sturdiness. If it feels solid, congratulations—you’ve built your very own bench!
Finishing touches can elevate your bench from functional to fabulous. Consider adding some comfy cushions for a cozy seating experience. You can also incorporate decorative elements like throw pillows or a stylish table on the side. If you want to take it a step further, think about painting patterns or adding stencils to personalize your creation. The goal is to make it uniquely yours!
Once your bench is complete, consider where to place it. Here are some creative ideas:
- Indoor: Position it in your living room as a statement piece or in your entryway for a welcoming touch.
- Outdoor: Place it on your patio or in the garden, surrounded by plants for a serene vibe.
Wherever you decide to put it, make sure it complements the surrounding decor and enhances the overall aesthetic of the space.
To keep your bench looking great over time, regular maintenance is essential. Here are some tips:
- Clean it regularly with a damp cloth to remove dust and dirt.
- If outdoors, consider applying a weatherproof sealant to protect it from the elements.
- Inspect for any loose screws or damage, and fix them promptly to ensure safety.
With a little care, your bench will continue to be a beautiful and functional addition to your home for years to come!
Beyond benches, crates can be transformed into various functional items. Here are a few ideas to inspire you:
- Storage solutions: Stack crates for a stylish way to organize books or toys.
- Display shelves: Use crates to showcase plants or collectibles.
- Side tables: Turn a crate on its side for a unique end table.
The possibilities are endless! Let your creativity run wild and see what other projects you can come up with.
Q1: How much weight can a crate bench hold?
A1: The weight capacity depends on the material and construction of the crates. Generally, well-built wooden crates can hold several hundred pounds.
Q2: Can I use plastic crates instead of wooden ones?
A2: Yes, plastic crates can be used, but they may not provide the same aesthetic appeal and durability as wooden crates.
Q3: How do I protect my bench from outdoor elements?
A3: Applying a weatherproof sealant and storing the bench indoors during harsh weather can help protect it.
Q4: Can I paint my crates?
A4: Absolutely! Painting your crates can add a personal touch and enhance their appearance.

Choosing the Right Crates
When embarking on your DIY bench project, the first step is to choose the right crates. This decision is pivotal, as it sets the foundation for both the aesthetics and functionality of your bench. You want crates that not only look good but also stand the test of time. So, what should you be looking for? Let's dive into some key factors that will guide your selection process.
First off, consider the size of the crates. Depending on the space you have available, you might opt for larger crates that can accommodate more seating or smaller ones that fit snugly in a corner. The dimensions will dictate how comfortable your bench will be, so take a moment to measure the area where you plan to place it. For instance, a standard bench height is about 18 inches, so ensure your crates align with this for optimal seating comfort.
Next, think about the material. Wooden crates are a popular choice due to their durability and natural beauty. However, not all wood is created equal. Look for crates made from solid wood, as they can withstand more weight and wear over time. If you come across crates made from pressed wood or plywood, be cautious; they might not hold up as well. Additionally, check for any signs of damage or rot, as these can compromise the integrity of your bench.
Another important aspect to consider is the condition of the crates. If you're sourcing them from a thrift store or a yard sale, inspect them closely. Look for cracks, splinters, or any signs of insect infestation. If you find crates that have been well-loved but need a little TLC, don’t worry! A bit of sanding and some wood treatment can breathe new life into them. Remember, a crate that looks a bit worn can add character to your bench, giving it a rustic charm.
In addition to these factors, think about the style of the crates. Do you want a cohesive look that matches your existing decor, or are you aiming for something more eclectic? Crates come in various designs, from vintage to modern, so choose what resonates with your personal style. You can even mix and match different styles for a unique twist!
Lastly, consider availability. You might find crates at local hardware stores, online marketplaces, or even from friends and family. Keep an eye out for sales or discounts to snag a great deal. If you're feeling adventurous, you can even explore making your own crates from scratch, which allows for complete customization!
In summary, choosing the right crates involves assessing their size, material, condition, style, and availability. By taking the time to select quality crates, you’ll ensure that your bench not only looks fantastic but also serves its purpose effectively. So, are you ready to start your DIY journey? Grab those crates and let your creativity flow!

Tools and Materials Needed
Before diving into your DIY project, it’s crucial to gather all the necessary tools and materials to ensure a smooth and enjoyable experience. Having everything at your fingertips not only saves time but also keeps the creative juices flowing without interruptions. So, let’s break down what you’ll need to transform those simple wooden crates into a stunning bench.
First up, you’ll need the crates themselves. When selecting your crates, consider their size, material, and condition. Look for sturdy wooden crates that can support weight and withstand wear and tear. You might find them at local thrift stores, farmers' markets, or even in your own garage!
Next, let’s talk about tools. Here’s a quick rundown of what you’ll need:
- Power Drill: Essential for drilling holes and securing screws.
- Screws: Make sure you have enough screws to connect the crates securely.
- Screwdriver: A manual screwdriver will also come in handy for tightening screws.
- Saw: If you need to cut your crates to size, a hand saw or power saw will do the trick.
- Sander or Sandpaper: To smooth out rough edges and prepare the wood for finishing.
- Paintbrush or Roller: If you decide to paint or stain your crates, these tools will help you apply the finish evenly.
- Measuring Tape: To ensure everything fits perfectly.
Once you have your tools ready, it’s time to gather your materials. In addition to the crates, consider the following items:
- Wood Glue: For extra strength in your connections.
- Wood Finish or Paint: To give your bench a personalized touch.
- Cushions: For added comfort when sitting.
Don’t forget to wear safety gear while working! Protective goggles and gloves are a must to keep you safe from dust and splinters. With your tools and materials lined up, you’re all set to start crafting your beautiful new bench. Remember, the right preparation is half the battle won!
Q: Can I use plastic crates instead of wooden ones?
A: While plastic crates can be lighter and more resistant to weather, they may not provide the same aesthetic appeal or stability as wooden crates. If you're looking for durability and a rustic charm, wooden crates are the way to go.
Q: How much weight can the bench hold?
A: The weight capacity of your bench will depend on the type of crates you use and how securely they are assembled. Generally, well-constructed wooden crates can hold a significant amount of weight, but it's always best to test for stability before use.
Q: Do I need to treat the wood before using it outdoors?
A: Yes, if you plan to place your bench outdoors, it's advisable to apply a weatherproof sealant or outdoor paint to protect the wood from moisture and UV damage.
Q: Can I customize the size of the bench?
A: Absolutely! You can adjust the number of crates you use and how you arrange them to create a bench that fits your space perfectly. Just remember to maintain balance for stability.
Preparing the Crates
This article guides you through creating a stylish and functional bench using wooden crates. Perfect for beginners, this project combines creativity with practicality, transforming simple materials into a beautiful addition to your space.
Selecting the right type of crates is crucial for your bench project. Consider factors like size, material, and condition to ensure durability and aesthetic appeal in your final product.
Gathering the necessary tools and materials is essential for a smooth DIY experience. This section lists everything you'll need, from crates to screws, ensuring you’re fully prepared before starting.
Properly preparing your crates is key to achieving a polished look. Begin by inspecting each crate for any damage or signs of wear. If you find any loose slats or splintered wood, it's best to repair these issues before proceeding. A little bit of effort now can save you from headaches later!
Next, cleaning is essential. Use a damp cloth to wipe away any dirt or debris. If your crates have been used for storage, they might need a more thorough cleaning. A mixture of mild soap and water can do wonders. Just remember to let them dry completely before moving on to the next step.
Once your crates are clean, it’s time for sanding. This process will smooth out rough spots and prepare the wood for any paint or stain you might want to apply. Use a medium-grit sandpaper first, followed by a finer grit to achieve a silky finish. Pay special attention to the edges and corners, as these areas can be particularly rough. If you have a power sander, it can make this job much easier and faster!
If you decide to add a splash of color or protect the wood, consider painting or staining your crates. Choose a paint or stain that complements your existing decor. You might want to use outdoor paint if your bench will be placed outside, as it will withstand the elements better. Apply at least two coats for an even finish, allowing adequate drying time between applications.
Lastly, don’t forget to apply a protective finish. A clear sealant can help preserve the beauty of your crates and extend their lifespan. This is particularly important if your bench will be exposed to moisture or direct sunlight. Just like sunscreen protects your skin, a good sealant will protect your bench from the harsh elements!
By following these steps, you will ensure that your crates are not only functional but also visually appealing. Remember, preparation is the foundation of any successful DIY project. So take your time, and enjoy the process!
Learn the step-by-step process of assembling your bench. This section covers how to securely connect the crates, ensuring stability and strength, while also maintaining an attractive design.
Finishing touches can elevate your bench from functional to fabulous. Explore options like cushions, paint, or decorative elements to personalize your creation and make it uniquely yours.
Once your bench is complete, consider where to place it. This section offers creative ideas for incorporating your new bench into various spaces, both indoors and outdoors.
To keep your bench looking great over time, regular maintenance is essential. Discover tips for cleaning, protecting, and preserving your bench against wear and environmental factors.
Beyond benches, crates can be transformed into various functional items. This section explores alternative DIY projects using crates, inspiring you to think creatively and expand your crafting skills.
Q: How many crates do I need to make a bench?
A: The number of crates required depends on the desired size of your bench. Typically, 2-4 crates can create a simple bench.
Q: Can I use plastic crates instead of wooden ones?
A: Yes, plastic crates can be used; however, they may not provide the same aesthetic appeal as wooden crates.
Q: How do I ensure my bench is stable?
A: Make sure to securely fasten the crates together with screws, and consider adding a plywood top for extra stability.

Assembling the Bench
Assembling your bench might feel like piecing together a puzzle, but with a little patience and guidance, it can be a fun and rewarding experience. First, gather your cleaned and prepared crates. Lay them out in the arrangement you envision for your bench—this is where your creativity can shine! You might want to stack them vertically for a taller bench or lay them flat for a more traditional look. The choice is yours, and it’s a chance to express your personal style.
Next, it's time to secure the crates together. Start by positioning the crates in your desired formation. If you're creating a two-level bench, place one crate on the ground and stack another on top. Use a level to ensure that everything is even; nobody likes a wobbly bench! Once you're satisfied with the arrangement, grab your screws and drill. It's important to pre-drill holes in the wood to prevent splitting, especially if you're working with older crates. Aim to connect the crates at the corners and edges for maximum stability.
As you drill, remember to check that the screws are tight but not overly so, as this can cause the wood to crack. Think of it like giving your bench a gentle hug—firm enough to hold it together, but not so tight that it feels constricted. Use wood glue in addition to screws for extra support, especially at the joints. This combination will ensure that your creation is not only sturdy but also capable of withstanding the test of time.
After securing the crates, you might want to add a top surface for a more finished look. A piece of plywood or a large wooden board can work wonders here. Simply measure the dimensions of your bench, cut the wood to fit, and attach it using screws. This will create a flat, comfortable seating area and enhance the overall aesthetic. If you’re feeling adventurous, consider adding some decorative trim around the edges for an extra flair!
Once everything is assembled, take a step back and admire your handiwork. It’s like watching a sculpture come to life! Make any necessary adjustments to ensure it’s level and sturdy. If you notice any rough edges, don’t hesitate to sand them down for a smoother finish. Remember, this bench is a reflection of your creativity, so don’t rush the final touches.
Finally, let’s not forget about safety. If you plan to leave your bench outside, consider applying a weatherproof sealant to protect it from the elements. This will help maintain its beauty and functionality for years to come. And there you have it! Your DIY crate bench is ready to be enjoyed, and you can feel proud knowing you crafted it with your own two hands.
- How many crates do I need for a bench? The number of crates depends on the design and size you want. Typically, 2-4 crates work well for a standard bench.
- Can I use painted crates? Absolutely! Just ensure the paint is non-toxic and safe for furniture, especially if you plan to use it outdoors.
- What type of wood is best for crates? Look for sturdy woods like pine or oak, as they provide durability and support.
- How do I maintain my crate bench? Regular cleaning and applying a sealant will help protect your bench from wear and tear.
Adding Finishing Touches
Once you've successfully assembled your bench from crates, it's time to elevate it from just a functional piece to a stunning focal point in your home or garden. Finishing touches can truly make a difference, breathing life and personality into your creation. Think of your bench as a blank canvas, waiting for your unique artistic flair to transform it into something extraordinary.
One of the simplest yet most impactful ways to enhance your bench is through cushions. Not only do they add comfort, but they also introduce color and texture. You can choose cushions that match your existing decor or go bold with contrasting colors to make your bench pop. Consider using weather-resistant outdoor cushions if your bench will be placed outside, ensuring they withstand the elements while still looking stylish.
Next up, let's talk about paint or stain. A fresh coat can completely change the look of your bench. If you prefer a rustic vibe, a wood stain can enhance the natural grain of the crates, giving them a warm, inviting feel. On the other hand, if you're aiming for a more contemporary aesthetic, a bright, bold color can turn your bench into a statement piece. Just remember to use outdoor-friendly products if your bench will be exposed to the weather.
Additionally, consider adding decorative elements to your bench. This could be anything from a small potted plant or a decorative tray to hold drinks, to fairy lights draped around the bench for an enchanting evening ambiance. You might even want to personalize it further with your name or a meaningful quote painted on the side. The possibilities are endless, and these little details can help reflect your personality and style.
Finally, don't forget about the surrounding area! The right placement can enhance the overall look of your bench. Think about arranging it with other outdoor furniture, or placing it near a garden feature like a fountain or flower bed. You might even create a cozy nook with a few additional crates as side tables, making it a perfect spot for relaxation or entertaining guests.
In conclusion, the finishing touches you choose for your crate bench are what will truly make it your own. Whether it’s through cushions, color, or decorative accessories, these elements allow you to express your creativity and style. So, roll up your sleeves and let your imagination run wild—your bench is waiting to be transformed!
Q: Can I use any type of crate for this project?
A: While you can use various types of crates, it's best to choose wooden crates that are sturdy and in good condition to ensure durability.
Q: How do I maintain the bench once it's completed?
A: Regular cleaning and applying a protective sealant can help maintain your bench's appearance and longevity, especially if it's placed outdoors.
Q: Are there specific paints or stains recommended for outdoor use?
A: Yes, look for paints and stains labeled as outdoor or weather-resistant to ensure they can withstand the elements.
Q: Can I customize the size of the bench?
A: Absolutely! You can adjust the number of crates and their arrangement to create a bench that fits your desired size and space.

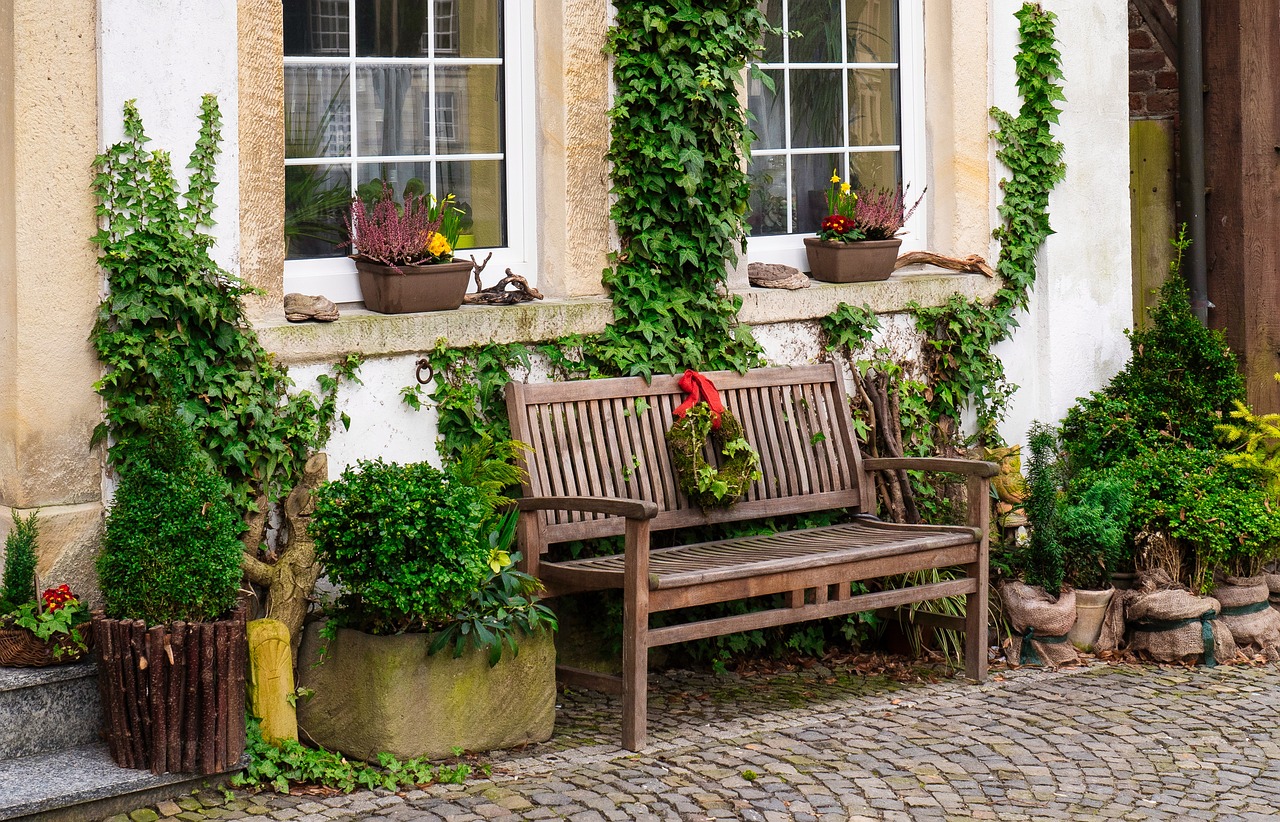
Placement Ideas for Your Bench
Once you've completed your stunning DIY bench, the next exciting step is finding the perfect spot for it. Think of your bench as a blank canvas; where you place it can transform the entire atmosphere of the space. Whether you envision it as a cozy nook or a statement piece, there are endless possibilities to explore.
For instance, consider placing your bench in the entryway. This is a great way to create a welcoming atmosphere for guests. Imagine walking into your home and being greeted by a beautifully crafted bench, adorned with cushions and perhaps a few decorative pillows. It not only provides a place to sit while putting on shoes but also adds a touch of style to your entrance.
If you have a garden or patio, your bench can serve as a charming outdoor seating area. Picture yourself sipping coffee in the morning sun or enjoying a good book in the afternoon breeze. Adding a few potted plants or fairy lights around your bench can enhance its appeal, making it a delightful retreat for relaxation. You might even want to consider a small table beside it for your drinks or snacks!
Another fantastic placement idea is in the living room. A bench can act as a unique alternative to traditional seating. You can position it against a wall or use it to define a space within a larger room. Style it with colorful cushions that match your decor, and you've got a functional yet fashionable seating option that sparks conversation.
Don't forget about the bedroom! A bench at the foot of your bed can serve multiple purposes. It can be a convenient spot to lay out clothes for the next day, a place to put on shoes, or simply a decorative element that ties the room together. You can even use it to store blankets or other items, maximizing space while keeping your room looking chic.
Lastly, think about the workspace. If you have a home office or study, a bench can provide additional seating for guests or a comfortable spot to take a break. You can place it near a window to soak up some natural light while you work or brainstorm ideas. It's a great way to break the monotony of a traditional desk chair!
In summary, the placement of your bench is not just about functionality; it's also about enhancing the overall aesthetic of your space. Whether indoors or outdoors, consider how your bench can complement your existing decor and serve as a focal point. With a little creativity and thought, your new bench can become a beloved feature in your home.
Q: Can I use different types of crates for my bench?
A: Absolutely! Mixing different styles and sizes of crates can create a unique look. Just make sure they are sturdy enough to support weight.
Q: How do I prevent my bench from getting damaged outdoors?
A: If you plan to place your bench outside, consider applying a weather-resistant sealant or paint to protect it from the elements. Regular maintenance will also help keep it in great condition.
Q: What type of cushions should I use for my bench?
A: For outdoor benches, choose cushions made with weather-resistant fabric. For indoor use, you can go with any fabric that complements your decor. Just ensure they are comfortable and fit well on your bench!
Q: Can I paint my crates before assembling the bench?
A: Yes! Painting or staining your crates before assembly can make the process easier and give you more control over the finish. Just allow enough drying time before putting everything together.
Q: How can I personalize my bench?
A: Personalization can be achieved through color, cushions, or decorative elements like throws and plants. Get creative and make it a reflection of your style!

Maintenance Tips for Longevity
To ensure your newly crafted bench remains a stunning centerpiece in your home or garden, regular maintenance is essential. Think of your bench as a prized plant that needs care and attention to thrive. Just like you wouldn’t let a beautiful flower wilt away, you don’t want your bench to succumb to wear and tear. Here are some key maintenance tips to keep your bench looking fabulous:
First and foremost, cleaning is crucial. Dust and dirt can accumulate over time, dulling the finish and making your bench look shabby. A simple solution is to use a damp cloth to wipe down the surfaces regularly. For tougher stains, a mild soap solution can work wonders. Just remember to dry the bench thoroughly afterward to prevent moisture damage.
Next, consider protection against the elements. If your bench is placed outdoors, it’s exposed to sunshine, rain, and possibly snow. Applying a weatherproof sealant or outdoor varnish can significantly enhance its durability. This layer acts as a shield, protecting the wood from moisture and UV rays. It’s a bit like putting on sunscreen before heading out to the beach—necessary for protection!
Another aspect to think about is repairing any damages promptly. If you notice any splinters or loose screws, address them immediately. A little bit of proactive care can prevent larger issues down the line. Just as you wouldn’t ignore a small leak in your roof, don’t let minor damages to your bench fester. Regularly inspect your bench for signs of wear and make repairs as needed.
Additionally, if your bench has cushions or fabric elements, ensure they are also maintained. Regularly check for any fraying or fading. You might want to bring them indoors during harsh weather to extend their lifespan. Think of them as a cozy blanket that needs to be cared for to stay warm and inviting.
Lastly, consider seasonal maintenance. In the fall, give your bench a thorough clean to remove leaves and debris. In the spring, inspect for any winter damage and reapply protective coatings if necessary. It’s like giving your bench a spring cleaning—refreshing and revitalizing!
By following these maintenance tips, you’ll not only prolong the life of your bench but also keep it looking as good as new. Remember, a little effort goes a long way in preserving the beauty and functionality of your DIY masterpiece!
Q: How often should I clean my bench?
A: It’s a good idea to clean your bench at least once a month, or more often if it’s exposed to dirt and debris.
Q: What type of sealant should I use for outdoor benches?
A: Look for a high-quality outdoor varnish or sealant that specifically mentions UV protection and water resistance.
Q: Can I leave my bench outside during winter?
A: If possible, it’s best to store your bench in a sheltered area during winter months to avoid damage from snow and ice. If it must stay outside, ensure it is well-sealed.
Q: How can I remove stubborn stains from my bench?
A: For stubborn stains, try a mixture of baking soda and water to create a paste. Apply it to the stain, let it sit for a few minutes, then scrub gently with a cloth.

Alternative Uses for Crates
When you think about wooden crates, the first thing that probably comes to mind is a simple bench, right? But hold on! These versatile pieces can be transformed into a myriad of functional and stylish items that can jazz up your home or garden. Just like a chameleon changes its colors, crates can adapt to fit various roles in your life. So, let’s dive into some creative ideas that will make you see crates in a whole new light!
One of the most popular alternative uses for crates is turning them into storage solutions. Imagine a clutter-free space where everything has its place! You can stack crates to create a unique shelving unit. Not only will this help organize your books, plants, or even toys, but it will also add a rustic charm to your decor. You could paint or stain the crates to match your existing furniture, making them a seamless addition to your home.
Another fabulous idea is to repurpose crates into a coffee table. Picture this: a cozy living room where your coffee table is not just a piece of furniture, but a conversation starter! By stacking a couple of crates together and adding a glass top, you can create a chic and functional table. Plus, you can use the space inside the crates for storing magazines, remote controls, or any other items that tend to clutter your living room. It's like having a hidden treasure chest right in your living room!
If you’re looking to spruce up your garden, why not consider creating a vertical garden with crates? This is an excellent way to maximize space, especially if you have a small yard or balcony. You can plant herbs, flowers, or even vegetables in the crates and stack them vertically. Not only will this add greenery to your space, but it will also create a stunning visual display. Just imagine the aroma of fresh basil or mint right outside your door!
Additionally, crates can be transformed into pet beds. Yes, you read that right! If you have a furry friend, why not give them a cozy spot to lounge? Simply add some cushions or a soft blanket inside the crate, and you have a stylish pet bed that complements your decor. Your pet will love it, and it will keep your home looking neat and organized.
Lastly, consider using crates for craft storage. If you’re a DIY enthusiast, you know how quickly crafting supplies can pile up. Crates can be a great way to keep everything tidy. You can label each crate for easy access to your paints, fabrics, or tools, making your crafting area more efficient and enjoyable. It’s like having your own little workshop, all thanks to the humble crate!
In summary, the possibilities are endless when it comes to repurposing crates. Whether you need storage solutions, stylish furniture, or creative gardening ideas, these wooden wonders can do it all. So, the next time you come across some crates, don’t just think of them as plain boxes; think of them as a canvas for your creativity. Who knows what amazing projects you will come up with?
Q: What types of crates are best for DIY projects?
A: Look for wooden crates that are sturdy and in good condition. Pine or cedar crates are popular choices due to their durability and aesthetic appeal.
Q: Can I use painted crates outdoors?
A: Yes, but make sure to use weather-resistant paint or sealant to protect them from the elements. This will help prolong their lifespan.
Q: How do I clean and maintain my crate furniture?
A: Regular dusting and occasional deep cleaning with mild soap and water will keep your crates looking fresh. If they are used outdoors, consider applying a protective coating every few months.
Q: Are there any safety concerns with using crates?
A: Always ensure that the crates are free from splinters and sharp edges. If you're using them for furniture, make sure they are securely assembled to prevent accidents.
Frequently Asked Questions
- What type of crates should I use for my bench?
When selecting crates for your bench, opt for sturdy wooden crates that are in good condition. Look for crates that are not too large or too small, ideally around 24 inches in length. This ensures stability and comfort while sitting.
- Do I need special tools to assemble the bench?
No need to worry! You can use basic tools like a screwdriver, drill, and sandpaper for this project. A level can also be helpful to ensure your bench is even. Most of these tools are common household items, making this a beginner-friendly DIY project.
- How can I prepare the crates before assembling the bench?
Preparing the crates involves cleaning them thoroughly to remove any dirt or dust. Sanding the surfaces is crucial to avoid splinters and to achieve a smooth finish. If you want to add a personal touch, consider painting or staining the crates to match your decor!
- What are some ideas for finishing touches on my bench?
Finishing touches can really bring your bench to life! Think about adding cushions for comfort, or a fresh coat of paint for a pop of color. You could also incorporate decorative elements like throw pillows or a small plant to make it uniquely yours.
- Where can I place my new bench?
Your bench can be a versatile addition to your home! Consider placing it in your entryway, living room, or even on your patio. It can serve as extra seating or a decorative piece, enhancing the overall vibe of your space.
- How do I maintain my bench for longevity?
To keep your bench looking great, regular maintenance is key. Clean it periodically with a damp cloth, and if it’s outside, make sure to protect it from harsh weather. Applying a sealant can help preserve the wood and keep it looking fresh for years!
- What other DIY projects can I do with crates?
The possibilities are endless! Beyond benches, you can transform crates into bookshelves, side tables, or even storage solutions. Let your creativity flow and explore new ways to repurpose crates in your home!


