
Create DIY Sparkle Ball Lights for Your Home
Are you ready to transform your living space into a dazzling wonderland? Creating DIY sparkle ball lights is not just a fun project; it's a fantastic way to add a touch of magic to your home decor. Imagine walking into a room filled with soft, twinkling lights that dance and shimmer, creating an atmosphere of warmth and enchantment. This article will guide you through the process of crafting these beautiful lights, enhancing your home decor with a simple DIY project that combines creativity and functionality.
Whether you're preparing for a festive occasion, looking to brighten up a dull corner, or simply seeking a creative outlet, sparkle ball lights are the perfect solution. They can be customized to fit any theme or color scheme, allowing you to express your personal style. Plus, this project is incredibly versatile; you can create small, delicate balls for a subtle glow or larger, more extravagant designs for a bold statement. So, grab your materials, unleash your inner artist, and let’s dive into the world of sparkle ball lights!
In the following sections, we will cover everything from the materials you'll need to the step-by-step instructions for creating your own sparkle ball lights. We’ll also explore decorative elements to make your lights stand out and share placement ideas to ensure your creations shine their brightest. By the end of this article, you’ll not only have a stunning new addition to your home but also the satisfaction of having made it yourself. Ready to light up your life? Let's get started!
Materials Needed
Creating your own sparkle ball lights is not only a fun DIY project but also a way to add a unique touch to your home decor. To get started, you’ll need to gather a few essential materials that will serve as the backbone of your project. The key to a successful sparkle ball lies in the right combination of supplies, so let’s dive into what you’ll need.
First and foremost, you’ll require a sturdy frame to hold everything together. This is where the wire comes into play. You can choose from a variety of wire types, but it’s important to select one that is both flexible and strong enough to maintain its shape. For example, galvanized steel wire is a popular option due to its durability, while craft wire is easier to manipulate for beginners. Aim for a wire gauge of about 18 to 20, which provides a good balance between flexibility and sturdiness.
Once you have your wire, it’s time to think about the lights themselves. You can opt for LED string lights, which are energy-efficient and come in various colors and styles. They not only illuminate your sparkle balls beautifully but also have a long lifespan, making them a smart choice for any DIY project. When selecting your lights, consider the length of the string and the number of bulbs, as this will affect how many sparkle balls you can create.
In addition to the wire and lights, you’ll want to gather some decorative elements to enhance the visual appeal of your sparkle balls. This is where your creativity can shine! Consider using glitter, paint, or even natural elements like twine or dried flowers. These materials can elevate the aesthetic of your lights, allowing you to customize them to fit your home decor perfectly.
Here’s a quick overview of the materials you’ll need:
| Material | Purpose |
|---|---|
| Wire (Galvanized Steel or Craft Wire) | To create the frame for your sparkle balls. |
| LED String Lights | For illuminating the sparkle balls. |
| Glitter and Paint | For decorative enhancement. |
| Natural Elements (Twine, Dried Flowers) | Add rustic charm to your design. |
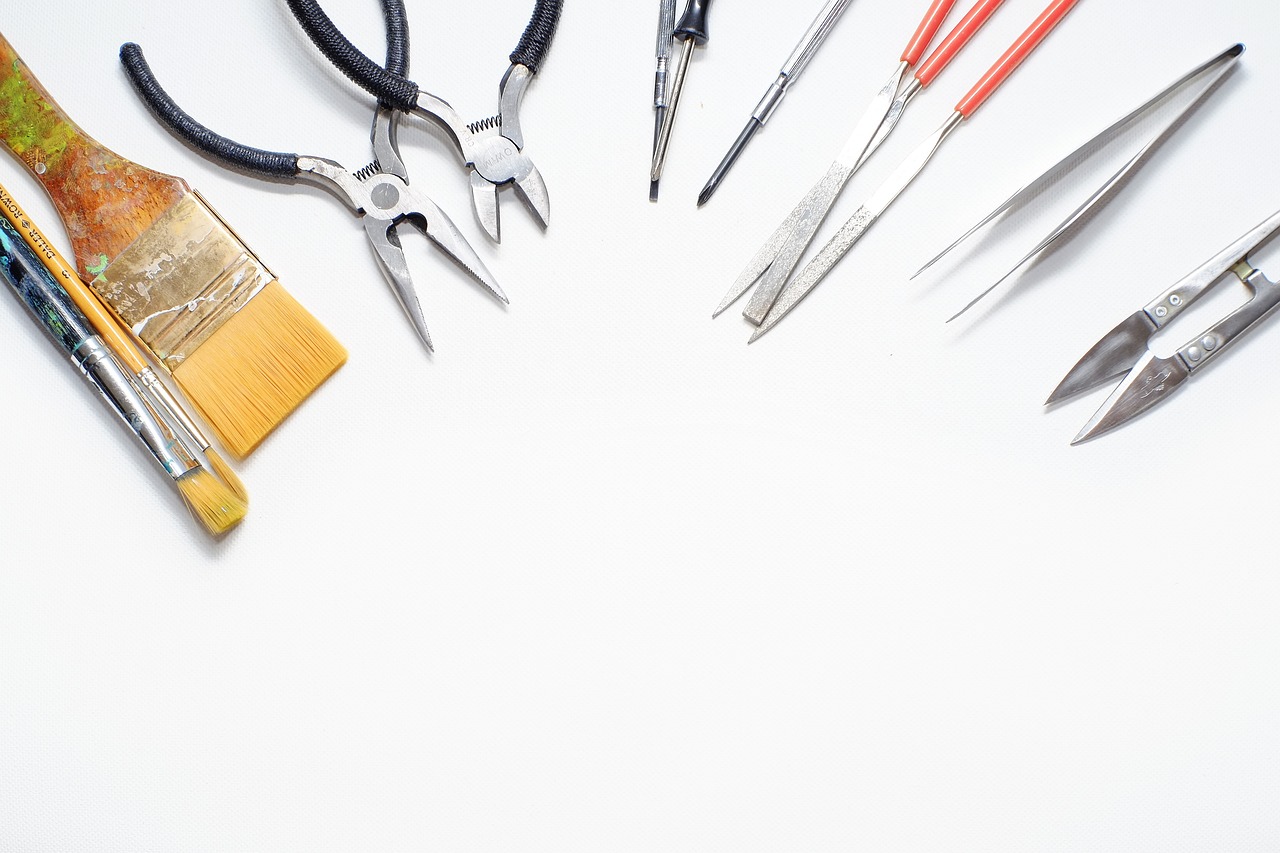
Lastly, don’t forget about some basic tools that will make your crafting experience smoother. You’ll need a pair of wire cutters to trim your wire to the desired lengths and possibly some glue for attaching decorative elements securely. Having a ruler or measuring tape handy will also help ensure that your frames are symmetrical and well-proportioned.
By gathering these materials ahead of time, you’ll set yourself up for success in creating stunning sparkle ball lights that will impress anyone who sees them. So, are you ready to light up your space with a little bit of sparkle?
Step-by-Step Instructions
Creating your own sparkle ball lights can be a delightful experience, and it’s easier than you might think! Let's dive into the step-by-step process that will transform simple materials into stunning decor pieces for your home. By following these instructions closely, you’ll be able to craft unique lights that not only brighten up your space but also showcase your creativity. Ready to get started? Here we go!
The first step in making your sparkle ball lights is preparing the frame. This is the backbone of your project, so it’s important to get it right. Begin by gathering your materials; you’ll need some sturdy wire, wire cutters, and a little bit of patience. The frame will hold everything together, so make sure it’s strong enough to support the lights you plan to use.
When it comes to wire, not all types are created equal. You want to choose a wire that is both flexible and durable. Here’s a quick comparison of some common wire types:
| Wire Type | Flexibility | Durability | Best For |
|---|---|---|---|
| Aluminum Wire | High | Medium | Lightweight structures |
| Steel Wire | Low | High | Heavy-duty projects |
| Florist Wire | Medium | Medium | Craft projects |
For most sparkle ball projects, aluminum wire is a great choice due to its balance of flexibility and strength. It allows you to shape your frame easily while providing enough support for the lights.
Now that you’ve chosen your wire, it’s time to shape it into a sphere. Start by cutting a length of wire approximately 6-8 feet long. This will give you enough material to create a decent-sized sparkle ball. Begin by bending the wire into a circular shape, ensuring that the ends overlap slightly. You can use a round object, like a bowl, as a guide to help you maintain a consistent shape. Once you have your circle, twist the ends together securely.
Next, create smaller circles inside the main frame to add structure. This will help hold the lights in place later on. You can do this by cutting additional lengths of wire and bending them into smaller circles, attaching them to the main frame at evenly spaced intervals. The more circles you create, the sturdier your sparkle ball will be!
With your frame ready, it’s time to bring it to life with lights! You can choose from a variety of lighting options, such as LED string lights or fairy lights. These are ideal because they are lightweight and come in various colors to match your decor. Start by wrapping the lights around the frame, beginning at the top and working your way down. Make sure to leave some space between the lights for a more enchanting glow.
As you wrap the lights, secure them in place with small pieces of tape or by weaving them through the wire frame. This will ensure that they stay put and don’t unravel. Once you’ve covered the entire frame with lights, plug them in to see how they look! Adjust the positioning of the lights as needed to achieve the perfect sparkle.
And there you have it! You’ve successfully created the frame and added the lights. The next step is to enhance the aesthetic appeal of your sparkle ball lights with decorative elements, which we’ll explore in the following sections.
Q: How long will my sparkle ball lights last?
A: If you use LED lights, they can last for years with minimal maintenance. Just make sure to store them properly when not in use.
Q: Can I use these lights outdoors?
A: Yes! Just make sure to use weatherproof lights and secure the wiring to prevent any damage from the elements.
Q: What if I want to change the color of my lights?
A: You can easily switch out the lights for different colored ones or even use colored bulbs to create a new look!
Preparing the Frame
Creating the perfect frame for your DIY sparkle ball lights is like laying the foundation for a beautiful home; it sets the stage for everything that follows. The frame not only provides structure but also determines the overall aesthetic of your sparkle balls. So, let’s dive into the nitty-gritty of preparing this essential component!
First things first, you’ll want to gather your materials. The most common choice for the frame is wire, typically something flexible yet sturdy enough to hold its shape. You might be wondering, “What kind of wire should I use?” Well, that depends on your design preferences. Here are a few options:
- Floral Wire: This is lightweight and easy to manipulate, making it a great choice for beginners.
- Aluminum Wire: Slightly more robust, aluminum wire holds its shape well and comes in various colors.
- Galvanized Wire: Perfect for those looking for durability, this wire is weather-resistant and ideal for outdoor displays.
Once you’ve chosen your wire, it's time to start shaping the frame. Begin by cutting a length of wire that is long enough to create a sphere. A good rule of thumb is to aim for a diameter of about 12 inches for a standard sparkle ball. As you cut, remember that you can always trim excess wire later, but it's hard to add more once it's cut!
Next, start bending the wire into a circular shape. This part can be a bit tricky, so be patient. You can use a round object, like a bowl or a bucket, as a guide to help you achieve a perfect circle. Wrap the wire around the object and twist the ends together to secure the shape. This will serve as the base of your sparkle ball.
Now that you have your base, it’s time to add structure. To create the spherical shape, you will need to add cross-sections of wire. Cut several shorter pieces of wire and attach them to the base by twisting them securely. Think of this as creating a web; the more connections you make, the sturdier your frame will be. Aim for at least six to eight cross-sections to ensure your sparkle ball has enough stability.
After securing the cross-sections, take a step back and admire your work! The frame should resemble a wire globe. If it looks a bit lopsided, don’t worry—just gently adjust the wires until it meets your vision. Remember, this is a DIY project, and part of the fun is in the imperfections!
Finally, once you’re satisfied with the shape, it’s time to prepare for the lights. Ensure that the frame is clean and free of any sharp edges that could snag your lighting materials. You can use wire cutters to trim any excess wire and sandpaper to smooth out rough spots. With a well-prepared frame, you're now ready to move on to the next exciting step: adding the lights that will make your sparkle ball truly shine!

Choosing the Right Wire
When it comes to crafting your DIY sparkle ball lights, is absolutely crucial. The wire serves as the backbone of your sparkle ball, providing the necessary support and structure to hold your design together. You might be wondering, "What kind of wire should I use?" Well, let’s break it down. There are a few types of wire that are particularly suited for this project, each with its own advantages.
First up is galvanized steel wire. This type of wire is known for its durability and strength, making it ideal for outdoor use. If you're planning on hanging your sparkle balls in your garden or patio, galvanized steel wire will withstand the elements without rusting. However, it can be a bit stiff, which might make shaping it into a perfect sphere a tad more challenging.
Next, we have aluminum wire. This wire is much more flexible, allowing you to easily shape it into the desired form. It’s lightweight, making it easier to handle and position your sparkle balls wherever you want. However, keep in mind that aluminum can be less durable than steel, so it may not be the best choice for outdoor displays unless you’re prepared for some wear and tear.
Another option is copper wire. This wire is not only aesthetically pleasing with its warm color but also offers great flexibility and ease of use. Copper wire is excellent for intricate designs, but like aluminum, it may not hold up as well in harsh weather conditions. If you decide to use copper, consider applying a protective coating to enhance its durability.
Here’s a quick comparison table to summarize the pros and cons of each wire type:
| Wire Type | Durability | Flexibility | Best For |
|---|---|---|---|
| Galvanized Steel | High | Low | Outdoor Use |
| Aluminum | Medium | High | Indoor/Outdoor Use |
| Copper | Medium | High | Indoor Use (with coating) |
When selecting wire, consider the overall look you want to achieve and the environment in which your sparkle balls will be displayed. If you're leaning towards an outdoor setup, galvanized steel is your best bet. However, for those who prefer indoor elegance, aluminum or copper wires can work wonders. Ultimately, the right wire will not only enhance the structural integrity of your sparkle balls but also contribute to their overall aesthetic appeal.

Shaping the Frame
Shaping the frame for your sparkle ball lights is an exciting step in the DIY process. Imagine the thrill of transforming a simple wire into a stunning spherical structure that will soon glow with warmth and charm! To achieve the perfect roundness, you need to take your time and be patient. After all, crafting is all about enjoying the journey as much as the destination.
Start by cutting a length of wire that suits the size of your desired sparkle ball. A good rule of thumb is to aim for about 3 to 4 feet, depending on how large you want your finished product to be. Remember, you can always trim down excess wire later, but starting with too little can be frustrating. Once you have your wire, it’s time to bend and shape it into a sphere.
As you begin to shape the wire, think of it like sculpting clay. You want to create a balanced, even form. A helpful tip is to use a round object, like a basketball or a large balloon, as a mold. Wrap the wire around this object, ensuring that you maintain an even distance between each loop. This technique will help you achieve that perfect spherical shape.
Once you have formed the basic shape, it's crucial to secure the ends of the wire together. Use a pair of pliers to twist the ends tightly, making sure there are no sharp edges sticking out. This will not only ensure the stability of your sparkle ball but also prevent any accidental injuries when handling it later on. If you're feeling particularly crafty, you can even add additional wires crisscrossing through the sphere for extra support and a more intricate design.
After securing the frame, take a step back and admire your work. It might not look like much yet, but this is the foundation for something truly magical. If you find any uneven spots or areas that need adjusting, now is the time to tweak them. A perfectly shaped frame will make all the difference when it comes to adding lights and decorative elements later on.
Remember, the beauty of a DIY project lies in the details. Don't rush through this step. Enjoy the process of shaping and molding your frame, and let your creativity shine through. Once you have your frame shaped to perfection, you’ll be ready to move on to the next exciting phase of your sparkle ball lights project!
Adding the Lights
Now that you’ve crafted the frame for your sparkle ball lights, it’s time to bring them to life with some dazzling illumination! The right lighting can transform your creation from a simple craft into a stunning focal point in any room. But before you dive in, let’s explore the various lighting options available and the techniques you can use to effectively illuminate your sparkle balls.
When it comes to adding lights, you have several choices. **String lights** are a popular option, as they come in various styles, colors, and lengths. You can choose from warm white lights for a cozy feel, or opt for vibrant colors to create a festive atmosphere. If you want to go the extra mile, consider using **LED fairy lights**. These are not only energy-efficient but also give off a beautiful glow that enhances the sparkle effect of your balls.
One important tip is to consider the **placement of the lights** within the frame. You want to ensure that the lights are evenly distributed to create a balanced illumination. Here’s a simple method to achieve this:
- Start by wrapping the lights around the frame, beginning at the bottom and working your way up.
- Secure the lights in place using small pieces of tape or by weaving them through the wire to prevent them from slipping.
- Make sure to leave a little bit of space between each bulb to allow for maximum light dispersion.
Another option is to use **battery-operated lights**. These are perfect if you want to avoid messy cords or if you plan to hang your sparkle balls in places without easy access to outlets. Battery-operated lights come with a variety of features, including timers and remote controls, making them incredibly convenient.
Once you’ve chosen your lighting, it’s time to test it out! Before finalizing the installation, plug in your lights or turn them on to see how they look. Adjust the positioning if necessary, ensuring that every part of your sparkle ball is beautifully lit. Remember, the goal is to create a magical ambiance that captures attention and sparks joy.
Finally, don’t forget about safety! If you’re using electrical lights, ensure that all connections are secure and that you’re using lights rated for the intended environment, especially if you plan to use them outdoors. With these tips in mind, you’re ready to add that enchanting glow to your DIY sparkle ball lights!
Q: Can I use any type of lights for my sparkle balls?
A: While you can use various types of lights, LED string lights or fairy lights are highly recommended due to their energy efficiency and beautiful glow.
Q: How do I ensure my sparkle balls are safe to use outdoors?
A: Make sure to use lights that are specifically designed for outdoor use and ensure all electrical connections are weatherproofed.
Q: What if I want to change the color of my lights?
A: You can use colored bulbs or even colored filters to change the ambiance of your sparkle balls without needing to replace the entire lighting system.
Decorative Elements
When it comes to creating your DIY sparkle ball lights, the fun doesn’t stop at just crafting the frame and adding lights. To truly make your sparkle balls a stunning focal point in your home, you'll want to incorporate that reflect your personal style and enhance their visual appeal. Think of these embellishments as the icing on the cake; they transform something simple into something extraordinary.
One of the most popular ways to add flair to your sparkle balls is by using glitter and paint. These materials can create a dazzling effect that captures and reflects light beautifully. Imagine your sparkle balls twinkling like stars in the night sky! To achieve this, you can spray paint your frames in vibrant colors or use a brush to apply paint in creative patterns. Once the paint is dry, sprinkle glitter over the surface while the paint is still tacky. This technique ensures that the glitter sticks well without falling off later. Just be careful to choose a paint that is compatible with the materials you’re using, especially if you’re working with plastic or metal.
Another way to elevate your sparkle balls is by incorporating natural elements. Think twine, dried flowers, or even leaves. These elements can lend a rustic charm to your lights, making them perfect for a cozy, inviting atmosphere. For instance, wrapping twine around the frame can give it a textured, earthy look. You can also glue small dried flowers or leaves onto the surface of the sparkle balls. This not only adds beauty but also connects your decor to the natural world, infusing your space with warmth and character.
To help you visualize how these decorative elements can enhance your sparkle balls, here’s a simple table showcasing different materials and their effects:
| Material | Effect |
|---|---|
| Glitter | Adds sparkle and shimmer, reflecting light beautifully |
| Spray Paint | Provides vibrant color and can create patterns |
| Twine | Offers a rustic, textured look |
| Dried Flowers | Brings a natural, organic feel to the design |
Remember, the goal is to create something that resonates with your personal aesthetic. Don’t be afraid to experiment! Mix and match different materials and techniques to find what works best for you. The beauty of DIY projects is that they are entirely customizable. So, whether you’re aiming for a whimsical fairy-tale vibe or a more sophisticated look, the decorative elements you choose will play a crucial role in achieving your vision.
As you embark on this creative journey, keep in mind that the process is just as important as the final product. Enjoy the act of crafting, and let your imagination run wild. Your sparkle ball lights are not just decorations; they are a reflection of your creativity and style, lighting up your home in more ways than one!
Q1: Can I use any type of paint on my sparkle balls?
A1: It's best to use acrylic or spray paint that is suitable for the materials you're working with. Ensure the paint is non-toxic, especially if you plan to use the lights indoors.
Q2: How do I secure the decorative elements to my sparkle balls?
A2: You can use hot glue for heavier items like dried flowers, while spray adhesive works well for lighter materials like glitter. Just be sure to let everything dry completely before handling.
Q3: Are there any safety tips I should keep in mind when using lights?
A3: Yes! Always use LED lights as they are cooler and reduce fire risks. Make sure to check the wattage and follow all safety guidelines provided with your lighting materials.
Using Glitter and Paint
When it comes to adding that extra sparkle to your DIY sparkle ball lights, glitter and paint are your best friends! These materials can transform your simple lights into stunning pieces of art that will catch the eye and elevate your home decor. But how do you effectively use them without compromising the functionality of your lights? Let’s dive into the magical world of glitter and paint!
First, let’s talk about glitter. It’s not just for kids’ crafts anymore! Using glitter can create a shimmering effect that mimics the twinkling stars in the night sky. To achieve the best results, consider the following:
- Choose the Right Type: Opt for fine glitter for a subtle sparkle or chunky glitter for a more dramatic effect.
- Application Method: Use a spray adhesive for an even coat or paint the areas where you want the glitter to stick.
- Seal It In: After applying glitter, seal it with a clear spray sealant to prevent it from shedding.
Now, onto paint. Paint can add color and depth to your sparkle ball lights. Whether you want a vibrant hue or a soft pastel, the choice is yours! Here are a few tips to keep in mind:
- Use Acrylic Paint: It’s versatile, dries quickly, and adheres well to most surfaces.
- Layering Techniques: Consider using a base coat followed by a lighter shade to create a gradient effect.
- Brush Types: Different brushes can give you various textures; a sponge brush can create a soft look, while a fine brush can help with details.
Combining glitter and paint can yield stunning results! For instance, you can paint your sparkle ball a solid color and then sprinkle glitter over specific areas to create a gradient effect. This technique adds depth and visual interest, making your lights truly one-of-a-kind.
Remember, the key to a successful application is to take your time and allow each layer to dry before adding more. This patience will pay off, as your sparkle ball lights will shine beautifully, creating a warm and inviting atmosphere in your home.
Q1: Can I use any type of glitter or paint?
A1: While you can use various types, it's best to opt for fine glitter and acrylic paint for the best adhesion and visual effect.
Q2: Will the glitter fall off over time?
A2: If properly sealed with a clear spray sealant, the glitter should remain intact and not shed.
Q3: How can I ensure the paint doesn’t affect the light bulbs?
A3: Make sure to let the paint dry completely before assembling your lights. Avoid painting directly on the areas where the bulbs will be.
Q4: Can I use this technique for outdoor sparkle balls?
A4: Yes, but make sure to use weatherproof paint and sealants to protect them from the elements.

Incorporating Natural Elements
When it comes to adding a touch of charm to your DIY sparkle ball lights, incorporating natural elements can transform them from simple decor to stunning focal points in your home. Imagine the rustic allure of dried flowers, twine, or even pinecones nestled within the delicate design of your sparkle balls. These elements not only enhance the visual appeal but also bring a sense of warmth and connection to nature, making your lights feel more inviting.
One of the easiest ways to incorporate natural elements is by using dried flowers. You can choose from a variety of options, such as lavender, eucalyptus, or even small sprigs of rosemary. The key is to select flowers that not only look beautiful but also have a pleasant scent. When adding these to your sparkle balls, consider placing them strategically around the frame, allowing their colors and textures to peek through the lights. This not only creates a stunning visual effect but also adds a lovely aroma to your space.
Another fantastic option is to use twine. Wrapping twine around your sparkle ball frame can give it a rustic, farmhouse feel. This simple addition can create a beautiful contrast against the bright lights, making them pop even more. You can also weave in small sprigs of greenery or even tiny flowers as you wrap the twine, further enhancing the natural aesthetic. The tactile quality of the twine adds an additional layer of interest and can make your sparkle balls feel more organic.
If you’re feeling particularly adventurous, consider incorporating pinecones or small branches. These elements can be attached to the frame using hot glue, creating a woodland-themed sparkle ball. Imagine the beauty of a snow-dusted pinecone nestled among glowing lights, bringing a cozy, wintery feel to your home decor. Just be sure to arrange them in a way that doesn’t obstruct the light, allowing your sparkle balls to shine brilliantly.
To help you visualize how to blend these natural elements into your sparkle ball design, here’s a simple table outlining various materials and their suggested uses:
| Material | Suggested Use |
|---|---|
| Dried Flowers | Place around the frame for color and scent. |
| Twine | Wrap around the frame for a rustic look. |
| Pinecones | Glue to the frame for a woodland theme. |
| Small Branches | Attach for added texture and natural feel. |
Incorporating these natural elements not only enhances the aesthetic of your sparkle ball lights but also allows you to express your personal style. Whether you prefer a bohemian vibe with wildflowers or a classic look with twine and pinecones, the possibilities are endless. So, gather your materials, unleash your creativity, and watch as your sparkle balls become a unique reflection of your home and personality.
Q: Can I use fresh flowers instead of dried ones?
A: While fresh flowers can look beautiful, they may not hold up well over time. Dried flowers are more durable and will maintain their appearance longer.
Q: How do I ensure the natural elements don’t obstruct the lights?
A: When placing natural elements, make sure to arrange them around the frame rather than covering the lights. This will allow for maximum illumination.
Q: What type of twine works best?
A: Natural jute twine or burlap twine are excellent choices as they provide a rustic look and are easy to work with.
Q: Can I use artificial flowers?
A: Absolutely! Artificial flowers can be a great alternative if you want a longer-lasting decor option. Just ensure they are of good quality for the best visual effect.
Placement Ideas
Once you've created your stunning sparkle ball lights, the next exciting step is figuring out where to showcase them! The right placement can truly transform your space, adding a touch of magic and warmth to your home. So, let’s dive into some creative placement ideas that will not only elevate your decor but also make your sparkle balls the star of the show.
First up, let’s talk about indoor displays. These lights can be a fantastic addition to various rooms in your home. For instance, consider hanging them in your entryway. Imagine stepping into your home and being greeted by a warm, twinkling glow that instantly sets a welcoming tone. You can use clear fishing line or decorative twine to suspend your sparkle balls from the ceiling, creating a floating effect that’s sure to impress your guests.
Another great idea is to use your sparkle balls as table centerpieces. Whether it’s for a dinner party or a cozy family meal, placing a few sparkle balls in the center of your dining table can create an enchanting atmosphere. You might even consider grouping them with some candles or seasonal decorations to enhance the visual appeal. Just think of it as creating a mini light show that dances with every flicker of the candlelight!
Now, let’s not forget about the outdoor arrangements. Sparkle ball lights can bring your garden or patio to life, especially during those warm summer nights. However, when placing them outdoors, it’s essential to ensure they are weatherproofed. You can use outdoor-rated LED lights and seal any openings with waterproof materials to keep them safe from the elements.
For outdoor displays, think about draping them along a garden path or wrapping them around tree branches. This can create a whimsical pathway that guides your guests through your yard, making any evening gathering feel like a fairytale. Additionally, hanging sparkle balls from a pergola or gazebo can create a stunning focal point for outdoor dining or lounging areas. Just picture how beautiful it would be to sit outside under a canopy of twinkling lights!
Here’s a quick table summarizing some placement ideas:
| Location | Suggestions |
|---|---|
| Indoor | Entryways, Dining Tables, Living Rooms |
| Outdoor | Gardens, Patios, Tree Branches |
In conclusion, the placement of your sparkle ball lights can significantly enhance the ambiance of your home, both indoors and outdoors. Whether you choose to hang them, display them on tables, or use them to illuminate your garden, these lights are bound to add a magical touch to your space. So, get creative and let your imagination run wild!
Q: Can I use sparkle ball lights outside?
A: Yes, but make sure to use weatherproof materials for both the lights and the decorations to ensure they last through different weather conditions.
Q: How do I make sure my sparkle balls are safe to use?
A: Always use LED lights as they generate less heat and are safer for decorative projects. Additionally, ensure all electrical components are properly sealed and rated for the intended environment.
Q: What materials can I use to decorate my sparkle balls?
A: You can use glitter, paint, twine, dried flowers, or any other decorative elements that suit your style. Just remember to apply them in a way that doesn’t obstruct the light.
Indoor Displays
When it comes to showcasing your sparkle ball lights indoors, the possibilities are as vast as your imagination! These enchanting lights can transform any space, adding a touch of whimsy and elegance. One popular idea is to hang your sparkle balls in entryways or hallways. Imagine walking into your home and being greeted by a soft, shimmering glow that instantly lifts your spirits. This can create a welcoming atmosphere for both you and your guests.
Another fantastic way to display your sparkle balls is by using them as table centerpieces. Whether it's for a dinner party, a casual gathering, or even just a cozy night in, placing a few sparkle balls on your dining or coffee table can create a stunning focal point. You can arrange them in groups of three or five, mixing different sizes for added visual interest. Consider using a decorative tray or a bed of faux greenery to enhance the overall look.
If you’re feeling particularly creative, you can also suspend your sparkle balls from the ceiling using clear fishing line. This creates a magical floating effect, making it seem like they’re gently drifting in mid-air. Position them at varying heights to add depth and intrigue to your room. Just imagine how captivating it would be to have these sparkling orbs dance with the light, casting beautiful shadows on your walls!
For those with shelves, sparkle balls can be placed among your favorite books or decorative items. This not only adds a unique touch but also draws attention to your decor. You might want to consider using them in conjunction with other lighting elements, like candles or fairy lights, to create a layered lighting effect that is both warm and inviting.
Lastly, think about using your sparkle balls in unexpected places. How about placing a few in your bathroom for a touch of glamour during a relaxing soak? Or perhaps in your home office to inspire creativity? The beauty of sparkle balls is their versatility; they can enhance any space with a bit of creativity and flair.
Here are some common questions people have about displaying sparkle ball lights indoors:
- Can I use sparkle ball lights in a small room? Absolutely! Sparkle balls can add a sense of depth and brightness to smaller spaces, making them feel more inviting.
- What type of bulbs should I use for my sparkle balls? LED lights are a great option as they are energy-efficient and produce less heat, making them safer for decorative projects.
- How can I ensure my sparkle balls stay secure when hanging? Use sturdy hooks or adhesive ceiling clips to ensure they remain in place. Always check the weight limit of the materials you use.

Outdoor Arrangements
When it comes to showcasing your DIY sparkle ball lights outdoors, the possibilities are as vast as the night sky. Imagine your garden or patio transformed into a magical wonderland, where each sparkle ball dances with the gentle breeze, casting enchanting shadows. To achieve this, you'll want to consider a few key factors that will ensure your lights not only look stunning but also function well in an outdoor setting.
First and foremost, placement is everything. Think about high-traffic areas where your sparkle balls can be admired by guests and family alike. For example, hanging them from tree branches can create a fairy-tale atmosphere, while placing them along pathways can guide your guests through your outdoor space. Just picture a winding path illuminated by your beautiful lights—it's sure to be a conversation starter!
Next, consider the weatherproofing of your sparkle balls. Since they'll be exposed to the elements, it's crucial to use materials that can withstand rain, wind, and even the occasional gust of snow. Here are some tips to help you weatherproof your creations:
- Use waterproof LED lights to avoid any electrical mishaps.
- Seal your sparkle balls with a clear waterproof spray to protect them from moisture.
- Opt for rust-resistant wire to maintain the integrity of your frames over time.
Additionally, think about the height and visibility of your sparkle balls. Hanging them at varying heights can create a dynamic look, drawing the eye upward and making your outdoor space feel larger. You can also place some on tables or ledges, allowing them to catch the light in different ways. This variation adds depth and interest to your arrangements.
Finally, don’t shy away from incorporating your sparkle balls into existing outdoor decor. Whether it’s wrapping them around a trellis, placing them in a decorative bowl on your patio table, or even using them as part of a centerpiece for an outdoor gathering, these lights can enhance any setting. Just remember to keep safety in mind; ensure that any electrical components are properly secured and that there’s no risk of tripping over wires.
In conclusion, with a bit of creativity and careful planning, your outdoor sparkle ball lights can become a stunning feature of your home. They not only provide illumination but also add a touch of whimsy and charm that will leave your guests in awe. So go ahead, light up your outdoor spaces and let the magic of sparkle balls shine through!
Q: Can I use regular light bulbs in my sparkle balls?
A: It's best to use LED lights as they are energy-efficient and produce less heat, making them safer for your DIY project.
Q: How do I ensure my sparkle balls are safe for outdoor use?
A: Make sure to use waterproof materials and seal any electrical components to protect against moisture.
Q: What is the best way to hang my sparkle balls outdoors?
A: You can use fishing line or sturdy twine to hang them from tree branches, hooks, or even your porch ceiling for a whimsical effect.
Q: How can I clean my sparkle balls?
A: Gently wipe them down with a damp cloth to remove dust and debris. Avoid using harsh chemicals, as they can damage the materials.
Frequently Asked Questions
- What materials do I need to create sparkle ball lights?
To make your own sparkle ball lights, you'll need wire for the frame, LED lights for illumination, and decorative elements like glitter, paint, or natural items such as twine or dried flowers. Don't forget tools like wire cutters and pliers to help shape and secure your design!
- Can I use any type of wire for the frame?
While you can experiment with different types of wire, it's best to use a sturdy, flexible wire like floral wire or aluminum wire. These options provide the right balance of strength and ease of manipulation, ensuring your sparkle balls maintain their shape.
- How do I safely hang my sparkle ball lights indoors?
For indoor displays, use fishing line or decorative twine to hang your sparkle balls. Make sure to secure them to a stable hook or ceiling fixture. This way, they can sway gently without risking a fall, adding a whimsical touch to your decor!
- Are sparkle ball lights safe for outdoor use?
Yes, sparkle ball lights can be used outdoors, but you must ensure that the LED lights are weatherproof. Additionally, consider using waterproof materials for the frame and decorations to protect them from the elements, allowing your lights to shine bright in your garden or patio.
- How can I customize my sparkle ball lights?
The possibilities are endless! You can customize your sparkle balls by using different colors of paint, varying sizes of glitter, or incorporating unique natural elements. Think of them as a canvas where your creativity can shine—literally and figuratively!
- What are some creative placement ideas for sparkle ball lights?
For indoor displays, consider hanging them in entryways, placing them on shelves, or using them as table centerpieces. Outdoors, they can be strung along a fence, hung from trees, or placed around your patio to create a magical atmosphere.
- How do I clean and maintain my sparkle ball lights?
To keep your sparkle ball lights looking fabulous, gently dust them with a soft cloth or use a can of compressed air to remove debris. If they get wet, make sure to dry them thoroughly before storing them to prevent any damage.


