
Creating DIY Canvas Prints for Personalized Decor
In a world where personalization reigns supreme, creating your own DIY canvas prints is a fantastic way to express your individuality while decorating your home. Imagine walking into your living room and being greeted by a stunning canvas print of your favorite vacation spot, or perhaps a candid shot of your family that captures a precious moment in time. These prints not only serve as beautiful decor but also as conversation starters, each telling a unique story that reflects your personal style. So, let’s dive into the exciting journey of transforming your cherished photos into captivating canvas prints that will enhance your living space!
Selecting the right photo is the first step in creating a canvas print that resonates with you. Think about the images that evoke strong emotions or memories. The composition, colors, and overall vibe of the photo are crucial elements that can either elevate or diminish the impact of your canvas. For instance, a vibrant sunset can bring warmth to a room, while a black-and-white portrait can add a touch of elegance. When choosing your photo, ask yourself:
- Does this photo make me smile or evoke a fond memory?
- Are the colors in this image harmonious with my existing decor?
- What story do I want this canvas to tell?
By carefully considering these questions, you'll ensure that your canvas print not only beautifies your space but also resonates deeply with you and your visitors.
Before you embark on your DIY canvas printing adventure, gathering the essential materials is key. Here’s a quick rundown of what you’ll need:
| Material | Description |
|---|---|
| Canvas | Choose between pre-stretched or rolled canvas, depending on your preference. |
| Printer | An inkjet printer works well, but professional services can provide higher quality. |
| Image Editing Software | Programs like Photoshop or GIMP can help you prepare your image. |
| Sealant | A protective sealant will help maintain your print's vibrancy and longevity. |
Having these materials on hand will streamline your process and set you up for a successful DIY project!
When it comes to canvas options, understanding the differences can help you choose the best one for your project. Here are the two main types:
Pre-stretched canvases are a fantastic option for beginners. They come ready to use and are available in various sizes, making them incredibly convenient. With a professional finish already achieved, you can focus solely on the creative process of selecting and printing your image.
If you’re feeling adventurous and want more control over the size and framing, rolled canvas is the way to go. This option requires some stretching or framing, but it allows for more customization, making it perfect for experienced DIYers who want to create a truly unique piece.
Now that you have your photo and canvas ready, it’s time to explore printing techniques. You can choose between using an inkjet printer at home or opting for professional printing services. Each method has its own set of advantages:
- Inkjet Printing: Convenient and cost-effective for small projects.
- Professional Printing: Offers superior quality and color accuracy, ideal for large prints.
Choosing the right printing technique can significantly impact the final quality of your canvas print, so consider what matters most to you!
Before you hit print, proper image preparation is essential. This involves editing your photo for color correction, adjusting the resolution, and cropping it to fit the canvas dimensions. Using image editing software like Photoshop or free alternatives can help you achieve the desired aesthetic. Remember, a higher resolution ensures clarity and detail, making your canvas print visually appealing. So, take your time to perfect your image before moving on to the next steps!
After printing, you can take your canvas print to the next level by adding paint or other artistic elements. This is where your creativity can truly shine! Incorporating texture with acrylic paints or mixed media can add depth and interest to your artwork, making it stand out even more. Once you’re satisfied with your artistic touches, sealing your canvas is crucial to protect it from dust and damage. Explore different sealants to ensure your artwork lasts for years while retaining its vibrancy.
Q: Can I use any photo for my canvas print?
A: Yes, but ensure the photo is high resolution to maintain quality when printed.
Q: How do I choose the right size for my canvas?
A: Consider where you plan to hang it and the scale of your space. A larger canvas can make a bold statement, while smaller prints can create a gallery wall effect.
Q: What type of paint should I use for finishing touches?
A: Acrylic paints are a great choice for adding color and texture, as they dry quickly and are easy to work with.
Choosing the Right Photo
When it comes to creating your own canvas prints, is absolutely crucial. Think of it as picking the perfect ingredient for a delicious recipe; the quality of your final dish depends heavily on what you start with! You want a photo that resonates with you, one that evokes emotions or memories every time you glance at it. So, how do you go about selecting that perfect image? Let’s dive into some key considerations.
First and foremost, consider the composition of the image. A well-composed photo can draw the eye and create a sense of balance on your wall. Look for images where the subject is clearly defined and positioned in a way that captures attention. This could mean using the rule of thirds, where you place your subject off-center, creating a more dynamic and interesting visual experience. Additionally, vibrant colors can significantly enhance your decor. A photo with a splash of color can bring life to a dull room, while softer tones may add a touch of tranquility.
Moreover, think about the emotional impact of the image. Does it remind you of a special moment, like a family vacation or a wedding day? Or perhaps it captures the beauty of nature that you love? Your canvas print should tell a story, and the right photo will do just that. It’s like having a conversation piece in your home that sparks joy and nostalgia every time you see it.
To help you narrow down your options, here are some tips to keep in mind:
- Personal Connection: Choose images that have a personal significance to you.
- Color Scheme: Consider how the colors in your photo will complement your existing decor.
- Resolution: Ensure the photo is of high enough resolution to look great when printed on canvas.
- Subject Matter: Think about what themes resonate with you—nature, family, abstract art, etc.
In the end, the photo you choose will not only adorn your walls but also reflect your unique style and personality. So take your time in selecting the right image; it’s the first step in transforming a simple canvas into a stunning piece of art that you’ll cherish forever.
Materials Needed for Canvas Prints
Creating your own canvas prints is not just a fun project; it’s an opportunity to express your creativity and personalize your living space. To get started, you'll need to gather a few essential materials that will make the process smoother and more enjoyable. Think of this as assembling your toolkit for a creative adventure! The primary items you'll require include canvas, printing supplies, and various artistic tools.
First and foremost, you'll need a canvas. You can choose between pre-stretched canvases or rolled canvases, depending on your skill level and desired outcome. Pre-stretched canvases are fantastic for beginners since they come ready to hang, while rolled canvases offer flexibility in size and framing options for those who are a bit more experienced. Each type has its unique charm and can significantly influence the final look of your artwork.
Next up, consider your printing supplies. If you have access to an inkjet printer, that’s a great start! Make sure to use high-quality photo paper designed for canvas printing. Alternatively, if you're looking for a professional touch, you might want to explore local printing services that specialize in canvas prints. They often use advanced techniques that can enhance the quality of your images.
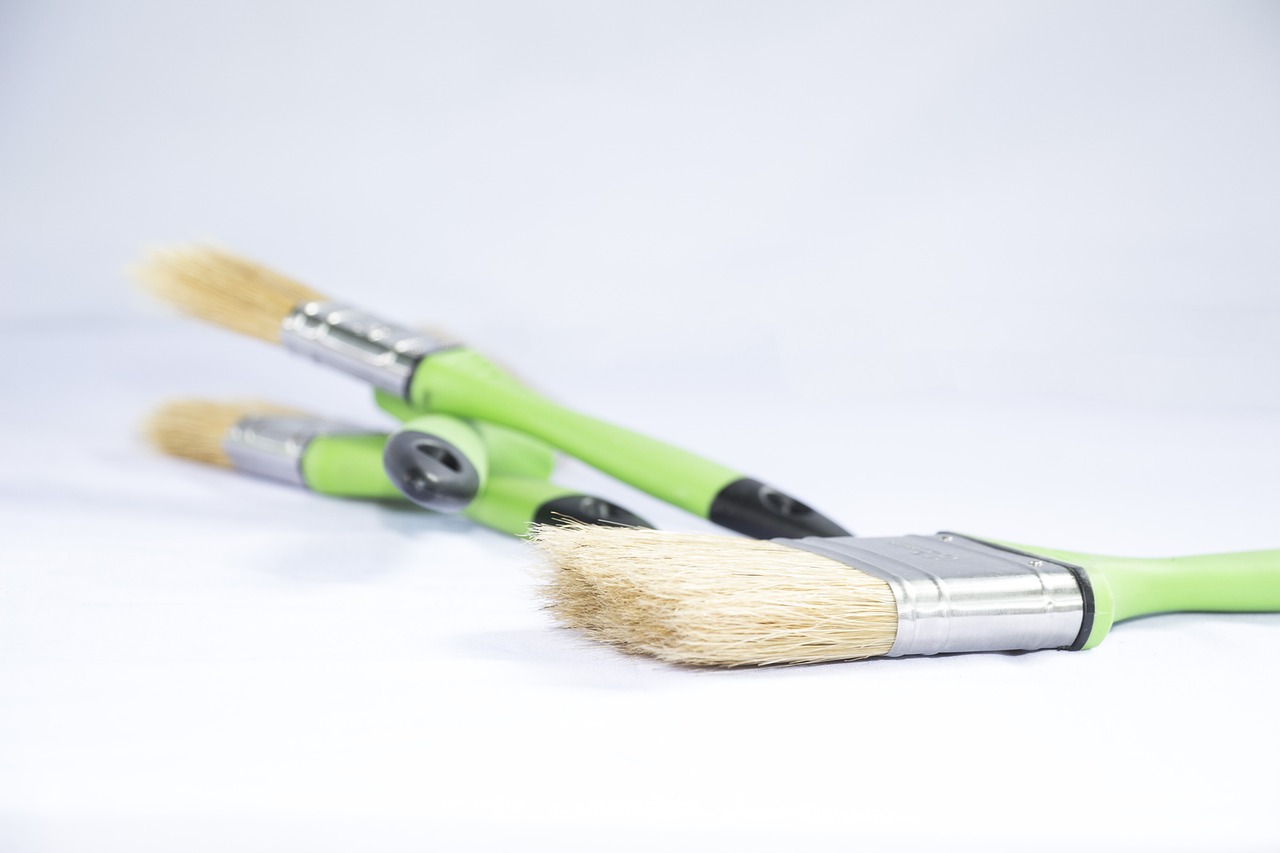
In addition to the canvas and printing supplies, you'll also need some artistic tools to add those finishing touches. This might include acrylic paints, brushes, and texture mediums. These materials will allow you to personalize your prints further, giving them depth and character. A palette knife can also be handy for creating interesting textures on your canvas.
To help you visualize what you need, here’s a simple table summarizing the essential materials:
| Material | Description |
|---|---|
| Canvas | Pre-stretched or rolled canvas for your prints. |
| Printing Supplies | High-quality photo paper or access to a professional printing service. |
| Artistic Tools | Acrylic paints, brushes, palette knife, and texture mediums. |
By having these materials on hand, you’ll be set to embark on your canvas print journey. Remember, the joy of DIY projects lies in the process itself, so don’t rush it. Take your time to experiment and enjoy the creative exploration!
Types of Canvas
When it comes to creating stunning DIY canvas prints, the type of canvas you choose can significantly influence the final result. There are primarily two types of canvas that you might consider: pre-stretched canvas and rolled canvas. Each type offers unique advantages and caters to different needs and preferences, making it essential to understand their characteristics before diving into your project.
Pre-stretched canvas is a popular choice for many DIY enthusiasts, particularly beginners. These canvases are already stretched over a wooden frame, which means they are ready to use right out of the box. This convenience saves you time and effort, allowing you to focus on the creative aspects of your project. They come in various sizes, which makes it easy to find one that fits your desired display area. Moreover, the professional finish they offer can elevate the look of your artwork, giving it a gallery-quality appearance.
On the other hand, rolled canvas provides a more customizable option, particularly for those with a clear vision of their artwork's dimensions. These canvases are sold in large rolls, allowing you to cut them to your desired size. While this option requires some additional steps—such as stretching or framing—it offers flexibility for experienced DIYers who want to create unique pieces tailored to their space. With rolled canvas, you can experiment with different sizes and shapes, which adds an exciting element to your artistic process.
To help you better understand the differences, here's a quick comparison:
| Feature | Pre-Stretched Canvas | Rolled Canvas |
|---|---|---|
| Convenience | Ready to use | Requires stretching or framing |
| Customization | Limited to available sizes | Highly customizable |
| Finish | Professional, gallery-quality | Depends on finishing technique |
| Skill Level | Beginner-friendly | Best for experienced DIYers |
Choosing the right canvas type ultimately depends on your personal style and the specific project you have in mind. If you're looking for a straightforward and polished option, pre-stretched canvas is the way to go. However, if you thrive on creativity and customization, rolled canvas will allow you to unleash your artistic flair. No matter which type you choose, the most important thing is to enjoy the process and let your creativity shine!
Pre-Stretched Canvas
When diving into the world of DIY canvas prints, one of the most user-friendly options available is the . These canvases come ready to use, eliminating the need for any additional stretching or framing, which is a huge plus for beginners. Imagine having a blank canvas that’s already taut and primed for your creative touch; it’s like having a blank slate that’s just waiting for your imagination to run wild!
Pre-stretched canvases are available in a variety of sizes, making them versatile for any project. Whether you're aiming for a small piece to accent a cozy corner or a large statement piece to dominate your living room wall, there’s a pre-stretched canvas that fits your needs. The convenience of these canvases allows you to focus on what truly matters: the artwork.
One of the standout features of pre-stretched canvases is their professional finish. They typically come with a sturdy wooden frame that ensures your canvas remains taut over time, preventing sagging or warping. This stability is crucial, especially if you plan to display your artwork prominently. Plus, many pre-stretched canvases are made from high-quality materials, which means your prints will not only look great but also stand the test of time.
However, it’s essential to consider the following factors when choosing a pre-stretched canvas:
- Quality of Material: Look for canvases made from 100% cotton or linen, as they provide a superior surface for painting.
- Depth of the Frame: Canvases come in various depths, typically ranging from 0.75 inches to 2 inches. Thicker canvases can add a more substantial feel to your artwork.
- Primed vs. Unprimed: Opt for primed canvases if you want to start painting right away. Unprimed canvases require gesso to prepare the surface.
In summary, pre-stretched canvases are an excellent choice for anyone looking to create stunning canvas prints without the hassle of additional preparation. They provide a solid foundation for your artistic expression, allowing you to focus on the fun part—bringing your favorite photos and designs to life! So, grab your pre-stretched canvas and let your creativity flow!
Q: Can I use any type of paint on a pre-stretched canvas?
A: While you can use various types of paint, acrylics and oils are the most common. Just ensure the canvas is primed properly if you’re using oils.
Q: How do I hang a pre-stretched canvas?
A: You can use picture hangers, nails, or even adhesive strips depending on the weight of your canvas. For larger pieces, consider using wall anchors for added support.
Q: Can I paint over a printed canvas?
A: Yes! Painting over a printed canvas can add a unique touch, but make sure the print is dry and the surface is clean.
Rolled Canvas
When it comes to creating stunning canvas prints, is a fantastic option that offers a wealth of flexibility and creativity. Unlike pre-stretched canvases, rolled canvas comes in large sheets, allowing you to cut it to your desired size. This means that if you have a grand vision for a large piece of art, you can make it happen without being restricted to standard dimensions. It’s like having a blank canvas—literally! You can also choose to stretch it yourself or frame it, which gives you the chance to personalize your artwork even further.
One of the greatest advantages of using rolled canvas is the customization it provides. You can select the exact size that fits your space perfectly, whether it’s a small accent piece or a large statement work. Additionally, rolled canvas is often more cost-effective than pre-stretched options, especially if you’re looking to create multiple pieces or larger installations. Think of it as having a tailor-made suit versus buying off the rack; the fit and finish can be just what you need to make your decor pop.
However, keep in mind that working with rolled canvas does require some additional steps. Once you’ve printed your image onto the canvas, you’ll need to stretch it onto a frame or have it professionally framed. This is where a bit of DIY spirit comes into play! Stretching the canvas yourself can be a rewarding experience, but it does take some practice and the right tools. You’ll need:
- Canvas pliers
- Staple gun
- Wooden stretcher bars
- Measuring tape
Once you have your tools ready, the stretching process involves carefully positioning the canvas over the frame and securing it in place with staples. It’s important to pull the canvas taut to avoid any wrinkles or sagging, which can detract from the overall look of your artwork. If you’re not comfortable with this step, many local art shops offer stretching services that can save you time and ensure a professional finish.
In summary, rolled canvas is a versatile choice for anyone looking to dive into the world of DIY canvas prints. It gives you the freedom to express your creativity while also allowing for a personalized touch that reflects your unique style. Whether you’re a seasoned artist or a beginner, rolled canvas can be a game-changer in your home decor journey.
Q: What is the main advantage of using rolled canvas?
A: The main advantage is its flexibility in size and framing options, allowing for greater customization compared to pre-stretched canvases.
Q: Can I stretch rolled canvas myself?
A: Yes, with the right tools and a bit of practice, you can stretch rolled canvas yourself. Alternatively, you can have it professionally stretched.
Q: Is rolled canvas more affordable than pre-stretched options?
A: Generally, yes. Rolled canvas is often more cost-effective, especially if you’re creating larger pieces or multiple artworks.
Printing Techniques
When it comes to creating stunning DIY canvas prints, the printing technique you choose can significantly influence the final outcome. There are several methods available, each with its own unique advantages and characteristics. Understanding these options will not only help you achieve the best quality for your prints but also ensure that your artwork reflects your personal style.
One of the most popular methods is inkjet printing. This technique utilizes inkjet printers that can produce high-resolution images with vibrant colors. The beauty of inkjet printing lies in its accessibility; many people already own inkjet printers at home, making it a convenient choice for DIY enthusiasts. However, it's important to use high-quality ink and photo paper designed for canvas prints to achieve the best results. The inkjet method allows for a wide range of colors and details, making it ideal for capturing the essence of your favorite photographs.
On the other hand, if you're looking for a more professional finish, you might consider using a professional printing service. These services often employ advanced printing technology, such as giclée printing, which uses pigments instead of dyes. This method produces prints that are not only stunningly detailed but also resistant to fading over time. While this option may come with a higher price tag, the quality and longevity of the prints can be well worth the investment, especially for cherished images that you want to display prominently in your home.
Here's a quick comparison of the two printing techniques:
| Printing Technique | Advantages | Considerations |
|---|---|---|
| Inkjet Printing |
|
|
| Professional Printing Service |
|
|
Ultimately, the choice between inkjet printing and professional services depends on your specific needs and the level of quality you desire. If you're just starting out or working on a casual project, inkjet printing can be a fantastic option. However, if you're aiming for gallery-quality prints or have a special occasion in mind, investing in professional printing might be the way to go. Remember, the goal is to create something that not only looks great but also tells your unique story through your chosen images.
In conclusion, understanding the different printing techniques available is essential for creating beautiful DIY canvas prints. With the right method, you can transform your favorite photos into stunning decor pieces that truly reflect your personality and style.
Q: Can I use any image for my canvas print?
A: While you can technically use any image, it's best to choose high-resolution photos that are well-composed and have a strong emotional impact. This will ensure your print looks vibrant and professional.
Q: What type of ink is best for canvas printing?
A: Pigment-based inks are generally preferred for canvas printing because they offer better longevity and resistance to fading compared to dye-based inks.
Q: How do I maintain my canvas print?
A: To keep your canvas print looking fresh, avoid direct sunlight and dust it regularly with a soft, dry cloth. If you’ve sealed it, it should be protected from minor wear and tear.
Preparing Your Image
Before you dive into printing your masterpiece, proper image preparation is essential. Think of this stage as the foundation of a house; without a solid base, everything built on top can crumble. The first step is to ensure that your image is not only visually appealing but also technically ready for the canvas. This means checking for color accuracy, adjusting the resolution, and cropping the image to fit the dimensions of the canvas you’ve chosen. Each of these elements plays a crucial role in how your final print will look, so let’s break them down.
When it comes to color correction, you want your photo to pop! Use image editing software to adjust brightness, contrast, and saturation. Sometimes, a little tweak can make a dull image come alive. Imagine walking into a room filled with art; the pieces that catch your eye are often the ones with vibrant colors and striking contrasts. You want your canvas print to have that same effect. Additionally, consider the mood you want to convey—warm tones can create a cozy atmosphere, while cooler tones might evoke calmness.
Next, let’s talk about resolution. This is where many DIYers stumble. A higher resolution means a clearer, more detailed image, which is especially important for larger prints. Ideally, your image should have a resolution of at least 300 DPI (dots per inch). This ensures that when printed, your image retains its sharpness and detail. If your image is low resolution, it might look pixelated or blurry when enlarged, which can be a major disappointment. To check the resolution, simply open your image in your editing software and look for the image size settings.
Now, onto cropping. This step is like framing a picture; it helps to focus the viewer's attention on the most important elements of your photo. Make sure to crop your image to the exact dimensions of your canvas. If you're using a pre-stretched canvas, you’ll want to match the size precisely. For rolled canvas, you might have a bit more flexibility, but it's still crucial to ensure that the main subject of your image is well-centered and not cut off at the edges. Think of it as preparing a delicious dish; you wouldn’t want to serve it without the garnish that makes it pop!
Once you've adjusted the colors, ensured the resolution is high enough, and cropped your image, you’re almost ready to print. However, don’t forget to save your work in the right format. For the best results, save your image as a JPEG or PNG file. These formats preserve the quality and are compatible with most printing services.
In summary, preparing your image is a crucial step in the DIY canvas printing process. By focusing on color correction, resolution, and cropping, you're setting yourself up for success. Just think of it as preparing a canvas for a masterpiece; the better the preparation, the more stunning the final result will be!
- What is the best resolution for printing a canvas? Aim for at least 300 DPI for the best quality.
- Can I use any photo for canvas prints? Yes, but ensure the photo is high-resolution and meaningful to you.
- What software is best for editing images? Adobe Photoshop is popular, but free alternatives like GIMP can also work well.
- How do I know what size canvas to choose? Consider where you’ll hang the print and the size of the image you want to display.
Image Editing Software
When it comes to creating stunning canvas prints, is your best friend. It’s like having a magic wand that transforms an ordinary photo into a breathtaking piece of art. Whether you’re a seasoned pro or just starting out, the right software can make all the difference. Programs like Adobe Photoshop are industry standards, offering a plethora of tools for color correction, cropping, and enhancing your images. But don’t worry if you’re not ready to dive into the deep end just yet; there are plenty of free alternatives that can do an excellent job as well.
For instance, GIMP is a fantastic open-source option that provides many of the features you’d find in Photoshop, but without the price tag. It allows for detailed editing and is perfect for those who want to customize their prints without breaking the bank. Similarly, Canva is a user-friendly platform that’s great for quick edits and design layouts, especially if you’re looking to create something simple and elegant.
Here’s a quick comparison of some popular image editing software:
| Software | Price | Features |
|---|---|---|
| Adobe Photoshop | Subscription-based | Advanced editing, filters, layers |
| GIMP | Free | Layer support, customizable interface |
| Canva | Free with premium options | Templates, easy drag-and-drop interface |
When using these programs, it’s important to focus on a few key aspects:
- Color Correction: Adjusting brightness, contrast, and saturation can dramatically enhance the visual appeal of your photo.
- Resolution Adjustments: Make sure your image is at least 300 DPI (dots per inch) for optimal print quality.
- Cropping: Frame your photo to fit the canvas dimensions perfectly, ensuring that no important details are lost.
Remember, the goal is to create a canvas print that not only looks amazing but also evokes emotions and tells your personal story. So take your time experimenting with different tools and settings until you find the perfect look for your artwork. The more you play around with the software, the more comfortable you’ll become, and soon you’ll be creating stunning pieces that you’ll be proud to display in your home.
Q: Do I need expensive software to edit my photos for canvas prints?
A: Not at all! While professional software like Adobe Photoshop offers advanced features, free alternatives like GIMP and Canva can also produce excellent results.
Q: What resolution should my image be for printing?
A: Aim for at least 300 DPI to ensure your canvas print is sharp and clear.
Q: Can I use my smartphone for photo editing?
A: Absolutely! There are numerous apps available that offer powerful editing tools right on your phone, making it easy to enhance your images on the go.
Resolution Considerations
When it comes to creating stunning DIY canvas prints, resolution is a key player that can make or break your final product. Think of resolution as the backbone of your image; it's what gives your print its clarity and detail. If you’ve ever zoomed in on a photo only to find a blurry mess, you know exactly what I mean! So, how do you ensure your canvas print looks crisp and vibrant? Let's dive into the nitty-gritty.
First off, understanding pixels is crucial. An image's resolution is typically measured in pixels per inch (PPI). The higher the PPI, the more detail your print will capture. For canvas prints, a resolution of at least 300 PPI is recommended to achieve that stunning, gallery-quality look. But why stop there? If your image is larger, you can even go up to 600 PPI for an ultra-crisp finish. Just imagine how breathtaking a high-resolution photo of your favorite sunset will look hanging on your wall!
Another important factor to consider is the dimensions of your canvas. You want to make sure that your image not only has the right resolution but also fits the canvas size perfectly. For instance, if you’re working with a 16x20 inch canvas, your image should ideally be at least 4800 x 6000 pixels at 300 PPI. This ensures that every detail shines through without any pixelation. If you’re unsure about your image’s dimensions, most image editing software will allow you to check and adjust the size accordingly.
Lastly, don’t forget to consider the source of your images. Not all photos are created equal! Images taken with high-end cameras or smartphones are generally better suited for printing than those pulled from the web, which might be compressed or low-resolution. If you're using a photo from your phone, check its settings to ensure you're capturing images at the highest quality possible. After all, you want your canvas print to be a true reflection of your style and creativity!
In summary, paying attention to resolution is crucial for achieving the best results with your canvas prints. Aim for high PPI, ensure your image dimensions match your canvas size, and always opt for high-quality sources. By following these guidelines, you’ll be well on your way to creating breathtaking pieces of art that you can proudly display in your home.
- What is the best resolution for canvas prints? Aim for at least 300 PPI to ensure high-quality prints.
- Can I use images from the internet? It's best to use high-resolution images, preferably from a camera, rather than low-quality images from the web.
- How do I check the resolution of my image? You can check the resolution in your image editing software, which will display the pixel dimensions and PPI.
Painting and Finishing Touches
Once your canvas print is ready, it's time to unleash your creativity and add those final artistic touches that will elevate your artwork to the next level. This is where you can truly make your canvas print a reflection of your unique style and personality. Whether you want to add a splash of color, some texture, or even a few embellishments, the options are endless. Let's dive into some exciting techniques that can transform your canvas from a simple print into a stunning piece of art.
One of the most effective ways to enhance your canvas is by incorporating texture. This can be achieved using acrylic paints, modeling paste, or even mixed media elements. Imagine running your fingers over the surface and feeling the depth and dimension that texture brings. You can create a variety of effects, from rough and rustic to smooth and sleek. For instance, using a palette knife to apply thick layers of paint can give your artwork a bold, impasto finish. Alternatively, you could use a sponge or brush to create soft, blended textures that add a subtle elegance to your piece.
Another fantastic technique is to add color washes. This involves diluting your acrylic paint with water to create a translucent effect. By layering these washes, you can achieve a beautiful gradient or a soft background that complements your main image. Think of it as creating a dreamy atmosphere around your print, which can evoke emotions and draw the viewer's eye. You can also use this technique to create contrast, making certain elements of your print pop while allowing others to recede into the background.
After you’ve painted and textured your canvas to your heart's content, the next step is to consider sealing your masterpiece. Sealing your canvas is crucial for preserving your artwork and protecting it from dust, dirt, and fading over time. There are various sealants available, ranging from sprays to varnishes, each offering different finishes such as matte, satin, or glossy. Choosing the right sealant can drastically affect the final appearance of your canvas. For instance, a glossy sealant can enhance the vibrancy of colors, while a matte finish can give a more understated, sophisticated look.
When applying a sealant, make sure to follow the manufacturer's instructions closely. Typically, you'll want to apply it in thin, even coats, allowing each layer to dry completely before adding another. This not only ensures even coverage but also enhances the durability of your artwork. After sealing, your canvas will be ready to hang, and you can take pride in knowing you’ve created something truly unique and personal.
In summary, the painting and finishing touches on your canvas print are where the magic happens. By adding texture, color washes, and a protective sealant, you can transform a simple print into a stunning piece of art that reflects your personal style. So, gather your materials, let your creativity flow, and enjoy the process of bringing your canvas print to life!
- What type of paint should I use for adding texture? - Acrylic paints are ideal for adding texture due to their versatility and quick drying time.
- How long should I wait before sealing my canvas print? - It's best to wait at least 24 hours after painting to ensure everything is completely dry before sealing.
- Can I use a regular spray sealant on my canvas? - Yes, but make sure it's suitable for use on acrylic paint and canvas surfaces for the best results.
Adding Texture
When it comes to creating a canvas print that truly stands out, is a game-changer. Think of your canvas as a blank page waiting for a story to be told. By incorporating texture, you can transform a simple image into a multi-dimensional piece of art that draws the viewer in. Imagine running your fingers over a canvas and feeling the different layers and elements that make up the artwork; this tactile experience can elevate the emotional impact of your print.
There are various techniques you can use to add texture to your canvas prints. One popular method is to use acrylic paints. These paints are not only vibrant but also versatile, allowing you to create a range of effects. For instance, you can use a palette knife to apply thick strokes of paint, creating a raised surface that catches the light beautifully. Alternatively, you can use a sponge or brush to dab on paint, producing a softer, more blended texture.
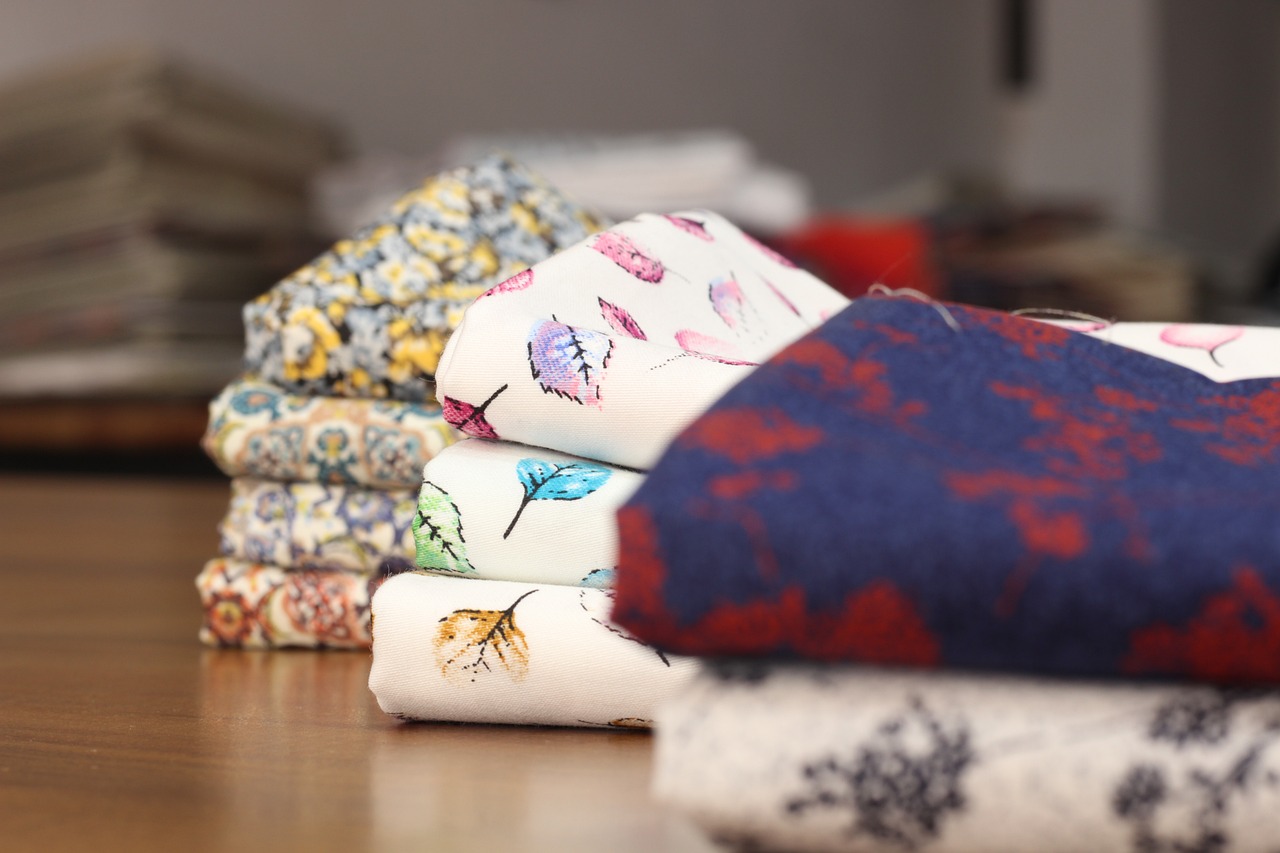
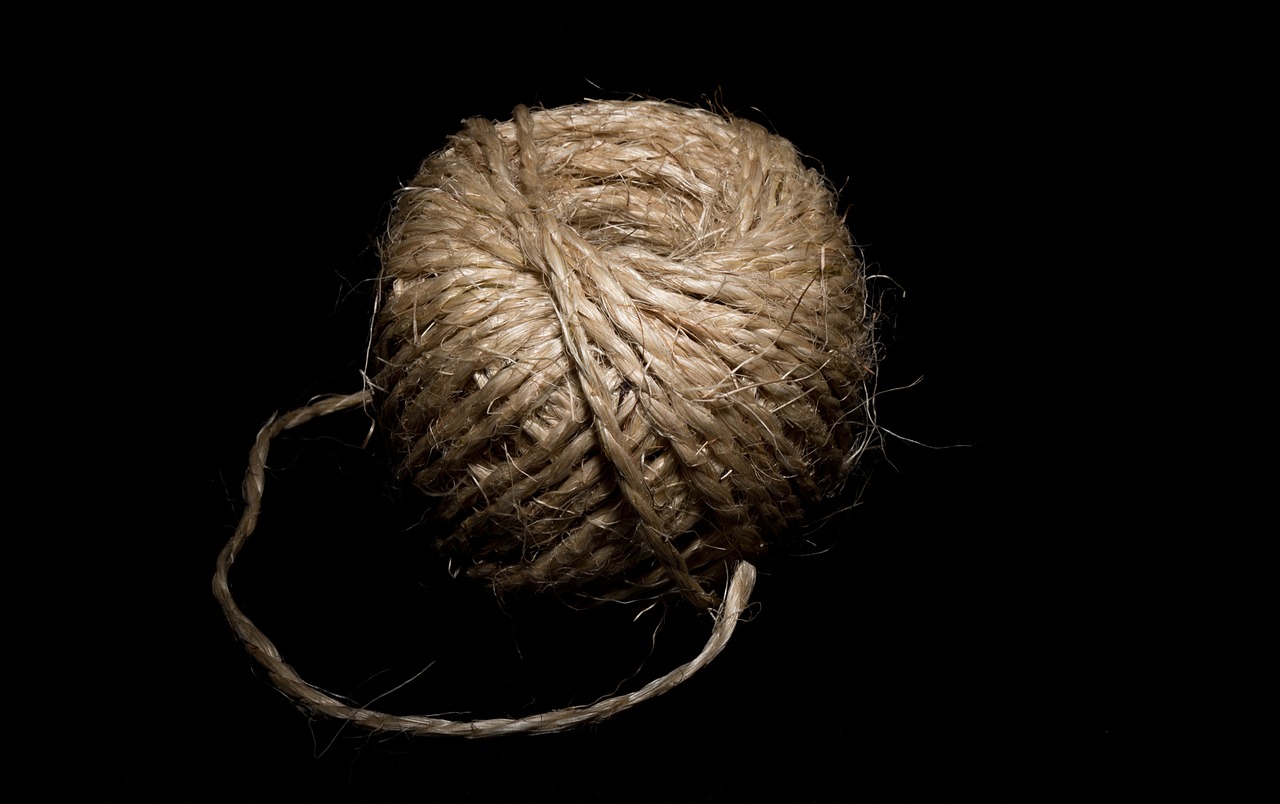
Another exciting option is to experiment with mixed media. This approach allows you to combine various materials, such as fabric, paper, or even natural elements like leaves or sand, into your canvas. The juxtaposition of different textures can create a stunning visual effect. For example, adhering a piece of burlap or lace to your canvas can introduce a rustic charm that complements your image beautifully.
Additionally, consider using texture gels or mediums specifically designed for acrylic painting. These products can be mixed with your paint to create a variety of textures, from smooth to rough. Some gels dry clear, allowing the colors beneath to shine through while still adding depth. This is particularly useful if you want to maintain the integrity of your image while enhancing its visual appeal.
Once you've applied your textures, it's essential to let everything dry completely before moving on to the next steps. Rushing this process can lead to smudging or unintended blending of colors, which can detract from your artwork. Patience is key here, as the drying time can vary based on the materials used. After everything is dry, you can further enhance your piece by adding finishing touches, such as highlights or shadows, to accentuate the textures you've created.
Finally, don't forget about the importance of sealing your textured canvas. This is crucial for protecting your artwork from dust, dirt, and damage. A good sealant will not only preserve the vibrancy of your colors but also enhance the texture, making it pop even more. Choose a sealant that is compatible with the materials you've used, and apply it according to the manufacturer's instructions to ensure the longevity of your masterpiece.
- What materials do I need to add texture to my canvas prints? You will need acrylic paints, texture gels, and possibly mixed media elements like fabric or paper.
- Can I use oil paints for texture? While oil paints can be used, they require different techniques and drying times compared to acrylics.
- How do I seal my textured canvas? Use a spray or brush-on sealant that is compatible with acrylics or mixed media to protect your artwork.
Sealing Your Canvas
Once you’ve completed your stunning canvas print, the next step is to seal it. Sealing your canvas is crucial to ensure its longevity and protect it from dust, moisture, and fading over time. Think of it as giving your artwork a protective armor, ensuring that it remains vibrant and beautiful for years to come. There are several methods and products available for sealing your canvas, and choosing the right one can make all the difference.
One popular method is using a spray sealant. These are quick and easy to apply, providing a uniform coat that dries clear. When using spray sealants, it’s essential to work in a well-ventilated area and to apply several light coats rather than one heavy coat. This helps prevent drips and ensures even coverage. Be sure to choose a spray that is specifically designed for canvas or artwork to get the best results.
Another option is to use a brush-on sealant. This method allows for more control over the application, especially in areas where you want to add a bit more texture or where the canvas meets the frame. When using a brush-on sealant, you can opt for either a matte or glossy finish, depending on your preference. Just make sure to use a clean, soft brush to avoid leaving streaks or brush marks on your artwork.
Before sealing, it’s advisable to conduct a test patch on a small, inconspicuous area of your canvas or a scrap piece of canvas. This will help you see how the sealant interacts with your paint and whether it alters the colors or texture. Once you’re satisfied with the test patch, proceed with sealing the entire canvas.
After sealing, allow your canvas to dry completely in a dust-free environment. This is crucial, as any dust particles that settle on the canvas while it’s drying can become trapped under the sealant, ruining the finish. Once dry, your canvas will be ready to hang, showcasing your unique style and creativity.
In summary, sealing your canvas print is an essential step in the DIY process. It protects your artwork and enhances its visual appeal. With the right techniques and products, you can ensure that your canvas remains a stunning centerpiece in your home decor for many years to come.
- What is the best sealant for canvas prints?
The best sealant often depends on your specific needs, but spray sealants designed for artwork are generally recommended for their ease of use and even coverage.
- How long should I wait before sealing my canvas?
It's best to wait at least 24 hours after printing or painting to ensure everything is completely dry before applying a sealant.
- Can I use regular spray paint as a sealant?
No, regular spray paint is not recommended as a sealant. It's better to use products specifically formulated for sealing artwork to avoid damaging your canvas.
Frequently Asked Questions
- What type of photo works best for canvas prints?
Choosing a photo with strong composition and vibrant colors is key. Look for images that evoke emotion or tell a story. High-resolution images will ensure your print looks sharp and professional, so keep that in mind when selecting!
- What materials do I need to create my own canvas print?
You'll need a few essential materials: a canvas (either pre-stretched or rolled), printing supplies (like ink and paper), and possibly some paints for finishing touches. Don’t forget tools like a ruler, scissors, and a staple gun if you're working with rolled canvas!
- How do I prepare my image for printing?
Start by editing your image for color correction and cropping it to match your canvas dimensions. Using software like Photoshop can help you adjust the resolution, ensuring your final print is clear and vibrant. Aim for a resolution of at least 300 DPI for the best results!
- What are the advantages of using pre-stretched canvas over rolled canvas?
Pre-stretched canvases are ready to use right out of the box, making them super convenient for beginners. They provide a polished look and come in various sizes. Rolled canvas, on the other hand, allows for more customization and creativity, but requires additional steps for stretching or framing.
- What printing techniques can I use for my canvas prints?
Common options include inkjet printing and professional printing services. Inkjet printers can provide great results at home, while professional services may offer higher quality and larger formats. Each method has its pros and cons, so choose what fits your needs!
- How can I add texture to my canvas print?
Incorporating texture can really make your artwork pop! You can use acrylic paints, mixed media, or even materials like fabric or paper to create depth. Experimenting with different techniques will help you find a style that resonates with you!
- How do I seal my finished canvas print?
Sealing your canvas is crucial for protection! You can use spray sealants or brush-on varnish to shield your artwork from dust and damage. Make sure to choose a sealant that is appropriate for the materials you've used to keep your print looking fresh for years to come.


