Painting Miniatures: Tips and Techniques
Painting miniatures can be a truly rewarding hobby that combines creativity with precision. Whether you're a seasoned artist or just starting out, understanding the nuances of miniature painting can significantly enhance your experience. In this article, we'll explore essential tips and techniques that will elevate your skills from basic to breathtaking! So, grab your brushes, and let's dive into the colorful world of miniature painting!
When it comes to painting miniatures, choosing the right one is crucial for your project’s success. You might be tempted to pick the most intricate or visually appealing piece, but take a moment to consider a few key factors:
- Size: Larger miniatures provide more surface area for painting but may require more time and effort. Smaller ones, on the other hand, can be intricate but might be challenging for beginners.
- Complexity: Look at the details of the miniature. A highly detailed piece can be rewarding but may also be daunting if you're just starting out.
- Type of Paint: Certain miniatures are better suited for specific paint types. For instance, resin miniatures often work well with acrylic paints.
By evaluating these aspects, you’ll ensure a more enjoyable and successful painting experience.
To achieve the best results in your miniature painting journey, having the right tools and materials is vital. Here’s what you’ll need:
- Brushes: Invest in a variety of brushes, including detail brushes for intricate work and larger brushes for base coating.
- Paints: Choose high-quality paints that suit your style and the material of the miniature.
- Palettes: A good palette helps you mix colors effectively and keep your workspace organized.
With the right tools in hand, you’ll be well on your way to creating stunning miniatures.
Understanding the different types of paints available can significantly impact your painting experience. Here’s a quick rundown:
| Type of Paint | Properties | Best For |
|---|---|---|
| Acrylic | Fast-drying, water-soluble | General use, easy clean-up |
| Enamel | Durable, glossy finish | Long-lasting miniatures |
| Oil | Slow-drying, smooth application | Detailed work, blending |
Each type of paint offers unique properties and finishes, so choose wisely based on your project needs.
Choosing the right brushes is essential for detail work and coverage. Different brush shapes and sizes can help you achieve various effects in your painting process. For instance, a fine-tip brush is perfect for intricate details, while a flat brush can cover larger areas quickly. Don’t forget to clean your brushes regularly to maintain their shape and effectiveness!
In addition to brushes, consider incorporating other tools like airbrushes, palettes, and sculpting tools into your painting arsenal. These tools can enhance your painting experience and allow for greater creativity. For example, an airbrush can create smooth gradients and is excellent for large surfaces, while sculpting tools can help you modify miniatures before painting.
Proper preparation of your miniature is key to achieving a smooth paint application. This includes:
- Cleaning: Remove any dust or grease from the miniature to ensure paint adheres properly.
- Priming: Apply a primer to create a uniform surface for the paint to stick to.
- Assembling: Ensure your miniature is fully assembled and any parts are securely attached.
These steps may seem simple, but they are crucial for achieving optimal results in your painting endeavors.
Various painting techniques can dramatically affect the final look of your miniature. Mastering techniques such as layering, dry brushing, and washes can help you create depth and detail that will make your miniatures stand out.
Layering is a fundamental technique that builds color and depth. Start with a base coat, then apply successive layers of color, gradually lightening or darkening as needed. This method allows you to create a more realistic finish on your miniatures, much like an artist layering oil paints on canvas.
Dry brushing and washing are popular techniques for adding texture and shading. Dry brushing involves using a dry brush with minimal paint to highlight raised areas, while washing involves applying a thinned paint to settle into the crevices, enhancing the details. These methods can transform your painted miniatures from flat to fabulous!
Q: What is the best paint for beginners?
A: Acrylic paint is often recommended for beginners due to its ease of use and quick drying time.
Q: How do I clean my brushes?
A: Clean your brushes with water or the appropriate solvent immediately after use to maintain their shape and longevity.
Q: Can I paint miniatures without priming?
A: While it’s possible, priming is highly recommended as it helps the paint adhere better and provides a smoother finish.

Choosing the Right Miniature
When it comes to painting miniatures, the first step is to choose the right one for your project. This decision is more than just a matter of preference; it can significantly impact your painting experience and the final results. Think of it like picking the right canvas for a masterpiece. You wouldn't want to paint a stunning landscape on a torn piece of paper, right? Similarly, selecting a miniature that aligns with your skills and goals is crucial.
Start by considering the size of the miniature. Larger miniatures often provide more surface area, which can be beneficial for beginners who are still mastering their techniques. They allow for easier handling and more room to practice your brush strokes. On the other hand, smaller miniatures can be more challenging but offer the opportunity to showcase intricate details. It's like deciding between a large mural and a tiny postcard—both have their charm, but they require different approaches.
Next, think about the complexity of the miniature. Some miniatures come with a multitude of tiny parts and intricate designs, while others are more straightforward. If you're just starting out, it might be wise to pick a simpler model. This way, you can focus on honing your skills without feeling overwhelmed. As you gain confidence, you can gradually tackle more complex pieces. Remember, every artist starts somewhere, and it's perfectly fine to take baby steps.
Another factor to consider is the type of paint you plan to use. Different miniatures may react differently to various paints. For instance, if you're using acrylics, ensure that the miniature material is compatible to avoid any mishaps. Some materials, like resin, are particularly good for acrylic paints, while others might be better suited for enamels or oils. It's essential to do a bit of research or even consult with fellow painters to find out which materials work best with your chosen paint.
To sum it up, here are some key points to keep in mind when selecting your miniature:
- Size: Larger miniatures are easier for beginners; smaller ones offer detail.
- Complexity: Start simple and work your way up to more intricate designs.
- Compatibility: Ensure your miniature material matches your chosen paint type.
Ultimately, the right miniature can make all the difference in your painting journey. It's about finding that perfect match that excites you and challenges your skills. So, take your time, explore your options, and choose a miniature that feels right for you. Happy painting!
Essential Tools and Materials
When diving into the world of miniature painting, having the right tools and materials can make all the difference between a frustrating experience and a fulfilling one. Imagine trying to paint a masterpiece without the right brushes or paints; it’s like trying to bake a cake without flour! So, let’s take a closer look at what you’ll need to ensure your painting sessions are not only productive but also enjoyable.
First and foremost, you’ll need a selection of brushes. The right brushes are crucial for achieving the level of detail and coverage you desire. You’ll want a variety of shapes and sizes, including fine-tipped brushes for detailed work and broader brushes for larger areas. A good rule of thumb is to have at least one of each of the following:
- Round brushes for detail work
- Flat brushes for broad strokes
- Detail brushes for intricate designs
Next up is your choice of paints. The type of paint you select can greatly influence the final outcome of your miniatures. Acrylic paints are the most popular choice among miniature painters due to their quick drying time and ease of use. However, you might also consider enamel or oil paints for specific effects. Here’s a quick comparison:
| Type of Paint | Properties | Best For |
|---|---|---|
| Acrylic | Fast drying, water-soluble | General use, easy cleanup |
| Enamel | Durable, solvent-based | Long-lasting finishes |
| Oil | Slow drying, rich colors | Blending and detailed work |
In addition to brushes and paints, having a reliable palette is essential for mixing colors and keeping your workspace organized. A simple ceramic or plastic palette can work wonders for your mixing needs. You might also consider a wet palette, which keeps your paints moist for longer periods, reducing waste and allowing for more extended painting sessions.
Don’t forget about other tools that can enhance your painting experience! An airbrush can be a fantastic investment if you want to achieve smooth gradients and fine details. Additionally, sculpting tools can help you modify or create custom miniatures, adding a personal touch to your projects. Here are a few tools that can be game-changers:
- Airbrush: For smooth, even coats
- Palette knives: For mixing and applying textures
- Pin vise: For drilling holes and fine adjustments
Lastly, let’s talk about cleaning supplies. Keeping your brushes and tools clean is vital for maintaining their longevity and performance. A simple brush cleaner or soap can do wonders, but don’t forget about a good quality paper towel or cloth to wipe off excess paint. Trust me; a clean workspace leads to a clearer mind and better results!
Now that you’re armed with the essential tools and materials, you’re one step closer to transforming those miniatures into stunning pieces of art. Remember, the right gear not only makes the process smoother but also enhances your overall enjoyment. So gather your supplies, and let’s get painting!
Q: What is the best type of paint for beginners?
A: Acrylic paints are often recommended for beginners due to their ease of use, quick drying time, and easy cleanup.
Q: How do I clean my brushes properly?
A: Rinse your brushes in water immediately after use, then clean them with soap or a dedicated brush cleaner to remove all paint residue.
Q: Can I use regular paints for miniatures?
A: While you can use regular paints, they may not adhere well or provide the desired finish. It’s best to use paints specifically designed for miniatures.
Types of Paints
When diving into the world of miniature painting, understanding the different available is crucial for achieving the desired results. Each type of paint offers unique properties, finishes, and applications, which can significantly impact your painting experience and the final look of your miniatures. Let's explore the three main types of paints commonly used in miniature painting: acrylics, enamels, and oils.
Acrylic paints are perhaps the most popular choice among miniature painters. They are water-based, which means they are easy to clean up with just soap and water. Acrylics dry quickly, allowing for faster layering and adjustments, making them perfect for beginners and experienced painters alike. Additionally, they come in a wide range of colors and can be thinned with water or acrylic mediums to achieve various effects. However, one must be cautious as they can sometimes dry too fast, leading to a less smooth finish if not applied correctly.
Enamel paints, on the other hand, are oil-based and offer a durable finish that is resistant to wear and tear. They take longer to dry than acrylics, which can be advantageous for blending and creating smooth transitions in color. However, the prolonged drying time can be a downside for those who prefer a quicker painting process. Enamels also require solvents for cleanup, which can be a bit more cumbersome than acrylics. Nevertheless, their glossy finish and vibrant colors make them a favorite for certain projects.
Lastly, oil paints provide a unique painting experience. They are known for their rich pigmentation and slow drying time, allowing artists to work on details for extended periods without the paint drying out. This characteristic is particularly beneficial for techniques like blending and glazing, where smooth transitions are essential. However, oil paints require a different approach, including the use of specific mediums and solvents for thinning and cleaning. They also take significantly longer to cure, which might not be ideal for those looking for a quicker turnaround.
To summarize, here’s a quick comparison of the three types of paints:
| Type of Paint | Base | Drying Time | Cleanup | Finish |
|---|---|---|---|---|
| Acrylic | Water | Fast | Soap and Water | Matte to Glossy |
| Enamel | Oil | Medium | Solvents | Glossy |
| Oil | Oil | Slow | Solvents | Rich and Glossy |
Ultimately, the choice of paint depends on your personal preferences, the specific project at hand, and the effects you wish to achieve. Whether you lean towards the quick-drying convenience of acrylics, the durability of enamels, or the rich textures of oils, understanding these types will help you make informed decisions as you embark on your miniature painting journey.

Brush Selection
When it comes to painting miniatures, is one of the most critical aspects that can make or break your project. Imagine trying to paint a delicate flower with a broad brush; it just won't work, right? The same principle applies to miniature painting. You need the right tools for the job, and that starts with your brushes. There are several types of brushes, each designed for specific tasks, and understanding these can greatly enhance your painting experience.
First off, let’s talk about the different shapes and sizes of brushes. A round brush is excellent for detail work and fine lines, while a flat brush is perfect for covering larger areas and creating sharp edges. You might also consider a filbert brush, which combines the best of both worlds, allowing you to achieve a soft edge while still having some control over your strokes. Additionally, a liner brush can be invaluable for those intricate details and fine lines that really bring your miniature to life.
Now, size matters! Brushes come in various sizes, often ranging from 00 (the tiniest) to 10 (the largest). For miniature painting, having a selection of sizes will allow you to tackle different aspects of your project effectively. For instance, smaller brushes (sizes 00 to 2) are ideal for detailed work like eyes or small accessories, while larger brushes can help you cover larger surfaces quickly. But remember, it’s not just about size; the quality of the brush is equally important. Invest in good quality brushes that hold their shape and have a good point. Synthetic brushes are often more durable and easier to clean, while natural hair brushes can offer a smoother application.
To help you visualize this better, here’s a simple table summarizing the types of brushes and their uses:
| Brush Type | Best For |
|---|---|
| Round Brush | Detail work and fine lines |
| Flat Brush | Covering large areas and sharp edges |
| Filbert Brush | Soft edges and controlled strokes |
| Liner Brush | Intricate details and fine lines |
Another aspect to consider is the brush maintenance. After all, a well-cared-for brush will last longer and perform better. Always clean your brushes thoroughly after each painting session. Use warm soapy water for acrylics and the appropriate thinner for oils or enamels. Store them upright or flat, bristles facing up, to maintain their shape. Neglecting your brushes can lead to frayed bristles and a less-than-perfect finish on your miniatures.
In conclusion, taking the time to select the right brushes for your miniature painting project is crucial. With the right tools in hand, you can unleash your creativity and achieve stunning results. So, the next time you’re gearing up for a painting session, remember that your brushes are your best friends in this artistic journey!
Other Tools
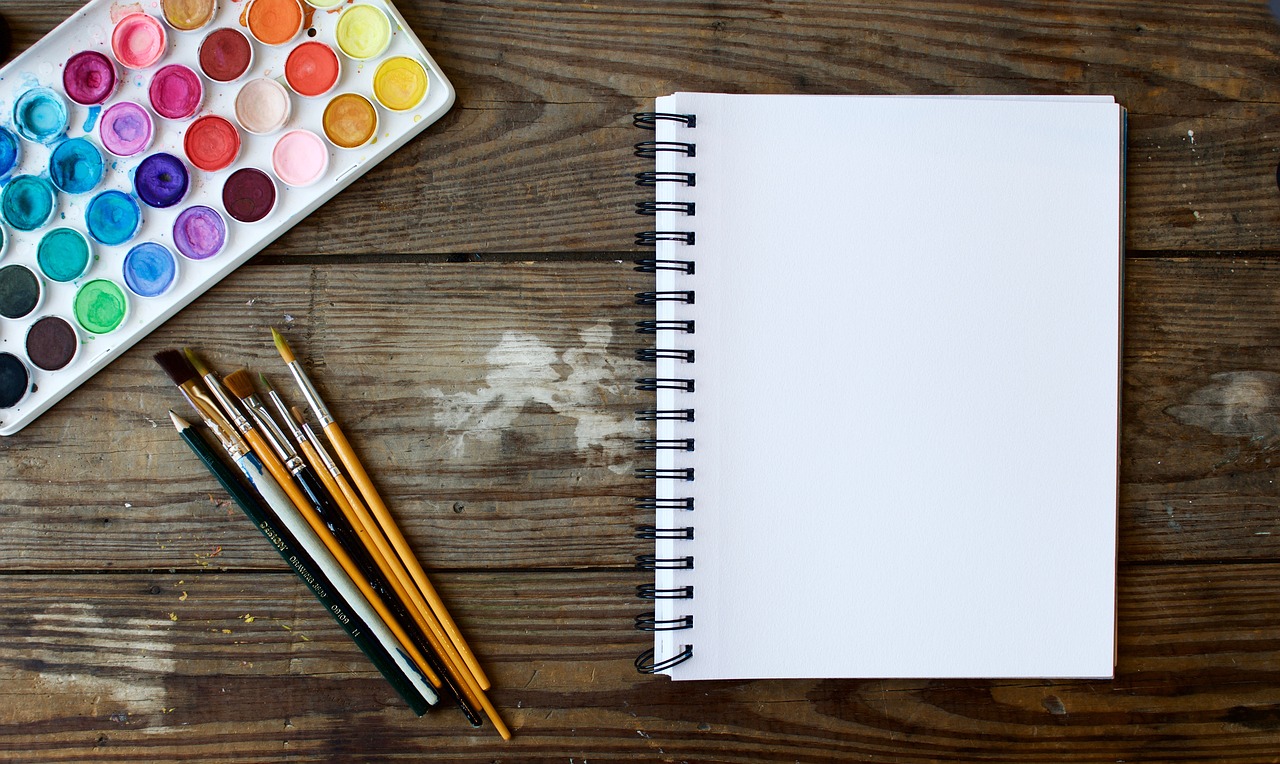
When it comes to painting miniatures, having the right tools can make all the difference. While brushes and paints are essential, there are several other tools that can enhance your painting experience and help you achieve stunning results. For instance, an airbrush is a fantastic tool that allows for smooth gradients and fine details, making it perfect for those who want to elevate their painting game. With an airbrush, you can achieve effects that are difficult to replicate with traditional brushes, such as smooth transitions between colors.
Another useful tool is a palette for mixing your paints. A good palette allows you to blend colors efficiently, ensuring you get the exact shade you desire. There are various types of palettes available, including disposable paper palettes, ceramic palettes, and even wet palettes that keep your paints moist for longer periods. Each type has its benefits, so choose one that suits your style.
Additionally, consider investing in sculpting tools. While you might think these are only for sculpting, they can also be incredibly useful for miniature painting. Tools like spatulas and knives can help you manipulate putty or remove excess paint, ensuring a cleaner finish. Moreover, having a set of tweezers can be beneficial for handling small parts without smudging your paint job.
Lastly, don't overlook the importance of lighting. Proper lighting can significantly affect how you see colors and details while painting. Consider using a bright, adjustable lamp that mimics natural daylight to help you see your work clearly. This will help you catch imperfections and ensure that your colors look vibrant and true to life.
To summarize, here are some other tools that can enhance your miniature painting experience:
- Airbrush for smooth gradients
- Palettes for mixing paints
- Sculpting tools for manipulating putty
- Tweezers for handling small parts
- Good lighting for accurate color perception
Preparing Your Miniature
When it comes to painting miniatures, preparation is key. Skipping this crucial step can lead to a frustrating experience, and nobody wants that! Think of it like preparing a canvas before painting a masterpiece; the smoother the surface, the better the result. So, let’s dive into what you need to do to get your miniature ready for that beautiful paint job.
First off, you’ll want to clean your miniature. Many miniatures come with a layer of mold release agent, which is like a slippery coating that prevents paint from adhering properly. To clean it, simply wash your miniature with warm soapy water and a soft brush. Rinse it thoroughly and let it dry completely. This step is essential because it ensures that the paint will stick well and provide a nice, even finish.
Next up is priming. This is where the magic really begins! Priming your miniature creates a surface that paint can grip onto, enhancing the vibrancy of the colors you’ll apply later. You can use spray primer or brush-on primer, depending on your preference. Make sure to apply it in thin, even coats. A common mistake is to over-prime, which can obscure fine details. Think of priming as laying down a foundation for a house; it needs to be solid and well-prepared to support everything that comes after.
After priming, you should assemble your miniature if it comes in multiple parts. This can be a bit tricky, especially for more complex models. Use a strong adhesive suitable for plastic or resin, depending on your miniature's material. Be patient during this step; rushing may lead to misaligned pieces or glue smudges that can ruin your paint job. If your miniature has multiple parts that require different colors, consider painting them separately before assembly. This approach can save you a lot of hassle later on.
Lastly, it’s a good idea to set up your workspace before you start painting. Make sure you have good lighting, a comfortable chair, and all your tools within reach. This will make the entire process smoother and more enjoyable. Consider using a turntable to easily rotate your miniature as you work on different angles, allowing for a more comfortable painting experience.
In summary, preparing your miniature is an essential part of the painting process that can greatly affect your final outcome. By cleaning, priming, assembling, and setting up your workspace properly, you’ll be on your way to creating stunning miniatures that showcase your skills and creativity!
- What type of soap should I use to clean my miniatures? Any mild dish soap works well. Just avoid anything too harsh that could damage the material.
- Can I skip priming if I’m using high-quality paint? While high-quality paints adhere better than cheaper options, priming is still recommended for the best results.
- What’s the best way to hold my miniature while painting? Using a hobby holder or a simple piece of putty can help you keep your miniature steady while you work.
Painting Techniques
When it comes to painting miniatures, the techniques you employ can make a world of difference in the final outcome. It's not just about slapping some paint on; it's about creating depth, texture, and realism that truly brings your miniatures to life. Let's dive into some of the most effective painting techniques that can elevate your skills from basic to breathtaking.
One of the foundational techniques is layering. This method involves applying multiple thin layers of paint to build up color and create a sense of depth. Imagine layering a cake; each layer adds to the overall flavor and texture. In miniature painting, this means starting with a base coat and gradually adding lighter or darker shades to create highlights and shadows. The key here is patience—allow each layer to dry before proceeding to the next to achieve a smooth finish.
Another popular technique is dry brushing. This technique is perfect for adding texture and highlighting details. To dry brush, you’ll want to use a brush with stiff bristles and a small amount of paint. After loading the brush, wipe off most of the paint on a paper towel, leaving just a hint on the bristles. Then, lightly drag the brush across the raised surfaces of your miniature. This method can create stunning effects, especially on textured surfaces like armor, fur, or stone.
Washing is also a game-changer in the world of miniature painting. This technique involves applying a thinned-down paint (often a darker color) over the entire surface of the miniature. The wash flows into the crevices and details, enhancing shadows and adding depth. It’s like giving your miniature a quick bath in color! Just be careful not to overdo it; a little goes a long way, and you can always apply more if needed.
To give you a clearer understanding of these techniques, here’s a quick comparison:
| Technique | Description | Best For |
|---|---|---|
| Layering | Building up color with thin layers | Creating depth and realism |
| Dry Brushing | Highlighting raised surfaces with minimal paint | Adding texture and detail |
| Washing | Applying a thinned paint to enhance shadows | Creating depth and emphasizing details |
Each of these techniques can be used individually or in combination to achieve stunning results. For example, you might start with a wash to create shadow, then layer on colors for highlights, and finally dry brush to accentuate the details. The beauty of miniature painting lies in the flexibility of these techniques, allowing you to experiment and find what works best for your style.
Remember, practice makes perfect! Don't be afraid to try out different techniques and find your unique approach. With time and experimentation, you’ll discover the methods that resonate with you and your artistic vision. So grab your brushes, unleash your creativity, and let your miniatures become a canvas for your imagination!
- What is the best paint for miniatures? Acrylic paints are generally recommended for their quick drying time and ease of use.
- How do I prevent paint from chipping? Always apply a clear sealant after painting to protect your work.
- Can I use regular brushes for miniature painting? While you can, using brushes specifically designed for detail work will yield better results.
- How long does it take to paint a miniature? It varies widely depending on the complexity of the miniature and your skill level, but expect anywhere from a few hours to several days.
Layering Techniques
When it comes to painting miniatures, are your best friends. Imagine building a beautiful cake, where each layer adds flavor and texture—this is precisely how layering works in miniature painting. It’s not just about slapping on a single coat of paint; it’s about creating depth, richness, and a stunning finish that makes your miniature pop. So, how do you master this technique? Let’s dive in!
The first step in layering is to start with a solid base coat. This is typically a uniform color that will serve as the foundation for your miniature. Choose a color that complements your design, and apply it evenly across the entire surface. Remember, a well-prepared surface is crucial for successful layering. If your base coat is uneven or poorly applied, it can ruin the layers that follow.
Once your base coat is dry, it's time to select your first layer color. This color should be slightly lighter than your base coat to create the illusion of highlights. Using a fine brush, apply this layer selectively to the raised areas of your miniature. This technique is akin to highlighting the peaks of a mountain in a landscape painting—you're drawing attention to the features that catch the light.
As you build up layers, consider the transparency of your paints. Thinning your paint with water or medium can help achieve a more translucent effect, allowing the base coat to show through. This is particularly effective for creating realistic skin tones or fabric textures. Remember to let each layer dry completely before applying the next; this prevents muddy colors and maintains clarity in your work.
To illustrate the layering process, here’s a simple table that outlines the steps:
| Step | Description |
|---|---|
| 1 | Apply a solid base coat. |
| 2 | Choose a lighter color for the first layer. |
| 3 | Thin your paint for transparency. |
| 4 | Apply the lighter color to raised areas. |
| 5 | Let each layer dry before adding the next. |
As you progress, don't shy away from experimenting with different colors and techniques. You might find that layering with complementary colors can yield stunning results. For example, layering a warm yellow over a cool blue can create a vibrant green that feels alive. This is where the magic of layering truly shines—by mixing colors and techniques, you can achieve a level of detail that makes your miniatures unique.
Ultimately, layering is about patience and practice. It can be tempting to rush through the process, but taking your time will reward you with a miniature that looks professionally painted. So grab your brushes, lay down those layers, and watch as your miniature transforms into a masterpiece!
- What is the best type of paint for layering? Acrylic paints are often recommended for layering due to their fast drying time and ease of use.
- How many layers should I apply? There's no hard and fast rule, but typically 3-5 layers can create a rich depth without overwhelming the details.
- Can I use a spray primer before layering? Absolutely! A good spray primer can help your base coat adhere better and provide a smoother surface for layering.
Dry Brushing and Washing
When it comes to painting miniatures, dry brushing and washing are two of the most effective techniques that can truly elevate your artwork. These methods not only enhance the details of your miniatures but also help you achieve a more realistic and visually appealing finish. So, what exactly are these techniques, and how can you master them? Let’s dive in!
Dry brushing involves using a brush that is barely wet with paint, which allows you to apply color to the raised surfaces of your miniature while leaving the recesses untouched. This technique is fantastic for creating highlights on textured surfaces, such as armor or fur. To get started, you’ll want to follow these simple steps:
- Choose a stiff-bristled brush and dip it lightly into your chosen paint.
- Remove excess paint by wiping the brush on a paper towel until it feels almost dry.
- Gently drag the brush across the raised areas of your miniature, allowing the paint to catch on the high points.
By varying the pressure and angle of your brush, you can create different effects, making dry brushing a versatile technique in your painting arsenal. It’s like giving your miniature a sun-kissed glow, adding depth and interest to the overall look.
On the other hand, washing is a technique used to deepen shadows and enhance details by applying a thin, transparent layer of paint (often a darker shade) over the entire surface of the miniature. This method allows paint to settle into the recesses, creating a dramatic contrast that can bring your work to life. Here’s how to effectively apply a wash:
- Prepare your wash by diluting paint with a medium or water to achieve a thin consistency.
- Using a large, soft brush, apply the wash generously across the miniature.
- Allow the wash to flow into the crevices and recesses, enhancing the details.
Washing is particularly effective for creating depth in areas like folds in clothing, the crevices of armor, or the texture of terrain. Think of it as giving your miniature a shadowy cloak that accentuates its features, making it pop off the table.
Combining these two techniques can yield stunning results. For instance, you might first wash your miniature to establish depth and then follow up with dry brushing to highlight the raised areas. This two-step process creates a rich, dynamic look that draws the eye and showcases your skill.
| Technique | Purpose | Best For |
|---|---|---|
| Dry Brushing | Highlights raised areas | Textured surfaces like armor, fur, and details |
| Washing | Deepens shadows and highlights details | Crevices, folds, and overall shading |
In conclusion, mastering dry brushing and washing will not only enhance your miniature painting skills but also allow you to express your creativity in new and exciting ways. So grab your brushes, experiment with these techniques, and watch your miniatures come to life!
- What type of paint is best for dry brushing? Acrylic paints are commonly used for dry brushing due to their quick drying time and ease of use.
- Can I use washes on any type of miniature? Yes, washes can be applied to most types of miniatures, but it's essential to ensure the surface is clean and primed.
- How do I clean my brushes after using washes? Clean your brushes immediately with warm soapy water to prevent the paint from drying and damaging the bristles.
Frequently Asked Questions
- What type of paint is best for miniatures?
When it comes to painting miniatures, acrylic paints are often the go-to choice. They dry quickly, are easy to clean up with water, and come in a wide variety of colors. However, enamel and oil paints can also be used, depending on your desired effects and the level of detail you want to achieve. Each type has its own unique properties, so experimenting can help you find what works best for you!
- How do I prepare my miniature before painting?
Preparation is key! Start by cleaning your miniature to remove any dust or oils. You can use warm soapy water for this. After cleaning, it's essential to prime your miniature. Priming helps the paint adhere better and provides a uniform surface. Once primed, you can assemble your miniature if it comes in multiple pieces. This ensures a smooth painting process!
- What brushes should I use for painting miniatures?
Choosing the right brushes is crucial for achieving detail in your work. Detail brushes are perfect for intricate areas, while flat brushes are great for larger surfaces. A good set will usually include a variety of sizes and shapes, allowing you to switch up your technique as needed. Remember, investing in quality brushes can make a significant difference in your painting experience!
- What are layering and dry brushing techniques?
Layering involves applying multiple coats of paint to build up color and depth, creating a more realistic finish. Start with a base coat and gradually add layers of lighter colors. On the other hand, dry brushing is a technique where you use a brush with very little paint to highlight raised areas, adding texture and detail. Both techniques can dramatically enhance the final look of your miniatures!
- Can I use an airbrush for miniature painting?
Absolutely! An airbrush can be a fantastic tool for miniature painting, especially for achieving smooth gradients and base coats. It allows for even coverage and can speed up the painting process. However, it does require some practice to master. If you're new to airbrushing, consider starting with basic techniques before diving into more complex projects!


