
How to Clean Up After A Painting Session
Painting can be a thrilling and fulfilling experience, but the aftermath can sometimes feel overwhelming. After pouring your heart and soul into your latest masterpiece, the last thing you want is to face a chaotic mess. Cleaning up after a painting session is not just about tidying your space; it’s also about ensuring your tools remain in top-notch condition for your next creative endeavor. In this article, we’ll explore essential steps and tips for effectively cleaning up, so you can enjoy your painting journey without the stress of a messy aftermath.
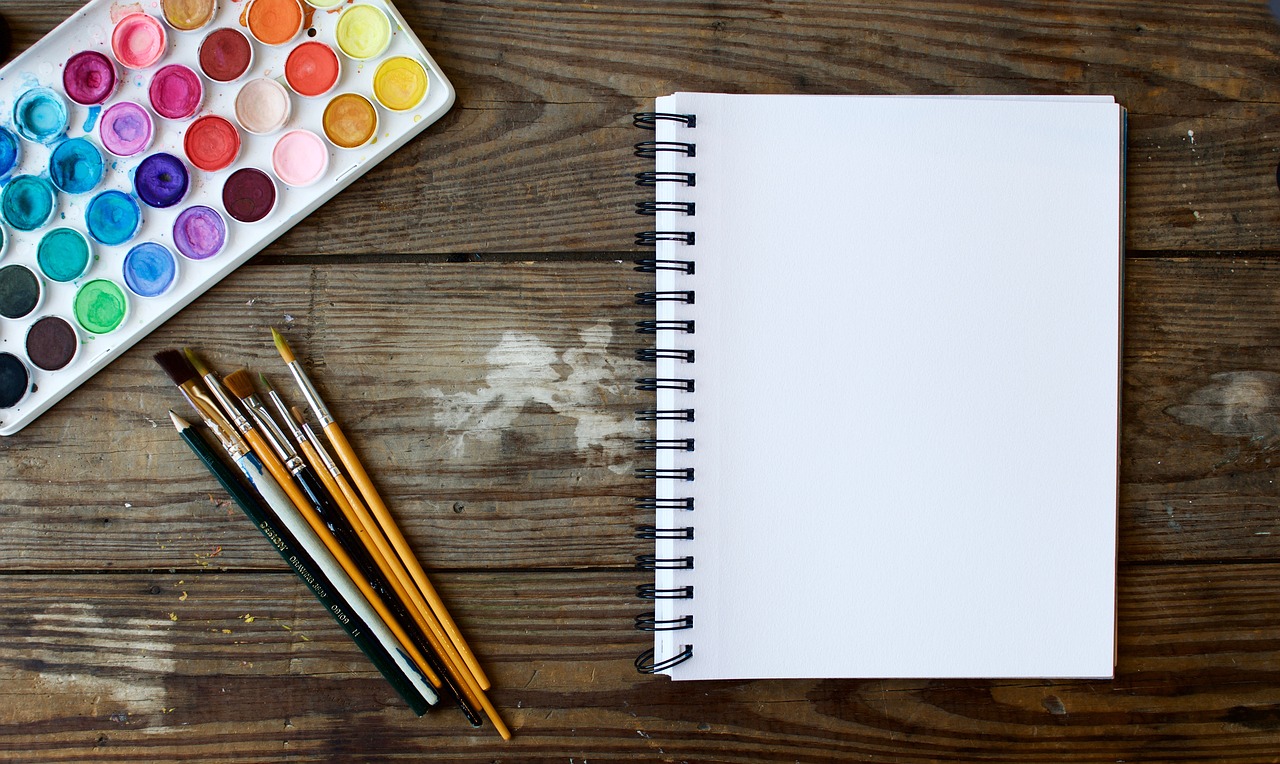
Before diving into the cleaning process, it’s crucial to gather all necessary supplies. Think of this as your pre-game warm-up. Having everything at hand not only streamlines the cleaning process but also prevents you from running around looking for items when you should be focusing on the task at hand. Here’s a quick checklist of what you might need:
- Cleaning solutions (soap, solvents)
- Brushes and rollers
- Rags or paper towels
- Containers for waste
- Drop cloths for protection
By organizing your supplies beforehand, you’ll find that the cleanup process becomes much more efficient, allowing you to wrap up your session with ease.
Now that you’re all set with your supplies, let’s talk about the heart of your painting tools: brushes and rollers. Properly cleaning these items is crucial for their longevity and performance. A well-maintained brush can make all the difference in your next painting project. Depending on the type of paint you used, the cleaning process will vary.
If you’ve used water-based paints, congratulations! Cleaning your brushes and rollers is relatively simple. Just rinse them thoroughly with warm water and a bit of soap. This will help dissolve any remaining paint residue, ensuring they’re ready for next time. It’s almost like giving your tools a refreshing shower after a long day of work.
On the flip side, if you’ve worked with oil-based paints, you’ll need a solvent like mineral spirits. Start by soaking the brushes and rollers in the solvent to loosen the paint. After that, it’s essential to follow up with soap and water to completely eliminate any paint residue. Think of this as a two-step dance—first, loosen up, and then clean up!
Once your brushes and rollers are clean, it’s time to tackle any leftover paint and cleaning materials. Disposing of these items properly is crucial for environmental safety. Always follow local regulations regarding hazardous waste disposal to ensure responsible practices. Remember, just like you wouldn’t throw your old batteries in the regular trash, paint waste deserves the same care.
With your tools clean, it’s time to focus on your workspace. A tidy area not only looks better but also enhances your creativity for future projects. Start by removing any paint spills, drips, or splatters. This is essential for maintaining a safe and organized space. You wouldn’t want to slip on a paint puddle next time you’re in the zone, right?
To effectively remove paint spills, choose a suitable cleaning solution based on the type of paint. Gently blot the area to lift the paint without damaging the underlying surface. Think of yourself as a detective, carefully uncovering the clean surface beneath the chaos.
Once everything is clean, take a moment to organize your painting supplies. Store brushes, paints, and tools in designated areas. This not only saves time during your next session but also helps you feel more prepared and inspired. It’s like creating your own little art sanctuary!
To save yourself time and effort in the future, consider taking preventive measures during your next painting session. Using drop cloths, painter's tape, and other protective gear can help minimize messes. It’s much easier to prevent a mess than to clean one up, right? Think of it as putting on a raincoat before stepping out into a storm.
After you’ve cleaned everything, take a moment to inspect your tools and workspace for any remaining paint residue. Regular maintenance of your supplies will extend their lifespan and enhance your painting experience. Just like a car needs regular oil changes to run smoothly, your painting tools need care to perform their best.
Q: How often should I clean my brushes and rollers?
A: It’s best to clean them immediately after each session to prevent paint from hardening and ruining your tools.
Q: Can I reuse cleaning solvents?
A: Yes, you can reuse solvents like mineral spirits. Just let the paint settle, and pour the clear liquid into another container for future use.
Q: What should I do with leftover paint?
A: Check local regulations for disposal options. Many places offer hazardous waste collection days for proper disposal.

Gathering Your Supplies
Before diving into the cleaning process after a painting session, it's crucial to gather all necessary supplies. Think of this step as laying the foundation for a sturdy house; without the right tools, your cleaning efforts might crumble. Having everything organized and within reach will not only save you time but also make the task feel less daunting. So, what exactly do you need?
Start by collecting cleaning solutions. Depending on the type of paint you've used, this could range from simple soap and water for water-based paints to more specialized solvents like mineral spirits for oil-based paints. Next, you'll want to have a selection of brushes and rags on hand. These will be your best friends in the cleanup process, helping you to scrub away any stubborn paint remnants.
Don’t forget about containers for waste. You’ll need a designated spot for disposing of used rags, paint cans, and any other materials that are no longer usable. This not only keeps your workspace tidy but also adheres to local regulations regarding hazardous waste disposal. In some cases, you might even need to check with your local waste management services for specific guidelines on how to handle leftover paint and cleaning products.
Here’s a quick overview of what you should gather:
- Water-based paint: Soap, warm water
- Oil-based paint: Mineral spirits, soap, warm water
- Rags: For wiping brushes and spills
- Containers: For waste disposal
- Protective gear: Gloves, mask (if needed)
Once you have everything ready, you’ll feel much more prepared to tackle the cleanup. It’s like having a well-stocked toolbox before starting a DIY project; you wouldn’t want to be halfway through and realize you’re missing a critical tool. So take a moment to gather your supplies, and you’ll find that the cleaning process can be both efficient and even a little enjoyable!

Cleaning Brushes and Rollers
Cleaning your brushes and rollers after a painting session is not just a chore; it’s an essential part of the painting process that can save you both time and money in the long run. Imagine this: you’ve just spent hours transforming a room with vibrant colors, and the last thing you want is to ruin your tools with dried paint. By taking the time to clean your brushes and rollers properly, you ensure they remain in excellent condition for future projects. Plus, you’ll avoid the frustration of having to buy new tools because the old ones are caked with paint.
First, let’s talk about the type of paint you’ve used, as this will determine your cleaning method. Water-based paints are a breeze to clean, while oil-based paints require a bit more effort. For water-based paints, all you need is some warm water and a drop of soap. Rinse the brushes and rollers thoroughly, making sure to work the bristles or fabric to release any trapped paint. It’s almost like giving your tools a refreshing bath! Once they’re clean, reshape the bristles and let them dry flat or hanging to maintain their shape.
On the other hand, if you’ve been working with oil-based paints, you’ll need to grab some mineral spirits or a similar solvent. Start by soaking the brushes and rollers in the solvent for a few minutes. This step is crucial because it helps dissolve the paint that water simply can’t tackle. After soaking, use a comb or your fingers to gently work out any remaining paint. Follow this up with a wash using soap and warm water to remove any lingering solvent and paint residue. Remember, cleaning oil-based tools might take a little more time, but it’s well worth the effort to keep them in top shape.
Here’s a quick comparison table to highlight the differences in cleaning methods:
| Type of Paint | Cleaning Method | Recommended Products |
|---|---|---|
| Water-Based | Rinse with warm water and soap | Liquid soap, warm water |
| Oil-Based | Soak in mineral spirits, then wash with soap | Mineral spirits, liquid soap, warm water |
In conclusion, taking the time to clean your brushes and rollers properly not only enhances their lifespan but also ensures that your next painting project goes smoothly. So next time you finish painting, remember: a little effort in cleaning now can lead to a lot of joy in your future projects!

Using Water-Based Paints
This article provides a comprehensive guide on the essential steps and tips for effectively cleaning up after a painting session, ensuring your workspace remains tidy and your tools are well-maintained.
Before you start cleaning, it's important to gather all necessary supplies. This includes cleaning solutions, brushes, rags, and containers for waste. Having everything at hand will streamline the cleaning process.
Properly cleaning your brushes and rollers is crucial for their longevity. Use the appropriate solvent or soap to remove paint residue, ensuring they remain in good condition for future use.
If you’ve used water-based paints, cleaning brushes and rollers is relatively simple and straightforward. The best part? You won’t need any fancy solvents or complicated processes. Just grab some warm water and soap, and you’re good to go! Start by rinsing your brushes and rollers under warm running water. It’s like giving them a refreshing shower after a long day of hard work. Be sure to work the paint out of the bristles or fibers; you can use your fingers to gently pull the paint out, ensuring you’re left with clean tools.
Once you’ve rinsed off the bulk of the paint, it’s time to lather up! Apply a small amount of mild soap or dish detergent to the bristles. Think of this step as giving your brushes a nice bubble bath. Work the soap into the bristles using your fingers, and rinse thoroughly until the water runs clear. This ensures that no paint residue remains, which is vital for the brush's future performance. After rinsing, gently reshape the bristles to their original form and lay them flat to dry. Avoid standing them upright, as water can seep into the ferrule and loosen the bristles over time.
For rollers, the process is similar but a tad different. Start by removing any excess paint with a paint scraper or a putty knife. Then, rinse the roller cover under warm water while rolling it back and forth in the sink. Add soap to the cover for a deeper clean, and keep rinsing until the water runs clear. Make sure to squeeze out excess water gently; you want to avoid damaging the roller nap. Once clean, let your roller covers dry completely before storing them away.
In summary, cleaning up after using water-based paints can be a breeze if you follow these simple steps. Not only does it help maintain your tools, but it also ensures that your next painting session will be just as enjoyable!
Disposing of leftover paint and cleaning materials properly is essential for environmental safety. Follow local regulations regarding hazardous waste to ensure responsible disposal practices.
After the tools are cleaned, it's time to tidy up your workspace. Remove any paint spills, drips, or splatters to maintain a safe and organized area for future projects.
To effectively remove paint spills, use a suitable cleaning solution depending on the type of paint. Blot the area gently to lift the paint without damaging the underlying surface.
Once the workspace is clean, take a moment to organize your painting supplies. Store brushes, paints, and tools in designated areas to ensure easy access for your next project.
Taking steps to prevent messes during your next painting session can save you time and effort. Use drop cloths, painter's tape, and other protective measures to minimize cleanup.
After cleaning, inspect your tools and workspace for any remaining paint residue. Regular maintenance of your supplies will extend their lifespan and enhance your painting experience in the future.
- How often should I clean my painting tools? It’s best to clean your tools after every use to prolong their life and maintain performance.
- Can I reuse paint that has dried in the container? Generally, dried paint should be discarded. However, if it’s still somewhat pliable, you might be able to mix it with a little water or thinner.
- What’s the best way to store leftover paint? Store it in a cool, dry place with the lid tightly sealed to prevent it from drying out.
Using Oil-Based Paints
When it comes to using oil-based paints, the cleanup process can feel a bit daunting, but with the right approach, it can be manageable and efficient. Oil-based paints are known for their durability and rich finish, but they also come with a catch: they require specific solvents for cleanup. The first step in your cleanup journey is to gather the necessary supplies. You'll need a container for soaking your brushes and rollers, a pair of gloves to protect your hands, and a good quality solvent, such as mineral spirits or paint thinner. These solvents are essential as they effectively dissolve the paint, making it easier to clean your tools.
To begin, immerse your brushes and rollers in the solvent. Make sure to give them a good soak for a few minutes, allowing the paint to loosen up. You can gently swirl the brushes in the solvent to help break down any stubborn paint residue. After soaking, it's crucial to follow up with soap and water. This step not only removes any lingering paint but also helps to neutralize the solvent, making it safer for your tools and the environment. Use a mild dish soap for this purpose, as it’s effective yet gentle on your brushes and rollers.
Once you've thoroughly cleaned your tools, rinse them under warm water to ensure all soap and paint particles are washed away. It’s important to reshape the bristles of your brushes while they’re still wet to maintain their form for future use. After rinsing, lay your brushes flat on a clean towel to dry. Hanging them upside down can also be an option, but be cautious as this can sometimes lead to water pooling in the ferrule, which can damage the brush over time.
Remember, proper cleanup after using oil-based paints not only extends the life of your tools but also enhances your painting experience. A well-maintained brush or roller can make all the difference in achieving that perfect finish on your next project. So, don't rush through this process; take your time to ensure everything is spotless. And if you find yourself frequently using oil-based paints, consider creating a dedicated cleanup station with all your supplies organized and easily accessible. This way, you can streamline the process and focus more on your creativity rather than the mess!
- What is the best solvent for cleaning oil-based paint?
The best solvent is usually mineral spirits or paint thinner, as they effectively dissolve oil-based paints. - Can I clean oil-based paint brushes with water?
No, water will not effectively clean oil-based paints. You need a solvent to remove the paint. - How can I dispose of leftover oil-based paint?
Check local regulations for hazardous waste disposal, as oil-based paints are considered hazardous. - Is it necessary to use gloves when cleaning with solvents?
Yes, wearing gloves is highly recommended to protect your skin from harsh chemicals.

Disposing of Paint Waste
When it comes to cleaning up after a painting session, one of the most critical steps is the proper disposal of paint waste. It's not just about keeping your workspace tidy; it's also about being a responsible member of your community and protecting our environment. Many people underestimate the importance of following local regulations regarding hazardous waste disposal, but this is essential for ensuring that harmful substances do not end up in landfills or water systems.
First and foremost, you need to identify what type of paint you've been using. Paints can generally be categorized into two main types: water-based and oil-based. Each type has its own disposal guidelines:
- Water-based paints: These are less hazardous and can often be disposed of with regular household waste, provided they are completely dry. To dry out leftover paint, you can mix it with an absorbent material like cat litter or sawdust before throwing it away.
- Oil-based paints: These require more careful handling. They are considered hazardous waste and should never be thrown away with regular trash. Instead, contact your local waste management facility to find out where you can safely dispose of oil-based paints and solvents.
Additionally, it's essential to consider the cleaning materials you used. Rags soaked in paint or solvents can also pose a fire hazard and should be disposed of properly. Always place them in a sealed container until you can take them to a hazardous waste facility. This way, you minimize the risk of spontaneous combustion and keep your environment safe.
Many communities offer special collection days for hazardous waste, so it’s worth checking if such services are available in your area. If you’re unsure about the local regulations, a quick call to your local waste management office can provide you with all the information you need. Remember, taking the time to dispose of paint waste correctly not only protects our planet but also sets a positive example for others in your community.
In summary, responsible disposal of paint waste involves:
- Identifying the type of paint used.
- Following local guidelines for disposal.
- Using appropriate containers for hazardous materials.
- Participating in community hazardous waste collection programs.
By adhering to these practices, you ensure that your painting sessions contribute positively to your surroundings rather than harm them. So, the next time you finish a project, remember that how you dispose of your paint waste is just as important as the artistry you create!
Q: Can I pour leftover paint down the drain?
A: No, you should never pour paint down the drain, as it can contaminate water supplies and harm aquatic life.
Q: How can I tell if my paint is water-based or oil-based?
A: Check the label on the paint can. Water-based paints are usually labeled as "latex" or "acrylic," while oil-based paints will mention "alkyd" or "oil-based."
Q: What should I do if I have a large amount of leftover paint?
A: Consider donating it to local schools, community centers, or charities that may need paint for their projects. Always check with them first to ensure they can accept it.
Q: Are there any eco-friendly paint disposal options?
A: Yes, many communities have eco-friendly disposal programs. Look for local recycling centers or hazardous waste collection events that accept paint.

Cleaning Your Workspace
Once you've cleaned your brushes and rollers, it's time to shift your focus to your workspace. A tidy environment is not just visually appealing; it promotes safety and efficiency for your next painting project. Think of your workspace as a canvas itself, where every stroke of cleanliness contributes to a masterpiece of organization. Start by surveying the area for any paint spills, drips, or splatters. These little messes can easily become a headache later if not dealt with promptly.
To tackle paint spills effectively, you need to consider the type of paint you've used. For water-based paints, a simple mixture of warm water and soap can work wonders. Gently blot the affected area with a clean rag or sponge, lifting the paint without damaging the surface beneath. If you’re dealing with oil-based paints, you’ll want to grab a solvent like mineral spirits. Apply the solvent to a cloth and carefully dab at the spill until it’s lifted away.
Once the spills are taken care of, it’s time to think about the rest of your workspace. A clean area not only enhances your creativity but also reduces the likelihood of accidents. Make sure to wipe down any surfaces that may have collected dust or paint particles. This includes tables, floors, and even walls if necessary. Remember, a clean workspace is like a blank canvas waiting for the next burst of creativity!
After cleaning, take a moment to organize your painting supplies. This is where the magic happens! Store your brushes, paints, and tools in designated areas. You can use bins, drawers, or even pegboards to keep everything neatly arranged. Not only does this make it easier to find what you need for your next project, but it also prevents clutter from building up over time. Think of it as setting the stage for your next artistic endeavor—everything in its place and ready to inspire!
In addition to cleanliness, consider implementing a routine for maintaining your workspace. Regularly check for any supplies that need replenishing or tools that might need a little extra care. By keeping your workspace organized and clean, you’ll not only enhance your painting experience but also cultivate a space that fosters creativity and inspiration.
- How often should I clean my workspace after painting? It's best to clean your workspace immediately after each painting session to prevent paint from drying and becoming harder to remove.
- What should I do if paint has dried on my workspace? For dried paint, you may need to use a scraper or a specialized paint remover, depending on the surface.
- Can I use the same cleaning supplies for all types of paint? No, different types of paint require different cleaning solutions. Always check the paint label for recommended cleaning methods.

Removing Paint Spills
We've all been there—you're in the zone, brush in hand, and suddenly, a paint spill happens. It's like a mini heart attack, right? But fear not! Removing paint spills doesn't have to be a daunting task. The first step is to act quickly; the sooner you tackle the spill, the easier it will be to clean up. Depending on the type of paint you’re dealing with, the cleanup method may vary. For instance, if you've spilled water-based paint, a little warm water and soap can work wonders. However, if you’re facing the more stubborn oil-based paint, you’ll need a solvent to get the job done.
Here’s a simple guide to help you navigate the cleanup:
- Identify the Paint Type: Knowing whether the paint is water-based or oil-based will dictate your cleaning approach.
- Blot, Don’t Rub: When you notice a spill, grab a clean cloth or paper towel and gently blot the area. Rubbing can spread the paint further and make the situation worse.
- Use the Right Cleaning Solution: For water-based spills, a solution of warm water and dish soap is usually sufficient. For oil-based spills, a solvent like mineral spirits or paint thinner is required.
- Test the Solution: Before applying any cleaning solution, test it on a small, inconspicuous area to ensure it won’t damage the surface.
- Apply and Blot: Apply your chosen cleaning solution to the spill, allowing it to sit for a minute. Then, gently blot the area until the paint lifts.
- Rinse and Dry: After removing the paint, rinse the area with clean water, then dry with a clean towel.
Remember, patience is key. If the paint doesn’t come up right away, don’t be discouraged. Sometimes, multiple applications are necessary. And if you’re dealing with a particularly stubborn stain, you might want to consider using a scraper or a more aggressive cleaning tool, but always be cautious to avoid damaging the surface underneath.
Once the spill is cleaned, take a moment to admire your handiwork. A clean workspace not only looks better but also sets the stage for your next painting adventure. Plus, it’s a great feeling to know you’ve tackled that mess head-on!
Q1: What should I do if the paint has dried?
A1: If the paint has dried, you may need to scrape it off gently with a putty knife or a similar tool. After scraping, use a suitable solvent to help dissolve any remaining residue.
Q2: Can I use vinegar to clean paint spills?
A2: Vinegar can be effective for certain types of spills, especially water-based paints. However, for oil-based paints, it's best to stick with a solvent designed for that purpose.
Q3: How can I prevent paint spills in the future?
A3: Prevention is always better than cure! Use drop cloths, painter’s tape, and keep your paint containers secure to minimize the chances of spills during your projects.

Organizing Your Supplies
Once your workspace is clean and your tools are sparkling, it's time to tackle the important task of . A well-organized workspace not only enhances your efficiency but also makes your next painting session more enjoyable. Think of it as setting the stage for your creative masterpiece! When everything has a designated spot, you won't waste precious time rummaging through clutter. So, how do you go about it? Let’s dive in.
Start by categorizing your supplies. Group similar items together; for example, keep all your brushes in one container, your paints in another, and your rollers in yet another. This way, you’ll know exactly where to find what you need. Consider using a toolbox or a dedicated storage bin for your brushes and tools. You might even label each container with its contents for quick reference. Not only does this save time, but it also prevents accidental mix-ups, like using a brush meant for oil paints on water-based projects!
Next, think about the vertical space in your workspace. Shelves can be a game-changer. Install some above your work area to store paints and other supplies. This keeps your essentials within arm's reach while freeing up your work surface. You can also use pegboards to hang tools and brushes. Imagine walking into your workspace and seeing everything neatly arranged and easily accessible—it's like having your own mini art studio!
Additionally, consider the environment in which you work. Make sure your supplies are stored in a cool, dry place to prevent any damage. Paints can dry out, and brushes can become misshapen if not stored properly. For paints, using airtight containers can significantly extend their shelf life. If you have leftover paint, pour it into smaller containers and label them with the color and date. This way, you won’t forget what you have on hand!
Lastly, don’t forget to regularly review and declutter your supplies. Over time, you may accumulate items that you no longer use. Set aside some time every few months to assess what’s working and what’s not. This will not only keep your workspace tidy but also allow you to focus on the supplies that truly inspire your creativity.
By taking these steps to organize your painting supplies, you’re not just tidying up; you’re creating an environment that fosters creativity and efficiency. A well-organized workspace is like a blank canvas, ready for your next artistic venture!
- How often should I clean my painting supplies? It's best to clean your supplies after every session to maintain their quality and extend their lifespan.
- What’s the best way to store leftover paint? Store leftover paint in airtight containers and label them with the color and date for easy access in the future.
- Can I reuse old brushes? Yes, as long as they are cleaned properly and stored in good condition, old brushes can be reused for future projects.
- How can I prevent paint spills in the future? Using drop cloths and painter's tape can significantly reduce the chances of spills during your painting sessions.

Preventing Future Messes
When it comes to painting, prevention is often the best cure for cleanup woes. Imagine gearing up for a new project only to find yourself staring at a chaotic workspace filled with paint splatters and messy brushes. To avoid this scenario, consider implementing a few key strategies before you even dip your brush into the paint. First and foremost, using drop cloths can be a game-changer. These protective sheets not only safeguard your floors and furniture but also catch any drips before they become a headache. Choose a material that is absorbent and durable, ensuring it can withstand the rigors of your painting session.
Another essential tool in your arsenal is painter's tape. This handy tape can be used to mask off edges, ensuring clean lines and preventing paint from sneaking onto surfaces where it doesn’t belong. Applying it carefully can save you from the frustration of touch-ups later. Additionally, consider using paint trays with liners. They make transferring paint easier and minimize spills, allowing you to focus on your masterpiece rather than the mess.
Now, let’s not forget about organization. Before starting your painting project, take a moment to arrange your supplies. Having everything in its designated spot not only speeds up the process but also reduces the likelihood of accidents. You might even create a checklist for your supplies, ensuring you have everything you need before you start. This simple step can help you avoid last-minute dashes to the store, which often lead to more mess and chaos.
Lastly, consider creating a designated painting station. This could be a table or a corner of your garage, where all your painting supplies reside. By having a specific area for your projects, you can keep everything contained and organized, making future cleanups a breeze. Plus, it gives you a sense of ownership over your creative space, making the process even more enjoyable.
- What type of drop cloth is best for painting? A canvas drop cloth is highly recommended as it is absorbent and durable, providing excellent protection for your floors.
- Can I reuse painter's tape? It’s best to use fresh tape for each project to ensure clean lines and optimal adhesion.
- How can I clean up paint spills quickly? Blot the area with a clean rag and a suitable cleaner based on the type of paint used, ensuring you don’t scrub, which can spread the paint.
Final Touches and Maintenance
Once you've tackled the cleaning process, it's time to focus on the final touches and maintenance of your painting tools and workspace. This step is crucial because it not only ensures that your supplies are ready for the next project but also enhances your overall painting experience. After all, nobody wants to start a new project with dirty brushes or a cluttered space, right?
Start by inspecting your brushes and rollers for any remaining paint residue. Even after a thorough cleaning, tiny bits of paint can linger, which may impact the performance of your tools in the future. Take a moment to rinse each brush under warm water and use your fingers to gently work out any stubborn bits. For rollers, a good shake can help dislodge paint, but don't forget to give them a thorough wash as well.
Next, consider the storage of your supplies. Proper storage is key to maintaining the integrity of your painting tools. Here’s a quick guide on how to store various items:
| Item | Storage Method |
|---|---|
| Brushes | Store upright in a container or hang them to prevent bristles from bending. |
| Rollers | Wrap in plastic to keep them moist and prevent drying out. |
| Paints | Seal tightly and store in a cool, dry place away from direct sunlight. |
Additionally, make it a habit to regularly check your supplies. A quick monthly audit can help you identify any tools that may need replacing or additional cleaning. This proactive approach minimizes the likelihood of surprise messes during your next painting session.
Finally, don't overlook the importance of maintaining your workspace. A clean and organized area not only boosts your creativity but also keeps you safe. Wipe down surfaces to remove any dust or paint particles, and make sure to dispose of any cleaning materials responsibly. By keeping your workspace in top shape, you set the stage for your next masterpiece!
- How often should I clean my brushes? It's best to clean your brushes immediately after each use to prevent paint from drying and ruining the bristles.
- Can I reuse leftover paint? Yes, as long as the paint is still in good condition and properly sealed. Just make sure to check for any changes in texture or smell.
- What’s the best way to remove dried paint from surfaces? You can use a paint remover or solvent, but always test it on a small area first to ensure it won't damage the surface.
Frequently Asked Questions
- What supplies do I need for cleaning up after painting?
Before you dive into the cleanup, gather essential supplies like cleaning solutions, brushes, rags, and waste containers. Having everything handy makes the process smoother and more efficient!
- How do I clean brushes and rollers after using water-based paints?
Cleaning brushes and rollers used with water-based paints is a breeze! Just rinse them thoroughly with warm water and a bit of soap until all the paint is gone. This ensures they’re in top shape for your next artistic endeavor.
- What’s the best way to clean brushes used with oil-based paints?
For oil-based paints, you’ll need a solvent like mineral spirits. Soak your brushes and rollers in the solvent to break down the paint, then follow up with soap and water to get them squeaky clean.
- How should I dispose of leftover paint?
Disposing of leftover paint responsibly is key! Always check your local regulations regarding hazardous waste to ensure you're disposing of materials safely and environmentally-friendly.
- What’s the best way to remove paint spills?
To tackle paint spills, use a suitable cleaning solution based on the type of paint. Gently blot the area to lift the paint without harming the surface underneath. It’s all about being gentle and patient!
- How can I prevent messes during my next painting session?
Preventing messes is easier than you think! Use drop cloths, painter's tape, and other protective measures to keep your space clean as you work. It’s like putting on a raincoat before heading out in a storm!
- What should I do after cleaning my workspace?
After cleaning, take a moment to organize your painting supplies. Store brushes, paints, and tools in designated spots for easy access next time. A tidy space fosters creativity!
- Why is regular maintenance of my painting tools important?
Regular maintenance extends the life of your tools and enhances your painting experience. By keeping everything clean and organized, you set yourself up for success in all your future projects!


