Creating Abstract Art with Acrylic Pours
Welcome to the vibrant and exhilarating world of acrylic pouring, where colors dance and blend in ways that are as unpredictable as they are beautiful. If you’ve ever gazed at a stunning piece of abstract art and wondered how it was created, you’re in for a treat! Acrylic pouring is not just a technique; it’s an experience that allows you to unleash your inner artist without the constraints of traditional painting methods. Imagine pouring a cascade of colors onto a canvas, watching them swirl and meld together, creating unique patterns that are completely one-of-a-kind. Sounds exciting, right? Well, it is!
This article is your gateway to understanding the ins and outs of acrylic pouring, from the essential materials you’ll need to the techniques that will help you master this art form. Whether you’re a seasoned artist looking to try something new or a complete beginner eager to dive into the creative process, acrylic pouring offers endless possibilities for expression. So, grab your supplies, roll up your sleeves, and let’s embark on this colorful journey together!
As we explore this captivating technique, you’ll discover how the combination of acrylic paint and pouring mediums can produce stunning effects that are both mesmerizing and unpredictable. The beauty of acrylic pouring lies in its spontaneity; no two pieces are ever the same, making each artwork a unique reflection of your creativity. So, are you ready to learn how to create your own abstract masterpieces? Let’s get started!
Acrylic pouring is a fluid art technique that combines acrylic paint with a pouring medium to create abstract designs. The science behind this technique is fascinating—when acrylic paint is mixed with a pouring medium, it alters the paint’s viscosity, allowing it to flow freely across the canvas. This interaction between the paint and medium is what produces those stunning, organic patterns that we all love. In essence, you’re not just applying paint; you’re orchestrating a beautiful dance of colors that blend, separate, and create depth on your canvas.
One of the most exciting aspects of acrylic pouring is the way it encourages experimentation. You can mix different colors, try various pouring techniques, and even add unique additives to alter the texture and finish of your artwork. Whether you’re looking to create a serene landscape or a vibrant explosion of colors, the possibilities are virtually limitless. So, let your imagination run wild, and don’t be afraid to make mistakes—after all, that’s where some of the best discoveries happen!
To embark on your acrylic pouring adventure, you’ll need a few essential materials. Here’s a quick overview of what you’ll require:
- Acrylic Paint: Choose a variety of colors that inspire you. The more, the merrier!
- Pouring Medium: This is crucial for achieving the right consistency.
- Canvas or Painting Surface: A sturdy surface to pour your paint onto.
- Cups and Sticks: For mixing your paints and pouring mediums.
- Protective Gear: Gloves and an apron to keep yourself clean.
With these materials in hand, you’re well on your way to creating stunning abstract art through acrylic pouring. But remember, the key to successful pouring lies not only in the materials but also in the techniques you choose to employ. So, stay tuned as we dive deeper into the methods that will help you achieve breathtaking results!
Q: Do I need to be an experienced artist to try acrylic pouring?
A: Absolutely not! Acrylic pouring is perfect for artists of all skill levels, including beginners. The beauty of this technique lies in its simplicity and the freedom it offers for creative expression.
Q: How do I prevent my paint from drying too quickly?
A: Using a good pouring medium can help slow down the drying process. Additionally, working in a cooler environment can also extend the drying time, allowing you more time to manipulate the paint.
Q: Can I use any type of acrylic paint?
A: While you can experiment with different types of acrylic paints, fluid acrylics are generally recommended for pouring due to their thinner consistency, which allows for better flow and blending.
Q: How do I store my leftover paint?
A: You can store leftover paint in airtight containers. Make sure to label them with the colors used so you can replicate your creations later!
Understanding Acrylic Pouring
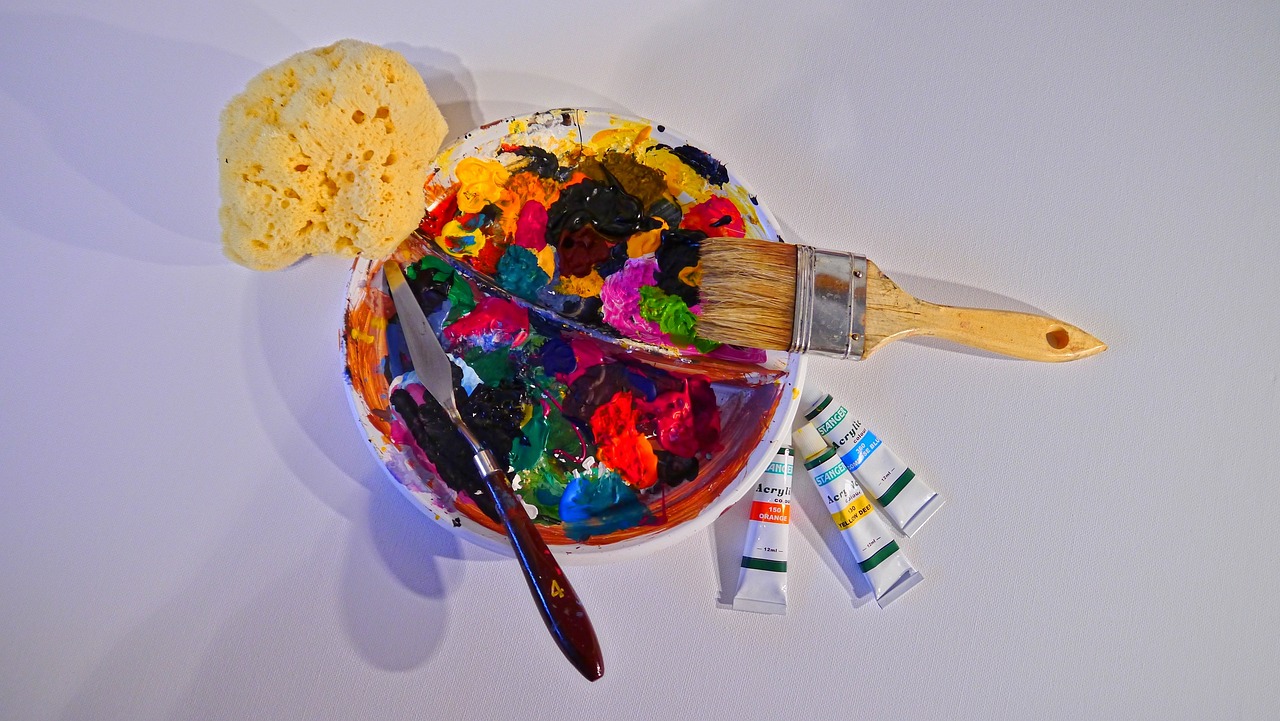
Acrylic pouring is more than just a painting technique; it's a mesmerizing dance of colors that captivates both the artist and the viewer. At its core, acrylic pouring is a fluid art technique that combines acrylic paint with a pouring medium, allowing the paint to flow freely across the canvas. Imagine watching a vibrant river of colors cascade and blend into each other, creating stunning patterns and textures that are truly one-of-a-kind. This method not only emphasizes creativity but also embraces the element of surprise, as the final outcome is often unpredictable.
The science behind acrylic pouring is fascinating. When you mix acrylic paint with a pouring medium, the consistency of the paint changes, allowing it to flow more freely. This interaction between the paint and the medium is crucial for achieving the desired effects. As the paint pours and mixes, it creates a variety of patterns, from swirling galaxies to soft ocean waves. Each pour is a unique experience, much like a snowflake—no two artworks are ever the same!
To truly grasp the beauty of acrylic pouring, it helps to understand some of its fundamental principles. The viscosity of the paint plays a significant role in how it behaves when poured. Viscosity refers to the thickness or thinness of a liquid, and in the world of acrylic pouring, it determines how the paint flows and interacts with other colors. For example, thicker paints will sit on top of thinner paints, creating beautiful layers and depth. This layering effect can lead to stunning results, especially when you experiment with different colors and pouring techniques.
Additionally, the temperature and humidity of your workspace can affect how your paint behaves. Warmer temperatures can cause the paint to flow more easily, while cooler conditions may slow it down. This is why it's essential to create a comfortable environment for your pouring sessions. Think of it like baking a cake; the right temperature and ingredients are crucial for achieving a delicious result!
In summary, understanding acrylic pouring involves grasping the interaction between paint, pouring mediums, and environmental factors. It's a journey filled with exploration and experimentation, where each pour is an opportunity to discover something new. So, grab your paints, embrace the chaos, and let your creativity flow!
Essential Materials for Acrylic Pouring
Acrylic pouring is an exciting journey into the world of abstract art, but before you dive in, it's crucial to gather the right materials. Think of this as assembling your artist's toolkit, where each item plays a vital role in crafting your masterpiece. The beauty of acrylic pouring lies not just in the technique but also in the materials you choose. So, let’s break down the essentials you’ll need to get started on this vibrant adventure.
First and foremost, you'll need acrylic paints. The type of paint you select can significantly influence the outcome of your artwork. There are three primary types of acrylic paints commonly used in pouring:
- Heavy Body Acrylics: These are thick and buttery, perfect for creating texture. However, they may require more pouring medium to achieve a suitable consistency.
- Fluid Acrylics: As the name suggests, these are more liquid and flow easily, making them ideal for pouring techniques.
- Soft Body Acrylics: These offer a balance between heavy and fluid acrylics, providing versatility in your pouring projects.
Next up is the pouring medium. This is perhaps the most critical component of your acrylic pouring setup. The pouring medium helps to thin the paint and improve flow, allowing for the stunning effects characteristic of this art form. Popular options include Liquitex Pouring Medium and Floetrol, each of which offers unique properties that can affect the fluidity and blending of colors.
In addition to paint and pouring medium, you'll want to consider other optional additives that can elevate your artwork. For instance, adding a few drops of silicone oil can create beautiful cells and textures in your pour. Glitter is another fun additive that can introduce sparkle and depth. Don't be afraid to experiment with different combinations to see what effects you can achieve!
Now, let’s not overlook the importance of a clean workspace. Before you start pouring, it’s essential to set up an organized area where creativity can flow freely. Lay down some plastic sheeting or old newspapers to catch any drips and spills. Have your materials within arm’s reach to minimize distractions and keep your focus on the art. Remember, a clutter-free environment can significantly enhance your artistic experience!
Lastly, don’t forget about your canvas or substrate. You can use traditional canvas, wood panels, or even ceramic tiles. Each surface will interact differently with your paints, so choose one that resonates with your artistic vision. With these materials in hand, you’re well on your way to creating stunning acrylic pour masterpieces!
Q: Do I need special paints for acrylic pouring?
A: While you can use any acrylic paint, fluid acrylics or soft body acrylics are generally preferred for their flow and consistency.
Q: Can I use regular water to thin my paints?
A: It's not recommended to use water as it can break down the paint's binder, affecting adhesion and finish. Instead, use a pouring medium for the best results.
Q: What is the best surface to pour on?
A: Canvas is popular, but you can also experiment with wood, tiles, or even glass. Just ensure the surface is primed and ready to hold the paint.

Types of Acrylic Paints
Acrylic pouring art is as much about the materials you choose as it is about the techniques you apply. When it comes to acrylic paints, understanding the different types can significantly impact your results. There are three primary categories of acrylic paints that artists typically use: heavy body, fluid, and soft body acrylics. Each type has its unique characteristics and effects, making them suitable for various styles of pouring.
Heavy body acrylics are thick and buttery, providing a rich texture that retains brush strokes and adds depth to your artwork. They are ideal for artists who want to create a more textured finish or incorporate layering techniques. When used in pouring, they tend to create more defined shapes and can hold their form better than other types. However, this thickness can also make it challenging to achieve the smooth, flowing effects that many pouring artists seek.
On the other hand, fluid acrylics are more pourable and have a consistency similar to that of heavy cream. They flow easily, making them perfect for creating the stunning, marbled effects that acrylic pouring is known for. Fluid acrylics blend beautifully, allowing for seamless transitions between colors. If you're looking to create dynamic swirls and soft edges, fluid acrylics are your best bet.
Lastly, we have soft body acrylics, which are somewhere in between heavy and fluid acrylics. These paints offer a smooth consistency that can be manipulated easily while still providing some texture. They are often favored for techniques that require a bit of control, allowing artists to create detailed designs without losing the fluidity essential to pouring. Soft body acrylics can also be mixed with pouring mediums to achieve the desired flow and finish.
| Type of Acrylic Paint | Characteristics | Best For |
|---|---|---|
| Heavy Body | Thick, retains brush strokes | Textured effects, layering |
| Fluid | Thin, easily pourable | Dynamic swirls, seamless blending |
| Soft Body | Medium consistency | Controlled techniques, detailed designs |
Choosing the right type of acrylic paint is crucial for achieving the desired effect in your artwork. Many artists enjoy experimenting with combinations of these paints to see how they interact during the pouring process. It’s like mixing different ingredients in a recipe; sometimes, the best results come from unexpected combinations!
In summary, understanding the distinctions between heavy body, fluid, and soft body acrylics can help you make informed decisions about your materials. Whether you’re aiming for textured layers or smooth, flowing designs, each type of paint offers unique possibilities for your acrylic pouring journey. So, grab your paints and let your creativity flow!
- Can I mix different types of acrylic paints? Yes, mixing different types can create unique effects, but be cautious about the consistency and flow.
- What is the best pouring medium for acrylic paints? There are many options, but popular choices include Liquitex Pouring Medium and Floetrol.
- How do I prevent my acrylic pour from cracking? Ensuring proper drying time and using the right medium can help prevent cracks.
Choosing the Right Pouring Medium
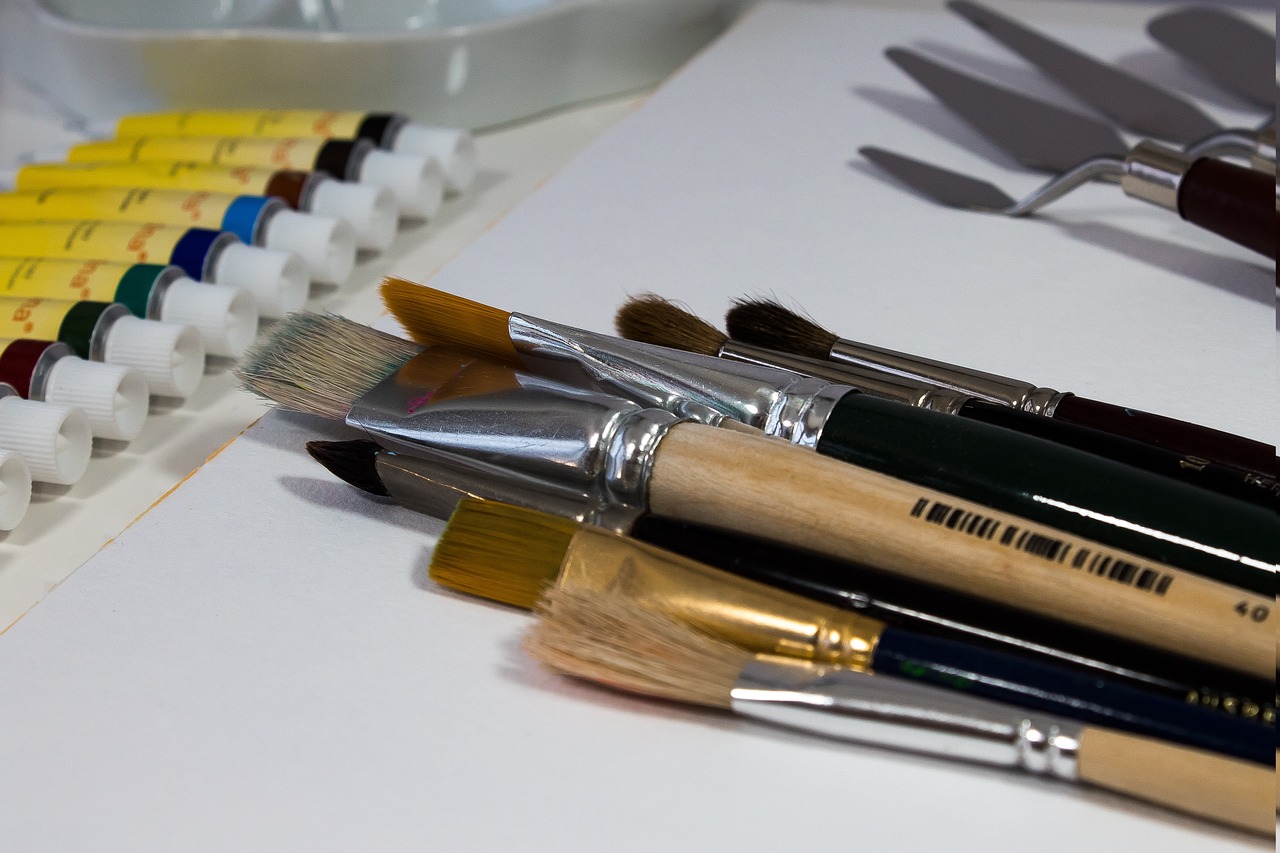
When it comes to creating stunning acrylic pour art, selecting the right pouring medium is crucial. This medium acts as a bridge between your acrylic paints, allowing them to flow smoothly and blend beautifully on your canvas. But with so many options available, how do you know which one to choose? Let's dive into the world of pouring mediums and explore what makes each unique.
First off, pouring mediums are designed to alter the consistency of your paint, making it more fluid without compromising its color vibrancy. A good pouring medium will help your paints maintain their translucency and luminosity, creating those mesmerizing effects that abstract art is known for. Some popular options include:
- Liquitex Pouring Medium: This medium is a favorite among many artists for its ability to produce a glossy finish and enhance color brilliance.
- Floetrol: Originally designed for paint thinning, Floetrol can also be used as a pouring medium. It’s cost-effective and works well to create smooth blends.
- Golden GAC 800: This medium is known for its flexibility and durability, making it a great choice for outdoor artwork.
Each of these mediums has its own characteristics, and the choice often depends on the desired outcome of your artwork. For instance, if you're looking to create a high-gloss finish, Liquitex is your best bet. On the other hand, if you're experimenting with a more budget-friendly option, Floetrol could be the way to go.
Moreover, the ratio of paint to pouring medium is also a vital consideration. A common starting point is to mix one part paint with one part pouring medium. However, depending on the thickness of your paint and the desired flow, you may need to adjust this ratio. Remember, the goal is to achieve a consistency that allows your paint to flow freely without losing its vibrant color.
Another aspect to keep in mind is the drying time of the medium. Some pouring mediums dry quickly, while others take longer, affecting the final look of your piece. If you’re planning to layer your pours, a slower-drying medium might be advantageous to allow for more manipulation and blending of colors.
In conclusion, choosing the right pouring medium is about experimenting and finding what works best for your style. Don’t hesitate to try different brands and formulations to discover the perfect balance for your artistic vision. With the right pouring medium in hand, you’re one step closer to creating breathtaking acrylic pour art that captivates and inspires!
Q: Can I use regular acrylic paint without a pouring medium?
A: While you can use regular acrylic paint, it may not flow as well or create the desired effects without a pouring medium. The medium helps achieve the right consistency for pouring.
Q: How do I know if my pouring medium is suitable for my project?
A: Always read the label and instructions provided by the manufacturer. Look for mediums specifically designed for pouring techniques, as they will provide the best results.
Q: Can I mix different pouring mediums?
A: Yes, you can experiment by mixing different pouring mediums to create unique effects. Just be sure to test small batches first to see how they interact.
Other Optional Additives
When it comes to acrylic pouring, the magic often lies not just in the paints and pouring mediums, but also in the optional additives that can elevate your artwork to a whole new level. Think of these additives as the secret spices in your favorite recipe; they can transform a basic meal into a gourmet feast. Whether you're looking to enhance texture, alter drying times, or add a bit of sparkle, the right additives can make all the difference.
One popular additive is silicone oil. This is often used to create stunning cells in your artwork. When mixed with acrylic paint, silicone oil causes the colors to separate, leading to organic, bubble-like formations that can add depth and interest to your piece. Just a few drops can yield remarkable results, so it’s worth experimenting with different amounts to see what works best for your style.
Another fun option is glitter. Who doesn’t love a bit of shimmer? Adding glitter to your acrylic pour can give your artwork a magical, eye-catching quality. You can mix it directly into your paint or sprinkle it on top after pouring for a more controlled effect. Just be cautious not to overdo it—too much glitter can overwhelm your design and take away from the beauty of the colors.
Additionally, there are various additives designed specifically for altering the texture of your paint. For instance, you might consider using a texturing medium to create a three-dimensional effect. This can add a tactile element to your artwork that invites viewers to reach out and touch. Similarly, incorporating flow improvers can help your paint flow more smoothly, making it easier to achieve those stunning, blended effects that are the hallmark of acrylic pouring.
Here’s a quick overview of some optional additives you might consider for your acrylic pour:
| Additive | Purpose |
|---|---|
| Silicone Oil | Creates cells and adds depth |
| Glitter | Adds shimmer and sparkle |
| Texturing Medium | Creates a three-dimensional effect |
| Flow Improver | Enhances paint flow and blending |
In conclusion, while the basic materials are essential for acrylic pouring, don’t overlook the potential of these optional additives. They can not only enhance the visual appeal of your artwork but also allow you to express your creativity in new and exciting ways. So, gather your supplies, experiment with different combinations, and let your imagination run wild!
Q: Can I use any type of silicone oil for my acrylic pours?
A: Yes, but it's best to use silicone oil specifically designed for art purposes. These formulations are often easier to mix and yield better results.
Q: How much glitter should I add to my pour?
A: It depends on your preference! Start with a small amount and gradually add more until you achieve the desired sparkle. Remember, less is often more.
Q: Will using additives change the drying time of my artwork?
A: Yes, some additives can alter drying times. For example, using a texturing medium may slow down the drying process, while flow improvers might speed it up. Always test on a small scale first!
Q: Can I mix different brands of pouring mediums and additives?
A: Generally, yes! However, it's recommended to test combinations on a smaller piece first to ensure compatibility and desired effects.

Preparing Your Workspace
Before diving into the vibrant world of acrylic pouring, it's essential to set up a workspace that fosters creativity and minimizes chaos. Imagine walking into a studio where every tool is within reach, and the surfaces are protected from splatters and spills. Sounds inviting, right? Here are some key elements to consider when preparing your workspace:
First, choose a location that allows for ample natural light. Good lighting not only helps you see the colors and textures of your paints more clearly but also enhances your mood and creativity. Next, cover your work surface with a protective layer such as a plastic drop cloth or old newspapers. This will save you from the headache of cleaning up paint splatters later on. Trust me, your future self will thank you!
Furthermore, gather all the materials you'll need before you start pouring. This includes your acrylic paints, pouring medium, cups for mixing, and any additives you plan to use. Having everything organized will keep you focused on the creative process rather than running around searching for supplies. You might even want to create a designated caddy or container to hold your tools and materials. This way, you can easily transport everything if you decide to change your workspace.
Don't forget to wear appropriate clothing that you don't mind getting a bit messy. Acrylic paint can be stubborn, and once it’s on your clothes, it’s usually there to stay. An old shirt or apron can be your best friend during this creative adventure. Additionally, having some paper towels or rags handy will help you quickly wipe up any accidental spills.
Lastly, consider the ventilation of your workspace. While acrylic paints are generally non-toxic, the pouring mediums and additives can sometimes release fumes. If you're working indoors, opening a window or using a fan can help circulate fresh air. If you have the option, working outside on a nice day can be a delightful way to connect with nature while you create your masterpiece.
By taking these steps, you’ll create a productive environment that encourages experimentation and fun. Remember, the key to successful acrylic pouring is not just the technique but also the atmosphere in which you create. So, roll up your sleeves, put on your favorite tunes, and get ready to unleash your inner artist!
- What is acrylic pouring? Acrylic pouring is a fluid art technique that involves mixing acrylic paint with a pouring medium and allowing it to flow on a canvas to create unique patterns.
- Do I need special equipment for acrylic pouring? While you can start with basic supplies like acrylic paints and a pouring medium, having tools like cups, stir sticks, and a heat gun can enhance your pouring experience.
- How do I clean up after acrylic pouring? It's best to clean your tools and workspace immediately after use. Warm soapy water usually does the trick for brushes and cups, while dried paint can be removed with a scraper.
Basic Pouring Techniques
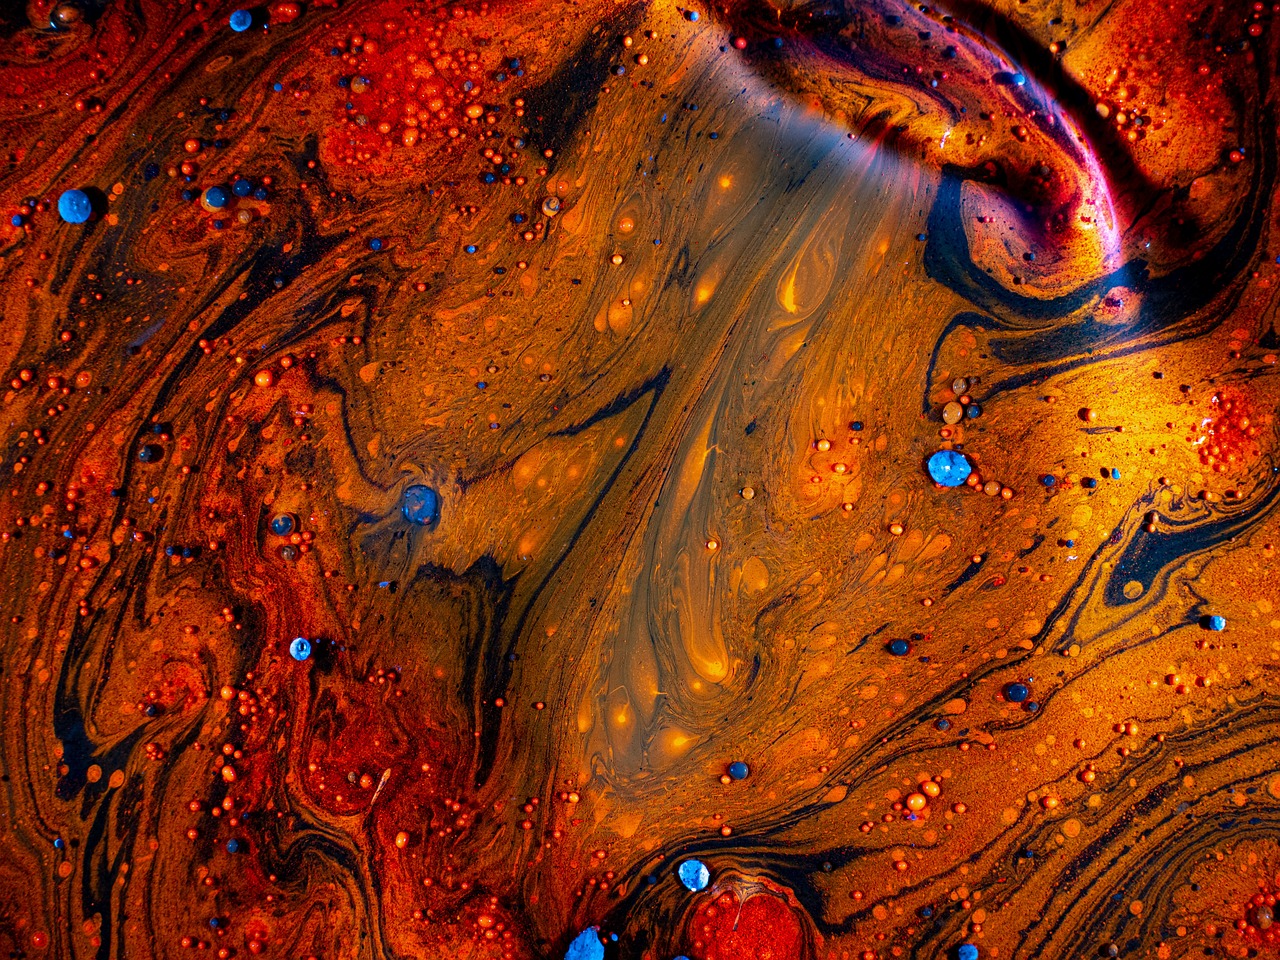
Acrylic pouring is a captivating art form that allows artists to unleash their creativity in a fluid and spontaneous manner. There are several that can be utilized to create mesmerizing abstract pieces. Each technique offers a unique way to manipulate the paint and achieve different visual effects, making it an exciting journey for both beginners and seasoned artists alike. Let’s dive into some of the most popular methods that will help you get started on your acrylic pouring adventure!
One of the most widely used techniques is the dirty pour. This method involves layering multiple colors of acrylic paint into a single cup before pouring it onto the canvas. The beauty of a dirty pour lies in the unexpected results that emerge as the colors blend and interact with one another. To execute this technique effectively, start by choosing a selection of colors that complement each other. Pour each color into the cup in a random order, allowing them to mix slightly as you go. Once you have your desired layers, flip the cup onto the canvas and lift it to reveal a stunning, multi-dimensional masterpiece. The key here is to embrace the unpredictability of the process, as the final outcome will often surprise you!
Another popular technique is the flip cup. This method is similar to the dirty pour but offers a different visual dynamic. With a flip cup, you pour your chosen colors into a cup, but instead of layering them, you simply pour them in one after the other. Once the cup is filled, you place it upside down on the canvas and then lift it to let the paint flow out. This technique often creates dramatic patterns and can produce beautiful cells in the paint as it spreads. To enhance the effects, try using different color combinations or varying the pouring speed. The excitement of the flip cup technique lies in the anticipation of what will emerge once you lift the cup!
Additionally, there are other techniques like the swipe technique, where you apply a base color to the canvas and then use a tool, such as a palette knife or a piece of cardboard, to swipe contrasting colors across the surface. This creates a stunning marbled effect that can resemble natural phenomena like waves or clouds. Each swipe can reveal different layers of color, adding depth and interest to your artwork.
As you explore these basic pouring techniques, remember that practice makes perfect. Don't be afraid to experiment with different colors, pouring speeds, and canvas sizes. The beauty of acrylic pouring is that there are no strict rules—only opportunities for creative expression. So grab your paints, set up your workspace, and let your imagination flow!
- What is the best surface for acrylic pouring? - Canvas is commonly used, but you can also experiment with wood, tiles, and even glass.
- Can I use any type of acrylic paint? - While fluid acrylics are preferred for pouring, you can use heavy body and soft body paints with the right pouring medium.
- How do I prevent cracks in my acrylic pour? - Ensure that your paint is mixed to the right consistency and allow it to dry slowly in a controlled environment.
- What should I do if my colors muddy together? - Choose colors that are more contrasting and avoid mixing them too much in the cup.
Dirty Pour Technique
The is a captivating method in the world of acrylic pouring that allows artists to create mesmerizing, layered effects effortlessly. Imagine pouring a rainbow of colors into a single cup, only to watch them swirl and meld together into a stunning masterpiece as they cascade onto your canvas. This technique not only emphasizes the beauty of color interaction but also adds a sense of spontaneity to the creative process. So, how do you master this intriguing method?
To start with, gather your materials. You will need a selection of acrylic paints, a pouring medium, and a cup for mixing. The beauty of the dirty pour lies in the combination of colors, so choose a palette that speaks to you. Think about contrasting shades that will pop against each other or harmonious tones that will create a soft gradient. Once you have your colors selected, it's time to prepare your paint mixture.
Begin by pouring a small amount of your pouring medium into each color of acrylic paint. This medium is essential as it helps the paint flow smoothly and blend beautifully. The ratio of paint to medium can vary, but a good starting point is about 1 part paint to 1 part medium. Mix thoroughly, but be careful not to overmix; you want to maintain the integrity of the colors. Once your paints are ready, it’s time to layer them in your cup. Here’s where the magic happens!
When layering the paints, start with your first color and pour it gently into the cup. Then, add the next color on top, allowing it to flow down the sides of the cup. Repeat this process, alternating colors until the cup is nearly full. The key is to avoid stirring the paints together; you want them to remain distinct yet ready to mingle when they hit the canvas. This layering technique creates beautiful, organic patterns when poured.
Now comes the exciting part—pouring! Hold your cup over the canvas at a slight angle and gently tip it to allow the paint to flow out. You can pour in a straight line or move the cup in circular motions to create different effects. As the paint flows, it will naturally blend and create stunning patterns. Don’t be afraid to experiment; each pour will yield a unique result, making every piece a one-of-a-kind creation.
After your pour, you may want to manipulate the paint further. You can use tools like a palette knife or a straw to create additional designs. Just remember to work quickly, as the paint will begin to set as it dries. Once you’re satisfied with your artwork, let it dry completely—this can take anywhere from 24 to 48 hours depending on the thickness of the pour.
In conclusion, the dirty pour technique is not only a fun and engaging way to create abstract art but also a fantastic opportunity to express your creativity. With a little practice and experimentation, you’ll find yourself producing captivating pieces that showcase the beauty of color and form. So, gather your supplies, unleash your imagination, and let the paint flow!
- What type of canvas should I use for acrylic pouring? A canvas that is pre-stretched and primed with gesso works best, as it provides a smooth surface for pouring.
- Can I use any type of acrylic paint? While you can use various types, fluid acrylics tend to work best for pouring due to their consistency.
- How do I clean my tools after pouring? Clean your tools immediately after use with warm soapy water to prevent the paint from drying and becoming hard to remove.
- What should I do if my paint isn't flowing well? Ensure that your pouring medium is mixed properly with your paint. You may need to adjust the ratio for better flow.

Flip Cup Technique
The is a thrilling method in the world of acrylic pouring that can yield stunning and unpredictable results. Imagine standing at the edge of a vibrant universe, where colors dance and swirl to create a masterpiece. This technique is all about layering your paints and then flipping a cup to unveil the magic beneath. It’s like flipping a coin—will it land on heads or tails? In this case, will the colors blend beautifully or create a chaotic explosion? The excitement lies in the unknown!
To start, gather your materials: you’ll need a clean cup, acrylic paints, a pouring medium, and a canvas or surface to pour onto. The beauty of this technique is that you can use a variety of colors, so let your imagination run wild! Begin by layering your paints in the cup. The order in which you add your colors can significantly impact the final outcome. For instance, you might want to start with a darker color at the bottom and then add lighter shades on top. This layering creates depth and allows for beautiful interactions between the colors.
Once your cup is filled with the desired colors, it’s time for the fun part. Carefully place the canvas over the cup, ensuring it covers the opening completely. With a quick motion, flip the cup upside down onto the canvas. Here’s where the magic happens—slowly lift the cup to reveal a stunning burst of colors! As the paint flows, it will create unique patterns and designs that are entirely one-of-a-kind. It’s like watching a flower bloom in real-time, each petal representing a different hue.
After the initial pour, you can manipulate the paint further. Tilt the canvas gently to allow the colors to spread and mix. This is where your artistic instincts come into play; you can guide the paint to create whatever shapes or patterns you envision. Just remember, less is often more. Over-manipulating can lead to muddied colors, so embrace the natural flow of the paint. If you want to add some extra flair, consider using a straw or a heat gun to create interesting effects by blowing air through the paint or warming it up.
Finally, once you’re satisfied with your creation, allow it to dry completely. This can take anywhere from a few hours to a couple of days, depending on the thickness of the paint. Once dry, you may choose to seal your artwork with a varnish to protect it and enhance its vibrancy. The Flip Cup Technique is not just about the final product; it’s about the journey of creativity and the joy of experimenting with colors. So, grab your materials and start flipping your way to stunning abstract art!

Finishing Touches and Sealing Your Artwork
Once you’ve created your stunning acrylic pour masterpiece, the next step is to ensure it remains as vibrant and beautiful as the day you poured it. This is where the finishing touches and sealing process come into play. Properly drying and sealing your artwork is crucial not only for its aesthetic appeal but also for its longevity. Imagine spending hours crafting a piece only to see it fade or get damaged over time—definitely not the outcome you want!
First, let’s talk about the drying process. Depending on the thickness of your paint and the environmental conditions, drying can take anywhere from a few hours to several days. It’s essential to find a dust-free area where your artwork can dry undisturbed. Placing the artwork on a level surface is also important to prevent any unwanted drips or runs. You might want to use a drying rack or elevate your piece using small cups or blocks to ensure airflow around the entire canvas.
After your artwork is completely dry, it’s time to consider sealing it. Sealing not only enhances the colors but also provides a protective barrier against dust, UV rays, and moisture. There are several options available for sealing your acrylic pour art:
- Acrylic Varnish: This is a popular choice among artists. It comes in various finishes, including matte, satin, and gloss. The choice depends on the look you want to achieve. Gloss varnish will give your artwork a shiny finish, making the colors pop, while matte varnish offers a more subdued, elegant appearance.
- Resin: For a high-gloss, glass-like finish, epoxy resin is an excellent option. It can be a bit tricky to work with, but the results are stunning. Just be sure to follow the instructions carefully and work in a well-ventilated area.
- Spray Sealers: These are convenient and easy to apply. However, it's essential to choose a spray sealer that is compatible with acrylic paints to avoid any adverse reactions.
When applying the sealer, whether it's varnish or resin, make sure to do so in thin, even coats. This will help avoid drips and ensure a smooth finish. If you’re using a varnish, a brush or a spray can work well, while resin typically requires a careful pouring technique. Always remember to wear appropriate protective gear, like gloves and a mask, especially when working with resin or spray sealers.
Finally, once your artwork is sealed and dried, consider how you want to display it. Framing can add a professional touch, but if you prefer a more modern look, you might opt for a gallery wrap or canvas board. Whichever method you choose, ensure that your artwork is showcased in a way that allows it to shine and be appreciated for its unique beauty.
To wrap things up, let’s address some common questions artists often have about finishing and sealing their acrylic pour artworks:
- How long should I wait before sealing my artwork? It's best to wait at least 72 hours after pouring to ensure the paint is fully cured before applying any sealers.
- Can I use a hairdryer to speed up the drying process? While it may seem tempting, using a hairdryer can create unwanted bubbles and distortions in your artwork. It's best to let it dry naturally.
- What if my artwork gets dusty after drying? You can gently wipe it with a soft, dry cloth or use a feather duster to keep it clean.
In conclusion, taking the time to add those finishing touches and properly sealing your acrylic pour artwork can make all the difference in preserving your creative expression for years to come. So, roll up your sleeves, apply that varnish, and let your artwork shine!
Frequently Asked Questions
- What is acrylic pouring?
Acrylic pouring is a fluid art technique that involves mixing acrylic paint with a pouring medium and then pouring it onto a canvas or other surfaces. This method allows artists to create vibrant, abstract designs with unique patterns and textures.
- What materials do I need to get started with acrylic pouring?
To start your acrylic pouring journey, you'll need acrylic paints, a pouring medium, a canvas or surface to pour on, and some basic tools like cups, stirrers, and gloves. Optional materials might include silicone oil or glitter to enhance your artwork.
- What types of acrylic paints are best for pouring?
There are three main types of acrylic paints you can use: heavy body, fluid, and soft body. Fluid acrylics are often preferred for pouring because they have a thinner consistency, allowing for better flow and blending of colors.
- How do I choose the right pouring medium?
The pouring medium is essential for achieving the desired consistency in your pours. Look for mediums specifically designed for acrylic pouring, as they help improve flow, prevent cracking, and enhance the final finish of your artwork.
- What are some basic pouring techniques I should know?
Some foundational techniques include the dirty pour, where you mix multiple colors in one cup before pouring, and the flip cup technique, which involves flipping a cup filled with paint onto the canvas to create dynamic patterns.
- How do I finish and seal my acrylic pour artwork?
Once your artwork is dry, you can apply a varnish or sealant to protect it. Make sure to choose a product compatible with acrylics, and follow the manufacturer's instructions for the best results.
- Can I add additives to my acrylic pours?
Yes! Additives like silicone oil can create interesting effects, while glitter can add sparkle. Experimenting with different additives can lead to unique textures and finishes in your artwork.
- How do I set up my workspace for acrylic pouring?
To minimize mess and maximize creativity, set up a clean, organized workspace. Use a drop cloth or plastic sheet to protect surfaces, and have all your materials within reach. It's also a good idea to wear old clothes or an apron!


