Creative Ideas for Simple Wooden Box Designs
Are you ready to unleash your inner craftsman? Wooden boxes are not just functional storage solutions; they can also be a canvas for your creativity! Whether you're a DIY enthusiast or a seasoned crafter, the possibilities are endless when it comes to designing wooden boxes that are both beautiful and practical. In this article, we’ll explore a variety of innovative designs for wooden boxes that will inspire you to create unique pieces for your home or as thoughtful gifts for loved ones.
Imagine walking into a room adorned with handcrafted wooden boxes that not only serve a purpose but also tell a story. From rustic charm to modern minimalism, there’s a style to suit every taste. You might be wondering, "Where do I even start?" Don't worry! We’ve got you covered with a plethora of ideas that will make your wooden box designs stand out. Let’s dive into the world of creativity and explore how simple wooden boxes can transform your space.
First off, let’s talk about the appeal of wooden boxes. They are incredibly versatile! You can use them for storage, as decorative accents, or even as personalized gifts. The beauty of wood lies in its natural grain and texture, which can be enhanced through various finishes and techniques. Whether you’re looking to create a rustic piece that evokes warmth or a sleek modern design that embodies sophistication, the right approach can make all the difference.
In the following sections, we will cover different themes and styles for your wooden box designs. From upcycled creations that promote sustainability to decorative techniques that add flair, you'll find inspiration for every project. Plus, we’ll provide tips on personalization options, ensuring that your creations are truly one-of-a-kind. So grab your tools and let’s get started on this exciting journey of crafting wooden boxes!
- What types of wood are best for making boxes? Hardwoods like oak, maple, and walnut are excellent choices for their durability and aesthetic appeal. Softwoods like pine and cedar are also popular for their ease of use and availability.
- Can I use reclaimed wood for my projects? Absolutely! Reclaimed wood adds character and is an eco-friendly option. Just ensure it’s clean and free from harmful chemicals.
- What tools do I need to start making wooden boxes? Basic tools include a saw, drill, sandpaper, and wood glue. As you progress, you might want to invest in more specialized tools.
- How can I personalize my wooden boxes? You can add monograms, custom artwork, or even engravings to make your boxes unique and special.
- What finishing techniques should I consider? Options include varnishes, stains, or natural oils that enhance the wood’s beauty while providing protection.
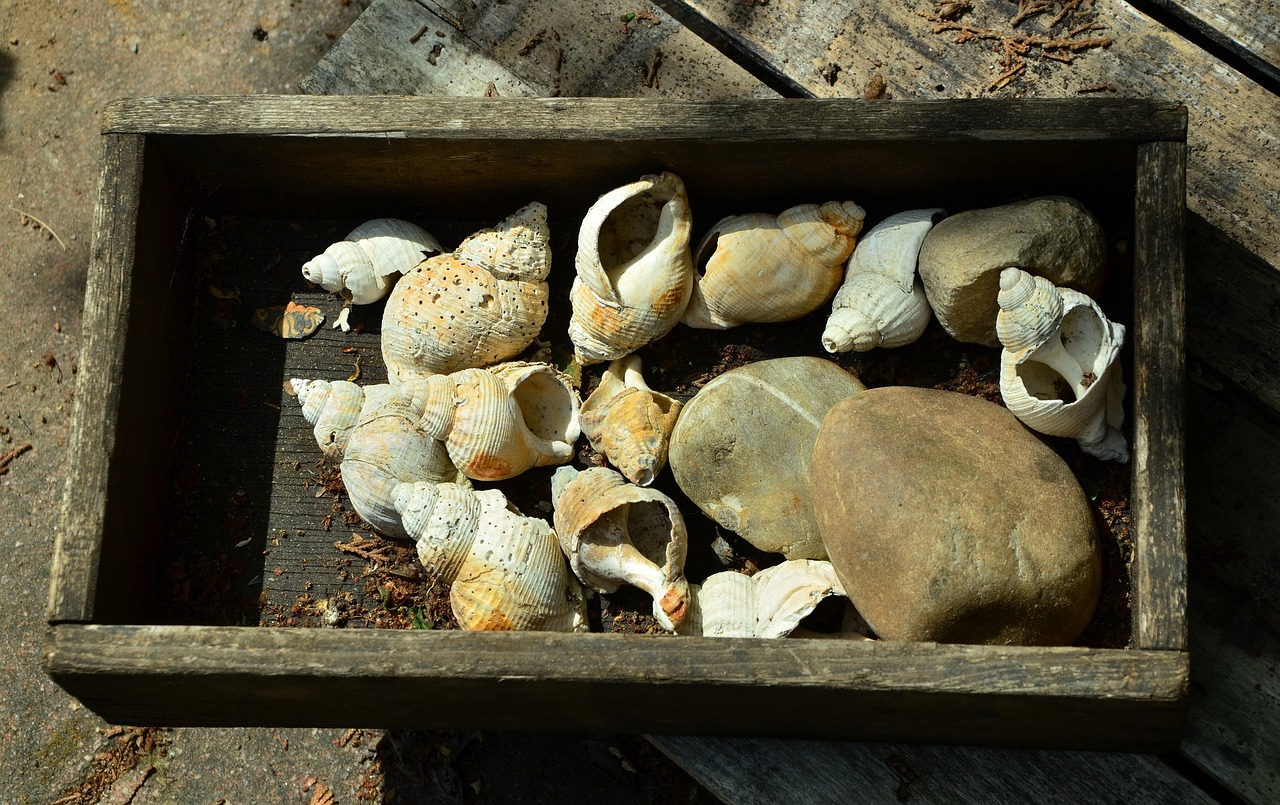
1. Rustic Charm
When it comes to wooden box designs, rustic charm is a timeless choice that invokes a sense of warmth and nostalgia. Imagine walking into a cozy cabin in the woods, where the air is filled with the scent of pine and the walls are adorned with handcrafted wooden decor. This aesthetic can be beautifully replicated in your own home by incorporating rustic elements into your wooden box projects. Using natural finishes and reclaimed wood not only enhances the visual appeal of your creations but also tells a story of sustainability and craftsmanship.
To achieve that perfect rustic look, consider these key elements:
- Natural Finishes: Opt for oils or waxes that highlight the wood grain, giving your box a rich, organic feel.
- Reclaimed Wood: Salvaged wood from old barns or furniture brings character and history to your designs, making each piece unique.
- Textures: Mixing different textures, such as smooth finishes with rough-hewn edges, can create a visually interesting contrast.
One of the most exciting aspects of rustic wooden boxes is their versatility. These boxes can serve multiple purposes, whether it's for storage, organization, or decoration. You can use them in various settings, from a rustic kitchen to a modern living room, effortlessly bridging the gap between styles. For instance, a reclaimed wood box can hold kitchen utensils, while a smaller version could be used as a decorative piece on a coffee table, filled with potpourri or seasonal decorations.
Additionally, the charm of rustic designs is further enhanced by incorporating personal touches. Consider adding hand-painted designs or wood-burned patterns that reflect your personality or interests. This not only makes your wooden boxes stand out but also turns them into conversation starters. Imagine a box adorned with a beautiful landscape scene or intricate floral patterns that capture the essence of nature – it's like bringing a piece of the outdoors inside!
In conclusion, embracing rustic charm in your wooden box designs is not just about aesthetics; it's about creating pieces that resonate with your personal style while promoting sustainability. By using natural materials and incorporating unique features, you can craft wooden boxes that are not only functional but also serve as beautiful decor that enhances your living space.
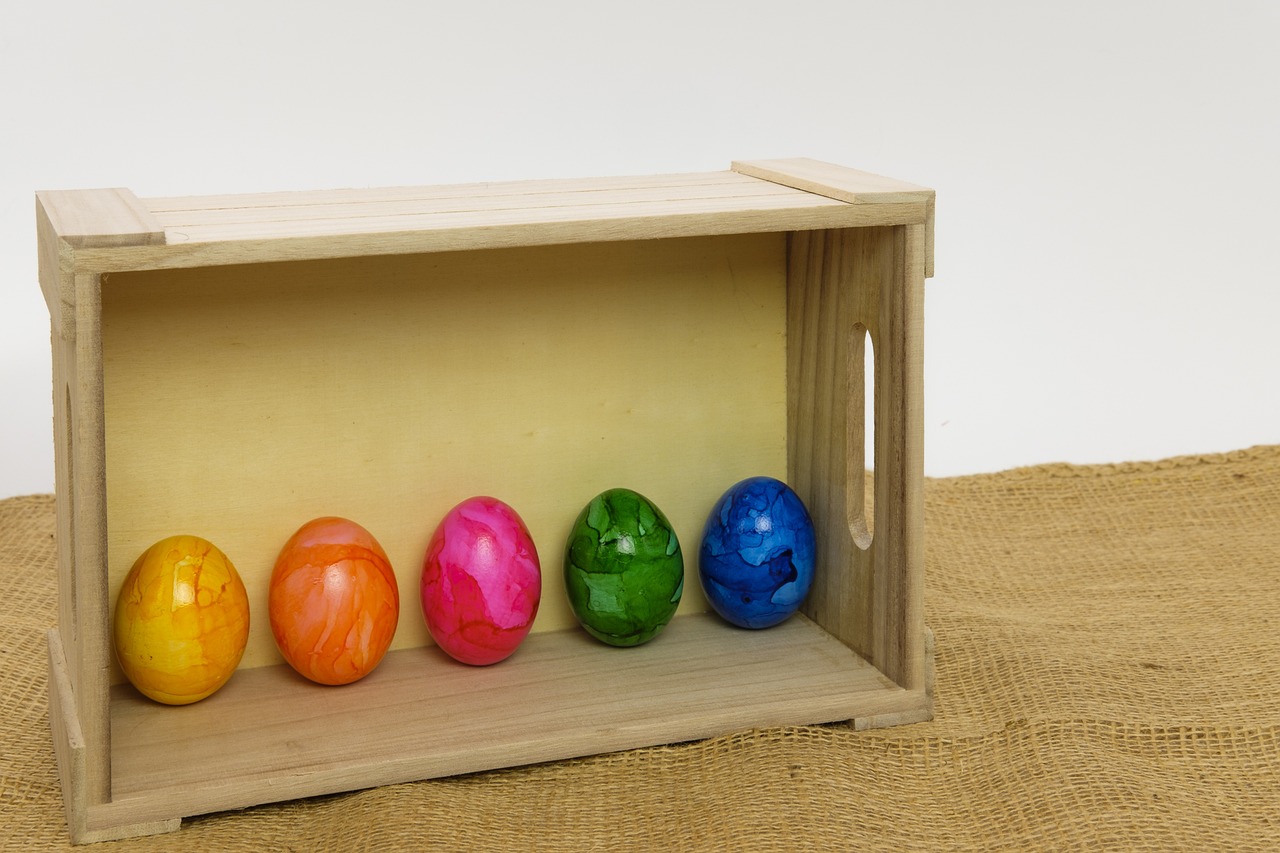
2. Modern Minimalism
When it comes to wooden box designs, modern minimalism stands out as a trend that emphasizes simplicity and functionality. This approach is all about clean lines, uncluttered spaces, and a focus on the essentials. Think of it as decluttering your life, one wooden box at a time. Whether you're looking to create a sleek storage solution or a decorative accent, modern minimalism allows you to express your style without overwhelming your space.
One of the key aspects of modern minimalist design is the use of geometric shapes. These shapes not only add visual interest but also maintain a sense of order and balance. For instance, a cube-shaped box can serve multiple purposes: it can be a stylish piece of decor on your coffee table or a hidden storage unit for your remote controls and miscellaneous items. The beauty of such designs lies in their versatility and adaptability to various settings.
Another exciting option within the realm of modern minimalism is the triangular box. This unique shape can serve as a conversation starter while also providing practical storage. Imagine a triangular box sitting on your shelf, its sharp angles contrasting beautifully with the soft curves of your other decor items. It's not just a box; it's a statement piece that reflects your taste and creativity.
To enhance the functionality of your minimalist wooden boxes, consider incorporating functional features such as compartments or removable lids. These elements not only improve usability but also align perfectly with the minimalist ethos of maximizing space and efficiency. A well-designed box can help keep your items organized, making it easier to find what you need without the hassle of rummaging through clutter.
In summary, modern minimalism in wooden box design is all about creating pieces that are both functional and aesthetically pleasing. By focusing on geometric shapes, incorporating unique designs, and adding practical features, you can craft wooden boxes that not only serve a purpose but also elevate the overall look of your home. So, why not embrace the beauty of simplicity and let your creativity flow in your next DIY project?
- What materials are best for modern minimalist wooden boxes?
Using high-quality hardwoods like oak or maple will give your boxes durability and a refined look. Plywood is also a good option for a more affordable and lightweight alternative. - Can I customize my minimalist wooden boxes?
Absolutely! Minimalist designs can be easily customized with stains, paints, or finishes that suit your personal style while maintaining their clean aesthetic. - Are there any specific tools I need for creating wooden boxes?
Basic woodworking tools such as a saw, drill, and sandpaper are essential. A measuring tape and square will help ensure your cuts are precise for that modern look.
2.1. Geometric Shapes
When it comes to wooden box designs, geometric shapes are a game changer. They not only introduce a modern twist but also enhance the functionality of your creations. Imagine a sleek cube box sitting on your coffee table, its sharp lines and angles drawing the eye and sparking conversation. Or picture a triangular box that adds a playful yet sophisticated element to your shelf. These shapes can serve multiple purposes, from practical storage to stunning decorative accents. The beauty of geometric designs lies in their versatility; they can be tailored to fit any style or space.
One of the most appealing aspects of using geometric shapes in wooden box design is the ability to customize them. You can easily personalize your boxes with different finishes, colors, or even textures. For instance, a cube box can be painted in a bold hue to make it a statement piece, while a natural wood finish can bring warmth and coziness to your home. The choice is yours! When you think about it, geometric shapes are like a blank canvas, allowing you to express your creativity and style.
Moreover, geometric boxes can be designed with functional features that enhance their usability. For example, you can incorporate compartments within a cube box to keep your items organized or add a removable lid for easy access. This not only maintains a minimalist aesthetic but also ensures that your designs are practical. The combination of form and function is what truly sets geometric wooden boxes apart.
To give you a clearer picture of how these shapes can be utilized, here are a couple of examples:
- Cube Boxes: These can be used for everything from storing toys to holding office supplies. Their uniform shape makes them easy to stack, optimizing your storage space.
- Triangular Boxes: Perfect for holding small items like jewelry or stationery, triangular boxes can be placed in corners or on shelves, making them a unique addition to your décor.
In conclusion, the integration of geometric shapes into wooden box designs opens up a world of possibilities. Whether you opt for a cube, triangle, or any other shape, the key is to let your creativity flow. By combining aesthetics and practicality, you can create stunning pieces that not only serve a purpose but also elevate the overall look of your space. So, why not grab some wood and start experimenting with geometric designs? You might just surprise yourself with what you can create!
Q1: What types of wood are best for creating geometric boxes?
A1: Softwoods like pine or cedar are great for beginners due to their ease of cutting and shaping. Hardwoods like oak or maple offer durability and a beautiful finish but may require more advanced tools.
Q2: Do I need special tools to create geometric wooden boxes?
A2: While basic woodworking tools like a saw, drill, and sandpaper are essential, you don't need specialized equipment. Many geometric designs can be achieved with standard tools found in most workshops.
Q3: Can I use geometric shapes for outdoor wooden boxes?
A3: Absolutely! Just be sure to use weather-resistant wood and finishes to ensure your boxes withstand the elements.
2.1.1. Cube Boxes
Cube boxes are not just your average storage solutions; they are versatile pieces that can transform any space into something special. Imagine a sleek, wooden cube sitting in your living room, serving as both a stylish decor piece and a practical storage unit. The beauty of cube boxes lies in their simplicity and functionality. They can be used for a variety of purposes, such as storing toys, books, or even as a unique coffee table. Plus, they can be easily customized with paint, stains, or finishes to match your personal style.
When designing your cube boxes, consider the following aspects to enhance both their aesthetic appeal and functionality:
- Size: Cube boxes can range from small keepsake sizes to larger storage units. Think about what you want to store and choose a size that fits your needs.
- Material: The type of wood you choose can greatly impact the final look. Hardwoods like oak or walnut offer durability and a rich grain, while softer woods like pine are easier to work with and can be painted or stained.
- Finish: A natural finish can highlight the wood grain, while a bold color can make your cube box a statement piece in your home.
Additionally, cube boxes can be designed with various features that enhance their usability. For instance, incorporating removable lids allows for easy access to stored items, while built-in compartments can help keep smaller items organized. You might also consider adding decorative elements such as handles or carvings that reflect your personal style.
In terms of DIY projects, creating a cube box can be a rewarding experience. With just a few basic woodworking tools, you can craft a beautiful piece that not only serves a purpose but also adds character to your home. Whether you’re a seasoned woodworker or a beginner, the process is manageable and enjoyable. Plus, the satisfaction of using something you made yourself is unmatched!
Finally, cube boxes are incredibly adaptable. They can be stacked for a more dynamic look or used as standalone pieces. You can even create a set of cube boxes in various sizes and finishes to add layers and depth to your decor. The possibilities are endless, and each cube box you create can be a reflection of your creativity and personal style.
1. What type of wood is best for making cube boxes?
While it depends on your personal preference, hardwoods like oak and walnut are excellent choices for their durability and beautiful grain. Softwoods like pine are also popular due to their ease of use and affordability.
2. Can I paint my cube box?
Absolutely! Painting your cube box can add a pop of color and personalize it to match your home decor. Just make sure to use a primer and suitable paint for wood to ensure a smooth finish.
3. How do I make my cube box more functional?
Consider adding features like removable lids, compartments, or even wheels for easy movement. These enhancements can make your cube box not only more functional but also more enjoyable to use.
4. Is it difficult to make a cube box as a beginner?
Not at all! Cube boxes are among the simpler woodworking projects, making them perfect for beginners. With some basic tools and materials, you can create a stunning piece with relative ease.
2.1.2. Triangular Boxes
Triangular boxes are not just a unique shape; they are a conversation starter! Imagine walking into a room and seeing a beautifully crafted triangular box sitting on a shelf, its angles catching the light just right. This distinctive design can serve multiple purposes, from practical storage solutions to stunning decorative accents that enhance your home decor. The beauty of triangular boxes lies in their versatility and the creativity they inspire. You can use them to store anything from trinkets to stationery, or even as a quirky gift box for special occasions.
When it comes to crafting your own triangular box, the possibilities are endless. You can choose to use different types of wood, each bringing its own character to the piece. For instance, a rich mahogany could add a touch of elegance, while a lighter pine might evoke a more casual, rustic feel. Don't forget about the finishing touches! A splash of color or a unique pattern can transform a simple wooden box into a standout piece. Here are some ideas to consider:
- Painted Designs: Use bold colors or soft pastels to match your decor.
- Natural Finishes: A clear varnish can enhance the wood's natural beauty.
- Embellishments: Consider adding decorative elements like stencils or decals for a personalized touch.
Additionally, triangular boxes can be designed with functional features that make them even more appealing. For example, you could create compartments within the box to keep smaller items organized. This not only maximizes the functionality of your box but also adds an element of surprise when someone opens it to discover hidden sections. Imagine the delight of a friend receiving a triangular box filled with personalized notes or small gifts, each compartment holding a special memory or message.
As you embark on your triangular box project, consider the size and dimensions that will work best for your needs. A small triangular box could serve as a charming keepsake holder, perfect for storing jewelry or sentimental items. On the other hand, a larger version could function as a stylish storage solution for books or magazines, effortlessly blending into your living space.
In conclusion, triangular boxes are more than just a creative design; they are a canvas for your imagination. Whether you choose to keep them simple or go all out with intricate designs, these boxes can elevate your home decor while serving practical purposes. So why not grab some wood and start crafting your own triangular masterpiece today? You might just find that this unique shape brings a fresh perspective to your DIY projects!
Q: What materials are best for making triangular boxes?
A: You can use various types of wood such as pine, oak, or plywood. The choice depends on your desired aesthetic and budget.
Q: Do I need special tools to create a triangular box?
A: Basic woodworking tools like a saw, sandpaper, and glue are usually sufficient. If you want to add compartments, a drill might be helpful.
Q: Can I personalize my triangular box?
A: Absolutely! You can paint it, add stencils, or even engrave designs to make it uniquely yours.
Q: What can I store in a triangular box?
A: The options are endless! You can store jewelry, stationery, craft supplies, or use it as a decorative piece to hold small plants or candles.
2.2. Functional Features
When it comes to wooden box designs, incorporating functional features can elevate your creations from mere storage solutions to essential, user-friendly items that seamlessly integrate into your daily life. Imagine opening a beautifully crafted box that not only looks stunning but also offers clever compartments, removable lids, and even hidden drawers. These elements not only enhance the usability of your boxes but also add a layer of sophistication and practicality that many appreciate.
One of the most appealing aspects of functional features is their ability to cater to specific needs. For example, if you’re a crafter, you might want a box with multiple compartments to keep your supplies organized. Alternatively, if you’re a collector, a box with a removable lid can provide easy access to your prized possessions while keeping them safe from dust. This versatility makes wooden boxes not just decorative pieces but also essential tools for organization.
Here are some functional features you might consider incorporating into your designs:
- Compartmentalization: Create sections within your box to hold different items separately. This is particularly useful for jewelry boxes or tool storage.
- Removable Lids: A lid that can be completely removed allows for easier access to the contents, making it perfect for boxes that will be opened frequently.
- Stackable Designs: Consider designing boxes that can be stacked on top of each other, maximizing vertical space and providing a neat, organized look.
- Hidden Compartments: For a touch of intrigue, incorporate secret compartments that can hold valuable items or surprises.
By focusing on these features, you're not just crafting a box; you're creating a functional work of art that serves a purpose in your home. The beauty of these designs lies in their ability to blend aesthetics with practicality, allowing you to showcase your creativity while providing real-world solutions. With a little thought and ingenuity, your wooden boxes can become indispensable parts of your living space, enhancing both style and organization.
Q1: What materials are best for creating functional wooden boxes?
A1: The best materials include high-quality hardwoods like oak or maple for durability, but softwoods like pine can also work well for lighter, decorative boxes.
Q2: How can I ensure my wooden box designs are functional?
A2: Start by identifying the purpose of your box. Incorporate features like compartments, removable lids, and stackable designs based on your specific needs.
Q3: Can I customize functional features in my wooden box?
A3: Absolutely! Customization is one of the best parts of DIY projects. You can tailor the size, shape, and features of your box to suit your personal style and requirements.
Q4: What tools do I need to create functional wooden boxes?
A4: Basic woodworking tools such as a saw, drill, measuring tape, and sandpaper are essential. For more advanced features, you might also need specialized tools like a router for creating compartments.
Q5: How do I finish my wooden box to enhance its functionality?
A5: Use varnishes or stains that provide protection while highlighting the wood grain. This not only improves durability but also enhances the overall aesthetic of your box.
3. Upcycled Creations
Upcycling is not just a trend; it’s a movement that breathes new life into discarded items while promoting sustainability. When it comes to wooden boxes, the possibilities are endless! Imagine transforming an old wooden chair into a stunning storage box or converting a forgotten drawer into a chic organizer. Upcycled creations allow you to express your creativity while making a positive environmental impact. Not only do these projects help reduce waste, but they also add a unique touch to your home decor that mass-produced items simply can’t replicate.
One of the most exciting aspects of upcycling wooden items is the story behind each piece. Every scratch, dent, or imperfection tells a tale, making your wooden boxes not just functional storage solutions but also conversation starters. The charm of upcycled wooden boxes lies in their **character**. They can be rustic, elegant, or even quirky, depending on how you choose to design them. The beauty of this process is that you have the freedom to customize each creation based on your style and needs.
Here are some popular sources for upcycled wooden materials:
- Old Furniture: Think of chairs, tables, or cabinets that have seen better days. With a little creativity, they can be transformed into beautiful wooden boxes.
- Wooden Pallets: These versatile materials can be disassembled and reconfigured into various box designs, making them a favorite among DIY enthusiasts.
- Crates and Boxes: Vintage crates can be repurposed into stylish storage solutions, adding a rustic vibe to your home.
When embarking on your upcycling journey, consider the following tips to ensure a successful project:
- Assess the Condition: Before starting, check the wood for any damage or rot. If it’s in good shape, you’re ready to go!
- Choose the Right Tools: Basic woodworking tools like saws, sanders, and drills will be essential for your project.
- Get Creative with Finishes: Whether you prefer a distressed look or a polished finish, the right touch can make your upcycled box stand out.
Ultimately, upcycled wooden boxes are not just about saving the planet; they’re about creating something **unique** and **personal**. They can serve as perfect gifts, cherished keepsakes, or simply beautiful additions to your home. So, the next time you come across an old piece of wood, don’t throw it away! Instead, envision the possibilities and let your imagination run wild. Who knows? You might just create a masterpiece that tells a story of its own!
Q: What tools do I need to start upcycling wooden boxes?
A: Basic tools like a saw, drill, sander, and clamps are essential for most upcycling projects. You may also need paint or wood stain for finishing touches.
Q: Can I use any type of wood for upcycling?
A: Yes, you can use various types of wood, including pallets, old furniture, and even scrap wood. Just ensure that the wood is in good condition and free from rot.
Q: How can I make my upcycled wooden boxes more decorative?
A: Consider using decorative techniques such as painting, wood burning, or decoupage. Adding hardware like handles and hinges can also enhance the overall look.
Q: Is upcycling cost-effective?
A: Absolutely! Upcycling can save you money by repurposing materials you already have, and it often costs less than buying new, ready-made items.

3.1. Furniture Repurposing
Repurposing old furniture into stylish wooden boxes is not just a trend; it's a sustainable practice that breathes new life into items that might otherwise end up in a landfill. Think about it: every piece of furniture has a story, and by transforming it into a box, you're not only creating a functional item but also preserving a piece of history. Imagine turning an old dresser drawer into a charming storage box or using the wood from a broken chair to craft a unique keepsake box. The possibilities are endless!
One of the best things about furniture repurposing is that it allows for a high degree of creativity. You can mix and match different styles, colors, and finishes to create a box that truly reflects your personality. For instance, if you have an antique table that has seen better days, consider removing the legs and using the tabletop to create a flat, elegant box. You can even add a layer of paint or stain to enhance its visual appeal.
When embarking on a furniture repurposing project, here are a few tips to keep in mind:
- Assess the Condition: Before you start, check the furniture for any damage. Make sure the wood is sturdy enough for your project.
- Choose the Right Tools: Having the right tools is crucial. Basic tools like a saw, sandpaper, and screws will go a long way.
- Plan Your Design: Sketch out your design before you begin. This will help you visualize the end product and make the construction process smoother.
Additionally, think about the functional aspects of your design. Will your box have compartments for organization? Should it have a lid for easy access? Consider these factors as you plan your project. By integrating functionality with aesthetics, you can create a stunning piece that serves a purpose while also being a conversation starter in your home.
In conclusion, furniture repurposing is a rewarding endeavor that allows you to unleash your creativity while promoting sustainability. Not only do you get to enjoy a unique wooden box, but you also contribute to a more eco-friendly lifestyle. So, gather those old furniture pieces, roll up your sleeves, and start crafting your one-of-a-kind storage solutions!
Q: What types of furniture are best for repurposing into boxes?
A: Almost any wooden furniture can be repurposed! Dressers, tables, and chairs are particularly good candidates due to their sturdy materials and ample surface area.
Q: Do I need special tools for furniture repurposing?
A: While basic woodworking tools like saws and sanders are helpful, you can start with simple tools. Just make sure you have a good quality saw and sandpaper to smooth out the edges.
Q: How can I ensure my repurposed box lasts?
A: Properly sanding, sealing, and finishing the wood will enhance durability. Using varnishes or stains can protect the wood from wear and tear.

3.2. Pallet Projects
When it comes to creating unique wooden boxes, pallet projects are a fantastic option that combines creativity with sustainability. Pallets, often discarded after their initial use, can be transformed into stunning storage solutions that not only serve a purpose but also add a rustic charm to your home. The beauty of using pallets lies in their versatility; with a little imagination and some basic tools, you can craft anything from simple storage boxes to intricate decorative pieces.
Imagine taking a weathered pallet and turning it into a charming wooden box that tells a story. The natural imperfections and unique grain patterns of pallet wood can enhance the aesthetic appeal of your creations. Plus, this approach is eco-friendly, allowing you to give new life to materials that would otherwise end up in a landfill. Here are some ideas to inspire your pallet projects:
- Storage Boxes: Create large storage boxes for your living room or garage. These can be used to store blankets, toys, or gardening tools.
- Decorative Accent Boxes: Smaller boxes can serve as decorative accents on shelves or coffee tables, perfect for holding miscellaneous items or acting as a unique centerpiece.
- Stackable Boxes: Design stackable boxes that can be easily stored away or displayed, allowing for a customizable organization system.
To get started, you’ll need to gather a few essential tools and materials. The basic tools typically include a saw, sandpaper, wood glue, and a hammer. If you want to add a personal touch, consider incorporating paint or stains to match your home decor. After cutting the pallets to your desired size, make sure to sand down any rough edges to ensure a smooth finish.
One of the most exciting aspects of pallet projects is the ability to customize your boxes. You can add features like dividers for organization, handles for easy transport, or even decorative elements such as stencils or wood burning designs. The sky's the limit when it comes to personalizing your wooden boxes, making them not only functional but also a reflection of your style.
Moreover, pallet projects can be a fun activity to do with friends or family. Gather your loved ones for a DIY day, where you can share ideas, techniques, and laughter while creating something beautiful together. This collaborative effort can lead to even more creative designs and a sense of accomplishment as you see your ideas come to life.
In conclusion, pallet projects are a rewarding way to create unique wooden boxes that are both practical and aesthetically pleasing. By repurposing pallets, you not only contribute to sustainability but also embark on a creative journey that can transform your living space. So, grab those pallets and let your imagination run wild with your next DIY project!
Q: What tools do I need to start a pallet project?
A: Essential tools include a saw, sandpaper, wood glue, a hammer, and optionally, a drill for added features.
Q: Do I need special skills to work with pallets?
A: No special skills are required! Basic woodworking knowledge is helpful, but many projects can be completed by beginners.
Q: How do I ensure the pallets are safe to use?
A: Look for pallets that are marked with "HT" (heat-treated) and avoid those with chemical markings. Always inspect for any damage or mold.
Q: Can I paint or stain my pallet projects?
A: Absolutely! Painting or staining can enhance the beauty of the wood and allow you to match your decor.
4. Decorative Techniques
When it comes to designing your wooden boxes, the decorative techniques you choose can truly elevate your creations from simple storage solutions to stunning pieces of art. Whether you're a seasoned crafter or a novice DIY enthusiast, incorporating various decorative elements can add character and flair to your wooden boxes. One of the most popular techniques is wood burning, which involves using a heated tool to etch intricate designs into the wood. This method not only personalizes your box but also creates a tactile experience that invites touch. Imagine a box adorned with swirling patterns or meaningful quotes that spark joy every time you see it!
Another technique to consider is painting. The beauty of paint lies in its versatility; you can choose to go bold with vibrant colors or opt for soft pastels that blend seamlessly with your home decor. A well-painted wooden box can serve as a statement piece in any room. For those who enjoy a bit of whimsy, consider using decoupage, which involves gluing decorative paper or fabric onto the surface of the box. This technique allows you to incorporate various patterns and textures, making each box unique. You can use themed paper, such as floral prints for a spring vibe or vintage maps for a travel enthusiast, to reflect your personality or the recipient's interests.
To give you a clearer idea of how these techniques can be applied, here’s a simple table summarizing some popular decorative methods:
| Technique | Description | Best For |
|---|---|---|
| Wood Burning | Etching designs into wood with a heated tool. | Personalized gifts, intricate designs |
| Painting | Applying colors to enhance visual appeal. | Bold statements, color matching |
| Decoupage | Gluing decorative paper or fabric onto surfaces. | Whimsical designs, theme-based boxes |
While these techniques can stand alone, you can also mix and match them to create something truly special. For instance, imagine a box that features both wood burning and painting, where the etched design is highlighted by a splash of color. The possibilities are endless! Remember, the key to successful decoration is to ensure that the techniques you choose align with the overall purpose of the box. Are you creating a gift for a friend? A keepsake for yourself? Tailoring your design to its intended use will make your creation even more meaningful.
Ultimately, the joy of crafting wooden boxes lies in the freedom to express yourself. So grab your tools, let your imagination run wild, and start experimenting with these decorative techniques to transform ordinary boxes into extraordinary treasures!
Q: What materials do I need for wood burning?
A: You'll need a wood burning tool, wood pieces, and possibly stencils to guide your designs. Don't forget safety gear like goggles!
Q: Can I use any type of paint on wooden boxes?
A: Yes, but it's best to use acrylic paint as it adheres well to wood and dries quickly. Make sure to seal your painted box with a clear finish for durability.
Q: Is decoupage suitable for outdoor wooden boxes?
A: While decoupage can be used on outdoor boxes, it's important to use waterproof glue and sealant to protect your design from the elements.
4.1. Wood Burning Art
When it comes to enhancing the beauty of your wooden boxes, wood burning art stands out as a captivating technique that adds a unique touch. Imagine transforming a simple box into a stunning piece of art, where every burn tells a story and every design reflects your creativity. Wood burning, or pyrography, involves using a heated tool to create intricate designs on the surface of the wood. This method not only enhances the aesthetic appeal but also personalizes your wooden boxes, making them truly one-of-a-kind.
One of the best aspects of wood burning is its versatility. You can choose to create simple patterns or dive into more complex illustrations. Here are a few ideas to get your creative juices flowing:
- Nature Themes: Incorporate elements like trees, flowers, or animals to bring a touch of the outdoors inside.
- Geometric Designs: Simple lines and shapes can create a modern look that complements minimalist decor.
- Personal Messages: Engraving a meaningful quote or a special date can make your box a cherished keepsake.
To get started with wood burning, you'll need a few essential tools. A basic wood burning kit typically includes:
| Tool | Description |
|---|---|
| Wood Burning Pen | The primary tool used for creating designs on wood. |
| Tips | Interchangeable tips that allow for different styles of burning, from fine lines to shading. |
| Wood | Choose a softwood like pine or basswood for easier burning. |
Once you have your tools ready, it's time to practice. Start with simple designs on scrap wood to get a feel for the pen and how the wood reacts to heat. As you gain confidence, you can transition to your wooden boxes. Remember, patience is key! Take your time to perfect each line and detail. The result will be a beautifully crafted box that not only serves a purpose but also acts as a stunning decorative piece.
Moreover, wood burning art is not just about aesthetics; it can also be a therapeutic process. Engaging in this creative activity can help you unwind and express your emotions through art. So, whether you're crafting for yourself or creating a gift for a loved one, wood burning adds a personal touch that speaks volumes.
In conclusion, wood burning art is a fantastic way to elevate your wooden box designs. By incorporating this technique, you not only enhance the visual appeal but also create lasting memories encapsulated in each piece. So grab your tools, unleash your creativity, and let your wooden boxes tell their own unique stories!
Q: What type of wood is best for wood burning?
A: Softwoods like pine or basswood are ideal for beginners as they are easier to burn and provide a smoother finish.
Q: Do I need any special skills to start wood burning?
A: No special skills are required, but practice is essential. Start with simple designs and gradually work your way up to more complex patterns.
Q: Can I use wood burning on painted surfaces?
A: It's best to use wood burning on unfinished wood. If you want to paint your box, do so after burning to avoid damaging the paint.
Q: How do I clean my wood burning tools?
A: Allow your tools to cool down, then wipe them clean with a cloth. For stubborn residue, use a little rubbing alcohol.
4.2. Painting Styles
When it comes to enhancing the aesthetic appeal of your wooden boxes, painting styles can make a world of difference. The right paint technique can transform a simple box into a stunning centerpiece that catches the eye and sparks conversation. Whether you're going for a bold statement or a subtle touch, there are various painting styles to explore that can elevate your wooden box designs.
One popular approach is the use of bold colors. Bright hues like deep reds, vibrant blues, or sunny yellows can bring a sense of energy and fun to your wooden boxes. Consider using these colors for themed boxes, such as those intended for children or festive occasions. On the other hand, if you prefer a more muted palette, soft pastels can create a calming effect, perfect for a serene atmosphere in your home.
Another exciting technique is the ombre effect. This style involves blending two or more colors together to create a gradient look. Imagine a wooden box that transitions from a rich navy blue at the base to a soft sky blue at the top—how stunning would that be? The ombre effect not only adds depth but also creates a unique visual experience that draws the eye.
For those who love a touch of elegance, metallic paints can be a game changer. Gold, silver, or copper accents can give your wooden boxes a luxurious feel. You can use metallic paint to highlight specific areas or details, such as edges or carvings, making your box not just a storage solution but a work of art.
Additionally, stenciling is a fantastic way to add personal touches to your designs. You can create intricate patterns or quotes that resonate with you. The beauty of stenciling is that it allows for creativity without requiring advanced painting skills. Simply choose a design, secure the stencil, and paint over it to achieve crisp, clean lines that enhance your wooden box's character.
Lastly, don't underestimate the power of decoupage. This technique involves gluing decorative paper or fabric onto the surface of your wooden box and sealing it with a protective finish. Decoupage allows for endless customization—think floral patterns, vintage prints, or even photographs that tell a story. It’s a wonderful way to turn a simple box into a cherished keepsake.
In summary, the painting styles you choose for your wooden boxes can dramatically impact their appearance and functionality. Whether you opt for bold colors, elegant metallics, or intricate stenciling, each technique offers a unique way to express your creativity and style. So grab your brushes, unleash your imagination, and let your wooden boxes reflect your personality!
- What type of paint is best for wooden boxes? Acrylic paints are often recommended for wooden boxes due to their durability and ease of use. They adhere well to wood and come in a wide range of colors.
- Can I use spray paint on wooden boxes? Yes, spray paint can provide a smooth and even finish. Just ensure the box is properly prepared and primed before application for the best results.
- How do I seal my painted wooden box? Using a clear sealant or varnish after painting will protect your design and enhance the wood's natural beauty. Make sure to follow the manufacturer's instructions for application.
- Are there any specific techniques for painting intricate designs? Yes, using fine-tipped brushes or paint pens can help you achieve detailed designs. Additionally, practicing on scrap wood can help you refine your technique.
5. Themed Designs
When it comes to crafting wooden boxes, themed designs can take your creativity to the next level. These boxes can cater to specific interests or occasions, making them not just functional storage solutions but also delightful gifts. Imagine giving a beautifully crafted box that reflects a person's hobbies or passions—how special would that be? Themed designs allow you to infuse personality and meaning into your creations, ensuring they resonate with the recipient.
One popular approach to themed wooden boxes is to draw inspiration from nature. Nature-inspired boxes can incorporate elements like leaf motifs, floral patterns, or even animal carvings. These designs are perfect for those who love the outdoors and want to bring a touch of nature into their homes. For instance, a box adorned with intricate leaf carvings can serve as a stunning decorative piece on a coffee table, while also providing a cozy nook for storing trinkets.
Another exciting avenue to explore is holiday-themed designs. Imagine crafting a festive wooden box that reflects the spirit of the season! Whether it’s a Christmas box adorned with snowflakes and Santa motifs or a spooky Halloween box featuring bats and pumpkins, these creations can serve multiple purposes. They can be used for storing seasonal decorations, holding gifts, or even as unique packaging for special occasions. The beauty of holiday-themed boxes is that they can become cherished keepsakes, bringing joy year after year.
To give you a clearer picture, let’s look at some examples of themed wooden boxes:
| Theme | Design Features | Uses |
|---|---|---|
| Nature-Inspired | Leaf motifs, animal carvings, earthy colors | Decorative storage, trinket holder |
| Holiday Themes | Festive colors, seasonal symbols, personalized touches | Gift packaging, decoration storage |
| Hobby-Centric | Custom artwork, themed engravings | Storage for hobby supplies, personalized gifts |
Incorporating these themes into your wooden box designs not only enhances their aesthetic appeal but also adds layers of meaning. When you create a box that reflects a loved one’s interests—be it gardening, crafting, or a favorite holiday—you’re not just giving them a box; you’re giving them a piece of yourself. So, whether you’re a seasoned crafter or just starting, consider diving into themed designs for your next project. You might just find that the process is as rewarding as the finished product!
Q: What materials are best for themed wooden boxes?
A: The best materials depend on the theme you choose. For nature-inspired boxes, reclaimed wood or natural finishes work well. For holiday themes, you might opt for brighter colors or themed embellishments.
Q: Can I personalize a themed wooden box?
A: Absolutely! Personalization can be done through engraving, painting, or adding decorative elements that reflect the recipient's personality or interests.
Q: Are themed wooden boxes suitable as gifts?
A: Yes! Themed wooden boxes make fantastic gifts, especially when they align with the recipient's hobbies or favorite occasions.
5.1. Nature-Inspired Boxes
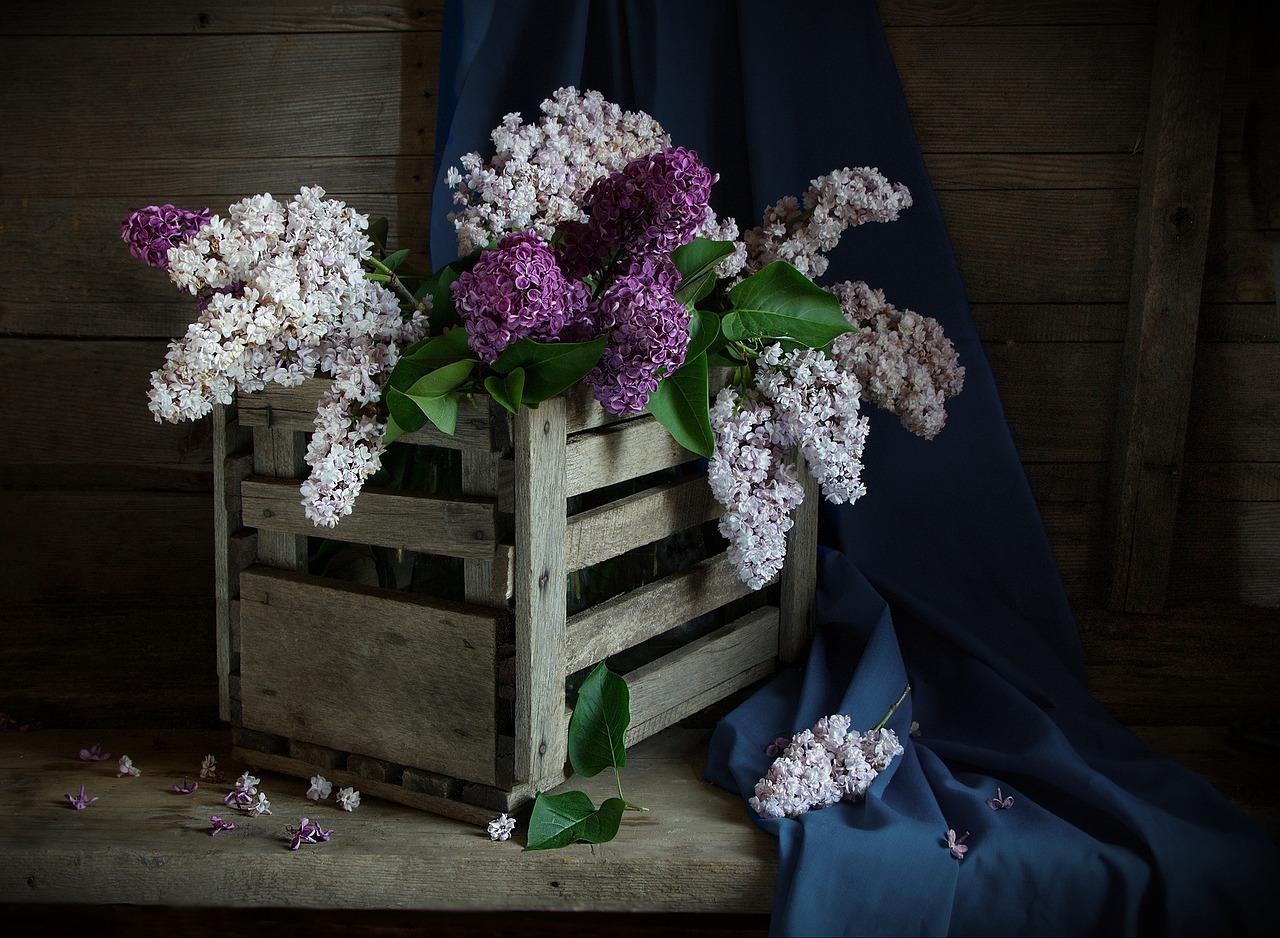
When it comes to crafting wooden boxes that resonate with the beauty of the great outdoors, nature-inspired designs are a fantastic choice. Imagine a box adorned with intricate leaf motifs or delicate animal carvings, each piece telling a story that connects you to the natural world. These designs not only serve as functional storage solutions but also as stunning decorative accents that breathe life into your home.
To create a nature-inspired wooden box, consider incorporating elements that reflect your favorite aspects of nature. For instance, you might choose to use wood that has a natural grain pattern reminiscent of tree bark or opt for colors that mimic the hues of a sunset. Engaging with nature in your designs can evoke feelings of tranquility and warmth, making your space feel more inviting.
Some popular themes to explore include:
- Floral Patterns: Carving or painting flowers on your wooden box can add a touch of elegance and charm. Think of daisies, sunflowers, or even intricate rose designs that can brighten up any room.
- Animal Motifs: Whether it's a majestic deer or a playful squirrel, incorporating animal designs can add a whimsical touch. These motifs can be carved into the wood or painted on for a more colorful approach.
- Landscape Scenes: For a more elaborate design, consider creating a small landscape scene on the lid of your box. This could include mountains, rivers, or forests, capturing the essence of your favorite outdoor spots.
Moreover, utilizing natural materials such as bark, twigs, or leaves can elevate your design to a new level. For example, wrapping a box with twine and adding a few dried flowers can create a rustic appeal that is both charming and unique. The beauty of nature-inspired boxes lies in their ability to blend seamlessly with various decor styles, from rustic farmhouse to modern chic.
In addition, these boxes can serve various purposes, whether for storing keepsakes, organizing crafting supplies, or even as unique gift boxes. The versatility of nature-inspired designs allows them to be customized for any occasion or personal preference, making them a perfect project for DIY enthusiasts looking to express their creativity.
Ultimately, creating nature-inspired wooden boxes is not just about the final product; it’s about the journey of bringing a piece of the outdoors into your home. So, grab your tools, let your imagination run wild, and start crafting a box that reflects the beauty of nature!
Q: What types of wood are best for nature-inspired boxes?
A: Woods like pine, cedar, and oak are excellent choices due to their natural beauty and durability. Each type of wood has unique grain patterns that can enhance your design.
Q: Can I use paint on my nature-inspired box?
A: Absolutely! Using non-toxic paints can add vibrant colors to your designs. Watercolors or acrylics work well for creating floral patterns or landscapes.
Q: How can I ensure my box is eco-friendly?
A: Opt for reclaimed wood or sustainably sourced materials. Additionally, using natural finishes like beeswax or oil can help maintain the eco-friendliness of your project.
Q: Are there specific tools I need for carving designs?
A: Basic carving tools, a wood burner for intricate designs, and sandpaper for smoothing edges are essential. Safety gear, such as gloves and goggles, is also recommended.
5.2. Holiday Themes
When it comes to creating holiday-themed wooden boxes, the possibilities are as endless as the holiday spirit itself! These boxes not only serve as practical storage solutions but also add a festive touch to your home decor. Imagine a beautifully crafted wooden box adorned with seasonal motifs, perfect for storing your holiday decorations or even serving as a unique gift box for loved ones. The joy of crafting these boxes lies in the creativity you can unleash, allowing you to reflect the essence of each holiday.
For instance, during the winter holidays, you might consider incorporating elements like snowflakes, reindeer, or Christmas trees into your designs. Using a combination of wood burning techniques and colorful paints, you can create a stunning visual that captures the magic of the season. Similarly, for Easter, think about adding pastel colors and floral designs that evoke the freshness of spring. The beauty of these holiday-themed boxes is that they can be both functional and decorative, making them perfect for any occasion.
Additionally, here are some ideas to inspire your holiday-themed wooden box creations:
- Halloween: Create spooky designs featuring bats, pumpkins, and ghosts. A box painted in orange and black can serve as a fun place to store candy or decorations.
- Thanksgiving: Use warm colors like browns and golds, and consider carving or painting designs of autumn leaves, turkeys, or cornucopias.
- Valentine's Day: A box decorated with hearts and soft colors can be a perfect gift box for that special someone, filled with chocolates or love notes.
By personalizing your wooden boxes for each holiday, you not only create unique storage solutions but also add an element of warmth and cheer to your home. Each box can tell a story, reminding you of the joy and love that comes with the holiday season. So grab your tools, unleash your creativity, and let your imagination guide you to craft the perfect holiday-themed wooden boxes!
Q: What materials do I need to create holiday-themed wooden boxes?
A: You will need basic woodworking tools, wood (such as pine or plywood), paint, wood stain, brushes, and decorative elements like stencils or wood-burning tools for designs.
Q: Can I use reclaimed wood for my holiday boxes?
A: Absolutely! Reclaimed wood adds character and a rustic charm to your holiday-themed boxes, making each piece unique.
Q: Are there specific techniques for painting holiday designs?
A: Yes, you can use techniques like stenciling for precise designs or freehand painting for a more personalized touch. Don't forget to seal your paint with a protective finish!
Q: How can I ensure my wooden boxes are durable for seasonal use?
A: Use high-quality wood and apply a protective finish such as varnish or polyurethane to ensure your boxes withstand seasonal wear and tear.
6. Size and Shape Variations
When it comes to wooden boxes, size and shape are not just practical considerations; they are key elements that can transform a simple storage solution into a stunning decorative piece. The beauty of wooden boxes lies in their versatility, allowing you to create designs that cater to various needs and preferences. Imagine walking into a room where every corner is adorned with beautifully crafted boxes, each telling a different story through its unique dimensions and shapes. Whether you need a small keepsake box for your cherished mementos or a large storage solution for organizing your craft supplies, there’s a wooden box design that fits the bill.
Small keepsake boxes are perfect for those special items that hold sentimental value. These boxes can be intricately designed, incorporating personal touches that make them ideal for gifts or special occasions. For instance, you might choose to create a box that holds a collection of letters, photographs, or trinkets that evoke cherished memories. The size of these boxes allows for creativity in design; you can experiment with different shapes such as hearts, stars, or even animals, making them not just functional but also delightful pieces of art.
On the other hand, larger wooden boxes serve as versatile storage solutions that can help keep your space organized. These boxes are fantastic for storing larger items like blankets, toys, or seasonal decorations. When designed thoughtfully, they can maintain a cohesive aesthetic throughout your home. Imagine a beautifully crafted wooden box that doubles as a coffee table, providing both storage and style. The size and shape variations in larger boxes can also be a conversation starter, inviting guests to admire your unique creations.
To illustrate the possibilities, consider the following table that highlights different size and shape variations for wooden boxes:
| Box Type | Dimensions | Uses |
|---|---|---|
| Small Keepsake Box | 6"x6"x3" | Jewelry, Letters, Photos |
| Medium Storage Box | 12"x8"x6" | Toys, Craft Supplies |
| Large Storage Chest | 30"x18"x18" | Blankets, Seasonal Decor |
Ultimately, the size and shape of your wooden boxes can significantly impact both their functionality and visual appeal. By experimenting with various dimensions and forms, you can create a collection of boxes that not only serve a purpose but also enhance the beauty of your space. So, whether you're crafting a small box that holds personal treasures or a large chest that organizes your living area, remember that every size and shape has its own charm and potential.
- What materials are best for making wooden boxes? - The best materials include hardwoods like oak, maple, or walnut for durability, but softer woods like pine can also be used for lighter projects.
- Can I paint or stain my wooden box? - Absolutely! Painting or staining your box can enhance its appearance and protect the wood from wear and tear.
- How do I ensure my wooden box lasts long? - Use quality materials, apply protective finishes, and store your box in a dry environment to ensure longevity.
6.1. Small Keepsake Boxes
Small keepsake boxes are more than just simple storage solutions; they are treasures that hold memories, stories, and moments that matter. Imagine a beautifully crafted box, just the right size to hold your most cherished items—perhaps a ticket stub from a first concert, a lock of hair from your child's first haircut, or a collection of love letters. These boxes serve as personal time capsules, preserving the essence of significant life events. The beauty of small keepsake boxes lies in their intricate designs, which can be tailored to reflect your unique personality or the interests of the recipient.
When designing a small keepsake box, consider the materials and finishes that will best suit your aesthetic. You might choose to work with rich hardwoods that age beautifully, or opt for lighter materials that can be painted or stained in vibrant colors. Adding personal touches like engravings or decorative elements can transform a simple box into a one-of-a-kind masterpiece. For instance, you could incorporate motifs that hold special meaning, like floral patterns for a nature lover or geometric designs for a modern touch.
To enhance the functionality of your small keepsake boxes, think about including compartments or dividers. This allows for organized storage, making it easy to categorize and access your treasured items. Here are a few design ideas to inspire your creativity:
- Nested compartments: Create smaller sections within the box for different types of keepsakes.
- Removable lids: Consider a lid that can be removed completely or one that lifts off easily, allowing for convenient access.
- Decorative inlays: Use contrasting wood or materials to create beautiful inlays that catch the eye.
Don't forget to consider the emotional aspect of these boxes. Each small keepsake box can be a gift that conveys thoughtfulness and care. Whether you're creating a keepsake box for a friend, a family member, or even for yourself, the time and effort you invest in the design will be appreciated. Think of it as a way to say, "I value our memories together."
In conclusion, small keepsake boxes are a delightful blend of functionality and sentimentality. They allow you to express your creativity while providing a special place for your most treasured items. So, whether you’re a seasoned crafter or a beginner, why not embark on this rewarding DIY project? You might just find that the process of creating the box is as meaningful as the memories it holds.
6.2. Large Storage Solutions
When it comes to maximizing space in your home, large wooden storage boxes are a game-changer. These boxes not only provide ample room for organizing various items but also add a touch of style to your decor. Imagine a beautifully crafted wooden box sitting in your living room or bedroom, serving as both a functional storage solution and a stunning piece of furniture. The versatility of large storage boxes means they can be used in numerous ways, from storing blankets and toys to holding seasonal decorations.
One of the biggest advantages of using large wooden boxes is their durability. Unlike plastic storage bins, wooden boxes have a timeless quality that can withstand the test of time, making them an excellent investment. You can choose from a variety of woods, such as oak, pine, or cedar, each offering its unique aesthetic and benefits. For instance, cedar is naturally resistant to insects and decay, making it perfect for storing clothing or linens.
In addition to functionality, large storage boxes can also serve as a focal point in a room. You can customize them with different finishes, stains, or paints to match your home’s decor. Whether you prefer a rustic, distressed look or a sleek, modern finish, the possibilities are endless. Here are some ideas for using large wooden boxes in your home:
- Living Room: Use a large wooden box as a coffee table that doubles as storage for magazines, remotes, and blankets.
- Bedroom: Place a large box at the foot of your bed to store extra bedding or seasonal clothing.
- Entryway: Keep shoes, hats, and gloves organized in a large box that also serves as a stylish bench.
Moreover, you can enhance the functionality of these large storage solutions by incorporating features like removable lids or compartments. A removable lid allows for easy access to the contents inside, while compartments can help keep items organized and prevent clutter. Think of a large box with dividers for storing different types of craft supplies or a box with a hinged lid that opens up to reveal a hidden treasure of board games.
In summary, large wooden storage boxes are not just practical; they are also an opportunity to express your creativity and style. By selecting the right design and finish, you can create a storage solution that complements your home while providing the functionality you need. So why not consider adding a few large wooden boxes to your space? They might just become the perfect blend of form and function that you've been searching for!
Q: What types of wood are best for large storage boxes?
A: Common choices include oak, pine, and cedar. Each type offers different aesthetics and durability levels, so choose based on your needs and style.
Q: Can I customize the size of my wooden storage box?
A: Absolutely! Many DIY enthusiasts create custom-sized boxes to fit specific spaces or storage needs.
Q: How do I maintain my wooden storage box?
A: Regular dusting and occasional polishing with a wood-safe cleaner will help maintain its appearance. Avoid placing it in direct sunlight to prevent fading.
Q: Are wooden storage boxes suitable for outdoor use?
A: Some woods, like cedar, are more resistant to the elements, but it’s best to treat any wooden box with outdoor-safe finishes if you plan to use it outside.

7. Finishing Touches
When it comes to crafting your wooden boxes, the finishing touches are not just an afterthought; they are the cherry on top that can elevate your creation from ordinary to extraordinary. Think of these finishes as the final brush strokes on a canvas, enhancing the beauty of the natural wood grain while providing essential protection. A well-finished wooden box not only looks appealing but also stands the test of time, ensuring your hard work pays off in durability and aesthetics.
One of the most popular choices for finishing wooden boxes is the use of natural finishes. These finishes allow the inherent beauty of the wood to shine through, showcasing its unique patterns and textures. Options like tung oil, linseed oil, and beeswax are excellent for this purpose. They penetrate the wood, providing moisture resistance and a soft sheen without obscuring the grain. Imagine the warm glow of a well-oiled cedar box that not only looks stunning but also smells divine!
On the other hand, if you're looking to add a splash of color or a more polished look, consider using stains and varnishes. Stains come in a variety of shades, allowing you to customize your box to match your home decor perfectly. A rich walnut stain can give a rustic feel, while a sleek black stain can add a modern twist. After staining, a layer of varnish can seal the deal, providing a protective coat that guards against scratches and moisture. It’s like putting on a suit of armor for your wooden masterpiece!
Additionally, don’t underestimate the impact of decorative hardware. Incorporating stylish handles, hinges, and locks can not only enhance the functionality of your wooden box but also serve as decorative elements that tie the entire design together. For instance, using antique brass hardware can lend a vintage charm, while sleek stainless steel can add a modern touch. The right hardware can transform a simple box into a statement piece that draws the eye.
Here’s a quick overview of some finishing options you might consider:
| Finish Type | Benefits | Ideal For |
|---|---|---|
| Natural Finishes | Enhances wood grain, moisture resistance | Rustic designs |
| Stains | Customizable color, highlights wood texture | Personalized aesthetics |
| Varnishes | Durability, scratch resistance | Protection for all designs |
| Decorative Hardware | Style enhancement, functionality | All types of boxes |
Remember, the finishing touches are where you can truly express your creativity. Don’t be afraid to experiment with different finishes and hardware options to find what resonates with your style. After all, your wooden box is not just a storage solution; it’s a reflection of your personality and craftsmanship. So, take your time, enjoy the process, and let your imagination run wild!
Q1: What is the best finish for a wooden box?
A1: The best finish depends on your desired look and use. Natural oils are great for a rustic finish, while stains and varnishes provide color and protection.
Q2: How do I apply a stain or varnish?
A2: Use a clean cloth or brush to apply the stain or varnish in even strokes, following the wood grain. Allow it to dry completely before applying additional coats.
Q3: Can I mix different finishes?
A3: Yes, you can mix finishes, but it's essential to test them on a scrap piece of wood first to ensure compatibility and desired results.
Q4: How can I maintain the finish on my wooden box?
A4: Regular dusting and occasional reapplication of oil or wax can help maintain the finish and protect the wood from wear and tear.
7.1. Natural Finishes
When it comes to enhancing the beauty of your wooden box designs, natural finishes play a crucial role. These finishes not only protect the wood but also highlight its unique grain and texture, allowing the natural beauty of the material to shine through. Imagine a beautifully crafted wooden box that feels warm and inviting, with a finish that enhances its organic appeal. Natural finishes can range from oils and waxes to varnishes, each offering different benefits and aesthetic qualities.
One popular option is linseed oil, which penetrates deep into the wood, providing a rich, warm tone while offering protection against moisture and wear. Another excellent choice is tung oil, known for its durability and water resistance. It dries to a hard finish that enhances the wood's natural color and grain. If you're looking for a more matte look, beeswax can be a fantastic choice, giving your wooden box a soft, velvety feel while providing a protective layer.
Here’s a quick overview of some natural finishes you might consider for your wooden boxes:
| Finish Type | Benefits | Application Method |
|---|---|---|
| Linseed Oil | Deep penetration, enhances color | Apply with a cloth, buff after drying |
| Tung Oil | Durable, water-resistant | Brush on, allow to cure |
| Beeswax | Soft finish, easy to apply | Rub on with a cloth, buff to shine |
Using these natural finishes not only preserves the integrity of the wood but also contributes to a sustainable approach to crafting. By opting for natural products, you’re making an environmentally friendly choice that can reduce the use of harsh chemicals often found in synthetic finishes. Plus, the application process can be quite therapeutic—a great way to unwind while working on your latest project.
Incorporating natural finishes into your wooden box designs is all about embracing the wood's inherent qualities. The right finish can elevate your project from a simple storage solution to a stunning centerpiece that draws attention and admiration. So, whether you’re creating a rustic keepsake box or a sleek modern storage solution, remember to consider how natural finishes can enhance your design while providing the durability and protection your wooden creations deserve.
As you embark on your woodworking journey, keep in mind that the beauty of natural finishes lies in their ability to age gracefully. Over time, these finishes will develop a character that tells the story of your craftsmanship and the life of the wood itself. So go ahead, experiment with different natural finishes, and watch your wooden boxes transform into cherished heirlooms!
- What is the best natural finish for beginners? Linseed oil is a great starting point as it is easy to apply and provides excellent protection.
- How often should I reapply natural finishes? It depends on the usage, but generally, every 6 to 12 months is recommended for optimal protection.
- Can I mix different natural finishes? Yes, but it's important to test the combination on a small area first to ensure compatibility.
7.2. Decorative Hardware
When it comes to enhancing the aesthetic appeal of your wooden boxes, decorative hardware plays a crucial role. Think of hardware as the jewelry for your wooden creations—just like a beautiful necklace can elevate an outfit, the right hardware can transform a simple wooden box into a stunning focal point. From ornate handles to stylish hinges, the choices are vast and can significantly impact the overall look and functionality of your box.
One of the most popular types of decorative hardware is handles. They not only serve a practical purpose but also add a touch of personality. For instance, if you’re going for a rustic vibe, consider using wrought iron handles that exude an old-world charm. On the other hand, sleek, polished metal handles can offer a modern touch, making your box look contemporary and chic. It's fascinating how something as simple as a handle can change the entire character of your piece!
Additionally, hinges are another important aspect of decorative hardware. The right hinges can add elegance and functionality to your wooden boxes. You might opt for decorative hinges that are visible on the outside, which can add to the overall design, or choose concealed hinges for a more minimalist approach. Whichever style you choose, make sure it complements the design of the box.
Furthermore, don't overlook the potential of adding decorative corner brackets. These small yet impactful elements can provide both support and style. They can protect the corners of your box from damage while also enhancing its visual appeal. Imagine a vintage-style box with antique brass corner brackets—it's a small detail that makes a big difference!
To help you visualize the various options available, here’s a simple table that outlines some popular types of decorative hardware and their suitable styles:
| Type of Hardware | Style | Best For |
|---|---|---|
| Handles | Wrought Iron, Brass, Modern Metal | Rustic, Vintage, Contemporary |
| Hinges | Decorative, Concealed | Traditional, Minimalist |
| Corner Brackets | Antique Brass, Decorative Designs | Vintage, Industrial |
In conclusion, incorporating decorative hardware into your wooden box designs is a fantastic way to express your creativity and style. Whether you choose ornate or simple designs, the key is to ensure that the hardware complements the overall aesthetic of your box. So, as you embark on your next DIY project, remember that these small details can create a significant impact, making your wooden boxes not just functional storage solutions but also beautiful pieces of art.
- What types of decorative hardware are best for wooden boxes?
It depends on your design preference. Wrought iron is great for rustic styles, while polished metal suits modern designs. Decorative hinges and corner brackets can also enhance the overall look.
- How do I choose the right size of hardware for my box?
Consider the dimensions of your box and the overall design. Larger boxes may require more substantial hardware, while smaller boxes can benefit from more delicate pieces.
- Can I paint or finish decorative hardware?
Yes! You can paint or apply a finish to match your box's color scheme. Just ensure the paint is suitable for metal to avoid peeling or chipping.
8. Personalization Options
When it comes to wooden boxes, personalization is what truly sets them apart and makes them special. Whether you're crafting a box for yourself or as a thoughtful gift for someone else, adding a personal touch can transform an ordinary storage solution into a cherished keepsake. One of the most popular ways to personalize your wooden box is by incorporating monograms or initials. This simple addition not only adds a unique flair but also makes the box feel like it belongs to someone specific. Imagine giving a beautifully crafted box, adorned with the recipient's initials, as a gift. It’s a gesture that says, "I thought of you."
Another fantastic way to personalize your wooden box is through custom artwork. This could be anything from a simple design to a detailed illustration that reflects the recipient's personality or interests. For instance, if you know someone who loves nature, a box featuring hand-painted leaves or animal motifs could be the perfect choice. Custom artwork allows you to express creativity while ensuring that the box is a true reflection of the individual it’s intended for.
Moreover, consider the use of photos or special messages engraved or decoupaged onto the surface of the box. This not only adds a layer of sentimentality but also makes the box a conversation starter. Imagine a box that holds your favorite memories, adorned with snapshots of those moments. It becomes more than just a storage solution; it becomes a treasure trove of memories.
For those who enjoy crafting, the possibilities for personalization are endless. You can use various techniques such as wood burning, where intricate designs are burned into the wood, creating a rustic and artistic appearance. This method allows for a high level of detail and can make even simple boxes look stunning. Additionally, painting is another avenue for personalization. You can choose colors that resonate with the person’s style or even paint a scene that holds significance to them.
Ultimately, the key to personalization is to keep the recipient in mind. Think about their interests, hobbies, and what would make them smile. By doing so, you can create a wooden box that is not only functional but also a meaningful piece of art that they will cherish for years to come. So, whether it's a monogram, custom artwork, or a heartfelt message, the personal touches you add will surely make your wooden box a standout piece.
| Question | Answer |
|---|---|
| What materials are best for personalizing wooden boxes? | Common materials include paints, wood-burning tools, and decoupage supplies. Choose based on the design you wish to create. |
| Can I personalize a wooden box for outdoor use? | Yes, but ensure you use weather-resistant finishes and materials to protect it from the elements. |
| How can I ensure the personalization lasts? | Use high-quality paints and finishes, and consider sealing the box with a protective coat to preserve the design. |
| Is it possible to personalize a box with photos? | Absolutely! You can use decoupage techniques to adhere photos to the box, making it a unique keepsake. |

8.1. Monograms and Initials
When it comes to personalizing your wooden boxes, monograms and initials stand out as a timeless choice. These personal touches not only add a layer of uniqueness to your creations but also transform an ordinary box into a cherished keepsake. Imagine gifting a beautifully crafted wooden box adorned with the initials of a loved one; it’s a heartfelt gesture that speaks volumes. But how do you go about incorporating these elements into your designs? Let’s dive into some creative ideas!
First off, consider the placement of the monogram or initials. The top of the box is a popular spot, as it’s the first place the eye is drawn to. However, you can also experiment with side placements or even the interior of the lid for a surprise element. The choice of font is equally crucial. A classic serif font can evoke a sense of tradition, while a modern sans-serif can lend a contemporary flair. Think about the personality of the recipient and choose a style that resonates with them.
Next, let’s talk about the techniques for adding these personal touches. Here are a few popular methods:
- Wood Burning: This technique allows for intricate designs that can be both elegant and rustic. With a wood burning tool, you can carefully etch the initials or monogram into the surface of the wood, creating a permanent and artistic feature.
- Painting: If you’re looking for a pop of color, consider painting the initials. You can use stencils for precision or freehand for a more personal touch. Just ensure you use paint suitable for wood to achieve a lasting finish.
- Engraving: For a sleek and modern look, engraving is an excellent option. This method can be done using a laser engraver, which provides clean lines and a professional finish. It’s especially great for intricate designs.
Additionally, think about the material you’re working with. Different woods can enhance the overall look of your personalization. For instance, dark woods like walnut can create a striking contrast with lighter-colored paint or engravings, making the initials pop. On the other hand, lighter woods like pine can be beautifully complemented with darker stains or burnt designs.
Finally, don’t forget to consider the size of the initials or monogram. A large, bold monogram can serve as a statement piece, while smaller initials can add a subtle touch of elegance. The key is to find a balance that complements the overall design of the box without overwhelming it.
In summary, incorporating monograms and initials into your wooden box designs is a fantastic way to personalize your creations. Whether you choose wood burning, painting, or engraving, these elements can transform a simple box into a treasured item. So go ahead, unleash your creativity, and make something truly special that reflects the personality of its owner!
Q: What tools do I need for adding monograms to my wooden boxes?
A: Depending on the technique you choose, you may need wood burning tools, paintbrushes, stencils, or a laser engraver. Basic woodworking tools like sandpaper and a drill may also come in handy for preparing the box.
Q: Can I personalize a wooden box that I bought from a store?
A: Absolutely! Store-bought wooden boxes are perfect candidates for personalization. Just ensure the surface is prepared properly for the method you choose, whether it’s sanding it down for painting or ensuring it’s clean for engraving.
Q: Are there any specific types of wood that work best for monogramming?
A: While you can personalize nearly any type of wood, hardwoods like oak, maple, and walnut tend to hold details better and provide a more durable surface for your designs.
8.2. Custom Artwork
Custom artwork can truly transform a simple wooden box into a unique masterpiece that reflects the personality and interests of the recipient. Imagine gifting a wooden box adorned with intricate designs or vibrant colors that resonate with someone’s passions. Whether it’s a hand-painted floral design, a stunning landscape, or even a beloved pet’s portrait, the possibilities are as endless as your imagination. Custom artwork not only enhances the aesthetic appeal of the box but also adds a layer of sentimentality, making it a cherished item for years to come.
When considering custom artwork for your wooden box, think about the following elements:
- Theme: Choose a theme that resonates with the person receiving the box. This could be anything from nature scenes to abstract art.
- Colors: Select a color palette that complements the decor of the space where the box will reside. Bold colors can make a statement, while soft pastels can provide a calming effect.
- Technique: Decide on the technique you want to use for the artwork. Options include painting, engraving, or even decoupage, each offering a different texture and visual appeal.
Custom artwork can be a fun DIY project, but if you’re not artistically inclined, consider hiring a local artist or finding a skilled artisan online. Websites like Etsy are fantastic platforms to connect with talented creators who can bring your vision to life. Plus, commissioning an artist not only supports their work but also ensures that you get a truly one-of-a-kind piece.
Ultimately, a wooden box with custom artwork becomes more than just a storage solution; it transforms into a personalized treasure that tells a story. Whether it's used to store keepsakes, jewelry, or even as a decorative piece on a shelf, the thoughtfulness behind custom artwork will resonate with anyone lucky enough to receive it.
Here are some common questions regarding custom artwork on wooden boxes:
- Can I create custom artwork myself? Yes! If you enjoy painting or crafting, you can definitely create your own designs. Just ensure you use materials that are safe for wood.
- What types of paints are best for wooden boxes? Acrylic paints are popular for their vibrant colors and quick drying time, while oil paints offer a rich finish but take longer to dry.
- How do I protect the artwork on my wooden box? Applying a clear sealant or varnish can help protect the artwork from scratches and fading over time.
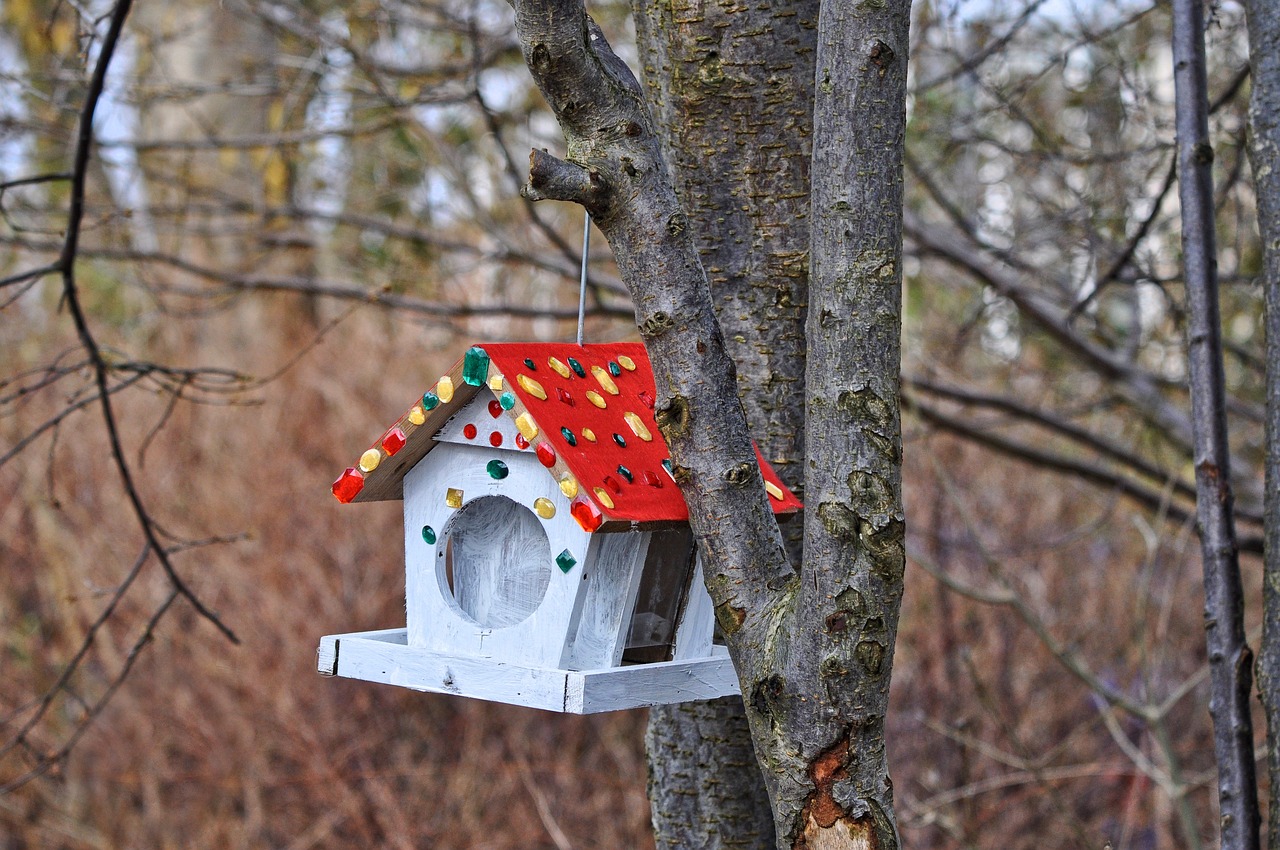
9. DIY Tips and Tricks
Creating your own wooden boxes can be an incredibly rewarding project, but it’s essential to approach it with the right mindset and tools. First and foremost, planning is key. Before you even pick up a saw, take some time to sketch out your design. Think about the purpose of your box: will it be a decorative piece, or do you need it for storage? Having a clear vision will guide you through the process and help you avoid costly mistakes.
When it comes to materials, quality matters. Invest in good wood that suits your project. Softwoods like pine are easier to work with for beginners, while hardwoods like oak offer durability and a beautiful finish. Additionally, consider the thickness of the wood; thicker boards will provide sturdiness for larger boxes, while thinner ones can be used for smaller, more delicate designs.
Next, let’s talk tools. Familiarizing yourself with essential tools is crucial for a successful DIY project. Here’s a quick rundown of what you’ll need:
- Measuring Tape: Accurate measurements are vital.
- Saw: A handsaw or a power saw will work, depending on your comfort level.
- Drill: For making holes and attaching hardware.
- Sander: Smooth edges for a polished finish.
- Clamps: To hold pieces together while the glue dries.
Once you have your materials and tools ready, remember that safety comes first. Always wear protective eyewear and a dust mask when working with wood and power tools. It’s easy to get caught up in the excitement of crafting, but taking a moment to ensure your safety will pay off in the long run.
As you start cutting and assembling your box, don’t rush the process. Take your time to measure twice and cut once. This old adage is particularly important in woodworking. If you’re unsure about a cut, it’s better to take a little extra time rather than end up with a piece that doesn’t fit or looks uneven. And remember, practice makes perfect! If you’re new to woodworking, consider starting with simple designs before moving on to more complex projects.
Lastly, don’t forget about the finishing touches. A well-finished box can elevate your project from basic to stunning. Whether you choose to stain, paint, or apply a natural finish, these details can make a significant difference. Experiment with different techniques and don’t be afraid to showcase your personality through your designs.
Q1: What type of wood is best for beginners?
A1: Softwoods like pine or cedar are great for beginners due to their ease of cutting and sanding.
Q2: How can I ensure my box is sturdy?
A2: Use thicker wood for larger boxes, and make sure to use screws or nails in addition to glue for added strength.
Q3: What are some common mistakes to avoid?
A3: Common mistakes include not measuring accurately, rushing the assembly, and neglecting to sand edges properly.
Q4: Can I personalize my wooden box?
A4: Absolutely! You can add monograms, paint designs, or even wood burn patterns to make it uniquely yours.
By following these tips and tricks, you’ll be well on your way to creating beautiful and functional wooden boxes that reflect your style and creativity. Happy crafting!
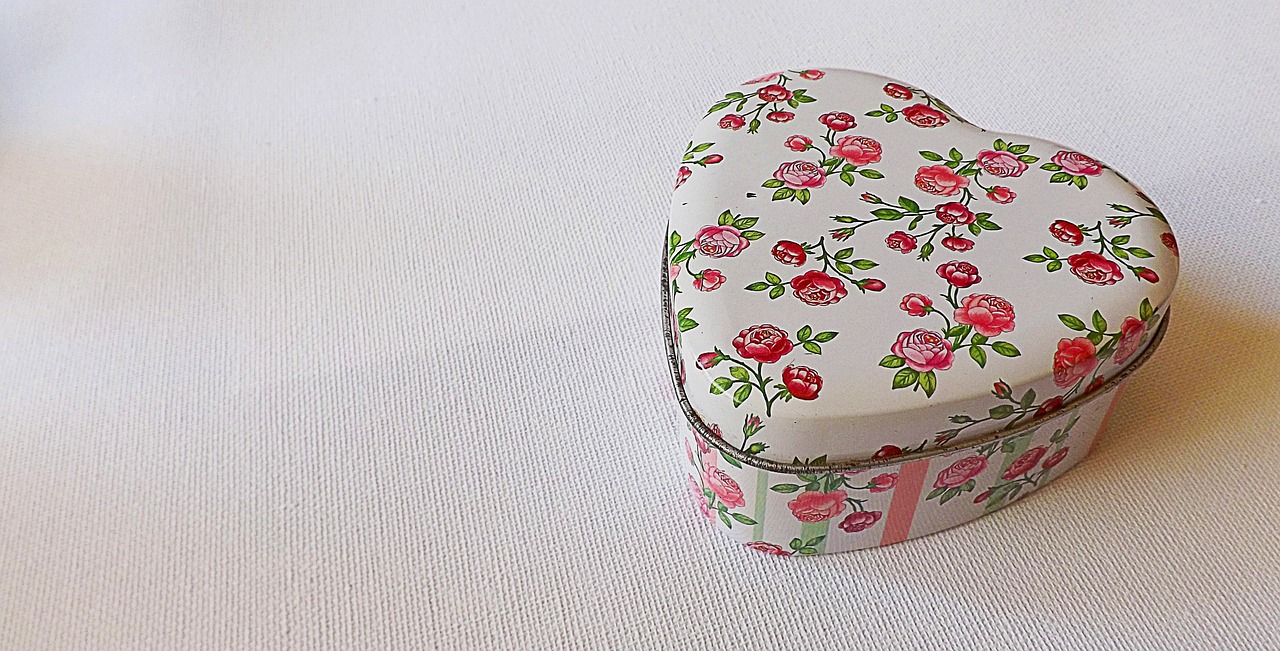
9.1. Essential Tools
When it comes to creating stunning wooden boxes, having the right tools is essential for both beginners and seasoned DIY enthusiasts. Imagine embarking on a journey without a map; that's what it feels like to start a woodworking project without the proper equipment. To ensure your crafting experience is smooth and enjoyable, let’s explore the essential tools you'll need. These tools not only make the process easier but also enhance the quality of your final product.
First and foremost, a circular saw is a must-have. This versatile tool helps you make straight cuts quickly and efficiently, allowing you to transform planks of wood into the pieces you need for your box. If you're looking for precision, a miter saw can be an excellent addition to your toolkit for making angled cuts that are perfect for corners and joints.
Next up is the drill. This handy device is essential for creating holes for screws or decorative elements. A cordless drill adds a layer of convenience, letting you maneuver freely without being tethered to a power outlet. Additionally, having a variety of drill bits on hand will allow you to tackle different tasks—from making pilot holes to installing hinges.
Don't forget about the sander. A smooth finish can elevate your wooden box from ordinary to extraordinary. Whether you choose a handheld sander or a more robust stationary one, this tool will help remove rough edges and create a polished look. For those intricate details, a detail sander can help you get into tight spots, ensuring every inch of your box is beautifully finished.
For joining pieces together, a good set of screws and wood glue is essential. Screws provide a strong hold, while wood glue adds an extra layer of durability. When used together, they can ensure that your wooden box stands the test of time. Remember, the right adhesive can make all the difference, so opt for a quality wood glue that dries clear and is strong enough to withstand wear and tear.
Lastly, let’s talk about safety gear. It may seem like a minor detail, but investing in a good pair of safety goggles and a dust mask can protect you from wood dust and debris, ensuring a safe crafting experience. After all, the last thing you want is to get sidelined by an injury while working on your beautiful wooden box.
To summarize, here’s a quick table of essential tools for your wooden box project:
| Tool | Purpose |
|---|---|
| Circular Saw | For making straight cuts in wood. |
| Miter Saw | For precise angled cuts. |
| Drill | For creating holes and installing screws. |
| Sander | For smoothing surfaces and edges. |
| Screws and Wood Glue | For joining pieces securely. |
| Safety Gear | For protecting eyes and lungs. |
By equipping yourself with these essential tools, you’ll be well on your way to crafting beautiful wooden boxes that reflect your creativity and style. So, roll up your sleeves, gather your materials, and let your imagination run wild!
Here are some common questions that DIY enthusiasts often ask when getting started with wooden box projects:
- What type of wood is best for making wooden boxes? - Softwoods like pine are great for beginners due to their ease of work, while hardwoods like oak offer durability and a beautiful finish.
- Can I use recycled wood for my projects? - Absolutely! Upcycling old wood not only saves money but also adds character to your designs.
- How do I finish my wooden box? - You can use varnish, paint, or stains to enhance the appearance of your box. Make sure to sand it down before applying any finish for the best results.
- Is woodworking safe for children? - While children can participate in woodworking projects, it's essential to supervise them closely and ensure they use age-appropriate tools.
9.2. Safety Precautions
When diving into the world of woodworking, especially when crafting your own wooden boxes, safety should always be your top priority. Whether you're a seasoned pro or just starting out, understanding the potential hazards and taking the necessary precautions can make all the difference. Imagine stepping into your workshop, tools glinting in the light, ready to create something beautiful. But if you're not careful, that excitement can turn into a trip to the emergency room. So, let's explore some essential safety measures to keep you safe and sound while you unleash your creativity.
First and foremost, always wear appropriate personal protective equipment (PPE). This includes safety goggles to protect your eyes from flying debris, a dust mask to keep harmful particles out of your lungs, and ear protection to guard against the loud noises of power tools. Think of it as your superhero gear, ready to shield you from the unexpected!
Next, it's crucial to maintain a clean and organized workspace. A cluttered area can lead to accidents, so take a moment to tidy up before you start your project. Ensure that all tools are stored properly and that there are no tripping hazards. You wouldn’t want to trip over that stray piece of wood while wielding a saw, right?
When using power tools, always read the manufacturer's instructions carefully. Each tool has its quirks and knowing how to operate them safely is vital. For instance, make sure to check the condition of your tools before use; a dull blade can lead to slips and accidents. Additionally, never bypass safety features on tools. They are there for a reason, and ignoring them can lead to serious injury.
Moreover, consider working with a partner, especially when handling larger pieces of wood. It’s much easier to manage heavy materials with a buddy by your side, and it can also be a great way to share ideas and techniques. Plus, it’s more fun to create together!
Lastly, always keep a first aid kit handy in your workspace. Accidents can happen, even to the most careful craftsmen. Having supplies readily available can save you valuable time in case of a minor injury. Think of it as your safety net, ready to catch you when things go awry.
In summary, woodworking can be an incredibly rewarding hobby, but it’s essential to respect the tools and materials you’re working with. By following these safety precautions, you can ensure that your creative process remains enjoyable and injury-free. Now, let’s transition to some common queries that many DIY enthusiasts have regarding woodworking safety.
- What should I wear while woodworking? It's important to wear safety goggles, a dust mask, and ear protection to safeguard against debris, dust, and noise.
- How can I prevent accidents in my workshop? Keep your workspace clean and organized, and always be aware of your surroundings while using tools.
- What should I do if I get injured while woodworking? If it's a minor injury, clean the wound and apply a bandage. For serious injuries, seek medical attention immediately.
Frequently Asked Questions
- What materials are best for creating wooden boxes?
When it comes to crafting wooden boxes, the best materials include hardwoods like oak, maple, or cherry for durability and aesthetics. If you're looking for a more rustic charm, reclaimed wood or pallets can be great options as well. Each material brings its unique character, so choose based on the style you want to achieve!
- How can I personalize my wooden box?
There are numerous ways to personalize your wooden box! You can add monograms or initials using wood burning techniques or paint. Custom artwork is another fantastic option—think about designs that reflect your personality or interests. This not only makes the box special but also a cherished keepsake!
- What are some beginner-friendly DIY tips for making wooden boxes?
If you're just starting out, begin with simple designs and use pre-cut wood pieces to save time. Familiarize yourself with essential tools like a saw, drill, and sandpaper. Always remember to prioritize safety by wearing protective gear and working in a well-ventilated area. Practice makes perfect, so don’t hesitate to experiment!
- Can I use old furniture to create wooden boxes?
Absolutely! Repurposing old furniture is a fantastic way to create unique wooden boxes. Not only does it promote sustainability, but it also allows you to incorporate character and history into your designs. Just ensure the wood is in good condition and free from pests before starting your project!
- How do I finish my wooden box for durability?
Finishing touches are crucial for enhancing the durability of your wooden box. You can use natural finishes like oils or varnishes that protect the wood while showcasing its grain. Additionally, consider adding decorative hardware like handles or hinges that not only improve functionality but also elevate the overall design!
- What decorative techniques can I use on wooden boxes?
There are a variety of decorative techniques you can use, such as wood burning for intricate designs, painting in various styles, or decoupage for a unique flair. Each method allows you to express your creativity and can transform a simple wooden box into a stunning piece of art!
- Are there specific themes I can follow for my wooden box designs?
Yes! Themed designs can be a lot of fun. You might consider nature-inspired themes with leaf motifs or animal carvings, or festive holiday themes for storing decorations. These themes make your wooden boxes perfect gifts or personalized storage solutions tailored to specific interests!


