How to Build a Wooden Ladder: DIY Steps
Have you ever looked at a wooden ladder and thought, "I can make that!"? Well, you're in luck! In this article, we provide a comprehensive guide on constructing a wooden ladder, detailing essential materials, tools, safety tips, and step-by-step instructions for a successful DIY project. Whether you're a seasoned woodworker or a novice, this guide will equip you with everything you need to know to tackle this rewarding project. Building a wooden ladder not only gives you a sense of accomplishment but also provides a functional piece for your home or workshop. So, grab your tools and let’s get started on this exciting DIY journey!
Understanding the materials required for building a wooden ladder is crucial. The foundation of your ladder's strength lies in the type of wood you choose. Common options include pine, oak, or birch, each offering different levels of durability and aesthetics. For a sturdy and durable ladder, consider the following materials:
- Wood: Select high-quality lumber, ideally 2x4s for the sides and 1x4s for the rungs.
- Screws: Use wood screws that are at least 2.5 inches long for secure connections.
- Finish: Choose a wood stain or sealant to protect your ladder from moisture and wear.
Equipping yourself with the right tools is vital for a smooth building process. Having the proper tools not only makes your job easier but also ensures precision in your work. Here’s a list of essential tools you’ll need:
- Saw: A circular saw or miter saw for cutting your wood to size.
- Drill: A power drill for making holes and driving screws.
- Measuring Tape: To ensure accurate dimensions.
- Level: To check that your ladder is even.
- Sandpaper: For smoothing out rough edges.
Safety should always be a priority when undertaking DIY projects. Working with tools can be hazardous, so it's essential to follow important safety measures to protect yourself. Here are some key safety tips:
- Wear Protective Gear: Always use safety goggles and gloves to protect your eyes and hands.
- Keep Your Workspace Clean: A tidy workspace reduces the risk of accidents.
- Handle Tools Safely: Ensure all tools are in good condition and used according to instructions.
Before starting construction, a well-thought-out design is necessary. Think about what you need your ladder for, as this will dictate its design. Considerations include height, width, and style. A standard ladder height is around 6 to 8 feet, but you can customize it based on your needs. Remember, the wider the ladder, the more stable it will be. Sketching your design on paper can help visualize the final product and ensure all measurements are accurate.
This section provides a detailed, step-by-step guide to constructing your ladder. Follow these phases for a smooth building experience:
- Cut the Wood: Measure and cut your wood according to your design specifications.
- Assemble the Sides: Attach the vertical pieces to the horizontal rungs using screws, ensuring they are evenly spaced.
- Secure the Rungs: Drill pilot holes to prevent the wood from splitting and attach the rungs securely.
- Check for Stability: Use a level to ensure your ladder is straight and stable.
After building the ladder, finishing touches enhance both functionality and aesthetics. Sanding down rough edges not only makes your ladder look better but also prevents splinters. Applying a stain or sealant will protect the wood from moisture and wear, ensuring your ladder lasts for years to come. Choose a finish that complements your home’s decor, making your ladder not just a tool, but a beautiful addition to your space.
Regular maintenance is key to prolonging the life of your wooden ladder. Here are some tips on how to care for your ladder:
- Inspect Regularly: Check for any signs of wear or damage before each use.
- Clean After Use: Wipe down the ladder to remove dust and debris.
- Store Properly: Keep your ladder in a dry place to prevent moisture damage.
Identifying common pitfalls can save time and resources. Here are frequent mistakes made during ladder construction and how to avoid them:
- Skipping Measurements: Always measure twice, cut once!
- Using Inadequate Fasteners: Ensure your screws are long enough for a secure hold.
- Neglecting Safety: Always prioritize safety gear and precautions.
1. What type of wood is best for a ladder?
Pine is a popular choice due to its balance of cost and durability, but hardwoods like oak offer greater strength.
2. How tall should my ladder be?
Consider your specific needs; a height of 6 to 8 feet is standard for most household tasks.
3. Can I use my ladder outdoors?
Yes, but ensure you use a weather-resistant finish to protect the wood from the elements.
4. How often should I inspect my ladder?
Regular inspections before each use are recommended to ensure safety.

Materials Needed
When it comes to building a wooden ladder, choosing the right materials is crucial for ensuring safety and durability. You want to make sure that your ladder can withstand the test of time and heavy use, so let’s dive into the essentials you’ll need.
The primary material for your ladder will be wood. Common choices include pine, cedar, and oak. Pine is a popular option due to its affordability and availability, while cedar offers natural resistance to rot, making it ideal for outdoor use. Oak, being a hardwood, provides exceptional strength and durability, but it can be a bit pricier. Whichever type you choose, ensure it is free from knots and defects to maintain structural integrity.
In addition to wood, you will need a variety of hardware components. Here’s a quick rundown of what you should gather:
- Screws: Choose galvanized or stainless steel screws to prevent rusting.
- Wood Glue: A strong adhesive can add extra stability to your joints.
- Finishing Nails: These can be used for securing the rungs to the side rails.
Don’t forget about finishing materials to protect your ladder from the elements and enhance its appearance. A good quality wood stain or sealant will not only bring out the natural beauty of the wood but also provide a protective barrier against moisture and UV rays. Look for products specifically designed for outdoor use if your ladder will be exposed to the elements.
Lastly, it’s always a good idea to have some sandpaper on hand for smoothing out any rough edges after cutting and assembling your ladder. This will help prevent splinters and ensure a safe, comfortable grip when using your ladder. The right combination of materials will set you on the path to creating a sturdy and reliable wooden ladder.
Essential Tools
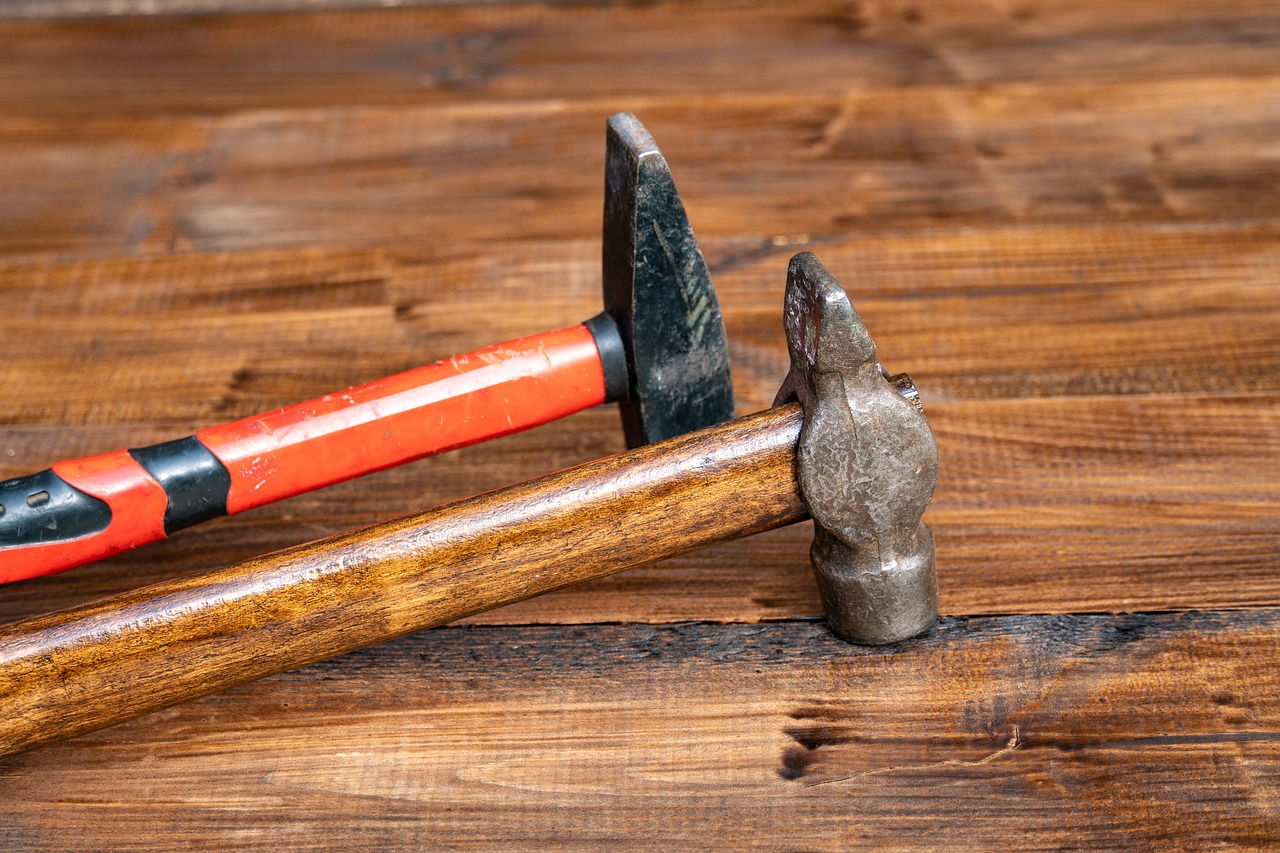
When it comes to building a wooden ladder, having the right tools can make all the difference between a smooth project and a frustrating experience. Just like a chef needs the right knives to create a culinary masterpiece, you need essential tools to construct your ladder effectively. Let’s dive into the must-have tools that will help you along the way.
First and foremost, a good quality saw is crucial. Whether you choose a hand saw or a power saw, ensure it’s sharp and suited for cutting wood. A circular saw is particularly useful for making straight cuts quickly, while a miter saw can help you achieve precise angled cuts. If you’re feeling adventurous, a jigsaw can add versatility for more intricate designs.
Next on the list is a reliable drill. A cordless drill is an absolute game-changer, allowing you to drill holes and drive screws without being tethered to a power outlet. Be sure to have a variety of drill bits and screwdriver bits on hand. This way, you can tackle different tasks without having to pause your project to search for the right bit.
Measuring your materials accurately is vital, and for that, a tape measure is your best friend. It’s important to measure twice and cut once, as the saying goes. A square tool will also come in handy to ensure your cuts are straight and your joints are square.
Don’t forget about clamps. These handy devices will help hold your pieces together while you work, ensuring everything stays in place. They can be especially useful when you’re assembling the ladder or applying glue. If you’re working with larger pieces of wood, consider using a sawhorse to provide a stable work surface.
Lastly, a sander is essential for achieving that smooth finish. You wouldn’t want splinters ruining your hard work, right? A power sander can save you time and effort, but if you prefer a more hands-on approach, a sanding block will do just fine.
Here’s a quick overview of the essential tools you’ll need:
| Tool | Purpose |
|---|---|
| Saw | For cutting wood to the desired lengths and angles. |
| Drill | For making holes and driving screws. |
| Tape Measure | For measuring lengths accurately. |
| Clamps | To hold pieces together during assembly. |
| Sander | To smooth out surfaces and edges. |
In summary, gathering the right tools is the first step toward a successful DIY ladder project. Each tool plays a vital role in ensuring that your ladder is not only sturdy but also safe to use. So, before you start cutting and drilling, take a moment to check your toolbox and make sure you’re fully equipped for the task at hand!
Q: What type of wood is best for building a ladder?
A: Hardwoods like oak or maple are excellent choices for their durability, but softwoods like pine can also work well for lighter ladders.
Q: How long does it take to build a wooden ladder?
A: The time can vary, but expect to spend a few hours to a full day, depending on your experience level and the complexity of the design.
Q: Do I need special training to build a wooden ladder?
A: While no formal training is required, having some basic woodworking skills and understanding of tool safety is essential.
Q: Can I customize the design of my ladder?
A: Absolutely! Customizing your ladder design to fit your needs and style is part of the fun in DIY projects.

Safety Precautions
When embarking on a DIY project like building a wooden ladder, prioritizing safety is non-negotiable. You might be excited to dive into the construction, but overlooking safety measures can lead to serious injuries or accidents. So, before you grab that saw, let’s talk about some essential precautions that will keep you safe and sound.
First and foremost, always wear protective gear. This includes safety goggles to shield your eyes from flying debris, a dust mask to avoid inhaling wood particles, and gloves to protect your hands from splinters and cuts. Think of these items as your armor in the battle against DIY mishaps. You wouldn’t go into a storm without an umbrella, right?
Next, ensure that your workspace is clean and organized. A cluttered area can lead to accidents, so take a few moments to clear away any unnecessary items. It’s like trying to cook in a messy kitchen—things can get chaotic quickly! Make sure you have ample space to work and that all your tools are within reach but not in the way.
Another vital aspect to consider is the proper handling of tools. Familiarize yourself with each tool before you start using it. Read the manuals if necessary. Just like you wouldn’t drive a car without knowing how to operate it, don’t use a drill or saw without understanding its functions. Additionally, always keep your tools in good condition; dull blades or malfunctioning equipment can lead to accidents.
Moreover, when using power tools, ensure that you are working in a well-ventilated area. This is especially important when cutting wood or applying finishes that may emit harmful fumes. Think of it as opening a window on a hot day—fresh air keeps you cool and comfortable, and it’s essential for your health while working.
Lastly, if you are working with a partner, communication is key. Let them know what you’re doing and where you are at all times. It’s like dancing; if you don’t communicate your next move, you’re bound to step on each other’s toes! Always have a plan in place so that both of you are aware of the tasks at hand and can assist each other safely.
In summary, the key safety precautions for building a wooden ladder include:
- Wearing protective gear such as goggles, gloves, and dust masks.
- Keeping your workspace clean and organized.
- Familiarizing yourself with your tools and maintaining them properly.
- Ensuring proper ventilation when using power tools.
- Communicating effectively with your partner if you have one.
By following these safety precautions, you can focus on your project without worrying about potential hazards. Remember, a safe DIY experience is a successful one!
As you embark on your wooden ladder construction journey, you might have some lingering questions. Here are a few frequently asked questions that can help clarify any doubts:
- What type of wood is best for a ladder? Generally, hardwoods like oak or maple are recommended for their strength and durability.
- How tall should my ladder be? The height of your ladder depends on its intended use. Make sure it’s tall enough to reach your desired height safely.
- Can I use recycled wood? Yes, but ensure that the wood is in good condition and free from rot or major defects.
- What finish should I apply? A good quality wood sealant or stain can enhance the appearance and protect your ladder from moisture.
Designing Your Ladder
Before diving headfirst into the construction of your wooden ladder, it's absolutely essential to take a step back and consider the design. Think of this phase as the blueprint of your project; without a solid plan, you might find yourself in a precarious position—quite literally! The design of your ladder will significantly impact its functionality, stability, and overall appearance. So, let’s break down the key elements you need to consider.
First and foremost, you need to determine the height of your ladder. Are you looking to reach the top shelf of your garage or perhaps the roof of your house? The height will dictate not only the length of the wood you’ll need but also the number of rungs. Generally, a standard ladder has rungs spaced about 12 inches apart, but this can vary depending on your specific needs.
Next, consider the width of your ladder. A wider ladder offers more stability, which is crucial when you’re climbing up and down. However, if space is tight, you might need to compromise a bit. A width of around 16 to 18 inches is usually a good balance between stability and compactness. Just imagine trying to balance on a tightrope; wider is definitely better when you’re scaling heights!
Now, let’s talk about the style of your ladder. Do you want a traditional A-frame design, or are you leaning towards a more modern look, like a straight ladder? The style not only affects the aesthetics but also the functionality. An A-frame ladder is perfect for indoor use, while a straight ladder can be more versatile for outdoor projects. Choosing the right style can make all the difference in how you use your ladder, so think about your specific needs.
It’s also important to consider the materials you’ll use for your ladder. While this will be discussed in detail in the materials section, keep in mind that the type of wood you choose will affect both the weight and durability of your ladder. Hardwoods like oak or maple are excellent for strength, while softer woods like pine are easier to work with but may not last as long. Think of it like choosing between a sports car and a pickup truck; one is faster, but the other is built for heavy lifting!
Finally, sketching out your design can be incredibly beneficial. Not only does it give you a visual reference, but it also allows you to make adjustments before you start cutting wood. You can use graph paper or a digital design tool to create a scaled version of your ladder. This way, you can play around with dimensions and styles until you find the perfect fit.
In summary, designing your wooden ladder requires careful consideration of height, width, style, materials, and a solid plan. By taking the time to map out your design, you’ll set yourself up for a successful and safe DIY project. Remember, a well-designed ladder is not just a tool; it’s a gateway to new heights!

Step-by-Step Construction
Constructing a wooden ladder may seem daunting at first, but with a clear plan and the right approach, it can be an enjoyable DIY project. The key to success lies in following a systematic process that ensures safety and precision. Let’s break it down into manageable steps, so you can build your ladder like a pro!
First, start by measuring and cutting your wood. You'll need two long pieces for the sides of the ladder, known as the 'rails,' and several shorter pieces for the rungs. Typically, a standard ladder might have a height of about 6 feet, so you might want to cut your rails to around 6 feet long. Make sure to measure twice and cut once, as precision is crucial. Use a saw that suits your skill level—whether it’s a hand saw or a power saw, just ensure you handle it safely.
Next, it's time to attach the rungs. For a sturdy construction, you can use a simple technique known as the 'mortise and tenon joint' for the rungs. This involves cutting notches into the rails where the rungs will fit snugly. If you're not comfortable with this joint, you can also drill holes into the rails and insert the rungs, securing them with screws. Remember to space the rungs evenly, typically about 12 inches apart, to provide a comfortable climbing experience.
Once the rungs are attached, it's essential to reinforce the structure. You can do this by adding diagonal braces, which will help stabilize the ladder and prevent wobbling. Cut two pieces of wood and attach them diagonally from the top of the rails to the bottom of the rungs. This is where a level comes in handy—make sure everything is straight before securing the braces with screws.
After the main structure is complete, it’s time for the finishing touches. Sand down any rough edges to prevent splinters, and consider applying a wood stain or sealant to protect your ladder from moisture and wear. Not only does this enhance the ladder's durability, but it also gives it a professional look. Choose a finish that complements your home or workshop, and allow it to dry completely before using the ladder.
Lastly, it's important to test your ladder before putting it to use. Carefully apply weight to ensure it can handle the load and that all joints are secure. This is a crucial step; you don’t want any surprises when you’re halfway up! Once you’re satisfied with its stability, your wooden ladder is ready to be used.
Remember, building a ladder is not just about getting it done; it's also about enjoying the process. Take your time, follow these steps, and soon you'll have a sturdy, reliable wooden ladder that you built yourself!
Q: What type of wood is best for building a ladder?
A: Hardwoods like oak or maple are excellent choices for strength and durability, while softer woods like pine can also work well for lighter ladders.
Q: How can I ensure my ladder is safe to use?
A: Regularly inspect your ladder for any signs of wear or damage, and always follow weight limits and safety guidelines when using it.
Q: Can I customize the height of my ladder?
A: Absolutely! You can adjust the length of the rails to create a ladder that suits your specific needs.
Q: What safety gear should I use while building my ladder?
A: Always wear safety goggles, gloves, and a dust mask to protect yourself from wood dust and debris.

Finishing Touches
After you've put in all the hard work to build your wooden ladder, it’s time to give it the that will not only enhance its appearance but also improve its durability. Think of this stage as the cherry on top of your DIY sundae! It’s where you can truly make your ladder shine and stand out. So, let’s dive into some essential steps to make your ladder not just functional, but also a beautiful addition to your home.
First up is sanding. This step is crucial for achieving a smooth finish. Use a medium-grit sandpaper to remove any rough edges or splinters that could potentially cause injuries. Once you’ve gone over the entire ladder, switch to a fine-grit sandpaper for that silky-smooth feel. Imagine running your hand over a freshly polished surface—satisfying, isn’t it? Sanding not only enhances the look but also prepares the wood for staining or sealing.
Next, let's talk about staining. Choosing the right stain can transform your ladder from plain to extraordinary. You can opt for a natural wood stain to highlight the grain, or go bold with a colored stain to match your decor. Apply the stain with a brush or cloth, making sure to follow the grain of the wood for an even application. Don’t rush this step; let the stain soak in as per the manufacturer’s instructions, and wipe off any excess to avoid a sticky finish.
Once the stain is dry, it’s time to seal the deal with a protective sealant. This is where your ladder gets its armor! A good sealant will protect your ladder from moisture, dirt, and wear and tear. Choose a sealant that’s suitable for outdoor use if your ladder will be exposed to the elements. Apply it with a clean brush, ensuring you cover all surfaces thoroughly. This step not only prolongs the life of your ladder but also makes it easier to clean in the future.
Finally, don’t forget about the hardware. Check all the screws and bolts to ensure they are tight and secure. You might want to add a coat of rust-resistant spray to any metal fittings to prevent corrosion. This attention to detail can make a world of difference in both safety and longevity.
In summary, the finishing touches on your wooden ladder are not just about aesthetics; they’re about ensuring that your hard work pays off in the long run. By sanding, staining, sealing, and checking hardware, you’re setting your ladder up for success. So, take your time with these final steps, and enjoy the satisfaction of a job well done!
- What type of wood is best for a wooden ladder?
Hardwoods like oak or maple are ideal for their strength and durability, but softer woods like pine can also work for lighter use.
- How long should I let the stain dry?
Typically, you should allow the stain to dry for at least 24 hours, but always check the manufacturer's instructions for the best results.
- Is it necessary to seal the ladder?
Yes, sealing is crucial as it protects the wood from moisture and extends the life of your ladder.
- Can I use my ladder immediately after staining?
It’s best to wait until the stain and sealant are fully cured before using your ladder to ensure safety and durability.

Maintenance Tips
Maintaining your wooden ladder is crucial to ensure its longevity and safety. Just like a well-loved pair of shoes, your ladder needs regular care to keep it in tip-top shape. So, what are the best practices for ladder maintenance? Let’s dive in!
First and foremost, cleaning your ladder after each use is essential. Dust, dirt, and debris can accumulate on the rungs and side rails, which can lead to slippage or even structural damage over time. Use a damp cloth to wipe down the surfaces, and for tougher grime, a gentle soap solution can do wonders. Just remember to dry it thoroughly afterward to prevent any moisture-related issues.
Next, it’s important to inspect your ladder regularly. Take a moment every few months to check for any signs of wear and tear. Look for cracks, splinters, or loose screws. If you notice anything amiss, it’s better to address it sooner rather than later. A small crack today can become a significant problem tomorrow, much like ignoring a tiny leak in your roof.
Another key aspect of maintenance is storage. Where you keep your ladder can significantly impact its durability. Ideally, store your ladder in a dry, cool place away from direct sunlight. Prolonged exposure to the elements can warp the wood and weaken the structure. If you have to store it outside, consider using a protective cover to shield it from rain and UV rays.
Lastly, applying a protective finish can enhance both the appearance and lifespan of your ladder. A good quality wood sealant or stain not only adds an aesthetic touch but also protects against moisture and pests. Think of it as giving your ladder a cozy little blanket to keep it warm and safe!
In summary, maintaining your wooden ladder involves:
- Regular cleaning after use
- Routine inspections for damage
- Proper storage away from harsh conditions
- Applying protective finishes to enhance durability
By following these simple maintenance tips, you’ll ensure that your wooden ladder remains a reliable tool for years to come. Remember, a little care goes a long way!
Q: How often should I clean my wooden ladder?
A: It’s best to clean your ladder after each use, especially if it’s been exposed to dirt or moisture.
Q: What should I look for during my ladder inspections?
A: Check for cracks, splinters, loose screws, and any signs of wear that could compromise safety.
Q: Can I store my ladder outside?
A: While it’s not ideal, if you must store it outside, use a protective cover and ensure it’s in a dry area to prevent damage.
Q: What type of finish should I use on my ladder?
A: A good quality wood sealant or outdoor stain is recommended to protect against moisture and UV damage.

Common Mistakes to Avoid
Building a wooden ladder can be an exciting project, but it’s easy to trip up on common mistakes that can turn your DIY endeavor into a frustrating experience. One of the biggest blunders is not taking accurate measurements. Imagine cutting your wood only to find out it doesn’t fit your intended design! Always double-check your dimensions before making any cuts. It’s like measuring twice and cutting once, a mantra that can save you from wasting materials and time.
Another frequent mistake is skimping on the quality of materials. Opting for cheaper wood might seem like a good idea at first, but it can lead to a weak structure that won’t hold up over time. Instead, invest in high-quality lumber that can withstand the test of time. Think of your ladder as a bridge; would you want to cross a rickety bridge made from flimsy materials? Absolutely not!
Additionally, many DIYers overlook the importance of proper safety measures. Not wearing protective gear such as gloves and goggles can lead to serious injuries. Always prioritize your safety; it’s better to be safe than sorry! When handling power tools, ensure you’re familiar with their operation to avoid accidents. Remember, a ladder is only as safe as the person using it.
In the realm of construction, another common pitfall is neglecting to secure the rungs properly. If the rungs are loose, it can lead to instability, which is the last thing you want when climbing up. Make sure to use the right screws and follow the recommended spacing for rungs. It’s like building a house; if the foundation isn’t solid, everything else will crumble.
Finally, don’t forget about the finishing touches. Skipping sanding or sealing can result in splinters and a ladder that deteriorates quickly due to moisture. Treat your ladder like a fine piece of furniture; a little care goes a long way. By taking the time to sand, stain, and seal your ladder, you not only enhance its appearance but also extend its lifespan.
In summary, avoiding these common mistakes can make your ladder-building project smoother and more successful. Remember to measure accurately, choose quality materials, prioritize safety, secure your rungs, and add those finishing touches. With these tips in mind, you’ll be well on your way to constructing a sturdy and reliable wooden ladder!
Here are some common questions that arise during the ladder-building process:
- What type of wood is best for a wooden ladder?
For durability, hardwoods like oak or maple are excellent choices, but softwoods like pine can work well for lighter ladders. - How do I ensure my ladder is safe to use?
Regularly inspect your ladder for any signs of wear or damage, and ensure all joints and rungs are secure before use. - Can I customize the height of my ladder?
Absolutely! Just make sure to adjust the spacing of the rungs accordingly to maintain safety and functionality. - What finish should I use for my ladder?
A good quality outdoor sealant or wood stain can protect your ladder from moisture and enhance its appearance.
Frequently Asked Questions
- What type of wood is best for building a wooden ladder?
When it comes to choosing wood for your ladder, hardwoods like oak or maple are fantastic options due to their strength and durability. However, softwoods like pine can also work well, especially for lighter ladders. Just ensure the wood is free of knots and defects!
- Do I need any special tools to build a wooden ladder?
Not necessarily! While having specialized tools can make the job easier, the basics include a saw, drill, and measuring tape. If you have these essentials, you’re well on your way to ladder-building success!
- What safety precautions should I take when building my ladder?
Safety first, always! Make sure to wear protective goggles and gloves to shield yourself from wood splinters and flying debris. Also, keep your workspace tidy to avoid accidents—think of it as creating a safe haven for your DIY project!
- How do I design my ladder properly?
Designing your ladder is all about knowing your needs. Consider the height and width based on where you plan to use it. It’s like tailoring a suit; you want it to fit just right for the job!
- What are the steps involved in constructing a wooden ladder?
The construction process typically includes measuring and cutting your wood, assembling the sides and rungs, and then securing everything with screws. Think of it like building a puzzle—just with a lot more measuring and a lot less cardboard!
- How can I give my ladder a polished finish?
Finishing touches can elevate your ladder from functional to fabulous! Start by sanding the surfaces, then apply a stain or sealant to protect it from the elements. It’s like giving your ladder a spa day!
- What maintenance does a wooden ladder require?
To keep your ladder in tip-top shape, regularly inspect it for any signs of wear and tear. Cleaning it occasionally and ensuring it’s stored properly can help prolong its life. Think of it as giving your ladder a little TLC!
- What are some common mistakes to avoid when building a ladder?
One common pitfall is not measuring accurately—always double-check your dimensions! Another is skipping the safety precautions. Remember, it’s better to take your time and do it right than to rush and face the consequences!


