Boost Your Skills with These Advanced Wood Projects
Are you ready to take your woodworking skills to the next level? Whether you're a seasoned pro or just starting out, diving into advanced wood projects can be an exhilarating way to enhance your craftsmanship. These projects not only challenge your abilities but also allow you to create stunning pieces that can be showcased in your home or gifted to loved ones. Imagine the satisfaction of crafting a beautiful piece of furniture or a decorative item that reflects your unique style and skills!
Advanced woodworking is like climbing a mountain; the higher you go, the more breathtaking the view becomes. With each project, you’ll gain more confidence and knowledge, unlocking new techniques and tools that will serve you well in the future. In this article, we’ll explore a variety of advanced wood projects, focusing on essential techniques, tools, and design considerations that will help you grow as a woodworker.
From understanding the different types of wood to mastering joinery techniques, we’ll cover everything you need to know to embark on your next woodworking adventure. So grab your tools, roll up your sleeves, and let’s get started on this exciting journey of creativity and craftsmanship!
Selecting the right type of wood is crucial for any project. The choice of wood can significantly influence the durability and aesthetics of your final product. Different woods have unique characteristics, such as grain patterns, color, and hardness, which can all contribute to the overall look and feel of your creation. For instance, hardwoods like oak and maple are known for their strength and durability, making them perfect for furniture, while softer woods like pine are easier to work with and ideal for decorative items.
Equipping yourself with the right tools can significantly improve your woodworking efficiency. Advanced woodworking requires a combination of power tools and hand tools to achieve precision and fine details. Below are some essential tools every advanced woodworker should have in their workshop:
| Tool Type | Examples | Purpose |
|---|---|---|
| Power Tools | Saws, Routers, Drills | To cut, shape, and assemble wood with precision. |
| Hand Tools | Chisels, Planes, Saws | For achieving fine details and craftsmanship. |
With the right tools in hand, you’ll be well-equipped to tackle any advanced woodworking project that comes your way. Remember, investing in quality tools can make a significant difference in the outcome and enjoyment of your projects!
Power tools can save time and enhance precision. Essential power tools for advanced woodworking include table saws for straight cuts, routers for shaping edges, and drills for making holes. These tools are indispensable for creating complex designs and ensuring your projects are executed with accuracy.
Despite the rise of power tools, hand tools remain vital in woodworking. Tools like chisels and planes allow for meticulous detailing and finishing touches that power tools might overlook. There's something incredibly rewarding about using hand tools; they connect you to the craft in a way that feels both traditional and personal.
Proper maintenance of tools ensures longevity and performance. Regularly cleaning and sharpening your tools can make a world of difference. Here are some quick tips to keep your tools in top shape:
- Clean tools after each use to prevent rust.
- Sharpen blades regularly for clean cuts.
- Store tools properly to avoid damage.
By taking care of your tools, you not only extend their life but also enhance your woodworking experience.
Mastering joinery techniques is essential for creating strong and visually appealing projects. Advanced joinery methods like dovetails, mortise and tenon, and finger joints can elevate your work from ordinary to extraordinary. Each technique requires practice and precision, but the results are well worth the effort!
Good design is the foundation of any successful woodworking project. It's not just about how something looks; it’s about how it functions and fits into your space. When designing, consider principles of aesthetics, functionality, and ergonomics to inspire your next creation. A well-designed piece not only serves a purpose but also tells a story.
Computer-Aided Design (CAD) software can streamline the design process. With CAD tools, you can create detailed plans and visualize your projects before starting. This can save you time and materials by allowing you to spot potential issues early on.
Creating prototypes allows you to test ideas before finalizing your project. This can be a game changer in refining your designs and improving overall execution. Whether you use foam, cardboard, or scrap wood, prototyping helps you see your vision come to life!
The finishing process can dramatically change the look and feel of your project. Techniques like staining, painting, and sealing enhance your woodworking creations and protect them from wear and tear. Choosing the right finish can be as crucial as the woodworking itself!
Selecting the appropriate finish is crucial for both appearance and protection. Consider the type of wood and the intended use of the piece when choosing finishes. Some finishes may enhance the grain of the wood, while others provide a protective layer against moisture and scratches.
How you apply the finish can affect the outcome. Explore various application methods, including brushing, spraying, and wiping, to achieve a professional-looking finish on your projects. Each method has its advantages, so experiment to find what works best for you!
Q: What is the best wood for beginners?
A: Pine is often recommended for beginners due to its softness and affordability, making it easier to work with.
Q: How can I improve my woodworking skills?
A: Practice regularly, take classes, and seek feedback from more experienced woodworkers to continuously improve.
Q: What is the most important tool for woodworking?
A: While it depends on the project, a good quality saw is essential for making accurate cuts.

Understanding Wood Types
When it comes to woodworking, selecting the right type of wood can make or break your project. Each wood type has its own unique characteristics that influence not only the durability of the final product but also its aesthetics. For instance, hardwoods like oak and maple are renowned for their strength and beauty, making them ideal choices for furniture and cabinetry. On the other hand, softwoods such as pine and cedar are lighter and more affordable, perfect for projects where weight and cost are significant factors.
Understanding the various wood types is essential for any woodworker, whether you're a novice just starting out or an experienced craftsman looking to refine your skills. To help you grasp the nuances of wood selection, let’s break down some common types:
| Wood Type | Characteristics | Common Uses |
|---|---|---|
| Oak | Strong, durable, with a beautiful grain | Furniture, flooring, cabinetry |
| Maple | Hard, fine grain, resistant to wear | Countertops, furniture, musical instruments |
| Pine | Soft, lightweight, easy to work with | Framing, shelving, outdoor projects |
| Cedar | Lightweight, aromatic, naturally resistant to decay | Outdoor furniture, decking, fencing |
Each wood type not only varies in physical properties but also in cost and availability. For example, while oak might be readily available in your local lumberyard, exotic woods like mahogany or teak may require special ordering and can be significantly more expensive. Therefore, it’s crucial to consider both your budget and the specific requirements of your project when making your selection.
Moreover, the moisture content of the wood is another factor that can impact your project. Wood that is too damp can warp or crack as it dries, while wood that is too dry can be brittle and prone to splitting. This is why it's vital to understand the seasoning process and to always check moisture levels before starting your project.
In conclusion, understanding wood types is more than just a matter of preference; it’s about selecting the right materials to ensure the success of your woodworking endeavors. By familiarizing yourself with the characteristics and uses of different woods, you can make informed decisions that will enhance both the durability and beauty of your finished products.

Essential Tools for Advanced Woodworking
When it comes to advanced woodworking, having the right tools is not just a luxury; it’s a necessity. The tools you choose can significantly enhance your efficiency, precision, and overall enjoyment of the craft. Imagine trying to sculpt a masterpiece with a dull chisel or a wobbly saw—frustrating, right? That's why investing in quality tools is essential for both your projects and your sanity.
First and foremost, let's talk about power tools. These modern marvels can save you a tremendous amount of time and effort while ensuring that your cuts are precise and clean. Key power tools that every advanced woodworker should consider include:
- Table Saw: The backbone of many workshops, a table saw allows for accurate cuts and is essential for ripping large sheets of wood.
- Router: Perfect for creating decorative edges and hollowing out areas in wood, routers are incredibly versatile.
- Drill: A powerful drill is indispensable for making holes and driving screws, allowing for strong joinery.
But don’t underestimate the importance of hand tools. Despite the rise of their powered counterparts, hand tools still hold a special place in woodworking. Tools like chisels, planes, and hand saws allow for a level of detail and craftsmanship that power tools sometimes can't match. For instance, a finely-tuned hand plane can produce a surface that feels as smooth as silk—something that’s hard to replicate with a power sander.
Now, let’s not forget about tool maintenance. Proper care of your tools is crucial for ensuring they last a long time and perform at their best. Regularly sharpening blades, cleaning sawdust from mechanisms, and storing tools in a dry environment can make a world of difference. A well-maintained tool is like a well-tuned instrument; it sings with every use.
To give you a clearer picture of what you might need in your workshop, here’s a simple table outlining some essential tools along with their primary functions:
| Tool | Function |
|---|---|
| Table Saw | Ripping and cross-cutting large pieces of wood |
| Router | Creating decorative edges and hollowing wood |
| Drill | Making holes and driving screws |
| Chisels | Shaping and carving wood |
| Hand Plane | Smoothing and flattening surfaces |
Ultimately, the tools you choose will depend on your specific projects and personal preferences. Whether you lean more towards power tools for speed or hand tools for precision, the key is to find a balance that works for you. As you embark on your advanced woodworking journey, remember that each tool has its own unique role to play in your craft. Embrace the journey of mastering these tools, and you'll find that your skills and confidence will grow exponentially.
Q: What are the most essential tools for a beginner woodworker?
A: For beginners, a good set of hand tools like a saw, chisel, and hand plane, along with a basic power drill, are essential to get started.
Q: How do I maintain my woodworking tools?
A: Regular cleaning, sharpening blades, and proper storage in a dry place are key to maintaining your tools in good condition.
Q: Can I do advanced woodworking with just hand tools?
A: Absolutely! While power tools can speed up the process, many experienced woodworkers prefer hand tools for the control and finesse they offer.
Q: What is the best wood for advanced projects?
A: The best wood depends on your project. Hardwoods like oak and maple are great for furniture, while softer woods like pine are easier to work with for beginners.
Power Tools
When it comes to advanced woodworking, are nothing short of a woodworker's best friend. They not only save time but also enhance precision, allowing you to tackle complex projects with ease. Imagine trying to cut through a thick piece of hardwood with a hand saw—it's doable, but it requires immense effort and time. Now, picture using a table saw or a band saw instead; the difference is like night and day! Power tools can transform a tedious task into a seamless process, making them essential in any serious woodworker's arsenal.
One of the most versatile power tools is the router. This tool is perfect for hollowing out an area in the face of a piece of wood, allowing for intricate designs and smooth edges. Whether you’re creating decorative edges or cutting grooves for joinery, a router can elevate your project to a whole new level. Another indispensable tool is the drill. Not only does it help in creating precise holes, but it also allows you to drive screws with speed and efficiency, ensuring that your joints are tight and secure.
Let’s not forget about the miter saw, which is crucial for making accurate crosscuts and angled cuts. This tool is particularly useful when you’re working on projects that require precise angles, such as picture frames or furniture. The jigsaw is another fantastic tool that allows for intricate cuts and curves, making it ideal for artistic projects. Each of these tools has its own strengths, and understanding when and how to use them can dramatically improve your woodworking skills.
To give you a clearer picture of how these tools stack up, here’s a quick comparison table:
| Tool | Primary Use | Benefits |
|---|---|---|
| Router | Hollowing, edging | Precision and versatility |
| Drill | Making holes, driving screws | Speed and efficiency |
| Miter Saw | Crosscuts, angled cuts | Accuracy in angles |
| Jigsaw | Curved cuts | Ideal for artistic designs |
As you can see, each power tool serves a unique purpose, and mastering them can take your woodworking projects from basic to breathtaking. However, it’s also essential to remember that with great power comes great responsibility. Always prioritize safety when using these tools—wear protective gear and follow manufacturer instructions to avoid accidents. Understanding the capabilities and limitations of each tool will not only enhance your skills but also boost your confidence as a woodworker.
In conclusion, investing in quality power tools is a game changer for anyone serious about woodworking. They empower you to create with precision, speed, and creativity, turning your visions into reality. So, whether you’re crafting a custom piece of furniture or embarking on a complex project, make sure your workshop is equipped with the right power tools to help you succeed.
- What power tools should a beginner start with? A beginner should consider starting with a drill, a circular saw, and a sander.
- How do I maintain my power tools? Regularly clean your tools, check for wear and tear, and follow the manufacturer's maintenance guidelines.
- Can I use power tools for all woodworking projects? While power tools are versatile, some intricate projects may still require hand tools for detailed work.

Hand Tools
When it comes to woodworking, are the unsung heroes of craftsmanship. While power tools often steal the spotlight with their speed and efficiency, hand tools bring a level of precision and control that can’t be matched. Imagine carving a delicate curve or smoothing a surface with the gentle touch of a hand plane; it’s a dance between the wood and the craftsman that creates a connection to the material itself.
There’s something incredibly satisfying about using hand tools. They allow for a more tactile experience, giving you the ability to feel the wood as you work. For instance, a chisel enables you to make intricate cuts and details that can elevate a project from ordinary to extraordinary. Think of it as painting with a brush instead of using a spray can; each stroke is deliberate and personal. Here are some essential hand tools that every advanced woodworker should consider:
- Chisels: Perfect for carving and detailing, chisels come in various sizes and shapes, allowing for a range of cuts.
- Hand Planes: These tools are essential for smoothing and shaping wood, providing a clean finish that power tools often can't replicate.
- Saws: While power saws are popular, hand saws offer the advantage of precision cuts without the noise and dust.
- Files and Rasps: Ideal for shaping and refining edges, these tools help in achieving the perfect finish.
Each of these tools plays a vital role in the woodworking process. For example, a well-sharpened chisel can turn a block of wood into a work of art, allowing for detailed joinery or decorative elements. Similarly, hand planes can transform rough lumber into smooth, flat surfaces that are ready for finishing. The key is to understand how to use these tools effectively.
Moreover, the maintenance of hand tools is crucial. Keeping them sharp and in good condition not only enhances their performance but also extends their lifespan. Regularly honing your chisels and maintaining the edges of your saws will ensure that you always have the best tools at your disposal. Think of it like keeping your favorite pen filled with ink; it’s essential for creating your best work.
In conclusion, while the allure of power tools is undeniable, hand tools offer a unique set of advantages that can enhance your woodworking projects. They foster a deeper connection to the craft, allowing for creativity and precision that can’t be replicated with machines. So, the next time you step into your workshop, consider reaching for those hand tools and experience the joy of traditional woodworking.
Q: Why should I use hand tools instead of power tools?
A: Hand tools provide greater control and precision, allowing for intricate work that power tools may not achieve. They also foster a deeper connection to the craft.
Q: How do I maintain my hand tools?
A: Regularly sharpen your chisels and saws, keep wooden handles clean, and store them in a dry place to prevent rust and damage.
Q: Can I achieve the same results with power tools?
A: While power tools can be efficient, they may not provide the same level of detail and finish that hand tools can offer for certain tasks.

Tool Maintenance
Proper maintenance of your woodworking tools is not just a chore; it’s a vital practice that ensures your tools perform at their best and last for years to come. Imagine trying to carve a beautiful piece of furniture with a dull chisel or a rusty saw—frustrating, right? Just like a car needs regular oil changes to run smoothly, your tools need care to function effectively. Let's dive into some essential maintenance tips that will keep your tools in top shape.
First and foremost, cleanliness is key. After each use, take a moment to wipe down your tools to remove sawdust, resin, and other debris. This simple act can prevent rust and deterioration. For power tools, ensure that you also clean the air filters and check for any buildup that could impede performance. A clean tool is a happy tool!
Next, consider sharpening your blades. Dull blades not only make your work harder but also pose safety risks. Invest in a good sharpening stone or a sharpening system. Regularly honing your chisels and blades will keep them effective and safe to use. You wouldn’t want to cut a piece of wood with a butter knife, right? The same principle applies here.
Storage is another crucial aspect of tool maintenance. Store your tools in a dry, temperature-controlled environment to prevent rust and warping. Using toolboxes or pegboards can help keep your workspace organized and your tools easily accessible. If you have hand tools, consider using protective covers or cases to shield them from dust and moisture.
Additionally, don’t forget about lubrication. Moving parts, such as those on saws and drills, benefit greatly from regular oiling. A few drops of machine oil on the pivot points can prevent wear and tear, ensuring smooth operation. Just like a well-oiled machine, your tools will work more efficiently and last longer.
Finally, keep an eye on the electrical components of your power tools. Inspect cords for frays and ensure that all connections are secure. A little preventative maintenance can save you from dangerous situations down the line. If you notice any issues, address them immediately—better safe than sorry!
In summary, maintaining your woodworking tools is essential for both performance and safety. By keeping your tools clean, sharp, and well-stored, you’ll not only enhance your woodworking experience but also prolong the life of your tools. Remember, a well-maintained tool is like a trusty companion—it’s always there when you need it!
- How often should I clean my tools? It's best to clean your tools after each use to prevent buildup of dust and debris.
- What is the best way to sharpen my chisels? Using a sharpening stone or a dedicated sharpening system will give you the best results.
- Can I store my tools outside? No, storing tools outside can lead to rust and damage. Always keep them in a dry, indoor environment.
- How do I know when to lubricate my tools? If you notice any stiffness in moving parts or hear squeaking noises, it’s time to apply some lubricant.

Joinery Techniques
Mastering is not just about connecting pieces of wood; it's about creating a bond that enhances the strength and beauty of your projects. Think of joinery as the backbone of woodworking, providing both structural integrity and aesthetic appeal. When you dive into the world of advanced woodworking, understanding the various joinery methods can elevate your craftsmanship to new heights. Let's explore some of the most popular and effective joinery techniques that every serious woodworker should know.
First up, we have the classic dovetail joint. This technique is renowned for its strength and is often used in drawer construction and fine furniture. The interlocking shape of the dovetail provides a mechanical advantage that resists pulling apart, making it ideal for high-stress applications. Imagine it as a lock and key, where the two pieces fit snugly together, creating a secure connection that stands the test of time.
Next, the mortise and tenon joint is another staple in the woodworking arsenal. This traditional joint consists of a rectangular hole (the mortise) cut into one piece of wood, with a corresponding protrusion (the tenon) on the other piece that fits into the mortise. This joint is commonly used in frames and structural connections, offering exceptional strength and stability. It’s like building a house on a solid foundation; without it, everything else could come crashing down!
Another fascinating technique is the finger joint, also known as a box joint. This method involves interlocking fingers cut into the ends of two pieces of wood, creating a strong and visually appealing connection. Finger joints are often used in box construction and cabinetry, as they provide a large gluing surface and can be both functional and decorative. Imagine the fingers of two hands clasping together in a firm handshake—this is the essence of a well-executed finger joint.
For those looking to add a touch of creativity to their projects, consider exploring half-lap joints. This technique involves removing material from both pieces of wood, allowing them to overlap and create a flush surface. This joint is not only strong but also offers a clean and seamless appearance, making it perfect for furniture and decorative items. Think of it as two puzzle pieces fitting together perfectly, enhancing the overall design.
To help you understand these techniques better, here's a quick comparison of the joinery methods discussed:
| Joinery Technique | Strength | Common Uses | Aesthetic Appeal |
|---|---|---|---|
| Dovetail Joint | High | Drawers, Fine Furniture | Very High |
| Mortise and Tenon | Very High | Frames, Structural Connections | High |
| Finger Joint | High | Boxes, Cabinets | Medium to High |
| Half-Lap Joint | Medium to High | Furniture, Decorative Items | High |
In conclusion, mastering these joinery techniques is essential for any woodworker looking to enhance their skills and create stunning projects. Each method has its unique advantages and applications, so it's worth experimenting with them to discover which ones resonate with your style and needs. Remember, woodworking is not just a craft; it's an art form that allows you to express your creativity and build something truly remarkable.
Q: What is the best joint for a beginner woodworker?
A: The butt joint is often recommended for beginners due to its simplicity. However, as you gain confidence, try incorporating dovetail or mortise and tenon joints for added strength and aesthetics.
Q: How do I choose the right joinery technique for my project?
A: Consider the strength required, the type of wood you're using, and the overall design of your project. For structural elements, opt for mortise and tenon, while decorative pieces may benefit from dovetails or finger joints.
Q: Can I use power tools for joinery?
A: Absolutely! Many joinery techniques can be executed with power tools, which can save time and enhance precision. Just ensure you have the right tools and practice proper safety measures.

Designing Your Project
Good design is the foundation of any successful woodworking project. It's not just about making something that looks nice; it’s about creating a piece that serves its purpose effectively while appealing to the eye. When you embark on a woodworking project, consider the functional aspects alongside the aesthetic qualities. Think about how the piece will be used and how it fits into its intended environment. For instance, a dining table needs to be sturdy and spacious, while a decorative shelf should be visually striking but also capable of supporting its load without warping.
One of the first things to consider in the design process is the ergonomics of your project. This means ensuring that your piece is comfortable and easy to use. For example, if you’re designing a chair, you should think about the height of the seat, the angle of the backrest, and the overall dimensions to ensure it’s comfortable for users. Ergonomics can make a significant difference in how well your project is received by its users, so don’t overlook this critical aspect.
Next, let’s talk about the materials. The choice of wood can greatly influence the overall look and feel of your project. Different types of wood have unique characteristics, such as grain patterns, color, and texture. For example, oak is known for its durability and attractive grain, making it a popular choice for furniture. On the other hand, softer woods like pine are easier to work with but may not hold up as well in high-traffic areas. When designing your project, take time to research and select the right materials that align with both your design vision and practical needs.
To help visualize your ideas, utilizing Computer-Aided Design (CAD) software can be incredibly beneficial. CAD tools allow you to create detailed plans and even 3D models of your projects. This technology not only helps in refining your designs but also allows you to experiment with different layouts and materials before you start cutting wood. Imagine being able to see how different finishes will look on your project before applying them! This can save you time, materials, and a lot of frustration.
Finally, prototyping is a crucial step in the design process. By creating a prototype, you can test your ideas in a tangible way, allowing you to identify any potential issues before committing to the final piece. This doesn’t have to be a full-scale version of your project; even a small model can provide valuable insights. Think of it as a dress rehearsal for your woodworking masterpiece. You can adjust dimensions, test materials, and even experiment with different joinery techniques without the pressure of ruining your final piece.
In summary, the design phase of your woodworking project is where the magic begins. By carefully considering functionality, aesthetics, ergonomics, materials, and utilizing modern tools like CAD software, you can set yourself up for success. And don’t forget the importance of prototyping—it's your safety net that allows you to innovate without fear. So roll up your sleeves, grab your sketchpad, and let your creativity flow!
- What is the most important aspect of designing a woodworking project? The most important aspect is ensuring that the design is both functional and aesthetically pleasing, taking into account how the piece will be used.
- Can I use any type of wood for my project? While you can technically use any wood, it’s best to choose a type that suits the function and style of your project. For example, hardwoods are often better for furniture due to their durability.
- How can CAD software help in woodworking projects? CAD software allows you to create detailed designs and 3D models, helping you visualize your project and make necessary adjustments before actual construction.
- Is prototyping necessary for woodworking projects? While not strictly necessary, prototyping can save time and resources by allowing you to test and refine your designs before committing to the final product.

Using CAD Software
In today's fast-paced world of woodworking, Computer-Aided Design (CAD) software has become an invaluable tool for both amateur and professional woodworkers. Imagine being able to visualize your project in a virtual space before you even touch a piece of wood! This powerful software allows you to create detailed plans, ensuring that you have a clear roadmap for your project. With CAD, you can easily adjust dimensions, experiment with different designs, and even simulate how your finished piece will look in a real environment.
One of the key advantages of using CAD software is its ability to streamline the design process. Instead of relying on traditional hand-drawn sketches, which can be time-consuming and prone to errors, CAD software provides precise measurements and the ability to make quick adjustments. This can save you a significant amount of time and materials, as you can identify potential issues before cutting any wood. Moreover, CAD programs often include features that allow you to visualize the project in 3D, giving you a better understanding of how different elements will interact with each other.
When choosing a CAD program, it's essential to consider your specific needs and skill level. Some software options are designed for beginners and offer user-friendly interfaces, while others cater to advanced users with more complex features. Here are some popular CAD software options that woodworkers often find useful:
- SketchUp: Known for its intuitive interface, SketchUp is great for beginners and allows for easy 3D modeling.
- Fusion 360: This software is perfect for those looking to combine woodworking with other manufacturing processes, offering advanced features for product design.
- AutoCAD: A professional-grade software that provides robust tools for detailed technical drawings, suitable for serious woodworkers.
Another significant benefit of using CAD software is the ability to create prototypes digitally. You can experiment with different styles, materials, and finishes without the risk of wasting resources. This not only enhances creativity but also allows for more innovative designs. Once you’ve finalized your design, many CAD programs allow you to generate cut lists, which can help in planning your material purchases and minimizing waste.
In conclusion, leveraging CAD software in your woodworking projects not only enhances your design capabilities but also improves efficiency and accuracy. By investing time in learning how to use these tools, you can elevate your woodworking skills to new heights, turning your creative visions into reality with precision and ease.
Q: Do I need to be tech-savvy to use CAD software?
A: While some familiarity with technology can be helpful, many CAD programs are designed with user-friendliness in mind, making them accessible to beginners.
Q: Can I use CAD software for other projects besides woodworking?
A: Absolutely! Many CAD programs are versatile and can be used for various design projects, including furniture design, architecture, and even mechanical engineering.
Q: Are there free CAD software options available?
A: Yes, there are several free CAD programs available, such as SketchUp Free and LibreCAD, which can be great starting points for beginners.

Prototyping Techniques
When it comes to woodworking, prototyping is not just a luxury—it's a necessity. Think of it like sketching before painting a masterpiece; it allows you to explore ideas without committing to the final product. Prototyping techniques can significantly enhance your design process, helping you visualize your project and refine your ideas before you start cutting wood. By creating a prototype, you can identify potential design flaws, test the functionality of your concepts, and ensure that your final piece meets your expectations.
There are several effective prototyping techniques that woodworkers can employ. One popular method is the use of mock-ups. These are typically built from inexpensive materials like cardboard or foam board. Mock-ups allow you to understand the scale and proportions of your design. You can easily manipulate these models, making adjustments as needed, which can save you a lot of time and resources in the long run. Imagine trying to visualize a large dining table; a mock-up can help you see how it fits in your space before you even touch the wood.
Another technique is creating digital prototypes using CAD software. This method is particularly beneficial for complex projects. By using CAD, you can create detailed 3D models that provide a clear picture of how your finished piece will look. Plus, many CAD programs allow you to simulate various materials and finishes, giving you a better understanding of the final product’s aesthetics. This is like having a virtual showroom where you can experiment with different styles and configurations without any physical limitations.
Additionally, scale models are another effective prototyping technique. These smaller versions of your project can help you assess proportions and design choices. For instance, if you're working on a large cabinet, building a 1:10 scale model can help you visualize how it will occupy space and interact with other elements in the room. Scale models are particularly useful for intricate designs where every detail matters.
Once you've created your prototype, it's essential to test it. This is where the real learning happens. You might discover that a joint doesn’t hold up as expected or that a particular design feature doesn’t function as intended. Embrace these challenges! Each prototype is a stepping stone to your final design. Remember, the goal of prototyping is to refine your ideas until they shine, so don't hesitate to iterate and improve upon your designs.
In conclusion, incorporating prototyping techniques into your woodworking projects can elevate your craftsmanship to new heights. Whether you choose to work with mock-ups, digital models, or scale designs, the insights gained from prototyping will help you create pieces that are not only beautiful but also functional and durable. So, grab your materials and start experimenting—your future self will thank you!
- What materials should I use for prototyping? You can use inexpensive materials like cardboard, foam board, or even scrap wood for physical prototypes. For digital prototypes, CAD software is the best choice.
- How detailed should my prototype be? It depends on the complexity of your project. For simple designs, a basic mock-up may suffice, while intricate projects may require detailed digital models.
- Can I skip prototyping altogether? While it’s possible to jump straight to the final product, prototyping significantly reduces the risk of costly mistakes and helps ensure a successful outcome.

Finishing Techniques
When it comes to woodworking, the finishing touches can make or break your project. The right finish not only enhances the aesthetic appeal but also provides protection against wear and tear. Imagine the satisfaction of running your hand over a beautifully finished surface, with the wood grain shining through, catching the light just right. It’s like adding the final brush strokes to a masterpiece! In this section, we’ll dive into various finishing techniques that can elevate your woodworking projects to a whole new level.
First and foremost, understanding the different types of finishes is crucial. There are three main categories of finishes: film finishes, penetrating finishes, and natural finishes. Film finishes, such as varnish and polyurethane, create a protective layer on the surface of the wood. They are durable and excellent for high-traffic areas. On the other hand, penetrating finishes, like oils and waxes, soak into the wood, enhancing its natural beauty while providing a softer feel. Finally, natural finishes, often made from natural ingredients, are eco-friendly but may require more frequent reapplication.
Choosing the right finish depends on several factors, including the type of wood, the intended use of the piece, and your personal style. For instance, if you’re working with a hardwood like oak, a clear varnish can highlight its grain while protecting it from scratches. If you’re crafting a rustic piece, a natural oil might be the best choice to maintain that earthy look. Remember, the finish you select should not only complement the wood but also fit the functionality of the item.
Once you’ve decided on the type of finish, the application method is equally important. Here are some common methods:
- Brushing: This traditional method allows for control and precision, ideal for detailed work.
- Spraying: Perfect for large surfaces, spraying can provide an even coat but requires practice to master.
- Wiping: This technique is excellent for oils and stains, allowing for easy application and quick adjustments.
Each method has its pros and cons, and the choice often comes down to the specific project and your comfort level. For example, if you’re applying a stain to a large dining table, spraying might save you time, but brushing could give you more control over the color intensity. It’s all about finding the right balance that works for you.
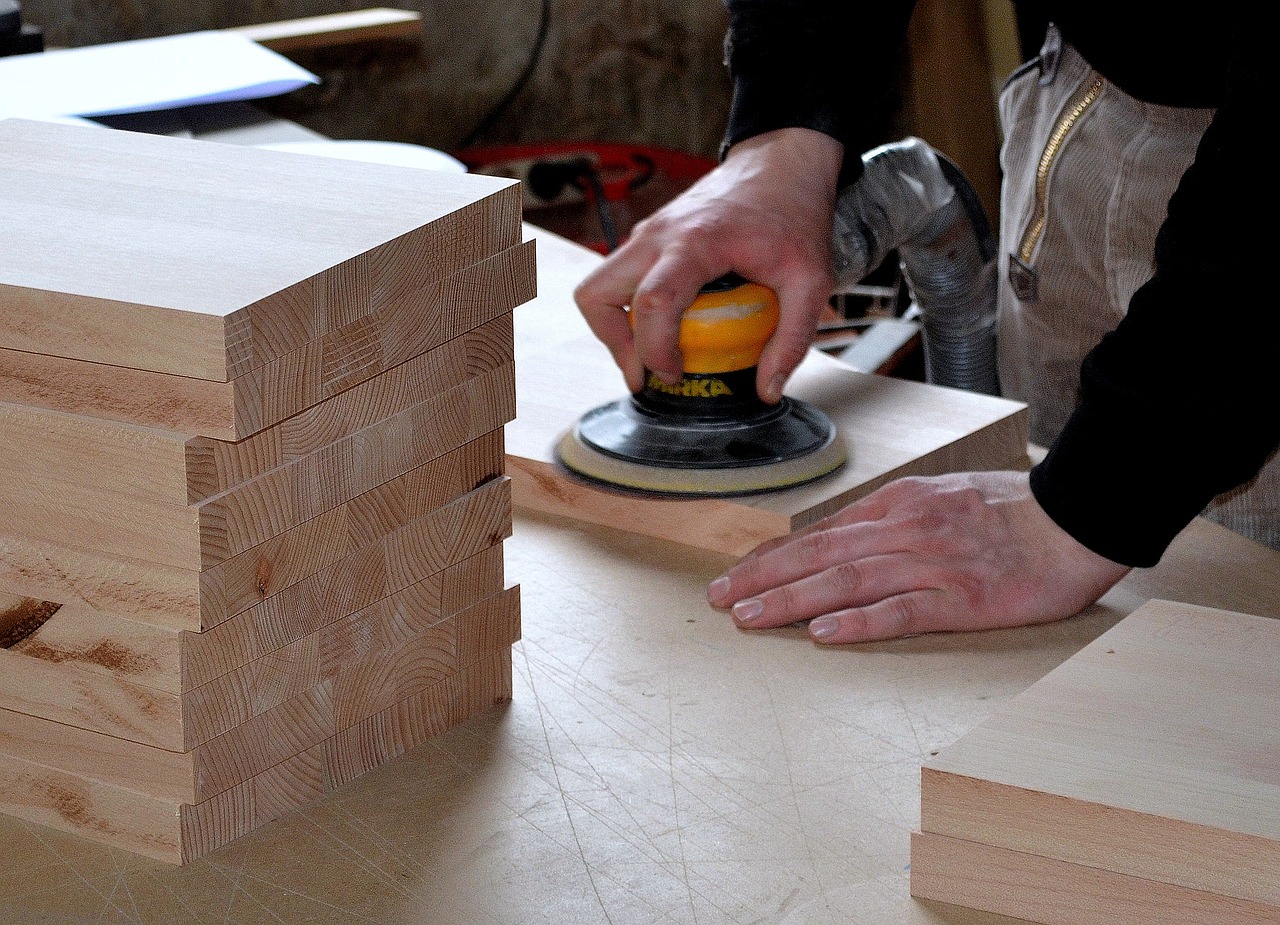
Finally, let’s not forget about the importance of proper preparation before applying your finish. Sanding your project to a smooth finish is essential, as it helps the finish adhere better and creates a more polished look. Always remember to wipe down the surface to remove any dust or debris before applying your chosen finish. This simple step can make a significant difference in the final outcome.
In summary, mastering finishing techniques is vital for any woodworker looking to elevate their projects. By understanding the different types of finishes, choosing the right application method, and preparing your surfaces properly, you can achieve a professional-looking finish that showcases your hard work and creativity. So, roll up your sleeves and get ready to transform your woodworking creations into stunning pieces of art!
- What is the best finish for outdoor furniture? - A durable, weather-resistant finish like marine varnish or a high-quality exterior polyurethane is recommended.
- How many coats of finish should I apply? - Generally, two to three coats are ideal for most finishes, but always follow the manufacturer's instructions.
- Can I apply a finish over an existing one? - Yes, but make sure to sand the surface lightly to ensure proper adhesion of the new finish.

Choosing the Right Finish
When it comes to woodworking, one of the most critical decisions you’ll make is choosing the right finish for your project. The finish not only enhances the visual appeal of your creation but also serves as a protective layer against wear and tear. Think of it as the icing on a cake; it can elevate the whole experience from good to extraordinary! But with so many options available, how do you decide which finish is best suited for your particular wood type and project purpose?
First and foremost, consider the type of wood you’re working with. Different woods absorb finishes differently, which can significantly affect the final look. For instance, hardwoods like oak and maple often require a different approach compared to softwoods like pine. Additionally, the grain pattern and color of the wood can influence your choice. A clear finish might be perfect for showcasing the natural beauty of a fine hardwood, while a more opaque finish could be ideal for covering imperfections in less attractive wood.
Next, think about the functionality of the item you’re finishing. Will it be exposed to moisture, heat, or heavy use? If so, you’ll want a finish that provides durability and protection. Here are some common types of finishes and their typical uses:
- Polyurethane: Known for its durability, this finish is excellent for surfaces that experience a lot of wear, such as tabletops and cabinets.
- Varnish: This is another robust option that offers good protection against moisture and UV rays, making it suitable for outdoor furniture.
- Shellac: A natural finish that dries quickly and provides a warm glow, but it's not as durable as synthetic options.
- Oil finishes: These penetrate the wood and enhance its natural beauty, making them great for items that won't see heavy use.
Moreover, the application method plays a crucial role in the effectiveness of the finish. Different finishes require different application techniques, and how you apply them can make or break the final look. For example, oil finishes are often applied with a cloth, allowing the wood to soak in the product, while spray finishes can provide a smooth, even coat without brush marks. Here’s a quick overview of common application methods:
| Application Method | Best For | Pros | Cons |
|---|---|---|---|
| Brushing | Thick finishes like paint and varnish | Good control; can reach crevices | Brush marks may show if not done carefully |
| Spraying | Thin finishes like lacquer | Even coat; fast drying | Requires practice; overspray can be messy |
| Wiping | Oil finishes | Easy to apply; no brush marks | May require multiple coats for full protection |
Lastly, don’t forget about the environment in which the finished piece will reside. If it’s going to be outdoors, you’ll need a finish that can withstand the elements. For indoor pieces, consider whether they’ll be in high-traffic areas or more serene spaces. Always read the labels and choose finishes that are appropriate for your specific needs.
In summary, choosing the right finish involves a careful consideration of the wood type, functionality, application method, and environmental factors. By taking the time to evaluate these aspects, you’ll not only protect your woodworking project but also enhance its beauty, making it stand out for years to come.
1. What is the best finish for outdoor furniture?
For outdoor furniture, a durable finish like marine varnish or a high-quality polyurethane is recommended, as they provide excellent protection against moisture and UV rays.
2. Can I use the same finish on different types of wood?
While you can use the same finish on different woods, the final appearance may vary. It’s best to test a small area first to see how the wood reacts with the finish.
3. How many coats of finish should I apply?
Typically, 2-3 coats of finish are recommended for optimal protection and appearance. However, always follow the manufacturer’s instructions for the specific product you are using.
4. How do I remove a finish if I want to start over?
You can use chemical strippers, sandpaper, or a heat gun to remove old finishes. Be sure to follow safety precautions and work in a well-ventilated area.

Application Methods
When it comes to achieving a professional-looking finish on your woodworking projects, the application method you choose can make all the difference. Each technique has its own unique advantages and can dramatically alter the final appearance of your work. Whether you're looking to create a smooth, glossy surface or a rustic, textured finish, understanding the various application methods is essential.
One of the most common methods is brushing. This technique is versatile and allows for great control, making it ideal for intricate details and surfaces that require precision. When using a brush, it’s crucial to select the right type—natural bristle brushes work well with oil-based finishes, while synthetic brushes are better suited for water-based products. Remember, the quality of the brush can significantly impact the finish. A poor-quality brush may leave streaks or bristles in your finish, ruining your hard work.
Another popular method is spraying, which is perfect for larger surfaces or projects that require a smooth, even coat. Spraying can be done using a variety of tools, from simple spray cans to more sophisticated airless sprayers. This method allows for quick application and can cover large areas in a fraction of the time it would take to brush. However, it does require some practice to master, as achieving an even coat without runs or drips can be tricky. Additionally, proper ventilation is crucial when spraying finishes to avoid inhaling harmful fumes.
Wiping is yet another effective method, especially for stains and oils. This technique involves applying the finish with a cloth and then wiping off the excess, which can create a beautiful, natural look. Wiping is particularly beneficial for achieving a more rustic finish, as it allows the wood grain to show through while still providing some protection. It's a simple method that requires minimal tools, making it perfect for beginners or those looking for a quick solution.
To help you decide which application method is best for your project, here’s a quick comparison of the three techniques:
| Application Method | Best For | Pros | Cons |
|---|---|---|---|
| Brushing | Detailed work | Control, precision | Time-consuming, brush marks |
| Spraying | Larger surfaces | Speed, smooth finish | Requires practice, ventilation needed |
| Wiping | Stains and oils | Natural look, easy | Less protection, may require multiple coats |
Ultimately, the best application method depends on your specific project requirements and personal preferences. Experimenting with different techniques can also help you discover what works best for you and the type of finish you want to achieve. So, grab your tools, choose your method, and let your creativity flow!
- What is the best finish for outdoor furniture? - For outdoor furniture, it's recommended to use a high-quality exterior varnish or oil that can withstand the elements.
- How many coats of finish should I apply? - Typically, 2-3 coats are recommended for optimal protection and appearance, but this can vary based on the type of finish.
- Can I mix different types of finishes? - It's generally not advisable to mix different types of finishes, as they may not adhere properly or could react negatively with each other.
Frequently Asked Questions
-
What types of wood are best for advanced woodworking projects?
When it comes to advanced woodworking, the choice of wood can make or break your project. Hardwoods like oak, maple, and cherry are popular because of their durability and aesthetic appeal. Softwoods like pine and cedar can also be used, especially for projects where weight is a concern. Each type of wood has its unique characteristics, so consider the final look and feel you want to achieve!
-
What essential tools should I have for advanced woodworking?
Equipping your workshop with the right tools is crucial. Some must-have tools include a table saw, a router, and a quality drill. Don't forget hand tools like chisels and planes! These tools allow you to achieve finer details and craftsmanship that power tools sometimes can't. Investing in high-quality tools will pay off in the long run!
-
How can I maintain my woodworking tools?
Proper maintenance is key to keeping your tools in top shape. For power tools, regularly clean and lubricate moving parts, and check for any wear and tear. For hand tools, keep them sharp and store them in a dry place to prevent rust. A little care goes a long way in ensuring your tools last for years!
-
What are some advanced joinery techniques I should learn?
Mastering joinery techniques is essential for creating strong and beautiful projects. Some advanced methods include dovetails, mortise and tenon joints, and finger joints. Each technique has its own benefits and can add unique character to your work. Plus, they can elevate the overall quality of your projects!
-
How can I effectively use CAD software for my designs?
Using CAD software can dramatically streamline your design process. It allows you to create precise plans and visualize your projects in 3D before you even pick up a tool. Familiarize yourself with the software's features, and don't hesitate to experiment with different designs. It’s like having a digital workshop at your fingertips!
-
What finishing techniques can enhance my woodworking projects?
The finishing process can truly transform your project. Techniques such as staining, painting, and sealing are essential to protect the wood while enhancing its natural beauty. Each method has its own application style, so take the time to experiment and find what works best for your specific project!
-
How do I choose the right finish for my wood project?
Choosing the right finish depends on a few factors: the type of wood, the intended use of the piece, and the look you want to achieve. For example, oil finishes can enhance the grain of hardwoods, while polyurethane provides a durable layer of protection. Always test finishes on a scrap piece of wood first to see how they react!