Tackling Complex Woodworking Projects for Beginners
Woodworking can seem like a daunting task, especially when you're just starting out. But guess what? It doesn't have to be! With the right mindset, a bit of patience, and some guidance, you can tackle even the most intricate projects. Think of woodworking as an exciting adventure, where each cut and joint brings you one step closer to creating something truly unique and beautiful. In this article, we will delve into the essential aspects of woodworking that will empower you to take on complex projects with confidence. Are you ready to unleash your inner craftsman?
Before diving into your woodworking project, it's crucial to understand the different types of wood available. Each type carries its own unique properties that can significantly affect the outcome of your work. For instance, hardwoods like oak and maple are durable and perfect for furniture, while softwoods such as pine are more accessible for beginners and great for simple projects. Here’s a quick overview of common wood types:
| Wood Type | Characteristics | Best Uses |
|---|---|---|
| Oak | Strong, durable, and resistant to wear | Furniture, flooring |
| Pine | Lightweight, easy to work with | Cabinets, shelving |
| Maple | Hard, fine grain, and resistant to shock | Countertops, cabinetry |
| Cherry | Rich color, smooth texture, ages beautifully | High-end furniture, cabinetry |
Choosing the right wood can make or break your project, so take your time to explore the options and find what suits your needs best.
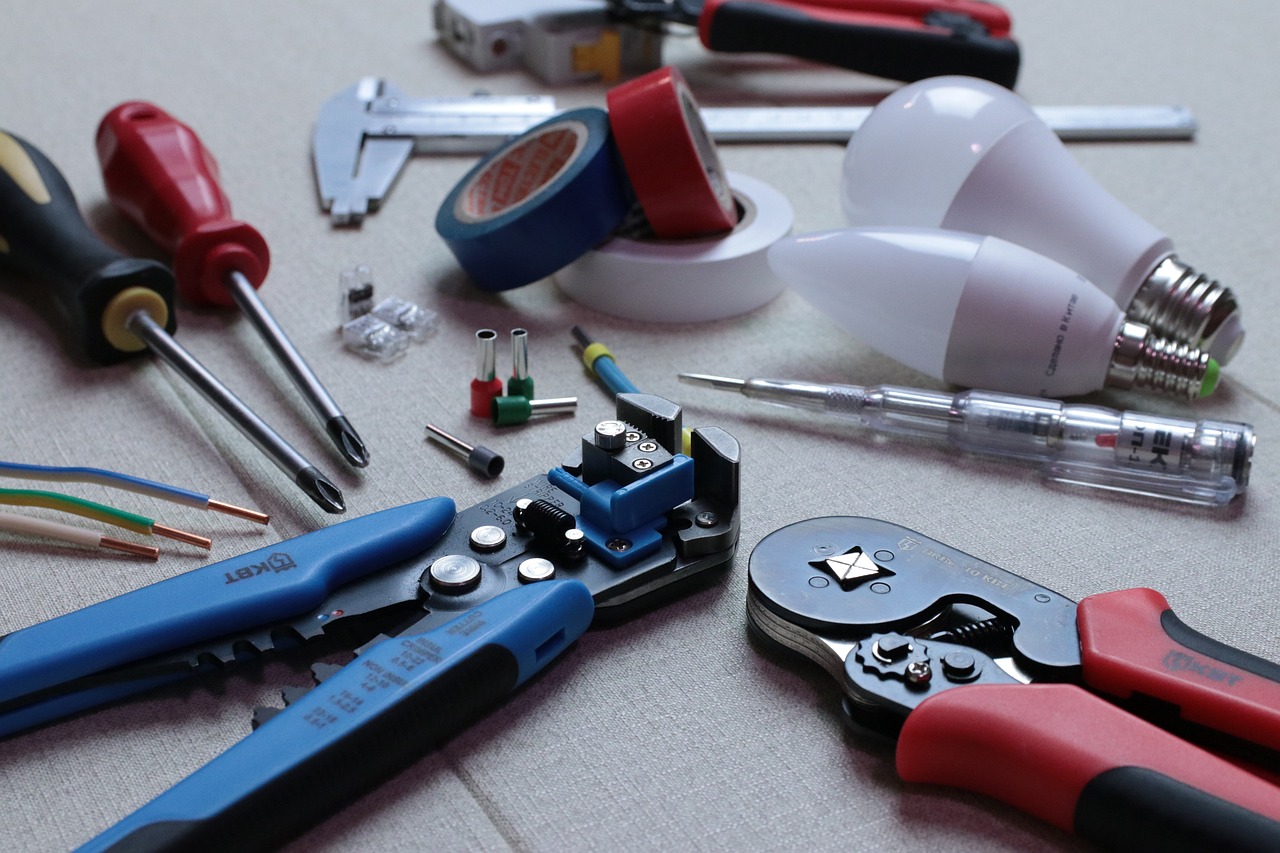
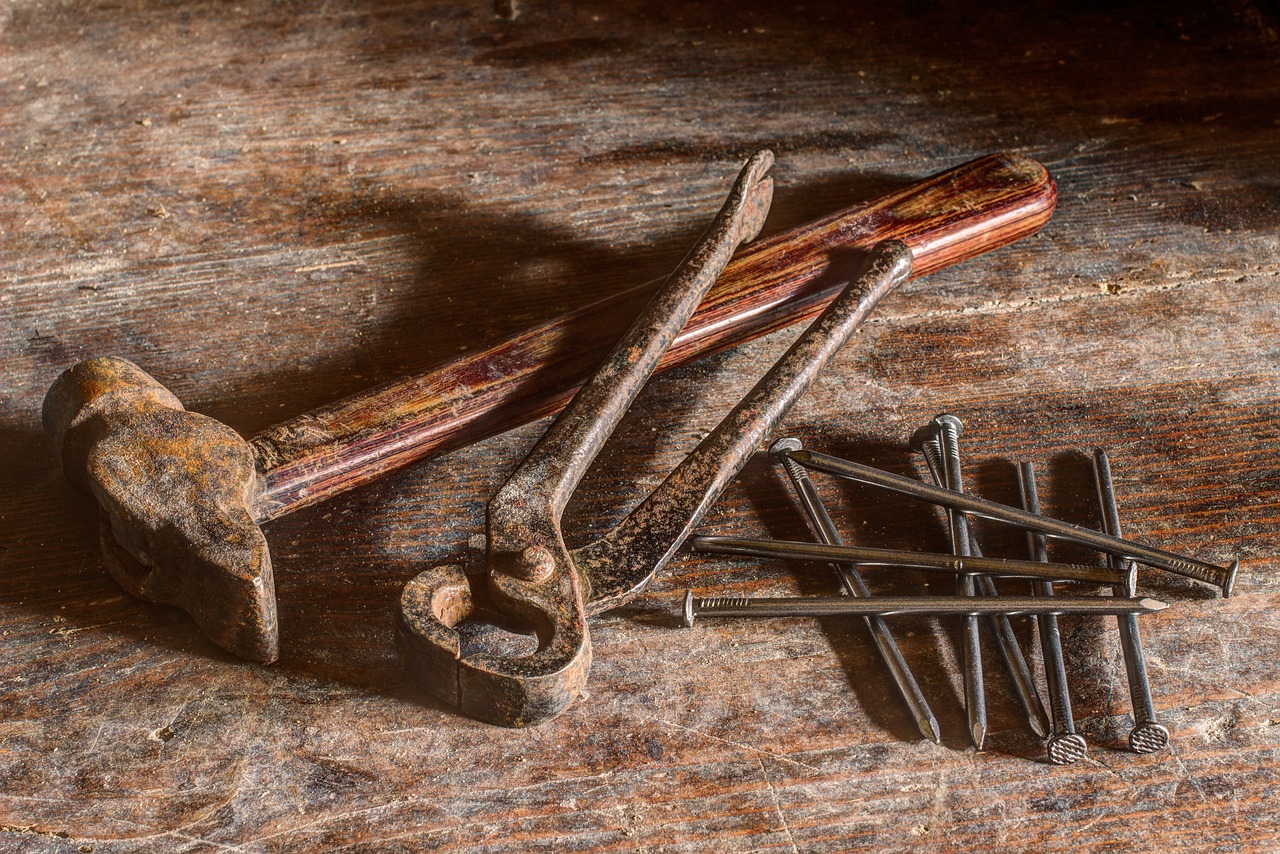
Now that you have a grasp on wood types, let’s talk tools. Having the right tools is crucial for any woodworking project. Imagine trying to bake a cake without the proper utensils—frustrating, right? Similarly, the right tools can make your woodworking experience smooth and enjoyable. Here are some essential tools every beginner should have:
- Measuring Tools: A tape measure and square are vital for accurate measurements.
- Cutting Tools: A handsaw or circular saw will help you make precise cuts.
- Joining Tools: Clamps are essential for holding pieces together while the glue dries.
- Finishing Tools: Sandpaper and brushes for a smooth finish.
With these tools in your arsenal, you’ll be well-equipped to take on your first project!
When it comes to woodworking, you’ll often find yourself choosing between hand tools and power tools. Each has its own benefits and limitations. Hand tools, such as chisels and hand saws, offer precision and control, making them great for intricate details. On the other hand, power tools like routers and table saws can save you time and effort, especially for larger projects. So, what's the best choice for you? It really depends on your project and comfort level!
For those who prefer a more traditional approach, selecting the right hand tools can enhance your precision and control. Start with the basics: a good set of chisels, a hand saw, and a plane. These tools can help you achieve fine details that power tools might overlook. Plus, there's something incredibly satisfying about shaping wood by hand, almost like sculpting!
Safety is paramount when using power tools. Always wear protective gear like goggles and ear protection. Ensure your workspace is clean and well-lit, and never rush your work. Remember, the goal is to create something beautiful, not to end up in the emergency room!
A well-thought-out plan is key to successful woodworking. Before you even pick up a tool, take some time to create a detailed project plan. This should include measurements, materials, and a timeline. Think of it as your roadmap; without it, you might find yourself lost halfway through your project!
Accurate measurements are critical in woodworking. Even a slight miscalculation can lead to a project that just doesn’t fit together. Use a tape measure and square to ensure everything is straight and true. And remember, measure twice, cut once!
Designing your woodworking project involves a blend of creativity and practicality. Sketch out your ideas, considering both aesthetics and functionality. There are countless styles to explore, so choose one that resonates with your skill level and interests. It’s your creation, after all!
Understanding different joining techniques is essential for building sturdy structures. Common methods include dovetail joints, mortise and tenon joints, and pocket hole joints. Each has its own applications and strengths, so familiarize yourself with them to enhance the durability of your projects.
When it comes to joining pieces of wood, you’ll often face the choice between glue and mechanical joints. Glue can create a seamless look, while mechanical joints add strength. It’s all about finding the right balance for your project!
Finishing adds beauty and protection to your woodworking projects. Whether you choose to stain, paint, or seal your work, the right finish can make your project stand out. Experiment with different techniques to find what works best for your style.
Even the most seasoned woodworkers make mistakes, but as a beginner, being aware of common pitfalls can help you avoid them. For instance, overestimating your skill level can lead to frustration. Start with projects that match your current abilities and gradually challenge yourself as you gain confidence.
It’s easy to get excited and want to jump into complex projects right away, but understanding your skill level is crucial. Setting realistic goals will help you build a solid foundation and prevent discouragement.
Always prioritize safety in woodworking. Following safety precautions and guidelines will help prevent injuries and accidents. Remember, no project is worth risking your well-being!
Continuous learning is vital for improvement in woodworking. There are numerous resources available to support your journey, including books, online courses, and communities. Don’t hesitate to seek out information and connect with fellow woodworkers!
Joining online woodworking communities can provide support and inspiration. Connecting with fellow woodworkers allows you to share experiences, ask questions, and learn from others’ mistakes. It’s a fantastic way to enrich your woodworking journey!
There are countless books and courses dedicated to woodworking. Look for materials that cater to your specific interests and skill level. These resources can enhance your knowledge and skills, helping you become a more proficient woodworker.
Q: What is the best wood for beginners?
A: Softwoods like pine are often recommended for beginners due to their ease of use and accessibility.
Q: How do I choose the right tools?
A: Start with essential tools like measuring tools, cutting tools, and clamps. As you progress, you can invest in more specialized tools.
Q: What safety gear should I use?
A: Always wear goggles, ear protection, and a dust mask when necessary to protect yourself while woodworking.
Q: How can I improve my woodworking skills?
A: Practice regularly, seek feedback from experienced woodworkers, and take advantage of online resources and courses.

Understanding Wood Types
When it comes to woodworking, understanding the different types of wood is like knowing the ingredients in a recipe. Each type of wood has its own unique properties that can greatly influence the outcome of your project. For beginners, the sheer variety of woods available can be overwhelming, but don’t fret! By familiarizing yourself with the most common types of wood, you can make informed decisions that will enhance your woodworking experience.
First off, let's talk about softwoods and hardwoods. Softwoods come from coniferous trees, such as pine, cedar, and spruce. These woods are typically lighter and easier to work with, making them ideal for beginners. For instance, pine is not only affordable but also readily available, which makes it a popular choice for furniture projects and home decor.
On the other hand, hardwoods come from deciduous trees, like oak, maple, and cherry. These woods are denser and often more durable, providing a rich aesthetic appeal. However, they can be more challenging to work with due to their hardness. If you're considering a project that needs to withstand wear and tear, such as a dining table, hardwoods might be the way to go.
Here’s a quick breakdown of some popular wood types:
| Wood Type | Characteristics | Best Uses |
|---|---|---|
| Pine | Lightweight, easy to work with, affordable | Furniture, shelving, crafts |
| Oak | Strong, durable, beautiful grain | Flooring, cabinets, furniture |
| Maple | Hard, fine texture, resistant to abrasion | Countertops, cabinets, toys |
| Cedar | Natural resistance to decay, aromatic | Outdoor furniture, closets, chests |
| Cherry | Rich color, smooth grain, ages beautifully | Fine furniture, cabinetry, musical instruments |
Choosing the right wood for your project can be a game-changer. It’s not just about aesthetics; the wood's properties will affect how easily you can work with it and how well it stands up to time and use. Think about the final look you want to achieve and the functionality required. For example, if you’re crafting a decorative piece that won’t see much use, you might opt for a beautiful hardwood like cherry. However, if you're building something that will be used daily, like a kitchen table, a sturdy hardwood like oak would be a better fit.
In conclusion, understanding wood types is essential for any beginner woodworker. It’s about more than just picking something off the shelf; it's about selecting a material that aligns with your project goals and skill level. Take the time to explore different woods, feel their textures, and appreciate their characteristics. This knowledge will not only boost your confidence but also enhance the quality and beauty of your woodworking projects.

Essential Tools for Woodworking
When diving into the world of woodworking, having the right tools can make all the difference between a frustrating experience and a rewarding one. Just like a chef needs a good set of knives, a woodworker requires a collection of essential tools to bring their creative visions to life. In this section, we’ll explore the must-have tools that every beginner should consider, and how each one contributes to the success of your projects.
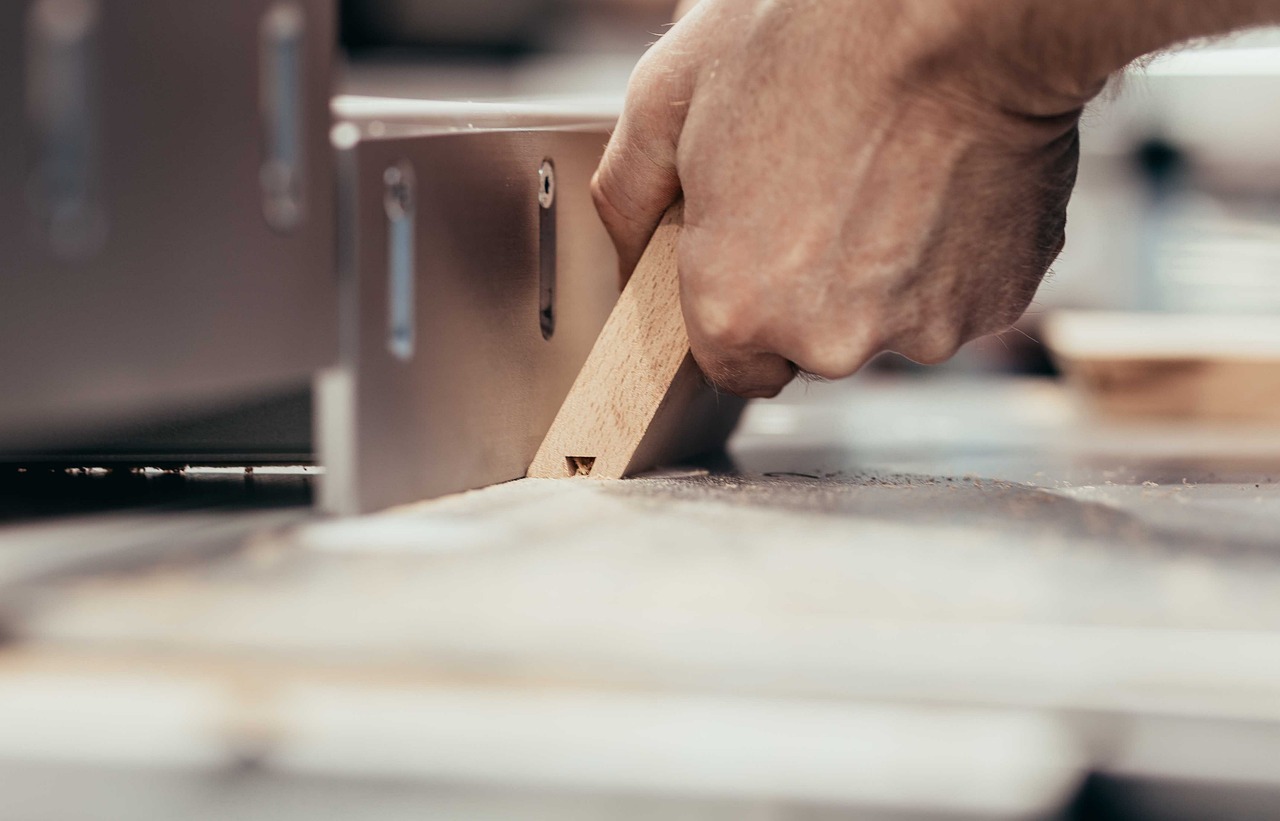
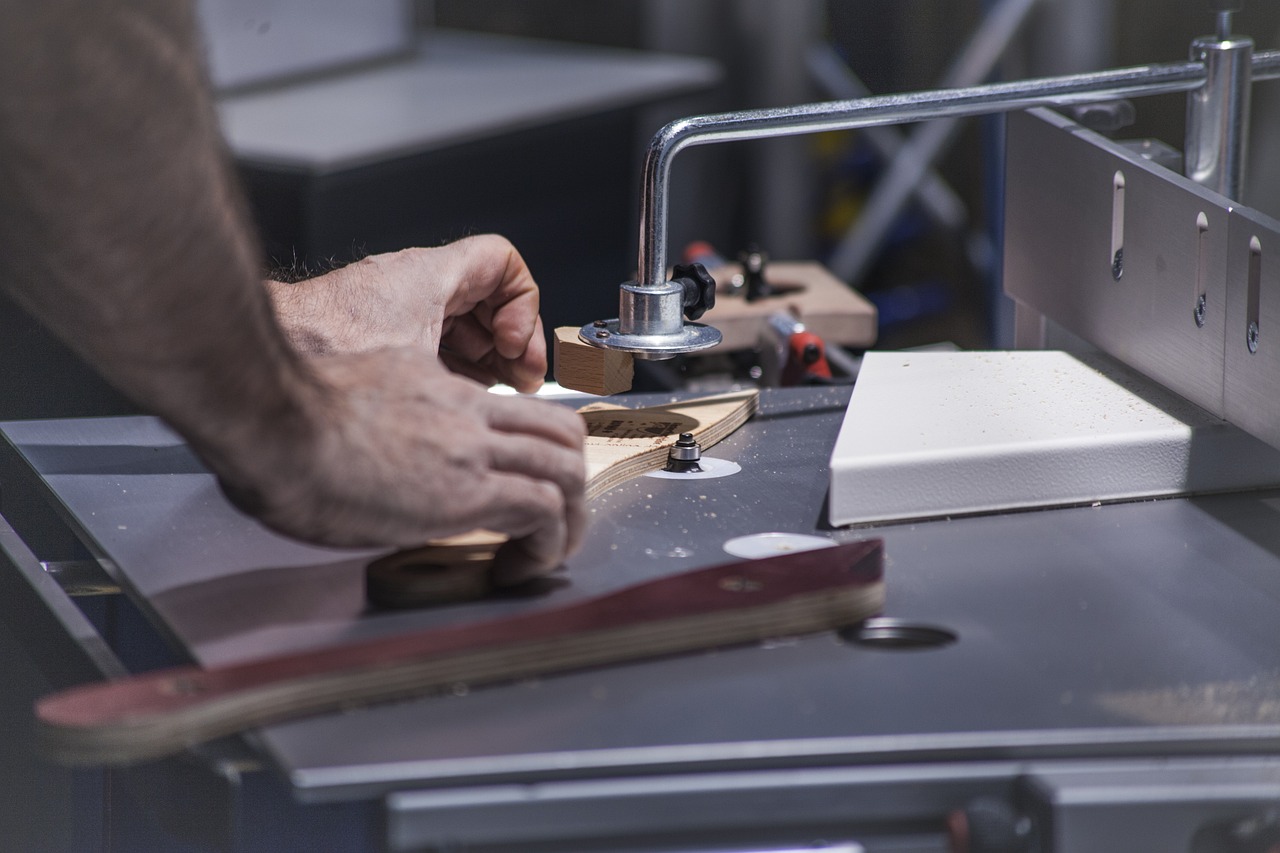
First and foremost, a table saw is often regarded as the heart of a woodworking shop. This powerful tool allows you to make precise cuts with ease, whether you're ripping boards down to size or cross-cutting them for a project. It’s important to understand that investing in a quality table saw can significantly enhance your woodworking capabilities. If you’re on a budget, a circular saw can be a great alternative, especially for larger pieces of wood.
Next up, let's talk about hand tools. While power tools are fantastic, hand tools should not be overlooked. A good hand saw, chisel set, and hand plane are essential for achieving finer details and ensuring precision in your work. These tools allow for more control and can be especially beneficial when working on intricate designs or delicate pieces. A well-rounded toolkit might include:
- Hand saws for quick cuts
- Chisels for shaping and carving
- Hand planes for smoothing surfaces
Furthermore, measuring tools are crucial in woodworking. You wouldn't bake a cake without measuring ingredients, right? Similarly, accurate measurements in woodworking are vital for a successful outcome. A reliable tape measure, a square for ensuring right angles, and a marking gauge for precision can save you from costly mistakes. Don't underestimate the importance of these tools; they are the backbone of any woodworking project.
As we move forward, let’s not forget about safety gear. This is often an overlooked aspect, but it is incredibly important. A good pair of safety goggles, a dust mask, and some ear protection should be staples in your workshop. The last thing you want is to suffer from hearing loss or respiratory issues because you didn’t take the necessary precautions. Safety gear is as essential as any tool in your collection.
Lastly, maintaining your tools is just as important as having them. Regular cleaning and proper storage can extend the lifespan of your tools significantly. For instance, after each use, wipe down your tools to remove any dust or moisture. A little bit of maintenance goes a long way in ensuring that your tools perform at their best.
In summary, while it may seem overwhelming at first, building your woodworking toolkit can be a fun and rewarding process. Start with the basics, and as you gain experience and confidence, you can expand your collection to include more specialized tools. Remember, the right tools not only make your projects easier but also enhance the quality of your work. So, gear up, and let’s get started on this exciting woodworking journey!
- What are the most essential tools for a beginner woodworker? A table saw, hand tools like saws and chisels, measuring tools, and safety gear are fundamental.
- Is it better to use hand tools or power tools? It depends on your project and preference. Hand tools offer more control, while power tools save time and effort.
- How can I maintain my woodworking tools? Regularly clean, sharpen, and store your tools properly to ensure they last longer and perform well.
Hand Tools vs. Power Tools
When diving into the world of woodworking, one of the first decisions you'll face is whether to use hand tools or power tools. Each type has its own unique advantages and drawbacks, and understanding these can significantly impact your woodworking experience. Think of hand tools as the traditional, time-honored approach to woodworking, while power tools represent the modern, efficient side of the craft. So, how do you choose?
Hand tools, such as chisels, hand saws, and planes, offer a level of precision and control that many woodworkers cherish. They allow you to feel every cut, every shave, and every joint, making it easier to develop your skills and instincts. Plus, hand tools are often more affordable and quieter than their power counterparts. However, they can be physically demanding and time-consuming, especially for larger projects. If you've ever tried to get through a thick piece of wood with just a hand saw, you know what I mean!
On the flip side, power tools, like table saws, drills, and routers, can make quick work of tasks that would take hours with hand tools. They are designed to handle heavy-duty work and can save you a lot of time, especially if you're working on complex projects. However, they come with their own set of challenges. Power tools can be intimidating for beginners, and they often require a learning curve to operate safely and effectively. Plus, the noise and dust they produce can be overwhelming, making it hard to concentrate on your work.
To help you navigate this decision, here’s a quick comparison:
| Feature | Hand Tools | Power Tools |
|---|---|---|
| Precision | High | Moderate |
| Cost | Generally lower | Generally higher |
| Noise Level | Low | High |
| Learning Curve | Gentler | Steeper |
| Physical Demand | Higher | Lower |
Ultimately, the choice between hand tools and power tools boils down to your personal preferences, project requirements, and comfort level. Many seasoned woodworkers find a balance between the two, using hand tools for intricate details and power tools for larger cuts. If you're just starting out, consider experimenting with both to see which feels right for you. Remember, woodworking is as much about the journey as it is about the end result. So, whether you're hand-sawing your way through a project or firing up a table saw, enjoy the process!
Q: Can I start woodworking with just hand tools?
A: Absolutely! Many beginners find that starting with hand tools helps them understand the fundamentals of woodworking. It can also be a more affordable way to get started.
Q: Are power tools dangerous?
A: Power tools can be dangerous if not used correctly. It's crucial to follow safety guidelines, wear protective gear, and understand how to operate each tool properly.
Q: Do I need both hand tools and power tools?
A: While it's not necessary to have both, many woodworkers find that a combination of hand and power tools offers the best of both worlds, allowing for flexibility and efficiency in their projects.
Choosing the Right Hand Tools
When it comes to woodworking, hand tools are your best friends. They offer a level of precision and control that can be hard to achieve with power tools, especially for beginners tackling complex projects. But how do you know which hand tools to choose? It's essential to start with the basics and gradually build your collection as your skills improve. A good starting point includes tools that will help you with various tasks, allowing for versatility in your projects.
Let's break down some of the essential hand tools every beginner should consider:
- Chisels: Perfect for carving and shaping wood, a set of chisels will allow you to create intricate designs and joints.
- Saws: A quality hand saw is crucial for making precise cuts. Consider a dovetail saw for fine cuts or a panel saw for larger pieces.
- Hand Planes: These tools are excellent for smoothing surfaces and reducing thickness, giving your projects a professional finish.
- Measuring Tools: Accurate measurements are the bedrock of successful woodworking. A good tape measure and a square will ensure your cuts are precise.
- Clamps: While not a cutting tool, clamps are vital for holding pieces together while glue dries or during assembly.
When selecting hand tools, consider the following factors:
- Quality: Invest in high-quality tools that will last. Cheap tools may save you money initially but can lead to frustration and poor results.
- Comfort: Tools should feel comfortable in your hands. Look for ergonomic designs that fit your grip well.
- Size: Choose tools that are appropriate for the scale of your projects. Larger tools can be unwieldy for small tasks.
Moreover, it's a good idea to start with a few essential tools and gradually expand your collection. Think of it like building a toolbox for life; you wouldn't want to clutter it with tools you might never use. Instead, focus on what you need for your current projects and add to your arsenal as you gain experience. Remember, the right hand tools can make all the difference in your woodworking journey, allowing you to express your creativity and skill with confidence.
Q: What hand tools should I buy first as a beginner?
A: Start with a good quality saw, chisels, a hand plane, measuring tools, and clamps. These will cover most basic tasks.
Q: How do I maintain my hand tools?
A: Regular cleaning, sharpening, and proper storage are key. Keep tools dry and store them in a cool, dry place to prevent rust.
Q: Can I use hand tools for all woodworking projects?
A: While hand tools are versatile, some projects may require power tools for efficiency, especially larger or more complex builds.
Q: Is it worth investing in expensive hand tools?
A: Yes, high-quality tools can enhance your woodworking experience and last much longer than cheaper alternatives, making them a worthwhile investment.

Power Tool Safety Tips
When it comes to woodworking, power tools can be your best friends, helping you accomplish tasks that would take hours with hand tools. However, with great power comes great responsibility! Understanding and practicing safety precautions is essential to ensure a safe and enjoyable woodworking experience. Here are some crucial power tool safety tips that every beginner should keep in mind:
First and foremost, always wear appropriate personal protective equipment (PPE). This includes safety glasses to protect your eyes from flying debris, ear protection to guard against hearing damage from loud machinery, and a dust mask to prevent inhalation of harmful particles. Additionally, wearing sturdy gloves can protect your hands, but be cautious with them around rotating tools, as they can get caught.
Before you even plug in your tool, take a moment to inspect it. Check for any signs of wear and tear, such as frayed cords or damaged components. If you notice anything unusual, do not use the tool until it has been repaired or replaced. It's also a good practice to familiarize yourself with the tool's manual, as it contains essential information about safe operation and maintenance.
When operating power tools, maintain a clean and organized workspace. Clutter can lead to accidents, so ensure that your area is free from unnecessary items and that your tools are stored properly when not in use. It’s also wise to keep your workspace well-lit to avoid any miscalculations during cutting or drilling.
Another vital tip is to always use the right tool for the job. Each power tool is designed for specific tasks, and using the wrong one can lead to accidents or damage to your project. For instance, using a jigsaw for a task better suited for a circular saw can result in uneven cuts and potential injury. When using power tools, maintain a firm grip and a stable stance to keep control and balance.
Lastly, never rush your work. It’s easy to get caught up in the excitement of creating something new, but taking your time can prevent mistakes and accidents. If you feel fatigued or distracted, it’s best to step away and return when you are focused and refreshed. Remember, woodworking is a journey, and safety should always be your top priority!
In summary, following these can significantly reduce the risk of injury and help you build confidence in your woodworking skills. Always prioritize safety, and you’ll find that your woodworking journey can be both rewarding and enjoyable.
- What should I wear when using power tools? Always wear safety glasses, ear protection, and a dust mask. Sturdy gloves are also recommended, but be cautious with rotating tools.
- How do I maintain my power tools? Regularly inspect your tools for damage, keep them clean, and store them properly when not in use.
- Can I use power tools in a cluttered workspace? No, a clean and organized workspace is essential for safety when using power tools.
- What should I do if I feel tired while working? Take a break! It’s important to stay focused and alert while using power tools.
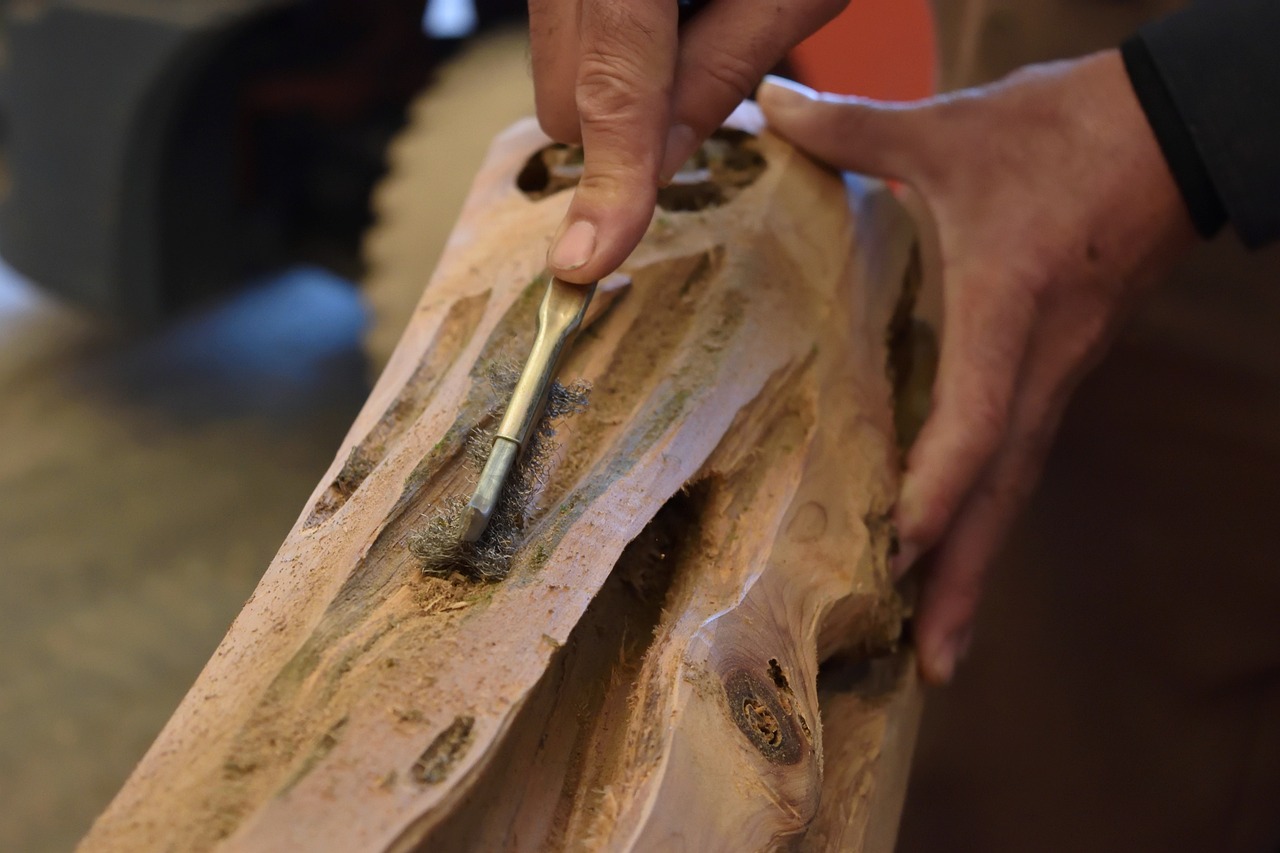
Maintaining Your Tools
When it comes to woodworking, the tools you use are your best friends. Just like any relationship, maintenance is key to keeping them performing at their best. If you want your tools to serve you well for years to come, it’s crucial to establish a regular maintenance routine. Think of it as giving your tools a little TLC, ensuring they remain sharp, clean, and ready for action whenever inspiration strikes.
First and foremost, cleaning your tools after each use is essential. Woodworking can be a messy endeavor, and sawdust, glue, and other debris can accumulate quickly. A simple wipe-down with a damp cloth can do wonders. For tools that have seen a lot of action, consider using a soft brush or compressed air to dislodge any stubborn particles. Remember, a clean tool is not just about aesthetics; it also helps maintain the tool's functionality and longevity.
Next up is sharpening your tools. Dull blades can make your work more difficult and less precise. Depending on the type of tool, you might need different sharpening techniques. For instance, chisels and plane blades can benefit from a whetstone, while saw blades may require a specialized sharpening tool. Regularly checking the sharpness of your tools will save you time and frustration in the long run. Here’s a quick tip: if you find yourself applying excessive force, it’s time to sharpen!
Finally, let’s not forget about storage. Properly storing your tools can prevent damage and keep them organized. Consider investing in a tool chest or pegboard to keep everything in its place. Additionally, using protective cases for power tools and covering hand tools with rust-resistant oil can help shield them from moisture and other damaging elements. A well-organized workspace not only enhances efficiency but also makes it easier to locate the tools you need when you need them.
To summarize, maintaining your tools is all about three key actions: cleaning, sharpening, and storing. By incorporating these practices into your woodworking routine, you’ll not only extend the life of your tools but also improve the quality of your work. Remember, a little effort goes a long way in ensuring that your woodworking experience remains enjoyable and productive!
- How often should I clean my woodworking tools?
It’s best to clean your tools after each use to prevent buildup of dust and debris. - What is the best way to sharpen my chisels?
Using a whetstone is a popular method. Make sure to maintain the correct angle while sharpening for the best results. - How can I prevent rust on my tools?
Applying a light coat of oil can help protect against moisture. Storing tools in a dry environment also reduces the risk of rust. - Is it necessary to have a separate storage space for my tools?
Yes, having a dedicated storage space helps keep your tools organized and easily accessible, which can save time and enhance your workflow.

Planning Your Project
When it comes to woodworking, is as crucial as the actual construction. Think of it like mapping out a road trip; without a clear route, you might end up lost or stuck in a dead end. A well-thought-out plan not only saves time but also reduces frustration, allowing you to enjoy the creative process. So, how do you create a solid plan for your woodworking project? Let’s dive into some essential elements to consider.
First, it’s important to define what you want to create. Are you aiming for a simple bookshelf, a complex coffee table, or perhaps a decorative piece for your home? Having a clear vision will guide all your subsequent decisions. Once you have your project in mind, you can start sketching out your ideas. Don’t worry about making it perfect; just let your creativity flow. You can always refine your design later. Here’s a simple approach to sketching:
- Start with a rough outline of your piece.
- Include dimensions to ensure it fits your space.
- Consider the materials you want to use.
Next, let’s talk about measurements. Accurate measurements are the backbone of any successful woodworking project. A small mistake in measurement can lead to significant issues down the line, so it’s vital to be precise. Invest in a good measuring tape and a square to help you create accurate cuts. You might also want to consider using a cutting list, which is essentially a detailed list of all the pieces you’ll need, along with their dimensions. This not only helps you keep track but also ensures you purchase the right amount of materials.
As you plan, think about the materials you’ll need. Different woods have unique characteristics that can affect the final outcome of your project. For instance, hardwoods like oak and maple are durable and great for furniture, while softwoods like pine are easier to work with and perfect for beginners. Here’s a quick comparison:
| Wood Type | Characteristics | Best For |
|---|---|---|
| Hardwood | Dense, durable, and often more expensive | Furniture, cabinetry |
| Softwood | Lighter, easier to work with, and more affordable | Craft projects, frames |
Once you’ve decided on your materials, it’s time to create a timeline. Consider how much time you can realistically dedicate to your project each week. Breaking down your project into manageable steps with specific deadlines can help keep you on track. For example, you might allocate one week for gathering materials, another for cutting and assembling, and a final week for finishing touches.
Finally, don’t forget to account for potential challenges. Every woodworking project comes with its own set of surprises. You might run into issues like warped wood, missing tools, or even a design flaw. By anticipating these challenges and having a backup plan, you can navigate through them more smoothly.
In summary, effective planning is the key to transforming your woodworking dreams into reality. By defining your project, taking accurate measurements, choosing the right materials, and creating a realistic timeline, you’ll set yourself up for success. Now, let’s move on to the next crucial step in your woodworking journey!
Here are some common questions beginners might have about planning their woodworking projects:
- How do I choose the right project for my skill level? Start with something simple and gradually increase the complexity as you gain confidence.
- What tools do I need for basic woodworking? A measuring tape, saw, hammer, and some hand tools are essential for beginners.
- Can I modify a project plan? Absolutely! Feel free to adjust designs and dimensions to better suit your needs.

Creating Accurate Measurements
When it comes to woodworking, accurate measurements are the backbone of any successful project. Imagine trying to build a beautiful piece of furniture, only to find that the legs are uneven or the tabletop is too small. Frustrating, right? That's why mastering the art of measuring is essential for every beginner woodworker. Let's dive into some techniques and tools that will help you achieve precision in your measurements.
First off, investing in a good quality measuring tape is a must. A tape measure is not just a tool; it's your best friend in the workshop. Look for one that is at least 25 feet long, as this will give you the flexibility to measure larger pieces of wood without any hassle. Additionally, consider using a square to ensure your cuts are straight and true. A framing square or a combination square can help you achieve right angles, which are crucial for making joints and ensuring your project has a professional finish.
Another handy tool is the caliper. This tool allows you to measure the thickness of wood accurately, which is especially important when you're working with multiple layers or trying to fit pieces together snugly. For example, if you're creating a drawer, knowing the exact thickness of the wood will help you design the drawer slides correctly.
But what if you're measuring something that isn't a perfect rectangle or square? That's where the Pythagorean theorem comes into play. If you're building something like a triangular shelf, you can use this simple formula: a² + b² c², where 'c' is the hypotenuse. By applying this principle, you can ensure that your angles are correct and that everything fits together seamlessly.
It's also important to remember that measuring twice and cutting once is a golden rule in woodworking. This old adage emphasizes the importance of double-checking your measurements before making any cuts. It’s a simple practice that can save you a lot of time, wood, and headaches in the long run. Plus, it gives you a chance to catch any mistakes before they become costly errors.
In addition to these tips, consider keeping a measurement log. This can be as simple as a notepad where you jot down the dimensions of each piece of wood you’re working with. Having a reference point can help you stay organized and prevent confusion, especially when you’re juggling multiple measurements at once.
Lastly, don't underestimate the power of digital tools. There are numerous apps available that can help you plan and measure your projects more effectively. Some of these apps even allow you to visualize your project in 3D, which can be incredibly helpful for understanding how different pieces will fit together. Using technology can elevate your woodworking game and help you achieve that professional look.
In summary, accurate measurements are vital for any woodworking project. By using the right tools, applying mathematical principles, and practicing diligent measuring habits, you'll be well on your way to creating stunning pieces that not only look great but are also structurally sound. So grab your measuring tape, and let’s get to work!
- What tools do I need for accurate measurements? A measuring tape, square, caliper, and possibly a digital measuring tool or app.
- How can I ensure my measurements are correct? Always measure twice before cutting, and consider keeping a measurement log.
- What is the Pythagorean theorem used for in woodworking? It helps you calculate the lengths of the sides of a right triangle, ensuring your angles are correct for projects like triangular shelves.
- Are there any apps that can help with measurements? Yes, there are several woodworking apps that can assist with planning and measuring your projects effectively.
Designing Your Project
Designing a woodworking project is like painting a masterpiece; it requires a blend of creativity and practicality. Whether you’re crafting a simple shelf or a complex piece of furniture, the design phase is where the magic begins. Start by visualizing your idea. What do you want to create? Take a moment to imagine how the finished product will look and function in your space. This mental picture will guide you as you move forward.
Next, it’s essential to put your ideas on paper. Sketching your design can help solidify your vision and highlight any potential issues before you start cutting wood. Don’t worry about making your sketches perfect; the goal is to capture your concept. You might want to include dimensions and notes about materials directly on your sketches, as this will make it easier to reference later. A simple table can help organize your thoughts:
| Component | Dimensions | Materials |
|---|---|---|
| Top Surface | 48" x 24" | Maple |
| Legs | 3" x 3" x 30" | Oak |
| Support Beams | 2" x 4" x 36" | Pine |
Once your sketches are complete, consider the style of your project. Are you aiming for a modern look, or do you prefer a rustic charm? The style will influence your choice of materials, joinery, and finishing techniques. For example, a sleek, modern table might benefit from clean lines and a glossy finish, while a farmhouse-style bench could embrace natural wood tones and visible joinery.
As you design, keep your skill level in mind. It’s tempting to go for an elaborate design, but if you’re a beginner, it’s wise to choose a project that matches your current abilities. You can always add complexity as you gain experience. A good rule of thumb is to start with a project that has fewer parts and simpler joints, gradually progressing to more intricate designs as your confidence grows.
Finally, don’t forget about functionality. Your project should not only look good but also serve its intended purpose well. Think about how it will be used and ensure that your design accommodates this. For instance, if you’re building a chair, consider the height, seat depth, and comfort. Ask yourself questions like: Will this piece fit in the intended space? Is it practical for daily use?
In summary, designing your woodworking project is a crucial step that combines imagination with practical considerations. By sketching your ideas, selecting appropriate materials, and keeping functionality in mind, you’ll set a solid foundation for a successful build. Remember, every great project starts with a well-thought-out design!
- How do I choose the right design for my skill level? Start with simple projects and gradually increase complexity as you gain confidence.
- What tools do I need for sketching my designs? A pencil, ruler, and graph paper can be very helpful for creating accurate sketches.
- How important is the style of my project? The style is important as it influences the materials and techniques you will use, so choose something that resonates with you.

Joining Techniques
When diving into the world of woodworking, understanding is essential for creating sturdy and durable projects. Think of joints as the backbone of your creations; they hold everything together, ensuring that your hard work doesn’t fall apart at the first sign of stress. There are several methods to join pieces of wood, each with its own strengths and ideal applications. Let's explore some of the most common joining techniques that every beginner should know.
One of the most popular methods is the dovetail joint. This technique is often used in drawer construction and cabinetry because of its strength and aesthetic appeal. The interlocking shape of the dovetail provides excellent resistance to pulling apart, making it a favorite among woodworkers. If you're looking for a joint that combines both beauty and functionality, this is a go-to choice.
Another classic method is the mortise and tenon joint. This joint is used to connect two pieces of wood at right angles, often seen in the frames of chairs and tables. The tenon is the protruding end of one piece that fits snugly into the mortise, or hole, in the other piece. This joint is renowned for its strength and durability, making it ideal for furniture that needs to withstand daily use.
For those seeking a simpler approach, the pocket hole joint is an excellent option. This technique involves drilling angled holes into one piece of wood, allowing screws to be driven into the adjoining piece. It’s a straightforward method that provides a strong connection and is particularly useful for beginners who may not yet have mastered more intricate joints. The beauty of pocket holes is that they can be hidden, giving your project a clean finish.
In addition to these traditional methods, you might also consider using glue as a joining technique. While it may not be as mechanically robust as other methods, when used in conjunction with other joints, glue can significantly enhance the strength of your assembly. It's essential to choose the right type of wood glue for your project, as different formulations offer varying drying times and strengths.
To summarize, here’s a quick comparison of the joining techniques discussed:
| Joining Technique | Strength | Best Used For |
|---|---|---|
| Dovetail Joint | High | Drawers, cabinets |
| Mortise and Tenon Joint | Very High | Frames, furniture |
| Pocket Hole Joint | Moderate | Simple furniture, repairs |
| Glue | Variable | All joints, enhancements |
As you embark on your woodworking journey, remember that mastering joining techniques is not just about knowing how to do them; it's about understanding when to use them. Each project will present unique challenges, and the right joint can make all the difference between a successful build and a frustrating failure. So, take your time, practice these techniques, and soon enough, you'll be crafting beautiful, sturdy pieces that you can be proud of!
- What is the best joint for beginners? The pocket hole joint is often recommended for beginners due to its simplicity and effectiveness.
- How do I choose the right joining technique? Consider the strength required for your project, the tools you have, and your skill level.
- Can I use glue alone for joints? While glue can be effective, it's best used in combination with other joints for added strength.
Glue vs. Mechanical Joints
When it comes to woodworking, one of the most crucial decisions you'll face is whether to use glue or mechanical joints to hold your projects together. Each method comes with its own set of advantages and disadvantages, and understanding these can greatly impact the durability and appearance of your finished piece.
Glue is often the go-to choice for many woodworkers due to its simplicity and effectiveness. It creates a strong bond between wood pieces, often stronger than the wood itself when applied correctly. One of the major benefits of using glue is that it allows for a clean, seamless appearance since it can be applied in thin layers and often dries clear. Additionally, glue can be used in conjunction with other methods, such as mechanical joints, to provide extra strength.
However, glue does have its limitations. It can be affected by moisture and temperature, leading to potential failures in humid environments. Moreover, once glue has dried, it can be challenging to disassemble jointed pieces without damaging the wood. This is where mechanical joints come into play.
Mechanical joints, such as dovetail, mortise and tenon, or pocket hole joints, are often seen as the backbone of traditional woodworking. These joints physically lock pieces together, providing structural integrity that glue alone may not offer. For instance, a dovetail joint not only looks beautiful but also resists pulling apart, making it ideal for drawers and furniture. On the downside, mechanical joints can be more complex to create, requiring precise measurements and skilled craftsmanship.
In comparing the two, consider the following table that outlines their key differences:
| Feature | Glue | Mechanical Joints |
|---|---|---|
| Strength | Strong bond, often stronger than the wood | Very strong, especially under stress |
| Appearance | Seamless, can be made invisible | Visible joints can add aesthetic value |
| Durability | Can weaken with moisture | Generally more durable over time |
| Ease of Use | Simple application | Requires more skill and precision |
| Repairability | Hard to disassemble without damage | Can be disassembled and repaired easily |
Ultimately, the choice between glue and mechanical joints will depend on your specific project and personal preferences. For beginners, it might be wise to start with glue for simpler projects, gradually incorporating mechanical joints as your skills improve. Remember, the best woodworkers often use a combination of both methods to achieve the strongest and most aesthetically pleasing results.
- Can I use both glue and mechanical joints together? Absolutely! Many woodworkers combine these methods to enhance the strength and appearance of their projects.
- What type of glue should I use for woodworking? PVA glue (polyvinyl acetate) is commonly used in woodworking due to its strong bond and ease of use.
- Are mechanical joints difficult to create for beginners? Some joints can be challenging, but with practice and the right tools, they can be mastered over time.

Finishing Techniques
When it comes to woodworking, finishing techniques are the cherry on top of your hard work. Just like a painter adds the final strokes to a canvas, the right finish can transform a simple wooden piece into a stunning masterpiece. Finishing is not just about aesthetics; it also serves to protect your project from wear and tear, moisture, and other environmental factors. So, let's dive into the various methods you can use to achieve that perfect finish!
There are several finishing techniques available, each with its unique benefits and applications. Here are some of the most popular methods:
- Staining: This technique allows you to enhance the natural beauty of the wood by adding color while still showcasing its grain. Stains come in different formulations, such as oil-based or water-based, and selecting the right one can depend on the type of wood you're using.
- Painting: If you want to completely change the look of your wood project, paint is a great option. It provides a solid color finish that can hide imperfections and allows for endless customization. Just remember to use a primer for better adhesion!
- Sealing: After staining or painting, applying a sealant is essential. Sealants protect the wood from moisture and damage while adding a layer of sheen. Options include polyurethane, varnish, and lacquer, each providing different levels of durability and finish.
Choosing the right finishing technique can feel overwhelming, especially for beginners. A good rule of thumb is to consider the purpose of the piece. For instance, if you're making a dining table, a durable finish that can withstand spills and scratches is crucial. Conversely, for decorative items, a lighter finish might be more appropriate.
Before applying any finish, always test it on a scrap piece of wood. This allows you to see how the wood reacts and ensures you achieve the desired look without any surprises. Remember, patience is key! Allow each layer to dry completely before applying the next one, and don't rush through the process. A well-finished piece speaks volumes about the craftsmanship behind it.
In summary, mastering finishing techniques can elevate your woodworking projects to new heights. Whether you choose to stain, paint, or seal, each method has its unique charm and protective qualities. So grab your brushes and sealants, and get ready to transform your wooden creations into stunning works of art!
Q: How long should I wait between applying coats of finish?
A: It typically depends on the type of finish you're using, but a good rule of thumb is to wait at least 24 hours between coats for oil-based finishes and around 2-4 hours for water-based finishes. Always check the manufacturer's instructions for specific guidance.
Q: Can I use a spray finish instead of a brush?
A: Yes! Spray finishes can provide an even coat and are great for intricate details. Just be sure to work in a well-ventilated area and protect surrounding surfaces from overspray.
Q: What if I don't like the finish after applying it?
A: If you're unhappy with the finish, you can often sand it down and reapply a different finish. Just make sure to remove all dust and debris before starting the new application.

Common Mistakes to Avoid
Woodworking can be a thrilling adventure, but it’s not without its bumps along the way. As a beginner, it’s easy to stumble into common traps that can derail your progress and dampen your enthusiasm. By understanding these pitfalls, you can navigate your woodworking journey with greater confidence and success.
One of the most significant mistakes beginners make is overestimating their skill level. It’s tempting to jump into complex projects that look impressive, but this can lead to frustration and disappointment. Instead, start with simpler projects that allow you to build your skills gradually. For example, crafting a basic bookshelf or a simple birdhouse can provide a solid foundation before tackling more intricate designs. Remember, every master was once a beginner!
Another critical mistake is neglecting safety precautions. Woodworking involves tools that can be dangerous if not handled properly. Always wear appropriate safety gear, such as goggles and ear protection, and familiarize yourself with the tools you’re using. It’s essential to create a safe workspace, free from clutter and distractions. A little caution goes a long way in preventing accidents and ensuring that your woodworking experience is enjoyable.
Additionally, many beginners underestimate the importance of planning. Jumping into a project without a clear plan can lead to wasted materials and time. Before you start, take the time to sketch your design, list the materials you’ll need, and outline the steps involved. This preparation not only saves you from potential headaches but also enhances your overall efficiency. A well-thought-out plan is like a roadmap guiding you toward your final destination.
Moreover, another common oversight is failing to measure accurately. Precision is crucial in woodworking, and even a slight miscalculation can throw off your entire project. Invest in quality measuring tools and take your time to double-check your measurements before making any cuts. Remember the old saying, “Measure twice, cut once.” This simple mantra can save you from costly mistakes and ensure that your pieces fit together seamlessly.
Finally, don’t forget about tool maintenance. Many beginners neglect to care for their tools, which can lead to poor performance and unsafe conditions. Regularly clean, sharpen, and properly store your tools to keep them in top shape. Just like a chef relies on sharp knives, a woodworker benefits from well-maintained tools. Your projects will turn out better, and you’ll enjoy the process much more.
In summary, by avoiding these common mistakes—overestimating your skills, neglecting safety, failing to plan, measuring inaccurately, and not maintaining your tools—you can set yourself up for a successful woodworking experience. Embrace the learning process, and don't be afraid to make mistakes; they are often the best teachers!
- What is the best wood for beginners? - Softwoods like pine or cedar are excellent choices for beginners due to their ease of handling and affordability.
- How can I improve my woodworking skills? - Practice regularly, seek feedback from experienced woodworkers, and continue learning through books and online resources.
- What should I do if I make a mistake? - Don’t panic! Assess the situation, see if it can be fixed, and learn from the experience to avoid similar mistakes in the future.
- Are there any safety courses for woodworking? - Yes, many local community colleges and woodworking shops offer safety courses for beginners.

Overestimating Skill Level
When diving into woodworking, one of the most common pitfalls beginners face is overestimating their skill level. It’s like jumping into the deep end of a pool without knowing how to swim; it can lead to frustration, wasted materials, and even injuries. Many newbies get excited by the prospect of creating intricate designs or complex furniture pieces, only to find themselves overwhelmed by the challenges that arise. So, how can you avoid this trap and set yourself up for success?
The first step is to honestly assess your current abilities. Take a moment to reflect on what you’ve accomplished so far. Have you built basic projects like shelves or birdhouses? If so, it might be wise to stick with similar projects before tackling something like a dining room table or a detailed cabinet. Remember, even seasoned woodworkers started with simple pieces before advancing to more complicated tasks. It’s all about building a solid foundation.
Another way to gauge your skill level is to consider the complexity of the project you’re interested in. Here are a few questions to ask yourself:
- Have I worked with the materials required for this project?
- Do I fully understand the tools and techniques necessary?
- Am I prepared to face potential challenges that may arise?
By answering these questions, you can better determine if you’re ready to take on a new project or if it might be more beneficial to practice on something simpler first. Remember, it’s completely normal to feel excited about the possibilities, but realistic expectations are key to enjoying the process and achieving satisfying results.
Additionally, consider starting with projects that have clear instructions and perhaps even video tutorials. This way, you can follow along and learn as you go, which can significantly boost your confidence and skill level. As you complete each project, you’ll gain valuable insights and experience that will prepare you for more challenging endeavors.
Finally, don’t hesitate to seek feedback from more experienced woodworkers. Joining local clubs or online forums can provide you with a wealth of knowledge and support. Sharing your work and asking for advice can help you avoid common mistakes and learn from others' experiences. Remember, woodworking is as much about community as it is about crafting.
In conclusion, while it’s natural to feel ambitious, taking the time to evaluate your skill level will pave the way for a more enjoyable and successful woodworking journey. Embrace the learning process, set achievable goals, and remember that every expert was once a beginner.
- What should I do if I feel overwhelmed by a project?
Take a step back, reassess your skills, and consider starting with a simpler project to build your confidence. - How can I improve my woodworking skills?
Practice consistently, seek feedback, and learn from tutorials or classes to enhance your abilities. - Is it okay to ask for help from more experienced woodworkers?
Absolutely! Woodworking communities are often very supportive and happy to share their knowledge.

Neglecting Safety Precautions
When it comes to woodworking, can lead to serious injuries and accidents that could easily be avoided. It’s easy to get caught up in the excitement of a new project, but the reality is that safety should always be your top priority. Think of it like driving a car; you wouldn't hit the road without buckling your seatbelt or checking your mirrors, right? The same principle applies when you're working with sharp tools and heavy materials.
One of the most critical aspects of woodworking safety is understanding the tools you are using. Each tool comes with its own set of risks and safety measures. For instance, when using a table saw, it’s essential to use a push stick to keep your hands at a safe distance from the blade. Similarly, when operating power tools, always wear appropriate personal protective equipment (PPE), such as goggles, gloves, and ear protection. These little steps can make a huge difference in preventing injuries.
Moreover, maintaining a clean and organized workspace is crucial. Clutter can lead to accidents, whether it’s tripping over sawdust or misplacing tools. So, take a moment to tidy up your area before starting your project. A well-organized workshop not only enhances your efficiency but also keeps you safe. Consider implementing a routine for cleaning up after each session to foster a safer working environment.
Lastly, it’s important to be aware of your surroundings. If you’re working in a shared space, communicate with others about what you’re doing. This can prevent accidents, as someone might unknowingly walk into your workspace while you’re operating a tool. Always be mindful of your environment and the people around you. Remember, woodworking should be a rewarding experience, not a hazardous one!
In summary, never underestimate the importance of safety in woodworking. By following the proper guidelines, wearing the right gear, and maintaining a clean workspace, you can significantly reduce the risks associated with this craft. After all, the goal is to create beautiful projects while keeping yourself safe and sound!
- What should I wear when woodworking? Always wear safety goggles, ear protection, and gloves. Closed-toe shoes are also recommended to protect your feet.
- How can I prevent injuries when using power tools? Always read the user manual, follow safety guidelines, and never operate tools when you’re tired or distracted.
- Is it necessary to have a first aid kit in my workshop? Yes! Having a first aid kit readily available can be a lifesaver in case of minor injuries.

Resources for Further Learning
Continuous learning is vital for improvement in woodworking. As a beginner, you might find yourself overwhelmed by the vast amount of information available. But fear not! There are plenty of resources designed to help you sharpen your skills and deepen your understanding of this rewarding craft. Whether you prefer reading books, taking online courses, or engaging with communities of fellow woodworkers, there’s something out there for everyone.
One of the best ways to enhance your woodworking knowledge is through books. There are countless titles catering to various skill levels and interests. For instance, books like The Complete Manual of Woodworking provide a comprehensive overview of techniques, tools, and projects that can serve as a solid foundation for your woodworking journey. Similarly, Woodworking Basics: Mastering the Essentials of Craftsmanship is perfect for beginners, offering step-by-step guidance to help you build confidence.
Online courses are another fantastic resource. Platforms such as Coursera and Udemy offer woodworking classes taught by experienced professionals. These courses often include video demonstrations, project assignments, and forums for discussions, making it easier for you to grasp complex concepts. You can learn at your own pace, which is a huge advantage for beginners who may need a little extra time to understand certain techniques.
Additionally, joining online communities can provide invaluable support and inspiration. Websites like Reddit's Woodworking Community and Woodworking Talk allow you to connect with fellow woodworkers, share your projects, and seek advice. Engaging in discussions with others who share your passion can motivate you and help you overcome challenges you may face along the way.
To make your search for resources easier, here’s a quick table summarizing some recommended resources:
| Type | Resource | Description |
|---|---|---|
| Book | The Complete Manual of Woodworking | A comprehensive guide covering tools, techniques, and projects. |
| Book | Woodworking Basics: Mastering the Essentials of Craftsmanship | Step-by-step guidance for beginners to build confidence. |
| Online Course | Coursera | Various woodworking classes taught by professionals. |
| Online Course | Udemy | Self-paced woodworking courses with video demonstrations. |
| Community | Reddit's Woodworking Community | A platform to share projects and seek advice from fellow woodworkers. |
| Community | Woodworking Talk | An online forum for discussions and sharing experiences. |
In summary, the journey of woodworking is filled with opportunities for learning and growth. By tapping into the resources available, you can enhance your skills, connect with others, and find inspiration for your next project. Remember, every expert was once a beginner, so embrace the learning process and enjoy the beautiful art of woodworking!
Q: What is the best way to start woodworking as a beginner?
A: Start with simple projects and gradually work your way up to more complex ones. Invest in a few essential tools and familiarize yourself with different types of wood.
Q: Are online courses worth the investment?
A: Absolutely! Online courses provide structured learning, expert guidance, and often include community support, making them a valuable resource for beginners.
Q: How can I avoid common mistakes in woodworking?
A: Take your time to plan your projects, measure accurately, and always prioritize safety. Learning from others’ experiences can also help you avoid pitfalls.

Online Communities
In today's digital age, have become a lifeline for beginners venturing into the world of woodworking. These platforms not only offer a wealth of information but also foster connections among enthusiasts who share a common passion. Imagine having a virtual workshop where you can ask questions, share your projects, and receive feedback from experienced woodworkers. That's the beauty of these communities!
Joining an online woodworking community can significantly enhance your learning experience. Here, you can find a range of resources, from tutorials and project ideas to advice on tools and techniques. Many members are more than willing to share their expertise, making it a fantastic opportunity for beginners to gain insights that might take years to acquire through trial and error.
Some popular online communities include:
- Reddit's r/woodworking: A vibrant forum where users post their projects, seek advice, and share tips. It's an excellent place for real-time feedback and inspiration.
- Facebook Groups: There are numerous woodworking groups on Facebook where members share photos, videos, and helpful articles. These groups often host challenges and contests, encouraging participation and creativity.
- Woodworking Forums: Websites like LumberJocks and WoodNet offer dedicated forums where enthusiasts can discuss specific topics, post detailed project logs, and ask for help on complex issues.
Engaging with these communities not only helps you learn but also allows you to build a network of fellow woodworkers. You can share your successes, learn from your mistakes, and even collaborate on projects. Plus, there's something incredibly motivating about connecting with others who are just as excited about woodworking as you are. It's like having a team cheering you on as you tackle your latest project!
As you dive into these online spaces, remember to contribute back. Share your own experiences, tips, and tricks. This not only enriches the community but also reinforces your own learning. After all, woodworking is as much about sharing knowledge as it is about creating beautiful pieces of art.
In summary, online woodworking communities are invaluable resources for beginners. They offer support, inspiration, and a sense of belonging in a craft that can sometimes feel solitary. So don't hesitate to join these platforms and immerse yourself in the world of woodworking!
Q: How do I find the right online woodworking community for me?
A: Start by exploring platforms like Reddit, Facebook, or dedicated woodworking forums. Look for communities that align with your interests and skill level. Don't hesitate to join a few and see which one feels like the best fit!
Q: Can I ask questions in these communities, even if I'm a complete beginner?
A: Absolutely! Online communities are designed to be welcoming to all skill levels. Most members are eager to help beginners, so feel free to ask questions and seek advice.
Q: What should I do if I receive conflicting advice from different members?
A: It's common to receive varying opinions in woodworking. Take the time to research and consider the context of the advice. Ultimately, trust your instincts and choose the methods that resonate with you.
Q: Are there any costs associated with joining online woodworking communities?
A: Most online communities are free to join. However, some platforms may offer premium memberships or special features for a fee. Always check the community guidelines before joining.
Recommended Books and Courses
If you're diving into the world of woodworking, having the right resources can make a world of difference. Books and online courses serve as your trusty guides, illuminating the path to mastering this craft. Whether you prefer flipping through pages or watching videos, there’s something out there for everyone. Here are some top-notch recommendations that can help you hone your skills and expand your knowledge.
One of the classics in woodworking literature is "The Complete Manual of Woodworking" by Albert Jackson, David Day, and Simon Jennings. This book is a comprehensive resource that covers everything from tools and techniques to project ideas. It’s like having a woodworking mentor at your side, providing detailed illustrations and step-by-step instructions that make even the most complex projects approachable.
Another gem is "Woodworking Basics: Mastering the Essentials of Craftsmanship" by Peter Korn. This book focuses on fundamental skills and techniques, making it perfect for beginners. Korn emphasizes the importance of understanding the materials and methods before jumping into projects, which is crucial for developing a solid foundation in woodworking.
For those who prefer online learning, platforms like Udemy and Skillshare offer a plethora of woodworking courses tailored to various skill levels. You can find everything from basic joinery techniques to advanced furniture making. A popular course on Udemy, "Complete Woodworking Course: From Beginner to Advanced", is designed to take you step-by-step through the essentials, ensuring you gain confidence as you progress.
Additionally, YouTube is a treasure trove of woodworking tutorials. Channels like Woodworking for Mere Mortals and The Wood Whisperer provide visual learners with engaging content that breaks down complex techniques into digestible segments. Watching these experts in action can spark your creativity and inspire you to tackle new projects.
To help you navigate through the plethora of options, here’s a quick comparison table of some recommended resources:
| Resource Type | Name | Level | Format |
|---|---|---|---|
| Book | The Complete Manual of Woodworking | Beginner to Advanced | |
| Book | Woodworking Basics | Beginner | |
| Online Course | Complete Woodworking Course | Beginner to Advanced | Video |
| Online Platform | Udemy | Various | Video |
| Online Platform | YouTube | Various | Video |
In addition to books and courses, joining local woodworking clubs or online forums can be incredibly beneficial. Engaging with a community of fellow woodworkers allows you to share experiences, ask questions, and receive constructive feedback. Remember, the journey of woodworking is not just about the end product; it's also about the connections you make along the way.
So whether you’re reading a book, watching a video, or chatting with a fellow woodworker, the key is to keep learning and practicing. With the right resources at your fingertips, you’ll be well on your way to creating stunning pieces that you can be proud of.
Q: What are the best beginner woodworking projects?
A: Some great beginner projects include simple shelves, birdhouses, or small tables. These projects help you practice basic skills without being overwhelming.
Q: How much should I invest in woodworking tools as a beginner?
A: Start with essential tools like a saw, hammer, and measuring tape. You can gradually build your collection as you gain experience. Quality tools can be more expensive, but they often last longer and perform better.
Q: Is woodworking safe for kids?
A: Yes, woodworking can be safe for kids if proper safety measures are taken. Always supervise children, teach them about tool safety, and provide age-appropriate projects.
Q: How can I find woodworking courses near me?
A: Check local community colleges, adult education centers, or woodworking shops. Many offer classes for beginners that cover various techniques and projects.
Frequently Asked Questions
-
What type of wood is best for beginners?
As a beginner, it's often recommended to start with softwoods like pine or cedar. These woods are easier to work with, forgiving when making mistakes, and readily available at most hardware stores. Plus, they allow you to practice your skills without breaking the bank!
-
Do I need to invest in power tools right away?
Not necessarily! While power tools can speed up your projects, starting with hand tools can help you develop a better understanding of woodworking fundamentals. As you gain confidence and experience, you can gradually invest in power tools that suit your projects.
-
How do I create accurate measurements?
Accurate measurements are crucial in woodworking. Use a reliable tape measure, a square, and a marking tool to ensure precision. Always double-check your measurements before making cuts to avoid costly mistakes. Remember, "measure twice, cut once!"
-
What are the best joining techniques for beginners?
For beginners, simple joints like butt joints and lap joints are great starting points. As you gain experience, you can explore more complex techniques like dovetail or mortise and tenon joints. Practice makes perfect, so don't hesitate to experiment!
-
How can I avoid common woodworking mistakes?
Avoiding common mistakes starts with understanding your skill level and setting realistic goals. Take your time, follow safety precautions, and don't rush through your projects. Learning from mistakes is part of the journey, so embrace them as opportunities for growth!
-
Where can I find resources for further learning?
There are plenty of resources available for woodworking enthusiasts! Check out online courses, woodworking books, and join online communities where you can share experiences and seek advice. Engaging with others can provide valuable insights and keep your motivation high!