
Mastering the Art of Painting Trees in Front Light
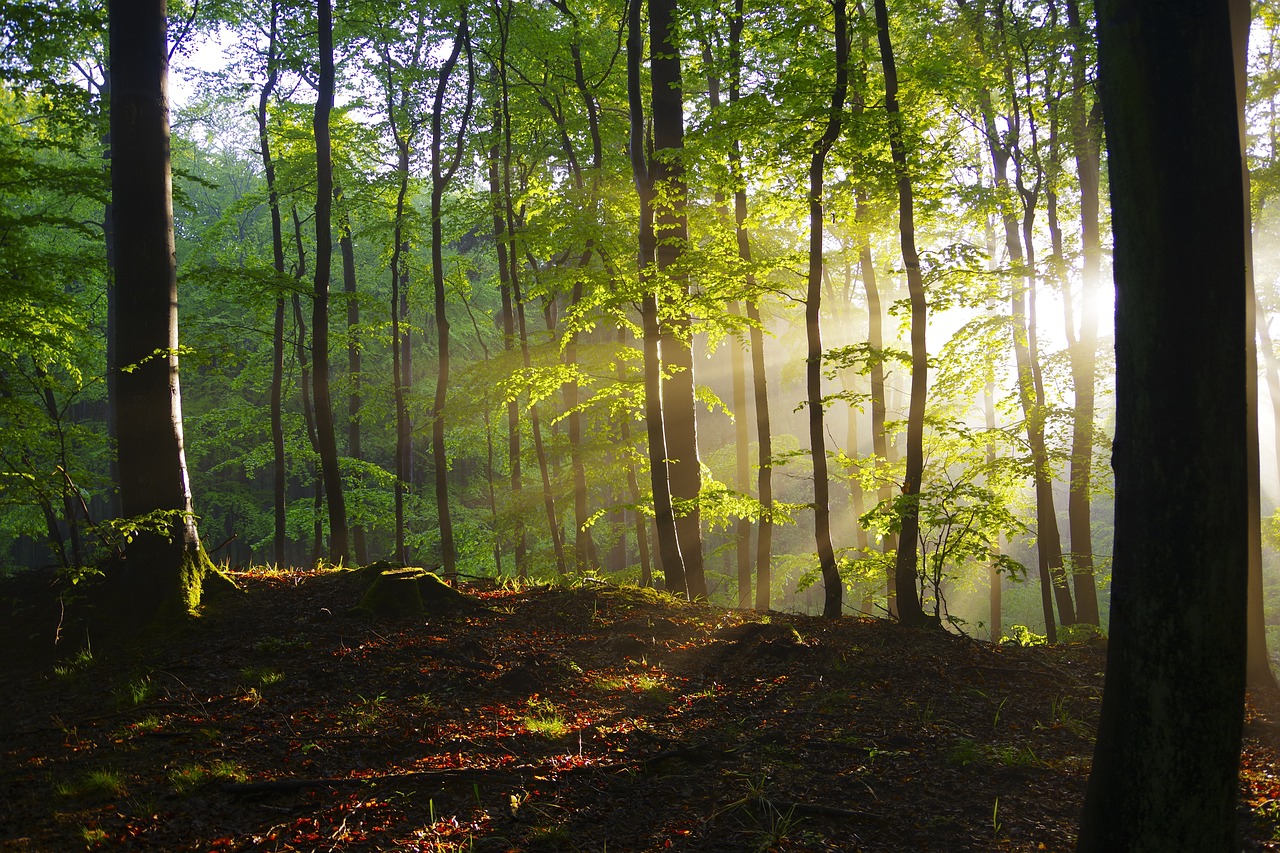
Painting trees under the enchanting glow of front light can transform an ordinary landscape into a breathtaking masterpiece. Imagine standing in front of a majestic oak, its leaves shimmering with vibrant hues as the sunlight filters through. The challenge lies not just in capturing the tree itself but in understanding how light interacts with its form, texture, and color. In this article, we will delve into the techniques and tips that will elevate your painting skills, allowing you to convey the stunning dynamics of light as it dances across the branches and leaves of trees.
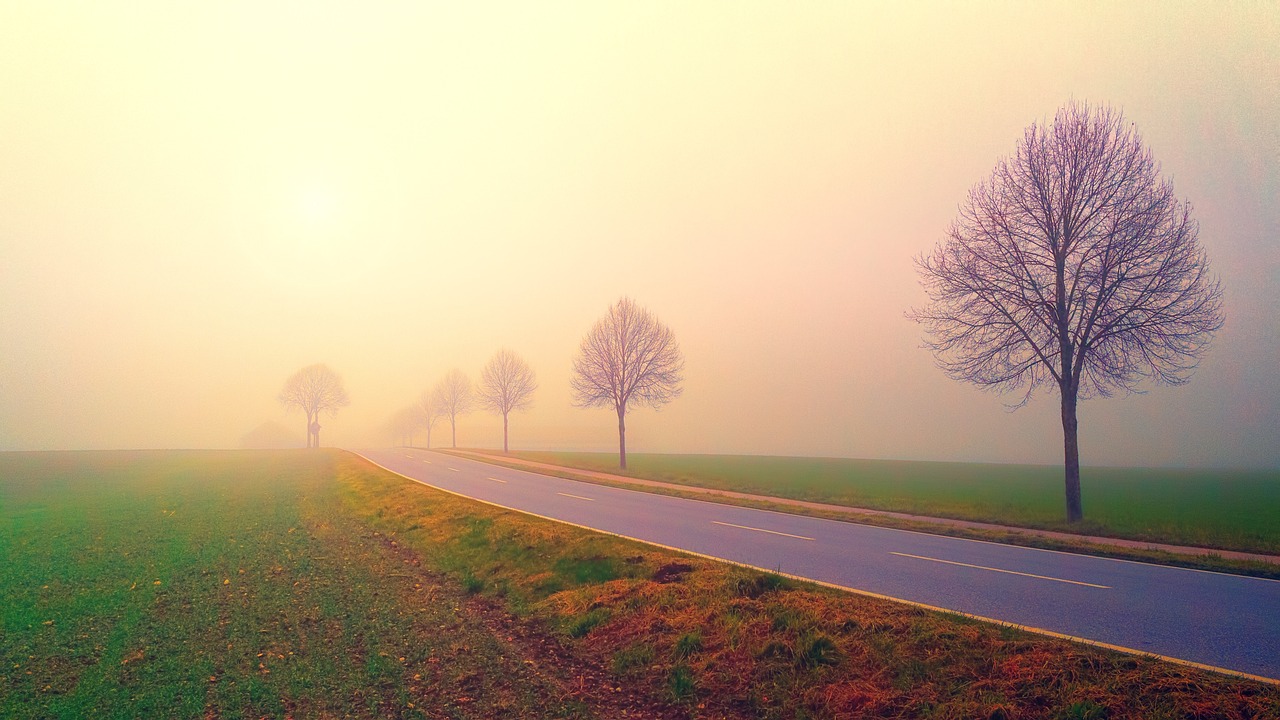
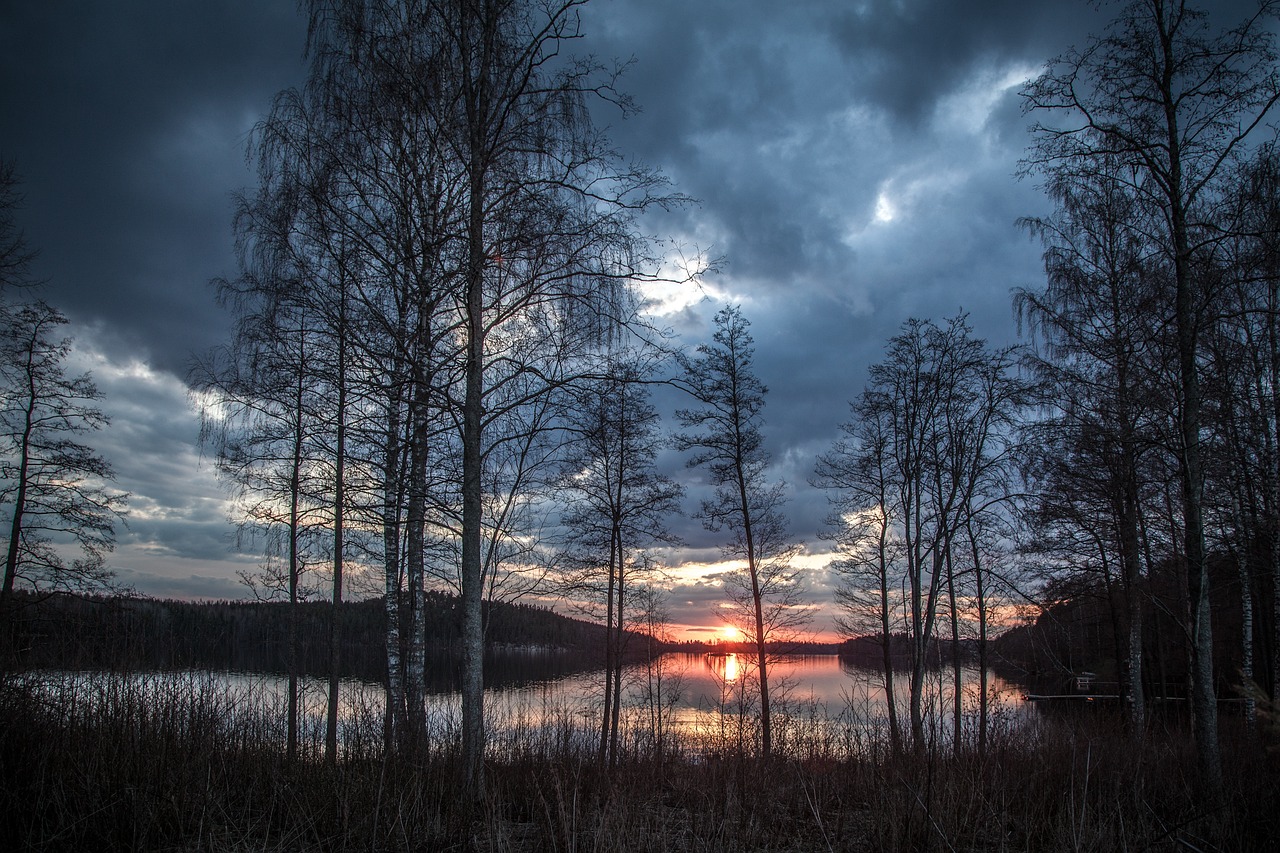
Front light, often referred to as direct light, occurs when the light source is positioned directly in front of the subject. This type of lighting can significantly alter the appearance of trees, highlighting their textures and creating sharp contrasts between light and shadow. When painting, it's essential to observe how the direction of light affects the tree's form. For instance, the bark may appear more textured, while the foliage can glow with an almost ethereal quality. Understanding these characteristics will help you create depth and dimension in your artwork, making your trees come alive on the canvas.
To achieve the desired effects when painting trees in front light, selecting the appropriate materials is crucial. The choice of paints, brushes, and canvases can significantly impact the final outcome of your artwork. For instance, oil paints are known for their rich colors and blending capabilities, while acrylics offer versatility and quick drying times. Watercolors, on the other hand, can create delicate washes that capture the subtle nuances of light. Below is a brief overview of the materials you might consider:
| Material | Characteristics |
|---|---|
| Oil Paints | Rich colors, slow drying, excellent for blending |
| Acrylic Paints | Fast drying, versatile, great for textures |
| Watercolors | Translucent, excellent for soft effects, quick washes |
Each type of paint has its unique qualities that can enhance your representation of trees. For example, oil paints allow for glazing techniques where layers of transparent color can be built up to create luminosity. Acrylics, with their fast drying time, enable artists to work quickly and layer colors without muddying the palette. Watercolors can create beautiful gradients, giving the impression of light filtering through leaves. Understanding these characteristics will help you choose the right medium for your artistic vision.
When working with oil paints, techniques such as glazing and layering can be particularly effective. Glazing involves applying a thin, transparent layer of paint over a dried layer, which can enhance the depth and luminosity of your trees. Layering, on the other hand, allows you to build up texture and detail gradually, creating a more realistic representation of bark and foliage. These methods can significantly improve the vibrancy of your work, making the trees appear as though they are bathed in natural light.
Acrylic paints come with their own set of advantages. Their quick drying times mean you can work on multiple layers in a single session without waiting for hours. This is especially useful when painting trees, as you can rapidly adjust and refine your work. Additionally, acrylics can be thinned with water or mediums to achieve various textures, making them ideal for capturing the complexity of tree bark and the softness of leaves. The versatility of acrylics allows you to experiment with different techniques, enhancing your creativity.
The brushes you choose can significantly influence the outcome of your painting. For foliage, a fan brush or a round brush can create the illusion of leaves, while a flat brush is perfect for rendering the texture of bark. Experimenting with different brush types will help you discover which ones best suit your style and the specific effects you want to achieve in your tree paintings.
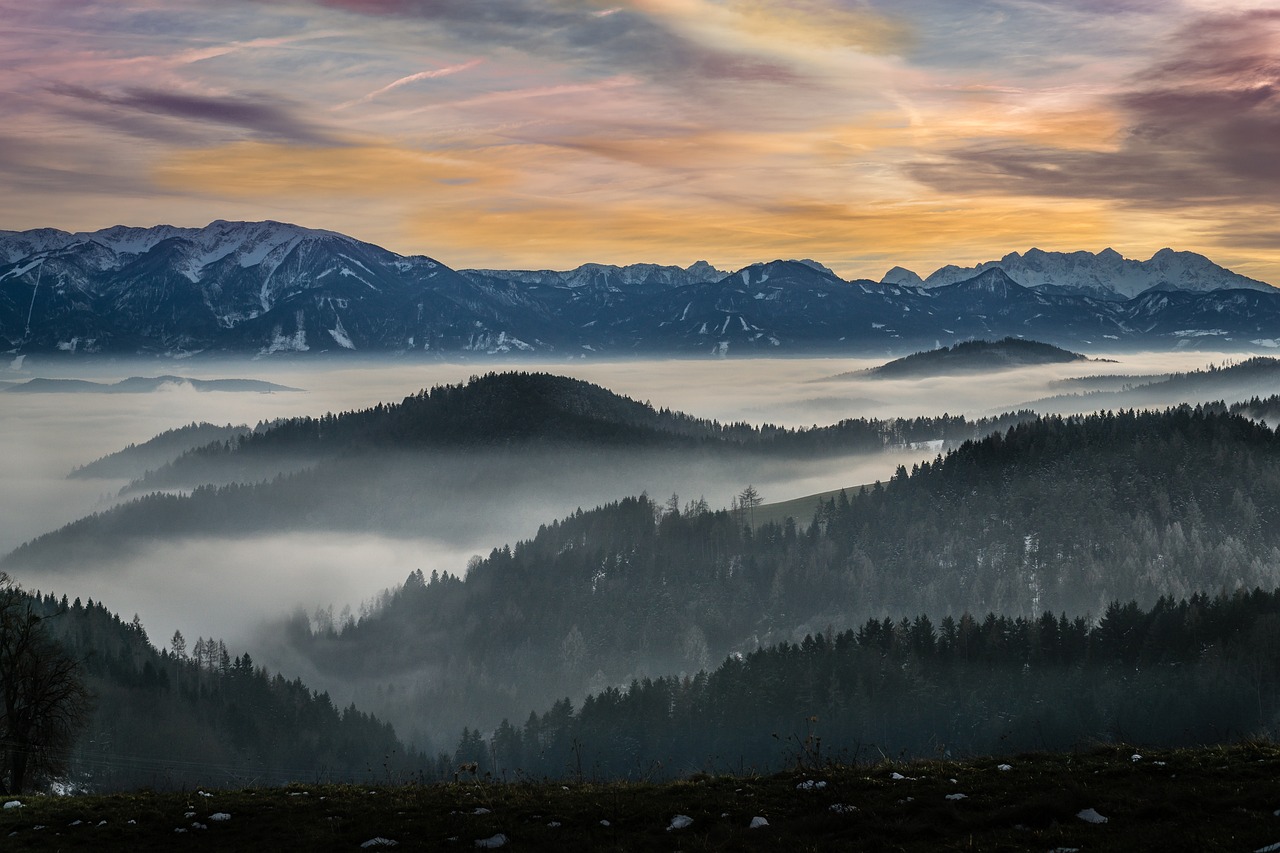
To truly master the art of painting trees in front light, it's essential to spend time observing nature. Take a walk in your local park or forest, and pay attention to how light interacts with the trees at different times of the day. Notice how shadows shift and change as the sun moves across the sky. This understanding will not only enhance your painting accuracy but also enrich your artistic expression. Try to capture these moments through sketches or photographs, which can serve as references for your future works.
Analyzing how light creates shadows on trees can greatly enhance your paintings. Shadows add depth and dimension, making your artwork feel more three-dimensional. When observing trees, take note of where the light hits and where the shadows fall. Use this knowledge to replicate these effects in your paintings, ensuring a realistic representation that draws the viewer in.
Color perception changes dramatically with different lighting conditions. Under front light, colors can appear more vibrant and saturated. As you paint, consider how the light affects the hues of the leaves and bark. Incorporating these variations into your tree paintings will create a more realistic and dynamic representation. Don't be afraid to experiment with color mixing to achieve the perfect shades that reflect the beauty of trees illuminated by light.
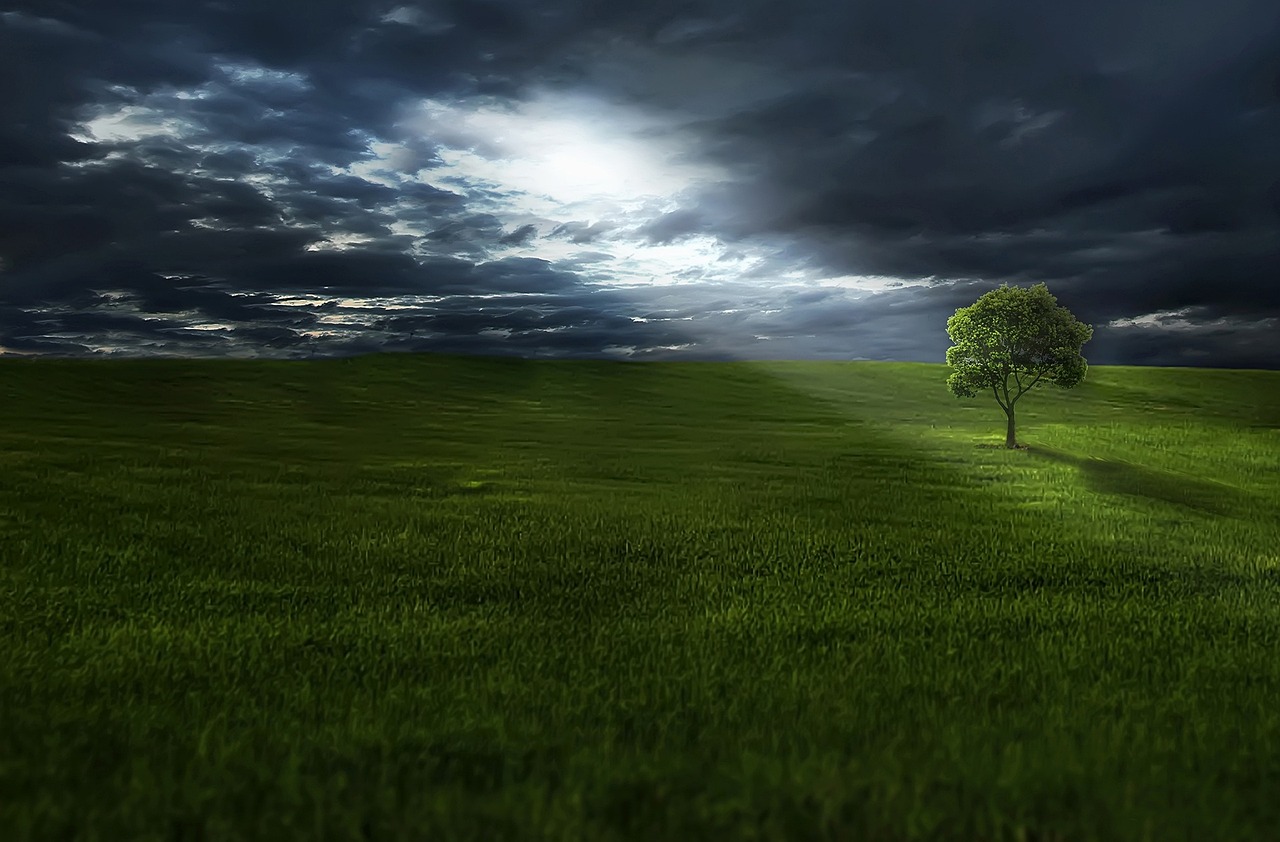
Effective composition is crucial for a successful painting. When arranging trees in your artwork, think about balance and focus. Consider the placement of each tree and how they interact with one another. A well-composed painting will guide the viewer's eye and create a sense of harmony. Remember, the goal is to create a scene that feels natural yet captivating.
Establishing focal points within your tree compositions is essential for directing the viewer's attention. This could be a particularly striking tree or an area where the light creates a stunning effect. By strategically placing these focal points, you enhance the overall impact of your painting, making it more engaging and memorable.
To create depth in your artwork, vary the sizes, colors, and placements of the trees. Larger trees in the foreground can create a sense of scale, while smaller trees in the background can simulate distance. Additionally, using lighter colors for distant trees and darker shades for those in the foreground can enhance the three-dimensional effect. This technique will make your paintings feel more immersive and realistic, inviting viewers to step into your artistic world.
- What type of paint is best for beginners? Acrylic paints are often recommended for beginners due to their ease of use and quick drying times.
- How can I improve my understanding of light and shadow? Spend time observing nature and practice sketching trees under different lighting conditions.
- What brushes are best for painting trees? A combination of fan brushes for foliage and flat brushes for bark textures works well.
- How do I create depth in my paintings? Use varying sizes, colors, and placements of trees to simulate a three-dimensional effect.
Understanding Front Light
When it comes to painting, especially trees, understanding front light is crucial. Front light refers to the light source that illuminates the subject from the front, typically casting a warm glow that enhances the colors and textures of the trees. Imagine standing in a sun-drenched forest, where the light filters through the leaves, creating a magical ambiance. This type of lighting can transform an ordinary scene into an extraordinary work of art, emphasizing the intricate details of bark and foliage.
Front light has unique characteristics that affect the way we perceive colors and forms. For instance, it often creates high contrast between light and shadow, which can add depth and dimension to your paintings. When the sun is shining directly on a tree, the leaves may appear vibrant and luminous, while the shaded areas can take on cooler, darker tones. This interplay between light and shadow is what gives your artwork a sense of realism and vitality.
One of the most important aspects of front light is its direction. The angle at which light strikes the trees can dramatically alter the visual impact of your painting. Here are a few key points to consider:
- Time of Day: The quality of light changes throughout the day. Early morning and late afternoon provide softer, warmer light, while midday sun can create harsh shadows.
- Weather Conditions: Overcast days diffuse light, resulting in a more uniform illumination that can soften colors and details.
- Seasonal Changes: Different seasons affect the color palette; for example, autumn brings vibrant reds and oranges, while spring showcases fresh greens.
To effectively capture the beauty of trees illuminated by front light, artists must be keen observers. Take the time to study how light interacts with the tree's surface, the way it dances on the leaves, and how it reveals the intricate details of the bark. This observation will help you make informed decisions about color choices and brush techniques when you sit down to paint.
In conclusion, mastering the art of painting trees in front light requires an understanding of the light's characteristics and its effects on your subject. By paying close attention to the direction, quality, and seasonal variations of light, you can create stunning, lifelike representations of trees that resonate with viewers. So grab your brushes, step outside, and let the front light inspire your next masterpiece!

Choosing the Right Materials
When it comes to painting trees illuminated by front light, the choice of materials can make or break your artwork. Selecting the right paints, brushes, and canvases is crucial for achieving the desired effects, especially when trying to capture the intricate play of light and shadow. Think of it like building a house; without the right foundation, the structure will never stand tall. In this section, we’ll dive into the essential materials you need to elevate your painting game.
First and foremost, let’s talk about paints. The medium you choose will significantly influence the vibrancy and texture of your tree paintings. Here’s a brief overview of the most popular types of paints:
| Type of Paint | Characteristics | Best For |
|---|---|---|
| Oil Paint | Rich colors, slow drying time, allows for blending | Creating depth and luminosity |
| Acrylic Paint | Fast drying, versatile, water-soluble | Quick applications and varied textures |
| Watercolor | Translucent, requires water for application | Soft, delicate tree effects |
Each medium has its strengths and weaknesses. For instance, oil paints are fantastic for creating depth and luminosity, especially when using techniques like glazing and layering. They allow you to manipulate the paint for hours, giving you time to perfect the light effects on your trees. On the other hand, acrylic paints dry quickly, which can be a double-edged sword. While it means you can work faster, it also requires you to be more decisive with your brushstrokes. If you’re looking for versatility and the ability to create various textures, acrylics might just be your best friend.
Now, let’s not forget about brush selection. The brushes you choose can significantly impact the final outcome of your artwork. For painting foliage, you’ll want to have a variety of brush types at your disposal. Flat brushes are excellent for broad strokes and creating the illusion of leaves, while round brushes are perfect for detailing bark textures and smaller branches. It’s like having a toolkit; each brush serves a specific purpose and can help you achieve different effects. Here are some brush types you might consider:
- Fan Brushes: Great for creating leaf textures.
- Filbert Brushes: Useful for blending and soft edges.
- Detail Brushes: Ideal for intricate bark and branch details.
Finally, the canvas you choose can also play a pivotal role in your painting process. Different surfaces can affect how the paint adheres and appears. For example, a smooth canvas will allow for fine details, while a textured canvas can add an interesting dimension to your work. Consider the following options:
- Stretched Canvas: Ready to use and provides a traditional painting surface.
- Canvas Boards: More affordable and portable, great for studies.
- Paper for Watercolor: Specifically designed to handle wet applications without warping.
In conclusion, choosing the right materials is a foundational step in mastering the art of painting trees in front light. Each component—from paints to brushes to canvases—contributes to the overall success of your artwork. So, take your time, experiment with different options, and find what works best for you. Remember, the right materials can unlock a world of creativity and allow you to truly capture the beauty of nature in your paintings.
Q: What type of paint is best for beginners?
A: Acrylic paint is often recommended for beginners due to its versatility and quick drying time.
Q: Can I use regular brushes for painting trees?
A: While you can use regular brushes, investing in specific brushes designed for painting can enhance your results significantly.
Q: How do I choose the right canvas?
A: Consider the type of paint you’ll be using; for example, oil paints work well on stretched canvases, while watercolors require special paper.
Types of Paints
When it comes to painting trees in front light, the choice of paint can significantly influence the final outcome of your artwork. Each type of paint has its unique characteristics and qualities, making them suitable for different styles and techniques. Understanding these differences will help you select the best medium for your artistic vision. Let’s dive into the three most common types of paints used by artists: oil, acrylic, and watercolor.
Oil paints are renowned for their rich colors and versatility. They allow for extensive blending and layering, making them ideal for capturing the intricate details of tree bark and foliage. One of the standout features of oil paints is their slow drying time, which gives artists the luxury of working on a piece over several days or even weeks. This extended working time is particularly beneficial when trying to achieve the subtle transitions of light and shadow that front light creates. Techniques such as glazing—applying thin layers of color over dried paint—can enhance the luminosity of trees, making them appear to glow in the warm embrace of sunlight.
On the other hand, acrylic paints have gained immense popularity due to their fast drying times and versatility. They dry quickly, allowing artists to layer colors without waiting long periods, which can be a huge advantage when working outdoors in changing light conditions. Acrylics can mimic the effects of oil paints by using mediums that extend drying time or create a glossy finish. Additionally, they can be thinned with water for a watercolor-like effect, offering even more flexibility. This adaptability makes acrylics a favorite among artists who enjoy experimenting with different techniques and styles.
Lastly, we have watercolor paints, which offer a completely different approach to painting. Watercolors are known for their transparency and fluidity, allowing artists to create stunning washes of color that can capture the delicate interplay of light and shadow on trees. While they may not provide the same level of opacity as oils or acrylics, their ability to layer and blend creates an ethereal quality that can be incredibly effective in depicting light effects. However, mastering watercolors requires a good understanding of water control and pigment application, as the paint can easily become too diluted or muddy if not handled properly.
| Type of Paint | Characteristics | Best For |
|---|---|---|
| Oil Paints | Rich colors, slow drying, excellent for blending | Detailed tree bark, layered foliage |
| Acrylic Paints | Fast drying, versatile, can mimic other mediums | Quick layering, outdoor painting |
| Watercolor Paints | Transparent, fluid, requires water control | Light washes, ethereal effects |
In conclusion, the type of paint you choose will greatly affect how you capture the beauty of trees illuminated by front light. Whether you prefer the richness of oil paints, the versatility of acrylics, or the delicacy of watercolors, each medium offers unique opportunities to express your artistic vision. Experimenting with different types of paints is not only fun but also essential for discovering what works best for your style and the effects you want to achieve in your tree paintings.
- What is the best type of paint for beginners? Acrylic paints are often recommended for beginners due to their ease of use and quick drying time.
- Can I mix different types of paint? It's generally not advisable to mix oil and water-based paints, such as acrylics and watercolors, as they have different properties.
- How do I choose the right brush for painting trees? Look for brushes with stiff bristles for foliage and softer brushes for blending and creating textures.
Oil Paint Techniques
When it comes to painting trees illuminated by front light, oil paints offer a unique set of advantages that can truly bring your artwork to life. The richness and depth of oil paints allow for a variety of techniques that enhance the luminosity and texture of trees, capturing the intricate play of light and shadow. One of the most effective techniques is glazing. This involves applying a thin, transparent layer of paint over a dried underpainting. By layering different colors, you can create a sense of depth and vibrancy that mimics the natural variations found in tree bark and foliage. The key here is to use a medium that slows down the drying time, allowing you to manipulate the glaze until you achieve the desired effect.
Another technique to consider is layering. This method involves building up multiple layers of paint, starting with darker colors and gradually adding lighter shades. This technique is particularly useful for capturing the texture of tree bark or the intricate details of leaves. By layering, you can create a three-dimensional effect that makes your trees pop off the canvas. Don't forget about the importance of scumbling as well—this involves using a dry brush to apply a thin layer of lighter paint over a darker base. This technique can create a beautiful texture that replicates the dappled light filtering through leaves.
Additionally, consider using a palette knife for textural effects. This tool can produce sharp edges and varied textures that are perfect for depicting the rugged surfaces of tree trunks or the delicate outlines of leaves. The versatility of oil paints allows you to experiment with these techniques to find what works best for your artistic vision. Remember, the goal is to capture not just the colors of the trees but also the feeling of light cascading over them.
In summary, mastering oil paint techniques such as glazing, layering, and scumbling can significantly enhance your ability to depict trees in front light. These methods allow you to play with transparency, texture, and depth, ultimately leading to a more dynamic and captivating piece of art. So grab your brushes and get ready to explore the beautiful world of oil painting!
Here are some common questions that artists often have regarding oil painting techniques for trees:
- What is the best medium to use for glazing? A slow-drying medium, such as linseed oil, is recommended for glazing techniques to allow for better manipulation of the paint.
- How can I create more realistic textures in my tree paintings? Experiment with different brush strokes and tools like palette knives to add texture. Layering and scumbling can also help achieve realistic effects.
- Can I mix oil paints with other mediums? Yes, oil paints can be mixed with various mediums, but be cautious as this can affect drying times and the final appearance of your work.
- How do I clean my brushes after using oil paints? Use a solvent like turpentine or mineral spirits to clean your brushes thoroughly, followed by soap and water to remove any residue.

Acrylic Advantages
Acrylic paints have gained immense popularity among artists for a multitude of reasons, especially when it comes to the vibrant representation of trees under front light. One of the most significant advantages of acrylics is their quick drying time. Unlike oil paints, which can take days or even weeks to dry, acrylics allow you to work swiftly, enabling you to capture the fleeting effects of light as they change throughout the day. This characteristic is particularly beneficial when you're outdoors, painting en plein air, where the natural light can shift dramatically in a short period.
Moreover, acrylics are incredibly versatile. They can be thinned with water to create a watercolor-like effect or used straight from the tube for a thick, impasto texture. This flexibility allows you to experiment with different styles and techniques, making it easier to achieve the desired look for your trees. You can create everything from soft, delicate leaves to bold, textured bark, all with the same set of paints.
Another remarkable feature of acrylics is their color retention. Once dried, acrylic colors remain vibrant and do not darken over time, which is a common issue with other paint types. This means that the stunning greens of your tree foliage or the rich browns of the bark will maintain their brilliance, even years after your painting is complete. Additionally, acrylics are less prone to yellowing, ensuring that your artwork looks fresh and alive for generations.
When it comes to clean-up, acrylics win hands down. They are water-based, which means you can easily clean your brushes and palette with soap and water. This convenience is a game-changer, particularly for artists who like to switch between colors frequently or work in small spaces. Plus, the non-toxic nature of acrylic paints makes them a safer choice compared to some oil paints, allowing you to create without worrying about harmful fumes.
In summary, the advantages of using acrylic paints for capturing trees in front light include:
- Quick drying time for immediate layering and adjustments
- Versatility in techniques and styles
- Color retention that keeps your artwork vibrant
- Easy clean-up with water-based solutions
- Non-toxic properties for safer painting
With these benefits in mind, it’s clear that acrylics are a fantastic choice for artists looking to enhance their skills in painting trees illuminated by front light. Whether you're a beginner or a seasoned painter, incorporating acrylics into your toolkit can open up new avenues of creativity and expression.
Q: Can I mix acrylics with other mediums?
A: Yes! Acrylic paints can be mixed with various mediums, including gels and pastes, to achieve different textures and finishes.
Q: How do I achieve a watercolor effect with acrylics?
A: To create a watercolor effect, simply dilute your acrylic paint with water. This will allow you to apply thin washes and create beautiful, transparent layers.
Q: Are acrylic paints suitable for outdoor use?
A: Absolutely! Acrylics are durable and weather-resistant, making them ideal for outdoor painting. Just ensure you have the right surface to work on.
Q: How do I store leftover acrylic paint?
A: Leftover acrylic paint can be stored in airtight containers or palettes. Make sure to seal them well to prevent drying out.
Brush Selection
Choosing the right brushes is a crucial step in your journey to master the art of painting trees in front light. The type of brush you use can significantly influence the texture and detail of your artwork, making it essential to select the right tools for the job. When it comes to painting trees, you’ll want to consider a variety of brush shapes and sizes to capture the intricate details of bark and foliage effectively.
For starters, flat brushes are fantastic for creating bold strokes and can help you establish the basic shapes of your trees. They are particularly useful for painting the trunk and larger branches, allowing you to lay down a solid foundation quickly. On the other hand, round brushes are your best friends for adding finer details. Their pointed tips allow for precision, making them ideal for painting leaves, twigs, and other intricate elements of your trees.
Another important type of brush to consider is the fan brush. This unique brush shape is excellent for creating textures that mimic the look of leaves and foliage. By using a gentle stippling motion, you can produce a lush, vibrant canopy that captures the essence of trees illuminated by front light. Additionally, filbert brushes, which combine the features of both flat and round brushes, are perfect for blending and softening edges, giving your trees a more natural and organic appearance.
When selecting brushes, it’s also essential to consider the material of the bristles. Synthetic brushes are versatile and durable, making them a popular choice among many artists. They hold their shape well and are easy to clean, which is a significant advantage when working with acrylics. However, if you’re working with oil paints, natural bristle brushes may be the way to go. They have a unique ability to hold more paint and create beautiful textures that can enhance the luminosity of your tree paintings.
Ultimately, the right brush selection will depend on your personal style and the specific effects you wish to achieve. Don’t hesitate to experiment with different brush types and techniques to find what works best for you. Remember, painting is as much about the process as it is about the final product. Embrace the journey, and let your creativity flow!
Q: What type of brush is best for painting tree leaves?
A: A round brush is typically the best choice for painting tree leaves, as it allows for precision and detail. A fan brush can also be useful for creating texture.
Q: Should I use synthetic or natural bristle brushes for oil painting?
A: Natural bristle brushes are often preferred for oil painting due to their ability to hold more paint and create unique textures. Synthetic brushes work well for acrylics.
Q: How do I clean my brushes after painting?
A: For acrylic paints, simply rinse your brushes in water. For oil paints, you should use a solvent like mineral spirits to clean the brushes thoroughly.
Q: Can I use the same brushes for different types of paint?
A: While it is possible to use the same brushes for different types of paint, it’s generally best to have dedicated brushes for acrylics and oils to avoid cross-contamination and to maintain the integrity of your brushes.

Observing Nature
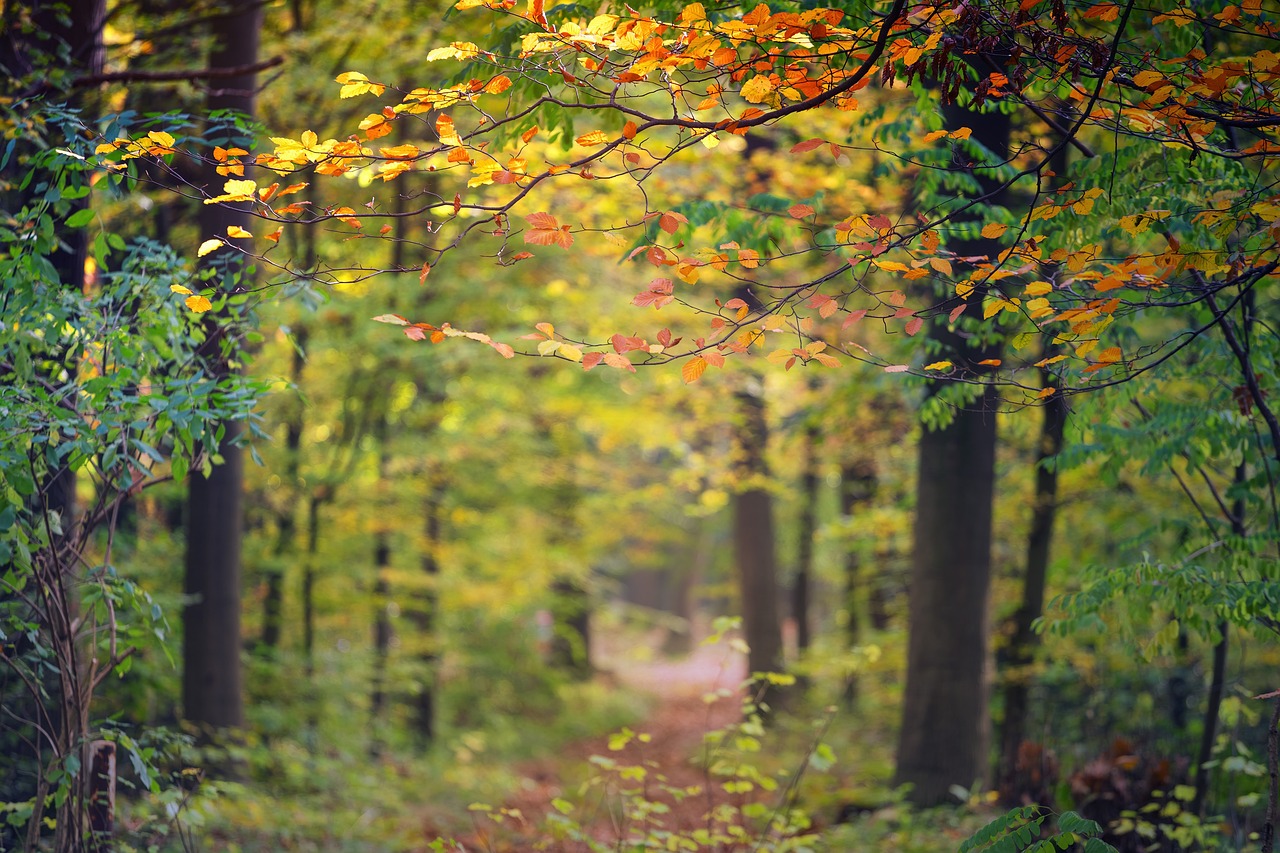
When it comes to painting trees in front light, one of the most rewarding practices an artist can engage in is firsthand. This isn’t just about looking; it’s about immersing yourself in the environment, understanding the nuances of how light interacts with the natural world, and translating that experience onto your canvas. Imagine standing in a sun-drenched forest, where the leaves shimmer like emeralds, and the bark of the trees takes on a warm, golden hue. This is the magic that front light brings, and to capture it, you need to be a keen observer.
Start by finding a location where trees are illuminated by direct sunlight. Pay attention to the time of day, as the angle of the sun can drastically change the way light and shadow play across the landscape. Early morning and late afternoon are particularly enchanting times for this kind of observation, as the light is softer and more dynamic. Here are a few aspects to focus on:
- Light Direction: Notice how the sunlight hits the trees. Does it create long shadows or dappled light? Understanding the direction of light is crucial for replicating these effects in your paintings.
- Color Variations: Observe the different shades of green in the leaves and how they change with the light. You might see vibrant yellows and oranges peeking through, especially in autumn. This color variation is essential for adding realism to your artwork.
- Texture and Detail: Take time to examine the bark and foliage closely. The texture can vary significantly, and capturing these details will enhance the overall quality of your painting.
As you observe, consider bringing a sketchbook along. Sketching the trees as you see them can help you internalize the shapes, shadows, and colors. Don’t worry about making perfect drawings; instead, focus on capturing the essence of what you see. This practice will not only improve your observational skills but also serve as a fantastic reference when you sit down to paint later.
Another effective technique is to take photographs of the trees under different lighting conditions. A well-composed photograph can provide a wealth of information, allowing you to analyze the interplay between light and shadow when you are back in your studio. However, remember that while photographs are helpful, they can’t replace the experience of being in nature. Always strive to balance your reference materials with real-life observations.
In conclusion, the act of observing nature is not just a step in the painting process; it’s a journey that enriches your understanding of light dynamics and enhances your artistic expression. By dedicating time to truly see the world around you, you’ll bring a depth and authenticity to your paintings of trees in front light that can only come from genuine experience.
Q: Why is observing nature important for painting?
A: Observing nature helps artists understand how light interacts with different surfaces, allowing for more realistic and dynamic representations in their artwork.
Q: What time of day is best for observing trees in front light?
A: Early morning and late afternoon are ideal times as the light is softer and creates more interesting shadows and highlights.
Q: Should I rely solely on photographs for reference?
A: While photographs can be useful, they should complement real-life observations. Being in nature provides insights that photos can’t capture.
Light and Shadow Analysis
When it comes to painting trees under front light, understanding the interplay between light and shadow is crucial. Imagine standing in a sun-drenched forest, where the light filters through the leaves, casting intricate patterns on the ground. This phenomenon is not just visually stunning; it’s a vital aspect of your artwork that can elevate it from ordinary to extraordinary. The way light interacts with tree forms can create a sense of depth and realism that draws viewers in, making them feel as if they could step right into your painting.
To analyze light and shadow effectively, start by observing how light sources affect the trees around you. Notice the direction of the light—whether it’s coming from above, the side, or even behind. Each angle will create different shadow patterns and highlights. For instance, when the sun is low in the sky, shadows become long and dramatic, accentuating the texture of the bark and the shape of the foliage. Conversely, when the light is overhead, shadows are shorter and can create a more uniform appearance.
One effective method for capturing these effects is to break down the tree into its fundamental shapes. Visualize the trunk as a cylinder and the branches as a series of smaller cylinders extending outward. This simplification allows you to see how light hits these forms. For example, the side of the trunk facing the light will appear lighter, while the opposite side will be darker. This contrast creates a three-dimensional effect, making your tree look more lifelike.
Another technique to consider is the use of color temperature in your shadows. Shadows are not just black or gray; they can carry hues from the surrounding environment. For instance, a shadow cast by a green tree might have a slightly blue or purple tint, especially if the light is warm. By incorporating these subtle color variations into your shadows, you can add richness and depth to your painting.
Here’s a quick breakdown of the key elements to keep in mind when analyzing light and shadow:
- Light Source Direction: Identify where the light is coming from to understand how it will affect your subject.
- Shadow Length: Observe how the position of the light source changes the length and intensity of shadows.
- Color Variation: Incorporate different hues into your shadows to reflect the surrounding environment.
- Texture Highlighting: Use highlights to accentuate the texture of the bark and leaves, enhancing realism.
In summary, mastering light and shadow analysis is about keen observation and practice. Spend time outdoors, sketching and painting trees under various lighting conditions. The more you observe, the better you’ll become at translating these effects onto your canvas. Just like a sculptor chisels away at stone to reveal the beauty within, your understanding of light and shadow will help you uncover the stunning forms of trees in front light.
Q: How can I practice my light and shadow analysis skills?
A: Start by observing trees in different lighting conditions, sketching their forms and shadows. Try painting them at various times of the day to see how the light changes.
Q: What colors should I use for shadows in my tree paintings?
A: Shadows can be created using darker versions of the local color of the tree, often mixed with complementary colors to add depth and interest.
Q: How do I create more depth in my tree paintings?
A: Varying the size and color of trees in your composition, along with effective use of light and shadow, can create a sense of depth and perspective in your artwork.
Color Variation in Light
When it comes to painting trees, understanding is fundamental. The way light interacts with color can transform a simple green leaf into a dazzling array of hues, from deep emerald to bright lime, or even warm yellows and cool blues. Imagine standing under a tree on a sunny day; the sunlight filtering through the leaves creates a kaleidoscope of colors that dance across the trunk and ground. This is the magic of light, and as an artist, capturing this essence can elevate your work to new heights.
One of the key aspects of color variation is recognizing how different lighting conditions affect our perception of color. For instance, during the golden hour—just after sunrise or before sunset—colors appear warmer and more saturated. This is the perfect time to observe how the light casts a golden glow on the leaves, creating a stunning contrast against the cooler shadows. On the other hand, midday light can be harsh and unforgiving, often washing out colors and creating stark contrasts between light and shadow.
To effectively incorporate these variations into your paintings, you can follow a few simple techniques:
- Observe and Analyze: Spend time outdoors, observing how light affects the trees at different times of the day. Take notes on the color shifts you see.
- Mixing Colors: Experiment with mixing your paints to achieve the desired shades that reflect the lighting conditions. For example, adding a touch of yellow to your greens can mimic the warmth of the sun.
- Layering Techniques: Use glazing techniques to build up layers of color, allowing the underlying tones to shine through. This can create a sense of depth and luminosity in your tree paintings.
Additionally, consider how the surrounding environment influences the colors you see. For example, a tree near a body of water might reflect blues and greens, while one set against a brick wall could take on warmer, earthy tones. This interplay of colors is what makes nature so vibrant and exciting, and it’s your job as an artist to capture that excitement on canvas.
In summary, mastering color variation in light is about more than just mixing paints—it's about observing nature, understanding how light interacts with color, and translating that knowledge into your artwork. By paying close attention to these elements, you can create more realistic and dynamic representations of trees that truly resonate with viewers.
- What is the best time to paint trees to observe color variation?
The golden hour, shortly after sunrise or before sunset, offers the most dynamic color variations due to the warm light. - How can I practice observing color variations?
Spend time outdoors, sketching or taking photographs of trees at different times of the day to note changes in color and light. - What techniques can help me capture the luminosity of trees?
Using glazing techniques with oil paints or layering colors in acrylics can enhance the luminosity in your paintings.

Composing Your Painting
When it comes to painting trees in front light, composition is not just an afterthought; it’s the backbone of your artwork. Imagine walking through a forest, the sun filtering through the leaves, casting playful shadows on the ground. This experience is what you want to translate onto your canvas. A well-composed painting draws the viewer in, guiding their eyes through the scene and creating a sense of balance and harmony. So, how do you achieve this? Let’s dive deeper into some effective techniques.
First and foremost, consider the rule of thirds. This classic composition technique involves dividing your canvas into a 3x3 grid, placing focal points along these lines or at their intersections. For instance, if you have a majestic oak tree bathed in sunlight, positioning it slightly off-center can create a more dynamic and engaging composition. This technique not only adds interest but also allows the surrounding elements—like the dappled light on the ground or other trees in the background—to play a role in your painting.
Another important aspect of composition is creating focal points. A focal point is essentially the star of your painting, the element that captures the viewer's attention first. In the case of trees, this could be a particularly vibrant tree or one with unique characteristics, such as interesting bark textures or unusual shapes. To enhance the impact of your focal point, consider surrounding it with less detailed elements or using contrasting colors. This contrast will naturally draw the eye to your main subject.
Now, let’s talk about depth. Creating a three-dimensional effect on a two-dimensional canvas can be challenging, but it’s essential for portraying the natural beauty of trees. One effective method is to vary the sizes of the trees in your composition. Larger trees in the foreground can create a sense of closeness, while smaller trees in the background give the illusion of distance. Additionally, you can use color to enhance depth; warmer colors tend to come forward while cooler colors recede. For instance, using a rich, warm green for the foreground trees and a cooler, muted green for those further back can help establish layers within your painting.
Don’t forget about the negative space—the areas around and between your subjects. This space is just as important as the trees themselves. By thoughtfully considering the negative space, you can create a balanced composition that allows your focal points to shine without feeling overcrowded. For example, if your painting features a cluster of trees, the spaces between them can serve to define their shapes and enhance the overall composition.
Lastly, it's crucial to remember that composition is not set in stone. Feel free to experiment! Move elements around, try different arrangements, and don’t hesitate to make adjustments as you go. Sometimes, the most magical moments in art come from unexpected changes. As you develop your skills in composing your paintings, you’ll find your unique style emerging, allowing you to express your vision of trees in front light more effectively.
- What is the rule of thirds? The rule of thirds is a composition guideline that suggests dividing your canvas into a 3x3 grid and placing key elements along these lines or intersections for a more balanced and engaging composition.
- How do I create depth in my painting? You can create depth by varying the sizes of trees, using different colors, and considering the placement of elements in the foreground and background.
- What is negative space, and why is it important? Negative space refers to the areas around and between your subjects. It is important because it helps define shapes and contributes to the overall balance of your composition.
Focal Points
When it comes to painting trees illuminated by front light, establishing is essential for drawing the viewer's eye and creating a sense of harmony within your artwork. Think of focal points as the heartbeats of your painting; they give life and direction to your composition. Without them, your artwork can feel flat and lifeless, like a stage without a spotlight. So, how do you create these captivating focal points? Let’s dive in!
First and foremost, consider the placement of your trees. A well-placed tree can act as a natural anchor in your painting. For instance, if you position a majestic oak slightly off-center, it can lead the viewer’s gaze across the canvas. This technique not only enhances the visual flow but also allows you to emphasize the play of light and shadow on the tree's leaves and bark, creating an engaging interaction with the surrounding elements. Remember, the eye is naturally drawn to areas of contrast, so use that to your advantage!
Another effective method for establishing focal points is through color contrast. By utilizing brighter or more saturated colors on your focal tree, you can make it pop against the softer hues of the background. For example, if your background consists of muted greens and browns, a vibrant golden-yellow tree can become the star of your painting. This contrast not only highlights the tree but also enhances the overall vibrancy of your artwork, making it more dynamic and exciting.
Additionally, consider the use of leading lines within your composition. These can be natural lines created by the landscape, such as a winding path or a riverbank, that guide the viewer's eye toward your focal tree. By incorporating these elements, you create a visual journey that invites the audience to explore your painting further. This not only enhances the focal point but also adds depth and interest to the overall scene.
Finally, don't underestimate the power of light and shadow in establishing your focal points. The way light interacts with your trees can create dramatic effects that draw attention. For instance, if your focal tree is bathed in sunlight while the surrounding trees are shrouded in shadow, it will naturally stand out. This technique can evoke emotions and set the mood for your painting, allowing the viewer to connect with your artwork on a deeper level.
In summary, creating focal points in your tree paintings illuminated by front light involves a combination of strategic placement, color contrast, leading lines, and the masterful use of light and shadow. By thoughtfully considering these elements, you can transform your artwork from a simple representation of trees into a captivating visual narrative that resonates with your audience. So grab your brushes and start experimenting with these techniques; the world of tree painting awaits!
- What are focal points in painting? Focal points are areas in a painting that draw the viewer's eye and serve as the main subjects or areas of interest.
- How can I create contrast in my painting? You can create contrast by using different colors, values, and textures to highlight your focal points against the background.
- Why is light important in painting? Light defines shapes, creates depth, and influences the mood of a painting, making it a crucial element in your artwork.
- Can I use photographs to help with focal points? Absolutely! Photographs can serve as excellent references for understanding light, shadow, and composition.
Creating Depth
Creating depth in your paintings is crucial, especially when capturing the enchanting beauty of trees under front light. Imagine standing in a sun-drenched forest; the way the light filters through the leaves creates a stunning interplay of shadow and brilliance. To replicate this in your artwork, you need to think about how to manipulate the elements of size, color, and placement. By varying these aspects, you can evoke a sense of three-dimensionality that draws viewers into your scene.
One effective way to create depth is by layering your trees. Position larger trees in the foreground, using darker shades to emphasize their mass and solidity. As you move towards the background, gradually decrease the size of the trees and lighten the colors. This technique mimics the natural perspective you would experience in real life, where distant objects appear smaller and less saturated. It’s akin to looking down a long road; the trees that are far away seem to fade into the background, almost like whispers of their closer counterparts.
Additionally, consider the use of atmospheric perspective. This technique involves softening the details and colors of trees that are farther away, creating a hazy effect that suggests distance. For instance, you might use cooler colors—blues and grays—for trees in the background, while reserving warm, vibrant hues for those in the foreground. This contrast not only enhances depth but also adds a dynamic quality to your painting, making it feel alive.
Another effective approach is to utilize overlapping elements. When one tree partially obscures another, it creates a natural layering effect that enhances the sense of depth. Think of it as a visual puzzle; the viewer's eye is naturally drawn to the layers, exploring the painting as if navigating through a forest. You can also experiment with negative space, allowing the background to breathe and adding to the overall composition.
To summarize, here are some key tips for creating depth in your tree paintings:
- Layering: Position larger trees in the foreground and smaller ones in the background.
- Atmospheric Perspective: Use cooler colors for distant trees and warmer tones for those up close.
- Overlapping Elements: Allow trees to partially obscure one another to enhance the sense of depth.
- Negative Space: Incorporate empty areas in your composition to provide balance and emphasis.
By paying attention to these techniques, you can transform your paintings from flat representations into dynamic, immersive experiences. So grab your brushes and start experimenting with depth; your trees will thank you for it!
Q: How can I make my tree paintings look more realistic?
A: Focus on observing real trees in different lighting conditions. Pay attention to how light and shadow interact with the bark and leaves, and try to replicate those effects in your paintings.
Q: What colors should I use for trees in the background?
A: Use cooler and lighter colors for background trees. This will help create a sense of distance and depth in your painting.
Q: How can I improve my brush techniques for painting foliage?
A: Practice using different brush types to create various textures. Experiment with dabbing and swirling motions to mimic the appearance of leaves and branches.
Q: Is it essential to use oil paints for painting trees?
A: While oil paints offer excellent blending capabilities, acrylics and watercolors can also be effective. Choose the medium that you feel most comfortable with and that suits your painting style.
Frequently Asked Questions
- What is front light and how does it affect painting trees?
Front light refers to sunlight or any direct light source hitting a subject from the front. This lighting creates clear highlights and shadows, which can enhance the texture and dimension of trees in your paintings. Understanding how front light interacts with the forms of trees allows artists to depict depth and realism effectively.
- Which types of paint are best for capturing trees in front light?
Both oil and acrylic paints are excellent choices for painting trees in front light. Oil paints allow for rich layering and glazing techniques, enhancing luminosity. Acrylics, on the other hand, dry quickly and offer versatility in texture, making them suitable for various effects. Watercolors can also be used, but they require a different approach to maintain vibrancy under direct light.
- How do I choose the right brushes for painting trees?
Selecting the right brushes is crucial for achieving the desired textures in your tree paintings. For foliage, consider using fan brushes or filbert brushes, which can create varied leaf shapes. For bark, a stiff bristle brush can help create texture and detail. Experimenting with different brush types can lead to unique results in your artwork.
- What should I observe in nature to improve my tree paintings?
Pay close attention to how light interacts with trees at different times of the day. Observe the shadows and highlights created by the light, as well as the color variations that occur. Taking notes or sketching can help you capture these elements, allowing you to replicate them in your paintings for a more realistic representation.
- How can I create depth in my tree compositions?
To create depth, vary the sizes and colors of the trees in your composition. Placing larger trees in the foreground and smaller ones in the background can simulate a three-dimensional effect. Additionally, using lighter colors for distant trees and darker shades for those closer to the viewer can enhance the sense of depth in your artwork.
- What are focal points, and why are they important in tree paintings?
Focal points are areas in your painting that draw the viewer's attention. Establishing a strong focal point, such as a particularly striking tree or a cluster of trees, can guide the viewer's eye and enhance the overall impact of your artwork. This helps create a more engaging and balanced composition.


