
How to Preserve and Frame Your Drawings
Creating beautiful drawings is just the beginning of your artistic journey. Once you’ve poured your heart and soul onto paper, the next step is to ensure that your creations are preserved and showcased in a way that reflects their beauty. **Preserving and framing your drawings** isn't just about aesthetics; it’s about protecting your hard work from the ravages of time, dust, and fading. In this article, we’ll explore various methods that can help you keep your artwork vibrant and protected. From selecting the right materials to choosing the perfect frame, we’ll cover all the essentials to help you showcase your artwork beautifully.
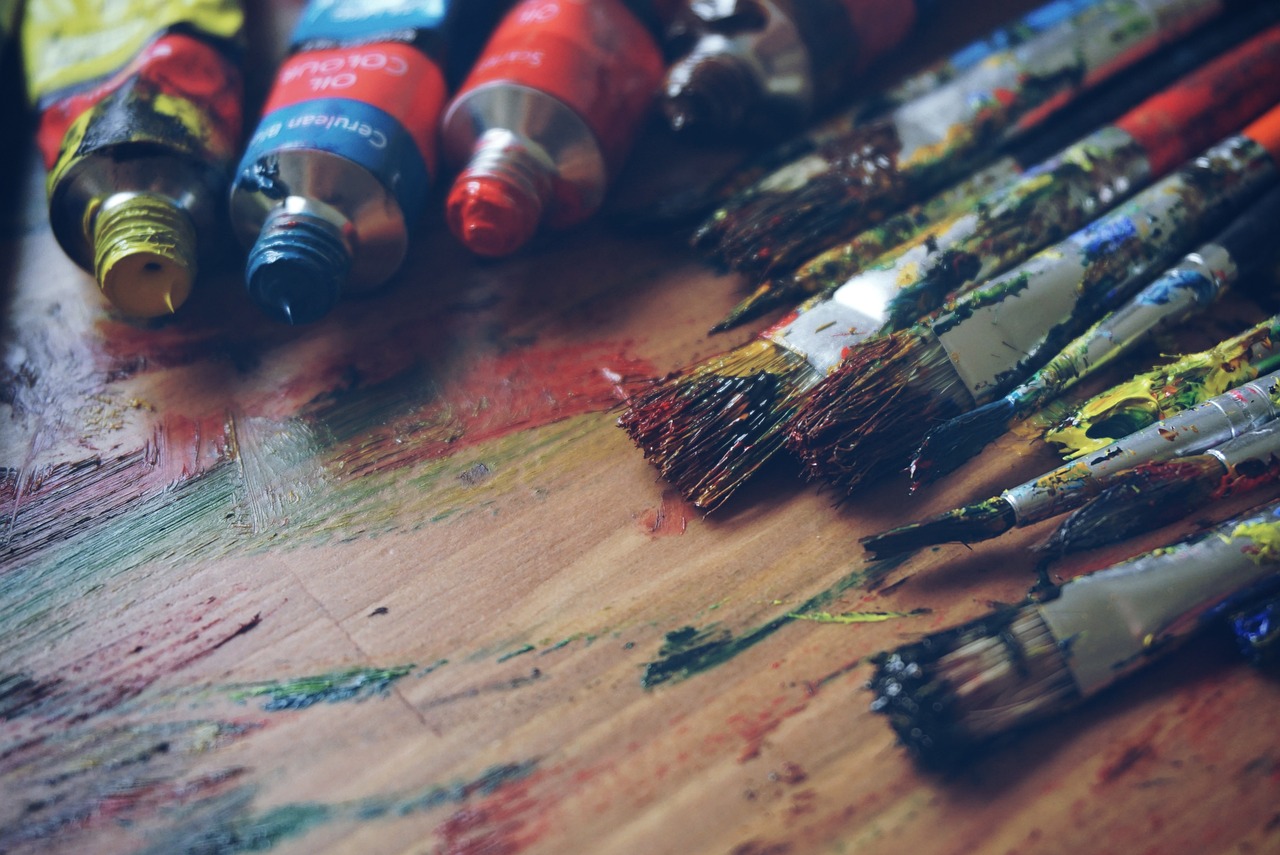
When it comes to preserving your drawings, the materials you choose can make all the difference. Not all papers, inks, or coatings are created equal, and selecting the right ones can enhance the longevity of your artwork. For instance, using acid-free paper is crucial, as it prevents yellowing and deterioration over time. Similarly, archival-quality inks are designed to resist fading, ensuring that your colors remain as vibrant as the day you created them. Additionally, consider applying a protective coating, such as a spray fixative, to shield your drawings from moisture and UV rays. Always remember, the right materials are your first line of defense in preserving your artistic legacy.
Before you frame your drawings, it’s essential to clean them properly. Dust and smudges can accumulate over time, detracting from the beauty of your work. However, cleaning artwork requires a gentle touch. Using the wrong methods can lead to irreversible damage, which is the last thing any artist wants. In this section, we’ll cover safe techniques to remove dust and stains, ensuring your artwork is presented in its best light.
Keeping your drawings dust-free is vital for maintaining their clarity and vibrancy. Regular dusting helps prevent the buildup of particles that can dull colors and obscure details. Here are a couple of effective dusting methods:
- Using Soft Brushes: A soft brush, like a clean paintbrush or a makeup brush, can effectively remove dust without harming the surface of your artwork. The gentle bristles glide over the paper, lifting away dust while preserving delicate details.
- Microfiber Cloths: These cloths are fantastic for cleaning drawings. Their fine fibers trap dust without scratching the surface, making them ideal for delicate artwork.
Stains can be a nightmare for artists, as they can distract from the overall beauty of your drawings. If you encounter a stain, it’s essential to address it carefully. For minor stains, consider using a clean, damp cloth to gently blot the area, being cautious not to rub, as this can spread the stain or damage the paper. For tougher stains, you may need to consult a professional conservator who can offer specialized cleaning techniques without risking further damage.
The frame you choose can significantly affect how your drawings are perceived. A well-chosen frame not only enhances the artwork but also provides necessary protection. When selecting a frame, consider the style of your artwork. For instance, traditional drawings may benefit from ornate wooden frames, while modern pieces might look stunning in sleek, minimalistic designs. Additionally, the material of the frame plays a role in durability and aesthetic appeal.
Explore various frame styles that can elevate your artwork:
- Traditional Frames: Often made of wood with intricate designs, these frames can add a classic touch to your artwork.
- Modern Frames: Sleek and simple, modern frames can provide a contemporary feel, allowing the artwork to take center stage.
Matting can add depth and dimension to your framed artwork. It acts as a buffer between the glass and the drawing, preventing any contact that could cause damage. When selecting matting, consider colors that complement your artwork, enhancing its overall presentation. A well-chosen mat can make your piece pop and draw the viewer's eye.
One of the most significant threats to your drawings is UV light, which can cause colors to fade over time. To combat this, consider using UV-filtering glass or acrylic when framing your artwork. These materials block harmful rays while allowing the beauty of your drawing to shine through. Investing in UV protection is a small price to pay for the longevity of your artistic creations.
Once your drawings are framed, it’s time to display them! Proper hanging techniques are crucial to ensure your artwork remains safe and secure. Consider the wall placement carefully; choosing a location that avoids direct sunlight can help protect your drawings from fading. Additionally, using secure hanging methods, such as wall anchors or picture hooks, can prevent accidents and damage, allowing you to enjoy your artwork worry-free.
Choosing the right wall for your artwork can enhance its visibility and impact. Think about the lighting and how it plays on your pieces. A well-lit area can bring out the colors and details, making your artwork come alive.
Using secure hanging methods is essential for preventing accidents. Consider using hardware designed for the weight of your frame, such as D-rings or sawtooth hangers, to ensure that your artwork is safely displayed.
Q: How often should I clean my drawings?
A: It depends on the environment, but a gentle dusting every few months is a good practice.
Q: Can I use regular glass for framing?
A: While you can, it’s recommended to use UV-filtering glass or acrylic for better protection.
Q: What should I do if my drawing gets wet?
A: If possible, blot the moisture gently with a clean cloth and let it dry flat. Avoid rubbing the surface.

Choosing the Right Materials
When it comes to preserving your drawings, the choice of materials plays a pivotal role. Not all papers and inks are created equal, and understanding the nuances can mean the difference between a vibrant piece of art and a faded memory. First and foremost, selecting the right type of paper is essential. For instance, acid-free paper is a top choice, as it prevents yellowing and deterioration over time. This type of paper is particularly beneficial for pencil, charcoal, and ink drawings, ensuring that your artwork retains its original beauty for years to come.
Next, let’s talk about inks. If you’re using markers or pens, opt for archival-quality inks. These inks are designed to resist fading and are often waterproof, which means your artwork can withstand the test of time. If you’re a watercolor artist, using high-quality, lightfast paints is crucial. Lightfastness indicates how resistant the colors are to fading when exposed to light, so be sure to check for this characteristic when purchasing your materials.
Additionally, protective coatings can significantly enhance the longevity of your drawings. A clear fixative spray is an excellent option for pencil and charcoal artworks, as it creates a protective barrier against smudging and dust accumulation. However, it’s important to apply these coatings in a well-ventilated area and follow the manufacturer’s instructions carefully to avoid damaging your artwork. Here’s a quick overview of the materials that can help preserve your drawings:
| Material Type | Recommended Options | Benefits |
|---|---|---|
| Paper | Acid-free, Cotton Rag | Prevents yellowing, durable |
| Inks | Archival-quality, Lightfast | Resists fading, waterproof |
| Protective Coatings | Clear fixative spray | Prevents smudging, dust accumulation |
In summary, taking the time to choose the right materials for your drawings is an investment in their future. By selecting high-quality, archival-grade papers and inks, along with protective coatings, you can ensure that your artwork remains as vibrant and beautiful as the day it was created. So, next time you sit down to create, think about the long-term preservation of your masterpiece!
Cleaning Your Drawings
When it comes to preserving your beloved drawings, cleaning is a crucial step that often gets overlooked. You wouldn’t wear dirty clothes to a special occasion, right? Similarly, your artwork deserves to shine in its best condition. Before you even think about framing, it’s essential to ensure your drawings are free from dust, smudges, and any unsightly stains. After all, a clean canvas allows the colors and details to pop, captivating anyone who lays eyes on it.
So, how do you go about cleaning your drawings without risking damage? Let’s dive into some effective and safe methods that will help you maintain the clarity and vibrancy of your artwork. Remember, gentle is the name of the game here. Think of your drawings as delicate flowers that need careful handling to bloom beautifully.
First up, let’s talk about dusting. Dust is like that annoying guest at a party who shows up uninvited; it clings to your artwork and can dull its vibrancy. To keep your drawings looking fresh, you can use a few different techniques:
- Soft Brushes: A soft brush is your best friend when it comes to dusting. Using a brush with gentle bristles allows you to sweep away dust without scratching the surface of your drawing. Think of it as giving your artwork a gentle massage!
- Microfiber Cloths: Another fantastic option is microfiber cloths. These cloths are designed to capture dust without leaving scratches behind. Their fine fibers are perfect for delicate surfaces, making them an excellent choice for cleaning your drawings.
By incorporating these dusting techniques into your routine, you can ensure that your artwork remains in excellent condition, ready to impress anyone who sees it.
Now, let’s tackle a more challenging issue: stains. Just like a coffee spill on a crisp white shirt, stains on your drawings can be a real eyesore. But don’t fret! There are ways to address common stains without risking damage to your precious artwork. Always remember to test any cleaning method on a small, inconspicuous area first to make sure it won’t harm the surface.
For instance, if you encounter a light smudge or fingerprint, a slightly damp microfiber cloth can work wonders. Just dab gently, don’t rub! If the stain is more stubborn, consider using an art-specific cleaning solution, but always follow the manufacturer’s instructions to avoid any mishaps.
In summary, cleaning your drawings is not just about aesthetics; it’s about preserving the integrity of your artwork for years to come. By employing the right dusting techniques and stain removal methods, you can keep your drawings looking as vibrant as the day you created them.
Q: How often should I clean my drawings?
A: It’s a good idea to dust your drawings every few months, or more frequently if they are displayed in a dusty environment. Regular cleaning helps maintain their vibrancy.
Q: Can I use regular cleaning products on my drawings?
A: No, it’s best to avoid regular household cleaning products as they can contain chemicals that may damage your artwork. Always opt for art-specific cleaning solutions.
Q: What if my drawing is framed? Can I still clean it?
A: Yes, you can clean framed artwork, but be cautious. Dust the frame and the glass with a soft cloth, and avoid touching the artwork itself unless absolutely necessary.

Dusting Techniques
When it comes to preserving your drawings, dusting is a crucial step that often gets overlooked. Just like you wouldn't leave a beautiful cake uncovered in a dusty kitchen, your artwork deserves the same level of care. Dust can accumulate over time, dulling the colors and obscuring the intricate details that make your drawing special. So, how do you keep your artwork looking fresh and vibrant? Here are some effective dusting techniques that can help you maintain the clarity and beauty of your pieces.
First and foremost, you want to use tools that are gentle yet effective. Soft brushes are a fantastic option for this task. They can easily reach into the nooks and crannies of your artwork without causing any harm. A soft bristle brush, such as a watercolor brush, can be ideal for this purpose. Just lightly brush the surface to dislodge any dust particles. Remember, the goal is to be gentle; you don’t want to rub too hard and risk damaging the paper or the drawing itself.
Another great tool for dusting is a microfiber cloth. These cloths are designed to trap dust and dirt without scratching surfaces, making them perfect for delicate artwork. When using a microfiber cloth, simply fold it into a small square and gently wipe the surface of your drawing. This method is especially useful for larger pieces where a brush might not be as effective. Just be sure to use a clean section of the cloth to avoid redistributing dust.
It's also essential to consider the environment where your artwork is displayed. Keeping your drawings in a dust-free zone can greatly reduce the need for frequent dusting. Consider using display cases or glass frames that can keep dust at bay. If your artwork is framed, make sure to dust the frame regularly, as dust can easily settle on the edges and eventually make its way onto the artwork.
In summary, maintaining the vibrancy of your drawings through proper dusting techniques is a simple yet effective way to ensure their longevity. By using soft brushes and microfiber cloths, along with keeping your display area clean, you can keep your artwork looking as good as new for years to come. So, the next time you admire your drawings, take a moment to give them a gentle dusting and watch them shine!
- How often should I dust my drawings? It's a good idea to dust your drawings every few months, or more often if they are in a particularly dusty environment.
- Can I use regular cloths to dust my artwork? It's best to avoid regular cloths as they can scratch the surface. Opt for soft brushes or microfiber cloths instead.
- Is it necessary to dust framed artwork? Yes, dust can accumulate on the frame and may eventually reach the artwork. Regular cleaning helps maintain its condition.

Using Soft Brushes
When it comes to preserving the integrity of your drawings, is a game-changer. These brushes are designed to delicately remove dust and debris without causing any harm to the surface of your artwork. Imagine trying to clean a precious gemstone; you wouldn’t use a rough cloth, right? Similarly, your drawings deserve that same level of care. Soft brushes come in various sizes, allowing you to reach even the tiniest crevices where dust loves to hide.
One of the best features of soft brushes is their ability to maintain the clarity and vibrancy of your artwork. The bristles are gentle enough to glide over the surface, lifting away particles without smudging or scratching. When you use a soft brush, it’s like giving your drawing a gentle massage, ensuring it looks as fresh as the day you created it. For optimal results, hold the brush at a slight angle and use light, sweeping motions. This technique helps to avoid any buildup of pressure that could potentially damage delicate details.
Here are a few tips to keep in mind when using soft brushes:
- Choose the right brush: Look for brushes specifically designed for art restoration or conservation. They typically have fine, soft bristles that are perfect for delicate surfaces.
- Clean your brush regularly: Dust and debris can accumulate on the bristles, so make sure to clean your brush frequently to avoid transferring dirt back onto your artwork.
- Be patient: Take your time while dusting. Rushing can lead to missed spots or accidental damage.
Incorporating soft brushes into your cleaning routine not only helps in maintaining the appearance of your drawings but also extends their lifespan. Think of it as an investment in your art; a little care goes a long way in preserving the beauty of your creations. So, the next time you notice a bit of dust settling on your artwork, reach for a soft brush instead of a cloth. Your drawings will thank you for it!
Q: Can I use any type of brush for cleaning my drawings?
A: It's best to use brushes specifically designed for art conservation to avoid damaging the surface. Soft brushes with fine bristles are ideal.
Q: How often should I clean my drawings?
A: It depends on the environment. If your artwork is displayed in a dusty area, consider cleaning it every few months. Otherwise, a couple of times a year should suffice.
Q: Will using a soft brush remove all types of dirt?
A: Soft brushes are excellent for dust, but for stains or more stubborn dirt, additional cleaning methods may be necessary.

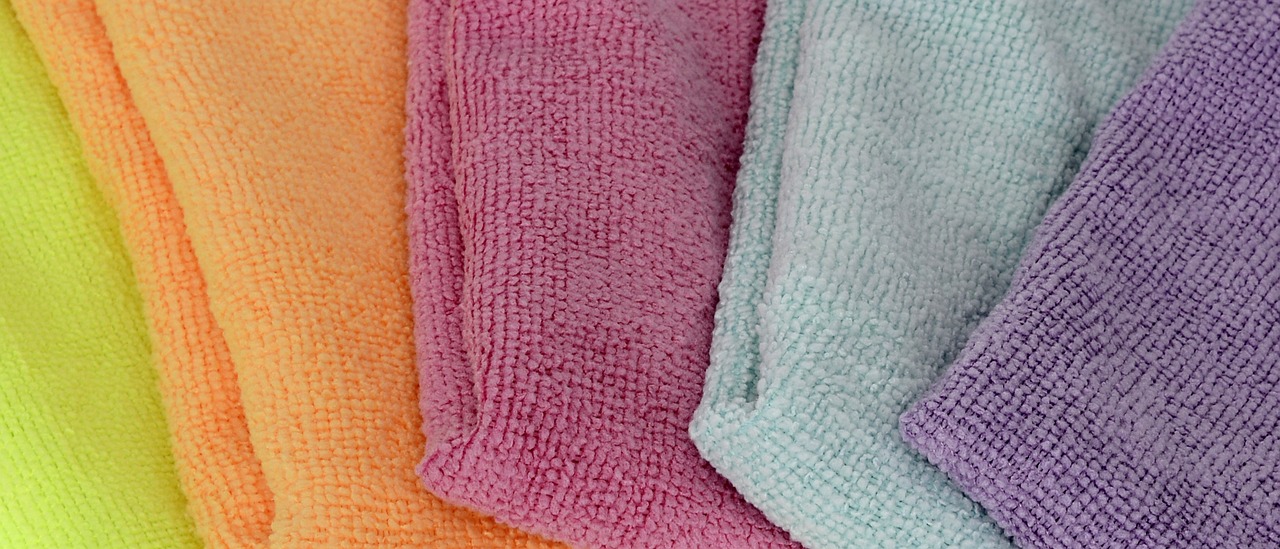
Microfiber Cloths
This article explores various methods for preserving and framing your drawings, ensuring they remain vibrant and protected. From materials to techniques, learn how to showcase your artwork beautifully.
Selecting appropriate materials is crucial for preserving your drawings. This section discusses different types of paper, inks, and protective coatings that can enhance longevity and prevent deterioration.
Proper cleaning techniques are essential before framing. Here, we cover safe methods to remove dust and smudges without damaging your artwork, ensuring a pristine presentation.
Learn the best practices for dusting your drawings to maintain their clarity and vibrancy. Gentle methods will ensure that your artwork stays in excellent condition.
Soft brushes can effectively remove dust while being gentle on the surface of your artwork. This method helps preserve delicate details and textures.
When it comes to cleaning your precious drawings, are an absolute game-changer. Unlike traditional cloths, which can leave scratches or lint behind, microfiber cloths are designed to be ultra-soft and non-abrasive. Their unique structure consists of tiny fibers that are much finer than a human hair, allowing them to trap dust, dirt, and smudges with remarkable efficiency. Imagine having a tiny vacuum cleaner in cloth form, ready to tackle any speck of dust without harming your artwork!
Using a microfiber cloth is incredibly simple. Just gently wipe the surface of your drawing using a circular motion. You don’t need to apply much pressure; let the cloth do the work for you. This method not only cleans but also preserves the integrity of your artwork. Plus, these cloths are washable and reusable, making them an eco-friendly choice for artists who care about the environment.
Here are a few reasons why microfiber cloths are essential for your art maintenance toolkit:
- Lint-free: They leave no residue behind, ensuring your artwork stays pristine.
- Highly absorbent: Microfiber can hold up to seven times its weight in water, making it effective for any accidental spills.
- Durable: With proper care, these cloths can last for years, providing excellent value for your investment.
In summary, incorporating microfiber cloths into your cleaning routine is a smart move to keep your drawings looking as vibrant as the day you created them. So, the next time you notice a bit of dust settling on your masterpiece, reach for that microfiber cloth and watch it work its magic!
Stains can detract from the beauty of your drawings. This section provides tips on how to address common stains without risking damage to the artwork.
The choice of frame can significantly impact the presentation of your drawings. This section discusses various frame styles and materials that complement different types of artwork.
Explore various frame styles, from traditional to modern, and how they can enhance the aesthetic of your drawings. Choosing the right style is essential for effective presentation.
Matting adds depth and dimension to your framed artwork. Here, we discuss different matting options and how they can enhance the overall look of your drawings.
UV protection is vital for preserving drawings from fading. This section covers options for UV-filtering glass and acrylic, ensuring your artwork remains vibrant for years.
Proper hanging techniques are important for displaying your framed drawings. This section provides guidance on positioning and securing your artwork to prevent damage.
Choosing the right wall placement can enhance visibility and impact. We discuss factors to consider when deciding where to hang your artwork.
Using secure hanging methods prevents accidents and damage. This section covers various hardware options and techniques to safely display your drawings.
Q: Can I use any cloth to clean my drawings?
A: It's best to avoid regular cloths as they can scratch the surface. Use microfiber cloths for safe cleaning.
Q: How often should I clean my artwork?
A: It depends on your environment. If you notice dust accumulating, it’s time for a gentle clean.
Q: What kind of frame is best for my artwork?
A: The best frame depends on your artwork style. Traditional frames work well for classic pieces, while modern frames suit contemporary art.
Removing Stains
Stains on your beloved drawings can be a real heartbreaker. Whether it’s a coffee spill, ink smudge, or even a stubborn fingerprint, these blemishes can detract from the beauty of your artwork. But fear not! There are safe and effective methods to tackle these pesky stains without risking damage to your precious creations. The key is to act quickly and use the right techniques.
Before diving into the cleaning process, it's important to identify the type of stain you're dealing with. Different stains require different approaches. For instance, water-based stains might be easier to remove than oil-based ones. Here’s a quick breakdown of common stain types and how to address them:
| Type of Stain | Recommended Action |
|---|---|
| Coffee/Tea | Blot gently with a damp cloth, then use a mild soap solution. |
| Ink | Use a cotton swab with rubbing alcohol; dab gently. |
| Grease | Sprinkle cornstarch on the stain and let it sit before brushing off. |
| General Dirt | Lightly brush off with a soft brush or microfiber cloth. |
When dealing with stains, always remember to test any cleaning method on a small, inconspicuous area first. This precaution ensures that your cleaning solution won’t react negatively with the inks or paper. If the test spot looks good, proceed with caution. For example, when using rubbing alcohol for ink stains, dab it on gently with a cotton swab—don't rub! Rubbing can spread the stain or damage the paper.
In some cases, you might find that a simple cleaning isn’t enough to restore your drawing to its former glory. If the stain is particularly stubborn, consider consulting a professional conservator. They have the tools and expertise to handle delicate art restoration without causing further harm. Remember, preserving your artwork is not just about cleaning; it’s about maintaining its integrity and value for years to come.
Ultimately, the goal is to keep your artwork looking as vibrant and beautiful as the day you created it. By understanding how to properly remove stains and taking proactive measures to protect your drawings, you can ensure that they remain cherished pieces for generations to enjoy.
- How can I prevent stains on my drawings?
To prevent stains, always handle your drawings with clean hands, store them in a safe place away from food and drinks, and consider using protective sleeves or folders. - Is it safe to use water to clean my drawings?
Water can be risky, especially for ink-based drawings. Always test on a small area first and use minimal moisture. - What should I avoid when cleaning my drawings?
Avoid harsh chemicals, excessive moisture, and abrasive materials that can scratch or damage the surface of your artwork.
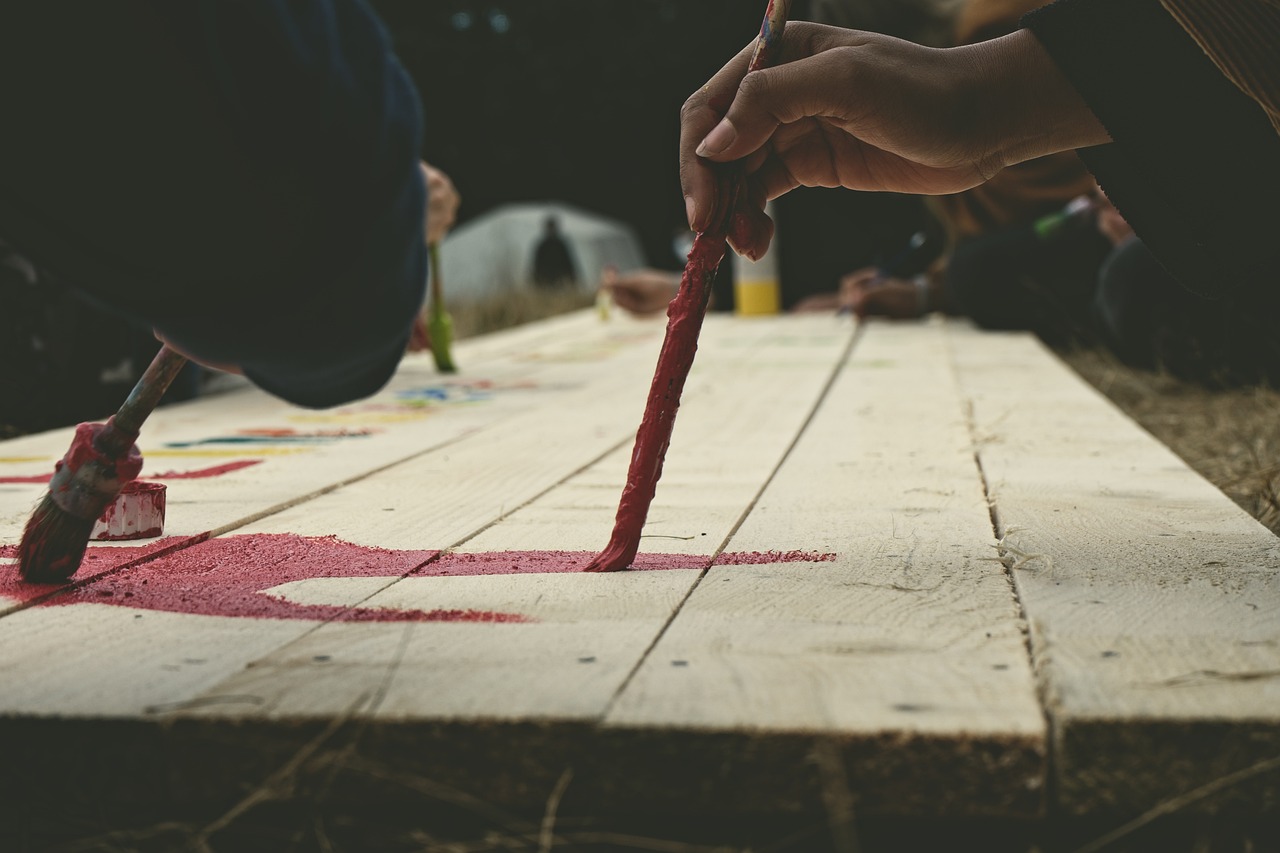
Choosing the Right Frame
When it comes to showcasing your drawings, is just as important as the artwork itself. A well-selected frame not only enhances the visual appeal of your piece but also plays a crucial role in its preservation. Think of your drawing as a precious gem; the frame is the setting that highlights its beauty and protects it from the elements. So, how do you choose the perfect frame? Let’s dive into some key considerations.
First off, consider the style of your artwork. Is it modern and abstract, or does it have a classic, traditional vibe? The frame should complement the style of the drawing. For instance, a sleek, minimalist frame might work wonders for a contemporary piece, while an ornate, vintage frame could enhance the charm of a classic artwork. Here’s a quick breakdown of frame styles:
| Frame Style | Description |
|---|---|
| Modern | Sleek and simple, often in black or white finishes. |
| Traditional | Ornate designs, usually made from wood with intricate carvings. |
| Rustic | Natural wood finishes that give a warm, homey feel. |
| Shadow Box | Deep frames that allow for three-dimensional displays. |
Next, let’s talk about materials. The frame material can significantly affect the overall look and durability. Common materials include wood, metal, and plastic, each bringing its unique flair. Wooden frames are timeless and can be stained or painted to match your decor, while metal frames offer a sleek, modern touch. Plastic frames are lightweight and often more affordable, making them a practical choice for casual settings.
Another essential aspect to consider is the matting. Matting is the border that surrounds your artwork within the frame. It not only adds a professional touch but also helps to keep the artwork from touching the glass, which can lead to damage over time. When selecting matting, think about the color and texture. A neutral mat can make your drawing pop, while a colored mat can add an extra dimension. Here’s a quick tip: choose a mat that complements the dominant colors in your artwork.
Finally, don’t overlook the importance of glass or acrylic in your framing choice. Opt for UV-filtering glass or acrylic to protect your artwork from harmful light that can cause fading. This is especially crucial if you plan to hang your drawing in a bright room. Remember, the right frame not only enhances the beauty of your artwork but also ensures its longevity.
In summary, choosing the right frame involves a mix of style, material, matting, and protective features. Take the time to explore your options and select a frame that not only showcases your drawing beautifully but also preserves it for years to come. After all, your artwork deserves to be seen in its best light!
- What is the best material for framing my drawings? - Wood and metal are popular choices, but it depends on the style of your artwork and your personal preference.
- How do I choose the right mat color? - Look for a mat that complements the dominant colors in your artwork for the best effect.
- Is UV-filtering glass worth the investment? - Absolutely! It protects your artwork from fading and damage caused by sunlight.
- Can I frame my drawing myself? - Yes, DIY framing can be a fun project, but make sure to use the right materials and techniques to ensure quality.

Frame Styles
When it comes to framing your drawings, the style of the frame plays a pivotal role in enhancing the overall aesthetic of your artwork. Think of the frame as the finishing touch to a delicious dish; it can either elevate the experience or leave it feeling flat. With a myriad of frame styles available, choosing the right one can feel overwhelming, but it’s essential to consider how each style complements the artwork. Here are some popular frame styles you might consider:
- Traditional Frames: These frames often feature ornate designs and rich finishes, perfect for classical artwork or detailed drawings. They exude elegance and can transform a simple drawing into a statement piece.
- Modern Frames: Sleek and minimalistic, modern frames are ideal for contemporary art. They typically have clean lines and neutral colors, allowing the artwork to take center stage without distraction.
- Rustic Frames: Made from reclaimed wood or distressed finishes, rustic frames add a touch of warmth and charm. They work beautifully with nature-themed drawings or anything that evokes a sense of nostalgia.
- Shadow Box Frames: If your artwork has depth or includes three-dimensional elements, shadow box frames provide the necessary space and protection. They create a stunning visual effect by allowing the artwork to "float" within the frame.
Each of these styles can change not just the look but also the feel of your artwork. For instance, a traditional frame can evoke feelings of sophistication, while a rustic frame might bring warmth and familiarity. When selecting a frame, consider the theme and mood of your drawing. A well-chosen frame can enhance the story your artwork tells, drawing viewers in and inviting them to appreciate the finer details.
Additionally, don't forget about the color of the frame. It should either complement or contrast with the colors in your drawing. A frame that matches the dominant colors in your artwork can create a harmonious look, while a contrasting frame can add excitement and draw attention to the piece. Remember, the goal is to create a balance that showcases your artwork in the best possible light.
Ultimately, the choice of frame style is a personal one, reflecting your taste and the message you want your artwork to convey. So take your time, explore various options, and choose a frame that not only protects your drawing but also enhances its beauty.
Q: What type of frame is best for pencil drawings?
A: For pencil drawings, a simple frame with a mat is often best. This allows the artwork to breathe and keeps it safe from smudging.
Q: Should I use glass or acrylic for framing?
A: Both options have their benefits. Glass is more scratch-resistant, while acrylic is lighter and less prone to shattering, making it a great choice for larger pieces.
Q: How do I choose the right mat color?
A: The mat color should enhance the artwork without overpowering it. Neutral colors like white or cream are safe bets, but don't hesitate to experiment with colors that complement your drawing.
Q: Can I frame my drawings myself?
A: Absolutely! Framing your own artwork can be a rewarding experience. Just make sure to use the right tools and materials to ensure your artwork is properly protected.

Matting Options
When it comes to framing your drawings, matting is not just an optional extra; it’s a crucial element that can elevate your artwork from ordinary to extraordinary. Think of matting as the frame’s best friend, providing a buffer that enhances the visual appeal while protecting the artwork. The right mat can add depth, draw focus, and even complement the colors in your drawing. So, how do you choose the right mat for your masterpiece? Let’s dive into the various options available!
First and foremost, consider the material of the mat. Acid-free mats are essential for preserving your artwork, as they prevent yellowing and deterioration over time. The most common materials include:
- Wood Pulp Mats: These are affordable and widely available, but make sure they are acid-free to avoid damage.
- Alpha Cellulose Mats: A step up in quality, these mats are made from wood pulp but are processed to be acid-free, providing better longevity.
- 100% Cotton Mats: The crème de la crème of matting, these are the most durable and fade-resistant options, ideal for high-value artwork.
Next, let’s talk about color. The mat color should not overshadow your drawing but rather enhance it. A neutral color, such as white, cream, or light gray, often works wonders, allowing the artwork to take center stage. However, don’t shy away from bolder colors if they complement your piece; just ensure they don’t clash. A good rule of thumb is to choose a mat that picks up a color from the artwork itself, creating a cohesive look.
Another important aspect to consider is the width of the mat. A wider mat can create a more dramatic effect and give your drawing an air of importance, while a narrower mat can lend a more modern touch. Typically, mats range from 1 to 4 inches in width, but this can vary based on the size of the artwork. For larger pieces, wider mats can help balance the proportions, while smaller works may benefit from a more modest mat width.
Lastly, don’t forget about the style of the mat. You can opt for a single mat or a double mat, where a second layer peeks out from behind the top mat, adding an extra dimension. Textured mats can also provide an interesting contrast to smooth drawings, enhancing the visual experience even further. Ultimately, the goal is to create a harmonious relationship between the mat, frame, and artwork.
In summary, when selecting matting options for your drawings, keep in mind the material, color, width, and style. Each of these factors plays a significant role in how your artwork is perceived and preserved. So take your time, experiment with different combinations, and find the perfect mat that showcases your creativity!
Q: What is the purpose of matting in framing?
A: Matting serves both aesthetic and protective purposes. It enhances the visual appeal of the artwork and creates a barrier between the glass and the artwork, preventing damage.
Q: How do I choose the right color for my mat?
A: Choose a color that complements your artwork. Neutral colors often work best, but you can also choose a mat that picks up a color from the artwork itself.
Q: What is the best material for mats?
A: Acid-free mats are the best choice for preserving artwork. Options include wood pulp, alpha cellulose, and 100% cotton mats, with cotton being the most durable.
Q: How wide should my mat be?
A: The width of the mat can vary based on the size of the artwork. Generally, mats range from 1 to 4 inches, with wider mats creating a more dramatic effect.

UV Protection and Preservation
When it comes to preserving your cherished drawings, UV protection is an absolute game changer. Imagine this: you’ve poured your heart and soul into creating a stunning piece of art, only to watch it fade away over time due to harmful sunlight exposure. That’s a nightmare for any artist! To prevent this tragedy, it’s essential to choose the right protective materials that will keep your artwork looking as vibrant as the day it was created.
One of the most effective ways to shield your drawings from UV rays is by using UV-filtering glass or acrylic when framing. These materials are designed to block a significant percentage of UV light, which can cause colors to fade and paper to deteriorate. In fact, high-quality UV-filtering glass can block up to 99% of harmful rays, ensuring your artwork remains protected. But how do you decide between glass and acrylic? Let’s break it down:
| Material | Pros | Cons |
|---|---|---|
| UV-Filtering Glass |
|
|
| UV-Filtering Acrylic |
|
|
Now that you know the differences, you can make an informed choice that best fits your needs and budget. Another important aspect of preservation is how you display your artwork. Even with protective glass or acrylic, the way you hang your drawings can impact their longevity. For instance, avoid placing them in direct sunlight or near heat sources, as these can accelerate fading and deterioration. Instead, opt for a cool, dry place with controlled lighting.
In addition to framing, consider using a protective spray designed for artwork. These sprays create a barrier against dust, dirt, and moisture, further enhancing the durability of your drawings. Just be sure to test any product on a small area first to ensure it won’t alter your artwork’s appearance. Remember, preservation is all about creating a safe environment for your art to thrive.
In summary, investing in UV protection and proper preservation techniques is crucial for maintaining the beauty of your drawings. By choosing the right materials and displaying them thoughtfully, you can enjoy your artwork for years to come, keeping its vibrancy alive and well. So, take the plunge and give your art the protection it deserves!
Q: What is the best way to protect my drawings from UV light?
A: The best way to protect your drawings is to use UV-filtering glass or acrylic when framing them. This will block harmful UV rays that can cause fading.
Q: Can I use regular glass for framing my artwork?
A: Regular glass does not provide UV protection, so it is not recommended if you want to preserve the colors and quality of your drawings.
Q: How often should I clean my framed artwork?
A: It’s best to clean your framed artwork every few months to remove dust and dirt, using gentle methods to avoid damaging the surface.
Q: Is it safe to use sprays on my drawings?
A: Yes, but always test any protective spray on a small, inconspicuous area first to ensure it doesn’t alter the appearance of your artwork.

Hanging and Display Tips
When it comes to showcasing your beautiful drawings, the way you hang and display them can make all the difference. Imagine walking into a room where every piece of art is positioned perfectly, drawing the eye and creating a conversation starter. It's not just about slapping a frame on the wall; it's about creating an experience. So, let’s dive into some essential tips to ensure your artwork shines.
First off, wall placement is key. You want to choose a spot that not only complements the artwork but also enhances the overall ambiance of the room. Consider factors like lighting, the color of the walls, and the flow of the space. For instance, if you have a vibrant drawing, hanging it against a neutral background can make those colors pop. On the other hand, if your artwork has a softer palette, a more colorful wall can add warmth and depth. It's all about balance!
Next, think about the height at which you hang your drawings. A common rule of thumb is to position the center of the artwork at eye level, which is typically around 57 to 60 inches from the floor. However, this can vary depending on the size of the piece and the height of the room. If you're displaying a series of drawings, try to keep them aligned at the same height for a cohesive look. This creates a gallery feel that can transform any space.
When it comes to secure hanging methods, safety is paramount. You don’t want your treasured artwork crashing to the ground due to inadequate support. Use appropriate hardware depending on the weight of your frame. For lightweight pieces, picture hooks or adhesive strips can work wonders. For heavier frames, consider using wall anchors or screws. Always ensure that the hardware is securely fastened to the wall. A little precaution goes a long way in preserving your artwork.
Additionally, consider the display arrangement. If you're hanging multiple pieces, think about creating a gallery wall. This can be an exciting way to showcase your collection. You can arrange the pieces in a grid format for a structured look or go for a more eclectic style by mixing different sizes and orientations. Before you start hammering nails into the wall, lay out your arrangement on the floor to visualize the final look. This allows you to play around with the positioning without committing to any holes in the wall.
Lastly, don't forget about lighting. Proper lighting can elevate your artwork from ordinary to extraordinary. Natural light is fantastic, but be cautious of direct sunlight, which can lead to fading over time. Consider using picture lights or LED spotlights to highlight your artwork without damaging it. The right lighting can create a stunning focal point in any room, making your drawings the star of the show.
In summary, hanging and displaying your drawings isn’t just about finding a spot on the wall. It’s about creating a harmonious environment that showcases your artistic vision. By paying attention to wall placement, height, secure hanging methods, display arrangements, and lighting, you can ensure that your artwork captivates anyone who walks into the room. So, go ahead and transform your space into an art lover's paradise!
- What is the best height to hang my artwork? Aim for the center of the artwork to be around 57 to 60 inches from the floor.
- How do I prevent my artwork from fading? Use UV-filtering glass or acrylic and avoid placing your artwork in direct sunlight.
- What type of hardware should I use for hanging? Use picture hooks for lightweight pieces and wall anchors or screws for heavier frames.
- Can I mix different frame styles? Absolutely! Mixing frame styles can add interest and character to your display.

Wall Placement
Choosing the right wall placement for your framed drawings is akin to finding the perfect stage for a performance; it can make all the difference in how your artwork is perceived. Think about it: just like a well-placed spotlight brings a star to life, the right wall can enhance the beauty and impact of your artwork. So, what should you consider when deciding where to hang your precious pieces? Here are some key factors to keep in mind:
- Lighting: Natural light can be both a friend and a foe to your drawings. While sunlight can illuminate your artwork beautifully, it can also cause fading over time. Ideally, place your drawings in a spot that receives indirect light. If you have a location that gets a lot of sunlight, consider using UV-filtering glass to protect your artwork.
- Height: The height at which you hang your drawings is crucial. A common rule of thumb is to hang artwork at eye level, which is typically around 57 to 60 inches from the floor. This height allows viewers to appreciate the piece without straining their necks. However, if you’re hanging multiple pieces in a gallery-style arrangement, consider the overall composition and adjust accordingly.
- Surroundings: The environment around your artwork can greatly influence its perception. Ensure that the wall color complements your drawing. A neutral background often works best, allowing your artwork to shine. Additionally, consider the furniture and other decor in the room; your artwork should harmonize with its surroundings.
- Room Function: Think about the purpose of the room where you plan to hang your artwork. For example, vibrant and energetic pieces might be perfect for a living room or a playroom, while calming and serene artworks may be better suited for a bedroom or study.
By considering these factors, you can create a visually appealing display that draws attention to your drawings while ensuring they are protected from potential damage. Remember, the goal is not just to hang your artwork but to create a cohesive and inviting space that showcases your creativity. So go ahead, take a step back, and envision how your drawings will interact with their new home. After all, every piece of art has a story to tell, and the right wall placement can help narrate that story beautifully.
Q: How can I prevent my artwork from fading?
A: To prevent fading, hang your artwork away from direct sunlight and consider using UV-filtering glass or acrylic when framing.
Q: What is the best material for framing my drawings?
A: Acid-free materials are recommended for framing as they help prevent deterioration of the artwork over time.
Q: How often should I clean my framed drawings?
A: It’s best to clean your framed drawings every few months, or as needed, using gentle dusting techniques to maintain their clarity.
Q: Can I hang my drawings in a bathroom?
A: It’s not advisable to hang artwork in bathrooms due to humidity, which can cause damage. If you must, ensure the artwork is properly sealed and framed with moisture-resistant materials.
Secure Hanging Methods
When it comes to displaying your cherished drawings, ensuring they are hung securely is paramount. You wouldn't want your masterpiece to come crashing down, would you? The right hanging method not only protects your artwork but also enhances its presentation. Let’s dive into some effective techniques that can keep your drawings safe and sound on your walls.
First off, consider using picture hanging strips. These are fantastic for lightweight frames and can hold surprisingly well without damaging your walls. They come in various sizes and strengths, making it easy to find the right fit for your artwork. Just make sure to follow the manufacturer's instructions for the best results. You’ll be amazed at how simple it is to apply and remove these strips without leaving a mark!
For heavier frames, you might want to opt for wall anchors. These are essential if you’re hanging on drywall, as they provide extra support. You can choose from plastic, metal, or toggle anchors, depending on the weight of your artwork. Using a wall anchor can prevent the frame from pulling out of the wall and causing damage. Just remember to drill a pilot hole before inserting the anchor to ensure a snug fit.
Another reliable method is using picture hooks. These hooks come in various designs and can accommodate different weights. They are easy to install and can hold your artwork securely without the risk of it slipping off. You can also find specialized hooks for frames that have wire on the back, which allows for a bit of flexibility in positioning your artwork.
Now, if you’re feeling a bit adventurous, consider using a French cleat system. This method involves two interlocking strips of wood or metal, which distribute the weight evenly across the wall. It’s particularly useful for larger pieces or when you want to create a gallery wall effect. The cleat system can make it easy to switch out artwork, too, so you can keep your display fresh!
Lastly, don't forget to consider the placement and spacing of your artwork. When hanging multiple pieces, aim for a consistent spacing of about 2 to 4 inches between frames. This will create a cohesive look and draw the eye across your collection. Also, make sure to hang your artwork at eye level, typically around 57 to 60 inches from the floor, to ensure it’s easily appreciated by viewers.
In summary, securing your drawings for display involves a combination of the right materials and techniques. Whether you choose picture hanging strips, wall anchors, picture hooks, or a French cleat system, the goal is to provide a safe and appealing presentation for your artwork. So go ahead, hang your masterpieces with confidence!
- What is the best way to hang lightweight drawings? Picture hanging strips are ideal for lightweight frames, allowing for easy application and removal.
- How do I hang heavier frames securely? Use wall anchors or picture hooks designed for heavier weights to ensure stability.
- Can I use a French cleat for smaller pieces? Yes, a French cleat can be used for any size artwork, providing a secure and flexible hanging solution.
- What is the ideal height to hang my artwork? Aim for the center of your artwork to be at eye level, around 57 to 60 inches from the floor.
Frequently Asked Questions
- What materials should I use to preserve my drawings?
Choosing the right materials is key to preserving your artwork. Look for acid-free paper, archival inks, and protective coatings that can help prevent fading and deterioration. Using high-quality materials ensures that your drawings remain vibrant for years to come.
- How can I clean my drawings without damaging them?
Cleaning your drawings requires a gentle touch. Use soft brushes or microfiber cloths to carefully remove dust and smudges. Avoid harsh chemicals or abrasive materials that could scratch or damage the surface of your artwork.
- What type of frame is best for my drawings?
The best frame depends on the style of your artwork. Traditional frames work well for classic pieces, while modern frames can enhance contemporary art. Consider the material and color of the frame to complement your drawing and enhance its presentation.
- Do I need UV protection for my framed drawings?
Absolutely! UV protection is crucial for preserving your drawings from fading due to sunlight exposure. Opt for UV-filtering glass or acrylic to keep your artwork looking fresh and vibrant for longer.
- What are some tips for hanging my framed drawings?
When hanging your drawings, choose a wall that enhances visibility and impact. Make sure to use secure hanging methods to prevent accidents. Consider the height and spacing between frames for a balanced display.
- How do I remove stains from my drawings?
Addressing stains can be tricky. For minor stains, try using a clean, dry eraser or a specialized art cleaning product. Always test any method on a small, inconspicuous area first to ensure it won't damage your artwork.


