DIY Old T-Shirts: Turning Waste into Decor
Are you tired of looking at that pile of old t-shirts cluttering your closet? Instead of tossing them into the landfill, why not transform waste into beautiful decor? This article explores creative ways to repurpose those forgotten garments into unique items that not only brighten up your home but also tell a story. With a little imagination and some DIY spirit, you can turn those old tees into something truly special. Imagine your living space filled with personalized decor that reflects your personality and style while also being environmentally friendly. Let's dive into some innovative projects that will inspire you to get crafty!
Transforming old t-shirts into vibrant wall art can add a splash of color to any room. Think about it: every t-shirt holds memories, whether it’s from a concert you attended or a vacation you cherished. By creating wall art, you can showcase these memories in a fun and artistic way. One technique is to cut the t-shirts into different shapes and sizes, then frame them or stretch them over canvas. You can create a collage effect or even a themed piece that resonates with your favorite colors or patterns. This not only reduces waste but also gives your walls a unique touch that store-bought art simply can’t replicate.
Old t-shirts can be turned into cozy pillows and cushions, perfect for adding comfort to your living space. Imagine curling up on your couch with a pillow that not only feels good but also holds sentimental value. To create these unique decor items, you don’t need to be a sewing expert; even beginners can master this project! Start by cutting the t-shirts into squares or rectangles, then sew them together, leaving a small opening for stuffing. Once you’ve stitched it up, it’s time to stuff your pillow with your choice of filling.
Selecting the right t-shirts for your pillow project is crucial. You want to pick shirts that are soft and comfortable, as well as visually appealing. Here are some tips for choosing the perfect fabric:
- Fabric Types: Look for 100% cotton or cotton blends for softness.
- Colors: Choose colors that complement your existing decor.
- Patterns: Fun graphics or unique designs can make your pillows stand out.
By carefully selecting your t-shirts, you can create pillows that not only look good but feel good too!
Before starting your project, proper care and preparation of t-shirts are essential. Always wash your t-shirts to remove any dirt or oils. You can use a gentle cycle and avoid harsh detergents to keep the fabric soft. After washing, make sure to dry them thoroughly. Once your t-shirts are clean, lay them flat and cut them into the desired shapes. A rotary cutter can be handy for achieving clean edges. This preparation ensures that your fabric is ready for crafting and will hold up well over time.
Choosing the right stuffing material is key to achieving the desired comfort level. You have several options, including:
- Synthetic Fillings: These are affordable and easy to find, providing a fluffy feel.
- Natural Fillings: Consider using materials like cotton or wool for a more eco-friendly option.
- Old Pillow Stuffing: Recycle stuffing from old pillows to give them a new life!
By experimenting with different fillings, you can find the perfect combination that suits your comfort needs.
T-shirt banners are a fun way to celebrate special occasions or add whimsy to your decor. Whether it’s a birthday party, a wedding, or just a casual get-together, a t-shirt banner can set the mood. To create one, simply cut the t-shirts into triangular shapes and string them together using twine or ribbon. You can personalize each triangle with messages or designs that resonate with the event. Hang it up and watch as your space transforms into a festive haven!
Making rugs or mats from old t-shirts is an eco-friendly way to add texture to your floors. This project not only reduces waste but also gives your home a unique touch. You can braid, knot, or weave the fabric into beautiful, functional pieces. Imagine stepping onto a soft, colorful rug made entirely from your favorite old t-shirts. It’s a great conversation starter and a perfect way to showcase your creativity!
This section delves into various techniques for creating t-shirt rugs, including braiding and crocheting. If you're a beginner, braiding is an easier method that requires less skill. Simply cut your t-shirts into strips and braid them together, then sew or glue the ends to secure the shape. For those with a bit more experience, crocheting can create intricate designs that are both beautiful and durable. Choose the method that suits your skill level and desired aesthetic!
To ensure your t-shirt rugs last, proper care and maintenance are necessary. Regular vacuuming will help keep dirt and debris at bay. For deeper cleaning, you can toss them in the washing machine on a gentle cycle. Just remember to let them air dry to maintain their shape and integrity. With a little love, your t-shirt rugs can be a lasting addition to your home decor!
Q: Can I use any type of t-shirt for these projects?
A: While any t-shirt can be used, it's best to choose ones made of soft fabric like cotton for comfort and ease of use.
Q: Will the colors of the t-shirts fade over time?
A: Yes, but proper washing and care can help maintain their vibrancy. Always wash in cold water and avoid bleach.
Q: How can I ensure my t-shirt projects are durable?
A: Use quality stitching techniques and choose the right stuffing materials to enhance durability.
Upcycled T-Shirt Wall Art
Transforming old t-shirts into vibrant wall art can add a splash of color to any room, making your living space feel more personalized and lively. Imagine walking into a room adorned with unique pieces that not only showcase your style but also tell a story about your past fashion choices. The beauty of upcycling is that it allows you to breathe new life into items that might otherwise end up in a landfill. So, how can you turn those forgotten tees into stunning wall decor? Let’s dive into some creative techniques!
One of the simplest yet most effective methods is to create a collage of t-shirt squares. You can cut your t-shirts into various shapes and sizes, then arrange them on a canvas or in a large frame. This method gives you the freedom to mix and match colors, patterns, and textures. For instance, a bright orange t-shirt with a fun graphic could serve as a vibrant centerpiece, surrounded by softer pastel fabrics. The result? A dynamic piece of art that reflects your personality and makes a statement!
Another exciting option is to create a t-shirt tapestry. This involves sewing or knotting together strips of fabric to form a large wall hanging. You can incorporate different lengths and widths to add depth and interest. Picture a bohemian-inspired tapestry made from your favorite band tees, hanging proudly in your living room. It’s a fantastic way to showcase your love for music while also being eco-conscious.
If you’re feeling particularly crafty, consider making framed t-shirt art. Choose a t-shirt with a design that resonates with you—maybe a vintage logo or a memorable quote. Cut out the design and frame it behind glass. This not only protects the fabric but also elevates it to a chic piece of decor. You can even create a gallery wall featuring several framed t-shirt designs, each telling its own story.
For those who enjoy a bit of texture, try creating a 3D wall sculpture using t-shirt scraps. By twisting, folding, and gluing pieces of fabric onto a sturdy base, you can create an eye-catching piece that adds dimension to your wall. Think of it as fabric origami! This technique allows you to play with colors and shapes, resulting in a unique piece that can be a conversation starter.
As you embark on your t-shirt wall art journey, remember to keep the following tips in mind:
- Choose t-shirts that have sentimental value or vibrant colors.
- Experiment with different textures by mixing cotton with other materials.
- Don't be afraid to get creative—there are no strict rules!
In conclusion, upcycling your old t-shirts into wall art is not just an environmentally friendly project; it’s also a fantastic way to express yourself. So gather those tees, unleash your creativity, and watch as your walls come to life with your personal touch. Who knew that a simple t-shirt could transform into a piece of art that resonates with your spirit and style?
Q: What types of t-shirts work best for wall art?
A: Any t-shirt can work, but those with vibrant colors, interesting graphics, or sentimental value are ideal. Consider the fabric's texture and how it will look once repurposed.
Q: Do I need any special tools to create t-shirt wall art?
A: Basic sewing supplies, scissors, a canvas or frame, and fabric glue are usually sufficient. If you're creating a tapestry or sculpture, you might need additional crafting tools like a hot glue gun.
Q: Can I wash the t-shirt art if it gets dirty?
A: It's best to avoid washing fabric wall art. Instead, dust it gently or spot clean if necessary to maintain its integrity.

T-Shirt Pillows and Cushions
Who knew that those old t-shirts you’ve been meaning to toss could transform into something as cozy and stylish as pillows and cushions? It's like giving your wardrobe a second life while adding a personal touch to your home decor! Imagine lounging on a pillow that not only feels great but also tells a story—maybe it’s your favorite band’s concert tee or that quirky shirt from your travels. In this section, we’ll dive into the art of turning those forgotten garments into delightful decor pieces that will have your guests asking, “Where did you get that?”
First things first, let's talk about the process. Creating t-shirt pillows is not only simple but also incredibly satisfying. You don't need to be a sewing expert to pull this off; with just a little bit of guidance, you can whip up some beautiful cushions in no time. Start by gathering your old t-shirts—those with fun graphics, vibrant colors, or sentimental value work best. You’ll be pleasantly surprised by how much personality these pillows can add to your space!
Now, before you dive into sewing, it’s essential to consider how you want your pillows to look. Do you want a classic square shape, or are you feeling adventurous and want to try something round or even heart-shaped? The shape you choose will influence how you cut the fabric. Once you’ve decided on the shape, it’s time to cut your t-shirt into the desired dimensions. Remember, you’ll need two pieces of fabric for each pillow, so make sure to account for that when cutting!
After cutting, it’s time to sew! If you're using a sewing machine, this part is a breeze. Simply place the two fabric pieces together, inside out, and sew along the edges, leaving a small opening for stuffing. If you’re hand-sewing, don’t worry; just take your time and use a simple running stitch. Once you’ve sewn around the edges, turn the pillow cover right side out through the opening.
Speaking of stuffing, this is where you can get creative! You can use traditional pillow stuffing, old fabric scraps, or even eco-friendly materials like shredded memory foam or natural cotton. Each stuffing option offers a different feel and comfort level, so choose what suits your taste best. Once you’ve filled your pillow to your desired fluffiness, simply sew up the opening, and voilà! You’ve got yourself a unique t-shirt pillow that’s ready to be showcased in your living room or bedroom.
Now, you might be wondering, “How do I choose the right t-shirts for this project?” Great question! Here are some tips to keep in mind:
- Fabric Quality: Look for t-shirts made of soft, durable fabric. Cotton blends work best for comfort.
- Colors and Patterns: Choose colors and designs that complement your existing decor. Bright colors can add a pop, while neutral tones can create a more subdued look.
- Sentimental Value: Don’t shy away from using shirts that hold memories. They can spark conversations and add a personal touch to your space.
Before you start crafting, it’s crucial to care for and prepare your t-shirts properly. Make sure to wash and dry them to remove any dirt or oils. This will also help pre-shrink the fabric, ensuring your pillows maintain their shape after washing. Once clean, cut away any tags or seams that may interfere with your design. This preparation step is vital for a polished final product!
Choosing the right stuffing material can significantly affect the comfort and look of your pillows. Here’s a quick overview of some popular options:
| Stuffing Type | Pros | Cons |
|---|---|---|
| Synthetic Filling | Affordable, hypoallergenic | Can flatten over time |
| Natural Cotton | Breathable, eco-friendly | Can be more expensive |
| Shredded Memory Foam | Moldable, comfortable | May retain heat |
In conclusion, creating t-shirt pillows and cushions is not just a fun DIY project; it’s a fantastic way to breathe new life into your old clothes while adding a unique flair to your home. So, gather those t-shirts, unleash your creativity, and enjoy the process of crafting something truly special!
Q: Can I use any type of t-shirt for this project?
A: While you can use most t-shirts, it’s best to choose those made of soft, durable fabric for comfort.
Q: How do I wash my t-shirt pillows?
A: You can wash them on a gentle cycle and air dry them to maintain their shape.
Q: What if I don’t know how to sew?
A: No worries! You can use fabric glue as an alternative to sewing, just be sure to let it dry completely before using your pillow.

Choosing the Right T-Shirts
When it comes to transforming your old t-shirts into stunning decor items, the selection process is just as important as the crafting itself. Not all t-shirts are created equal, and choosing the right ones can make a world of difference in the final product. So, how do you know which t-shirts to pick? First, consider the fabric type. Look for t-shirts made from 100% cotton or a cotton blend; these materials are not only soft and comfortable but also hold up well during the crafting process. Avoid t-shirts that are too stretchy or made from synthetic fabrics, as they may not provide the desired structure for your projects.
Next, think about the colors and patterns of the t-shirts. If you want your decor to pop, vibrant colors and interesting patterns can add a unique touch to your creations. For instance, if you're making pillows, consider using t-shirts with bold graphics or fun prints that reflect your personality. On the other hand, if you prefer a more muted aesthetic, solid colors can provide a chic and sophisticated look. Remember, the goal is to create items that not only showcase your creativity but also complement your existing decor.
Another factor to consider is the condition of the t-shirts. Make sure to choose shirts that are in good shape—no holes or excessive wear. A well-preserved t-shirt will not only look better but will also last longer in your decor projects. If you have sentimental t-shirts, like those from concerts or events, they can be perfect candidates for upcycling, allowing you to keep cherished memories alive in a functional way.
Lastly, think about the size of the t-shirts. Larger shirts can provide more fabric to work with, which is especially useful for projects like rugs or larger pillows. Conversely, smaller sizes can be great for banners or smaller decorative items. Ultimately, the right choice of t-shirts can elevate your DIY projects from ordinary to extraordinary, making your home feel more personalized and inviting.
- What types of t-shirts work best for crafting? Look for 100% cotton or cotton blends that are in good condition.
- Can I use t-shirts with prints or logos? Absolutely! They can add a unique flair to your projects.
- How do I clean my t-shirts before crafting? Wash them in cold water and avoid fabric softeners to maintain the fabric quality.
- Are there specific colors I should choose? Choose colors that complement your decor or reflect your personal style.
Fabric Care and Preparation
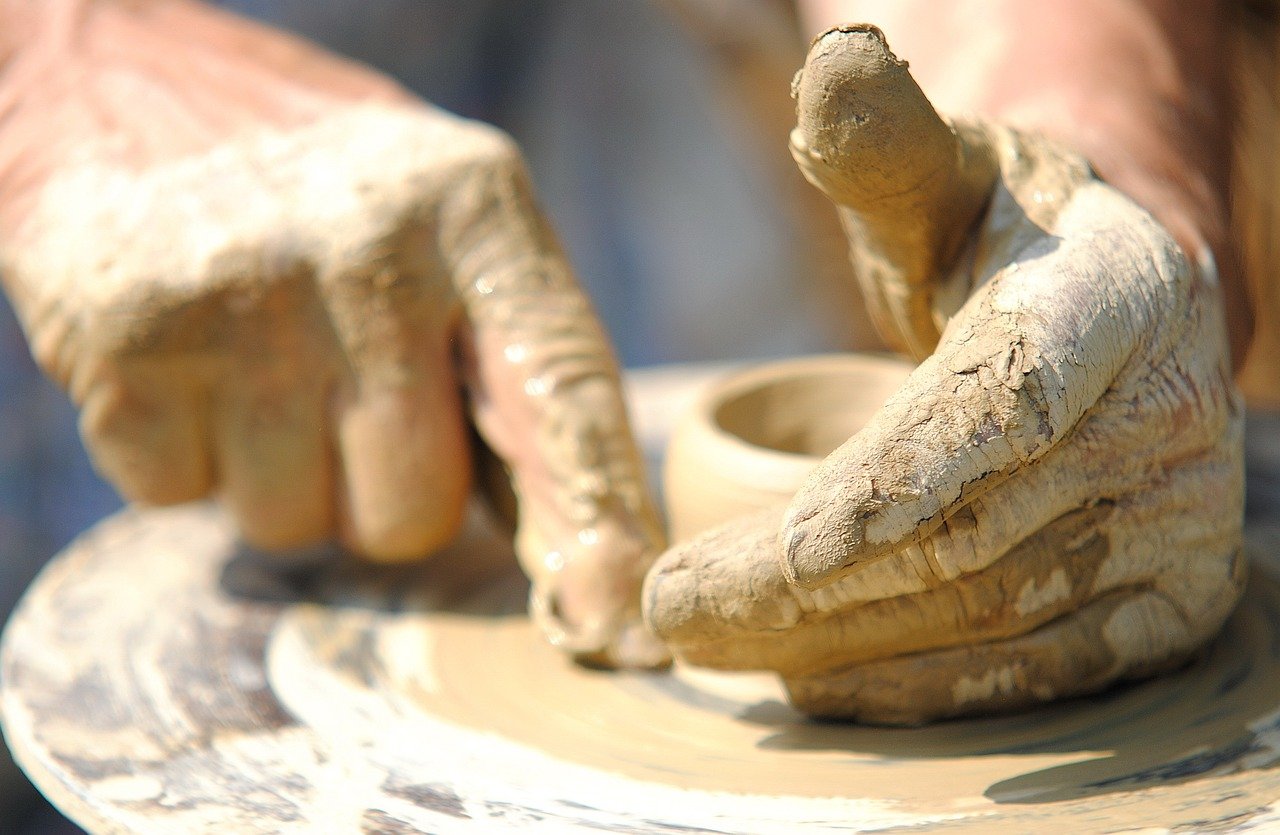
Before diving into your exciting t-shirt crafting projects, it's essential to give your old t-shirts the proper care and preparation they deserve. Think of this step as laying the foundation for a beautiful house; without a solid base, everything else could crumble. Start by washing your t-shirts to remove any dirt, oil, or residues that might have accumulated over time. This not only ensures that your final product looks fresh and vibrant, but it also helps to eliminate any potential allergens or irritants.
When washing, use a gentle cycle with cold water to prevent shrinking and fading. It’s best to avoid fabric softeners, as they can leave a residue that may affect your fabric's ability to adhere during crafting. After washing, dry your t-shirts on a low heat setting or hang them up to air dry. This method preserves the fabric's integrity and keeps your t-shirts soft and pliable for sewing or cutting.
Once your t-shirts are clean and dry, it’s time to prepare them for your upcoming projects. Start by laying the t-shirts flat on a clean surface. Using sharp fabric scissors, cut away any seams, tags, or unwanted areas. This not only gives you a clean slate to work with but also allows you to utilize as much fabric as possible. If you’re planning to make pillows, for example, consider cutting out large sections of fabric that can be easily sewn together.
For those who love a little extra flair, you can also experiment with cutting techniques. Try creating fringes or even decorative shapes that can add personality to your final product. Remember, the more creative you get with your cuts, the more unique your decor items will be!
Additionally, if you're working with multiple t-shirts, it’s helpful to organize them by color or pattern. This not only makes the crafting process smoother but also allows you to visualize how your final piece will look. A well-organized workspace can spark inspiration and creativity, making your crafting experience even more enjoyable.
Finally, don’t forget to pre-shrink your fabric if you’re worried about future washing. Simply soak your t-shirts in warm water for about 30 minutes, then dry them as you normally would. This extra step can save you from future headaches when your beautiful creations unexpectedly shrink in the wash!
By taking the time to properly care for and prepare your fabric, you're setting yourself up for crafting success. Remember, a little preparation goes a long way in ensuring that your DIY projects turn out beautifully!
- How do I choose the right t-shirts for crafting? Look for t-shirts made from 100% cotton or a cotton blend for ease of sewing and durability.
- Can I use t-shirts with prints or logos? Absolutely! In fact, unique prints can add character to your decor items.
- What if my t-shirt is too small? You can always combine pieces from multiple t-shirts to create larger items like pillows or rugs.
- How do I clean my finished t-shirt projects? Most t-shirt crafts can be machine washed on a gentle cycle. Always check for specific care instructions based on your project.

Stuffing Options for Pillows
When it comes to creating cozy pillows from your old t-shirts, one of the most important aspects to consider is the stuffing. The right filling not only affects the comfort level of your pillow but also its durability and overall appearance. You might be wondering, "What are my options?" Well, let’s dive into the world of pillow stuffing!
There are several popular materials you can use for stuffing your t-shirt pillows, each with its own set of benefits:
- Synthetic Fill: This is a common choice for many DIY pillow makers. Synthetic fills, such as polyester fiberfill, are lightweight, hypoallergenic, and resistant to mold and mildew. They provide a plush feel and can easily be found at craft stores.
- Natural Fill: If you're looking for something more eco-friendly, consider natural fillings like cotton, wool, or even down feathers. Cotton is breathable and great for those who prefer a softer, more organic feel. Wool offers excellent insulation, while down feathers provide a luxurious touch.
- Recycled Materials: Want to take your eco-friendliness a step further? You can use scraps from your old t-shirts or other fabric remnants as stuffing. Not only does this reduce waste, but it also gives your pillow a unique texture and character!
Choosing the right stuffing is all about personal preference. For instance, if you love a firm pillow that supports your back while you lounge, synthetic fill might be your best bet. On the other hand, if you enjoy sinking into a soft cloud, natural fill or recycled materials could be the way to go. It’s like choosing between a firm mattress and a plush one—what feels best for you?
Another important factor to consider is how much stuffing you need. A well-stuffed pillow should hold its shape without being overly tight. Think of it like filling a balloon; you want it to be full but not so full that it bursts! A good rule of thumb is to start with a moderate amount of stuffing and add more as needed until you achieve your desired firmness.
In summary, the stuffing you choose for your t-shirt pillows can make or break your DIY project. Whether you opt for synthetic, natural, or recycled materials, remember to consider your comfort, the pillow's purpose, and of course, your personal style. So grab those old t-shirts, pick your stuffing, and let your creativity flow!
Q: Can I mix different types of stuffing?
A: Absolutely! Mixing different types of stuffing can create a unique feel and texture for your pillow. Just make sure the materials complement each other in terms of weight and firmness.
Q: How do I wash my stuffed pillow?
A: It’s best to check the care instructions for the stuffing material you used. Most synthetic fills can be machine washed, while natural fills may require special care. Always use a gentle cycle and cold water to maintain the integrity of your pillow.
Q: How can I ensure my pillow stays fluffy?
A: Regularly fluff your pillow by giving it a good shake and patting it into shape. You can also put it in the dryer on a low heat setting with a couple of dryer balls to help restore its fluffiness.
Creative T-Shirt Banners
Are you looking for a fun and unique way to spruce up your space or celebrate a special occasion? are the answer! Not only do they add a personal touch to your decor, but they also allow you to repurpose those old tees that are just taking up space in your closet. Imagine walking into a room adorned with colorful banners that tell a story or mark a celebration—it's like bringing a piece of your personality to life!
Creating a t-shirt banner is easier than you might think. First, gather your old t-shirts, scissors, and some string or twine. The beauty of this project is that you can mix and match colors and patterns to create a vibrant display. Think about the themes you want to convey. Are you celebrating a birthday, an anniversary, or simply adding some cheer to your home? This will guide your color choices and designs.
To start, cut your t-shirts into shapes. You can go for traditional triangles, but why not get creative? Hearts, stars, or even letters can make your banner stand out. Once you have your shapes, you can either sew them onto the string or use fabric glue for a no-sew option. If you're feeling extra crafty, consider adding embellishments like beads or glitter to give your banner some extra flair!
Here’s a quick overview of the steps involved:
- Gather Materials: Old t-shirts, scissors, string or twine, and optional embellishments.
- Cut Shapes: Create your desired shapes from the t-shirts.
- Assemble the Banner: Attach your shapes to the string using sewing or gluing methods.
- Display: Hang your banner in a prominent place to showcase your creativity!
Not only are these banners a great way to recycle your t-shirts, but they also serve as a fantastic conversation starter. Imagine your guests admiring your handiwork and asking about the stories behind each shirt. It's a delightful way to share memories while also showcasing your artistic side. Plus, you can change them out for different seasons or occasions, keeping your decor fresh and exciting!
In summary, are an eco-friendly and engaging project that can transform your old clothing into beautiful decor. Whether you're decorating for a party or just adding some personality to your living space, this project is sure to bring a smile to your face. So grab those old t-shirts and let your imagination run wild!
Q: What types of t-shirts work best for banners?
A: Any old t-shirts will work, but those with bold colors and interesting designs can make your banner pop!
Q: Can I wash the t-shirt banner after I make it?
A: It's best to spot clean your banner to maintain its shape and color, but you can wash it gently if needed.
Q: How long will my t-shirt banner last?
A: With proper care, your t-shirt banner can last for many celebrations. Just be mindful of how you store it when not in use!
T-Shirt Rugs and Mats
Have you ever thought about how those old t-shirts, once cherished but now collecting dust, can be transformed into something both beautiful and functional? Making is not only an eco-friendly project but also a creative way to add a personal touch to your home. Imagine stepping onto a soft, colorful rug made from your favorite band tees or those quirky shirts you just couldn't part with! This project is a fantastic opportunity to reduce waste while showcasing your unique style.
To get started, you'll need to gather your materials. Old t-shirts are the star of the show, but you'll also want some basic crafting supplies like scissors, a ruler, and a sewing machine or needle and thread. The beauty of this project lies in its simplicity: you don’t need to be a crafting expert to create something stunning. Just grab a few old shirts and let your creativity flow!
There are several techniques you can use to create your t-shirt rugs, and each method offers its own charm. For instance, you can braid the fabric strips for a textured look, or you might prefer to crochet them into a more intricate design. If you're feeling adventurous, you could even try weaving the strips for a unique pattern. The choice is yours! Below is a brief overview of some of these techniques:
| Technique | Description | Skill Level |
|---|---|---|
| Braiding | Simple method of intertwining strips for a textured finish. | Beginner |
| Crocheting | Using a crochet hook to create intricate patterns. | Intermediate |
| Weaving | Interlacing fabric strips for a unique design. | Advanced |
Once you’ve decided on a technique, the next step is to prepare your t-shirts. Cut them into strips, ensuring the width is consistent for a uniform look. Don’t worry about making them perfect; the beauty of a t-shirt rug lies in its handmade charm! As you cut, consider the colors and patterns of the shirts. Mixing and matching can lead to a vibrant, eclectic rug that tells a story.
After you’ve created your rug, you’ll want to think about care and maintenance. T-shirt rugs are generally machine washable, but it’s best to check the fabric type and care instructions first. A gentle cycle and air drying will help maintain their integrity. With proper care, your t-shirt rug can last for years, serving as a reminder of the memories tied to those old shirts.
In conclusion, making t-shirt rugs and mats is a fun and rewarding project that allows you to express your creativity while being kind to the environment. So, gather those old tees, unleash your imagination, and step into a world of colorful, comfy decor!
- Can I use any type of t-shirt for my rug?
Yes! However, consider using cotton or cotton-blend shirts for better durability and softness. - How do I clean my t-shirt rug?
Most t-shirt rugs can be machine washed on a gentle cycle. Always check the care instructions for your specific materials. - What if my t-shirts have prints or designs?
Incorporating printed shirts can add character and uniqueness to your rug. Just be mindful of how the designs will look when cut into strips.
Techniques for T-Shirt Rugs
Creating a t-shirt rug is not just a fun project; it's a fantastic way to give those old tees a new life while adding a unique touch to your home decor. There are several techniques you can use, each offering a different aesthetic and level of difficulty. Whether you're a seasoned crafter or a novice, there's a method here for everyone!
One popular technique is braiding. This method involves cutting your t-shirts into long strips and then braiding them together to create a thick, textured rug. To start, you'll need to gather a few old t-shirts, preferably in colors that complement each other. Cut the t-shirts into strips about 1-2 inches wide, making sure to keep them uniform for a cleaner look. Once you have enough strips, begin braiding them together. The beauty of this method is that it allows for creative freedom; you can choose to braid in a simple three-strand braid or mix it up with a four-strand braid for a more intricate design.
Another technique that is gaining popularity is crocheting. If you have some basic crochet skills, this can be a delightful way to create a t-shirt rug. Similar to braiding, you'll start by cutting your t-shirts into strips, but instead of braiding, you'll use a crochet hook to create stitches. This method can be a bit more challenging, but the end result is often a more refined and durable rug. Plus, crocheting allows you to play with different patterns and textures, making each rug truly one-of-a-kind.
If you're looking for something even simpler, consider the knotting technique. This method is perfect for beginners and requires minimal tools. Simply cut your t-shirts into strips and tie them together in knots to form a rug. You can create a simple grid pattern by tying the strips at regular intervals or get creative and make a free-form design. This technique is not only easy but also allows for a lot of improvisation, so you can let your creativity flow!
Regardless of which technique you choose, it's essential to keep a few things in mind:
- Color Coordination: Think about the colors you want in your rug. Mixing and matching can create a vibrant, eclectic look, while sticking to a color palette can provide a more cohesive appearance.
- Size Matters: Decide on the size of your rug before you start. This will help you determine how many t-shirts you'll need and how long to cut your strips.
- Durability: Consider the wear and tear your rug will face. For high-traffic areas, you might want to choose a sturdier technique like braiding or crocheting.
In conclusion, making a t-shirt rug is a rewarding project that not only decorates your space but also promotes sustainability. With techniques like braiding, crocheting, and knotting, you can turn those forgotten t-shirts into a beautiful, functional piece of art. So grab those old tees and let your creativity shine!
Q: Can I use any type of t-shirt for making a rug?
A: Yes, you can use any type of t-shirt, but keep in mind that thinner fabrics may not hold up as well as thicker ones. Cotton blends work best for durability and comfort.
Q: How do I clean my t-shirt rug?
A: Most t-shirt rugs can be machine washed on a gentle cycle. Just make sure to air dry them to maintain their shape and integrity.
Q: How long does it take to make a t-shirt rug?
A: The time it takes to create a t-shirt rug varies depending on the technique and size. On average, you can expect to spend a few hours to a couple of days on the project.

Care and Maintenance of T-Shirt Rugs
Taking care of your t-shirt rugs is essential to ensure they remain vibrant and functional for years to come. Just like any other piece of decor, these unique creations require a bit of attention to keep them looking their best. First off, it’s important to remember that t-shirt rugs are often made from cotton or cotton blends, which means they can be washed, but with a few precautions. Always check the care instructions for any specific t-shirts you used, as some may have special finishes that could affect their durability.
To maintain the integrity of your t-shirt rug, regular cleaning is a must. For light cleaning, simply shake the rug outside to remove dust and debris. If it needs a deeper clean, you can toss it in the washing machine. However, it's best to wash it on a gentle cycle with cold water to prevent fading and shrinking. To protect the rug’s shape, avoid using fabric softeners, as they can make the fibers less absorbent and affect the overall texture.
After washing, air drying is the best option. Lay the rug flat on a clean surface or hang it up to dry, ensuring it retains its shape. If your rug is particularly large, consider using a clothesline or a large, clean area where it can dry without being folded or bunched up. This will help maintain its form and prevent any unwanted creases.
In addition to cleaning, you'll want to keep an eye out for any signs of wear and tear. If you notice any fraying edges or loose threads, don’t hesitate to do some quick repairs. A simple needle and thread can work wonders in extending the life of your rug. Alternatively, if you’re feeling crafty, you can even incorporate these imperfections into your design, giving your rug a unique character that tells a story.
Lastly, consider rotating your t-shirt rug regularly, especially if it’s placed in a high-traffic area. This will help distribute wear evenly and prevent certain areas from becoming overly flattened or damaged. By following these simple care tips, your t-shirt rug can become a cherished and lasting addition to your home decor.
- Can I wash my t-shirt rug in the washing machine?
Yes, but use a gentle cycle and cold water to protect the fabric. - How do I dry my t-shirt rug after washing?
Air drying is recommended; lay it flat or hang it up to maintain its shape. - What should I do if my rug starts to fray?
Quick repairs with a needle and thread can extend its life, or you can embrace the fraying as part of the rug's character. - How often should I clean my t-shirt rug?
Shake out dust regularly and wash as needed, depending on traffic and dirt accumulation.
Frequently Asked Questions
-
What types of old t-shirts are best for crafting?
When selecting t-shirts for your projects, look for those made of soft, breathable cotton. Bright colors and interesting patterns can really enhance your decor. Consider using shirts that hold sentimental value, as they can add a personal touch to your creations!
-
How do I prepare my t-shirts before starting a project?
It's essential to wash and dry your t-shirts first to remove any dirt and oils. After that, cut them into the desired shapes or strips based on your project needs. Make sure to iron them out to eliminate wrinkles, which will make your crafting process smoother.
-
What are some stuffing options for t-shirt pillows?
You can use a variety of stuffing materials for your t-shirt pillows. Synthetic options like polyester fiberfill are popular for their softness and durability. If you prefer a natural alternative, consider using cotton batting or even shredded memory foam for a comfy feel.
-
Can I wash my t-shirt rugs?
Absolutely! However, it's crucial to follow specific care instructions. Most t-shirt rugs can be machine washed on a gentle cycle. To preserve their shape, air drying is recommended. Just make sure to check for any loose threads or knots before washing!
-
How long does it take to create a t-shirt banner?
The time it takes to make a t-shirt banner can vary based on your design and crafting speed. On average, you can expect to spend 1-2 hours. It's a fun project that can be completed in an afternoon, making it perfect for last-minute celebrations!
-
Are there any special tools needed for these projects?
Most of the projects can be done with basic crafting tools like scissors, a sewing machine (or needle and thread), and fabric glue. For t-shirt rugs, you might want to have a crochet hook or a braiding tool, depending on the technique you choose.


