How to Make a DIY Jewelry Tree for Your Room
Have you ever found yourself tangled in a mess of necklaces or searching for that one pair of earrings you just can't seem to find? If so, you're not alone! Many of us struggle to keep our jewelry organized while also wanting to add a touch of style to our rooms. That's where a DIY jewelry tree comes into play. Not only does it serve as a functional storage solution, but it also acts as a stunning decorative piece that can elevate your space. In this article, we’ll guide you through the process of creating your very own jewelry tree, ensuring that you can showcase your accessories beautifully while keeping them neatly organized.
Before diving into this exciting project, it's crucial to gather all the necessary materials. Having everything on hand will make the process smoother and more enjoyable. Here's a list of what you'll need:
- Base Material: This could be a wooden block, a ceramic pot, or even a sturdy piece of cardboard.
- Branches or Sticks: These will form the structure of your jewelry tree. You can collect them from your backyard or purchase them from a craft store.
- Glue: A strong adhesive like hot glue or wood glue is essential for securing your branches.
- Paint or Stain: To give your jewelry tree a personal touch, choose your favorite colors or finishes.
- Decorative Elements: Consider adding beads, ribbons, or other embellishments to enhance the look.
Gathering these materials is the first step to crafting a beautiful and functional jewelry tree that reflects your personality and style.
Now that you have your materials, it’s time to think about the design of your jewelry tree. The right design not only complements your room's decor but also showcases your unique style. There are various design options to consider, ranging from minimalist to elaborate styles. Let’s explore some ideas that might inspire your creativity.
If you prefer a clean and modern aesthetic, a minimalist jewelry tree might be the perfect choice for you. These designs focus on simplicity and functionality, allowing your jewelry to stand out without overwhelming your space. Think about using a single branch or a few slender sticks arranged in a way that gives your jewelry room to breathe. The beauty of minimalist designs lies in their elegance and understated charm.
Incorporating natural materials like wood or branches can create a rustic aesthetic that adds warmth to your room. Imagine a jewelry tree made from a beautifully gnarled branch, displaying your necklaces and earrings in a way that feels organic and inviting. This approach not only showcases your jewelry but also connects your decor to nature, creating a serene atmosphere in your space.
The colors and finishes you choose can significantly elevate the look of your jewelry tree. You can opt for a natural wood finish for a rustic vibe, or go bold with bright colors that pop against your walls. Consider using paint, stains, or even metallic finishes to add a touch of glamour. The right finish can transform a simple design into a stunning focal point in your room.
If you’re someone who loves intricate details and bold statements, elaborate designs might be more your style. These jewelry trees can be a true reflection of your creativity, showcasing an array of accessories in a visually captivating way. Think about incorporating multiple branches, decorative elements, and even small shelves to hold rings or bracelets. The key is to create a piece that not only organizes your jewelry but also tells a story about your personal style.
Once you've settled on a design and gathered your materials, it's time to put everything together! In the following sections, we'll provide you with a detailed, step-by-step guide to ensure your assembly process is smooth and enjoyable.
Follow these instructions carefully to construct your jewelry tree:
- Start by preparing your base. If using a wooden block, sand it down for a smooth finish.
- Attach your branches to the base using glue, ensuring they are securely fastened and positioned to hold your jewelry.
- Once the glue has dried, apply paint or stain to your jewelry tree to add color and personality.
- After the finish has dried, decorate your tree with embellishments like beads or ribbons to enhance its visual appeal.
With these steps, you’ll have a stunning jewelry tree ready to showcase your collection!
As with any DIY project, there are common pitfalls to watch out for. Here are a few mistakes to avoid:
- Using weak glue that may not hold over time.
- Overcrowding your tree with too many branches, which can make it look cluttered.
- Choosing a base that isn’t sturdy enough to support the weight of your jewelry.
By steering clear of these mistakes, you'll ensure a smoother crafting experience and a more durable jewelry tree.
After building your jewelry tree, it's essential to style it for maximum impact. Consider arranging your jewelry by color, type, or occasion to make it visually appealing and easy to access. You can also incorporate decorative items like small plants or candles around your jewelry tree to create a cohesive look that enhances your room's overall aesthetic.
Q: How do I clean my jewelry tree?
A: Simply use a damp cloth to wipe down the branches and base, avoiding any harsh chemicals that could damage the finish.
Q: Can I make a jewelry tree for my kids?
A: Absolutely! Just ensure that the materials used are safe and appropriate for children.
Q: How can I personalize my jewelry tree?
A: Personalization can be achieved through color choices, decorative elements, and even the arrangement of your jewelry.
Materials Needed
Gathering the right materials is essential for your DIY jewelry tree. You want to ensure that you have everything at your fingertips before diving into this creative endeavor. The beauty of a DIY project lies not only in the final product but also in the joy of crafting it. So, let’s get into what you’ll need!
First off, you’ll need a solid base to support your jewelry tree. This could be a piece of wood, a small wooden box, or even a sturdy ceramic pot. Think of this as the foundation of a house; without it, everything else might crumble. You can also get creative here! For instance, if you prefer a more rustic look, a slice of a tree trunk could add that earthy touch.
Next, consider the branches or arms of your jewelry tree. These can be made from various materials such as:
- Wooden dowels
- Sticks from your backyard
- Metal wire
Each option has its unique charm and can contribute to the overall aesthetic of your jewelry tree. If you’re going for a minimalist design, thin wooden dowels could provide a clean and modern look. On the other hand, if you want something more whimsical, using branches can create a natural and organic feel.
Now, let’s talk about the decorative elements. This is where your personality truly shines through! You might want to add some paint, glitter, or even fabric to your design. Here’s a quick breakdown of what you might consider:
| Decorative Element | Purpose |
|---|---|
| Paint | Adds color and personality |
| Glitter | Gives a sparkly, fun touch |
| Fabric | Softens the look and adds texture |
Lastly, don’t forget about the jewelry hooks or holders. These can be purchased from craft stores or made from simple materials like small nails or clips. They’re essential for hanging your earrings, necklaces, and bracelets securely. Think of them as the support system that keeps your accessories organized and easily accessible.
To wrap it up, here’s a quick checklist of what you’ll need:
- Base (wood, ceramic pot, etc.)
- Branches or arms (wooden dowels, sticks, metal wire)
- Decorative elements (paint, glitter, fabric)
- Jewelry hooks or holders
With these materials in hand, you’re all set to embark on your DIY jewelry tree adventure! Remember, the key is to have fun and let your creativity flow. Happy crafting!

Choosing the Right Design
When it comes to creating your very own DIY jewelry tree, is a pivotal step that can set the tone for your entire project. Think of it as picking the perfect outfit for a special occasion; the right design not only reflects your personal style but also complements the space you’re decorating. So, what should you consider when selecting a design? Let’s dive in!
First off, consider the size of your space. Is your room cozy and compact, or do you have a spacious area to work with? If you're working with limited space, a minimalist design might be the way to go. These designs are sleek and take up less room while still providing functionality. On the other hand, if you have a larger area, you might want to explore more elaborate designs that can serve as a stunning focal point.
Next, think about your personal style. Are you drawn to modern aesthetics, or do you prefer something more rustic and organic? Your jewelry tree should be a reflection of who you are. For instance, if you love nature, a tree made from branches or reclaimed wood could resonate with you. Alternatively, if you lean towards contemporary vibes, a geometric design with clean lines would fit perfectly. Here are a few styles to consider:
- Minimalist - Simple shapes and neutral colors.
- Rustic - Incorporates natural elements like wood and branches.
- Modern - Bold colors and geometric patterns.
- Whimsical - Playful designs with curves and unique features.
Another critical factor is how the jewelry tree will function in your daily life. Will it be a place to display your favorite pieces, or do you need it to organize a larger collection? If you have many items, look for designs that offer multiple tiers or branches, allowing for better organization and visibility. It’s like a well-organized closet; everything has its place, making it easier to find what you need.
Finally, don't underestimate the impact of color and finish. The right hues can make your jewelry tree pop against your room's backdrop. Whether you choose a vibrant paint color or a more subdued stain, think about how it will interact with your existing decor. A well-finished piece can elevate your entire room’s aesthetic, much like the perfect accessory can complete an outfit.
In summary, choosing the right design for your DIY jewelry tree involves a blend of personal style, functional needs, and aesthetic considerations. Take your time to explore various options and let your creativity shine. After all, this is not just a project; it's an expression of you!
Minimalist Designs
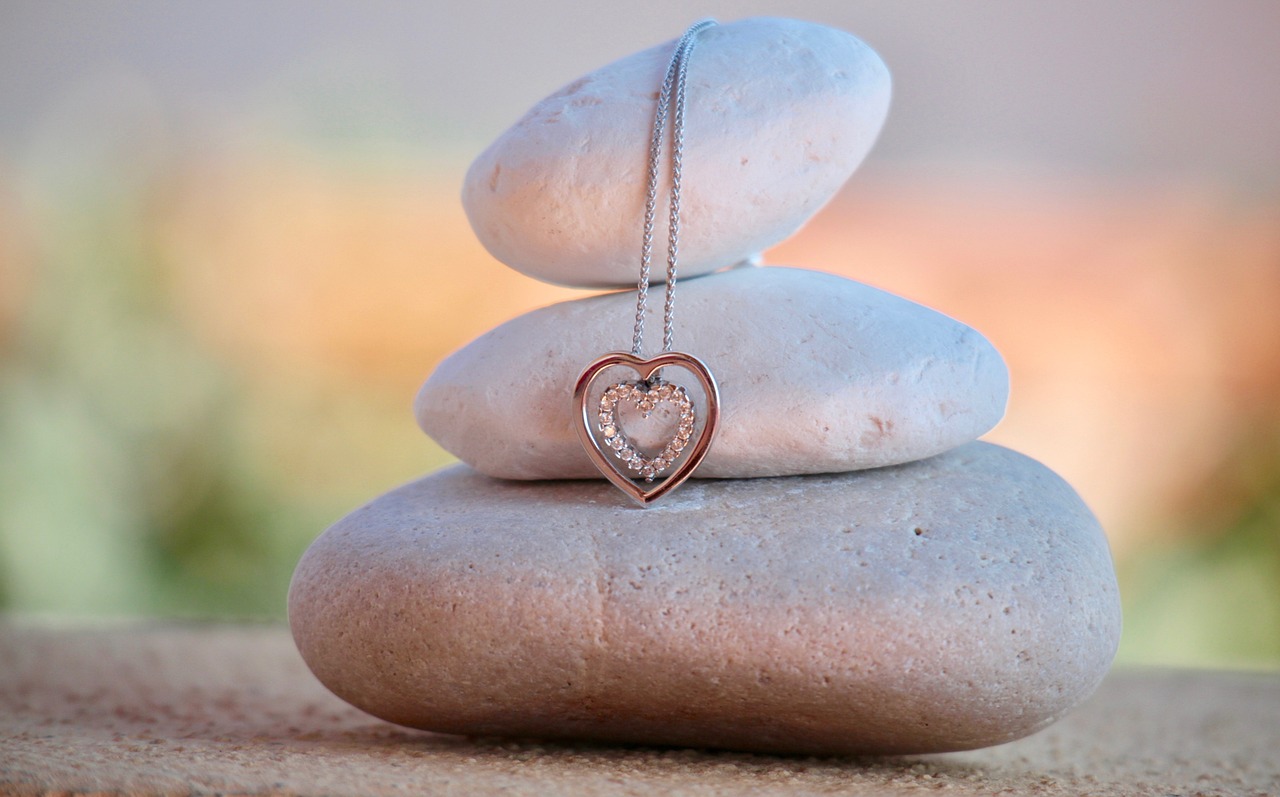
When it comes to creating a DIY jewelry tree, are all the rage. They embody the principle of "less is more," allowing your jewelry to shine while keeping your space uncluttered. Imagine a sleek, simple structure that draws attention to your favorite pieces without overwhelming your decor. Minimalist jewelry trees often feature clean lines and a monochromatic color palette, making them a perfect fit for modern interiors. The beauty of these designs lies in their ability to blend seamlessly with any room style, from contemporary to Scandinavian.
One of the key elements of a minimalist jewelry tree is its functional simplicity. It’s not just about aesthetics; it’s about creating a space where you can easily access your jewelry while keeping it organized. Think of a jewelry tree that stands tall with branches extending outward, allowing you to hang necklaces, bracelets, and earrings without tangling them. This design not only saves you time in the morning but also adds a touch of elegance to your vanity or dresser.
To inspire your creativity, here are some popular minimalist styles to consider:
- Branch-Like Structures: These resemble tree branches and can be made from metal or wood. They provide a natural look while being functional.
- Geometric Shapes: Think triangles or circles that can hold your jewelry in a stylish way. These shapes can be made from wire or wood, adding a modern twist.
- Wall-Mounted Designs: If you’re short on space, consider a wall-mounted jewelry tree. This keeps your accessories off surfaces while making them a part of your decor.
Incorporating natural materials can also enhance the minimalist aesthetic. For example, a simple wooden base with branches extending outwards creates a rustic yet modern feel. You can leave the wood in its natural state or paint it in a soft hue to match your room's color scheme. The key is to keep the design uncomplicated, allowing the natural beauty of the materials to stand out.
Lastly, don’t underestimate the impact of color and finish options. A minimalist jewelry tree can be transformed with just a coat of paint or a stain. Soft pastels or classic whites can create a serene look, while bold colors can add a pop of personality without overwhelming the design. Consider using matte finishes for a more understated look or glossy finishes for a touch of elegance. The choice of color and finish can reflect your personal style and harmonize with your existing decor.
In summary, minimalist designs for your DIY jewelry tree not only serve a practical purpose but also enhance the overall aesthetics of your room. By focusing on simple shapes, natural materials, and thoughtful color choices, you can create a stunning piece that showcases your jewelry beautifully while keeping your space organized and stylish.
Using Natural Materials
When it comes to crafting a DIY jewelry tree, not only enhances the aesthetic appeal but also brings a touch of the outdoors into your space. Imagine a beautiful jewelry tree made from branches or reclaimed wood, adding a rustic charm that perfectly complements your accessories. The beauty of natural materials lies in their unique textures and organic shapes, making each piece one-of-a-kind. So, let’s dive into how you can effectively incorporate these elements into your design.
First, consider the type of natural material you want to use. Wood is a fantastic choice due to its versatility and availability. You can opt for a sturdy base made from a thick slice of wood, which can serve as the foundation for your jewelry tree. From there, you can attach branches of various lengths to create a multi-tiered effect, allowing you to hang necklaces, bracelets, and earrings in an organized fashion. The natural grain of the wood adds an earthy feel that can easily match any room decor.
Another option is to use branches from trees or shrubs. These can be found in your backyard or during a nature walk. Look for branches that have interesting shapes and angles, as they will add character to your jewelry tree. Simply clean them up, remove any rough edges, and paint or stain them to match your desired color scheme. You can even leave them in their natural state for a more rustic look.
Here’s a quick overview of some popular natural materials you might consider:
- Driftwood: Perfect for a beachy vibe, driftwood can be shaped and arranged to create an artistic display.
- Twigs and branches: These can be used to create a whimsical, nature-inspired jewelry holder.
- Reclaimed wood: Not only eco-friendly, but it also adds a story and history to your jewelry tree.
Once you’ve chosen your materials, think about how you want to finish them. A simple coat of natural oil can enhance the wood’s grain, while a light stain can add depth and richness. If you prefer a pop of color, consider using non-toxic paint that complements your room's palette. The key is to maintain the natural beauty of the materials while adding your personal touch.
Incorporating natural materials into your DIY jewelry tree is a rewarding experience. Not only do you get to create something beautiful, but you also connect with nature in the process. So gather your materials, unleash your creativity, and watch as your jewelry tree transforms into a stunning centerpiece that reflects your personal style.
Q: Can I use any type of wood for my jewelry tree?
A: Yes, you can use various types of wood, but it's best to choose hardwoods for durability. Softwoods may bend or break more easily.
Q: How do I ensure my branches are safe to use?
A: Make sure to clean the branches thoroughly and remove any insects or debris. You can also soak them in a vinegar solution to disinfect.
Q: What tools do I need to assemble my jewelry tree?
A: Basic tools like a saw, drill, glue, and sandpaper will help you cut, shape, and finish your jewelry tree effectively.
Color and Finish Options
Choosing the right colors and finishes for your DIY jewelry tree can truly transform it from a simple accessory holder to a stunning piece of decor that reflects your personal style. Think of it as giving your jewelry tree a wardrobe makeover; just like you wouldn’t wear the same outfit every day, your jewelry tree deserves a splash of color and a touch of finesse to stand out. So, where do you start?
First, consider the overall theme of your room. Are you going for a bohemian vibe, a modern aesthetic, or perhaps a rustic charm? The colors you choose should harmonize with your existing decor. For instance, if your room is filled with earthy tones, a natural wood finish could seamlessly blend in, while a bold metallic paint might pop against a minimalist backdrop.
Here are some popular options to think about:
- Paint: A quick and easy way to add color. You can opt for bright, vibrant hues or soft pastels, depending on your mood. Spray paint offers a smooth finish and can be applied quickly, while acrylic paint allows for more detailed designs.
- Stains: If you prefer a more natural look, wood stains can enhance the grain of the wood and provide a rich, warm finish. Choose lighter stains for a fresh, airy feel or darker stains for a more dramatic effect.
- Metallic Finishes: Gold, silver, or copper finishes can add a touch of elegance and sophistication. These finishes work particularly well for more elaborate designs, making them look luxurious and eye-catching.
- Decoupage: If you're feeling extra creative, consider using decoupage techniques with decorative paper or fabric. This method allows you to mix and match patterns and colors, making your jewelry tree a true reflection of your personality.
When it comes to finishes, don’t forget about the protective coatings. A clear sealant can protect your paint or stain from scratches and wear, ensuring your jewelry tree remains as beautiful as the day you made it. Plus, it can give your tree a lovely sheen that adds depth to your design.
Ultimately, the color and finish choices are all about personal expression. Take your time to experiment with different combinations until you find the perfect match that resonates with you. It’s like painting a canvas; the more you play with colors, the more unique and stunning your final piece will be!
Q: What type of paint works best for a jewelry tree?
A: Acrylic paint is a great choice as it dries quickly and comes in a wide range of colors. If you prefer a smoother finish, spray paint is also an excellent option.
Q: How do I protect the finish on my jewelry tree?
A: Applying a clear sealant after your paint or stain has dried will help protect it from scratches and wear, keeping it looking fresh for longer.
Q: Can I use fabric to decorate my jewelry tree?
A: Absolutely! Decoupage with fabric can give your jewelry tree a unique look. Just ensure you use a suitable adhesive and seal it with a protective coat.

Elaborate Designs
When it comes to creating a jewelry tree that truly stands out, elaborate designs are where the magic happens. These intricate pieces not only serve a functional purpose but also act as stunning decorative elements in your room. Imagine a jewelry tree that resembles a whimsical tree, complete with delicate branches and artistic flair, inviting admiration from anyone who enters your space. The beauty of elaborate designs lies in their ability to showcase your creativity while providing ample storage for your beloved accessories.
One popular approach to elaborate designs is to incorporate multiple tiers or levels into your jewelry tree. This can be achieved by using a combination of materials such as metal, wood, or even ceramic. Each tier can be adorned with various hooks and holders, allowing you to display necklaces, bracelets, and earrings in an organized yet visually appealing manner. Consider using an asymmetrical layout to add a modern twist, giving your jewelry tree a unique character that reflects your personal style.
Another exciting option for elaborate designs is to integrate decorative elements such as beads, crystals, or even fairy lights. These embellishments can transform a simple jewelry tree into a dazzling centerpiece. For example, wrapping LED fairy lights around the branches can create a magical glow, perfect for adding a cozy ambiance to your room in the evenings. You might also consider hanging small decorative charms or pendants from the branches, making your jewelry tree not just a storage solution but a captivating art piece.
When designing your elaborate jewelry tree, think about the overall theme of your room. Are you going for a bohemian vibe, a chic modern look, or perhaps something vintage? This theme will guide your choice of colors and materials. For a bohemian feel, consider using natural wood with colorful threads and beads, while a modern design might lean towards sleek metals with a monochromatic color scheme. Whatever your choice, ensure that the design complements your existing decor to create a cohesive look.
To help you visualize the possibilities, here’s a quick table summarizing some popular elaborate jewelry tree designs:
| Design Type | Materials Used | Style Features |
|---|---|---|
| Tiered Metal Tree | Metal, Wire | Multiple levels, sleek finish |
| Wooden Branch Display | Natural Wood, Twine | Rustic look, organic shapes |
| Crystal-Embellished Tree | Metal, Crystals | Glamorous sparkle, elegant design |
| LED Fairy Light Tree | Metal, Lights | Whimsical glow, enchanting atmosphere |
In conclusion, elaborate designs for your DIY jewelry tree can truly elevate the aesthetic of your space while providing a practical solution for organizing your jewelry. By combining creativity with functional design, you can create a stunning piece that reflects your personality and adds charm to your room. So grab your materials, let your imagination run wild, and start crafting a jewelry tree that is as unique as you are!

Assembly Instructions
Once you've gathered all your materials and selected the perfect design for your DIY jewelry tree, it's time to dive into the exciting assembly process! This is where your creativity truly comes to life. Start by laying out all your materials in a well-lit workspace, making sure everything is within reach. This will not only streamline your crafting but also keep the creative juices flowing. Remember, the goal is to create something that not only organizes your jewelry but also serves as a stunning piece of decor.
To begin, you’ll want to secure your base. If you’re using a wooden block or a sturdy piece of driftwood, ensure it’s stable enough to support the weight of your jewelry. If you’re opting for a more elaborate design, consider using a small flower pot filled with stones or sand for added stability. Once you have your base, it’s time to attach the branches or rods that will hold your jewelry. Using a strong adhesive or screws, carefully affix your chosen supports to the base. Make sure they’re evenly spaced to allow for an aesthetically pleasing arrangement of your accessories.
As you assemble, think about the height and positioning of each branch. You want your jewelry tree to be functional, allowing easy access to your favorite pieces without overcrowding. A good rule of thumb is to place longer branches lower and shorter ones higher, creating a cascading effect that draws the eye. This design not only looks great but also makes it easier to find what you’re looking for!
Once the main structure is in place, it’s time to add any decorative elements you’ve chosen. This could be anything from beads and ribbons to paint or stains. If you’re using natural materials, consider applying a clear sealant to protect the wood and enhance its natural beauty. For those who love a pop of color, painting the branches or adding colorful embellishments can really make your jewelry tree stand out. Just be sure to let everything dry completely before moving on to the next step!
Finally, once your tree is assembled and decorated, it’s time for the fun part—styling! Place your jewelry tree in a spot that showcases it beautifully, perhaps on your dresser or a shelf where it can catch the light. Arrange your jewelry in a way that highlights your favorites while keeping everything organized. Remember, this is not just a functional piece; it’s a reflection of your personal style!
While crafting your jewelry tree, it’s easy to make some common mistakes that can lead to frustration or a less-than-perfect result. Here are a few pitfalls to watch out for:
- Overcrowding: Avoid putting too many pieces on one branch, which can make it difficult to see and access your jewelry.
- Neglecting Stability: Ensure your base is sturdy enough to hold the weight of your jewelry to prevent tipping.
- Skipping Drying Times: Be patient and allow glue, paint, or sealants to dry completely before handling your tree.
By following these assembly instructions and keeping these common mistakes in mind, you’ll be well on your way to creating a stunning DIY jewelry tree that not only organizes your accessories but also adds a personal touch to your space.
Q: How long does it take to assemble a DIY jewelry tree?
A: The assembly process can take anywhere from 1 to 3 hours, depending on the complexity of your design and the materials used.
Q: Can I customize the size of my jewelry tree?
A: Absolutely! You can make your jewelry tree as tall or as short as you like, just be sure to maintain stability.
Q: What type of adhesive should I use?
A: A strong craft glue or wood glue works well for most materials. If you’re using heavier elements, consider using screws for added support.
Step-by-Step Guide
Creating your own DIY jewelry tree can be an exciting and rewarding experience! It’s not just about organizing your accessories; it’s about crafting a piece of art that reflects your personality and style. Let’s dive into the step-by-step process to bring your jewelry tree to life. First, make sure you have all your materials ready. You’ll need a sturdy base, branches or rods for hanging your jewelry, and your choice of decorative elements. Having everything at hand will make the process smoother and more enjoyable.
Begin by preparing your base. This could be a wooden block, a ceramic pot, or even a repurposed item like an old picture frame. The base is crucial as it provides stability to your jewelry tree. If you’re using wood, consider sanding it down to ensure a smooth finish. Once your base is ready, it’s time to attach your tree structure. If you’re using branches, arrange them in a way that they resemble a tree. You can use a hot glue gun for a secure hold, or if you’re feeling adventurous, drill holes into the base and insert the branches for a more permanent solution.
Next up, let’s talk about the height and spacing of your branches. This is where the magic happens! You want to ensure that there’s enough space between each branch to hang your jewelry without it getting tangled. Think of it like arranging a bouquet of flowers; you want each piece to stand out while still being part of a cohesive design. A good rule of thumb is to leave at least 4-6 inches between each branch. This allows for easy access to your accessories and keeps everything looking neat.
Once your structure is up, it’s time to add those finishing touches. This is where your creativity can really shine! You might want to paint or stain the branches to match your room decor. Consider using a metallic spray paint for a chic look, or go for a rustic stain if you prefer a more natural aesthetic. Don't forget to let everything dry thoroughly before moving on to the next step.
Now that your jewelry tree is taking shape, it’s time to style it! Hang your necklaces, earrings, and bracelets on the branches. You can use small hooks for earrings or simply drape necklaces over the branches. For a more organized approach, you might want to consider adding small bowls or trays at the base to hold loose items like rings or watches. This not only adds functionality but also enhances the overall design.
Finally, step back and admire your handiwork! Take a moment to appreciate the effort you’ve put into creating this beautiful piece. If you find that certain areas feel sparse, don’t hesitate to add more decorative elements. You could incorporate small plants, fairy lights, or even photos to personalize your jewelry tree further.
In summary, making a DIY jewelry tree is a straightforward process that involves selecting the right materials, assembling them thoughtfully, and styling them to reflect your unique taste. Remember, crafting is all about having fun and expressing yourself, so let your creativity flow!
Q: What materials do I need to make a jewelry tree?
A: You’ll need a base (like wood or ceramic), branches or rods, glue, paint or stain, and decorative elements like hooks or trays.
Q: How can I ensure my jewelry tree is stable?
A: Choose a sturdy base and make sure to securely attach your branches. Drilling holes for the branches can provide extra stability.
Q: Can I customize my jewelry tree?
A: Absolutely! You can paint it, add decorative elements, or even incorporate lights to make it uniquely yours.
Q: What’s the best way to hang my jewelry?
A: Use hooks for earrings and drape necklaces over branches. Small bowls at the base can hold rings and other loose items.
Common Mistakes to Avoid
When embarking on your journey to create a stunning DIY jewelry tree, it’s easy to get caught up in the excitement and overlook some crucial details. Avoiding common mistakes can save you not just time but also the frustration of having to redo parts of your project. One of the most frequent pitfalls is not measuring your materials accurately. Imagine starting with a beautiful piece of wood, only to realize it’s too short or too wide for your intended design. Always have a measuring tape handy and double-check your dimensions before cutting or assembling.
Another common misstep is underestimating the stability of your jewelry tree. If your base isn’t sturdy enough, your entire creation could topple over, sending your precious accessories crashing to the floor. To prevent this, consider using a heavier base material like a solid piece of wood or a decorative stone. Additionally, make sure to balance the weight of your jewelry evenly across the branches. It’s akin to balancing a seesaw; if one side is too heavy, it will tip over, leading to chaos.
Furthermore, don’t neglect the finishing touches! Many DIYers rush through the painting or staining process, thinking it’s just a quick step. However, the finish can dramatically affect the overall look of your jewelry tree. Skipping this step or applying it hastily can lead to uneven colors and a less polished appearance. Take your time to choose the right paint or stain and apply it evenly for a professional finish.
Lastly, while it’s tempting to cram as much jewelry as possible onto your tree, overcrowding can detract from its aesthetic appeal. Instead, think of your jewelry tree as a gallery; each piece deserves its spotlight. Organize your accessories in a way that allows each item to shine, creating a visually pleasing display that’s easy to navigate. Remember, less is often more!
By being mindful of these common mistakes, you can ensure that your DIY jewelry tree not only looks fabulous but also functions effectively. Happy crafting!
As you embark on your DIY jewelry tree project, you might have a few questions swirling in your mind. Here are some frequently asked questions to help you along the way:
- What materials are best for a jewelry tree? - The best materials often include wood, metal, or branches. Consider your room's decor when selecting the material.
- How can I ensure my jewelry tree is stable? - Use a heavy base and distribute weight evenly across the branches to prevent tipping.
- Can I customize my jewelry tree? - Absolutely! Painting, staining, or adding decorative elements can make your jewelry tree uniquely yours.
- What type of jewelry works best with a jewelry tree? - Jewelry trees are great for hanging earrings, necklaces, and bracelets. Just ensure the branches are appropriately spaced!
Styling Your Jewelry Tree
Now that you've crafted your stunning DIY jewelry tree, it’s time to give it some personality! Styling your jewelry tree is not just about hanging your accessories; it’s about creating a visual masterpiece that reflects your unique style and enhances your room's decor. Think of your jewelry tree as a canvas, where each piece of jewelry is a brushstroke, contributing to the overall picture. So, how do you transform this functional piece into a stunning display? Let’s dive into some creative styling tips!
First, consider the color scheme of your room. Does your space embrace a minimalist vibe with neutral tones, or is it bursting with vibrant colors? Aligning your jewelry tree's styling with your room's color palette can create a harmonious look. For instance, if your room features soft pastels, consider using jewelry with similar tones to create a cohesive aesthetic. On the other hand, if you love bold colors, don’t shy away from showcasing vibrant pieces that pop against a neutral tree.
Next, think about the arrangement of your jewelry. You can use a layering technique to create depth and interest. Place shorter necklaces at the front and longer ones at the back, allowing each piece to be visible and easy to access. Additionally, consider grouping similar items together. For example, you might cluster all your earrings on one side and your bracelets on another, which not only organizes your accessories but also creates a visually appealing display.
When it comes to styling, texture plays a vital role. Mixing materials can add a layer of intrigue to your jewelry tree. For instance, pairing wooden elements with metal or glass accessories can create a striking contrast. You might also want to incorporate decorative elements such as small plants, fairy lights, or even framed photos around your jewelry tree. This not only enhances the overall look but also personalizes it even further.
Don’t forget about the lighting! A well-lit jewelry tree can make your accessories shine even brighter. Consider placing your tree near a window or under a soft lamp to highlight your jewelry's brilliance. If you’re feeling adventurous, adding fairy lights around the base or weaving them through the branches can create a magical glow, especially in the evening.
Finally, keep in mind that styling is an ongoing process. As your collection grows or your taste evolves, don’t hesitate to rearrange your jewelry tree. It’s like a living piece of art that can change with you! Regularly updating your display not only keeps it fresh but also gives you a chance to rediscover pieces you might have forgotten about.
Q: How do I keep my jewelry organized on the tree?
A: Organize your jewelry by type or color. Use hooks for necklaces, small trays for rings, and designated spots for earrings to keep everything neat.
Q: Can I use artificial plants for styling?
A: Absolutely! Artificial plants can add a touch of greenery without the maintenance of real plants, making them a great addition to your jewelry tree.
Q: How often should I change the arrangement of my jewelry?
A: There’s no set rule! Change it whenever you feel like it, especially when you acquire new pieces or when your decor changes.
Frequently Asked Questions
- What materials do I need to make a DIY jewelry tree?
To create your DIY jewelry tree, you'll need a sturdy base, branches or dowels, paint or stain for finishing, and decorative elements like beads or ribbons. Don't forget tools like scissors, glue, and a drill if necessary!
- Can I customize the design of my jewelry tree?
Absolutely! Your jewelry tree can be as unique as you are. Whether you prefer a minimalist look or something more elaborate, you can choose the shape, colors, and materials that reflect your personal style.
- How do I assemble the jewelry tree?
Start by securing your base, then attach the branches or dowels at varying heights for an eye-catching effect. Follow the step-by-step guide provided in the article to ensure you don’t miss any important steps!
- What are some common mistakes to avoid when making a jewelry tree?
Some common pitfalls include using too weak a base, not securing the branches properly, and overcrowding your display with too many accessories. Take your time and plan your design carefully to avoid these issues!
- How can I style my jewelry tree for maximum impact?
To style your jewelry tree effectively, arrange your pieces by size, color, or type. Use decorative elements like flowers or fairy lights to enhance its visual appeal and make it a focal point in your room.
- Is it difficult to make a DIY jewelry tree?
Not at all! With the right materials and instructions, making a DIY jewelry tree can be a fun and rewarding project. Just take your time and enjoy the creative process!


