
Upgrade Your Home with DIY Lighting Projects
Are you ready to transform your living space into a cozy haven with just a little creativity and effort? DIY lighting projects are the perfect way to enhance the ambiance of your home while showcasing your personal style. Imagine walking into a room where the lights not only illuminate but also tell a story, creating an atmosphere that resonates with your mood. Whether you’re looking to create a warm, inviting glow for your living room or a bright, functional workspace in your home office, the possibilities are endless!
In this article, we’ll explore a variety of DIY lighting projects that can help you achieve that perfect balance of style and functionality. From understanding the different types of lighting to selecting the right fixtures, we’ll guide you through each step of the process. You’ll discover that with a few simple tools and a dash of imagination, you can turn ordinary spaces into extraordinary ones.
But before we dive into the nitty-gritty of DIY lighting, let’s take a moment to understand the importance of lighting in our homes. Lighting isn’t just about visibility; it’s about setting the mood. Think of it as the cherry on top of your home decor. Just like a beautifully arranged table is elevated by the right centerpiece, the right lighting can enhance the overall aesthetic of your space. So, whether you're a seasoned DIY enthusiast or a curious beginner, let’s embark on this illuminating journey together!

Understanding Different Lighting Types
When it comes to lighting your home, understanding the different types of lighting is crucial. Think of it like cooking a delicious meal; each ingredient plays a vital role in creating the perfect dish. In lighting, there are three primary types: ambient, task, and accent. Each type serves a unique purpose and contributes to the overall ambiance of your space.
Ambient lighting is your home's primary source of light. It sets the mood for a room and provides a comfortable level of brightness without causing glare. Imagine walking into a cozy living room filled with soft, warm light that invites you to relax. This type of lighting can come from ceiling fixtures, chandeliers, or even natural light streaming through windows. To achieve the right balance, consider the size of the room and the color of the walls, as these factors can significantly influence how ambient light is perceived.
Next up is task lighting. Just as a spotlight highlights a performer on stage, task lighting focuses on specific areas to help you accomplish particular activities. Whether you're reading a book, cooking dinner, or working on a craft project, having adequate task lighting is essential. Desk lamps, under-cabinet lights in the kitchen, and adjustable floor lamps are all excellent examples. The key here is to ensure that the light is directed where you need it most, enhancing functionality without overwhelming the space.
Last but not least, we have accent lighting. This type is all about creating drama and highlighting specific features in your home, much like how a painter uses color to draw attention to certain areas of a canvas. Accent lighting can be used to showcase artwork, architectural details, or even plants. Wall sconces, spotlights, and LED strips are popular choices for accent lighting. To make the most of accent lighting, aim for a contrast between the accent light and the ambient light, which will create a stunning visual effect.
Now that we've covered the basics, let’s take a quick look at how these lighting types can be combined to create a harmonious environment:
| Lighting Type | Purpose | Examples |
|---|---|---|
| Ambient | General illumination | Ceiling fixtures, chandeliers |
| Task | Focused light for specific activities | Desk lamps, under-cabinet lights |
| Accent | Highlighting features | Wall sconces, spotlights |
Understanding these different lighting types is like having a toolbox filled with various tools; each serves a specific purpose and can be combined to create a masterpiece in your home. As you embark on your DIY lighting projects, keep these categories in mind to achieve the best results. You'll be amazed at how the right lighting can transform your living space into a warm, inviting haven.
- What is the best type of lighting for a small room? Ambient lighting is ideal for small rooms, as it creates an open and airy feel. Consider using wall sconces or ceiling fixtures that don’t take up much space.
- How can I make my task lighting more effective? Ensure that your task lighting is adjustable and directed at the area where you need light. This will help reduce eye strain and improve your focus.
- Can I mix different types of lighting? Absolutely! Mixing ambient, task, and accent lighting can create a layered effect that enhances the overall atmosphere of your home.
Essential Tools for DIY Lighting
When embarking on your DIY lighting journey, having the right tools is not just a luxury; it's a necessity. Imagine trying to bake a cake without a mixer or measuring cups—it just wouldn't turn out the same, right? Similarly, the right tools can make or break your lighting project. Whether you’re installing a chic pendant light or creating a cozy corner with string lights, the following tools are essential.
First and foremost, you’ll need a reliable multimeter. This handy device helps you measure voltage, current, and resistance, ensuring that your electrical connections are safe and functional. Think of it as your trusty sidekick, guiding you through the electrical jungle. Next on the list is a screwdriver set. A good set with both flathead and Phillips screwdrivers will help you tackle any fixture installation with ease. It’s like having a Swiss Army knife for your lighting projects!
Additionally, a wire stripper is crucial for preparing your electrical wires. It allows you to remove insulation without damaging the wire itself, ensuring a clean connection. You wouldn’t want to serve a gourmet meal on a dirty plate, right? The same goes for your wiring connections! For those who are more adventurous, consider investing in a drill with various drill bits. This will help you create holes for mounting fixtures, making installation a breeze. Just remember, a well-drilled hole is like a well-placed nail in a painting—it can elevate the entire aesthetic!
To keep everything organized, a toolbox is indispensable. It’s your personal workshop on the go, keeping all your tools in one place. You’ll also want a good quality ladder for those hard-to-reach areas. Safety is key, so make sure it’s sturdy and reliable. Lastly, don’t forget about protective gear such as gloves and safety goggles. They’re your armor against any unexpected mishaps, ensuring that your DIY adventure remains enjoyable and safe.
Here’s a quick reference table of the essential tools:
| Tool | Purpose |
|---|---|
| Multimeter | Measures voltage, current, and resistance |
| Screwdriver Set | For installing and securing fixtures |
| Wire Stripper | Prepares electrical wires for connections |
| Drill | Creates holes for mounting |
| Toolbox | Organizes all your tools |
| Ladder | Reaches high areas safely |
| Protective Gear | Ensures safety during projects |
In summary, having these essential tools at your disposal will not only streamline your DIY lighting projects but also enhance your overall experience. You’ll feel more confident tackling any challenge that comes your way. So, gear up and get ready to illuminate your space like a pro!
Q: What is the most important tool for DIY lighting?
A: While all tools are essential, a multimeter is particularly crucial for ensuring electrical safety and functionality.
Q: Can I use regular household tools for DIY lighting?
A: Yes, many household tools can be used, but having specialized tools like wire strippers and a multimeter will make the process easier and safer.
Q: How do I ensure my safety while working on DIY lighting?
A: Always turn off the power before starting any electrical work, use insulated tools, and wear protective gear like gloves and goggles.

Safety Precautions to Consider
When diving into the world of DIY lighting projects, safety should always be your top priority. Electricity can be a powerful ally in creating the perfect ambiance for your home, but it can also be dangerous if not handled with care. Before you even think about picking up a tool, it's crucial to understand the essential safety precautions that can keep you out of harm's way. First and foremost, **always turn off the power** at the circuit breaker before starting any electrical work. This simple step can prevent shocks and accidents that could lead to serious injuries.
In addition to shutting off the power, using **insulated tools** is a must. These tools are designed to protect you from electrical currents and can significantly reduce the risk of electrocution. Think of them as your protective armor in the battle against electrical hazards. It's also wise to wear **appropriate protective gear**, such as gloves and safety goggles, to shield yourself from any debris or unexpected sparks that may fly your way during installation.
Another important aspect of safety is to ensure that your workspace is well-lit and clutter-free. A tidy environment allows you to focus on the task at hand without the distraction of tripping over tools or materials. When working with fixtures, always double-check that they are compatible with the wattage of the bulbs you plan to use. Overloading a fixture can lead to overheating and potential fire hazards, so it's better to be safe than sorry!
While working, it's also a good idea to have a **first aid kit** nearby, just in case of any minor accidents. You never know when a small cut or scrape might occur, and having a kit on hand can make all the difference. Lastly, if you're ever in doubt about a particular electrical task, don't hesitate to consult with a professional electrician. It's always better to seek help than to risk your safety or the integrity of your home.
In summary, keeping safety at the forefront of your DIY lighting projects involves:
- Turning off the power before starting any work
- Using insulated tools to protect against electric shocks
- Wearing protective gear like gloves and goggles
- Ensuring your workspace is well-lit and organized
- Having a first aid kit readily available
- Consulting a professional when in doubt
By adhering to these safety precautions, you can confidently embark on your DIY lighting projects, knowing that you’re taking the necessary steps to protect yourself and your home.
Q: What should I do if I accidentally cut a wire?
A: If you cut a wire, first ensure that the power is turned off. Then, assess the situation. If it's a simple cut, you may be able to splice the wire back together using wire connectors. However, if you're unsure, it's best to consult a professional electrician.
Q: How can I tell if a light fixture is safe to use?
A: Check the manufacturer's specifications for the fixture, including the maximum wattage it can handle. Ensure that it is in good condition, free from cracks or damage, and that all connections are secure.
Q: Is it safe to use extension cords for lighting projects?
A: While extension cords can be convenient, they should only be used temporarily. Ensure that the cord is rated for the wattage of the lights you're using and avoid overloading it.

Choosing the Right Fixtures
When it comes to enhancing your home’s lighting, choosing the right fixtures is like picking the perfect outfit for a special occasion—it sets the tone and can make all the difference. You wouldn’t wear just anything to a wedding, right? Similarly, the lighting fixtures you select should complement your home’s overall decor and serve their intended purpose effectively. There are a plethora of options available, ranging from sleek modern designs to rustic vintage styles, and understanding what each offers can help you make an informed decision.
First, consider the style of your home. Are you leaning towards a contemporary vibe, or does your space embrace classic charm? For a modern home, you might want to explore fixtures with clean lines and minimalist designs. On the other hand, if your decor is more traditional, ornate chandeliers or vintage sconces could be the perfect fit. The key is to ensure that your lighting fixtures not only provide adequate illumination but also enhance the aesthetic appeal of your space.
Next, think about the functionality of the fixtures. Are you looking to create a cozy atmosphere in your living room, or do you need bright task lighting for your kitchen? Different areas of your home will require different types of lighting. For instance, pendant lights can work wonders over a dining table, providing both style and function, while recessed lighting can offer a clean and unobtrusive look in a hallway or kitchen. It’s all about finding that balance between beauty and practicality.
Moreover, consider the size of the fixtures in relation to the space they will inhabit. A large chandelier can become a stunning focal point in a grand entryway, but in a small room, it could overwhelm the space. To help visualize the right size, you can use a simple formula: add the room’s dimensions (in feet) together, and convert that sum to inches. For example, if your room is 10 feet by 12 feet, you would want a fixture that is approximately 22 inches wide. This little trick can save you from making costly mistakes.
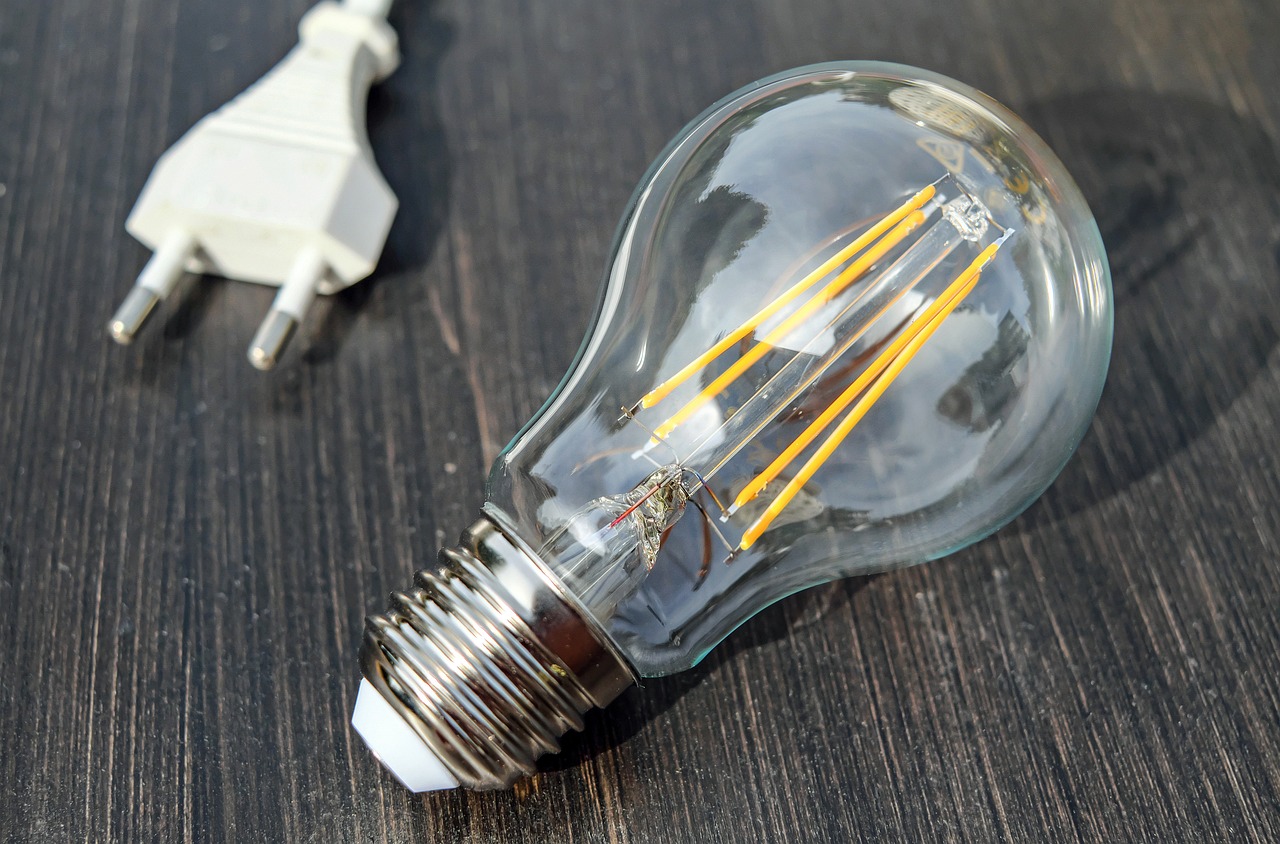
Lastly, don’t forget about the light bulbs themselves. The type of bulb you choose can significantly affect the ambiance of your room. LED bulbs are energy-efficient and long-lasting, while incandescent bulbs provide a warm glow that many people find inviting. Consider using dimmable bulbs to give you flexibility in adjusting the light based on your mood or the time of day. With the right bulb, your fixtures will not only shine but will also create the perfect atmosphere.
In summary, choosing the right fixtures is a blend of style, functionality, size, and light quality. By taking the time to assess your home’s needs and your personal taste, you can create a lighting scheme that not only illuminates your space but also adds character and warmth. Remember, lighting is more than just a necessity; it’s an opportunity to express your personal style and enhance the beauty of your home.
Q: How do I determine the best type of lighting for my space?
A: Consider the purpose of the room and the mood you want to create. Use a combination of ambient, task, and accent lighting for a well-rounded approach.
Q: Are there specific styles of fixtures that work best in certain rooms?
A: Yes, for example, pendant lights are great for kitchens and dining areas, while floor lamps can add warmth to living rooms and bedrooms.
Q: How can I make sure my lighting fixtures are safe?
A: Always follow the manufacturer's instructions for installation, use the correct wattage for bulbs, and ensure fixtures are properly grounded.

DIY Lighting Design Ideas
When it comes to transforming your home with DIY lighting projects, the possibilities are truly endless! Imagine stepping into a room that radiates warmth and style, all thanks to your creative flair. Whether you're looking to create a cozy nook or an eye-catching centerpiece, designing your own lighting can be both fulfilling and fun. Here are some innovative ideas to get your creative juices flowing!
One fantastic approach is to repurpose old items. For example, an old ladder can be transformed into a stunning chandelier. Simply hang lightbulbs from the rungs, and you have a rustic, bohemian lighting fixture that not only illuminates but also serves as a conversation starter. This method not only saves money but also adds a unique touch to your décor.
If you're a fan of the industrial style, consider creating your own pendant lights using metal piping. These fixtures can be customized in size and shape, allowing you to fit them perfectly into your space. Imagine a row of these hanging over your kitchen island, casting a warm glow while adding an edgy vibe to the room.
For those who love a bit of whimsy, try crafting light-up wall art. You can use fairy lights to outline shapes or words on a canvas or directly on the wall. This not only serves as a decorative piece but also provides soft lighting that can create a relaxing atmosphere in your home.
Another exciting idea is to use mason jars as light fixtures. Fill them with string lights or small LED bulbs, and hang them at varying heights for a charming, eclectic look. This is perfect for outdoor spaces or cozy corners where you want to add a little magic.
Don’t forget about the power of color. You can easily transform plain lampshades by painting them or covering them with colorful fabric. This simple upgrade can completely change the ambiance of a room, making it feel more vibrant and inviting.
Lastly, consider incorporating smart lighting into your DIY projects. With the right tech, you can control the brightness and color of your lights from your smartphone, allowing you to tailor the mood of your space at any time. Imagine hosting a dinner party and being able to set the perfect lighting with just a tap on your phone!
Remember, the key to successful DIY lighting design is to let your personality shine through. Don't be afraid to experiment with different materials, styles, and techniques. The more you play around, the more unique and personal your lighting solutions will become!
Q: What are some easy DIY lighting projects for beginners?
A: Some beginner-friendly projects include creating mason jar lights, repurposing old lampshades, and stringing fairy lights in creative ways. These projects require minimal tools and materials, making them perfect for those just starting out.
Q: How can I ensure my DIY lighting is safe?
A: Always follow safety precautions, such as turning off power before starting any electrical work, using insulated tools, and checking for any frayed wires. If you're unsure about electrical connections, consider consulting a professional.
Q: Can I use LED bulbs in my DIY projects?
A: Absolutely! LED bulbs are energy-efficient and come in various shapes and colors. They are a great choice for DIY projects as they produce less heat and have a longer lifespan compared to traditional bulbs.

Step-by-Step Installation Guides
When it comes to DIY lighting projects, having a clear and concise installation guide can make all the difference between a successful transformation and a frustrating experience. Whether you're a seasoned DIY enthusiast or a complete novice, following these step-by-step instructions will help you illuminate your space with confidence. Let’s dive into some popular DIY lighting projects and how to install them safely and effectively.
First up, let's talk about installing a pendant light fixture. This project can add a touch of elegance to your dining area or kitchen. Here’s a simple guide to get you started:
- Gather Your Materials: Ensure you have the necessary tools and materials, including the pendant light fixture, a ladder, screwdrivers, wire connectors, and a voltage tester.
- Turn Off the Power: Safety first! Switch off the circuit breaker that controls the area where you'll be working.
- Remove the Old Fixture: Carefully remove the existing light fixture by unscrewing it from the ceiling and disconnecting the wires.
- Install the Mounting Bracket: Attach the new mounting bracket that comes with your pendant light to the ceiling box.
- Connect the Wires: Match the wires from the fixture to the wires in the ceiling—typically black to black (hot), white to white (neutral), and green or copper to ground. Use wire connectors to secure them.
- Attach the Pendant Light: Hang the pendant light according to the manufacturer’s instructions, ensuring it's securely fastened.
- Restore Power: Once everything is in place, turn the power back on and test your new light fixture.
Next, let’s look at how to create a DIY wall sconce. This project is perfect for adding ambiance to hallways or reading nooks. Here’s how to do it:
- Choose Your Location: Decide where you want to install the sconce and mark the spot on the wall.
- Prepare Your Materials: Gather your sconce kit, a drill, screws, and a level.
- Drill Holes: Use a drill to create holes for the mounting bracket, ensuring they are level for a professional look.
- Attach the Sconce: Secure the mounting bracket to the wall with screws, then attach the sconce to the bracket.
- Connect the Wiring: Similar to the pendant light, connect the sconce wires to the existing wiring in the wall, following safety protocols.
- Finish Up: Install the light bulb and any decorative covers, then turn on the power to test your new wall sconce.
Finally, for those who love a bit of creativity, let’s explore creating a string light installation. This project can be a fun way to add charm to outdoor spaces or cozy corners inside your home. Here’s a simple approach:
- Pick Your String Lights: Choose a style of string lights that fits your aesthetic—whether it’s fairy lights or more industrial-looking bulbs.
- Plan Your Layout: Decide where you want to hang them, and use clips or nails to mark the spots on the wall or ceiling.
- Install Hooks or Clips: Securely attach hooks or clips to hold the string lights in place.
- Hang the Lights: Carefully drape the string lights along the planned route, ensuring they are evenly spaced.
- Plug Them In: Finally, connect the lights to an outlet, and enjoy the magical glow they provide!
By following these step-by-step installation guides, you’ll not only enhance your home’s lighting but also gain confidence in your DIY skills. Remember, the key to a successful project is taking your time and ensuring safety at every step. Happy DIYing!
Q: Do I need any special tools for my DIY lighting projects?
A: Most projects require basic tools like screwdrivers, pliers, and a drill. However, for more complex installations, you may need specialized tools.
Q: How do I know if my electrical system can handle new lighting?
A: If you're unsure, it's best to consult with a licensed electrician to assess your current wiring and capacity.
Q: Can I install lighting fixtures without prior experience?
A: Yes, many DIY lighting projects are designed for beginners. Just be sure to follow safety precautions and installation guides.
Q: What if I encounter issues during installation?
A: If you run into problems, don't hesitate to seek advice from online forums or consult a professional electrician.

Budget-Friendly Lighting Solutions
Upgrading your home's lighting doesn't have to drain your wallet. In fact, with a little creativity and some smart choices, you can achieve stunning results without spending a fortune. The key is to explore that not only enhance the ambiance of your space but also reflect your personal style. Imagine transforming a dull room into a cozy haven with just a few clever adjustments!
One of the best ways to save money is to consider repurposing old items. Have an old lamp sitting in the attic? Instead of tossing it, why not give it a fresh coat of paint and a new shade? This simple project can breathe new life into a forgotten piece and add a unique touch to your decor. Additionally, thrift stores and flea markets can be treasure troves for finding inexpensive lighting fixtures that just need a little TLC.
Another effective approach is to utilize energy-efficient bulbs. While the initial cost may be slightly higher than traditional bulbs, they save you money in the long run through reduced energy bills. Plus, many of these bulbs come in various styles and brightness levels, allowing you to create the perfect atmosphere for any occasion. Consider using LED bulbs, which not only last longer but also offer a range of color temperatures to suit your mood.
When it comes to DIY projects, think about creating your own light fixtures. For instance, you can use materials like mason jars, wood, or even wire to craft unique pendant lights or sconces. These projects can be both fun and fulfilling, and they allow you to customize your lighting to fit your home's aesthetic. A quick search online for DIY lighting ideas can yield a plethora of inspiration, from rustic to modern designs.
If you're looking for a quick and affordable upgrade, consider string lights. These versatile lights can be draped over furniture, hung on walls, or used to create a cozy outdoor space. Not only do they provide soft, ambient lighting, but they also add a whimsical touch to your decor. Plus, they're incredibly easy to install and can be found at various price points to fit any budget.
Lastly, don't overlook the power of natural light. Enhancing your windows with sheer curtains can allow more sunlight to flood your rooms, creating a bright and airy atmosphere. By strategically placing mirrors, you can also reflect light and make your space feel larger and more inviting. These simple adjustments can significantly improve your home's lighting without any cost at all!
In summary, achieving beautiful lighting on a budget is entirely possible with a bit of creativity and resourcefulness. By repurposing items, choosing energy-efficient options, and exploring DIY projects, you can elevate your home’s aesthetic without breaking the bank. So, roll up your sleeves, get inspired, and let your imagination guide you to a brighter, more inviting living space!

Incorporating Smart Lighting
In today's fast-paced world, smart lighting is more than just a trend; it's a game-changer for how we illuminate our homes. Imagine walking into a room and having the lights adjust automatically to your preferred brightness, or being able to control your lighting from your smartphone while lounging on the couch. Sounds like magic, right? Well, it’s all possible with smart lighting technology! By integrating smart lighting into your DIY projects, you can not only enhance the ambiance of your living space but also add a layer of convenience that traditional lighting simply can't match.
So, how do you get started with smart lighting? First, you'll want to choose the right smart bulbs that fit your existing fixtures. Most smart bulbs are designed to replace standard incandescent or LED bulbs, making the transition seamless. Brands like Philips Hue, LIFX, and Wyze offer a variety of options that can be controlled via a smartphone app or voice commands through smart assistants like Amazon Alexa or Google Assistant. It's like having a personal lighting assistant at your beck and call!
Next, consider the network your smart lighting will connect to. Most smart lighting systems rely on Wi-Fi or Bluetooth. If you opt for Wi-Fi-based bulbs, ensure your home network is robust enough to handle multiple devices without lag. For those who prefer a more integrated approach, a smart hub can connect various smart devices in your home, allowing for centralized control. This means you can set up routines such as having the lights dim automatically when it's movie time or brighten up when it's time to wake up in the morning.
When it comes to installation, smart lighting is typically straightforward. Simply replace your existing bulbs with smart ones, download the corresponding app, and follow the setup instructions. However, if you're feeling adventurous and want to take it a step further, consider installing smart switches. These can control multiple lights at once and can be a stylish addition to your decor. Just remember, if you're working with electrical components, always prioritize safety—turn off the power and consult a professional if needed.
Moreover, the flexibility of smart lighting extends beyond just control. You can customize your lighting to suit different moods or activities. For example, you might want bright, energizing light for your home office during the day and soft, warm light for your living room in the evening. With smart lighting, you can create scenes that cater to your lifestyle. Some systems even allow you to change the color of the lights, adding a splash of creativity to your space. Think of it as painting with light!
Incorporating smart lighting into your home can also lead to energy savings. Many smart bulbs are designed to be more energy-efficient than traditional bulbs, helping you reduce your electricity bill. Plus, with the ability to schedule when lights turn on and off, you can ensure that you're not wasting energy when you're not home. It's a win-win situation!
In conclusion, smart lighting is a fantastic way to enhance your DIY lighting projects. It offers convenience, customization, and energy efficiency, transforming your home into a modern sanctuary. So why not dive into the world of smart lighting? With a little creativity and the right tools, you can elevate your living space to new heights.
- What are smart bulbs? Smart bulbs are LED bulbs that can be controlled remotely via a smartphone app or smart home system, allowing for customization of brightness and color.
- Do I need a smart hub for smart lighting? While a smart hub can enhance connectivity and control, many smart bulbs can operate independently via Wi-Fi or Bluetooth.
- Can I use smart lighting with existing fixtures? Yes! Most smart bulbs are designed to fit standard light fixtures, making them easy to integrate into your current setup.
- How do I ensure my smart lighting is secure? Always update your smart devices with the latest firmware and use strong, unique passwords for your Wi-Fi network and smart home apps.

Maintaining Your DIY Lighting
Once you've put in the effort to create stunning DIY lighting projects, it's essential to keep them in top shape. Just like a car needs regular maintenance to run smoothly, your lighting fixtures require some TLC to ensure they continue to shine brightly and efficiently. Regular maintenance not only enhances the longevity of your fixtures but also keeps your home looking its best. So, what should you focus on?
First and foremost, cleaning is key. Dust and grime can accumulate on light fixtures, dulling their brightness and affecting the overall ambiance of your space. Depending on the material of your fixtures, you can use a simple solution of warm water and mild soap to gently wipe them down. For glass or crystal fixtures, a glass cleaner can help restore that pristine sparkle. Don't forget to turn off the power before cleaning to avoid any accidents!
Next, keep an eye on the bulbs. It's a good idea to check them periodically to ensure they’re functioning properly. If you notice any flickering or dimming, it may be time to replace the bulb. Remember that different types of bulbs have varying lifespans, so be aware of what you have installed. For example:
| Type of Bulb | Average Lifespan | Energy Efficiency |
|---|---|---|
| Incandescent | 1,000 hours | Low |
| CFL | 10,000 hours | Medium |
| LED | 25,000+ hours | High |
Additionally, if your DIY project involves any wiring, it's crucial to troubleshoot any issues that arise. Look out for signs like flickering lights or a buzzing sound, which may indicate a loose connection or a more significant electrical problem. If you're not comfortable handling electrical components, it's always best to consult a professional. Safety should never be compromised!
Finally, consider the aesthetic aspect of your lighting. Over time, you might find that your style evolves or that certain fixtures don't fit as well with your decor as they once did. Don’t hesitate to give your lighting a refresh! Simple updates, like changing the bulbs to a warmer tone or swapping out shades, can make a world of difference without requiring a complete overhaul.
In summary, maintaining your DIY lighting is about regular cleaning, checking bulbs, troubleshooting electrical issues, and keeping your decor in sync with your lighting choices. By following these tips, you can ensure that your hard work continues to pay off, creating a warm and inviting atmosphere in your home for years to come.
- How often should I clean my light fixtures? It’s recommended to clean them at least once every few months, or more frequently if they are in a dusty area.
- What should I do if a bulb burns out? Simply replace it with a new one, but make sure to turn off the power before doing so!
- How can I tell if my electrical wiring is safe? If you notice any flickering lights or unusual sounds, consult a professional electrician to evaluate your wiring.
Frequently Asked Questions
- What types of lighting should I consider for my DIY projects?
When diving into DIY lighting, it's essential to understand the three main types: ambient, task, and accent lighting. Ambient lighting provides overall illumination, task lighting focuses on specific areas for activities like reading or cooking, and accent lighting highlights particular features in your home, such as artwork or architectural details. By mixing these types, you can create a balanced and inviting atmosphere.
- What tools do I need for DIY lighting projects?
Before you start, gather some essential tools to ensure a smooth process. You'll typically need basic hand tools like screwdrivers, pliers, and wire strippers, along with a drill for mounting fixtures. Depending on your project, you might also require specialized tools like a voltage tester or a soldering iron. Having the right tools on hand will make your DIY adventure much more enjoyable!
- How can I ensure safety while working with electrical components?
Safety should always be your top priority! First and foremost, turn off the power at the circuit breaker before starting any work. Use insulated tools to prevent shocks and wear appropriate protective gear, such as gloves and goggles. Always double-check your connections and follow the manufacturer's instructions for any fixtures or equipment you use. Remember, a little caution goes a long way in keeping you safe!
- What factors should I consider when choosing light fixtures?
Choosing the right fixtures can make or break your lighting design! Consider factors like the style and material of the fixtures to ensure they complement your home’s decor. Additionally, think about the brightness and energy efficiency of the bulbs you'll use. Finally, don’t forget about the scale of the fixtures—make sure they fit well within your space without overwhelming it.
- Can you suggest some budget-friendly DIY lighting ideas?
Absolutely! There are plenty of ways to create stunning lighting on a budget. Consider repurposing old items like jars or bottles into unique pendant lights. You can also use inexpensive materials like wood or metal to craft your own fixtures. Don't forget about paint—upcycling old lamps with a fresh coat can completely transform their look without costing a fortune!
- How can I incorporate smart lighting into my DIY projects?
Smart lighting can add a whole new level of convenience to your home. Look for smart bulbs that can easily replace traditional ones and connect to your Wi-Fi. You can control these bulbs via smartphone apps or voice assistants, allowing you to change colors, dim lights, or set schedules effortlessly. Integrating smart technology into your DIY projects not only enhances functionality but also modernizes your space!
- What maintenance is required for DIY lighting?
Once your DIY lighting is installed, regular maintenance is key to keeping everything looking and working great. Make it a habit to clean your fixtures periodically to remove dust and grime. If you notice any flickering or dimming, check your connections and replace any burnt-out bulbs promptly. Keeping an eye on your lighting will ensure it remains a beautiful and functional part of your home.


