DIY Stenciled Tile Projects for Your Home Decor
Are you looking to add a personal touch to your home decor? Well, look no further! Stenciled tiles can transform your living space into a unique masterpiece. Whether you want to spruce up your kitchen backsplash, create a stunning entryway, or even revamp your bathroom, stenciled tiles are a versatile and creative solution. The beauty of this DIY project lies in its simplicity and the endless possibilities it offers. Imagine walking into a room that reflects your personality, with vibrant colors and intricate designs that make a statement. Sounds exciting, right? Let’s dive into how you can achieve this!
Before you grab your paintbrush and stencils, it's essential to choose the right tiles. The first thing to consider is the material. Do you prefer ceramic, porcelain, or maybe even natural stone? Each material has its own charm and durability. Next, think about the size of the tiles. Larger tiles can create a more modern look, while smaller tiles may lend a more traditional feel. Lastly, the color should harmonize with your existing decor. A well-chosen tile can serve as the perfect canvas for your stenciling project!
Now that you've selected your tiles, it’s time to gather the essential tools and materials. You’ll need stencils, paint, brushes, and some protective gear. Let’s break it down:
- Stencils: You can either buy them or create your own.
- Paint: Choose a high-quality paint suitable for tiles.
- Brushes and Sponges: Different tools will give you different effects.
- Sealant: To protect your artwork once it’s done.
Having these items at your disposal will set you up for success. Remember, the right tools can make a world of difference in achieving that professional finish!
When it comes to stencils, the options are practically limitless. You can find reusable stencils that can be used multiple times, or you might prefer vinyl options that stick directly to the tile. If you’re feeling particularly creative, consider designing your own custom stencils to reflect your personal style. This is where the fun really begins!
Creating your own stencils can be a rewarding experience. You can use materials like cardstock or mylar to craft unique designs that fit your vision perfectly. Simply sketch your design, cut it out carefully, and you’re ready to go! This allows for a level of creativity that pre-made stencils simply can’t match.
If DIY isn’t your cup of tea, don’t worry! There are plenty of places to purchase pre-made stencils that are both high-quality and affordable. Check out local craft stores or online retailers for a wide selection that can meet your project needs.
The paint you choose is vital for the durability and finish of your stenciled tiles. Look for paints specifically designed for tile surfaces, as they offer better adhesion and longevity. Brands that specialize in tile paints often provide a variety of finishes, from matte to glossy, allowing you to customize your look even further.
Proper preparation is the backbone of a successful stenciling project. Start by thoroughly cleaning your tiles to remove any dirt or grease. This step is crucial for ensuring that the paint adheres well. After cleaning, consider applying a primer to create a smooth base for your stenciling work.
To clean your tiles effectively, use a mixture of warm water and mild detergent. Scrub away any stubborn stains, and rinse thoroughly. Once dry, apply a suitable primer that will help the paint stick better. This will not only improve adhesion but also enhance the vibrancy of your colors.
Creating an organized workspace can make all the difference in your project. Find a well-lit area and lay down some protective coverings to catch any paint spills. Having everything within reach will save you time and keep your project flowing smoothly.
Now that you’re all set up, it’s time to master some stenciling techniques! Applying paint evenly is crucial for achieving that professional look. Use a light hand and dab your brush or sponge rather than sweeping it across the stencil. This technique helps prevent smudging and ensures crisp lines.
To achieve an even application, consider using a foam roller for larger areas, or a small brush for intricate designs. Remember, less is more! It’s easier to build up color gradually than to fix a heavy-handed application.
Layering colors can add depth and interest to your designs. Don’t be afraid to experiment with blending different shades to create stunning visual effects. This technique can make your stenciled tiles truly pop and become a focal point in your home.
Once you’ve completed your stenciling, sealing your design is essential for protecting your artwork. A good sealant will help preserve the vibrancy of your colors and keep your tiles looking fresh for years to come.
When selecting a sealant, consider options that are specifically designed for tile surfaces. There are various types available, including water-based and solvent-based sealants, each with its own advantages. Make sure to choose one that suits your specific needs.
To apply the sealant, use a clean brush or roller, and cover the entire surface evenly. Follow the manufacturer’s instructions for drying times and number of coats for optimal results.
To keep your stenciled tiles looking vibrant, regular maintenance is key. Simple cleaning routines will help preserve the appearance of your designs and keep them looking as good as new.
For routine cleaning, use a gentle cleaner and a soft cloth. Avoid abrasive materials that could scratch your tiles. Regular maintenance will ensure that your stenciled artwork remains intact and beautiful.
Accidents happen, but don’t fret! If you notice any chips or faded areas, you can easily repair them. Use a small brush to touch up the affected area with paint, and seal it again to protect your work.
Q: Can I use any paint for stenciling tiles?
A: It's best to use paints specifically designed for tile surfaces to ensure durability and adhesion.
Q: How do I clean my stenciled tiles without damaging them?
A: Use a gentle cleaner and soft cloth to avoid scratches. Regular maintenance will keep them looking fresh.
Q: What if I make a mistake while stenciling?
A: Don’t worry! You can touch up areas with a small brush and the same paint you used for stenciling.
Q: How long will my stenciled tiles last?
A: With proper sealing and maintenance, your stenciled tiles can last for many years, retaining their beauty.

Choosing the Right Tiles
When it comes to stenciled tile projects, the first step is selecting the right tiles. This decision is crucial because the tiles you choose will set the stage for your entire design. Think of it as the foundation of a house; if it's not solid, everything built on top could crumble. So, what should you consider? Let's break it down.
First off, you need to think about the material. Tiles come in various materials like ceramic, porcelain, and natural stone, each with its unique characteristics. For instance, ceramic tiles are generally more affordable and easier to work with, while natural stone tiles can add a touch of luxury but often require more maintenance. If you're looking for something durable that can withstand wear and tear, porcelain might be your best bet. It's like choosing between a cozy sweater and a sturdy jacket; it all depends on your needs.
Next, size matters! The dimensions of your tiles can drastically affect the overall look of your space. Larger tiles can create a sense of openness, making a small room feel bigger, while smaller tiles offer more intricate designs that can add character. Imagine a canvas; a big, bold stroke can make a statement, while tiny brush strokes can create a detailed masterpiece. Think about the vibe you want to achieve and select your tile size accordingly.
Then comes color. The color of your tiles should harmonize with the overall color scheme of your home. Do you want a bright, cheerful space or a calm, serene atmosphere? A well-chosen color palette can evoke emotions and set the mood in any room. You might want to consider using neutral colors as a base and then adding pops of color through your stenciled designs. It’s like painting a room in soft pastels and then adding vibrant artwork to make it come alive!
Lastly, don’t forget about the texture. Tiles can be glossy, matte, or textured, and each finish offers a different aesthetic and functional benefit. Glossy tiles can reflect light and make a space feel brighter, while matte tiles can provide a more understated, sophisticated look. Textured tiles can add depth and interest, much like a well-chosen accessory that completes an outfit. When selecting your tiles, consider how the texture will work with your stencil designs and overall decor.
In summary, choosing the right tiles involves a thoughtful consideration of material, size, color, and texture. Each element plays a vital role in how your stenciled project will turn out. Take your time, explore your options, and remember that this is your chance to express your personal style. So, are you ready to dive into the world of stenciled tiles? Your creative journey awaits!

Essential Tools and Materials
When embarking on your journey of stenciling tiles, having the right tools and materials at your disposal is absolutely crucial. Think of it as preparing for a big adventure; you wouldn’t head out without the essentials, right? So, let’s dive into what you’ll need to make your stenciled tile project a success.
First and foremost, you’ll need stencils. These are the stars of your project! There are various types available, from reusable plastic stencils to intricate vinyl designs. If you’re feeling particularly creative, you can even design your own stencils. This personalized touch can elevate your project to a whole new level. But if DIY isn't your thing, fear not! There are plenty of places to purchase high-quality stencils that will meet your needs.
Next up is paint. Choosing the right type of paint is essential for ensuring your designs last. Look for paints specifically formulated for tile surfaces, as they offer better adhesion and durability. Acrylic paints are a popular choice due to their versatility and ease of use. However, if you’re aiming for something a bit more durable, consider epoxy paints, which can withstand wear and tear while maintaining their vibrant colors.
Now, let’s talk about application tools. You’ll need a variety of brushes and sponges to apply your paint evenly. A foam roller can also be a great addition to your toolkit for larger areas. Each tool serves a different purpose, so having a mix will help you achieve that perfect finish. Remember, the right tools can make all the difference in getting a clean and crisp stencil design.
Don’t forget about primer. Before you start painting, applying a good primer is essential for ensuring that your paint adheres properly to the tile surface. It creates a smooth base that enhances the vibrancy of your colors. Look for a primer that is compatible with your chosen paint for the best results.
Lastly, you’ll need a sealant. Once your masterpiece is complete, applying a sealant will protect your design from scratches and fading. There are various types of sealants available, so choose one that meets your specific needs—whether it’s for indoor or outdoor use, or for high-traffic areas.
Here’s a quick summary of the essential tools and materials you’ll need:
| Item | Description |
|---|---|
| Stencils | Reusable, vinyl, or custom designs for unique patterns. |
| Paint | Acrylic or epoxy paint suitable for tile surfaces. |
| Application Tools | Brushes, sponges, and foam rollers for even application. |
| Primer | Ensures paint adhesion and enhances color vibrancy. |
| Sealant | Protects your design from wear and ensures longevity. |
With these tools and materials in hand, you’re well on your way to transforming your space with stunning stenciled tiles. The journey may seem daunting, but remember, every great project starts with a solid foundation. So gather your supplies, roll up your sleeves, and let your creativity flow!
Q: Can I use regular paint on tiles?
A: While you can use regular paint, it's best to choose paint specifically designed for tiles to ensure durability and adhesion.
Q: How do I clean my stenciled tiles?
A: Use a gentle cleaner and a soft cloth to avoid damaging the design. Avoid abrasive cleaners that can scratch the surface.
Q: Can I create my own stencils at home?
A: Absolutely! You can design and cut stencils using materials like cardstock or mylar for unique patterns.

Stencils: Types and Options
When it comes to stenciling tiles, the type of stencil you choose can significantly impact the overall look and feel of your project. There are several types of stencils available, each offering unique benefits and possibilities for creativity. Understanding these options will help you select the perfect stencil for your home decor project.
One popular choice is reusable stencils. These stencils are made from durable materials, allowing you to use them multiple times without losing their shape or quality. They are ideal for larger projects or if you plan to create a cohesive design throughout your space. With reusable stencils, you can experiment with different colors and patterns without the need to buy a new stencil each time.
Another option is vinyl stencils. These are often self-adhesive, making them easy to apply and remove. Vinyl stencils are great for intricate designs, as they can hold fine details without bleeding. They are especially useful for smaller tiles or when you want to achieve a precise and clean finish. However, keep in mind that vinyl stencils are typically single-use, so plan accordingly if you want to replicate your design elsewhere.
If you're looking for something truly unique, consider creating your own custom stencils. This option allows you to express your personal style and design preferences. You can use materials like cardstock or mylar to cut out your designs. The process can be as simple or complex as you wish, giving you complete control over the final product. Not only does this approach ensure that your design is one-of-a-kind, but it also adds a personal touch to your home decor.
For those who prefer convenience, purchasing pre-made stencils is a viable option. Many craft stores and online retailers offer a wide range of high-quality stencils that cater to various design aesthetics. When looking for stencils, consider factors such as size, complexity, and the type of material used. Online marketplaces often have user reviews that can guide your selection process, ensuring you choose stencils that will meet your expectations.
In summary, whether you opt for reusable, vinyl, custom, or purchased stencils, the choices are plentiful. Each type has its own set of advantages that can elevate your stenciled tile project. So, take your time to explore your options and choose the stencils that resonate with your vision for your home.
- What type of paint should I use for stenciling tiles? It's best to use paint specifically designed for tile or acrylic paint that adheres well to surfaces.
- Can I use stencils on outdoor tiles? Yes, but ensure you use weather-resistant paint and sealant to protect your design from the elements.
- How do I clean my stenciled tiles? Use a mild detergent and a soft cloth to avoid damaging the stencil work.
- Is it difficult to create my own stencils? Not at all! With some basic tools and creativity, you can easily design and cut your own stencils.
DIY Stencil Creation
Creating your own stencils can be an exciting and rewarding part of your DIY tile project. Not only does it give you the freedom to design something truly unique, but it also allows you to personalize your home decor in a way that reflects your style. Imagine walking into a room and seeing a stunning pattern that you crafted with your own hands! To get started on your DIY stencil creation journey, you’ll need a few basic materials and some creativity.
The first step in making your own stencil is to decide on a design. This could be anything from geometric shapes to floral patterns or even custom lettering. Once you have your design in mind, you can sketch it out on a piece of paper. Keep in mind that simpler designs are often easier to cut and apply, especially if you're a beginner. You can also find inspiration online or in design books, allowing you to mix and match ideas to create something that’s uniquely yours.
Next, you'll need to choose the right material for your stencil. The most common materials include:
- Cardstock: This is a great option for one-time use stencils. It’s easy to cut and manipulate, but it may not hold up well if you plan to use it multiple times.
- Mylar: A more durable option, Mylar is a plastic material that can withstand multiple uses. It’s slightly more challenging to cut but offers fantastic results.
- Vinyl: If you have access to a cutting machine, vinyl can be an excellent choice for creating intricate designs. It adheres well to surfaces, making it easy to apply paint without bleeding.
Once you've selected your material, it’s time to transfer your design. You can either draw directly onto the stencil material or print your design and trace it. If you're using a cutting machine, simply upload your design file and let the machine do the work. For manual cutting, use a sharp craft knife to carefully cut out the design, ensuring to take your time for clean edges. Remember, the cleaner your cuts, the better your stencil will look on the tiles!
After cutting your stencil, it's essential to test it on a scrap piece of tile or paper. This allows you to see how well the design transfers and if any adjustments are needed. If you notice any areas where the paint might bleed, consider reinforcing those edges with tape or adjusting your cutting technique. Testing is a crucial step that can save you from potential mishaps when you finally apply your stencil to your tiles.
Finally, once you’re satisfied with your stencil, it's ready for use! You can store it for future projects or use it immediately to bring your tile design to life. With a bit of practice and experimentation, you’ll be stenciling like a pro in no time! Remember, the key to a successful DIY stencil creation is patience and a willingness to learn from each attempt.
Q: Can I use any type of paint on my stencils?
A: It's best to use paint specifically designed for tile or surfaces you are working with. Acrylic paint is a popular choice for DIY stenciling.
Q: How do I clean my stencils after use?
A: Gently wash your stencils with warm soapy water and a soft sponge. Avoid abrasive materials that could scratch the surface.
Q: Can I reuse my stencils?
A: Yes, especially if you use durable materials like Mylar or vinyl. Just make sure to clean them properly after each use.
Purchasing Stencils
When it comes to for your DIY tile projects, the options are virtually endless! Whether you’re looking for a simple design or something more intricate, finding the right stencil can make all the difference in achieving that perfect look. One of the first things to consider is where to shop. You can find stencils at a variety of places, including craft stores, home improvement centers, and online retailers. Each option has its pros and cons, so let’s break them down.
Craft stores often have a wide selection of stencils in various styles, from geometric patterns to floral designs. They allow you to see the stencils in person, which can help you gauge their size and quality. However, the selection might be limited to what's currently in stock. On the other hand, home improvement centers typically carry stencils aimed at more practical applications, such as stenciling on walls or floors. While their designs may be less artistic, they are often durable and made for heavy use.
Online shopping opens up a world of possibilities. Websites like Amazon, Etsy, and specialized stencil shops offer a plethora of designs, including custom options. This means you can find something that perfectly matches your vision! Just be sure to check the reviews and ratings before making a purchase to ensure you’re getting a quality product.
Another consideration is the material of the stencil. Stencils can be made from various materials, including:
- Plastic: Durable and easy to clean, plastic stencils are ideal for multiple uses.
- Mylar: This material is flexible and can be used on uneven surfaces, making it a great choice for tiles.
- Cardstock: While less durable, cardstock stencils can be a budget-friendly option for one-time projects.
Don't forget to think about the size of the stencil as well. Larger stencils can create bold statements, while smaller ones might be perfect for adding subtle details. If you have a specific design in mind, consider custom stencils. Many online retailers and local shops offer the option to create your own design, allowing for a truly unique touch to your stenciled tiles.
In conclusion, purchasing stencils can be an exciting part of your DIY journey. With the right stencil, your tile project can transform from ordinary to extraordinary. So take your time, explore different options, and choose the stencils that will best express your personal style!
As you embark on your stenciling adventure, you might have some questions. Here are a few frequently asked questions to help guide you:
- Where can I find stencils for tile projects? You can find stencils at craft stores, home improvement centers, and online marketplaces.
- What material is best for stencils? Plastic and Mylar are great for durability, while cardstock is a budget-friendly option.
- Can I create my own stencil? Absolutely! You can design and cut your own stencils using materials like cardstock or Mylar.
- How do I choose the right size stencil? Consider the scale of your project; larger stencils make bold statements, while smaller ones add subtle details.
Choosing the Right Paint
When it comes to stenciling tiles, is not just a matter of color; it’s about ensuring durability and achieving the desired finish. You want your stenciled tiles to look fantastic, but they also need to withstand the wear and tear of daily life. So, how do you select the perfect paint for your project? Let’s dive into the essentials!
First off, consider the type of paint you’ll be using. For tile surfaces, it’s crucial to opt for paints that are specifically designed to adhere to non-porous materials. Acrylic paints are a popular choice due to their versatility and ease of use. They come in a range of finishes, from matte to glossy, allowing you to achieve the look you want. However, for areas that experience high moisture, like kitchens and bathrooms, you might want to consider using epoxy paints or specially formulated tile paints for extra durability.
Another factor to keep in mind is the color selection. While it’s tempting to go bold, think about how the colors will interact with your existing decor. Do you want to create a striking contrast, or are you aiming for a more subtle, harmonious look? A well-planned color palette can transform your space and bring your stenciled designs to life. Here’s a quick tip: use a color wheel to help visualize complementary colors and shades that work well together.
Now, let’s talk about finish. The finish of your paint can dramatically affect the final look of your stenciled tiles. Here’s a brief overview of common finishes:
| Finish Type | Description | Best Use |
|---|---|---|
| Matte | Non-reflective, soft appearance | Low-traffic areas, decorative accents |
| Satin | Soft sheen, easy to clean | Moderate-traffic areas, kitchens, bathrooms |
| Glossy | High shine, very durable | High-traffic areas, surfaces needing frequent cleaning |
Lastly, it’s essential to consider the application method. Some paints are better suited for brushes, while others work well with sponges or spray applications. Your choice here can affect the texture and precision of your stenciled design. For example, using a sponge can create a softer edge, while a brush can offer more control for detailed designs. Experiment with different tools to find what works best for you!
In summary, when choosing the right paint for your stenciled tile projects, remember to consider the type of paint, color selection, finish, and application method. Making informed choices in these areas will ensure your stenciled tiles not only look beautiful but also stand the test of time.
- Can I use regular paint on tiles? While you can use regular paint, it’s not recommended as it may not adhere well to the tile surface and could chip or peel over time. Opt for paints specifically designed for tiles.
- What is the best way to clean stenciled tiles? Use a gentle cleaner and a soft cloth to avoid damaging the paint. Avoid abrasive cleaners that can scratch the surface.
- How long does the paint take to dry? Drying times can vary based on the type of paint used, but generally, most acrylic paints dry to the touch within an hour. For full curing, it’s best to wait 24 hours before using the surface.

Preparation Steps
Before diving into your exciting stenciling project, it's essential to lay the groundwork for success. Proper preparation ensures that your tiles are ready to receive the beautiful designs you have in mind. The first step in this journey is to clean your tiles thoroughly. Dust, grime, and old adhesives can interfere with paint adhesion, leading to a less-than-perfect finish. Use a mixture of warm water and a mild detergent to wipe down the tiles. For stubborn stains, a gentle scrub with a non-abrasive sponge can work wonders. Remember, the cleaner the surface, the better the results!
Once your tiles are sparkling clean, the next step is priming. Priming not only helps the paint stick better but also enhances the vibrancy of your chosen colors. Look for a primer specifically designed for tile surfaces. Apply it evenly using a roller or a brush, making sure to cover every inch of the tile. Allow the primer to dry completely before moving on to the fun part—stenciling!
Now that your tiles are clean and primed, it's time to set up your workspace. A well-organized area can make all the difference in achieving a professional look. Choose a flat surface, preferably in a well-lit area, to work on your stenciling. Lay down a drop cloth to catch any paint drips and keep your space tidy. Gather all your materials—stencils, paints, brushes, and sealants—so everything is within arm's reach. This will not only save you time but also minimize the risk of accidents.
Additionally, consider creating a test tile before jumping straight into your main project. This is a small piece of tile where you can practice your stenciling technique, color application, and sealing process. It’s a valuable step that can help you troubleshoot any issues before they arise on your primary tiles.
With your tiles prepped and your workspace set up, you're ready to unleash your creativity! Remember, preparation is the backbone of a successful DIY project, so take your time with these steps. They will pay off in the long run, ensuring that your stenciled tiles not only look stunning but also stand the test of time.
- How long should I wait after cleaning before priming? It's best to wait until the tiles are completely dry, which usually takes about 1-2 hours.
- Can I use any type of paint for stenciling tiles? No, it’s recommended to use paint specifically designed for tile or ceramic surfaces for the best adhesion and durability.
- What if I make a mistake while stenciling? Don’t worry! You can often fix mistakes by carefully scraping off the paint with a craft knife or touch up with additional paint.
Cleaning and Priming Tiles
Before diving into your exciting stenciling project, it's essential to ensure that your tiles are in prime condition. Cleaning and priming your tiles is not just a step; it's the foundation of your entire design. Think of it like prepping a canvas before painting a masterpiece. You wouldn't want to start on a dirty surface, right? So, let's break down the steps to get your tiles squeaky clean and ready for some artistic flair!
First, start with a thorough cleaning. Use a mixture of warm water and a mild detergent to wipe down the tiles. This will help remove any dust, grease, or grime that may have accumulated over time. For tougher stains, you might want to incorporate a gentle scrub brush or a non-abrasive sponge. Just remember to avoid anything too harsh that could scratch the surface of your tiles. After scrubbing, rinse the tiles with clean water to remove any soap residue. This ensures that your tiles are not only clean but also primed for the next step.
Once your tiles are clean and dry, the next step is priming. Priming is crucial, especially if you're working with porous tiles that can absorb paint unevenly. A good primer creates a smooth surface for your paint, allowing for better adhesion and a more vibrant finish. Choose a primer that is specifically designed for tile surfaces; this will ensure that it bonds well and stands the test of time.
To apply the primer, use a clean brush or roller, and apply an even coat across the tiles. Make sure to cover all areas, including edges and corners, to prevent any unpainted spots from showing through your stencil design. Allow the primer to dry completely according to the manufacturer's instructions, as this will set the stage for your stenciling adventure.
Here’s a quick summary of the cleaning and priming process:
| Step | Action |
|---|---|
| 1 | Mix warm water with mild detergent and scrub the tiles. |
| 2 | Rinse thoroughly to remove soap residue. |
| 3 | Apply a tile-specific primer evenly across the surface. |
| 4 | Allow the primer to dry completely before stenciling. |
By following these steps, you're setting yourself up for success. Your tiles will be clean, primed, and ready to transform into a stunning canvas for your stenciled designs. Remember, taking the time to properly prepare your tiles will pay off in the end, resulting in a beautiful finish that you can proudly showcase in your home.
- How often should I clean my stenciled tiles? It's best to clean them regularly, ideally once a week, to maintain their appearance and prevent dirt buildup.
- Can I use any type of primer for my tiles? No, it's important to use a primer specifically designed for tile surfaces to ensure proper adhesion and durability.
- What if my tiles are still dirty after cleaning? If you're still having trouble, consider using a stronger tile cleaner or a mixture of vinegar and water for tougher stains.
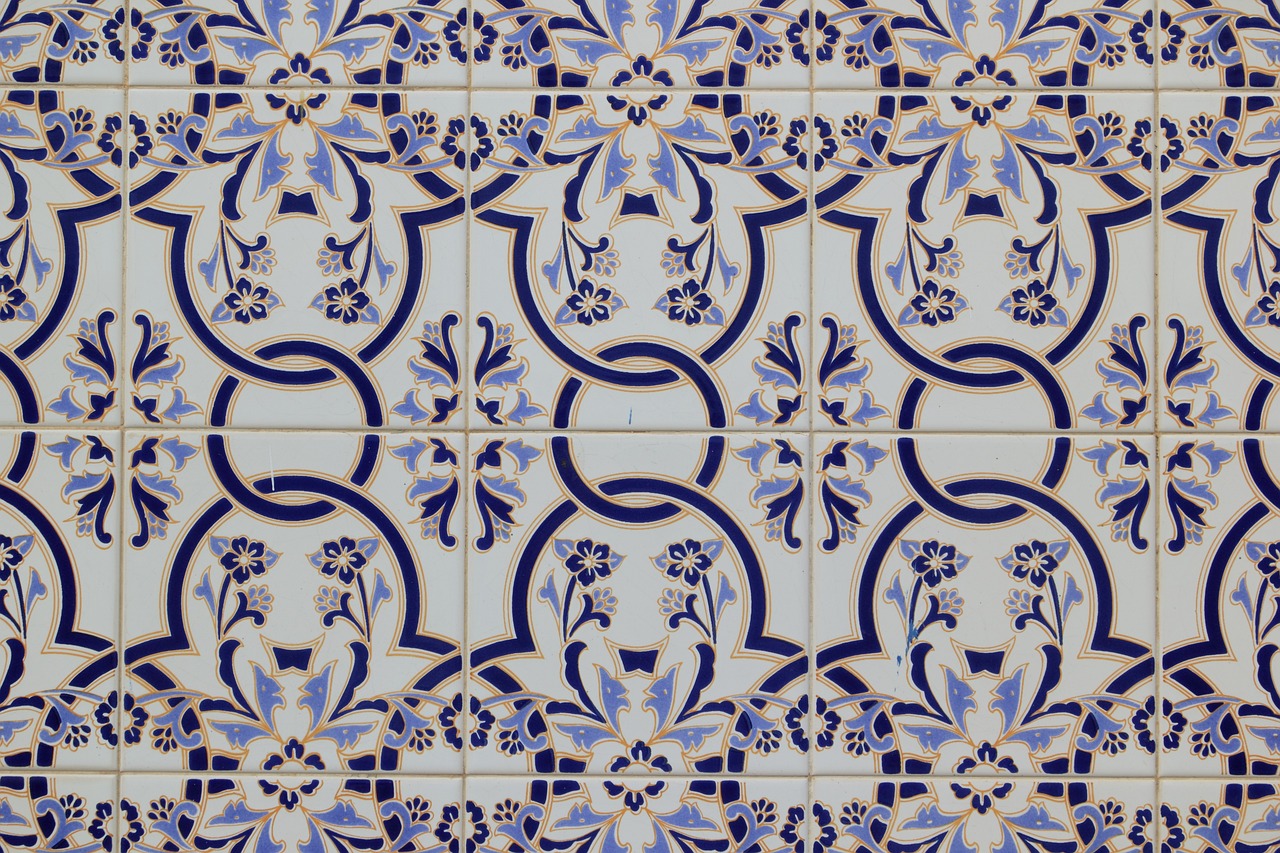
Setting Up Your Workspace
Creating an organized and efficient workspace is essential for any DIY project, especially when it comes to stenciling tiles. Imagine trying to paint a masterpiece in a cluttered room—frustrating, right? To ensure your stenciling experience is smooth and enjoyable, take some time to set up a dedicated area. Start by choosing a location with good lighting, as this will help you see the details of your work clearly. Natural light is ideal, but if that's not possible, consider using bright, white LED lights to illuminate your space.
Next, clear off a sturdy table or workspace. You want a surface that can handle spills and paint splatters without worry. Lay down a drop cloth or plastic sheet to protect your table and make cleanup easier. This protective layer is like a safety net for your creative endeavors! Additionally, gather all the necessary tools and materials before you start. Keeping everything within arm's reach will save you from running back and forth, which can break your creative flow.
Here's a quick checklist of items to have on hand:
- Tiles to stencil
- Stencils (whether DIY or purchased)
- Paints suitable for tile
- Brushes, sponges, or rollers
- Painter's tape
- Drop cloths or plastic sheets
- Cleaning supplies (like rags and water)
- Sealant for finishing touches
Finally, think about your comfort. If you’re going to be standing or sitting for a while, make sure your workspace is ergonomically friendly. An uncomfortable setup can lead to fatigue and frustration, which are the last things you want when you’re trying to create something beautiful. You might even want to play some music or have a podcast on in the background to keep your spirits high while you work. Setting up a workspace is not just about organization; it’s about creating a space that inspires you to unleash your creativity!
Stenciling Techniques
Mastering is crucial for achieving professional-looking results in your DIY tile projects. Whether you’re a seasoned crafter or a beginner, understanding the right methods can make all the difference in the world. The key to a stunning stenciled tile is not just in the design but also in how you apply the paint. So, let’s dive into some effective techniques that will help you create beautiful, crisp designs without the frustration of smudging or bleeding.
One of the first things to consider is how you apply the paint. Using a stippling technique can yield fantastic results. Instead of brushing the paint on, try using a sponge or a stippling brush. This method involves dabbing the paint onto the stencil, which minimizes the risk of paint seeping under the edges. It’s like creating a masterpiece one dot at a time! You’ll find that this technique not only gives you better control but also adds texture to your design.
Another essential technique is using painter's tape to secure your stencil. This can prevent any movement while you’re painting. Simply place the stencil on the tile, and use the tape to hold it in place. This way, you can focus on applying your paint without worrying about the stencil shifting. It’s a simple trick that can save you a lot of headaches!
When it comes to applying paint evenly, less is more. It’s better to use multiple thin layers of paint rather than one thick coat. This approach not only helps in achieving a smooth finish but also reduces the chances of paint running under the stencil. If you’re using spray paint, keep the can at a distance of about 6-12 inches from the tile. This distance helps in creating a fine mist that won’t overwhelm the stencil.
Layering colors can add a whole new dimension to your stenciled tiles. Imagine your design coming to life with different shades! To achieve this, start with a light base color and allow it to dry completely. Once dry, you can add darker shades or contrasting colors on top. Blending these colors can create stunning visual effects, making your tiles look like they belong in an art gallery. Just remember to clean your stencil between color applications to avoid muddy results.
Don’t forget about the importance of patience in stenciling. Allow each layer of paint to dry before applying the next one. This not only ensures that your colors stay vibrant but also helps in achieving that clean, crisp edge that every DIYer dreams of. Think of it as waiting for a cake to bake; if you rush it, you might end up with a gooey mess instead of a delightful treat!
In summary, mastering stenciling techniques is about practice and patience. From stippling and using painter's tape to layering colors, each method contributes to the final look of your stenciled tiles. So grab your tools, unleash your creativity, and enjoy the process of transforming your home decor one tile at a time!
- What type of paint is best for stenciling on tiles? Acrylic paint is often recommended for its durability and ease of use on tile surfaces.
- How can I prevent paint from bleeding under the stencil? Using a stippling technique and ensuring the stencil is securely taped down can help prevent bleeding.
- Can I use my stencils on other surfaces? Absolutely! Stencils can be used on walls, furniture, and even fabric, giving you endless creative possibilities.
- How do I clean my stencils after use? Gently wash your stencils with warm soapy water and let them dry completely before storing.
Applying Paint Evenly
When it comes to stenciling tiles, one of the most crucial aspects is learning how to apply paint evenly. This step can make or break your design, transforming a simple tile into a stunning piece of art. Imagine standing back and admiring your work only to notice uneven edges or splotchy colors—definitely not the look you want! So, how do you achieve that perfect, crisp finish? Let's dive into some effective techniques.
First off, the tools you choose can significantly impact your results. While some people prefer using brushes, others swear by sponges. Each tool has its unique benefits:
- Brushes: Ideal for detailed work, brushes allow for precision and control, especially in tight corners or intricate designs.
- Sponges: These are fantastic for larger areas. They help in applying a smooth layer of paint without leaving brush strokes.
Regardless of the tool you choose, the key is to use minimal paint at a time. Dip your brush or sponge into the paint, then gently tap off any excess. This prevents drips and ensures that you’re not overloading the stencil. Think of it like frosting a cake—too much can lead to a messy finish!
Next, when you begin painting, use a dabbing motion rather than a sweeping one. This technique helps to push the paint into the stencil openings without causing it to bleed underneath. It’s all about that controlled touch! Start from the outer edges of the stencil and work your way inward. This way, you can avoid any accidental smudging on your freshly painted areas.
For those who are a bit more adventurous, consider using a spray paint option. It can give an even coat in a fraction of the time, but be cautious! Make sure to practice on scrap tiles first to get the hang of the spray pattern. Always remember to work in a well-ventilated area and use protective gear.
After applying the paint, it’s wise to lift the stencil carefully while the paint is still wet. This way, you can avoid any lifting or tearing of the design. If you notice any areas that need touch-ups, wait for the paint to dry completely before going back in with a small brush for precision work. Think of it as giving your tiles a little pampering!
In conclusion, applying paint evenly may seem daunting, but with the right tools, techniques, and a bit of practice, you’ll be able to create beautiful stenciled tiles that will wow anyone who steps into your space. Remember, patience is key, and don’t rush the process—your tiles will thank you for it!
Here are some common questions regarding the process of applying paint evenly on stenciled tiles:
- What type of paint is best for tiles? Acrylic paint is often recommended for its durability and ease of use on tile surfaces.
- Can I use regular wall paint for stenciling? While you can use wall paint, it’s best to use paint specifically designed for tiles to ensure better adhesion and longevity.
- How do I fix mistakes when painting? If you make a mistake, wait for the paint to dry and then carefully sand it down before repainting.

Layering Colors
Layering colors on your stenciled tiles is like adding a new dimension to your artwork; it transforms a simple design into something truly captivating. Imagine walking into a room and being greeted by a vibrant mosaic of colors that not only catches the eye but also tells a story. This technique can create depth, shadow, and even a sense of movement in your tile designs. But how do you achieve that stunning effect without making a mess? Let's dive into the world of color layering!
First and foremost, it’s essential to choose a color palette that resonates with your space. Think about the mood you want to create—do you prefer calming blues and greens, or vibrant reds and yellows? Once you have your colors selected, the next step is to plan your layering technique. Here are a few methods to consider:
- Blending: This technique involves applying two or more colors while they are still wet, allowing them to mix on the tile for a soft transition.
- Ombre Effect: Start with a darker shade at the bottom and gradually lighten as you move up. This creates a stunning gradient that can add elegance to any space.
- Stippling: Using a sponge or a brush, dab different colors onto the tile, which can create a textured look that feels dynamic and lively.
After selecting your technique, it’s time to get your hands a little dirty! Start with a base color and apply it evenly across the tile. Once it dries, you can begin layering your additional colors. Remember to use a light hand; it’s easier to add more paint than to take it away! For instance, if you’re using the blending technique, apply your secondary color while the first is still slightly wet. This allows the colors to merge seamlessly, creating a beautiful transition.
Another pro tip is to use different tools for different effects. A brush can give you more control for fine details, while a sponge might be perfect for broader strokes or stippling. Experiment with various tools and techniques on a practice tile to find what works best for you.
Finally, don’t forget to seal your masterpiece once you’ve achieved the desired look. This will not only protect your design but also enhance the vibrancy of the colors, making your stenciled tiles truly pop. Layering colors can seem daunting at first, but with a little practice and creativity, you’ll be able to create stunning, one-of-a-kind tile designs that will leave your guests in awe.
Q: How many colors should I use when layering?
A: It really depends on your design vision! Generally, using three to five colors can create a balanced look without overwhelming the tile.
Q: Can I layer colors on top of already painted tiles?
A: Absolutely! Just ensure that the existing paint is clean and dry before applying your new layers.
Q: What type of paint is best for layering colors on tiles?
A: Acrylic paint is commonly recommended for stenciled tiles as it adheres well and comes in a variety of colors. Just make sure it is suitable for your tile material.
Q: How do I fix mistakes while layering colors?
A: Don’t panic! If you make a mistake, you can often paint over it once it’s dry. Just ensure that the new layer is applied smoothly for the best results.
Sealing Your Design
Once you've poured your creativity into stenciling your tiles, it’s time to protect your masterpiece. is not just a finishing touch; it’s a vital step that ensures your artwork remains vibrant and intact for years to come. Think of sealants as the armor for your tiles, shielding them from wear and tear, moisture, and stains. But how do you choose the right sealant, and what are the best application techniques? Let’s dive into the details!
First, you need to consider the type of sealant that will work best for your project. There are several options available, each with its own set of benefits. For instance, water-based sealants are easy to apply, dry quickly, and are less toxic than their solvent-based counterparts. On the other hand, solvent-based sealants tend to offer stronger protection but may require more ventilation during application. Here’s a quick overview of some popular sealant types:
| Sealant Type | Benefits | Best For |
|---|---|---|
| Water-Based Sealant | Quick drying, low odor, easy cleanup | Indoor projects, light traffic areas |
| Solvent-Based Sealant | Strong protection, durable finish | High traffic areas, outdoor use |
| Penetrating Sealant | Deep penetration, stain resistance | Natural stone tiles, porous surfaces |
After selecting the right sealant, the next step is to apply it correctly. Proper application ensures that every inch of your stenciled tiles is protected. Here’s a simple guide to help you:
- Step 1: Ensure your stenciled tiles are completely dry before sealing. This is crucial; otherwise, you risk smudging your design.
- Step 2: Use a high-quality brush or roller to apply the sealant evenly. Avoid using too much product at once, as this can lead to drips and uneven coverage.
- Step 3: Allow the first coat to dry fully, then assess if a second coat is necessary for added protection.
- Step 4: Follow the manufacturer’s instructions regarding drying time and re-coating.
Remember, the goal of sealing is to create a barrier that not only protects your design but also enhances its appearance. A well-sealed tile can bring out the colors and patterns of your stenciled art, making them pop even more. After sealing, your tiles will be ready to withstand everyday use, whether it be in a busy kitchen, a lively bathroom, or a cozy entryway.
In conclusion, sealing your stenciled tiles is a crucial step that shouldn’t be overlooked. By choosing the right sealant and applying it correctly, you can ensure that your beautiful designs remain as stunning as the day you created them. Happy stenciling!
Here are some common questions that arise when sealing stenciled tiles:
- How long should I wait before sealing my stenciled tiles? It’s best to wait at least 24 hours after painting to ensure everything is completely dry.
- Can I use any sealant on my stenciled tiles? Not all sealants are suitable for all surfaces. Make sure to choose a sealant that is compatible with the type of tiles you are using.
- How often should I reseal my tiles? Depending on traffic and wear, resealing every 1-2 years is recommended to maintain protection.
Choosing the Right Sealant
When it comes to preserving the beauty of your stenciled tiles, choosing the right sealant is absolutely crucial. You want a product that not only enhances the colors and designs of your artwork but also provides long-lasting protection against wear and tear. There are several types of sealants available, each with its unique properties, advantages, and best-use scenarios. For instance, water-based sealants are typically easier to work with and dry quickly, making them ideal for indoor projects. On the other hand, solvent-based sealants offer superior durability and are better suited for outdoor use or high-traffic areas.
It's essential to consider the finish you desire as well. Sealants come in various finishes, from matte to glossy. A matte finish can give your tiles a more natural look, while a glossy finish can enhance colors and make your designs pop. Additionally, the level of UV protection can vary between products, which is particularly important if your tiles will be exposed to direct sunlight. To help you make an informed decision, here’s a quick comparison of different sealant types:
| Sealant Type | Best For | Finish | Drying Time |
|---|---|---|---|
| Water-Based | Indoor Use | Matte or Glossy | 1-2 Hours |
| Solvent-Based | Outdoor Use | Glossy | 2-4 Hours |
| Epoxy | High-Traffic Areas | Glossy | 24 Hours |
Before applying any sealant, it's a good idea to read the manufacturer's instructions carefully. Some sealants require specific application techniques or additional drying times to achieve optimal results. Moreover, consider conducting a small test patch on an inconspicuous area of your stenciled tiles to see how the sealant interacts with the paint and the tile surface. This step can save you from potential mishaps and ensure that your beautiful designs remain intact.
Ultimately, the right sealant can make all the difference in the longevity and appearance of your stenciled tiles. By investing a little time into selecting the appropriate product, you're setting yourself up for success and ensuring that your creative efforts shine for years to come.
- What is the best sealant for indoor stenciled tiles? Water-based sealants are generally recommended for indoor use due to their ease of application and quick drying time.
- Can I use the same sealant for both indoor and outdoor tiles? It's best to use a sealant specifically formulated for outdoor use if your tiles will be exposed to the elements.
- How often should I reseal my stenciled tiles? It depends on the wear and tear, but typically, resealing every 1-3 years is advisable to maintain protection.
Application Techniques
When it comes to stenciling tiles, mastering is essential for achieving that flawless, professional look that will leave your guests in awe. Imagine standing back after a long day of crafting, only to see your tiles transformed into stunning pieces of art. To get there, you need to focus on a few key methods that will ensure your designs come out crisp and clean, without any smudges or uneven patches.
One of the most effective ways to apply paint evenly is by using a stencil brush. These brushes are specially designed with stiff bristles that allow for precise control, making it easier to dab paint onto your tiles without over-saturating the stencil. When using a stencil brush, remember to load it with a small amount of paint and work it into the bristles before applying it to the stencil. This technique minimizes the risk of paint bleeding under the stencil edges. It's like using a fine-tipped pen versus a broad marker; precision is key!
Another popular method is using a foam applicator or sponge. These tools are perfect for achieving a soft, blended look, especially when working with multiple colors. To get started, simply dip the sponge into the paint and gently pounce it over the stencil. This technique not only provides even coverage but also allows for beautiful color layering. Just remember to keep your sponge damp but not soaking wet, as too much moisture can lead to unwanted drips and runs.
For those who prefer a more modern approach, consider using a spray paint technique. While this method requires a bit more practice, it can yield stunning results. When using spray paint, ensure that you are working in a well-ventilated area and that you have a steady hand. Hold the spray can about 12 inches away from the stencil and apply a light, even coat. The key here is to build up the color gradually, allowing each layer to dry before adding more. This technique is like adding layers to a cake; each layer contributes to the final masterpiece.
Regardless of the method you choose, always make sure to test your application technique on a scrap piece of tile or cardboard first. This practice run will help you gauge how much paint to use and how your stencil will react, ensuring that you’re fully prepared for the main event. Plus, it’s a great way to build confidence before diving into your project!
In summary, whether you opt for a stencil brush, foam applicator, or spray paint, the right technique can make all the difference in your stenciling success. With some practice and patience, you’ll be able to create beautiful, eye-catching designs that will elevate your home decor to new heights. So, roll up those sleeves, gather your materials, and get ready to unleash your creativity!
- What type of paint should I use for stenciling tiles? It's best to use acrylic paint or specially formulated tile paint for durability and adhesion.
- Can I use spray paint for stenciling? Yes, spray paint can be used, but make sure to apply it lightly and from a distance to avoid overspray.
- How do I prevent paint from bleeding under the stencil? Use a dry brush technique and avoid overloading your brush or sponge with paint.
- Is it necessary to seal my stenciled tiles? Yes, sealing your stenciled tiles is crucial for protecting the design and ensuring longevity.
Maintenance Tips
Maintaining your stenciled tiles is essential for keeping them looking fresh and vibrant over time. Just like a well-loved book that needs care to preserve its pages, your tiles require a little attention to ensure their beauty lasts. Regular maintenance not only enhances the appearance of your tiles but also prolongs their lifespan, allowing you to enjoy your artistic creations for years to come.
One of the most important aspects of tile maintenance is routine cleaning. You want to keep your stenciled tiles free from dust, dirt, and grime, which can dull their appearance. However, it’s crucial to use the right cleaning methods to avoid damaging your designs. For instance, using harsh chemicals or abrasive scrubbers can wear down the paint and ruin your hard work. Instead, opt for gentle cleaning solutions that are safe for painted surfaces.
Here’s a simple cleaning routine to follow:
- Dust Regularly: Use a soft microfiber cloth to dust your tiles at least once a week. This prevents dirt buildup and keeps your tiles looking crisp.
- Gentle Cleaning Solution: Mix warm water with a few drops of mild dish soap. Dampen a soft cloth or sponge with the solution and gently wipe the tiles, avoiding excessive scrubbing.
- Rinse and Dry: After cleaning, rinse the tiles with clean water and dry them with a soft towel to prevent water spots.
Accidents happen, and sometimes your beautiful stenciled tiles may suffer from chips or faded areas. But don’t despair! Repairing damaged tiles is entirely possible, and it’s often easier than you might think. If you notice a chip, the first step is to clean the area around the damage. Then, you can use a small brush to carefully apply matching paint to the affected area, blending it in with the surrounding design. If your tiles have faded due to sun exposure or wear, consider applying a new layer of paint over the entire tile or just the faded sections to restore their vibrancy.
Lastly, consider applying a fresh coat of sealant every few years, especially if your tiles are in high-traffic areas or exposed to moisture. This will help maintain their protective barrier and keep your designs looking as good as new. Think of it as giving your tiles a protective armor that shields them from the wear and tear of daily life.
Q: How often should I clean my stenciled tiles?
A: It’s best to dust your tiles weekly and perform a deeper clean every month or as needed, depending on the traffic in the area.
Q: Can I use any type of cleaner on my stenciled tiles?
A: Avoid harsh chemicals and abrasive cleaners. Opt for a mild soap and water solution for the best results.
Q: What should I do if my tiles get damaged?
A: Clean the damaged area and carefully repaint it to blend with the existing design. For larger damages, consider consulting a professional.
Q: How often should I reapply the sealant?
A: Reapplying sealant every few years is recommended, especially in areas with high foot traffic or moisture exposure.
Cleaning Stenciled Tiles
Keeping your stenciled tiles looking fresh and vibrant is essential for maintaining the beauty of your home decor. Regular cleaning will not only enhance the appearance of your tiles but also prolong their lifespan. However, it’s important to approach the cleaning process with care to avoid damaging the intricate designs you've worked hard to create. So, how do you effectively clean your stenciled tiles without compromising their beauty? Let’s dive into some smart strategies!
First and foremost, always use gentle cleaning solutions. Harsh chemicals can strip away the paint or sealant, leading to faded or chipped designs. Instead, opt for a mild dish soap mixed with warm water. This solution is effective in removing dirt and grime without causing any harm to your tiles. Simply dip a soft cloth or sponge into the soapy water, wring it out, and gently wipe the surface of your stenciled tiles. Remember, the goal is to lift away dirt, not to scrub aggressively, which could damage the stencil work.
After cleaning, it’s crucial to rinse the tiles with clean water to remove any soap residue. Use a separate cloth or sponge for this step, ensuring that no soapy film is left behind. Follow this by drying the tiles with a soft towel to prevent water spots and streaks. If you notice any stubborn stains or spills, try to address them immediately. A light scrub with a soft-bristled brush can help, but be cautious not to apply too much pressure. For particularly tough stains, consider using a mixture of baking soda and water to create a paste. Apply it gently to the stained area and let it sit for a few minutes before wiping it away with a damp cloth.
Additionally, it's wise to avoid abrasive cleaners or tools, such as steel wool or rough sponges. These can easily scratch the surface of your tiles and ruin your beautiful stenciled designs. Instead, stick to soft materials and gentle cleaning agents. To help you remember the do's and don'ts of cleaning your stenciled tiles, here’s a quick reference table:
| Do's | Don'ts |
|---|---|
| Use mild dish soap | Avoid harsh chemicals |
| Gently wipe with a soft cloth | Don't scrub aggressively |
| Rinse with clean water | Don't leave soap residue |
| Dry with a soft towel | Don't use abrasive tools |
Lastly, consider establishing a regular cleaning schedule. Depending on the location of your stenciled tiles—whether they’re in a high-traffic area like the kitchen or a more serene space like a bathroom—your cleaning frequency may vary. A good rule of thumb is to clean them weekly or bi-weekly to keep them looking their best. By following these tips, your stenciled tiles will not only look stunning but will continue to be a source of pride in your home for years to come!
- How often should I clean my stenciled tiles? It’s recommended to clean them weekly or bi-weekly, depending on the traffic in the area.
- Can I use vinegar to clean my stenciled tiles? While vinegar is a natural cleaner, it can be too acidic for some paints. Stick to mild dish soap for safety.
- What should I do if my stenciled tiles get stained? Address stains immediately with a soft cloth and a mild cleaning solution. For tough stains, a baking soda paste can be effective.
- Is it safe to use a steam cleaner on stenciled tiles? It’s best to avoid steam cleaners as the high heat can damage the paint and sealant.
Repairing Damaged Areas
Accidents happen, and sometimes your beautifully stenciled tiles may suffer from chips, scratches, or fading. But don’t worry! Repairing these damaged areas is not only possible, but it can also be a rewarding DIY project that restores the charm of your home decor. First, assess the extent of the damage. Is it a small chip, or has a larger area been affected? Understanding the type and size of the damage will guide you in choosing the right repair method.
For minor chips, you can use a touch-up paint that matches your original design. If you’re unsure about the color, a quick test on a spare tile can help you find the perfect match. Once you have your paint ready, carefully apply it to the damaged area using a fine brush, ensuring you stay within the lines of your stencil design. Remember to let the paint dry completely before proceeding to the next step.
In cases where the damage is more extensive, you might need to re-stencil the affected area. This involves carefully cleaning the damaged section, applying a primer, and then re-stenciling it with your desired design. If you’ve created your own stencils, this process can be straightforward. However, if you’re using pre-made stencils, make sure they fit perfectly over the damaged area to maintain the consistency of your design.
Here’s a quick overview of the steps to repair damaged stenciled tiles:
- Assess the Damage: Determine if it’s a minor chip or a larger area that needs attention.
- Gather Materials: You’ll need matching paint, a fine brush, primer, and possibly a stencil.
- Touch-Up Paint: For small chips, apply the matching paint carefully.
- Re-Stencil: For larger damages, clean the area, prime it, and reapply the stencil design.
- Seal the Area: Once the paint is dry, apply a sealant to protect your repairs.
Don’t forget to seal your repairs! This step is crucial as it protects your artwork from future wear and tear. Use a sealant that is compatible with the paint you used, and follow the manufacturer’s instructions for the best results. By taking the time to repair damaged areas, you not only enhance the beauty of your stenciled tiles but also prolong their lifespan, ensuring that your home decor continues to impress.
Q: Can I use regular wall paint for stenciling tiles?
A: It’s best to use paint specifically designed for tile surfaces, as it provides better adhesion and durability.
Q: How do I clean my stenciled tiles without damaging them?
A: Use a mild detergent and a soft cloth or sponge. Avoid abrasive cleaners that can scratch the design.
Q: What should I do if my stencil doesn’t fit perfectly over the damaged area?
A: You can create a custom stencil that matches the design or use painter’s tape to mask off the area for a clean edge.
Q: How often should I seal my stenciled tiles?
A: It’s a good idea to reseal your tiles every couple of years or sooner if you notice wear.
Frequently Asked Questions
- What type of tiles are best for stenciling?
When it comes to stenciling, ceramic tiles are a popular choice due to their smooth surface and durability. However, porcelain and natural stone tiles can also work well. Just ensure the tile surface is clean and suitable for paint adhesion.
- Can I use any paint for my stenciled tiles?
No, not all paints are created equal for tile projects. It's best to use acrylic paint specifically designed for ceramics. This ensures better adhesion and durability. Also, consider using water-based paints for easier cleanup and lower toxicity.
- How do I clean my stenciled tiles without damaging them?
To keep your stenciled tiles looking fresh, use a soft cloth or sponge with mild soap and water. Avoid abrasive cleaners or scrubbing pads, as they can scratch the design. Regular gentle cleaning will help maintain the vibrancy of your artwork.
- Is it necessary to seal my stenciled tiles?
Yes! Sealing your stenciled tiles is crucial for protecting your design from wear and tear. A good quality sealant will help prevent fading and chipping, ensuring your beautiful work lasts for years to come.
- Can I create my own stencils?
Absolutely! Making your own stencils can add a personal touch to your project. You can use materials like cardstock or mylar to design and cut out your stencils, allowing for unique patterns that reflect your style.
- What should I do if my stencil paint smudges?
If you notice smudging, don’t panic! Allow the paint to dry completely, then carefully touch up the affected areas with a fine brush. Practice makes perfect, so don’t be discouraged—every artist has their learning moments!
- How long does it take for the paint to dry on stenciled tiles?
Drying time can vary based on the type of paint and the thickness of your application. Generally, you can expect it to take anywhere from 30 minutes to a few hours for the paint to dry. Always check manufacturer instructions for the best results.
- Can I use stenciled tiles outdoors?
Yes, you can use stenciled tiles outdoors, but it's important to use weather-resistant paint and sealant to withstand the elements. Make sure the tiles are installed properly to avoid moisture issues.


